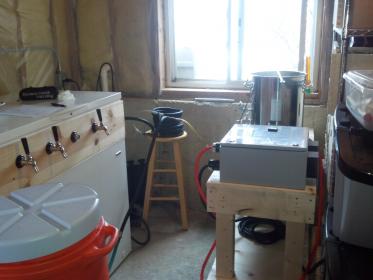
Popped the hole and installed the element in the Blichman tonight and did a boil test on it. No leaks at all so tomorrow it looks good for a first brew using electric.
You are using an out of date browser. It may not display this or other websites correctly.
You should upgrade or use an alternative browser.
You should upgrade or use an alternative browser.
E-HERMS Build
- Thread starter Begin2Brew
- Start date

Help Support Homebrew Talk:
This site may earn a commission from merchant affiliate
links, including eBay, Amazon, and others.
Mash went great! I love the fact with the PID you can set your strike water temp, walk away and come back with it holding at the correct temp.
Here is the make shift set up for now.


Yup, been busy. I have everything ordered or I have it now. Need to continue to work on getting it wired up and test it. I plan on brewing tomorrow so it won't be a fully functional system yet. I figure another week of wiring and tidying up. I'll need to work on the HLT and MLT to get those all plumbed up.


BeerguyNC61
Well-Known Member
Awesome post Bill! System looks great!
How did the drilling of the Bling-mann go? I want to go the electric route but the thought of drilling into those pots having never don't that before freaks me out a little....
How did the drilling of the Bling-mann go? I want to go the electric route but the thought of drilling into those pots having never don't that before freaks me out a little....
iijakii
Well-Known Member
Drilling into the pots is pretty easy. Honestly the control panels are like 100x harder to drill.

$53.24
1pc Hose Barb/MFL 1.5" Tri Clamp to Ball Lock Post Liquid Gas Homebrew Kegging Fermentation Parts Brewer Hardware SUS304(Liquid Hose Barb)
yunchengshiyanhuqucuichendianzishangwuyouxiangongsi

$719.00
$799.00
EdgeStar KC2000TWIN Full Size Dual Tap Kegerator & Draft Beer Dispenser - Black
Amazon.com

$28.98
Five Star - 6022b_ - Star San - 32 Ounce - High Foaming Sanitizer
Great Fermentations of Indiana

$33.99 ($17.00 / Count)
$41.99 ($21.00 / Count)
2 Pack 1 Gallon Large Fermentation Jars with 3 Airlocks and 2 SCREW Lids(100% Airtight Heavy Duty Lid w Silicone) - Wide Mouth Glass Jars w Scale Mark - Pickle Jars for Sauerkraut, Sourdough Starter
Qianfenie Direct

$176.97
1pc Commercial Keg Manifold 2" Tri Clamp,Ball Lock Tapping Head,Pressure Gauge/Adjustable PRV for Kegging,Fermentation Control
hanhanbaihuoxiaoshoudian

$22.00 ($623.23 / Ounce)
AMZLMPKNTW Ball Lock Sample Faucet 30cm Reinforced Silicone Hose Secondary Fermentation Homebrew Kegging joyful
无为中南商贸有限公司

$172.35
2 Inch Tri Clamp Keg Manifold With Ball Lock Posts, Pressure Gauge, PRV (0-30 PSI) – Homebrew, Fermentation, Kegging System
wuhanshijiayangzhiyimaoyiyouxiangongsi

$159.99 ($26.66 / Count)
3M High Flow Series System BREW120-MS, 5616001, For Brewed Coffee and Hot Tea, Valve-in-Head Design
SpaceCityProviders

$58.16
HUIZHUGS Brewing Equipment Keg Ball Lock Faucet 30cm Reinforced Silicone Hose Secondary Fermentation Homebrew Kegging Brewing Equipment
xiangshuizhenzhanglingfengshop

$479.00
$559.00
EdgeStar KC1000SS Craft Brew Kegerator for 1/6 Barrel and Cornelius Kegs
Amazon.com

$10.99 ($31.16 / Ounce)
Hornindal Kveik Yeast for Homebrewing - Mead, Cider, Wine, Beer - 10g Packet - Saccharomyces Cerevisiae - Sold by Shadowhive.com
Shadowhive

$53.24
1pc Hose Barb/MFL 1.5" Tri Clamp to Ball Lock Post Liquid Gas Homebrew Kegging Fermentation Parts Brewer Hardware SUS304(Gas Hose Barb)
Guangshui Weilu You Trading Co., Ltd

$7.79 ($7.79 / Count)
Craft A Brew - LalBrew Voss™ - Kveik Ale Yeast - For Craft Lagers - Ingredients for Home Brewing - Beer Making Supplies - (1 Pack)
Craft a Brew

$20.94
$29.99
The Brew Your Own Big Book of Clone Recipes: Featuring 300 Homebrew Recipes from Your Favorite Breweries
Amazon.com

$44.99
$49.95
Craft A Brew - Mead Making Kit – Reusable Make Your Own Mead Kit – Yields 1 Gallon of Mead
Craft a Brew

$76.92 ($2,179.04 / Ounce)
Brewing accessories 1.5" Tri Clamp to Ball Lock Post Liquid Gas Homebrew Kegging Fermentation Parts Brewer Hardware SUS304 Brewing accessories(Gas Hose Barb)
chuhanhandianzishangwu
BeerguyNC61
Well-Known Member
It's just scary thinking I will have paid a lot of money for those pots and could ruin them.....
iijakii
Well-Known Member
Look into greenlee punches. They're expensive but if you're scared to use a step-bit they're the way to go. Pretty much impossible to screw up.
I did most of the holes in the blichman and the panel with the greenlee punches. They make a nice hole. I did mount a temp probe that I had to used a step bit in the blichman. You need to be very careful as the step bit will catch and rip the blichman.
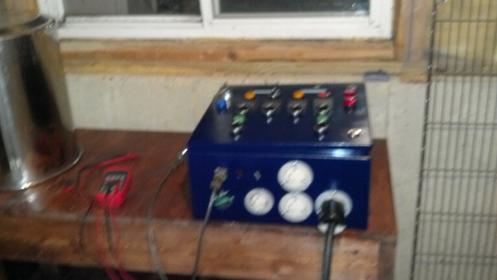
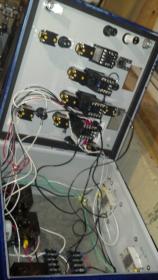
Wired up all I could and did an electric test and all is well. Did find out I had a bad push button for the reset on the timer. Pioneer breaker said they would ship a replacement so hopefully they do.
Most of my time tonight was spent on the MLT adding the inlet side. I wanted to use my existing MLT and be able to close the lid. I knew I would have to go through the side. So after some self deliberating I decided to pop a hole towards the back.
I drilled a smaller hole on the inside and a larger one on the outside. This was to accommodate the 3/4 inch peice of copper tubing to act as a bushing to keep a tight seal without crushing the side of the cooler in.

I did leave the washer out on the ride side of this picture.

Hole large enough for the copper tube but only big enough on the inside for the 1/2 nipple.

Bushing inserted.

Here you can see the bushing just covers the shoulder on the valve.

Finished product.
Most of my time tonight was spent on the MLT adding the inlet side. I wanted to use my existing MLT and be able to close the lid. I knew I would have to go through the side. So after some self deliberating I decided to pop a hole towards the back.
I drilled a smaller hole on the inside and a larger one on the outside. This was to accommodate the 3/4 inch peice of copper tubing to act as a bushing to keep a tight seal without crushing the side of the cooler in.

I did leave the washer out on the ride side of this picture.

Hole large enough for the copper tube but only big enough on the inside for the 1/2 nipple.

Bushing inserted.

Here you can see the bushing just covers the shoulder on the valve.

Finished product.
Attachments
I was able to finish off what was needed to make my system a fully functional battle station..... I mean brewery....last night and run it through testing.
Had one small leak in the HLT on the top side of the coil but not enough to worry about. Learning the PID's was not as bad as I thought. The HLT would shoot up on the high side but the temperature loss through the hoses kept my mash at the 155F I was shooting for. I did an Oktoberfest, one I have done at least half a dozen times so far in my brewing career. Most of the time I hit around 83% on my old system but this time on the HERMS I had 90%. Looks to be a nice Oktoberfest. I had full conversion at 35 minutes on this, my shortest mash has been 40 minutes.
Everything I know states consistancy. For those satistical guys, it always easier to move the mean the to shrink the variability. This system will shrink the variability.
Just an update, I have used this system for the last year an a half and it has been nothing but spectacular! It is consistent and repeatable. I have yet to see any leaks or any other issues. It's pretty much a plug and play system once it's up and running.
Matthewjscott
Well-Known Member
How much was your final cost?
Sent from my DROID RAZR HD using Home Brew mobile app
Sent from my DROID RAZR HD using Home Brew mobile app
augiedoggy
Well-Known Member
awesome to hear! I have been using mine for just over a month now and so far am in the same boat as you...I'm also amazed at the efficiency... I barely need to sparge and im consistently getting 83-85% with only about 3 gallons of sparge water on a 5.5 batches that were actually 5 gallon kits.Just an update, I have used this system for the last year an a half and it has been nothing but spectacular! It is consistent and repeatable. I have yet to see any leaks or any other issues. It's pretty much a plug and play system once it's up and running.
I hit 1.075 og instead og the 1.066 the oktoberfest recipe kit stated on saturday... Next time less sparging I guess.
The herms coil and constant recirculation seems to make a huge difference in efficiency.
I bought components to make a "dirt cheap rims coil" and I'm curious if that will effect anything although I doubt it.
I dont know the OP's final cost
But mine was about $700.00 with everything including new pots/cooler,pumps hoses, connectors ,plate chiller and grain mill......Just the electrical control panel and elements cost me $280.00 for a three pid two element system with timer. So budget builds are certainly possible.
Matthewjscott
Well-Known Member
Thanks for the response. I have actually weighed the options and this thread has pushed me over the edge to go electric
Sent from my DROID RAZR HD using Home Brew mobile app
Sent from my DROID RAZR HD using Home Brew mobile app
corb5309
Member
- Joined
- Feb 21, 2013
- Messages
- 8
- Reaction score
- 0
I'm about to start down this same road. The setup you showed at the beginning is exactly what I started with except I just got ahold of an old keg someone had laying around and cut the top off of it. I have a large order about to go in at brewhardware.com for just about everything I need for the build minus the electrical and control parts.
I was going to do the solder on triclover ports for the heating elements so they could be removed for cleaning or capped off in case for some reason I needed to use my old propane burner.
Do you think you could get away with a cheaper heating element in your HLT since scortching is less likely to be an issue there? I've considered just using the wavy 5500W camco element on the kettle and using something I can get at the hardware store on the HLT.
After having ran with this system for a few years now, is there anything you would have added or changed at the beginning to make things easier or better?
wbarber69
Well-Known Member
- Joined
- Oct 13, 2013
- Messages
- 2,191
- Reaction score
- 263
I'm about to start down this same road. The setup you showed at the beginning is exactly what I started with except I just got ahold of an old keg someone had laying around and cut the top off of it. I have a large order about to go in at brewhardware.com for just about everything I need for the build minus the electrical and control parts.
I was going to do the solder on triclover ports for the heating elements so they could be removed for cleaning or capped off in case for some reason I needed to use my old propane burner.
Do you think you could get away with a cheaper heating element in your HLT since scortching is less likely to be an issue there? I've considered just using the wavy 5500W camco element on the kettle and using something I can get at the hardware store on the HLT.
After having ran with this system for a few years now, is there anything you would have added or changed at the beginning to make things easier or better?
The solder on triclover element kits from brewhardware cannot be beat. I'm currently in the last stages of building my electric HERMS system and use the 5500w camco element in my boil pot. I intend to use a 4500w element for the HLT when it's finished. Since I can get these at my local hardware store as opposed to waiting for amazon to deliver the limelife. As I was running the numbers I couldn't find any reason to go with the larger element in my HLT since the temps in there will never get over 175. The only trade off is the speed of heating things up.
fidler2475
Member
- Joined
- Nov 20, 2011
- Messages
- 9
- Reaction score
- 4
Similar threads
- Replies
- 11
- Views
- 942
- Replies
- 20
- Views
- 846
- Replies
- 6
- Views
- 875


![Craft A Brew - Safale BE-256 Yeast - Fermentis - Belgian Ale Dry Yeast - For Belgian & Strong Ales - Ingredients for Home Brewing - Beer Making Supplies - [3 Pack]](https://m.media-amazon.com/images/I/51bcKEwQmWL._SL500_.jpg)


