• Please visit and share your knowledge at our sister communities:
  • If you have not, please join our official Homebrewing Facebook Group!

    Homebrewing Facebook Group

DIY glycol chilled plastic conical fermenters

Homebrew Talk

Help Support Homebrew Talk:

This site may earn a commission from merchant affiliate links, including eBay, Amazon, and others.
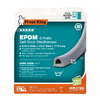
On my plastic inductor tanks I make the lid air tight by removing the thread ring,and then buying a foamy plastic weather sealer for doors that you can get at Lowes and the like. It is the only one that Lowe's carries with a double bead.
and a sticky side like this:
077578012551sm.jpg


The one at Lowe's is white and that's what I use. I leave it doubled up and run it just right up next to the holes all the way around the top of the Inductor Tank after removing the threaded flange ring. Then I put the flange ring back on. This sandwiches one of the double seals under the flange ring. The remainder of the 8.5 ft weather seal roll I put on the under side of the lid where the flange and the lid come together. This makes the Inductor tank air tight.


I bought some of this stuff. Please post a pic of how you applied it. My lids are most probably NOT air tight.

Thanks!

TD
 
Remove the lid, and then remove the screws holding in the lid's screw in flange. Next apply the the seal around the top allowing the seal to go right up to and slightly over the holes that secure the flange to the inductor tank.
10676226_10205064437593689_4072572439993536759_n.jpg


Take the remainder of the seal and simply apply it around the underside of the lid.

1939420_10205064436833670_1994439091621699674_n.jpg


Half of seal should remain under the flange when done.

1236844_10205064438513712_1713801716698712394_n.jpg


The seal under the Flange seals that part of the fermenter and the screw in lid is sealed by the ring on the under side of the lid. The white color made it difficult while taking pictures. I feel the white seal is better than the gray because the white shows any dirt or dried beer. The seal can take bleach, PBW, Star san, and or rubbing alcohol. During the taking of these pictures I inspected for any dried beer between the seal and the flange and there was none. I have used this conical for years... so its water and beer tight as well.

10635727_10205064434473611_8792822225168958899_n.jpg


Hope this helps
 
Thanks a ton!

Nice pics! What are the block-like components in the last picture?

The flange I had actually sealed with a generous amount of silicone directly to the tanks, so trying to remove that now would likely prove impossible. I think mine have air leaks through the lid to flange contact point.

I am hoping that one roll will let me do three lids (no flanges).

Any tricks to getting the straight moulding into a curved application without wrinkles?

TD

Oh, and by the way, for any who've sent me a PM requesting the PDF scans but haven't yet received them, please try downloading them from the member who has hosted them on his home webpage - he has posted a link in his sig.
 
I have been KEENLY eyeing those Bru-gear tanks and also the kettles. Its hard to get through to them by email. I'm wanting to go all electric and not sure if I just want to convert my 15 gallon Blichmann kettles with the boil coil, or go another route. I'd really like to upsize to 20 gallon kettles. Bottom line is, PLEASE let me know when you get your conical and and other reviews about Bru-Gear.

As an update on the Bru Gear fermentors, I got an email from them with the pictures of the final product. They look good and I am happy with the changes that were made for the final product (as far as the pictures go at least). This is their facebook page and there are some pictures on there of the fermentors: https://www.facebook.com/BruGear

As far as I know they are only fulfilling kickstarter backers right now but who knows what their future will bring. I did order 3 tanks and am not sure if Ill need/have space for more than 2 :(
 
No big secret the curve is gradual enough and the seal is quite pliable. The items that look like blocks are my old chilling system that doesn't work real well. They are salt water aquarium chillers. One arrived slightly damaged so they sent another, and told me to leave the other one out for UPS..... No one ever took it so I installed both after the one just wasn't getting it done. I'll be trashing this fermenter and buying 2 new ones when I go to the new glycol chiller, and putting the peltier chillers on a bucket.
:D
 
I am having a hell if a time here guys. Something is definitely wonky with my system, most likely the way I have it programmed. The ball valves all open when the machine is turned on. The pump doesn't stop running when the probes drop below the temp range. Someone please help. I finally figured out a way to give someone remote access to the unit I think... Help!!!!
 
has anyone considered one of these as an option for heating? may not fit considering the stainless coil used for the glycol

http://brewha.co/products/ulwd-electric-element

These work great to make your wort, but I would never add one to a fermentor. They would be a impossible to keep sanitary, and I would imagine they would have very adverse effects on the yeast while heating. I use flexwatt heaters wrapped around my sanke fermentors and they work amazing. Nice gentle heat, and scalable to the size of your tank. You can get them on ebay in rolls and you cut them to the size you need. They use very little power and you don't have to worry about cleaning them.
 
I am having a hell if a time here guys. Something is definitely wonky with my system, most likely the way I have it programmed. The ball valves all open when the machine is turned on. The pump doesn't stop running when the probes drop below the temp range. Someone please help. I finally figured out a way to give someone remote access to the unit I think... Help!!!!


Are you using PID (you shouldn't be)? You may want to set the hysteresis tighter to keep the fermentor in a tighter rangeBe sure also that you've not accidentally setup for heat rather than cool. Lastly, I think that the wiring to the driver board was incorrect in the original diagrams, so check out the pages I scanned and see how yours is wired. I believe that mine has the correct wiring written in.
Again I'm not much of an expert on this, and the guys at the ECC forum may be of more help.

TD


Sent from my iPad using Home Brew
 
These work great to make your wort, but I would never add one to a fermentor. They would be a impossible to keep sanitary, and I would imagine they would have very adverse effects on the yeast while heating. I use flexwatt heaters wrapped around my sanke fermentors and they work amazing. Nice gentle heat, and scalable to the size of your tank. You can get them on ebay in rolls and you cut them to the size you need. They use very little power and you don't have to worry about cleaning them.

In the BREWHA 3-in-1 vessel, the entire fermenter (including element) is sanitized by heat during the boil. It is very sanitary.

@parkerhd36 regarding using the element to regulate fermentation temperature, my understanding is that the main concern is that the intense (localized) heat of the element will adversely affect the yeast. My response would be that with the BREWHA Power Box, you are able to manually (the rheostat/dial on the side) turn the power way down so that the 5500W element is only producing ~500W. This would make it an ultra, ultra, ultra....low watt density element (less than 10W/square inch). I would suggest that if one had the power low enough, it would be sufficient to keep the fermenter warm, while not adversely affecting the yeast. And might also have the added benefit of rousing the yeast by creating slight upward currents in the fermenter (jacket also does this by introducing warm water at the bottom since the entrance is near the middle of the fermenter--tip of cone). I personally have always used warm water in the jacket but trials with the element in this capacity are planned.
 
I am having a hell if a time here guys. Something is definitely wonky with my system, most likely the way I have it programmed. The ball valves all open when the machine is turned on. The pump doesn't stop running when the probes drop below the temp range. Someone please help. I finally figured out a way to give someone remote access to the unit I think... Help!!!!


I think you have the driver board incorrectly wired. I had this issue too. I think that you need to connect the driver board ground to the 12 volt power supply negative terminal.

Tell me how your bcs is wired to power and ground connections, and tell me how your driver board is connected to the power ground and BCS terminals. I thought it was crazy and that it would blow up when I made that connection, but nothing happend and it was working properly after I did that. I will try to double check my wiring tonight, but that's what I recall. Remind me if you don't get another message about that.

I recall I posted these questions on the ECC forum, where you can search for posts by trickydick.

I think the original wiring diagrams were not correct for the driver board connections.

TD


Sent from my iPad using Home Brew

Ok, so I changed the ground wire from one of the group grounds to the 12v neg and it definitely did something. Lights on the driver board seem to be much brighter, and the ball valves seem to actuate a bit quicker.
That being said, all the ball valves still open when the system is first powered on. Will they close once a process is initiated, and then open when hysterisis temp is at the high limit? Could I somehow have them wired backwards (though I don't think this is it, as it seems to me that the BCS is telling them to open, right?). Thanks all. I am headed to work, but will try and reply throughout the night, as I am scheduled for fill tomorrow afternoon, so I somehow have to have this figured out by then, lol.
 
Also, I fixed the problem with the pump running all the time. I had to use REG0 and REG1 in my ladder logic to connect two groups of rungs, and I had REG0 programmed to auto pump from some earlier point for some reason.

Now the only problem is those ball valves auto opening....
 
Odd. These are the NC (Normally closed) variety of ball valves?

I had some strange behavior during testing that doesn't occur during operation.

Have you contacted any of the folks over at the ECC forum? It sounds like it could be a combination of problems, but that you're slowly tracking them down.

TD

Hmmm.....never really thought about the fact that there were valves that were *normally open* or *normally closed*....How do I find out?
 
Mine were doing the same thing initially because my driver board wasn't wired up properly.

Take at look at your valves for any markings lettering, etc. often there is an abbreviation N.O. Or N.C. To indicate which variety you have. You might also be able to track down the information from the place you bought them.

TD


Sent from my iPad using Home Brew
 
Just got done reading all 78 pages, and I'm definitely going to be building a prototype for my sankey fermentors, until I go the conical route. I have two questions that looks like no one asked about.

  1. Everyone is making a IC to place inside the fermenter for the glycol to regulate the fermentation temperature. I'm planning on warping the coil around the fermenter like a jacketed conical. I've seen others do this on other forums, but was just wondering why no one brought it up?
  2. I see people buying all this expensive TC fittings, but if your still using weldless fittings for some of the connections why even bother buying the TC? The weldless fittings still have threads so you still have to deal with that.
 
Just got done reading all 78 pages, and I'm definitely going to be building a prototype for my sankey fermentors, until I go the conical route. I have two questions that looks like no one asked about.


  1. Everyone is making a IC to place inside the fermenter for the glycol to regulate the fermentation temperature. I'm planning on warping the coil around the fermenter like a jacketed conical. I've seen others do this on other forums, but was just wondering why no one brought it up?
  2. I see people buying all this expensive TC fittings, but if your still using weldless fittings for some of the connections why even bother buying the TC? The weldless fittings still have threads so you still have to deal with that.


I used SS immersion coil for the coolant which is submerged into the fermenting beer.
Since you are using a metal sanke, you'd certainly be able to place the coolant coils on the outside. Plastic would likely not conduct the heat adequately through the wall of the tank to permit doing this, which I assume is why it hasn't been brought up.

TC fittings are sexy that's why. Why use them at all on a plastic fermenter? Who knows. Maybe someday I'll step up to stainless conicals.

TD


Sent from my iPad using Home Brew
 
For a sanke, please don't butcher it up with a half-assed copper coil mangled and soldered around the outside like others have done. Do yourself a favor and get one of these: http://www.gotta-brew.com/products/cool-zone-cooling-jacket.html with the expansion panel. I have 4 of them and they are a dream. Plus if you go oldschool with a carboy for a smaller batch you can still use them for that! With my ac glycol chiller and a little reflectex around the kegs I can cold crash effortlessly.
 
For a sanke, please don't butcher it up with a half-assed copper coil mangled and soldered around the outside like others have done. Do yourself a favor and get one of these: http://www.gotta-brew.com/products/cool-zone-cooling-jacket.html with the expansion panel. I have 4 of them and they are a dream. Plus if you go oldschool with a carboy for a smaller batch you can still use them for that! With my ac glycol chiller and a little reflectex around the kegs I can cold crash effortlessly.


I'm glad to know you like yours. I just ordered one of their jackets for a 15 gal. corny I have to go along with the glycol chiller I'm building. People certainly do make the copper coils work, but I didn't want to bother with that. These jackets just looked a lot easier. The only concerns I have are how well it works (sounds like it works well) and how long it will hold up vs a copper coil. At $60, I hope it holds up well.
 
For a sanke, please don't butcher it up with a half-assed copper coil mangled and soldered around the outside like others have done. Do yourself a favor and get one of these: http://www.gotta-brew.com/products/cool-zone-cooling-jacket.html with the expansion panel. I have 4 of them and they are a dream. Plus if you go oldschool with a carboy for a smaller batch you can still use them for that! With my ac glycol chiller and a little reflectex around the kegs I can cold crash effortlessly.

Hell yes!!!! So glad that you informed me about this product, first time I've seen it surprisingly since I'be been searching a lot on the topic.

One other question, since I'll be using the glycol outside of the fermenting beer, is it fine to just go with the glycol antifreeze for RV's version that you can find at Walmart and etc? I figured that since it won't be coming in contact with the beer, I wouldn't have to use the food grade version and I could same some money.
 
The owner, Steve, is a great guy to deal with, and is very helpful with questions and suggestions. It is so sad that such a great product isn't in everyone's arsenal, but I've been telling anyone who will listen! I don't remember how I found them, but ordered one within 5 min of stumbling onto the site. When I got it I tested it out with a cooler of ice water and a carboy of warm water. It took less than an hour to bring it down from 90 to 60 before they reached equilibrium. Not really sure what the exact time was because I was busy on the website ordering 3 more!

Yes, the RV antifreeze is what you want. Some have different slush points. I found some at Home Depot that is suppose to go to 0* before slushing. With a ac unit glycol chiller you want to have about 15* or so difference between your set point and slushing point, so that it doesn't freeze up your ac coil. I normally run it at about 40 or so during fermentation with a hysteresis on the controller of about 15*. Then for cold crashing I bump it down to 20-25. I do that mainly for energy conservation, even though these things don't use that much power. You also lessen any undershoots that might occur with such a cold source. I ended up using vinyl tubing to run to the jacket as it was cheaper, but it does get pretty stiff at those temps. Also when running it that cold I would highly recommend tubing clamps. The connectors worked fine when I used a fridge for the reservoir, but with the super cold temps the tubing slipped off. Someday I will start a new thread with my fermentation endeavors!

Do you have the Expansion Link? If so does the coolant run through that, and if not, how do you get an even cooling temperature around your fermentor?
 

Latest posts

Back
Top