• Please visit and share your knowledge at our sister communities:
  • If you have not, please join our official Homebrewing Facebook Group!

    Homebrewing Facebook Group

DIY Conical Fermenter

Homebrew Talk

Help Support Homebrew Talk:

This site may earn a commission from merchant affiliate links, including eBay, Amazon, and others.
I bought one of Yuri's conicals and months ago, but by the time i was set up to use it, summer had hit and the basement just wasn't cool enough. so we did a 100% rye mash, which has been turned into some wonderful whiskey.

We had some left after the run-off, and i was waiting until the weather cooled down to brew some beer in there. So we went to open it up the other day, expecting some foulness to clean up inside. Pop the lid, and there was still co2 in there! it smelled great, a little sour, but great. We took a sample, and it tasted like a lambic!

So my friend brought over some black berries and a lambic yeast blend (brett and lacto, i think). We'll blend with another wort later and make a gueuze/kriek type thing. After it's bottled, i'm going to destroy all the equipment we use as i'm not a big fan of brett :D but i'm really curious as to how this turns out.

anyway, we dismantled and cleaned the conical out and, now that the weather is cool again, we brewed up my first 15 gallon batch of beer yesterday. i made my SMaSH Ale:

30 lbs of Vienna Malt (150°F mash)
2.5 oz 7% Northern Brewer @ 60 min
2.0 oz 7% Northern Brewer @ 20 min
2.0 oz 7% Northern Brewer @ Flameout
3 packs nottingham yeast

i ended up getting 90% efficiency! there was very little heat loss in the mash (we completely filled a 15.5 gallon keg) and the rest of the session went incredibly smooth. it only took us 6 hours compared to our regular 5 for 5 gallons. big batches are the way to go! We're going to do a batch every 2-3 weeks with this and keep kegs constantly full of tried and true recipes.

Yuri, thanks again! wonderful setup!
 
Hey Yuri, Would the clamp like the one shown in the picture work for your lid? Maybe the domed lid?
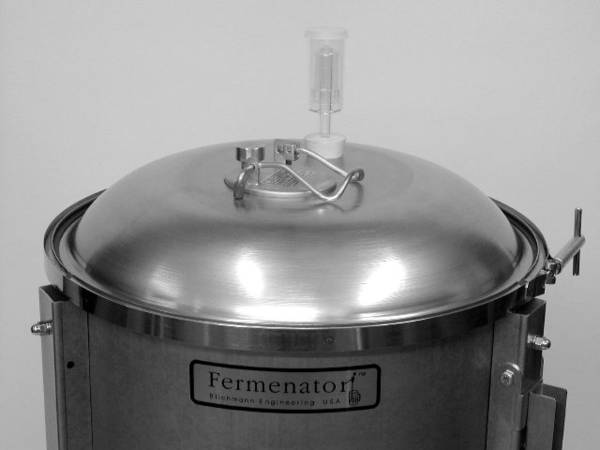
F3_domed_lid_B_W.JPG


Just a thought....

that is called a v-band clamp aka banjo clamp
 
Update! My buddy that bought the other conical never used it and needed money for his motorcycle, so he sold it back to me. I now have awesome capacity, I can brew up to 60 gallons in stainless! :rockin:

So both these puppies will now be in the basement:

new_conicals.jpg


I'm a little concerned about this, as it will be difficult to clean:

4688-dumpweld.jpg


And we were planning on going with sanitary fittings anyway, so we're going to cut this guy off, weld on a sanitary fitting and attach it to an elbow with a butterfly valve.

Then we will finally have a true 20 gallon "pilot" setup that could actually be used in a brewery!

Yuri, I'll give you some pictures when we do this so you can check it out.

As for brewing...we've been doing 18 gallon batches, due to my biggest pot only being 20 gallons and concern for headspace, but after looking in the fermenters after they are done, I think we could easily go to 20 gallons. The krauesen never gets high enough to be a problem. We get about a 16 gallon yield right now, so those extra two gallons would be very beneficial for filling a 4th keg to 3 gallons or so.

Oh, and we now use about 10 clamps all the way along the side of the rim. It works much better than sealing the top (even when we placed wood on top under the clamp.)

We clean in place. The conical never moves. We use pressure to transfer and after we run cleaner through and lightly scrub the conical itself, all the fittings are removed and cleaned.

It's actually quite a wonderful setup and I'm really excited to have two of them.

Thanks again, Yuri! This is definitely my favorite equipment!
:mug:
 
Hey there. Great info here. What about that Toledo's 31 gal hopper and asking them attach a dome to it for a 1bbl fermenter? If that could work, it appears to be a modestly affordable SS conical fermenter. Thoughts?
 
Anyone thought of boiling directly in the conical with heatsticks?

The welds wouldn’t be a concern because they will be sanitized by the boil. This would also eliminate the need for a boil kettle / make it easier to justify the purchase of a conical.

If you incorporated a stainless IC in the lid it could first be used to chill the wort and afterwards to cool/heat the fermenting beer. You would have to use a bag for the hops and dump the trub after boiling.

What’s you thoughts on this dream/idea ?
 
thats a great idea,i was thinking about the same. theroretecly its possible. i see only one problem with that, you gona have alot off crap stack to the sides above the wort after to are done boiling! if you put hopps in a some kind of container with a filter and pushed boilig wort thru it with a pump. a multy stage filtering might be nessesary! but than you have a temperature drop, so one more heating element is nessesary to keep on boiling in container where the hopps are.
 
I'm going to start my HERMS build with the brew kettle. This way I can still do Extract & PM while I gather material. I was planning to use a half keg. I intend to put the drain valve in the bottom of the keg just like suggested above. Would a false bottom keep all the hops from draining or would I still need a SS mesh of some sort?

Are there any other concerns I should think about? If this doesn't work I can always convert it to a fermentor fairly easily.
 
I know I'm reviving an ancient thread, but I love the design, I hadn't come across toledo metal before, and I bet you could come up with a functional version of these for 10 gal batches for 300/each, if you had the metalworking capabilities (which I do).

I think this could even be made easier by throwing the stand together out of wood (looking at the hexagonal design), especially if, as I'm going to, you make the legs high enough that you can gravity into a corny and not have to worry about pressure.

I guess my point is, thank you to Yuri for saving me from blowing money on the blingmanns. Besides, putting it together myself should be a lot more fun.
 
Yuri, quick question on the 21 gallon Toledo hoppers...pre- molestation/modification, were the bottoms solid?

What I'm getting at is can I drill a hole of my own in these, or are they pre-drilled?
 
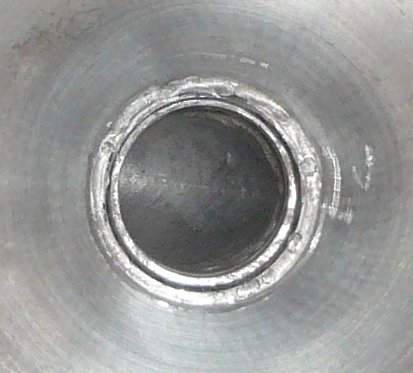
The bottom weld (interior):

cleaned_weld.jpg

I am always intrigued by your DIY threads. You have great ideas and back them up with excellent quality.
If I may, I'd like to suggest a welding tip.
I noticed at the stops of your welds you have a couple of "fish eyes"
Those are caused by coming off the foot pedal too quickly when ending a weld. Come off the foot pedal slower and let the puddle solidify completely before extinguishing your arc. Those fish eyes can be surprisingly deep depending on how quickly you pulled out of the weld.
Hope I didn't offend, and I'll always be on the look out for your next thread!
 
Well not to hijack the thread but I found this at work today. I work at a power plant and this was an Emergency Eyewash station. It is SS and in perfect swhape. We had to change styles because of the feds. Anyway It is 36" high and 12" across. Can anyone tell me roughly gallons??


Im thinking a fermentor or something. Any ideas anyone. Im very curious. I love DIYing stuff so this is right up my alley for my backyard brew station.

Thanks everyone. Be Creative Im open minded.


:mug:
You must work at Diablo, I work at San Onofre. I have also had my eye on those eyewashes. They would be great. I could fit 4 an my fridge.
 
Given a cylinder of 12" diameter and 36" tall inside dimensions would be about 17.5 gallons. If those would be scrapped - let me know as I would be interested in picking some up.
 
I think i saw earlier in the thread that he isnt. But it is inspiring, I wonder what the damage would be to get those hoppers shipped to canada.
 
How much was the ups cost to have the hoppers and lids shipped? Did you have them shipped freight? Looking to possibly do the same! Great work
 
Hummm old thread but I am looking for something like to for Yeast Harvesting...

I want to be able to pour my dregs in to something and drain off the hops and other trub... leaving good yeast...

DPB
 
Being a professional welder I can tell you that "sanitary welds" are not at all just a ploy. However, that being said, it's not incredibly difficult to do. Sanitary welds simply means there are no cracks or pinholes where bacteria or yeast can settle into and avoid the cleaning process. That usually means nice, clean, shiny welds and usually with a good bit of practice anyone with a steady hand and a good eye can easily accomplish this (especially with the TIG process).

Also, as far as the lid is concerned, equal pressure around the seam to prevent "waffling" is all you need so reinforcing the lid and/or collar should fix and leakage issues and would essentially give you the same or better pressure tolerance of a corny keg. That of course is subjective of the hopper's wall thickness and integrity.

All in all, this is an impressive project and I will DEFINITELY be trying this myself!

Oh and p.s. Stainless paste Flux is a hit or miss, I've had it work great and seen it sugar just as bad as if it never had anything on it at all...welding temperature probably has a lot to do with it but I haven't played with it enough in my career to truly get all the nuances and bugs worked out. Almost always back gassing is the preferred way. Since it is a conical hopper you could use something like a pot lid with a silicone ring around it and find a way to make a seal inside to prevent wasting your argon :D less is more
 
Back
Top