• Please visit and share your knowledge at our sister communities:
  • If you have not, please join our official Homebrewing Facebook Group!

    Homebrewing Facebook Group

DFH 120 minute clone

Homebrew Talk

Help Support Homebrew Talk:

This site may earn a commission from merchant affiliate links, including eBay, Amazon, and others.
How do hips in the primary affect attenuation?

I'm thinking less contact area, but who knows if it actually has anything to do with it.

I do know that hop resins coat yeast. I don't know the affect that has on how the yeast attenuate.
 
Well after 2 weeks in the secondary it's surprisingly drinkable, I'm actually shocked. Its brilliantly clear, and could pass for a nice high ABV barley wine right now. Even with 16oz of hops in the boil, there's hardly any hop aroma, and little bitterness. So it's time to start the 3 week long dry hop with 6oz of hops.

1oz Amarillo and 1oz Simcoe were added tonight. I'll repeat that dose in a week, repeat a third time in two weeks, then keg a week after that. I figure a month or so cold conditioning, and this bad boy is done!!
 
I don't know if you posted this already but what type of water profile did you use? If you used RO, what additives were used? Thank you.
 
I don't know if you posted this already but what type of water profile did you use? If you used RO, what additives were used? Thank you.

RO. Added 4oz Acid Malt to the grain bill to adjust pH, then:

1tsp calcium chloride and 1tsp gypsum for every 5gal of water. I think I used almost exactly 10 gallons for that batch, so 2tsp calcium chloride and 2tsp gypsum.

I pretty much follow Ajdelange's water primer to the T for most of my beers.
 
Been following this write up a while now, it's nice to see how it turned out, congrats! I'm following your methods pretty much spot on, brewed mine on Sunday, thanks for sharing the info.
 
Been following this write up a while now, it's nice to see how it turned out, congrats! I'm following your methods pretty much spot on, brewed mine on Sunday, thanks for sharing the info.

Best of luck, let us know how it turns out!
 
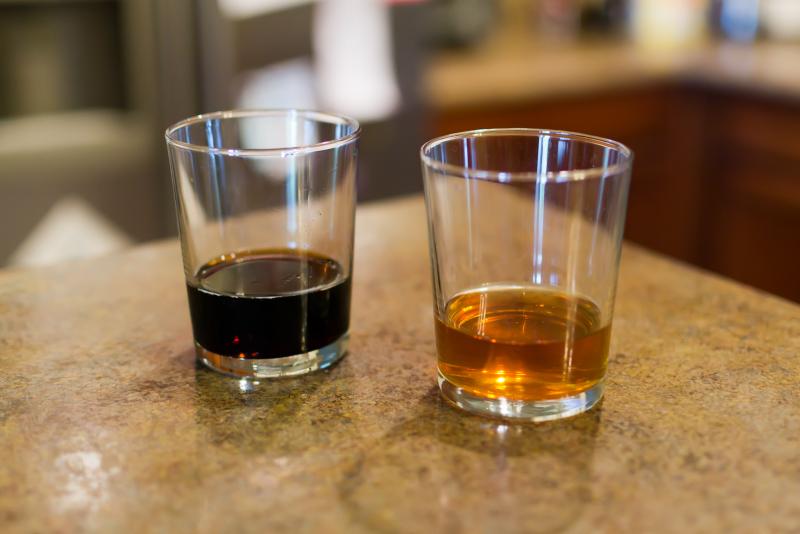
World Wide Stout was on sale for $7/bottle, so I picked one up. My 120 has been dry hopping for 9 days now, so I pulled a sample to compare the two 18+% beers.

The 120 has dropped completely clear. SRM is right around 9. The sharp edges are starting to smooth out, it's tasting very good now that it has some hop aroma.

This my first time trying WWS; it's very good.

DSC_3552.jpg
 
I like it!

btw, thanks for the input on my beer. This thread was a huge help and an invaluable resource.
 
mxracer, looks like you're right on track!

My dry-hopping is a little ahead of schedule. I added the 3rd dose 1.5wks in, and I'm going to rack to keg about a full month earlier than planned. It's tasting very close to done, so I don't see the need to age it at warm temps any longer. Once it's kegged, I'll leave it in the kegerater for about 3 weeks to cold condition, then it's off to bottle.
 
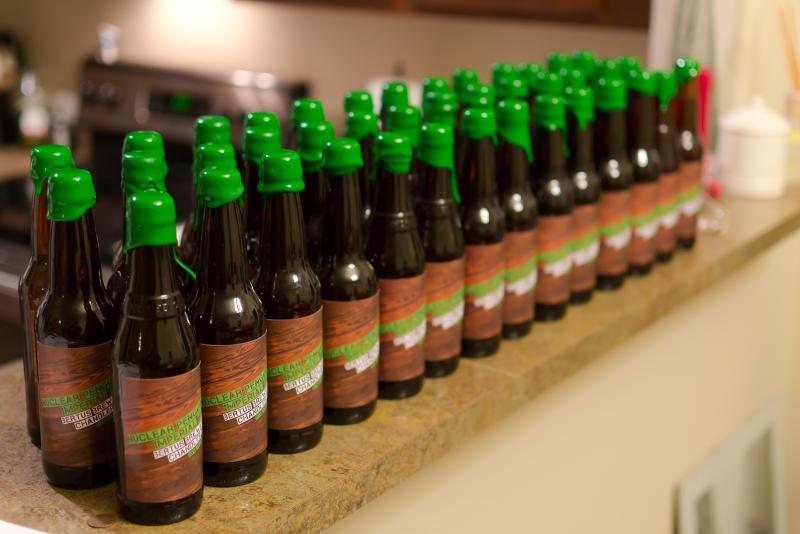
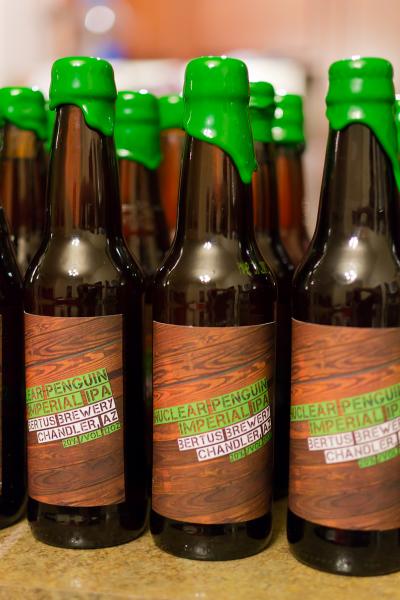
Well I put the finishing touches on this beer tonight. I kegged it around three weeks ago, carbed it lightly, and bottled it last weekend. I printed off some labels, and finally tonight wax coated the bottles.

I followed the wax-hot glue experiment thread. Used 50 mini glue sticks and 15 crayons(mix of light and dark green with two white ones). They turned out very nice, very similar to Marker's Mark.

That completes my 120 minute saga. As for the taste: It's very close to how I remember 120 minute a few years ago. Syrupy thick, a little bitter, rather sweet, and fairly hoppy. It has a piney, citrusy, kind of grapfruity aroma that is mostly masked by the intense alcohol and malt. I've very excited to see how this ages.

DSC_3890.jpg


DSC_3898.jpg
 
what kind of paper/printer did you use for the lables and how are they attached? That is cool!
 
I like you went "Nuclear Penguin", but not "Tactical" :)

Your labels look fantastic, especially with the neon green wax seals - Far better than my sharpie labeled caps LOL. I too am curious what paper you printed on to and what you used to attach them. I wouldn't mind coming up in the world..
 
I go to fedex online and do their color printing service where you pick it up in the store. It's around 70 cents a sheet, and they print on a nice heavy weight paper with a laser printer. I only have an inkjet at home so it's my best option. I can get six labels per sheet, so it costs about $5 for a batch worth of labels. Then I cut them out, and use Elmer's glue sticks to stick them on. Works great, and they wash off clean with hot water.

As for the penguin, my DIPA I call 'Furry Penguin', and I have another beer that's called 'Slippery Penguin' so I tried to think of something big for this one. It was either Nuclear Penguin or Penguin of Mass Destruction. I found out after Brewdog has that 32% stout they call Tactical Nuclear Penguin, oh well.

FYI on the wax caps, once they set overnight, them seem like they will be very had to remove. Kind of a bummer. On the bright side it'll help keep me away from these until they have some age on them.
 
So how many Gallons do you start off with and how many do you end with? since you have to take several hydrometer readings throughout Id imagine you end up with about 4 gallons? or is there something IM missing?
 
So how many Gallons do you start off with and how many do you end with?

Started with something like 6 or 6.2 in the fermenter and came out with around 4.8 or 4.9 in the keg. I cleaned and sanitized my hydrometer and test tube so the samples went right back into the beer every day. The hops and yeast were the big loss. There was close to a gallon of yeast in the bottom of the primary, and then I dry hopped with 6oz of pellets in the secondary.
 
FYI on the wax caps, once they set overnight, them seem like they will be very had to remove. Kind of a bummer. On the bright side it'll help keep me away from these until they have some age on them.

Nothing a pocket knife and pint glass can't handle, the beer can run but it can not hide, not from us thirsty consumers! :cross:

So did you heat wax and dip or did you just drip it on? Still pretty cool looking, I've seen (rarely) some special releases do the same - always a visually stimulating effect.
 
scottland said:
I go to fedex online and do their color printing service where you pick it up in the store. It's around 70 cents a sheet, and they print on a nice heavy weight paper with a laser printer. I only have an inkjet at home so it's my best option. I can get six labels per sheet, so it costs about $5 for a batch worth of labels. Then I cut them out, and use Elmer's glue sticks to stick them on. Works great, and they wash off clean with hot water.

As for the penguin, my DIPA I call 'Furry Penguin', and I have another beer that's called 'Slippery Penguin' so I tried to think of something big for this one. It was either Nuclear Penguin or Penguin of Mass Destruction. I found out after Brewdog has that 32% stout they call Tactical Nuclear Penguin, oh well.

FYI on the wax caps, once they set overnight, them seem like they will be very had to remove. Kind of a bummer. On the bright side it'll help keep me away from these until they have some age on them.

In the future if you wax some bottles, use a high percentage of parrafin wax and it will stay much softer. Thanks for the FedEx tip! Will definitely do that soon!
 
Dipped. Heated the hot-glue and wax in an empty soup can on the stove. Then dipped, swirled the bottle to let the excess run off, then flipped them back upright. It was actually fairly easy. You just have to stir it a bunch. Temperature was the hardest part. Too hot and it runs too much, too cool and it doesn't run enough, hence why some are quite different than others. The texture is identical to maker's mark though. Maker's mark wax is tough to remove without the tape strip so it's very similar..

Thanks for the paraffin tip, that will come in handy because unfortunately it sounds like I'm going to be wax dipping more bottles in the future. SWMBO saw how nice these turned out: "OMG, those are so cool. You realize now you're going to have to do that to every bottle we give away right." and "I'm totally going to find more uses for this idea, these are so cool." Oy vey.....
 
SWMBO saw how nice these turned out: "OMG, those are so cool. You realize now you're going to have to do that to every bottle we give away right." and "I'm totally going to find more uses for this idea, these are so cool."

"Hey hun, look! I've got 3 different colors of wax heated up! Cool huh? You should totally get creative with these, really make the caps shine! Great! You're doing great..

I'm just going to step in here for a sec...


Doing great honey!

I'll just be in here...

*click* ~ Coming up next, Rams and Packers battle it out"

:mug: You may have an angle here...
 
***If anyone has a bottle of 2011 DFH 120 minute, I'll gladly trade you a bottle of mine. PM me***

After sharing a few bottles with some friends over the last week, I'll say I'm very happy with how this turned out. It's very, very, close to 120 minute. There's some citrus in the aroma, mixed with a raisin/candied fruit aroma. Almost like a citrusy fruit cake kind of aroma. There's some heat from the alcohol in the taste that's mostly masked by a sticky caramel sweetness and a litle citrus hop flavor, with a lingering bitterness in the finish. I'm dying to get some of the recent 120 minute to compare. The clone seems very close to what I remember. I think the areas where Paxton's recipe was woefully short were yeast pitching rates and hopping rates.

That got me thinking about what I would change if/when I would brew this again.
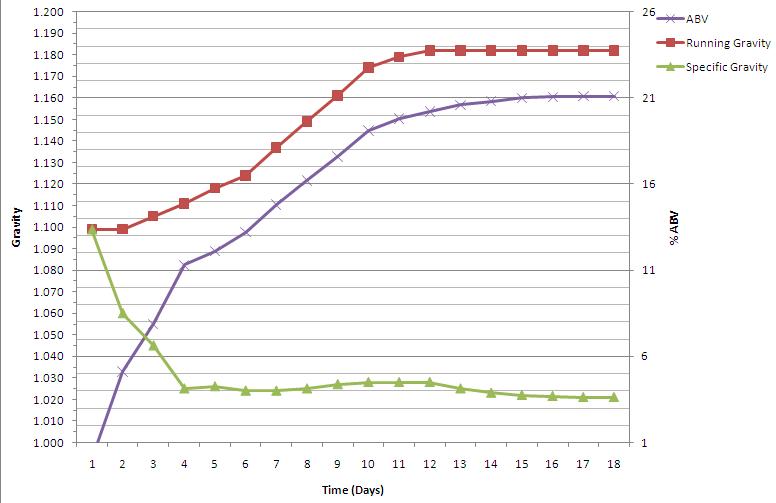
A. To all those that said this should be as dry as possible, you were 100% right. In retrospect I think this beer could have been better if I stopped adding sugar sooner. I would have loved if it finshed at like 1.010

B. Building on that idea, now that I have the bug out of my system to make a beer as strong as can be, I believe this beer would be best brewed around 1.130 instead of 1.182. Still shoot for around 1.100 from malt, and then add around 4.5lbs of dextrose. Ideally drying it out around 1.010 to 1.016. Maybe 15% ABV.

C. Way more hops. I added way more hops, but I'm talking way more hops than that.

D. I'm thinking about Hop extract. After listening to Vinnie from Russian River, and the brewer from Lagunitas talk about the benefits of using it for bittering these insanely big IPAs, I think it would be a good idea. Initially I was thinking about 6oz of Warrior for bittering between 90min and 60min(About 100AAU worth), but now I'm thinking about 100AAU worth of hop extract. Northern Brewer sells those hop shot syringes.

E. Citra. I love the Amarillo and Simcoe combo, and I've added citra, and the three are great together.

Assuming I can get my hands on a good chunk of the 2011 Amarillo, Simcoe, and Citra crop, I might brew:

Same grain bill

Hops:
6oz Warrior continuously hopped from 90 to 60min (or 100AAU of hop shot)
2oz ea Simcoe, Amarillo, and Citra hopped continuously from 30min to 0min
1.5oz ea Simcoe, Amarillo, and Citra added at flameout
Allow hops to steep hot for 10min
Same yeast, same pitching rates, same temp

Add 4.5lbs Dextrose added incrementally over 7 days 12oz per addition, twice/day
Rack to secondary after it hits FG, then dry hop with 9oz total of the same simcoe/amarillo/citra mix. Add an ounce every couple days for two weeks, then allow it to sit on the bed of hops for a month.

The goal being a mix between Pliny the Younger and 120 Minute. 15% ABV, nice and dry, and extremely hoppy. It'll be a long while before I do another brew this demanding, so don't expect any results for at least 6 months =)
 
Back
Top