Crane's Never ending Brewery Upgrades

Homebrew Talk - Beer, Wine, Mead, & Cider Brewing Discussion Forum

Help Support Homebrew Talk - Beer, Wine, Mead, & Cider Brewing Discussion Forum:

This site may earn a commission from merchant affiliate links, including eBay, Amazon, and others.

crane

Supporting Member
HBT Supporter
Joined
Sep 20, 2011
Messages
1,215
Reaction score
457
Location
San Diego
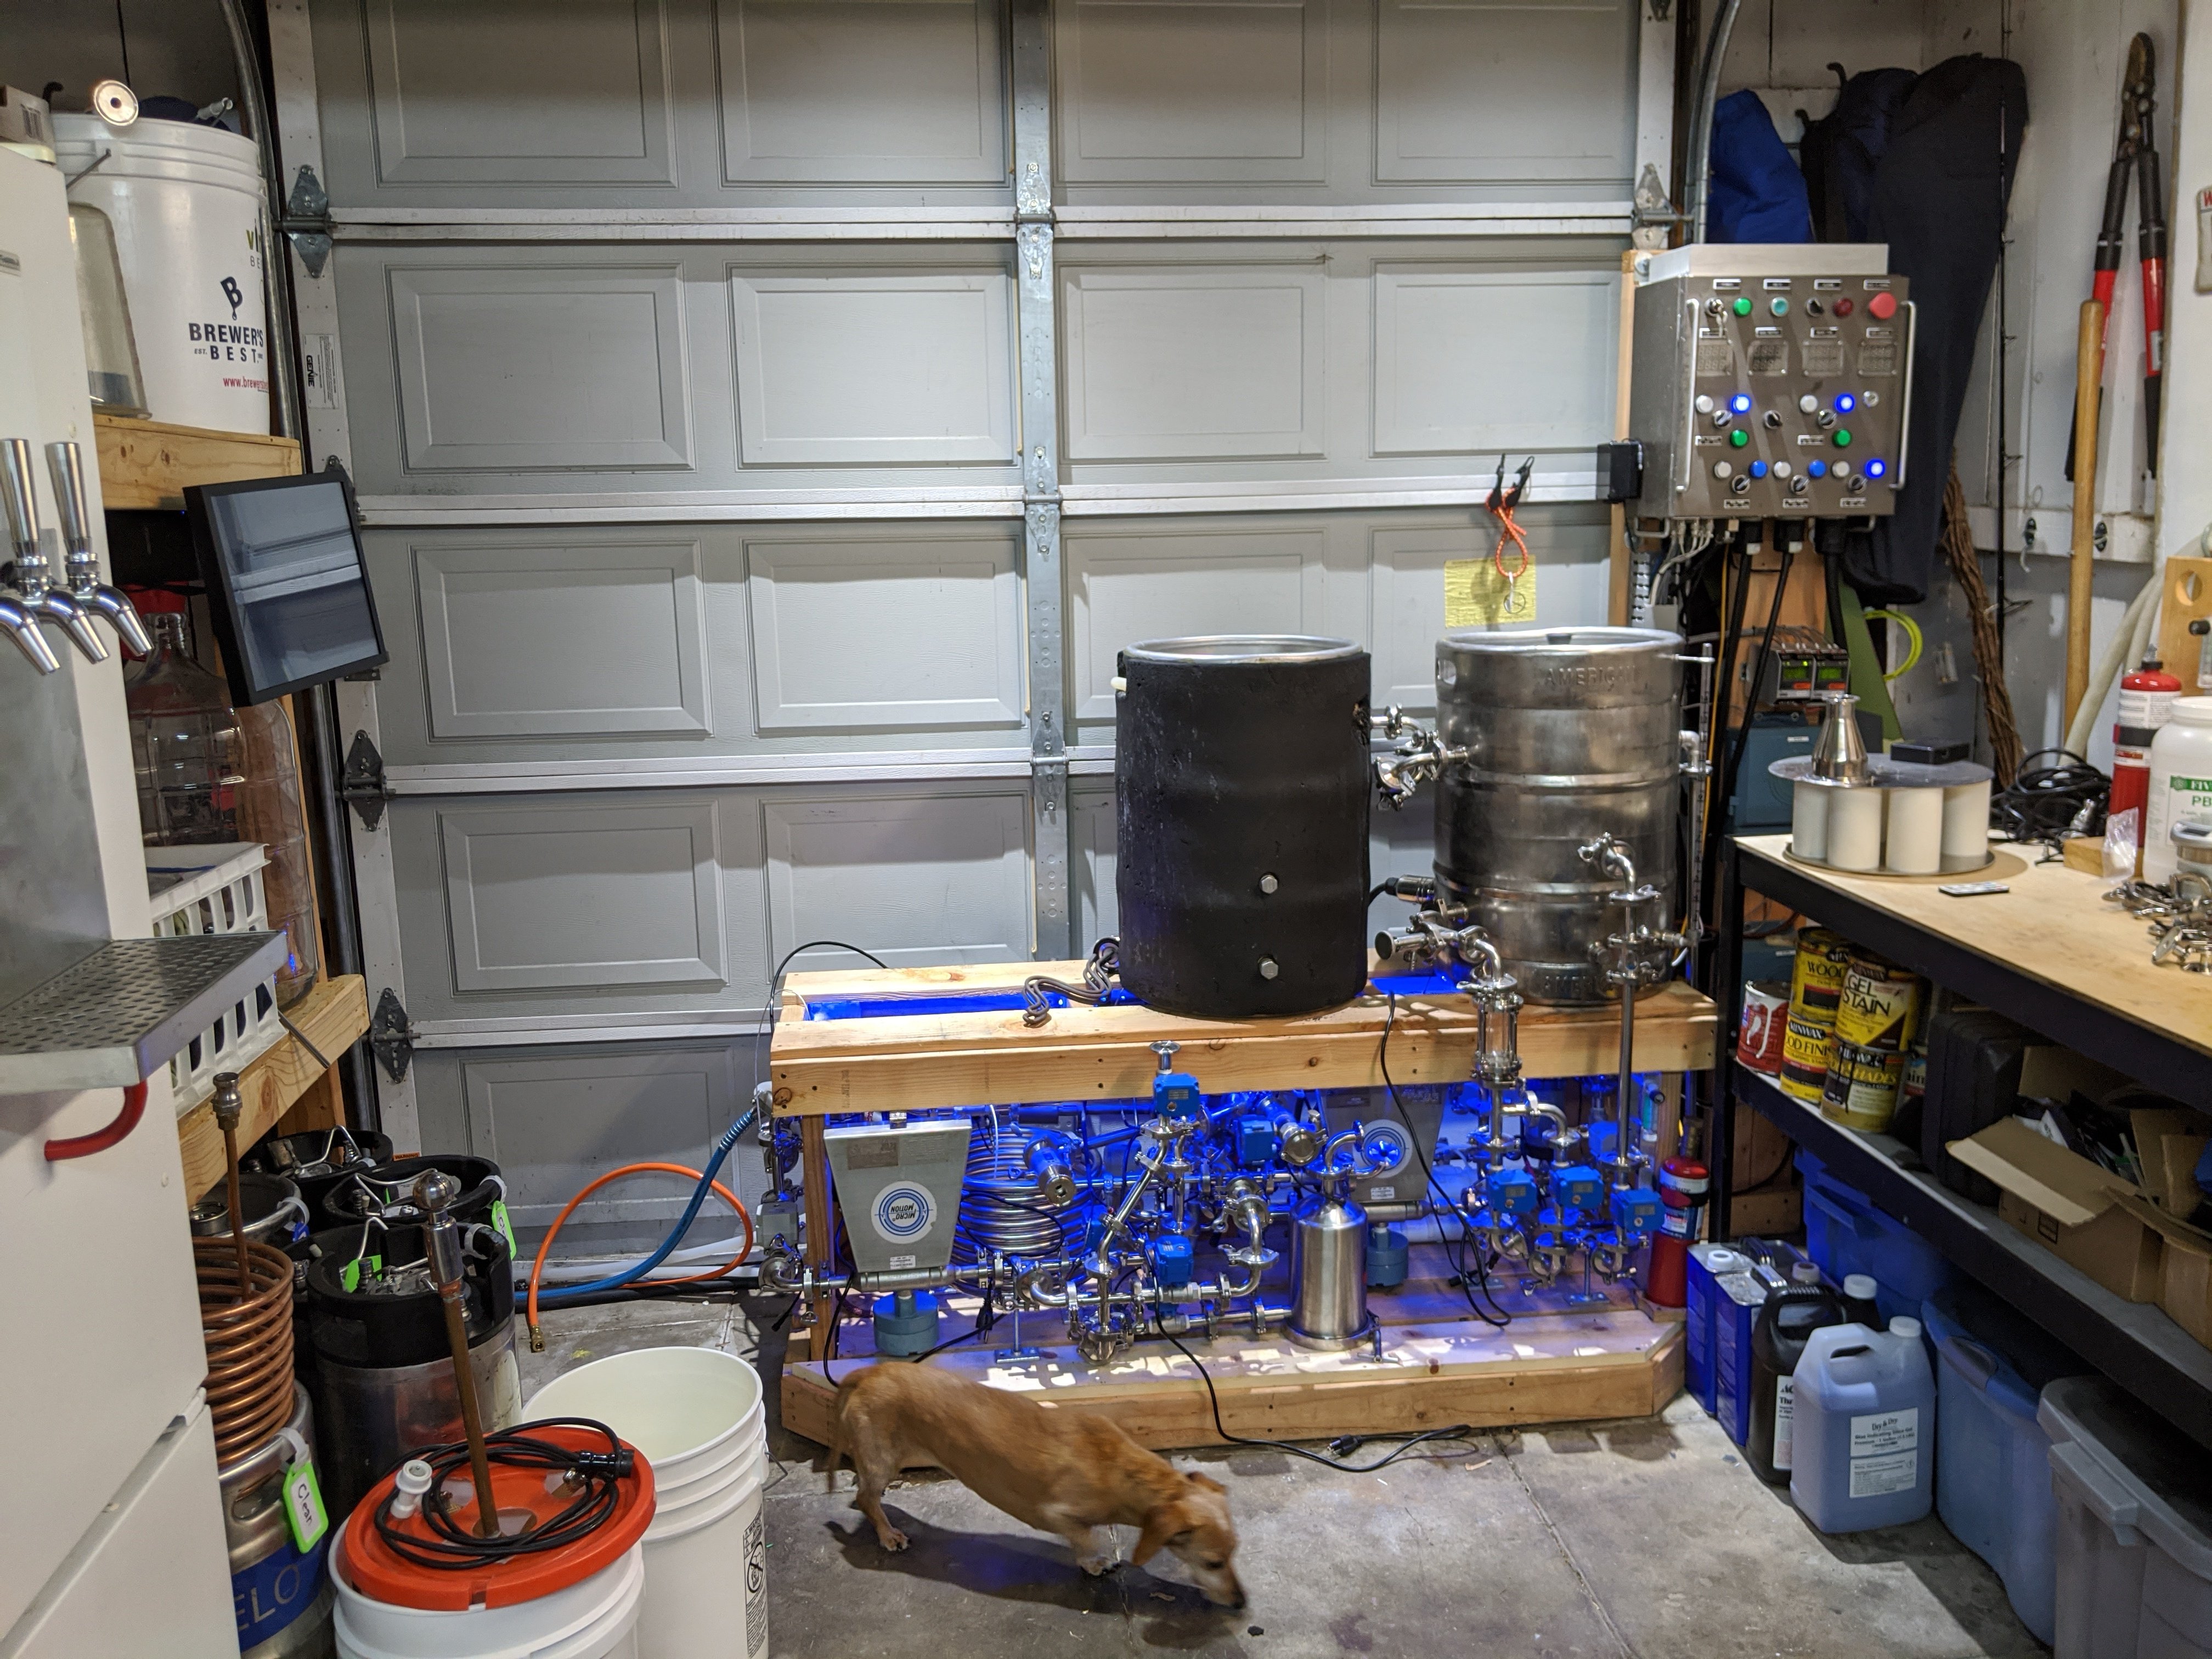
My brewing rig has evolved a lot over the last 10 years as I have added more and more automation. I recently completed a major overhaul, but that doesn't mean I'm done making changes. I used to brew in the back yard. As I added more and more features to my brewing rig, it became exponentially more of a PIA to setup and tear down for brew day.

This was my setup after the previous overhaul when I was still brewing outsitde.

20150913_112048.jpg


My control panel was originally built for a BCS-460. Here is the original layout of the control panel from 2014.

20140526_125722.jpg


I have had the goal of slowly getting to an almost completely automated brew day for a long time. However, the landscape for feature rich/flexible homebrew automation control systems was lacking. It seemed that everything out there had some sort of significant limitations and/or the development path was non-existent/too slow. The other alternative would be to go with a PLC based setup, but that is a bit out of my price range. Luckily BruControl came along. With the data exchange protocol, I can work around any currently unsupported interfaces.

After playing around with BruControl on the desk, I created the following setup to replace the BCS in my control panel. From bottom to top we have.

1. FR4 board with DIN mounts on the bottom.
2. 16 channel relay board
3. FR4 board for mounting more stuff
4. 6 channel Thermistor input/filtering board (left), Arduino Mega (right)
5. On top of the Thermistor board is another board with:
A. pump PWM speed control FETs
B. Control circuitry for time sharing heating elements since I only have a 30A power source
6. On top of the Mega is a terminal breakout board with an ethernet shield on top.

IMG_20170823_185522.jpg


Now to replace the BCS. Since my panel is way too small, I used a DB50 connector for the ball valves and counter flow meters.

20180128_112106.jpg


20180128_124303.jpg


20180128_152241.jpg


Most of everything on the front panel is no longer functional, but I was too lazy to rip out all of that wiring and re-wire some of the low voltage control signals that go through some of the switches.

20180128_152255.jpg


IMG_20180211_164322.jpg


At this point I was back up and brewing. I created a basic brew day script that was identical to the process/steps I had setup in the BCS. The only new feature I had at this point was PWM speed control for my pumps. The more I planned for electric ball valves, new sensors and plumbing, the more daunting the thought of hauling all this crap out of the garage and setting it up became. I rent the house we are in, so installing a vent hood and large hole in the garage was out of the question. Luckily @BrunDog posted his initial results of a homebrew sized steam condenser right around this time. BAM, no more brewing outdoors. After getting rid of a few things I cleared out some space in the garage to build a brew stand that I don't have to tear down between brew days. It was time to rethink all of this. Instead of trying to stay lean and light, I could add as much as I wanted to make things easier. For example, CIP and automating the cleaning became a must.
 
Last edited:
And then we got lots of Stainless from China that needed a good cleaning.

IMG_20190228_201322.jpg


IMG_20190228_212525.jpg


IMG_20190228_212550.jpg


Switching from pickup tubes to bottom drains was high on my list of priorities. I silver soldered in drains as well as a second port for volume (pressure) sensors.

IMG_20190228_202751.jpg


IMG_20190628_185629.jpg


Since I was going with bottom drains and I whirlpool, I decided to silver solder in a trub damn into the BK.

IMG_20190704_205639.jpg
 
One of the other problems I had to solve when moving my setup to the garage was water. I am not going to be hauling buckets of water around. Previously, when I was brewing outside I ran an RV hose into the Laundry room at the back of the house and connected it to the utility sink faucet. The room is too small to fit a utility sink in it with the size of our washer and dryer. So, off with the faucet. I bought another RV hose to reach the garage, so I can supply Hot and cold water to the brew rig. Additionally I can pump my waste PBW and rinse water down the washing machine drain.

IMG_20190302_203336.jpg


I built a small control box using a NodeMCU with 4 relays, and a input for a counter flow meter, and a couple of spare buttons I had to control the water supply manifold.

20190120_135734.jpg


20190120_141851.jpg


20190120_191505.jpg


20190120_191509.jpg
 
Next up was to re-wire the ball valves to connect up to the wiring harness I created. Right is the original flying leads, and left is with the new waterproof connector.

20190123_135105.jpg


I don't have any pictures of the brew stand without anything on it. After building that, it was time to work on the plumbing.

IMG_20190304_195951.jpg


I new I was going to have a lot of wiring and would like it to be clean looking. I used some large wiring duct for cable management in the stand up to the control panel.

IMG_20190404_124717.jpg


IMG_20190404_124756.jpg


IMG_20190404_124653.jpg


IMG_20190404_130500.jpg

IMG_20190410_152913.jpg


I originally planned on using the uni-strut more for mounting things, but its rather bulky so I only ended up using it in the back to mount the water supply manifold.

IMG_20190609_131118.jpg
 
Because all my stuff is wonky, I new I wouldn't be able to hard pipe all of this with pre-fabricated pieces. I decided to silver solder all the straight Tri Clamp spools, since they would be weird lengths. I bought TC end caps with 5/8" holes drilled in them. I widened these out to 3/4" half way through so it would sit on the end of the pipe. This provided more surface area for the solder to stick to as well as it made it easier to solder. To solder these, I placed the cap on the top of my vice and set the pipe into the end cap. This helps gravity pull solder into the inside of the joint.

IMG_20190527_120319.jpg


For the longer pieces I had to create a jig to hold the pipe in place.

IMG_20190608_184054.jpg


Here is a close up of the inside of the joint after cleaning it up. You can see the layer of solder in between the pipe and the end cap.

IMG_20190601_130026.jpg


Now onto finishing the plumbing.

IMG_20190527_171103.jpg


IMG_20190609_131531.jpg


IMG_20190609_131535.jpg

IMG_20190810_104051.jpg


IMG_20190609_131522.jpg
 

Attachments

  • IMG_20190410_173509.jpg
    IMG_20190410_173509.jpg
    1.9 MB · Views: 83
I needed to modify the panel for some new sensors. At this point I know that I will eventually make a new control panel so, I'm not trying to make it pretty anymore. I'm running out of analog inputs on my mega.

IMG_20200129_160012.jpg


Setting up and calibrating the MFMs.

IMG_20190622_151557.jpg


I got a 15" touch screen to setup next to the brew stand in the garage. I initially set it up on my work bench as I was bench testing many different things.

20190120_092916.jpg


IMG_20191214_140255.jpg
 
I came home from work one day to see that my irrigation timer cracked and was spraying water all over my back yard. Boo. Instead of buying another plastic POS, I decided "why not use BruControl?" If for whatever reason water is flowing when it shouldn't I have a script to monitor the state of all the valves and a flow meter. It will now email me if I have another such problem.

Of course, if I am going to do that I might as well make a multi zone setup. We now have 3 seperate zones in the back yard.

IMG_20190814_185048.jpg

Another opportunity to cramp a NodeMCU into a small project box.

IMG_20190902_134404.jpg
 
Last edited:
This came in the mail recently. They stopped selling the original unit and only sell the pro version with a larger capacity now.

hops-boss-pro.jpg


Props to Darin from Brew Boss for giving me all the details I needed to integrate this into BruControl. BruControl doesn't natively support UART interfaces, so I had to do a little work here. I started by bringing up the UART interface on the Hops-Boss by using a nodeMCU in a serial pass through mode so I could send and receive commands from a terminal on my laptop.

Serial_passthrough.jpg


I also used a little trick I picked up at my last job to interface the 3.3V nodeMCU to the 5V UART on the Hops-Boss with only a single resistor. A little googling shows that people have successfully driven 5V logic into the esp8266. A lot of micro-controllers will have clamping diodes on the IO cells to prevent over/under voltage damage. As long as you limit the current going through these diodes they will not burn up, and they will clamp the voltage to prevent the IO cell from being overvolted. I placed a 1.1K Ohm resistor in series from the Hops-Boss 5V Tx to the nodeMCU's 3.3V Rx pin. Typically you would see 5V on the Hops-Boss side of the resistor and ~4v on the micro-controller side when the clamping diode is on. In this case it does not appear that there are any clamping diodes turning on when I apply 5V to the input because I only measured a 25mV drop across the resistor, so the receiver is only drawing 23uA. This does mean that the voltage at the input of the nodeMCU is almost 5V. However, given that each pin can sink 12mA of current, the little current I measured will not create enough heat to burn up the IO cell. In terms of the other direction, the 3.3V output from the nodeMCU is high enough to meat the minimum Vih for a 5V TTL UART.

Over the weekend I wrote a framework for sending/receiving global variables from BruControl to the nodeMCU over Wifi using the data exchange interface in BruControl. Below shows the 2 globals I use in BruControl for interfacing with the Hops-Boss. From BruControl I set the position I want it to move to. The nodeMCU will send back a status of when it is moving. There is some other state machine handling in the firmware to not send any commands to move to a new position when it is homing or currently moving.

BcHopBoss.PNG


Next up was to throw the nodeMCU into a small project box. Now we have 56oz of Wifi enabled automated hops dispensing capacity. Now I need to work on mounting this to my boil kettle.

Hops_boss_box2.jpg


Hops_boss_box.jpg
 
Last edited:
That’s pretty trick! I suppose we could add a UART element to facilitate this! But nice job adding one of the trickier elements of brewery automation.

Generically supporting any I2C, UART, SPI, or 1-wire device would be difficult for sure. Either you take on the burden of enabling each device one by one and having a pretty drop down to select them, or you create a pass through bridge where a script can send and receive commands to a specific device over a certain protocol. The latter still has a number of pitfalls and corner cases to overcome.
 
We will get to that. But in the meantime here is the latest upgrade to the brewery, albeit not related to automation.

About 3 years ago our roommate's brother-in-law stayed with us for a few nights. He mentioned that he made wood carvings and asked if I wanted him to make me a tap handle. Sure, why not. Never thought it would actually happen. Our roommate doesn't live with us anymore. He stopped by to see us a couple days ago with this. I just had to drill it out and install the tap mount.

MVIMG_20200215_114140.jpg


IMG_20200215_125003.jpg


IMG_20200216_171107.jpg
 
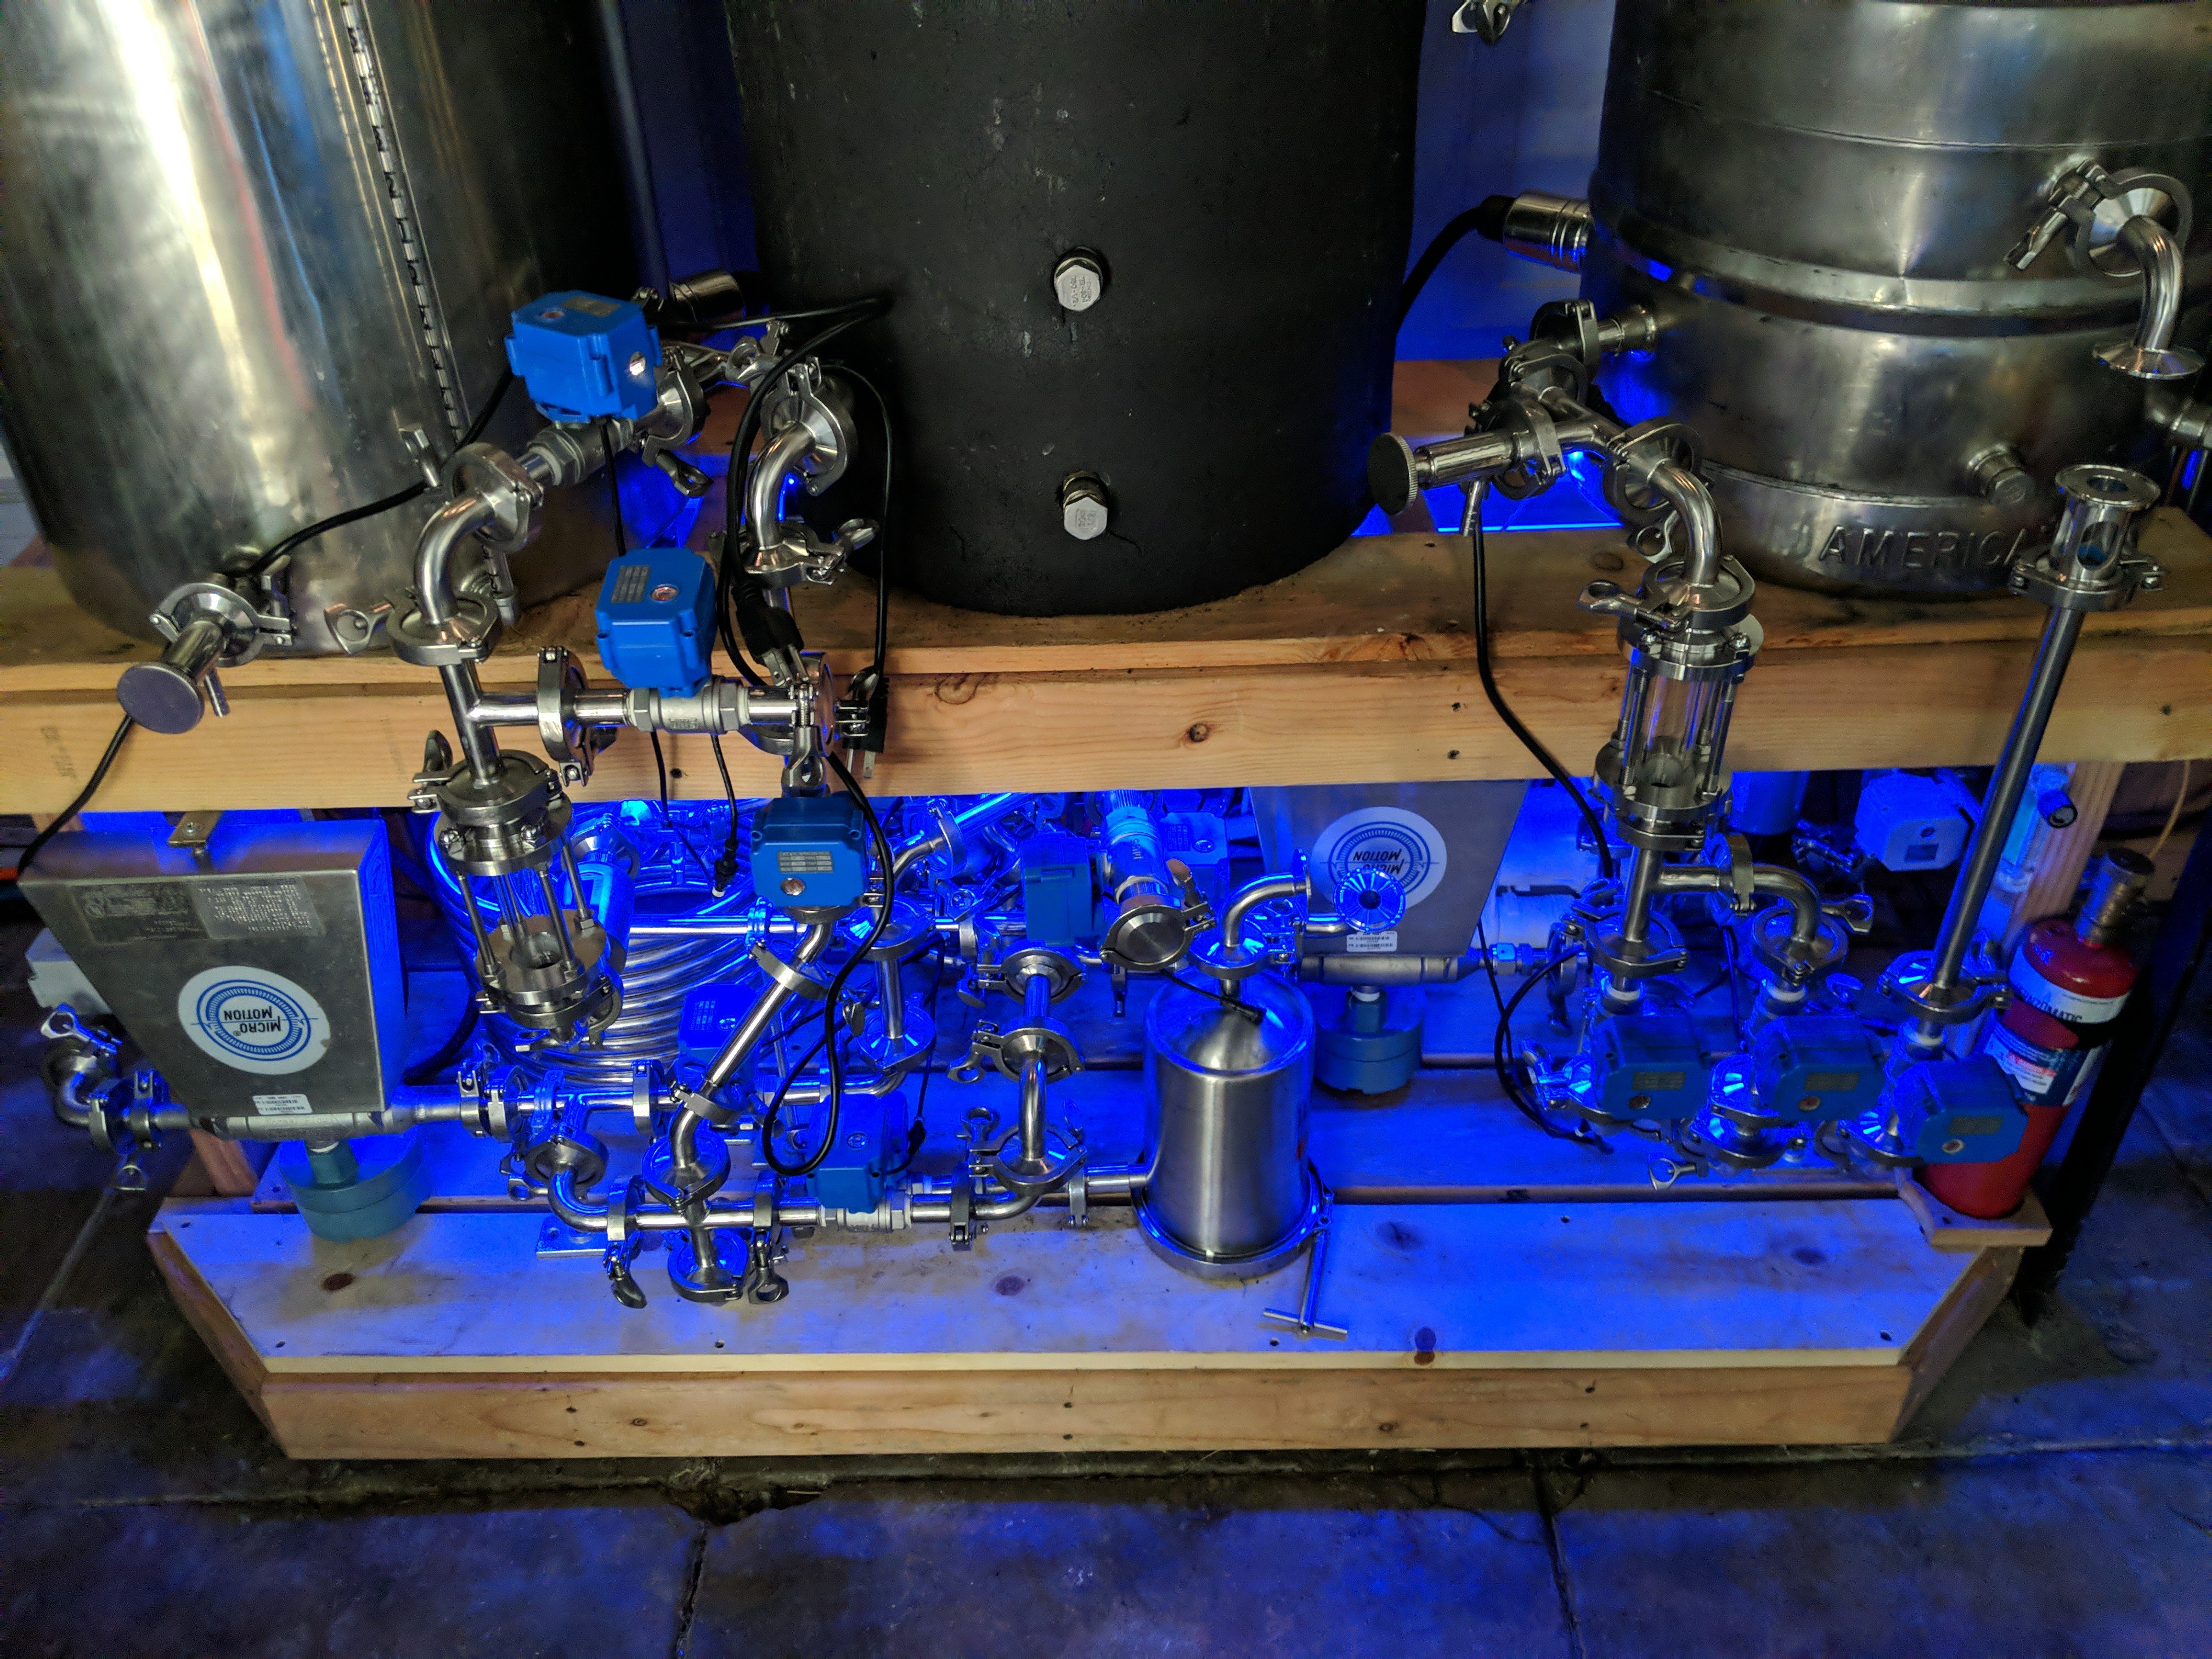
I have some 1 1/2 TC and 3" TC 24v valves, you can see some of them on my boil kettle (left vessel). They are aliexpress valves, and require a DPDT relay.
S567MPp.jpg
 
I have some 1 1/2 TC and 3" TC 24v valves, you can see some of them on my boil kettle (left vessel). They are aliexpress valves, and require a DPDT relay.
S567MPp.jpg

Where'd you get the old school picture on the wall from? =)
 
The valve looks like one of these:
https://www.aliexpress.com/item/32868181267.html

They LOOK heavy but might not be that bad.
I bought mine off of eBay. $145 including shipping. They have stock in the US so I didn't get hit with the Corona/dosXX/Modelo virus crap. The rest of my orders this year are just starting to ship from China.

It weighs 8.5 lbs, but my silver soldered TC ferrule is holding up to the weight so far...
 
img_20191012_173659-jpg.664242


I love that image. How did you make it?

Also, do you mind revealing your source in China for stainless?

Cheers, Richard
 
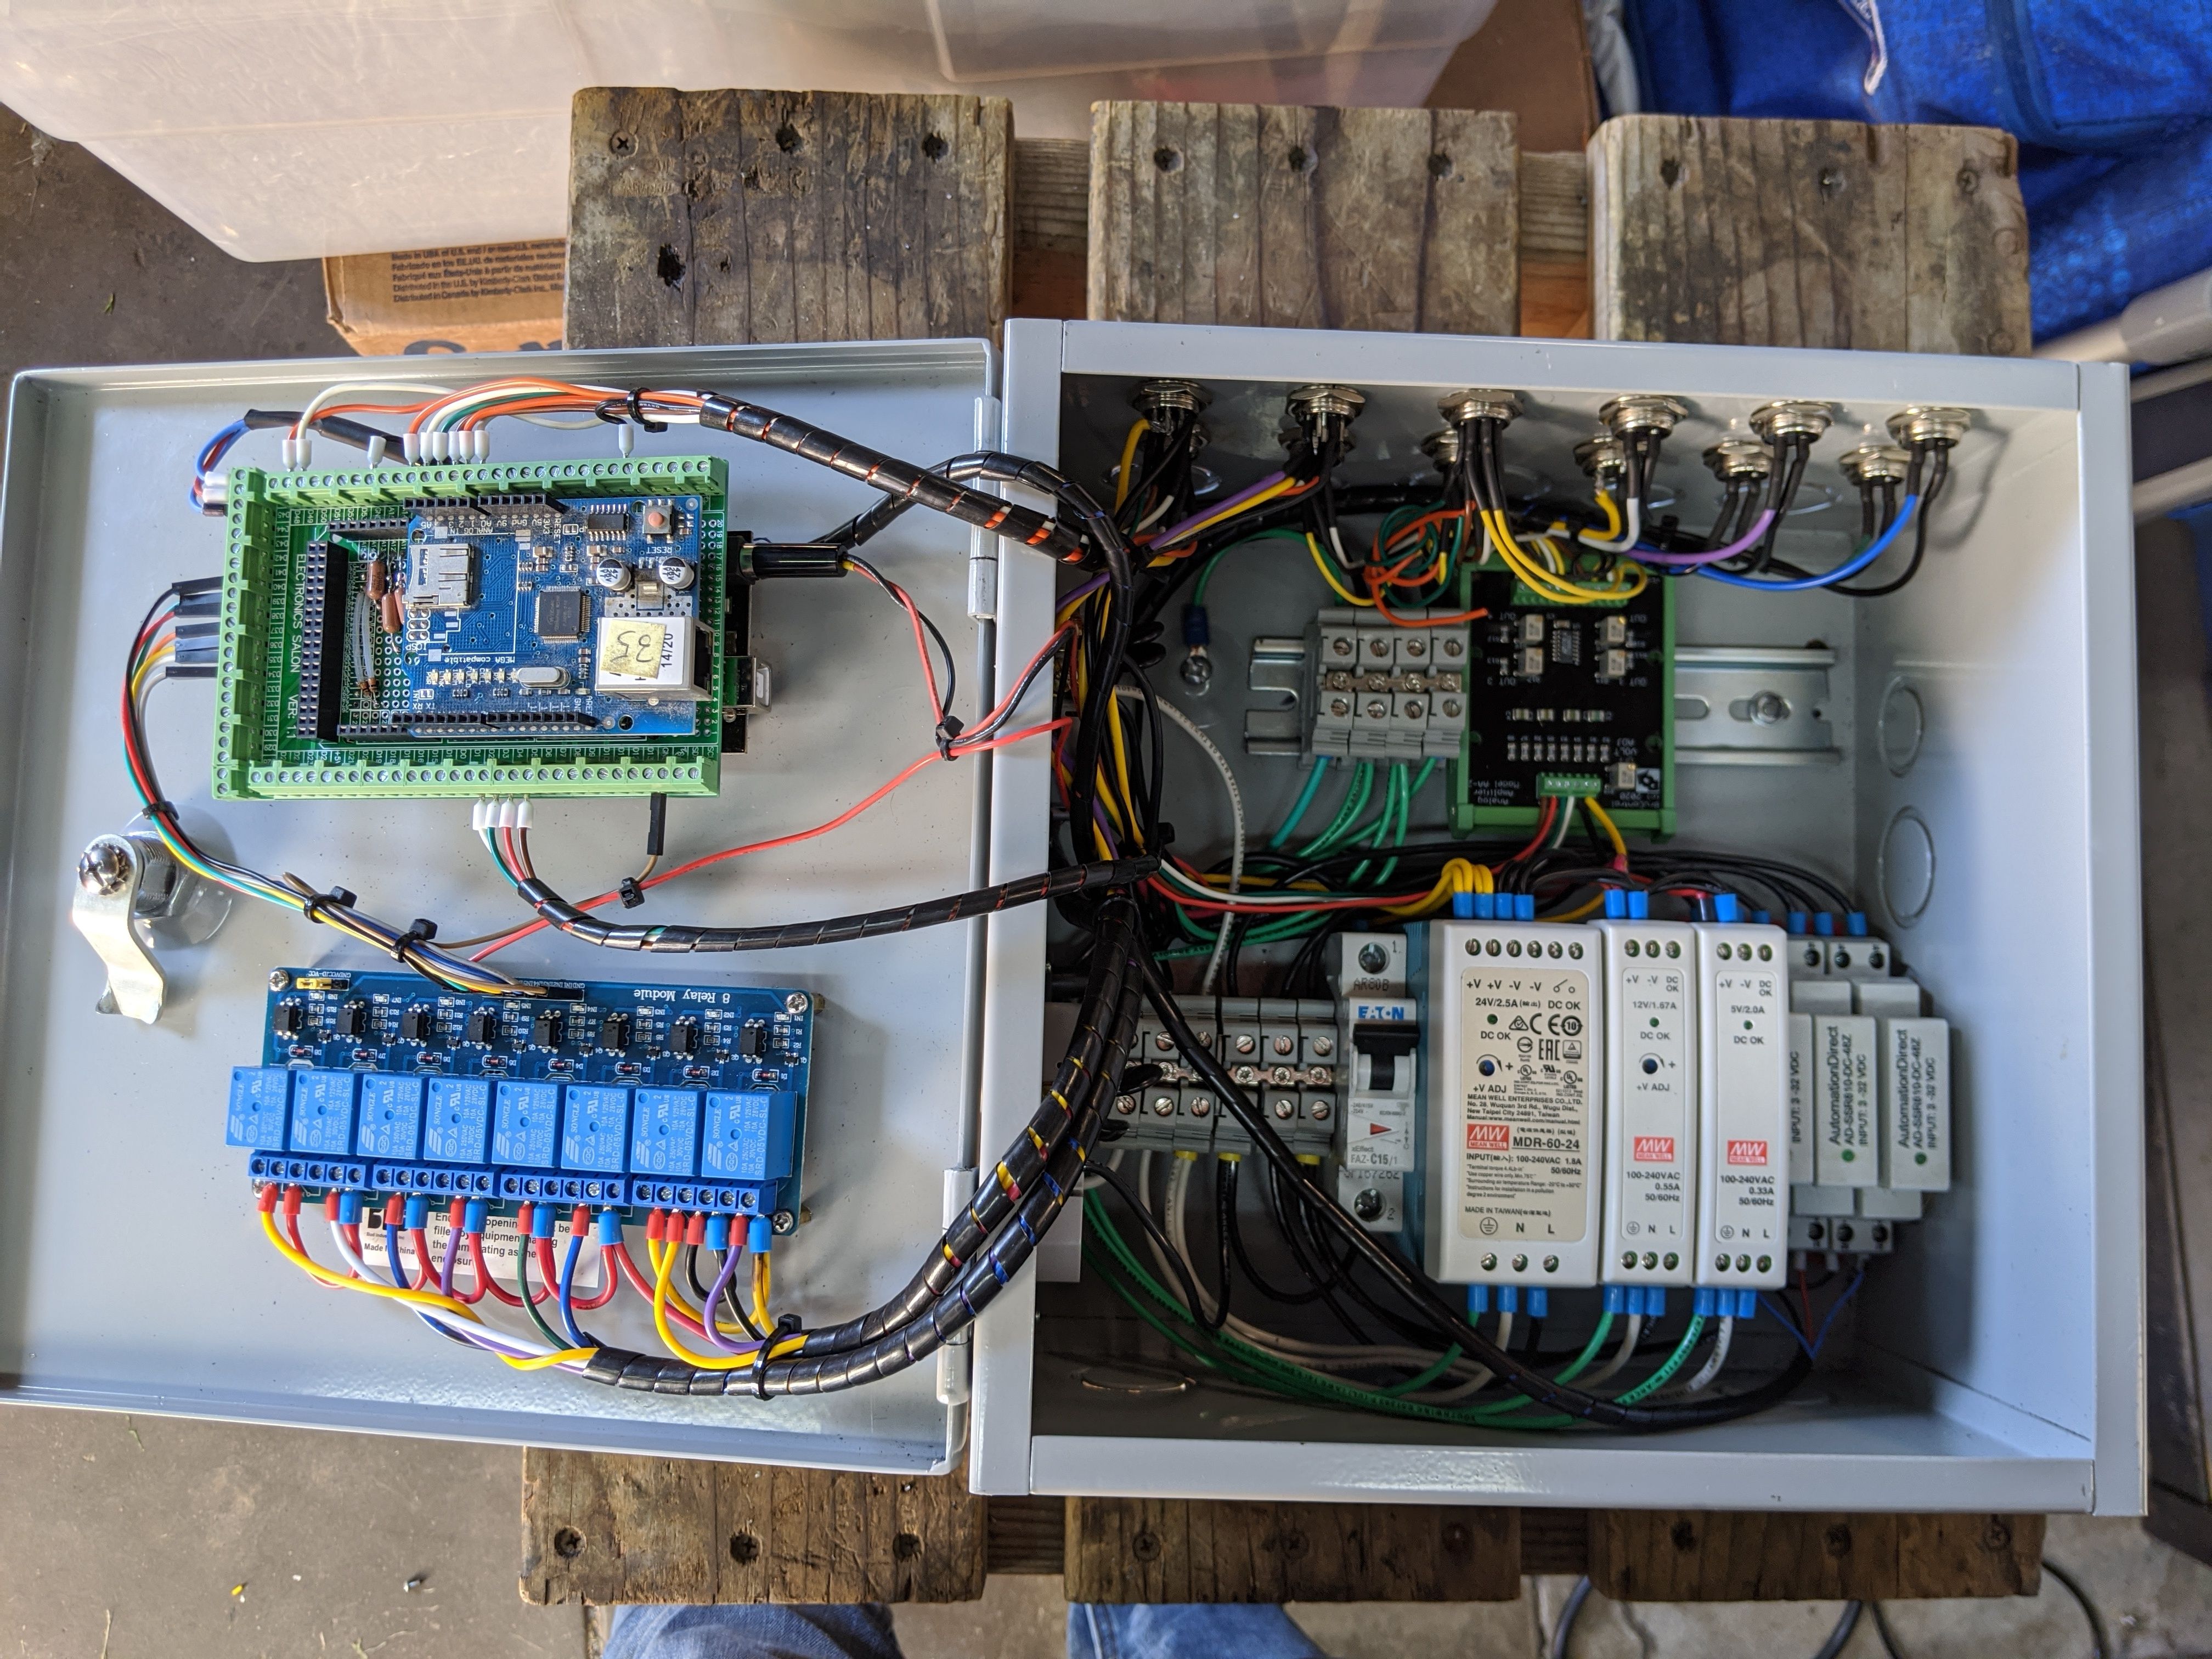
I ran out of analog inputs and room for more stuff in my control panel. I plan on building a new control panel at some point, but that's going to wait until a few other things are taken care of first. In the meantime, I had almost everything I needed to throw together a second make-shift control panel. I spent $30 for the box, $2 for the AC outlets, and another $51 for the analog output board.

3 switched 120V outlets
4 Proportional valve outputs
6 4-20mA Analog inputs
6 12V ball/solenoid valve outputs
1 24V output for TC butterfly valve

IMG_20200321_151233.jpg


MVIMG_20200322_085948.jpg


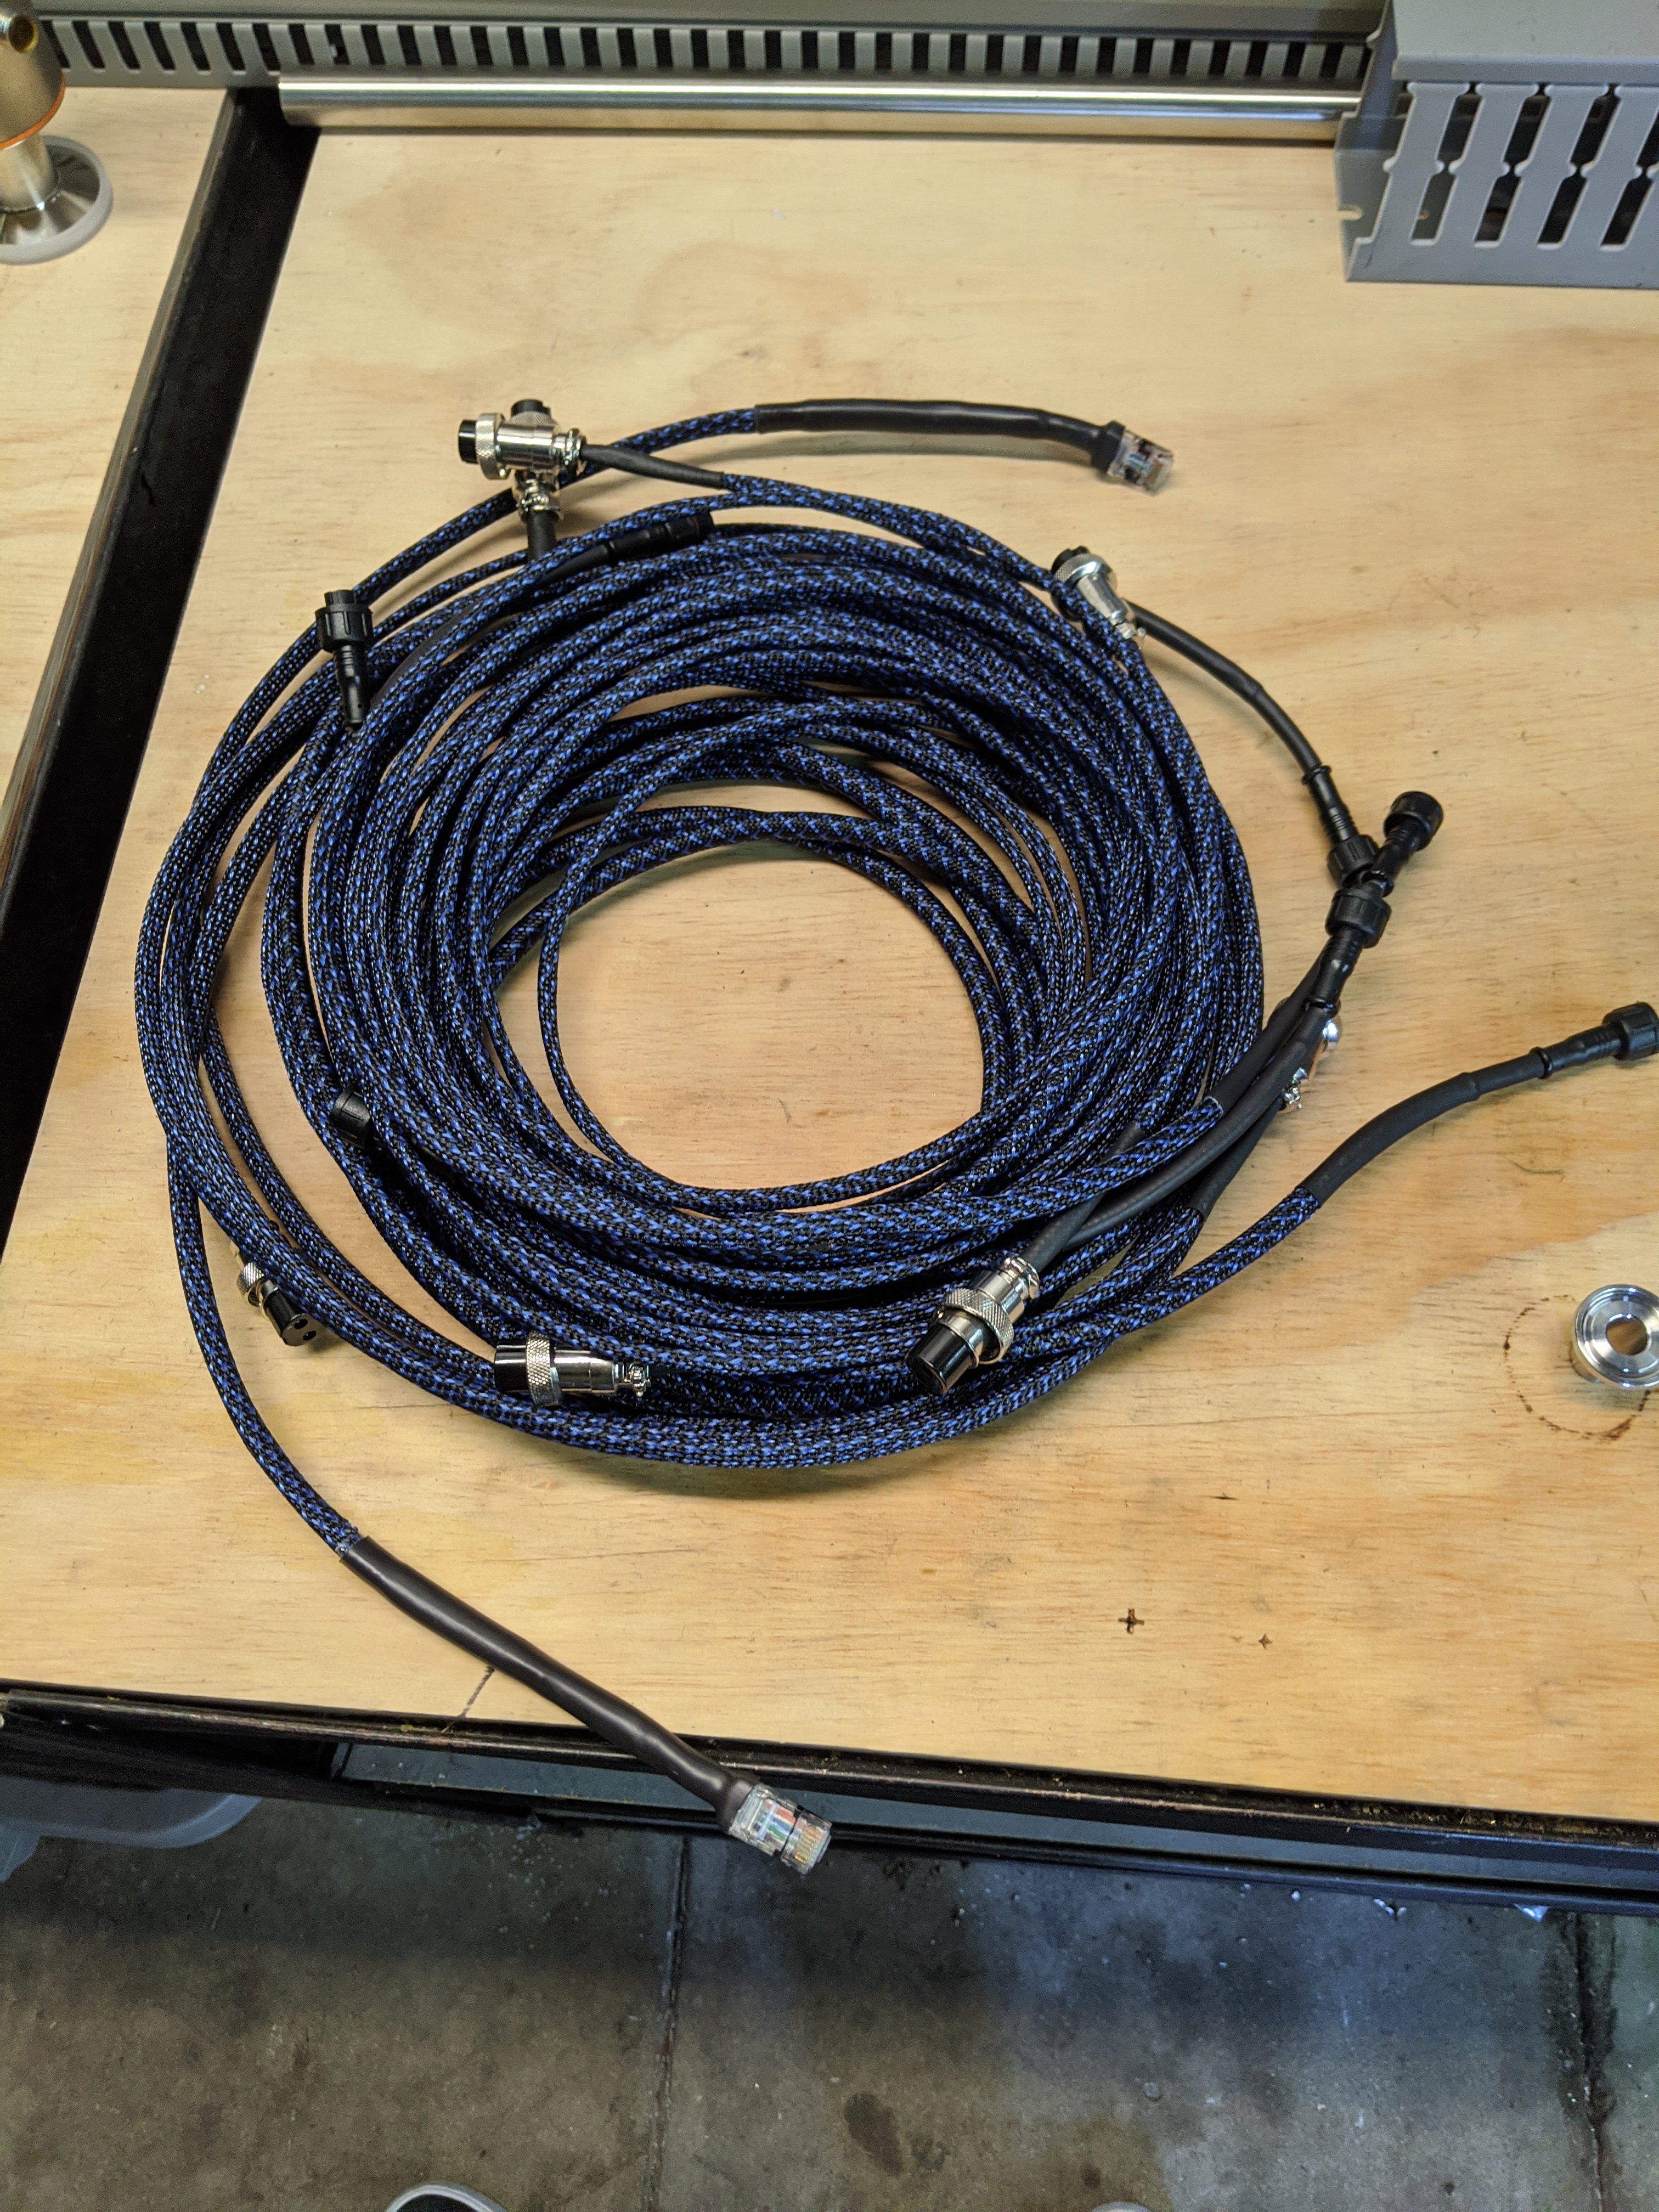
And then I made up some cables to go along with it.

IMG_20200322_083625.jpg
 
I ran out of analog inputs and room for more stuff in my control panel. I plan on building a new control panel at some point, but that's going to wait until a few other things are taken care of first. In the meantime, I had almost everything I needed to throw together a second make-shift control panel. I spent $30 for the box, $2 for the AC outlets, and another $51 for the analog output board.

3 switched 120V outlets
4 Proportional valve outputs
6 4-20mA Analog inputs
6 12V ball/solenoid valve outputs
1 24V output for TC butterfly valve

View attachment 672239

View attachment 672242

And then I made up some cables to go along with it.

View attachment 672238

What cable is that?
 
What cable is that?
They are made up with cable sleeving as pointed out above. Even makes an ugly gray Ethernet cable look sexy.

I also use marine grade heat shrink with glue inside of it to create a waterproof connection after soldering. Works great as the glue melts and gets pushed in between the wires as the heat shrink contracts.
 
What did you decide about ordering?
I’m wondering about ordering from AliExpress?

Lights for the brew stand, miscellaneous stainless steel fittings, and toilet paper. Seriously though, I came back from Mexico 2 weeks ago to find that we are in a pooper paper crisis!

As far as AlieExpress goes, all but one of the items I ordered before lunar new year has arrived. Some of the items I have ordered in the last couple of weeks have already arrived. Every else has "shipped".

IMG_20200324_204257.jpg
 
Back
Top