• Please visit and share your knowledge at our sister communities:
  • If you have not, please join our official Homebrewing Facebook Group!

    Homebrewing Facebook Group

CPVC Manifold questions

Homebrew Talk

Help Support Homebrew Talk:

This site may earn a commission from merchant affiliate links, including eBay, Amazon, and others.
This:

Pasco-4290.jpg


and a vise will get it done fast.

OY
 
I had a small bottle brush that I used. It cleaned up some, but there was a lot that simply wouldn't pull off. I didn't want to scratch the CPVC too much.

Scratchs won't hurt anything. Every thing that comes out of the mashtun is boiled. In case of a mouse turd or grasshopper body part in the grain. Actually if you take a hack saw blade and rough up the fittings and may the pipe ends just a bit they will fit very tight.
 
I agree with not gluing anything. I sized mine to fit snugly in the bottom of my 52-quart. I used an actual Dremel on mine, so I didn't have any power issues. I batch sparge and stir the crap out of my grain bed and have not had a stuck sparge or had any of the CPVC come apart (used 1/2" with no Teflon tape or glue). To clean the burrs from the inside, I took a tube brush and gave it a thorough brushing, filled the tun with hot tap water and let it soak for 45 minutes to check for leaks, drained it and ran the brush through it again. It has been nearly a perfect transition (cut some pieces too long at the start, so had to fine adjust those). Even saw a small (3% to 5%) increase in my mash efficiency from my SS Sink Braid (only problem was doing nearly 30lbs of grain crushed the unreinforced braid).
 
Band saw is what you really really want.

+1. I did mine with a bench vise and a hacksaw, it's always a pain in the shoulder. Literally. :)

I also did not glue this one together (my last one I did) just because I wanted to be able to remove and disassemble it for cleaning every once in a while. We'll see if I ever actually DO, but it's nice to have the option.
 
Wow I had not anticipated this problem. The cheap Dremel does cut through them, but it takes forever..it keeps getting caught up and stopping itself. It's not powerful enough to go through easily..so I had to sit and chip away at it. Some of my cuts looked reallly bad..they got better the longer I sat at it. I might be replacing some of the cpvpc lol.


Yup sorry buddy I went threw the same thing took forever, broke like 10 cut off wheels. They were so cheap you couldn't even put them on without breaking them
 
+1 on the band saw, if I had my plans again I could build a new one in 30 minutes or so if I had a bandsaw I'd bet. Even adjusting for things on the fly and not having built one I didn't spend more than an hour building it cause of the bandsaw.
 
I WISH my slits were that uniform and perfect. I'll upload a photo when I'm done, but some of them are hacked up a bit. I don't think the openings are too big, but maybe they are..
 
I am putting together a 48qt cooler MLT and I have the cpvc parts cut out and put together for the manifold. I want to use cpvc cement on some of the pieces and adhere them together, but I was concerned that it might have negative effects. Would I have any problems from using the cemented cpvc manifold in the mash?


I've attached a photo of the design I went with. I bought 3/8" parts for the outside and the cpvc is 1/2". I bought a brass coupler that converts 1/2" to 3/8". Could this brass piece cause any issues?


Here's a photo of the cpvc cement I got.


Thanks for looking.


Make it from copper!
 
Alright so I may have a problem. I cut all my slits 1/2" apart on the cpvc. I wanted to test it so I hooked it up and dumped in a few gallons of hot water (about 160F-170F) and let it sit for an hour then I drained it. But it didnt drain all the way. There was quite a bit of water left. I propped up the back of the cooler and that helped it drain more , but eventually it stopped and wouldnt drain it all out.

Is this a common occurence? Should I do any more modifications to help it drain all of the liquid?
 
Every manifold system will have some amount of wart that is trapped once the highest opening finally sucks air and breaks the siphon of wort running out. I guess the smaller this is the better, but it does not really matter. What you really need to know is what the volume of the water is that is left in the mash tun after you have drained it. With that and an estimate of the amount of water the grain will absorb and not give up, you know how much water you need to have above your target pre-boil volume. I have about a quart or so that remains trapped in my mash tun.

1/2" apart is not bad. That's about what mine are. How far apart does not effect the amount of wort left when drained.
 
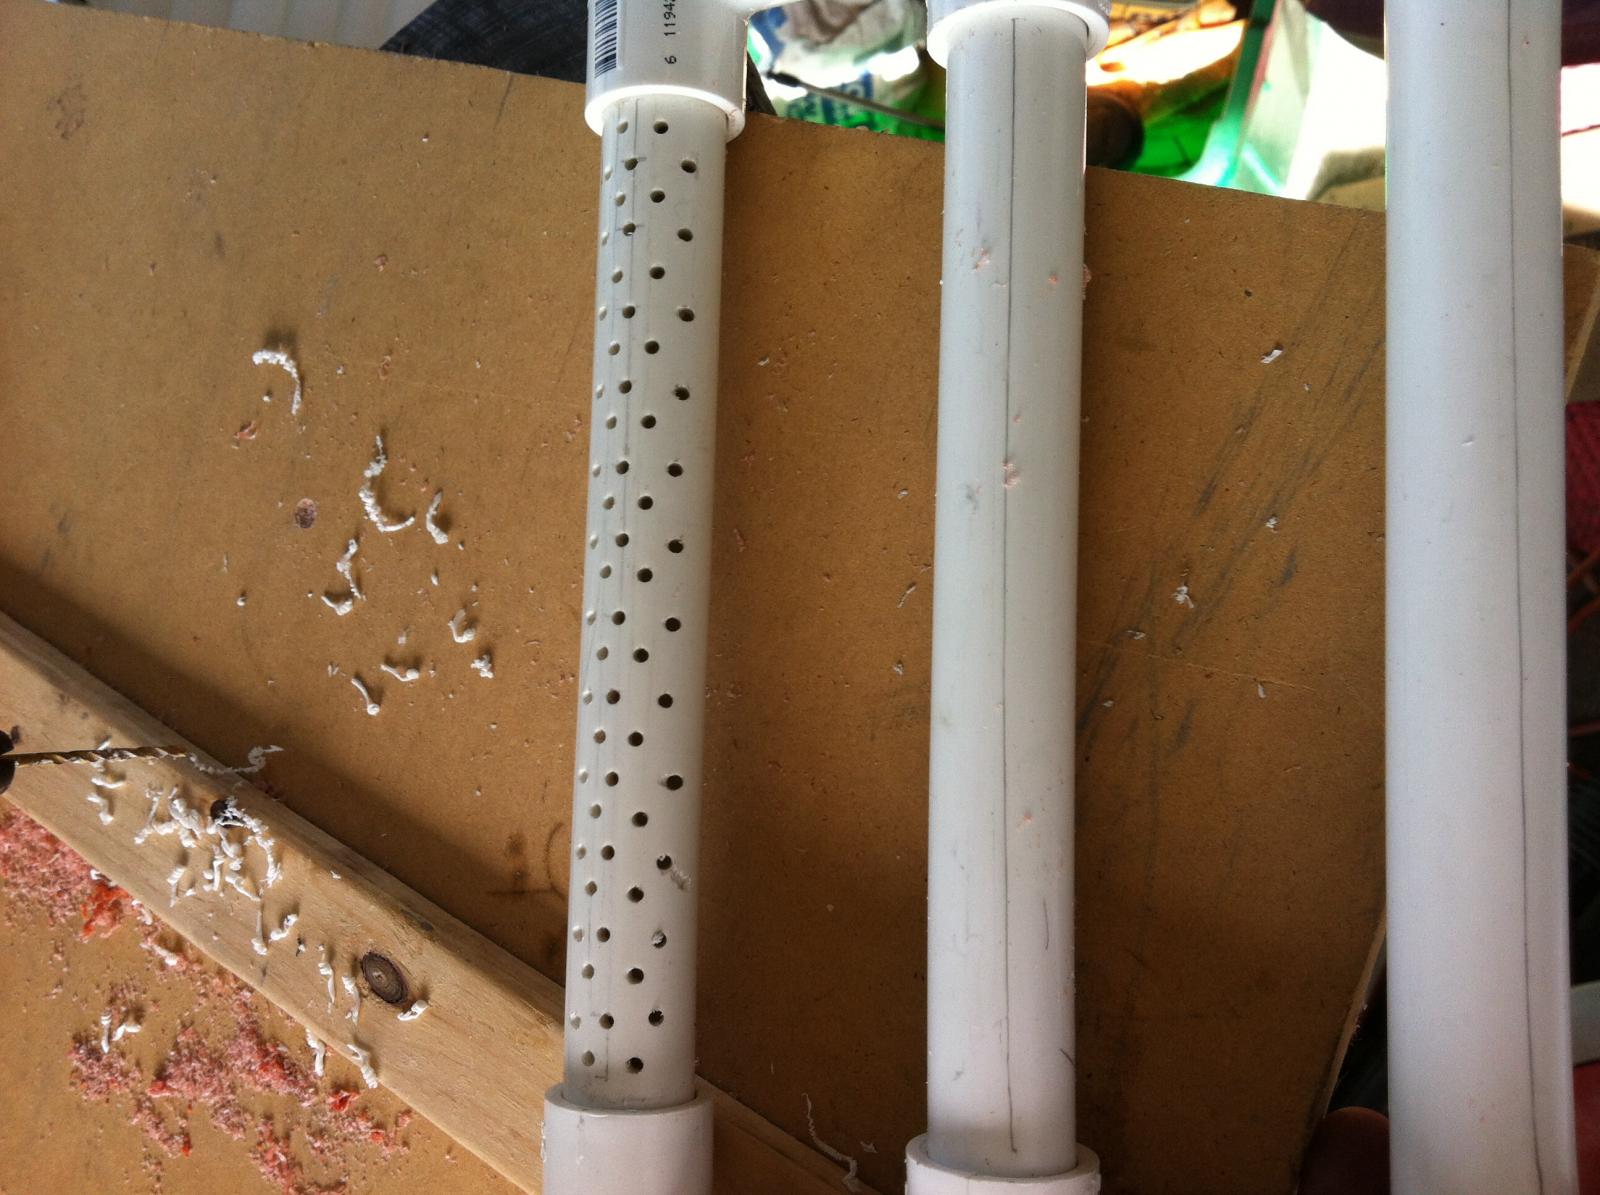
I am also on final design of my cpvc system. There seems to be no way to hook the drain to the cooler drain on the same level. Reference articles say to make the slits face up or to the side. I am going to test both ways but hope that slits facing sideways will allow for more thorough drain completion of the wort.
 
Last edited:
I am also on final design of my cpvc system. There seems to be no way to hook the drain to the cooler drain on the same level. Reference articles say to make the slits face up or to the side. I am going to test both ways but hope that slits facing sideways will allow for more thorough drain completion of the wort.

Keeping them facing down will keep the siphon going longer, me thinks, and prevents excess clogging.
 
Based on John Palmers article. He says openings should face up or sideways to avoid stuck sparge. Seems most folks are using face down openings.
Now we just need more experienced folks to chime in!
 
I didn't have a bandsaw blade that made wide enough slits so thought I would try this. Any thoughts? 3/32 holes like in false bottoms.

image.jpg
 
I was going to drill holes like that in the Ts and 90s. Here is a photo of my manifold after I made all the cuts. Maybe i should cut them a little deeper..i tried to make them go about 1/4 of the way through on either side. I feel like it stopped draining before the water got down that low..it was still just above the actual manifold until I tilted the whole cooler

View attachment 1426439159882.jpg
 
My completed unit in a 10 gal round HD igloo container left 2 qts in bottom. Not sure how that stacks up with others but I can live with it. Drilled 4 rows of 3/32 holes, staggered. Turned tubes to face the side or favored toward the bottom. Drains out to 1/4" below top of PVC.
 
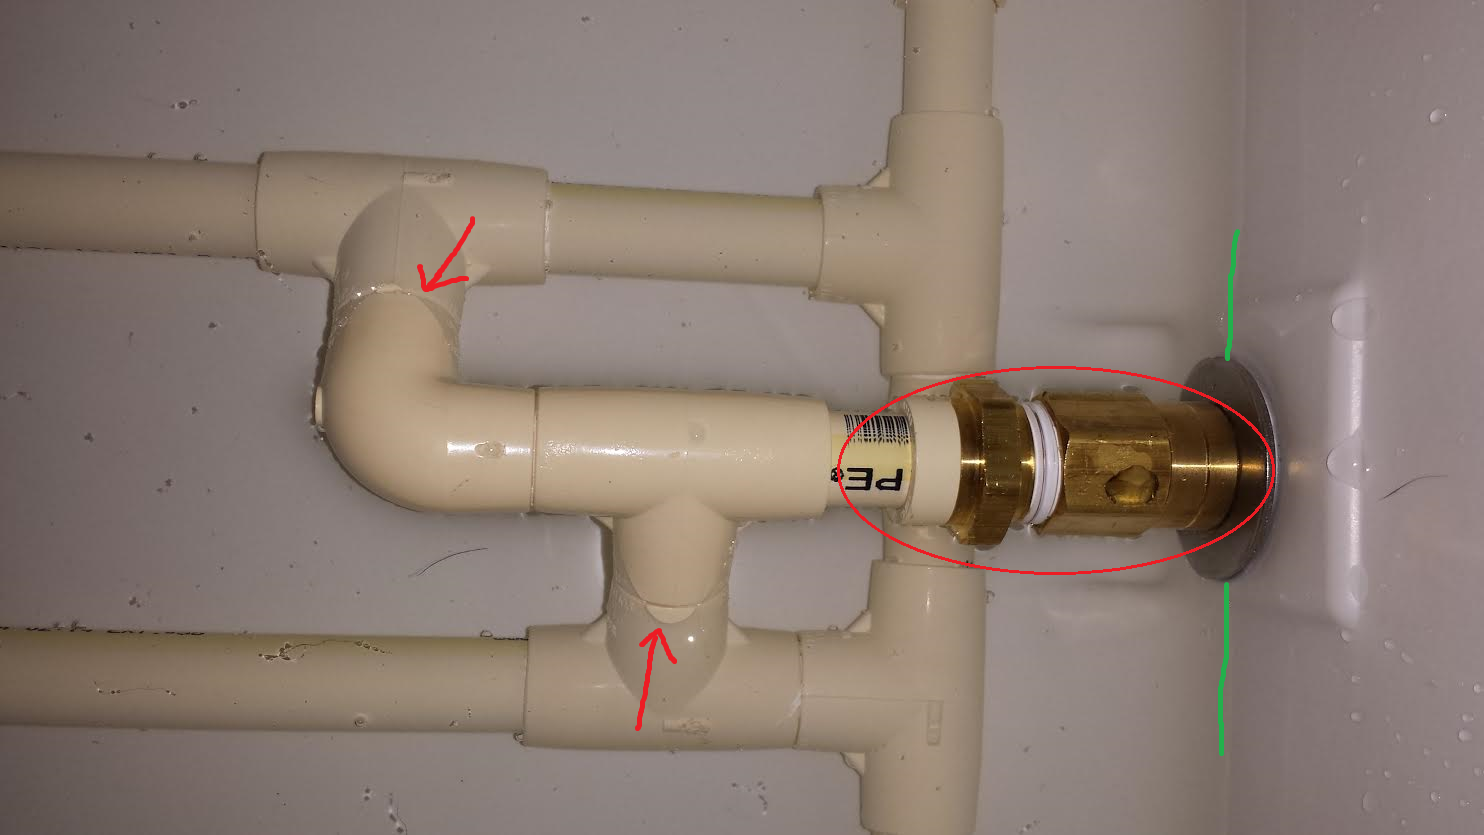
I've found that it doesn't drain down past halfway down the spigot, which leaves over a gallon of water in the bottom.. The attached photo shows the water line down the side where it stops draining. I am thinking that it doesn't seal properly somewhere in the red circle..the connections at the red arrows seem to be connected well with teflon tape, but maybe they aren't.

Also, the outside has a small leak where the valve connects to the nipple connector at the washers. I'm currently unable to unscrew it, or I would try and add an o-ring..

I'm not sure what to do. Should I try and simplify the connections on the inside?

unnamed.png


unnamed2.jpg
 
I hope when your doing your testing.....you have a hose attached to your hose barb? If you do Not. You are not achieving a good syphon. I bet if you attach a hose to it and let the hose hang down below your valve, you'll find that it will suck almost all of the liquid out that you have left now. Your picture shows no hose.
 
I hope when your doing your testing.....you have a hose attached to your hose barb? If you do Not. You are not achieving a good syphon. I bet if you attach a hose to it and let the hose hang down below your valve, you'll find that it will suck almost all of the liquid out that you have left now. Your picture shows no hose.

Correct, I did not have a hose hooked up. I didn't realize that by not having it I was limiting the siphon. I had another person confirm the same thing.

I have a 2' length of 3/8" high-temp silicone tubing that I bought specifically to put on the barb when I transfer the wort..so tonight I will hook that up and give it another test to see if that fixes it.
 
Some liquid left is fine..over a gallon left is not fine lol. I've got my fingers crossed that this helps a lot more. :D About how much liquid should I expect to have left after?
 
Some liquid left is fine..over a gallon left is not fine lol. I've got my fingers crossed that this helps a lot more. :D About how much liquid should I expect to have left after?

My guess would be a less than a quarter gallon.
 
I got it to work!!! I just needrd to attach a hose to the barb adapter and presto! I had just about 3/4 of a quart leftover inside. Thanks everyone!!
 
Also, the outside has a small leak where the valve connects to the nipple connector at the washers. I'm currently unable to unscrew it, or I would try and add an o-ring..

I had similar issues when I built mine. I used one of these between the cooler and the first washer. Worked perfectly and I haven't had to mess with it in 2 years.
 
Back
Top