- Joined
- Aug 26, 2009
- Messages
- 284
- Reaction score
- 25
This was the inspiration for this project.
I'm new to homebrewing so I was very excited.
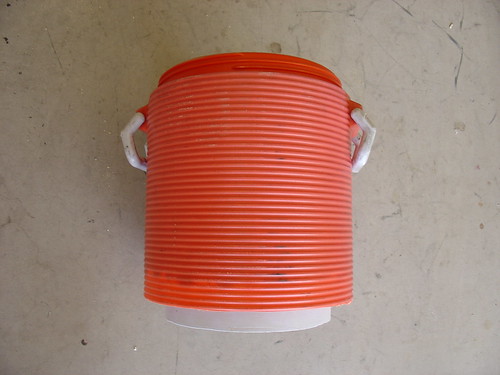
I won this as a raffle project at the homebrewing club I joined. The club was going on a beer bus trip, so I started to think of ways to keep the keg cold. I had an idea but it would not be possible to complete until after the trip. I asked the guys at work to save me some old 5 gallon rubbermaid coolers to experiment with and they were finaly able to help me out.
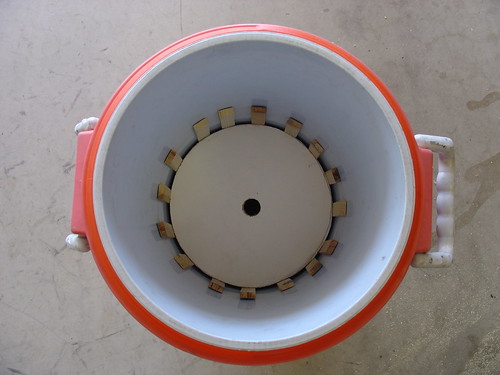
I didn't want to cut up new ones in case this idea did not work.
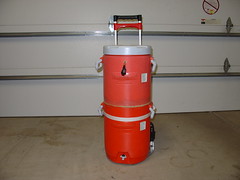
I haven't tested it yet but here it is. The space between the keg and the sides are small, so I would recommend having the keg cold beforehand.
The front view
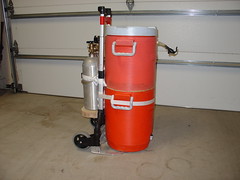
The side view
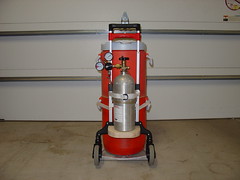
The backside
The cart is from Costco one of the folding ones rated to 150lb.
The cO2 tank is sitting on part of an old cutting board I made 28 years ago.
I have the word out to people I know in construction to save me a couple of 10 gallon Rubbermaid coolers to experiment with.
Thanks to all of the HBT people who post. I'm trying to soak up all of the knowledge here like a sponge.
Thanks to ollllllo for helping me test posting pictures. I hope this works.
I'm new to homebrewing so I was very excited.
I won this as a raffle project at the homebrewing club I joined. The club was going on a beer bus trip, so I started to think of ways to keep the keg cold. I had an idea but it would not be possible to complete until after the trip. I asked the guys at work to save me some old 5 gallon rubbermaid coolers to experiment with and they were finaly able to help me out.
I didn't want to cut up new ones in case this idea did not work.
I haven't tested it yet but here it is. The space between the keg and the sides are small, so I would recommend having the keg cold beforehand.
The front view
The side view
The backside
The cart is from Costco one of the folding ones rated to 150lb.
The cO2 tank is sitting on part of an old cutting board I made 28 years ago.
I have the word out to people I know in construction to save me a couple of 10 gallon Rubbermaid coolers to experiment with.
Thanks to all of the HBT people who post. I'm trying to soak up all of the knowledge here like a sponge.
Thanks to ollllllo for helping me test posting pictures. I hope this works.