Brutus 10ish Build

Homebrew Talk - Beer, Wine, Mead, & Cider Brewing Discussion Forum

Help Support Homebrew Talk - Beer, Wine, Mead, & Cider Brewing Discussion Forum:

This site may earn a commission from merchant affiliate links, including eBay, Amazon, and others.

FlynnAle

Supporting Member
HBT Supporter
Joined
Nov 23, 2006
Messages
63
Reaction score
2
Location
Fort Worth
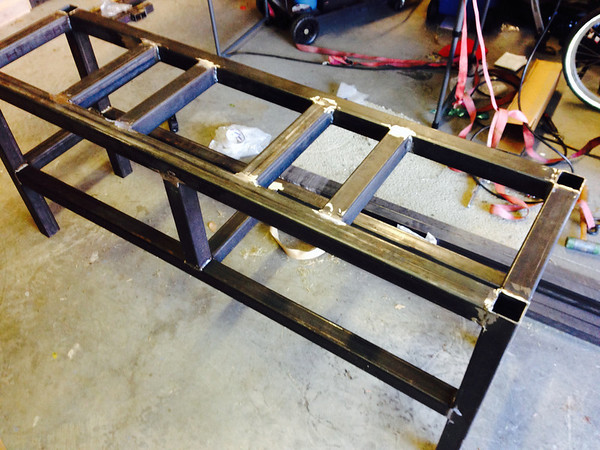
I decided to tackle a stand myself even though I can't weld, or couldn't weld when I started. I used Lonnie's Brutus 10 plans and made them a bit longer to accommodate the SABCO kegs I have.

I used 2" x 2" x .120" mild steel so that I would have something to tap for the gas lines, pumps etc... I did not trust myself enough to build the gas beam. ;)

The burners I got from Northern Brewer, sheds and valves from Brewers Hardware and misc pipe etc... from Lowes. The plate chiller is from duda.

I am still debating on adding some stainless stand offs to help dissipate the gasses from the bottom of the stand. I probably should have thought of that first.

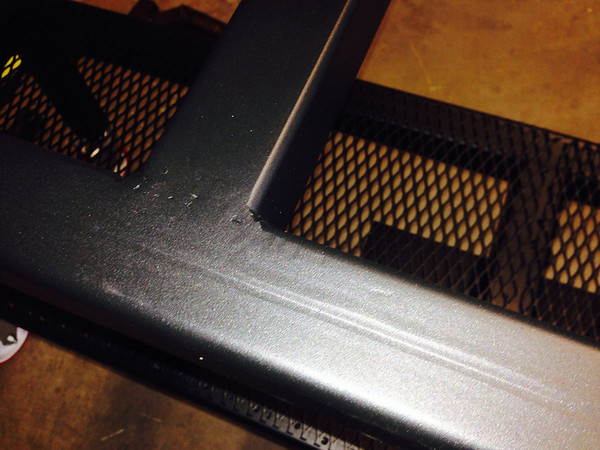
The stand was coated with a high temperature ceramic coating. I still need to hard wire the pumps to a switch but it should be ready for a test run soon.


Excellent job FlynnAle, you will love those Sabco kegs with their false bottom, and beautiful tig welds. I love mine!

Good Luck with the rest of your build!

John :mug:
 
I am just buying my steel and getting my parts in order. I really like the layout of your stand. Is there any way you can post your cut list and measurements? Plus how did you attach your plate chiller and heat shields?
 
Thanks, lonniemac's design was the bulk of it. I just changed some parts and dimensions.

(4) 56"
(4) 26"
(10) 12"

All of it is 2 x 2 x .120 mild steel tubing.

The plate chiller is bolted to a 16 ga steel plate welded to the stand.

The heat shields are from Brewers Hardware and secured with 3/4" #10 x 32 thread bolts. I drilled and tapped for the screws. They were $23 each.

The drip shield is 16 ga plate too and the front bolts are drilled and tapped 1/4 x 28 while the back is the same but with nuts.

I ended up making some stainless stand offs to raise the keggles 1/2" to allow more air flow for exhaust gasses. What I should have done is lower the back top beam by 2" and the shield "unfold" to open that area for gas to escape. I had a brain fart and forgot to do it. I was just so pleased I was able to weld halfway decent.
 
John, thank you. I think I am going to add a electric RIMS tube similar to the RIMS wizard that SABCO makes.

I have a PJ diagram and will most likely use more of brewers hardware stuff for the tube.
 
Awesome thanks I will probably have more questions soon. If that's ok?
 
So if I am calculating this right your overall length is 60". What is the space in between your keggles not including the post? 6 inches?
 
I decided to tackle a stand myself even though I can't weld, or couldn't weld when I started.


Can I ask how you learned? I have been thinking about building my own stand as well and I have no experience with welding. I was going to take a MIG Welding class first and then try TIG since that is what would be needed for stainless steel. How hard is it to learn?
 
cossacks19 said:
So if I am calculating this right your overall length is 60". What is the space in between your keggles not including the post? 6 inches?

Right. 60 overall and 6 in between. I would go to 12 in between if you have the room with SABCO kegs. If all of your fittings are on the front or back. 6 is adequate.

I put a 90 deg elbow on the mash and hlt pointing towards the front. I wanted to keep it as small as possible.

The hole for the burners is 12" inside edge to inside edge. 16" outside to outside.
 
NedStackey said:
Can I ask how you learned? I have been thinking about building my own stand as well and I have no experience with welding. I was going to take a MIG Welding class first and then try TIG since that is what would be needed for stainless steel. How hard is it to learn?

I watched a lot of YouTube videos and practiced on scrap. The mild steel at 0.120 is pretty forgiving.

I am far from a expert but I am competent enough and own a grinder ;-)
 
So I bought my steel, and I think I got a little extra. I think I am going to take your advise and make the space between the burners 8" instead of the 6" before. This should lengthen my stand to 64". My question is, I believe your height is 26", do you feel like that is a good height or would you adjust it a little higher if you had to do it over?
 
Well, my wheels add 5.25 inches to the height so I pretty happy. I am 6'3" so it is not too tall for me. I would make the space between the shelf and burners 18" though. With the BG14 there is not much room there.
 
I'm not sure I understand what you mean by the 18" shelf. I thought the space between your burners not including the steel was 6" (laterally). I have increased mine to 8". By the way so excited the welding should be done this weekend thanks for the help. Per your advise I added the 2" drop in the back for ventilation.
 
The shelf, where the expanded metal shelf is located. On my stand it is 12" from the top long rail to the bottom long rail. With the BG14 installed and running full blast I would have liked it to be 18" between the top rail and bottom rail. Does that make sense?
 
Yes it does (basically you wish you stand was 22" wide post included), why and how would you have installed the heat shield? Plus would this effect the supports of your pots.
 
I think we are talking about to different dimensions.

The stand, without wheels is 26" high, 16" depth and 60" wide.

The distance from the top of the stand to the expanded metal shelf on the next level down is 12". That is the dimension that I wish was 18".

The depth would still be 16", height w/o wheels 26" and width 60". None of the burner mounts, shield etc... would be changed.
 
Before you weld and cut make sure you think about hose routing etc... and are sure it is exactly what you want. It is hard to go back and correct. :) What may work for me, may not be exactly what you want.

If you are having the welding done by a pro, the gas beam is a cool idea. I would have liked to incorporate that but alas I figured my welds and explosive gasses would not mesh well together.
 
Thinking of starting a build like this this summer. How much did the steel run ya? I've already got plates, pumps, keggles, disconnects and hoses... I'm have basically been rocking this setup on 3 floor burners for about 2 years now, and looking to finally build the stand. Did you buy a used Tig welder? Trying to figure out the cheaper way to do things first :D

Your setup looks freaking sweet too by the way!

Thanks!
 
cossacks19 said:
Sorry...gas beam is what I meant.

On Lonnie's Brutus 10 build the lower front beam is the gas manifold. It is welded gas tight and drilled with welded full couplings for the burners and regulators. Search lonniemac brutus10 and you can see it.
 
Seriously so sorry to be a pain. But I did the search and came up with nothing. Are you talking google search or this web site? Anyway you can post a link? Again sorry.
 
Great looking build! I'm in the FTW area, can you PM me who you used for the metal and did the cuts?
Thanks!
 
FlynnAle said:
No worries. Search Brutus 10 on here. There are 393 unique posts. Lonnie's you tube video is http://youtu.be/eSwqcqzp-uU I ordered the plans from BYO bac issues for $3.00 and then made the size changes I wanted. http://byo.com/photos/gallery/13 Hope that helps.

Yeah, buy the plans. Even if you don't go 100% by them, having them helps immeasurably during planning. I cobbled together a two burner "Jethro 10" but I wouldn't even have tried it without being able to reference Lonnie's plans. Standing on the shoulders of giants and all that.
 
Well I got mine together yesterday. I ended up getting 2"x2"x1/8" that's right this is one heavy beast!!! I love the way it turned out. Thanks for the advice.
 
The only photo I don't have is with the expanded metal on the bottom rack. Putting on caster this weekend.

image-4097537550.jpg


image-1443860224.jpg


image-628346541.jpg


image-1785714298.jpg
 
I changed the dimensions a little (because I had extra metal). Also added the 2" ventilation drop in the back because I am going to add the eat shields.
 
Back
Top