• Please visit and share your knowledge at our sister communities:
  • If you have not, please join our official Homebrewing Facebook Group!

    Homebrewing Facebook Group

Brewzilla Gen4 Discussion/Tips Talk

Homebrew Talk

Help Support Homebrew Talk:

This site may earn a commission from merchant affiliate links, including eBay, Amazon, and others.
I think Kegland sells a shower head for the purposes of what you are looking for. The Kegland Sergeant Sparge Head. I have not used it, but I would definitely consider it for during the recirculating mash.
This sparge head only works for sparging. When used for mashing it clogs easily and it is difficult to unclog. Since I mash full volume, my sparge head now sits in my unused gear pile. It is also advertised for aerating during transfer to your fermentor, but not something that I've tried. I'd be worried about clogging there as well. It was cheap enough to tack onto an order, but I probably wouldn't have bought it if I hadn't somehow missed this posting from 2023 in this thread:
The Seargant Sparge Head is no good.ine little piece of grain or ricehuls will block the fout tiny holes in the Sparge Head. A flawed design if uou want to use it while mashing.
It only works while sparging.
 
@Spetz I don't have any experience with as much hops as you describe, so nothing very useful to contribute. Other than you comment about moving the chiller up and down. If you leave recirculation arm running during chill, that should do the same as bouncing your chiller, without having to babysit.

As for sparge, I do as you describe for the most part, but I've always used the top plate. After I add grains at mash in, I stir slowly for a few minutes to ensure I've got everything mixed well, no dough balls, then I put on the top plate (and BT thermometer through the middle hole) and let the recirc hose rest on there. No mash stirring. When mash is done, I lift basket and set on first set of feet for a few seconds, then to the bottom feet. I leave the top plate on and pour sparge water 0.5-1 gallon at a time from my pitcher and just let gravity run it through while I'm heating the wort to a boil.

I get 80-89% mash efficiency and I'm always impressed with that. I don't have problems with the grain bed getting compacted and preventing sparge water from passing through, and I get good efficiency. For me, there are no negatives with using the top plate.
Thanks for the comprehensive breakdown of your process! This is pretty much exactly as I did for the first few batches until I found the top plate was compressing the grain bed down, and I was left with either a stuck mash or stuck sparge almost every time. I was still getting 'ok' efficiency but it meant lots of babysitting and annoyances throughout the entire mash, which is precious free time wasted. One thing I do like about the top plate is the hole for the probe. Just to add, I don't use rice hulls (widely available from source, I just don't trust the cleanliness in this climate)

Perhaps I will try it again, follow your process, and see how it goes. Between then and now (using/not using top plate) i've got many more batches under my belt on the BZ and know the system better than before, so maybe it will improve. 80-89% mash efficiency is indeed impressive and exactly where I want to be on this system. I can't seem to budge the 72-75% range. I wasn't planning to make my crush any finer, but maybe I will slightly.

RE the chiller - I face power issues at the best of times here, which means the pump and whirlpool arm aren't running quite as well as they should be. I find bouncing it up and down every 5 minutes or so shaves off about 1/3 of chill time. If i'm not doing a hopstand, which adds on a significant amount of time to an already very long brew day, I simply leave it alone to do it's thing and i'm down to pitching temp in around 30-40 minutes. It's actually faster with double batches, since more of the IC is submerged.
I haven't had much issues, but I have only recently started making "hoppier" offerings. The most I have put in the kettle during boil/flameout/whirlpool is about 0.75/oz per gallon or roughly 22g/liter.

I think Kegland sells a shower head for the purposes of what you are looking for. The Kegland Sergeant Sparge Head. I have not used it, but I would definitely consider it for during the recirculating mash. I don't know if the imperial sparge arm is worthwhile and honestly doesn't fit perfectly on my 35L.

View attachment 868823
This photo I took from the internet and I have not read much on it, but it is cheaper than the imperial sparge arm and easily plugs into the existing hose of the brewzilla.

For the imperial sparge arm - I only used it for sparging. I did that for a bit and it really was nice to use with my old grainfather as a HLT, but I stopped using it to try to reduce things to cleanup and pull out for brewday. My process was to mash out, raise the malt pipe slowly, attach silicon tubing to the sparge arm from the pump of the grainfather, and then choke the pump down to prevent it from sparging too fast. It was great and hands free, but I felt like I was overhandling and wanted to simpify things. Originally I was going to raise the pipe and do a true vorlauf, but that also sounds like overhandling. I have two young kids at home and anything I can do to keep my hobby must be done.

I currently am just heating sparge water on my gas stove with two different stock pots and then pour over manually. It is easier to clean and dry a pot than my grainfather and a sparge arm. I don't use the top plate either since I stir every 15-30 minutes. My current process is to stir the grains one last time, raise the temp to mash out around 168-170, turn off the pump about 5 minutes after reaches the target temperature, then wait another 5-10minutes before puling the malt pipe. Slowly pull the malt pipe up (I only have one set of feet on my gen4 in the US, BS). Let the runnings pull through a bit until I can see a "dry" grainbed and then slowly pour about a half gallon to a gallon, 2-3x (waiting 5-10 minutes between each pourover) and I have been getting 80% brewhouse efficiency.

I am considering adding 1-2 gallons of water while raising the temp to mash out, stir it up, turn off the pump, wait 5-10 minutes and then raise the malt pipe. Then I am hoping I can have less time sparging.
@jdubdvdt thank you also for your breakdown! Firstly yes, total BS about the lack of feet in the middle...as a little side note, when I took delivery of my BZ and tested it for the first time, the pump clogged and started making the most horrendous dystopian grating/moaning sound i've ever heard in a brewing environment. You could have sampled it and put it in the next Blade Runner movie. No wort/grain/anything running through it, just water. I took the pump apart and found small shards and shavings of metal inside it, all magnetically stuck to the impeller. Turns out they were from the machining of the feet on the malt pipe! Spent a few hours with some tweezers picking off parts of (very, very sharp) metal between the weld of the feet. The middle row of feet was the worst - perhaps a coincidence, perhaps not...

I was looking at the sargeant sparge head and can find one here in Indo actually. As others have mentioned too, I hear it's renowned for clogging so probably only worthy of being used for sparging. I think I may just end up building my own manifold out of CPVC. I'm going to give the top plate another go as mentioned @micraftbeer above, but i'm set on trying something different to improve both efficiency and recirculation without channeling or compressing the grain bed. Like yourself, I have stirred numerous batches all the way through, around every 10-20 minutes or so, and achieved pretty good efficiency too, but want to use that time to get on with other stuff instead and simply rely on a better and more stable setup. I'm also quite hesitant to go too crazy with stirring since I don't always trust that malt pipe screen to stay in place.

That's awesome you still have the grainfather to hand for the sparge. My previous setup (stainless stockpots) succumbed to rust unfortunately, so I no longer have the luxury of using anything in parallel with the Brewzilla to take care of the sparge water. It's incredibly frustrating. For now it's a brewbucket filled with 80c+ water that sites for an hour then gets dumped over the top in 2 rounds (around 6L each time).

Perhaps I'm rushing my sparge and losing efficiency there. I always find myself having to either top up the sparge water or top up the kettle after removing the pipe (doesn't help that the water level markers are basically impossible to see without removing the malt pipe) to reach my pre-boil volume, probably because i'm not waiting long enough for it to drain, or because my grain bed isn't draining properly. Without fail, after all sparge water has been delivered, I've missed the target volume on every single batch (albeit not by very far). I resort to either topping up the sparge water and rinsing the grains one last time, quickly lifting off the malt pipe a few moments before target volume is reached, or just top up the kettle. I'm going to adopt your method and slow things down, leaving more time between sparges and waiting for every last drop before considering any top ups - essentially, this is why I'm missing the target, although I am generally very patient with it and let it run until the end. This has also got me thinking that perhaps my grain absorption rate is off..? I have it dialed in at 0.8L/Kg (0.21galon/lb) at the moment.

It would be handy if Brewfather had pre-boil and post-boil volumes as both hot and cold, would make the maths slightly easier and simplify other variables...especially when using an immersion chiller.

My hoppier/hopstand beers are generally hit with around 100-120grams in the kettle for my 5gal batches, so basically same as you. Maybe the increased trub loss is just down to the unpredictable nature in which the bottom screen behaves. Sometimes it works great, sometimes not. I also rack to FV via the recirculation arm + silicone tube, not the spigot.

(it's probably worth mentioning - all of the above in based on single, 23.5L batches, not double batches, in the 65L BZ)
 
Last edited:
@jdubdvdt thank you also for your breakdown! Firstly yes, total BS about the lack of feet in the middle...as a little side note, when I took delivery of my BZ and tested it for the first time, the pump clogged and started making the most horrendous dystopian grating/moaning sound i've ever heard in a brewing environment. You could have sampled it and put it in the next Blade Runner movie. No wort/grain/anything running through it, just water. I took the pump apart and found small shards and shavings of metal inside it, all magnetically stuck to the impeller. Turns out they were from the machining of the feet on the malt pipe! Spent a few hours with some tweezers picking off parts of (very, very sharp) metal between the weld of the feet. The middle row of feet was the worst - perhaps a coincidence, perhaps not...

I was looking at the sargeant sparge head and can find one here in Indo actually. As others have mentioned too, I hear it's renowned for clogging so probably only worthy of being used for sparging. I think I may just end up building my own manifold out of CPVC. I'm going to give the top plate another go as mentioned @micraftbeer above, but i'm set on trying something different to improve both efficiency and recirculation without channeling or compressing the grain bed. Like yourself, I have stirred numerous batches all the way through, around every 10-20 minutes or so, and achieved pretty good efficiency too, but want to use that time to get on with other stuff instead and simply rely on a better and more stable setup. I'm also quite hesitant to go too crazy with stirring since I don't always trust that malt pipe screen to stay in place.

That's awesome you still have the grainfather to hand for the sparge. My previous setup (stainless stockpots) succumbed to rust unfortunately, so I no longer have the luxury of using anything in parallel with the Brewzilla to take care of the sparge water. It's incredibly frustrating. For now it's a brewbucket filled with 80c+ water that sites for an hour then gets dumped over the top in 2 rounds (around 6L each time).

Perhaps I'm rushing my sparge and losing efficiency there. I always find myself having to either top up the sparge water or top up the kettle after removing the pipe (doesn't help that the water level markers are basically impossible to see without removing the malt pipe) to reach my pre-boil volume, probably because i'm not waiting long enough for it to drain, or because my grain bed isn't draining properly. Without fail, after all sparge water has been delivered, I've missed the target volume on every single batch (albeit not by very far). I resort to either topping up the sparge water and rinsing the grains one last time, quickly lifting off the malt pipe a few moments before target volume is reached, or just top up the kettle. I'm going to adopt your method and slow things down, leaving more time between sparges and waiting for every last drop before considering any top ups - essentially, this is why I'm missing the target, although I am generally very patient with it and let it run until the end. This has also got me thinking that perhaps my grain absorption rate is off..? I have it dialed in at 0.8L/Kg (0.21galon/lb) at the moment.

It would be handy if Brewfather had pre-boil and post-boil volumes as both hot and cold, would make the maths slightly easier and simplify other variables...especially when using an immersion chiller.

My hoppier/hopstand beers are generally hit with around 100-120grams in the kettle for my 5gal batches, so basically same as you. Maybe the increased trub loss is just down to the unpredictable nature in which the bottom screen behaves. Sometimes it works great, sometimes not. I also rack to FV via the recirculation arm + silicone tube, not the spigot.

(it's probably worth mentioning - all of the above in based on single, 23.5L batches, not double batches, in the 65L BZ)
I was unaware of all the issues people were having with the sargeant sparge head. Glad I know that now. A CPVC manifold would work well. The top plate probably will work fine and maybe that is the cause of my grain compaction issues (not using the top plate). I like stirring, but I came from a 3 vessel system before the grainfather and it is part of my process that I can't break, yet. Definitely don't get too crazy with stirring, my previously mentioned mishap with a clogged pump actually came from overstirring while doughing in and the screen tilted up letting grain get underneath the malt pipe. I didn't know until the boil was over. I had been trying to figure out why my efficiency was so good, but the volume was displaced and off. Luckily it was a dunkelweizen and there was plenty of malt flavors to hide any off flavors.

I will say that I typically do top off, but my sparge process is slow. I couldn't imagine putting the full brewfather sparge volume through it. Honestly anything above 2 gallons is probably sufficient for a sparge, maybe even less. My grain absorption rate is 1L/kg (0.479 qt/lb) and I use a mash thickness of 3.4L/kg (1.625qt/lb), not including the deadspace under the mashtun.

I think the part that irks me in general regarding volumes is not knowing the post boil volume until it is transferred. Even with the markings on the kettle it is difficult to account for trub and hops. Could say I am overthinking it or could dial it in, but I have had difficulty over "winter" brewing in cooler weather and getting some weaker boils when it is 0C out. The boils are insane when its warm out. Either way, I am getting good results to the fermenter. And the beer, drinks.
 
A retrofit sight glass is the answer.
I think you misunderstood. I said it was difficult to account for the trub and hops, not that I couldn't read the kettle markings. On my fermenter a sight glass would be cool, maybe. For the kettle, the trub and hop matter displaces liquid and is a variable on each recipe. There is no variable for pellet hop absorption or displacement in Brewfather. I can read the markings in the kettle after boil, but can't remove the hop debris or trub.

Unless I am overthinking it, but on a NEIPA I might have 8oz of hops in the kettle. That absorbs and displaces liquid - I don't see brewfather accounting for hops in pre or post boil volumes.
 
I was unaware of all the issues people were having with the sargeant sparge head. Glad I know that now. A CPVC manifold would work well. The top plate probably will work fine and maybe that is the cause of my grain compaction issues (not using the top plate). I like stirring, but I came from a 3 vessel system before the grainfather and it is part of my process that I can't break, yet. Definitely don't get too crazy with stirring, my previously mentioned mishap with a clogged pump actually came from overstirring while doughing in and the screen tilted up letting grain get underneath the malt pipe. I didn't know until the boil was over. I had been trying to figure out why my efficiency was so good, but the volume was displaced and off. Luckily it was a dunkelweizen and there was plenty of malt flavors to hide any off flavors.

I will say that I typically do top off, but my sparge process is slow. I couldn't imagine putting the full brewfather sparge volume through it. Honestly anything above 2 gallons is probably sufficient for a sparge, maybe even less. My grain absorption rate is 1L/kg (0.479 qt/lb) and I use a mash thickness of 3.4L/kg (1.625qt/lb), not including the deadspace under the mashtun.

I think the part that irks me in general regarding volumes is not knowing the post boil volume until it is transferred. Even with the markings on the kettle it is difficult to account for trub and hops. Could say I am overthinking it or could dial it in, but I have had difficulty over "winter" brewing in cooler weather and getting some weaker boils when it is 0C out. The boils are insane when its warm out. Either way, I am getting good results to the fermenter. And the beer, drinks.

Been there before with the screen tilting up and dropping grain underneath the malt pipe - daunting experience but the lesson has been learned now! RE sparging - i'll slow it down but stick to the amount Brewfather is giving me I think - when I lift and dump the malt pipe (into a huge bucket) after sparge, 30 minutes later when I expect the final runnings that have come out (usually about 100-300ml or so), it's by no means clear and is likely still full of sugar. I've never actually taken a gravity reading from that bucket but it looks like this is the only real way to see where I'm at in terms of effectiveness of the sparge. I'm also going to increase my grain absorption next batch and see what happens to the volumes.

I think you misunderstood. I said it was difficult to account for the trub and hops, not that I couldn't read the kettle markings. On my fermenter a sight glass would be cool, maybe. For the kettle, the trub and hop matter displaces liquid and is a variable on each recipe. There is no variable for pellet hop absorption or displacement in Brewfather. I can read the markings in the kettle after boil, but can't remove the hop debris or trub.

Unless I am overthinking it, but on a NEIPA I might have 8oz of hops in the kettle. That absorbs and displaces liquid - I don't see brewfather accounting for hops in pre or post boil volumes.

This is exactly why it would be nice if Brewfather gave an option for both hold/cold volumes pre and post boil. Most of the time, mainly due to the immersion chiller already being in the wort (same would apply for plate/CFC - residual wort in the lines etc), I wouldn't bother to take a post-boil volume reading, it was just more reliable to check the final volume that made it over to the FV. I would work backwards from there and input the post-boil volume thereafter. With that said, the equation isn't as simple as adding on +4% to find that post-boil volume, it's always a slight overshoot, which is why it would be nice if they included a 'cold' post boil volume also. I figured simply racking over to FV and checking the volume there makes more sense if you are comfortable with/have a consistent boil off rate. With all that said, the volume markings on both FV and BZ must match, otherwise all of it is just a waste of time!
 
Last edited:
100g of hop pellets seems to make a about 1200ml of trub in my system. Measured the volume a few times when scraping the bottom of kettle out post whirlpool.
 
seems to be higher than how Brewer's Friend does the calculation. Does not seem like the Brewfather software does this. Must be where I have some variety in my post boil volumes since it doesn't seem to account for it?

1739829782698.png

Screenshot from Brewer's Friend.

1739830078735.png

Screenshot from Brewfather doesn't have a linear loss for Trub or Hop additions. Kind of silly if you had 1oz in one recipe and 10oz in another.
 
I completely agree, I plug in a different value for the trub loss depending on the beer. Would be nice if the software could factor in based on the hop amount used.
Chiller loss is the same every time but trub because of hops is a variable.

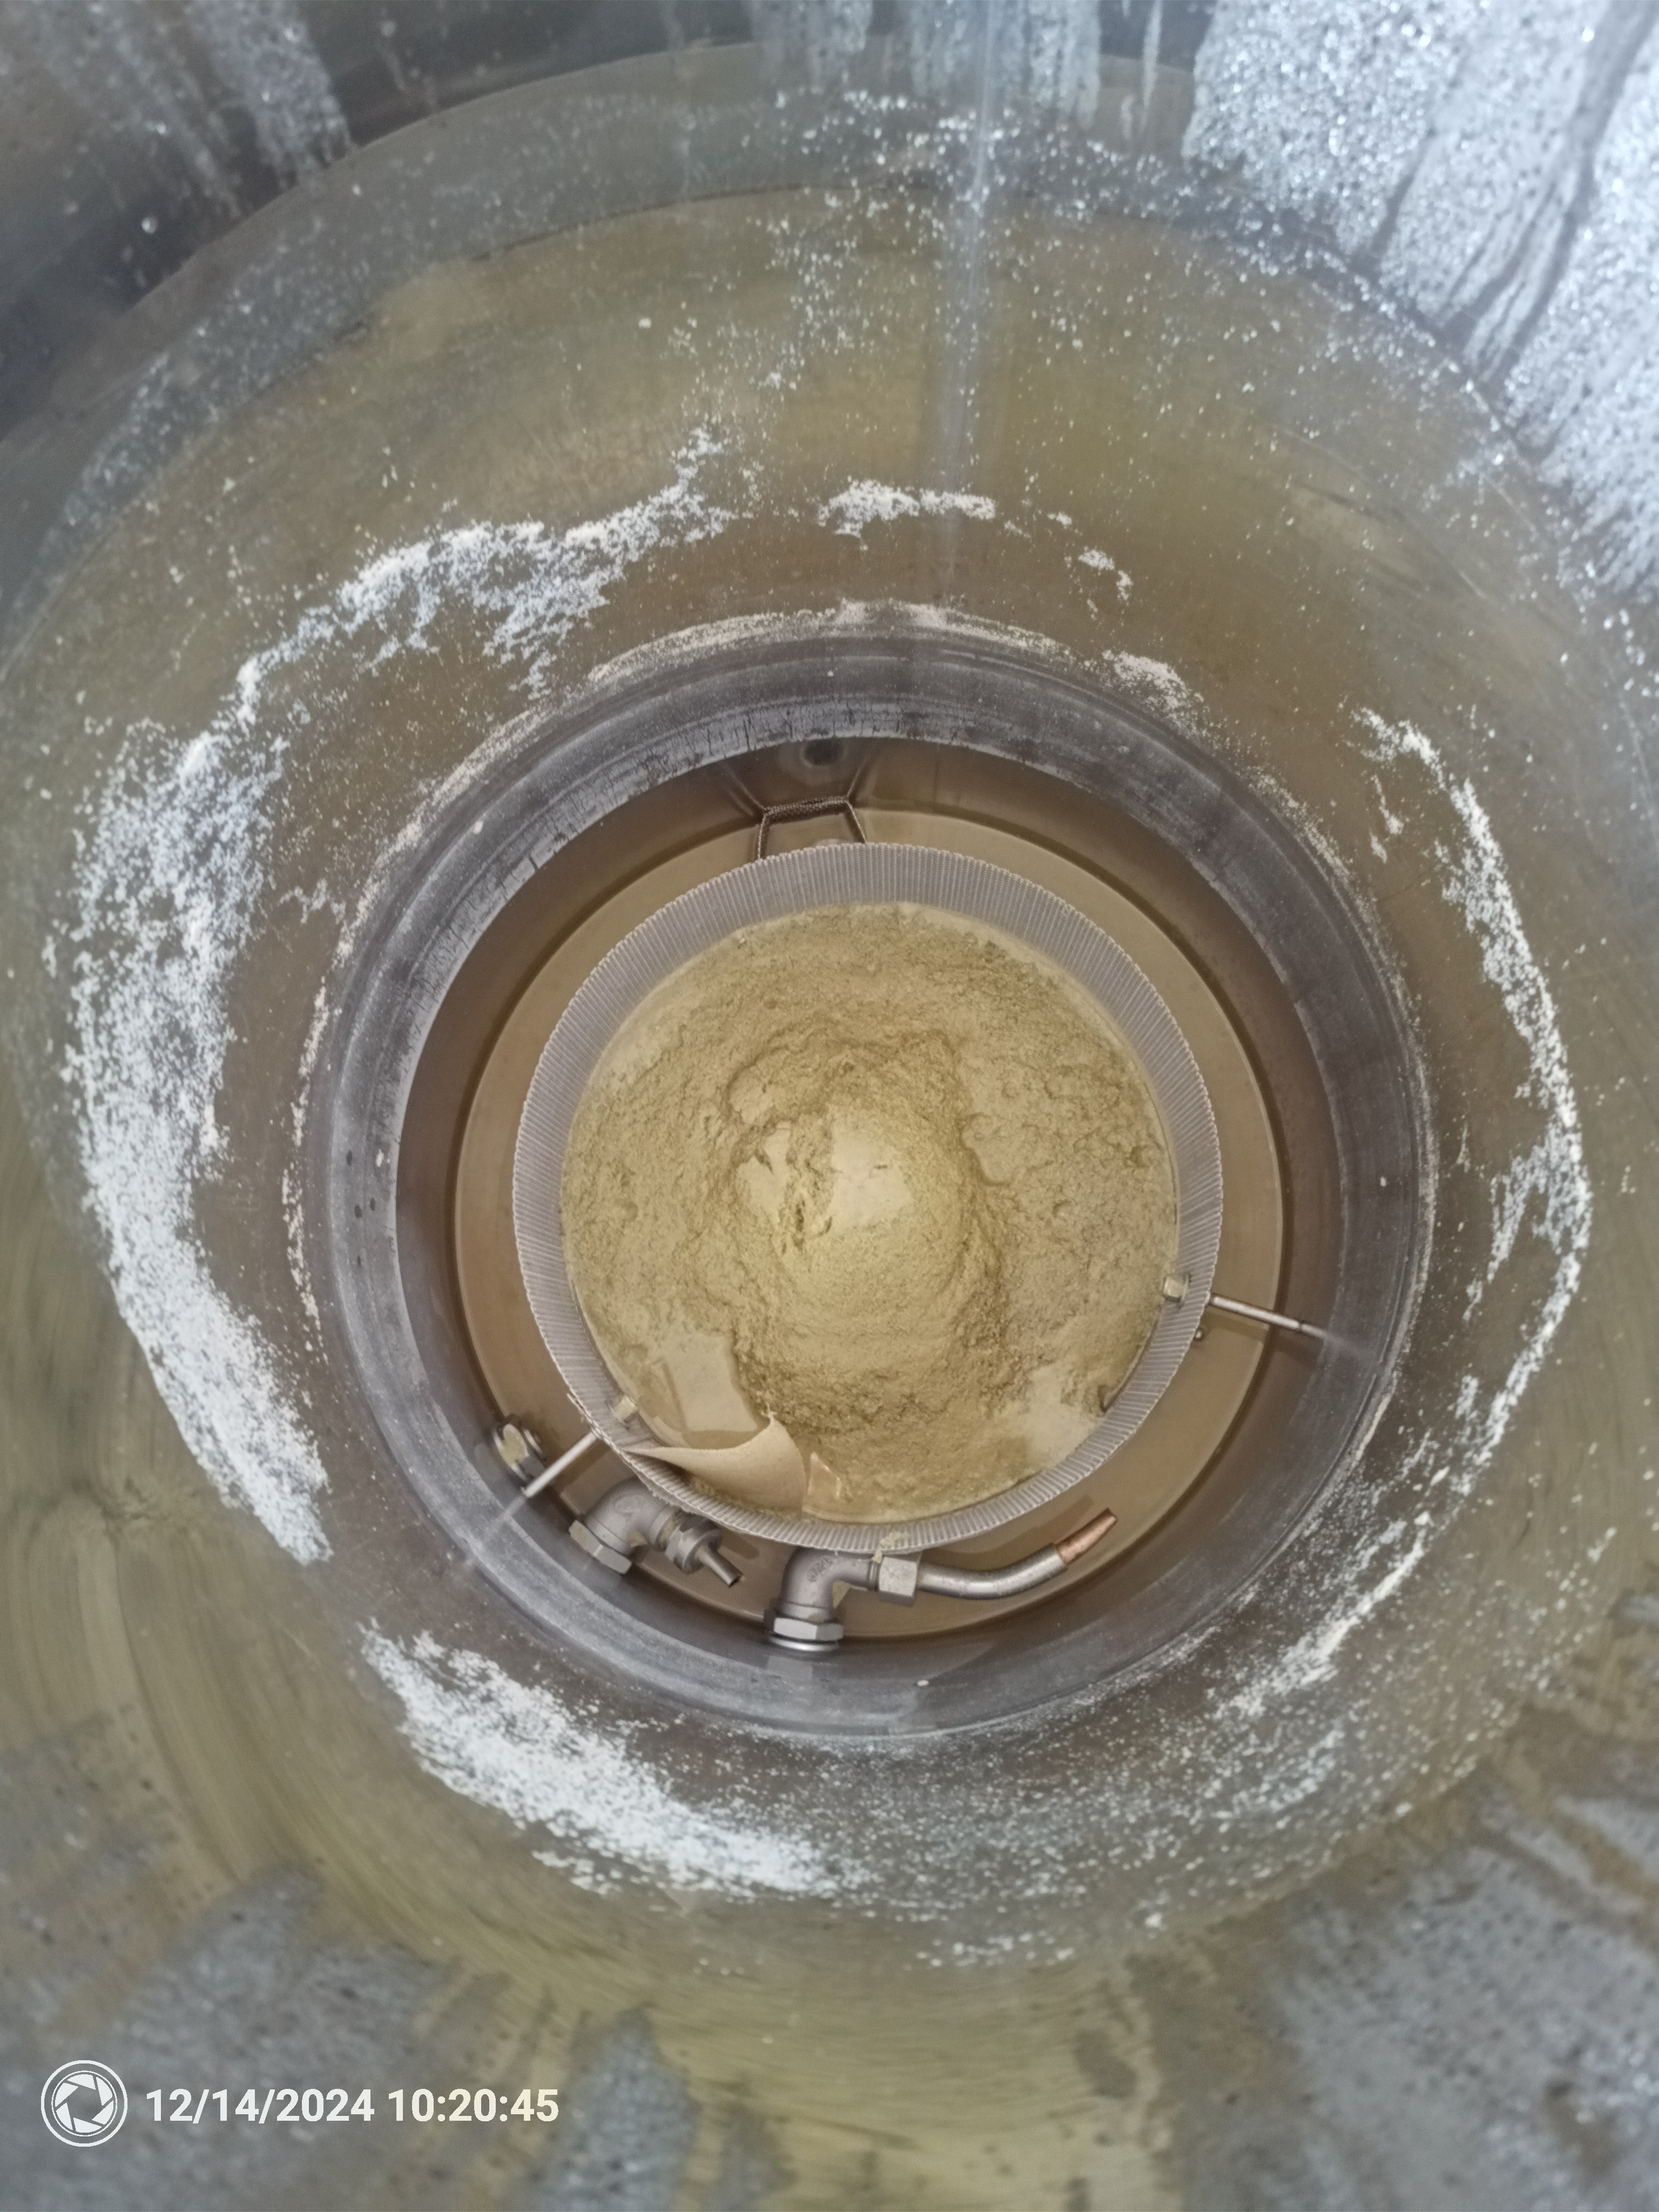
120g hops in a hazy

IMG_20241214_102046_844.jpg


12.5 g in a belgian Table beer


IMG_20240915_155522_050.jpg


Both the same batch size.
 
Last edited:
I completely agree, I plug in a different value for the trub loss depending on the beer. Would be nice if the software could factor in based on the hop amount used.
Chiller loss is the same every time but trub because of hops is a variable.

120g hops in a hazy

View attachment 869201

12.5 g in a belgian Table beer


View attachment 869202


Both the same batch size.
Is this a BZ gen 4 with central drain? ...Do you do a whirlpool? ...I don't recognize this plate under the hops ..what it is ?
 
Is this a BZ gen 4 with central drain? ...Do you do a whirlpool? ...I don't recognize this plate under the hops ..what it is ?
That is an aftermarket false bottom it looks like.
Looks similar to https://www.williamsbrewing.com/Hom...es/Heavy-Duty-35-Liter-Digiboil-False-Bottom-
BZ Gen 4 is bottom drain. They sell an add-on... Bottom HED plate (heat exchanger disk?)... Works great. Yes... To whirlpool.
I am still confused that I had the HED in the box for my Gen4 35L 220V (not 4.1). Waiting for confirmation that it definitely doesn't come in the box with the Gen4.1 65L 220V when I pickup my 65L this week.
 
That is an aftermarket false bottom it looks like.
Looks similar to https://www.williamsbrewing.com/Hom...es/Heavy-Duty-35-Liter-Digiboil-False-Bottom-

I am still confused that I had the HED in the box for my Gen4 35L 220V (not 4.1). Waiting for confirmation that it definitely doesn't come in the box with the Gen4.1 65L 220V when I pickup my 65L this week.
I can doubly confirm that the latest 65L Gen 4.1 Unit does NOT have the HED. I checked with MoreBeer and they confirmed that, plus when i unboxed my new unit last week it was not included
 
This is not a brewzilla 4 but a Guten 70
Very similar to the brewzilla 3 in design, the thing catching the trub and hops is my made version of one of these.

https://www.themaltmiller.co.uk/product/trubinator-m/

It is nothing like the link from @jdubdvdt
I just take the malt pipe out post sparge and then drop the trub trapping device in. It's very effective as you can see and virtually no liquid kettle loss.
 
That is an aftermarket false bottom it looks like.
Looks similar to https://www.williamsbrewing.com/Hom...es/Heavy-Duty-35-Liter-Digiboil-False-Bottom-

I am still confused that I had the HED in the box for my Gen4 35L 220V (not 4.1). Waiting for confirmation that it definitely doesn't come in the box with the Gen4.1 65L 220V when I pickup my 65L this week.
My BrewZilla 4.1 didn't come with the HED. I picked one up though. Another great add-on is the platform with casters. Coupled with the pulley system it's really nice to wheel the BZ under the pulley, lift the malt pipe, sparge, then wheel the BZ away and lower the grain while the BZ comes to a boil.
 
Malt grains in basket BEFORE or AFTER water ?
In Single Vessel pans... First malt grains inside the basket, before the water... or first water in the basket and then malt grains ?
In Brewzilla gen 4 I have been looking at forums that : A couple of pro tips to wrap things up. First, is to make sure you add your grains to the malt pipe BEFORE you lower it into the vessel. This ensures the weight of the grain keeps the bottom plate in place, so that as you lower it down, the water doesn’t push the bottom plate out of position and create a sneak path for whole grains to get through
 
As pointed out on the other forum, the grains will initially want to float, so they won't weigh the malt pipe down.
Just put the basket in gently empty, check it's fully seated with your mash paddle and then dough in.
This method also allows the malt pipe to be heated to the strike temperature.
 
Measure water/add water
False bottom in
Malt pipe in with bottom screen
Set strike temp
Add salts and other water additions
Dough in after it reaches strike temp
Let settle for 10 min or so, then turn the pump on low, put lid on, go have a beer
 
There are some claims that letting the bed naturally settle helps avoid compaction. I've been trying it out and haven't seen significant effects, but can't rule it out entirely. It may depend on pump strength or something.
After initially suffering a few badly 'stuck' mashes in BZ g4, I now always leave for 15 - 20min before starting recirculation (and then recirculate slowly for 10min).

When searching for solutions, I found the G.Wheeler advice on avoiding a compacted grain bed. Which is to gradually add grain (after premixing dry), stirring just enough to break up dough balls, without knocking off any trapped air. This air increases grain buoyancy, and gives a more open grain bed.
Then allow a grain bed rest (of 15-20min) for the grain (and flour) to hydrate and swell. After the swollen grain interlocks, it shouldn't then collapse when recirculation starts.
Early recircilulation can wash through the flour, to settle on (heater) base, and can squeeze the grain tightly together.

Grain bed compaction, is more likely to be an issue in malt pipes with a tall narrow profile, such as the BZ G4 (rather than with wide shallow profiles).
I often mash with sticky grains, eg 60% malted wheat. But since changing method, never get stuck mashes.
BZ Gen 4 is bottom drain. They sell an add-on... Bottom HED plate (heat exchanger disk?)... Works great. Yes... To whirlpool.
Whirlpools works by forming a centre cone of trub.
The basic BZ g4 has a center drain hole. So trub cone forms over drain.
The HED is a solid central plate (with gap to allow flow around the perimeter). So trub cone shouldn't affect flow.
So agree, HED great / only way to whirlpool in g4.
 
After initially suffering a few badly 'stuck' mashes in BZ g4, I now always leave for 15 - 20min before starting recirculation (and then recirculate slowly for 10min).

When searching for solutions, I found the G.Wheeler advice on avoiding a compacted grain bed. Which is to gradually add grain (after premixing dry), stirring just enough to break up dough balls, without knocking off any trapped air. This air increases grain buoyancy, and gives a more open grain bed.
Then allow a grain bed rest (of 15-20min) for the grain (and flour) to hydrate and swell. After the swollen grain interlocks, it shouldn't then collapse when recirculation starts.
Early recircilulation can wash through the flour, to settle on (heater) base, and can squeeze the grain tightly together.

Grain bed compaction, is more likely to be an issue in malt pipes with a tall narrow profile, such as the BZ G4 (rather than with wide shallow profiles).
I often mash with sticky grains, eg 60% malted wheat. But since changing method, never get stuck mashes.

Whirlpools works by forming a centre cone of trub.
The basic BZ g4 has a center drain hole. So trub cone forms over drain.
The HED is a solid central plate (with gap to allow flow around the perimeter). So trub cone shouldn't affect flow.
So agree, HED great / only way to whirlpool in g4.
When searching for solutions, I found the G.Wheeler advice on avoiding a compacted grain bed. Which is to gradually add grain (after premixing dry) .....

You mix the dry grains in the basket first...and then put the basket in the water ?
 
When searching for solutions, I found the G.Wheeler advice on avoiding a compacted grain bed. Which is to gradually add grain (after premixing dry) .....

You mix the dry grains in the basket first...and then put the basket in the water ?

Basket? I'm in Scotland, with many different device names.


I mx in a spare brewbucket. Then gradually add to water in (immersed) malt pipe.
 
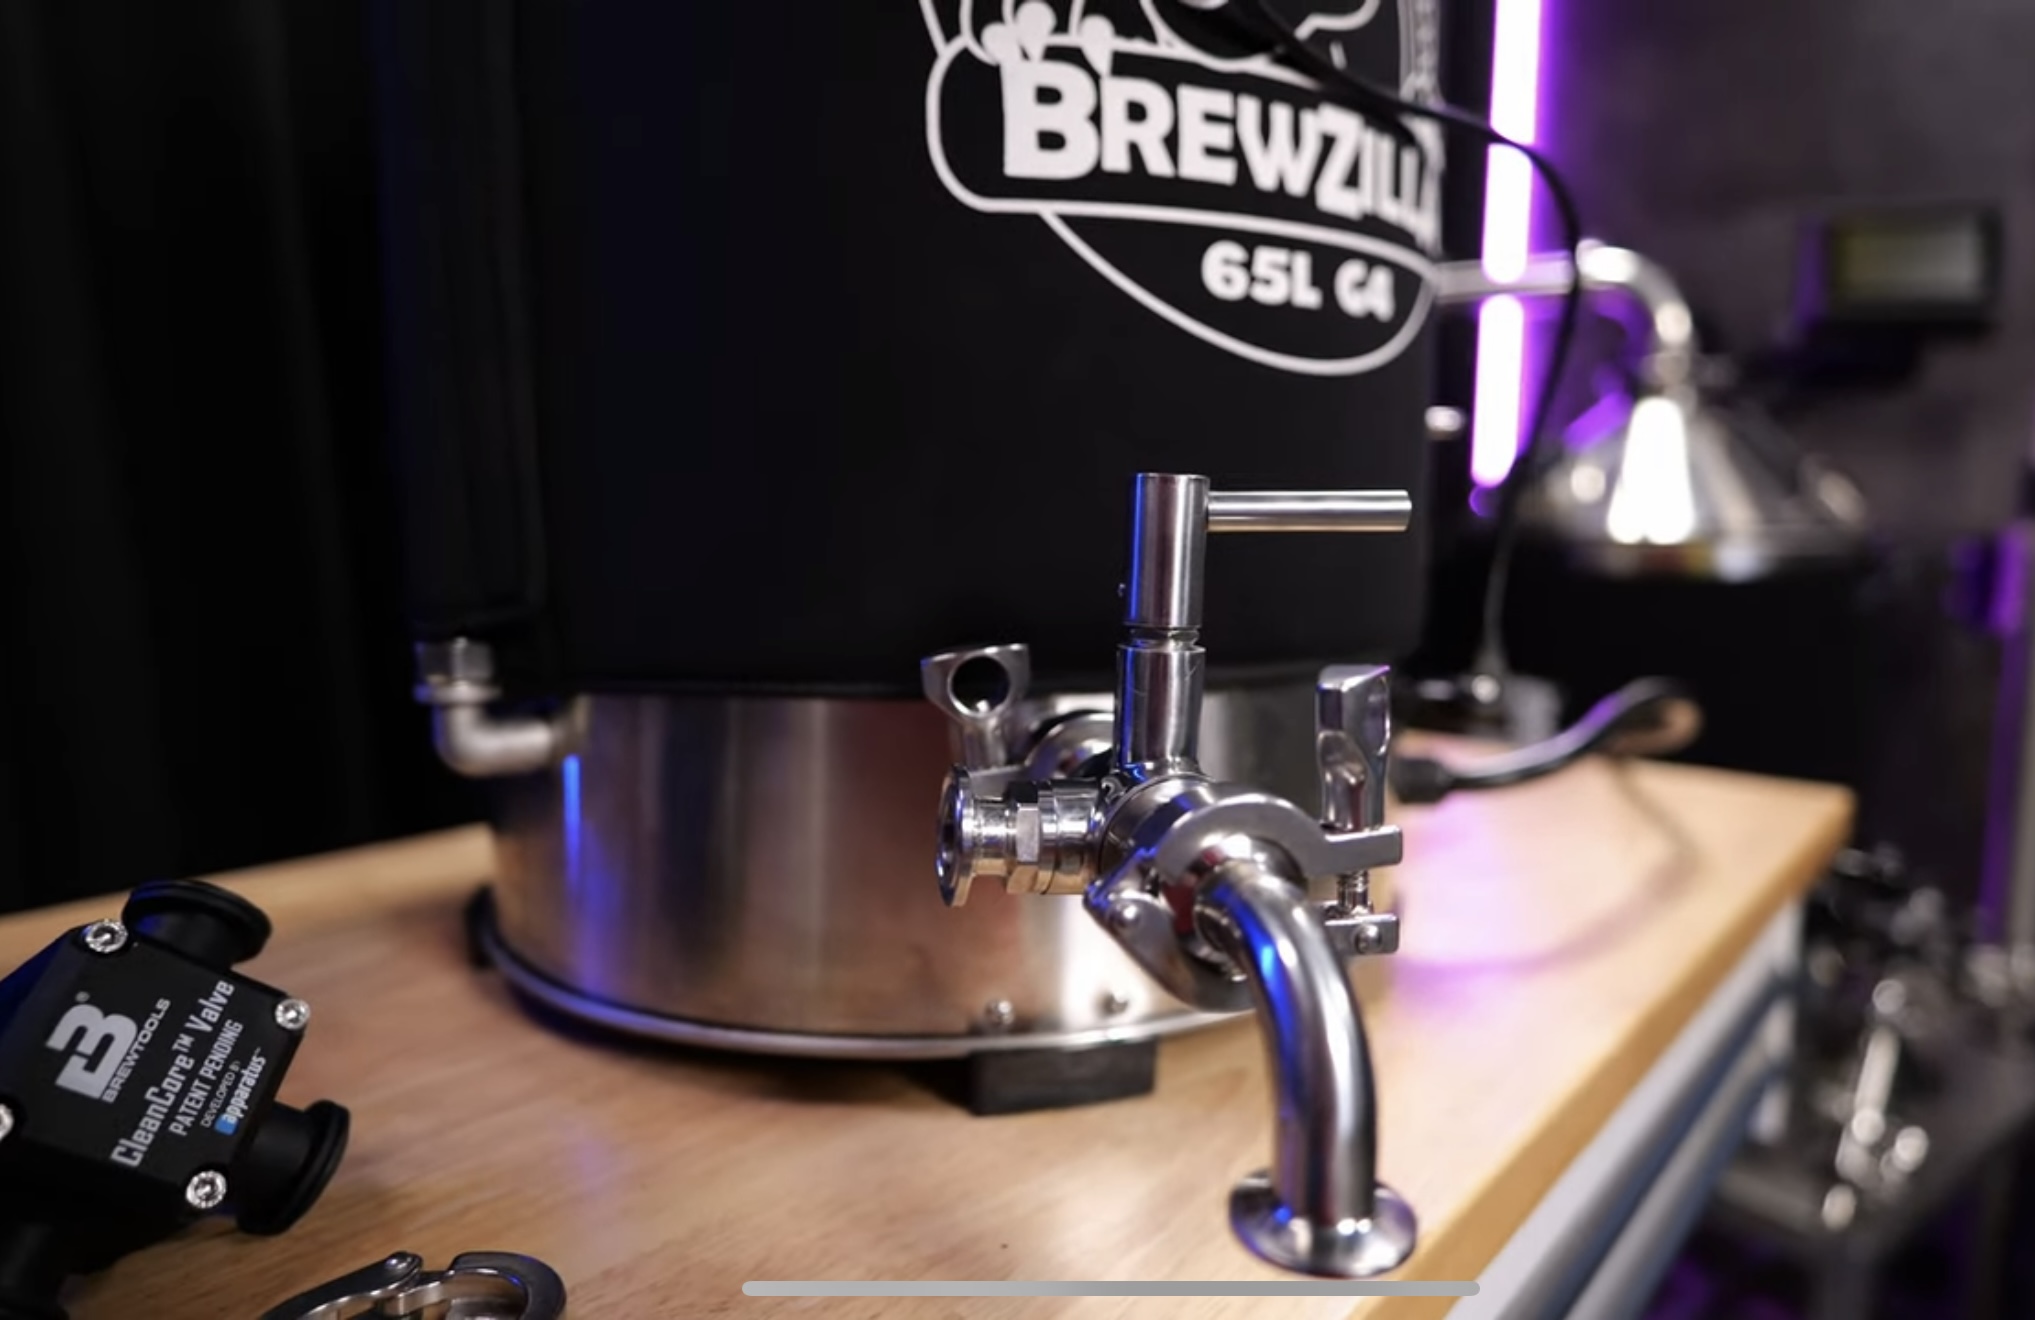
Has anyone tried to replace the "garden like" tap?

It doesn't have to be as fancy as a tri clamp version (like Brad used), but at least an intermediate threaded version.
View attachment 875202
I haven't messed with it, but the drain and pump are barb connections with 1/2" silicone*. I imagine you could swap to anything with a similarly sized barb.

*Kegland used molded silicone elbows and offsets. Take note if rearranging.
 
Back
Top