• Please visit and share your knowledge at our sister communities:
  • If you have not, please join our official Homebrewing Facebook Group!

    Homebrewing Facebook Group

Brewstand build finished! 1st brew today

Homebrew Talk

Help Support Homebrew Talk:

This site may earn a commission from merchant affiliate links, including eBay, Amazon, and others.
Thanks for the compliments.:D

The rig isn't all THAT big. It measures 60" x 20". That is the same size as our Weber gas BBQ with side burner.

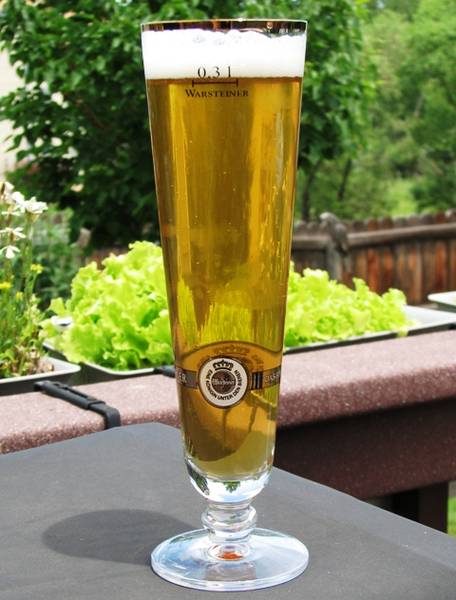
Since I posted those pictures, the brew frame has been moved to the deck in the back of our house. It has been a bit of a challenge to brew outside this spring. The beer I am sipping on now was made during a rainstorm that turned into a hailstorm right in the middle of lautering.

Quite a lot of fun donning the rain gear to check water level in the mash tun. It all turned out well.

I have made 6 brews on the rig since. All have been fairly easy. No surprises on the mechanical side.

The last 2 have been 10 gallon batches. The first 10 gallon was slightly stressfull when there was a small boil over. Filling the keggle to 15 gallons, hitting boil and then adding hops was too much. The second batch I waited 30 minutes to add hops. The evaporation took the volume down to a point that reduced the boil over fears. I do use a de-foamer, but I simply need a bit bigger kettle to end up with 10 gallons in my serving tanks.
 
Wayne, do you have a picture of how you positioned your spark igniter with your burner. I want to do the same as you but I'm concerned about too much heat melting the wire sheathing.
 
That is a sweet effin rig u got there. I love how the keggles are all shiny and purty. Also good heads up on Colorado Malting. That looks like something I am really interested in since I do AG myself, although my rig is more ghetto Fabulous. I might need that welders info some day. I know all about having friends that drink the Bud light. I just do not get it myself

Another prop for Colorado Malting here.

I recently picked up a sack of 40 lb precrushed 2-row from Colorado Malting. At $1/lb, delivered to the back of my car, it's a good deal.

The first brew with their malt is still in the fermenter, but everything points to good quality, and my efficiency was 78%, which is typical for me. All signs point to good things.
 
MountainJack,

I don't have a picture right now, but I'll take one for you in the next day or so. I wouldn't worry about melting anything. They are designed for barbecues and temps will go over 500 F easy. I bought the CharmGlow ones from Home Depot and they include a spacing bar so you can set it to the correct distance for a spark.

I used an "L" bracket to move the element closer to the center of the burner. I mounted the "L" to the same brackets that hold the burner.

Joe,

I have made seven brews with the Colorado Malting 2-row. All have been great. Here is a shot of a Blonde Ale I made:

Blonde_Ale.JPG


95% Colorado Malting 2-row & 5% Melanoiden malt. 5 SRM

One addition of 0.60 oz of Cascades for 60 min.

SafAle S-05

Very clean and crisp :D

Perfect for the weather we have been having the past few days.
 
MountainJack,

Here is a shot of the underside of the burner showing how I mounted the igniter on a small "L" bracket. The bracket is mounted to one of the four supports that the burner and wind screen are mounted to:

Ignite.JPG


I just finished brew #8 today.

It was an American Wheat I named after my father, Waino. He was the first born in the US of his family and he was born on the 4th of July. He passed on over 35 years ago, but I think he would enjoy being remembered by a beer named for him.
 
Good looking brew rig!!
I'm getting ready to build one myself, and will certainly take bils and pieces as ideas!!

Keep the good beers coming!
 
Thanks Wayne, that makes sense. Unfortunately, my burners are a bit different and I don't think I can get the sparker to reach up over them. I'm still messing around with this.
 
Wayne,

Just picked up a bag of Colorado Malting and brewed a Pale Ale with it. Good stuff. I would love to come to your area sometime and see the brew stand at work. Let me know!
 
I do plan to brew tomorrow, Labor Day. My wife has to work, so I firgure I'll do a 10 gallon batch of my house ale: Kimbeerly ;)

You are welcome to come on up.

Cheers,

Wayne
 
Hey, Wayne. Sorry weather didn't permit brewing last weekend. I'd invite myself over, but I've got a family picnic tomorrow.

Currently sitting in my garage, heating strike water for my partially lacto-soured, dry stout with rye. Hooray for weekends!.
 
Colorado Malting Company are a GREAT company. Very friendly. They are currently only making 2-row. But at $1.00 a pound it is inexpensive and very high quality.

That sounds awfully expensive straight from the malt house, isnt it? Is it organic or something?
 
Wayne1
I really like the whirlpool set up in your BK. Quick question about the inlet. Is that also a welded in double female? Then there would need to be a close nipple- the visible coupler-another close nipple and the elbow? is that correct? I'm wondering about the spacing from the edge of the keg wall. Was there some experimentation to find an optimum spacing for whirlpool effect? Or is this just dictated by the fittings used and has just worked well for 15 yrs? I would love to get a pile like that.
thanks
jason
 
Nice setup! Welcome back. I'm on a non-voluntary hiatus myself. I've been itching to brew but can not. Anyway, you were a professional brewer, did you go to a school to learn the trade? I've got some extra time on my hands and have been looking to educate myself on brewing.
 
jwright,

The whirlpool fitting is a double male welded in the kettle. From there I used a double female and a street elbow. Male end screwed into the double female. No real experimentation. It has just worked for me in two different kettles over the years.

(edited because of poor memory. Now has correct plumbing parts)


LarMoeCur,

I never attended any formal brewing school. I think it is more important to have practical, hands-on knowledge than theory. If you want to learn more, volunteer to work for free at a local brew-pub. You will learn more and have an in if they ever are looking for workers.

I brewed at home for many years. I entered every competition I could to get feedback from judges. My beers improved and I received many awards. That is what served me the best when I went for the interview. Also. ALWAYS bring samples of your beers.

The Pol,

For a "boutique" malthouse, their prices are very fair. They can only malt in 1,000 lb batches. I far prefer to go for quality over the cheapest prices. I know the malt is fresh and the barley grown locally. It does add a bit for me to use a local product for a base malt.
 
I personally wouldnt consider Weyerman, Best Malz or Thomas Fawcett a "cheap" malt. According to the malt analysis anyhow.

Just asking, as $1/pound sounded high for bulk malt purchasing.

Cool that you are using a local product.
 
I don't consider Weyerman or Thomas Fawcett, cheap. I use a lot of their malts for specialty grains. I am very pleased to be able to purchase them at around $1.50 a pound from the LHBS. I don't use enough to justify keeping 25 kilo sacks of specialty grains around.

50-100 lbs is not exactly "bulk" For the pubs I worked in I would buy in 10,000 and 20,000 lb lots. I still ended up paying around $0.40 delivered for bulk European grains, blown into a silo.

If you can get bagged European grains delivered to you for less than $1.00 a pound, more power to you. I am very happy with the pricing and the quality of the Colorado Malting Company.
 
Mid Country, North Country Malts sell 55 pound sacks for $.49-$.65 per pound. The higher end being MO, Pilsner and such. Luckily I dont have to have it shipped.
 
Now that GABF is over, I have a trade show to attend this coming weekend.

I probably won't be brewing again until the weekend of October 10-11.
 
Hi Wayne,

Hope you had a good time at the GABF. One question, with all your experience what made you go with a CFC vs. a plate chiller on your rig? This is the last part I'm still up in the air on for my build. I have a plate, but was waiting for BobbyM's opinion on his whirlpool IM. Just thought I'd get your take on it.

If you have a plate, use it. It is more efficient. I already had a CFC from my first go round in homebrewing. I did think about going for one, but the CFC works fine for me. I can cool the wort to pitching temps as fast as I can pump.

The CFC is a bit easier to clean. As there are no channels, there is no space for debris to hide. Using a plate chiller in the brewpub systems, I always disassembled it once a yet for a through mechanical cleaning.

As I mentioned, I can cool 11 gallons of wort to pitching temps as fast as I can pump, roughly 7-12 minutes. I do not believe you can chill wort that fast with an immersion chiller. I happen to feel that it is important to whirlpool first and then cool as rapidly as possible. With the system I have, I am able to do just that. I am sure there are other methods to do the same thing. I chose the components for my system based on what I was familiar with, what I already owned and the best compromise between cost and operation.
 
Well damn!

Thanks for the kind words on my new stand, Wayne. But, now it looks like a sad little pile of scrap metal to me!

Your stand is truly a beautiful thing and I think, as others have stated, the panel on the front gives a super-clean, very pro look to it. After brewing on my stand yesterday, I was discussing with a friend the benefits of using a more "complete" system and looking forward to my next set up and improving my process further. I would not be surprised if it ends up very similar to yours here.

Thanks for sharing!

P.S. Kudos for buying local
 
Thank YOU for the comments.

All the gear is always in flux. I really like my stand, but over the course of the summer and fall, I have thought up a few improvements.

I will be changing the thermometer in the mash tun to a digital readout. I do tend to hit the mash temps just fine, but it is reassuring to just be able to glance at a readout and know for certain. The old analog thermometer I have been using is out of calibration.

I hope to eventually change out the brass quick disconnects to stainless steel cam-lock fittings. We'll see how cash flow is this winter.

Cheers,

Wayne
 
Wayne, your setup is great! I'm very slowly trying to gather diffferent odds and ends for a system. I just bought a shirron chiller (1st year teacher and can't find time to build), and I was worrying about the break material getting into the chiller and into the fermenter. Is there any other way besides using a whirlpool to keep it out? and I do like the whirlpool idea... my next purchase is a pump so I'll probably do that. Can you possibly give me some tips on how you do your whirlpool setup? And I like your panel for disconnects. Could you post a close up pic of that? Thanks!
 
Thanks for the comments.

I always whirlpool with a pump. That was one of my main design features. My previous system had one and I am used to that concept from my days of pro-brewing. I simply connect a hose from the outlet of the kettle to the inlet of the pump. The outlet of the pump goes to the inlet of the whirlpool.

As soon as the boil is over, I start the whirlpool. I let it go for 10 minutes and shut it off. I allow the wort to settle for 5 minutes and then start pumping it through the CFC into the fermenter.

You will always pass on some break material and hop mass. There are very few ways of getting around it. Having an inverted domed bottom in the brewkettle and whirlpooling certainly helps keeps most of the solids in the kettle.

I just finished re-reading "The Practical Brewer" 1st edition published in 1946 by the Master Brewers' Association of America. This shows most of what was used by large breweries at the time. Whirlpooling in the kettle was not used until the late 50's. It the 40's wort was run through a "hop jack" (similar to what we now call a hop back) for removal of hops and some trub. It was then pumped into "cool ships: which were long, shallow vessels to allow the trub to settle out before the wort was then pumped into the fermenters through heat exchangers.

Using a pump to whirlpool is the easiest and fastest way I know of to seperate the solids from your wort, if you do not care to use some mechanical filtering system such as a strainer. They do have a tendency to clog on occasion.

What do you wish to see about the front panel? It is just a sheet of stainless steel with some holes drilled in it. I mounted the disconnects in places where the pumps were located. I will be happy to take some more pictures, but please let me know what you would like me to highlight.
 
Thanks that would be tons of help! I am particularly horrible with the lingo of pipe and fittings, so pictures are my friend. I just wanted to see exactly how you had the connectors fastened to the panel, and I also wanted to see the exact fitting you used for the disconnects. I like the 90 bend you have right on the disconnect.

As for the whirlpooling, I guess you lose some wort in the bottom of the kettle since you can't extend you drainage tube right down into the center of the dome? My original plan was to extend the tube to there, use a false bottom to catch the large trub, and then some sort of a large sheet of fine stainless mesh to filter the fine hop particles. But I figured it may clog since I use pellets, and the stainless is expensive. So I guess you just have your tube on the edge?

I also know breweries have their tube tangent to the kettle wall. Can you explain the insice of your kettle to me? Looked like you have a large drainage tube on the edge, and then another 90 bend tube that is positioned sideways. That's the interesting part. Thanks!
 

Latest posts

Back
Top