• Please visit and share your knowledge at our sister communities:
  • If you have not, please join our official Homebrewing Facebook Group!

    Homebrewing Facebook Group

Brewery Build - Single Tier HERMS

Homebrew Talk

Help Support Homebrew Talk:

This site may earn a commission from merchant affiliate links, including eBay, Amazon, and others.
Found the regulator on eBay - several for sale under RV suppliers. Just make sure you get the correct one and clarify with the seller it's as pictured.
 
Is that with the Plexi still?

Not sure what you mean. So you can sort of see the clamp in the photo of our mash starting up. We used the clamp on the copper tubing that we adjust up and down - the clamp simply keeps the arm from sliding down into the mash tun once it heats up. We dont use any clamps on the plexi lid, it just rests on the top of the kettle.
 
It looks really good. Well done friend.:mug:

I'm glad you guys got to brew on it. It sorta sucks being on my end of a build that isn't an upgrade. I don't get to taste the brew.

Enjoy the new setup. I am jealous of your bar. Maybe some day.

Cheers.
 
Matt - Any update on your trials and tribulations? Did you figure out what was wrong with the wiring?

Any other issues you see or do you have things running smoothly?

I know you're a busy man but looking forward to the write-up, design, wiring diagrams, etc. Clean system!

Update: June 4, 2010

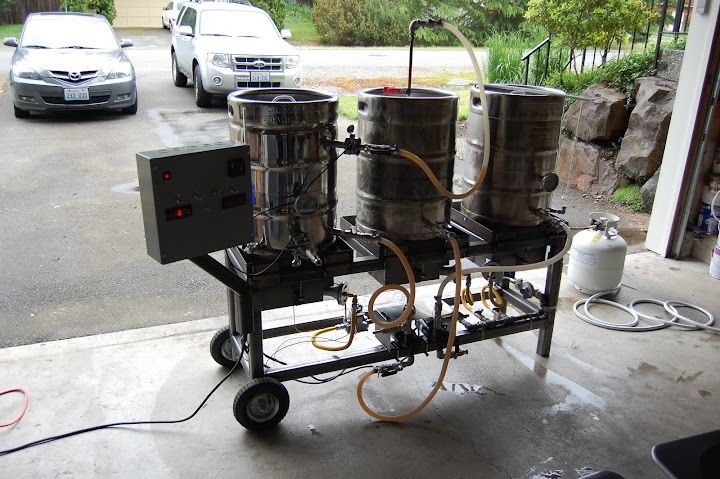
Been meaning to update for a few days now just been so busy. After months of work we finally got around to brewing our first batch on the new brewery last Sunday.

Overall everything went pretty darn well for our first run on it. We did run into a few problems we've been trying to work through.

1) Our Love Controllers don't seem to be reading correct temps - consistently off by several degrees - we'll probably just have to end up adjusting our settings to accommodate this. Additionally they don't seem to be turning our gas valve off / on as we'd expect (actually at all) - luckily we wired in an override so we can turn the burner on and off via a switch - which allowed us to continue brewing but will need to troubleshoot.

2) Our BK and HLT seem to be suffocated when the kettles are resting on the frame. If we prop them up just slightly (a bolt head) they gain enough oxygen to breath and burn appropriately. We're going to play around with options to raise up our kettles and leave a little breathing room between the frame and the tip tray. We'll post updates when we get to that point. The bolt head works for now though - just have to be careful not to go grabbing a piping hot bolt! Guess our wind screens/design to prevent the wind and heat issues was too efficient!

We ended up turning our pump heads around so the outlet is on top - this did end up helping with our air issues during priming and made things go much smoother than when we had done our water tests.

Overall though - enjoyed getting to use it and looking forward to making some tweaks and getting it to a point where we're 'happy' with it.

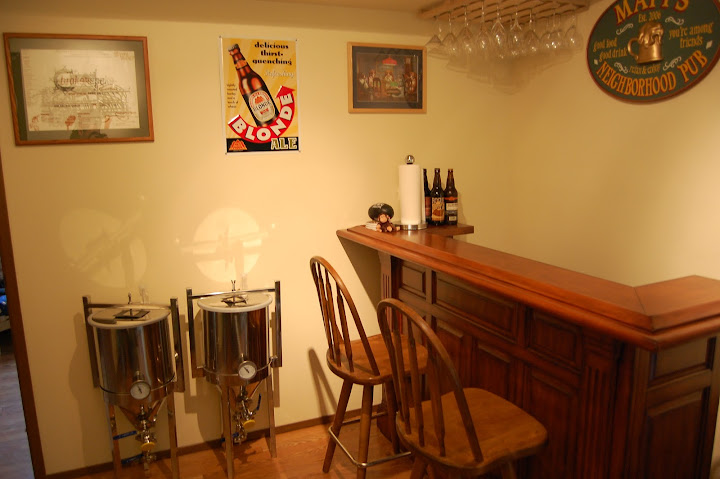
Brewed a 10 gallon batch of a blonde style ale. Separated between our two conicals and fermenting away with two different yeast varieties to see which one we prefer.

We're working on a full guide/writeup on the brewery build with most everything we did/learned during our build. We'll include all of our diagrams, measurements, parts list, etc.

Here are a few pics of our brewday:

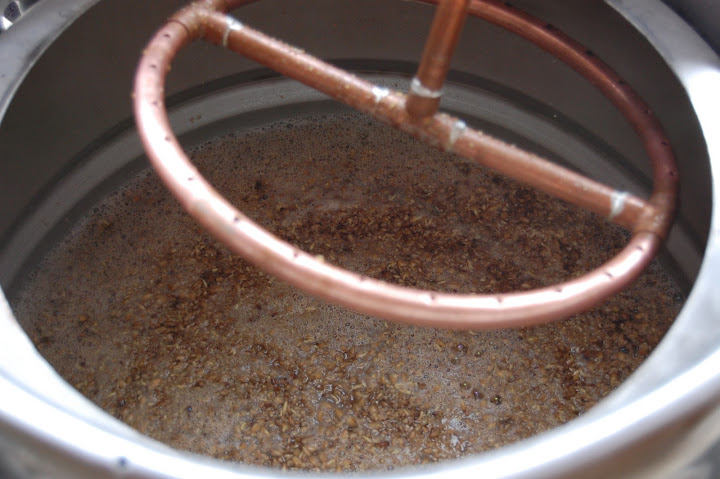
Starting our recirculating mash
DSC_0048.JPG


Getting ready to sparge
DSC_0049.JPG


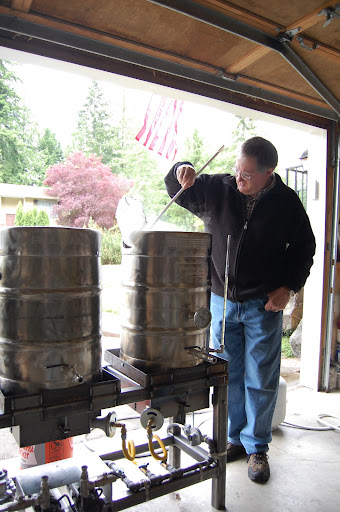
Dad after adding hops to the BK
DSC_0053.JPG


Fermenting away:
DSC_0059.JPG
 
Matt - Any update on your trials and tribulations? Did you figure out what was wrong with the wiring?

Any other issues you see or do you have things running smoothly?

I know you're a busy man but looking forward to the write-up, design, wiring diagrams, etc. Clean system!

Unfortunately no we haven't gotten around to troubleshooting everything. We opted to hit up a local father's day brewfest last weekend :)

Hopefully over the next few weeks we'll figure out at least the wiring piece of it as we're considering brewing the second batch over the 4th of July weekend.

I'll try and find some time this week to work on all of our documentation and details and see if I can at least post a draft up here.
 
Hoping to get some work done on our 'documentation' this weekend. Spent today brewing instead though:) batch #2 on the system - getting in the grove. Didn't get around to fixing the issues we had but wanted to brew ... so we did!

Blonde & Kolsch on tap, porter in the fermenter.
 
Hoping to get some work done on our 'documentation' this weekend. Spent today brewing instead though:) batch #2 on the system - getting in the grove. Didn't get around to fixing the issues we had but wanted to brew ... so we did!

Blonde & Kolsch on tap, porter in the fermenter.

I'm currently getting my parts accumulated similar to your rig. Anything you would change about it? How did batch #2 brewing go?
 
Sorry folks - work has been just crazy lately and I've hardly been on HBT.


I'm currently getting my parts accumulated similar to your rig. Anything you would change about it? How did batch #2 brewing go?

Like stated before - I'd adjust how much space there is between the tippy tray and the top of the frame - allowing more oxygen into the burners (we've got a work around just sticking a bolt head in to tip it up but we'll be fixing with our welder soon. Other than that - not sure there is anything that jumps out at me as something we'd do differently.

Batch 2 went well - brewed a brown porter - waiting to see how it turns out. We decided to do just a 5 gallon batch which worked out just fine, which was good!


Any news or new progress??

Not much - unfortunately work has put a damper on brewing and any tweaks to the brewery - hoping things will settle down in a few months and we can get more batches through it.
 
Are you recirculating your mash through your sparge ring?

Are the LOVE controllers only measuring HEX in HEX out?
 
Sorry folks - work has been just crazy lately and I've hardly been on HBT.

Like stated before - I'd adjust how much space there is between the tippy tray and the top of the frame - allowing more oxygen into the burners (we've got a work around just sticking a bolt head in to tip it up but we'll be fixing with our welder soon. Other than that - not sure there is anything that jumps out at me as something we'd do differently.

Batch 2 went well - brewed a brown porter - waiting to see how it turns out. We decided to do just a 5 gallon batch which worked out just fine, which was good!

Matt,
Have you tasted the brown porter yet? I have the majority of my parts and my frame is being welded as we speak. I hope to post pics in the near future. I would expect sometime next year it would be done. Like you, work gets in the way of pleasure. I've taken many things from your design for my design.

I do have a similar enclosure for the control panel. Is there anyway to snap a pic of the inside "guts" when you have a moment. I'm trying to figure out how I want to position and fasten the terminal/barrier. I'm looking for ideas. Didn't know if you got a DIN rail or plate to mount things too. Electricity is not my thing.
Cheers!


Have not tasted the Brown Porter yet - actually let it condition for a bit longer than originally planned. Hoped to bottle it last weekend but something came up, might end up putting it on tap soon and then bottling some as well. We'll see.

I have a few photos of the inside guts of the control panel but it's no where near as 'pretty' as a lot of them on here - I'll look for them and send via PM.

In our box we just drilled a few holes to mount the terminal block to. We are no electricians either!

Are you recirculating your mash through your sparge ring?

Are the LOVE controllers only measuring HEX in HEX out?


Yes we're using the ring for recirculation. It sits just above the surface in the mash tun.

As for the LOVE controllers, no - we have them measuring HEX out (HEX in wouldn't give us much of anything valuable). And HLT out. This gives us the temps of the fluid as it leaves the HLT vessel and makes its way to the Mash Tun.
 
How well do the tippy trays work? I'm thinking about incorporating that into mine. I hate lugging those damn kegs around to clean them!
 
How well do the tippy trays work? I'm thinking about incorporating that into mine. I hate lugging those damn kegs around to clean them!

They work alright. In all honesty we unbolt the kegs so we can take them out to the gravel near the driveway to clean the kegs out. Mostly because of the electrical and the fact that the frame isn't painted yet so we don't want to hose it down.

They are nice for lighting burners though I can say that much.
 
Meant to wrap this up and post it months ago but got busy and never got around to it. Spent last night wrapping it up.

Here's a write-up on the whole build, links to our parts list spreadsheet, dimensional drawings, explanations on some of the steps we took, etc.

Hopefully this helps folks:

Plude Brewing - Brewery Plans

I appreciate all the documentation. It is very well done and organized. I probably would have avoided a few pitfalls in my build if I would have read this first.

With that said, I will hopefully be done with my rig come February. The majority of my build inspiration comes from your design with a few modifications. I'm looking forward to testing and configuring my system.

By the way, has the rig worked well in your brew sessions? I imagine it is pumpting out some good beer.

Cheers!
 
Nice job on your build and for taking the time to document all that went into it! I hope that porter turns out great!

John :mug:
 
By the way, has the rig worked well in your brew sessions? I imagine it is pumpting out some good beer.

Cheers!

We've had a few batches through it - lack of being able to consume so much beer & available time to brew (brew days are a few hours longer now) have hindered large production #s. But it is nice and we've enjoyed brewing with it. As I've noted a few times - we are still tinkering with getting our temps right and as a result have over shot our mash temps causing what I'm suspecting are unfermentable sugars and sweet batches - not the greatest but that's our own fault for not watching it close enough while we dial things in.

Overall though - happy with it.

Glad to hear your rig is coming along!
 
Matt,

As many others have said....wow....and thanks for the great detail and documentation. I can't believe you actually did the full writeup like you promised...you are truly a good man.

I was originally thinking of building a Brutus 2.0 but now I need to compare this build and the Brutus to see which is best for me. Brutus uses 2 vessels and constant recirculation in lieu of fly sparging, but since I like to fly sparge that is causing me some indecision.

It looks like your rig is designed for fly sparging too, so thats probably gonna win my internal tug of war between Brutus and your rig.
 
No problem and glad you found it useful. Feel free to hit me up with questions. I'm trying to remember all the specifics I didn't take notes on as others ask - whatever I can do to help! Love seeing everyone's new builds and of course hearing about them in action, producing more brew!

We've found we don't have to recirculate as much as we originally thought to maintain temps, likely because our ambient here in the Seattle area doesn't get too cold usually. We of course haven't brewed on days below freezing so who knows!

We did focus on making our build flexible for all sorts of sparge setups if we wanted to in the future.

Best of luck with your build!
 
I have one ? If you don't mind. My build is almost like yours same gas vales but with jet burners that suck. I like the banjo burners you have. Did you have to do anything to the burners? northerns web site said the they are low pressure but should be used with a 20 psi reg. Thanks
 
We did end up drilling out the brass orifice that screws into the front of the burner because we're using propane not NG. There is a drill guide here on HBT if you search for it, think Kladue might have been the one who posted it but can't remember. We started small and gave it a try until we got the flame we wanted. Beyond drilling them out, no nothing else was modified.
 
I ran in to that same problem, and rather than raising the kegs up, I cut 2 6"x1" vents in the skirt on each keg. It worked great, and was easy. (Especially if you know someone with a plasma cutter.)

b04dde9ea5b70c0e230b1d6ac9c037c1.jpg

What exactly do you mean they were suffocating?
 
The burners need air - without enough air they tend to be weak flames. In our case, just small blue tips (tiny!) but as soon as we lifted up the keg tray with the bolt head the flames grew to full size. We've still not fixed it on our rig but plan to just put spacers between the main frame body and the kettle tray.
 
Did anyone have success drilling holes into the bottom of the keg and using a jigsaw to cut the vent holes into it? That would be my only option to get vent holes in my kegs as I don't know anyone witha plasma cutter. If you used a jig saw what type of blades did you use?
 
Also, cutting vent holes in my kegs might solve another problem. To contain the heat I put up metal panels along the outside of my frame. If I try to heat up a keg, the heat starts to burn and melt the high temp paint I applied to the metal panels. If i vent my kegs i wonder if enough heat would escape and not burn my panels?
 
I used an angle grinder (for horizontal cuts) and a dremel (for vertical cuts) to cut the rectangular vent holes in my keggle skirts. I also have the keggles sitting on sections of square tubing. Check out the second picture in my brewstand thread.
 
Back
Top