BrewBuddy II HERMS build

Homebrew Talk - Beer, Wine, Mead, & Cider Brewing Discussion Forum

Help Support Homebrew Talk - Beer, Wine, Mead, & Cider Brewing Discussion Forum:

This site may earn a commission from merchant affiliate links, including eBay, Amazon, and others.

Deric

Supporting Member
HBT Supporter
Joined
Dec 14, 2011
Messages
608
Reaction score
2,513
Location
Marysville
Been brewing on a propane fired 3 vessel system (2 keggles and 10 gallon cooler) for the last 6 years or so. It has served us well but we've decided to make the switch to an electric HERMS setup. I've ordered the BrewBuddy II HERMS kit from Auber (should be here in a couple days) and elements, cables, housings, HERMS coil, fittings etc. from Brewhardware (also due in a few days). Will likely be ordering a Spike mash tun this week.

I have a question about temp probe placement for the mash. Most controllers that I've seen come with a single probe and it seems most people put it in-line with the output of the mash tun. The BrewBuddy comes with with both a mash-in and a mash-out probe. Looking for suggestions on the best location to mount both. ?? I'm thinking inline at the in and out of the mash tun or possibly the out of the mash tun and the out of the HERMS coil. Not sure it makes a difference either way.

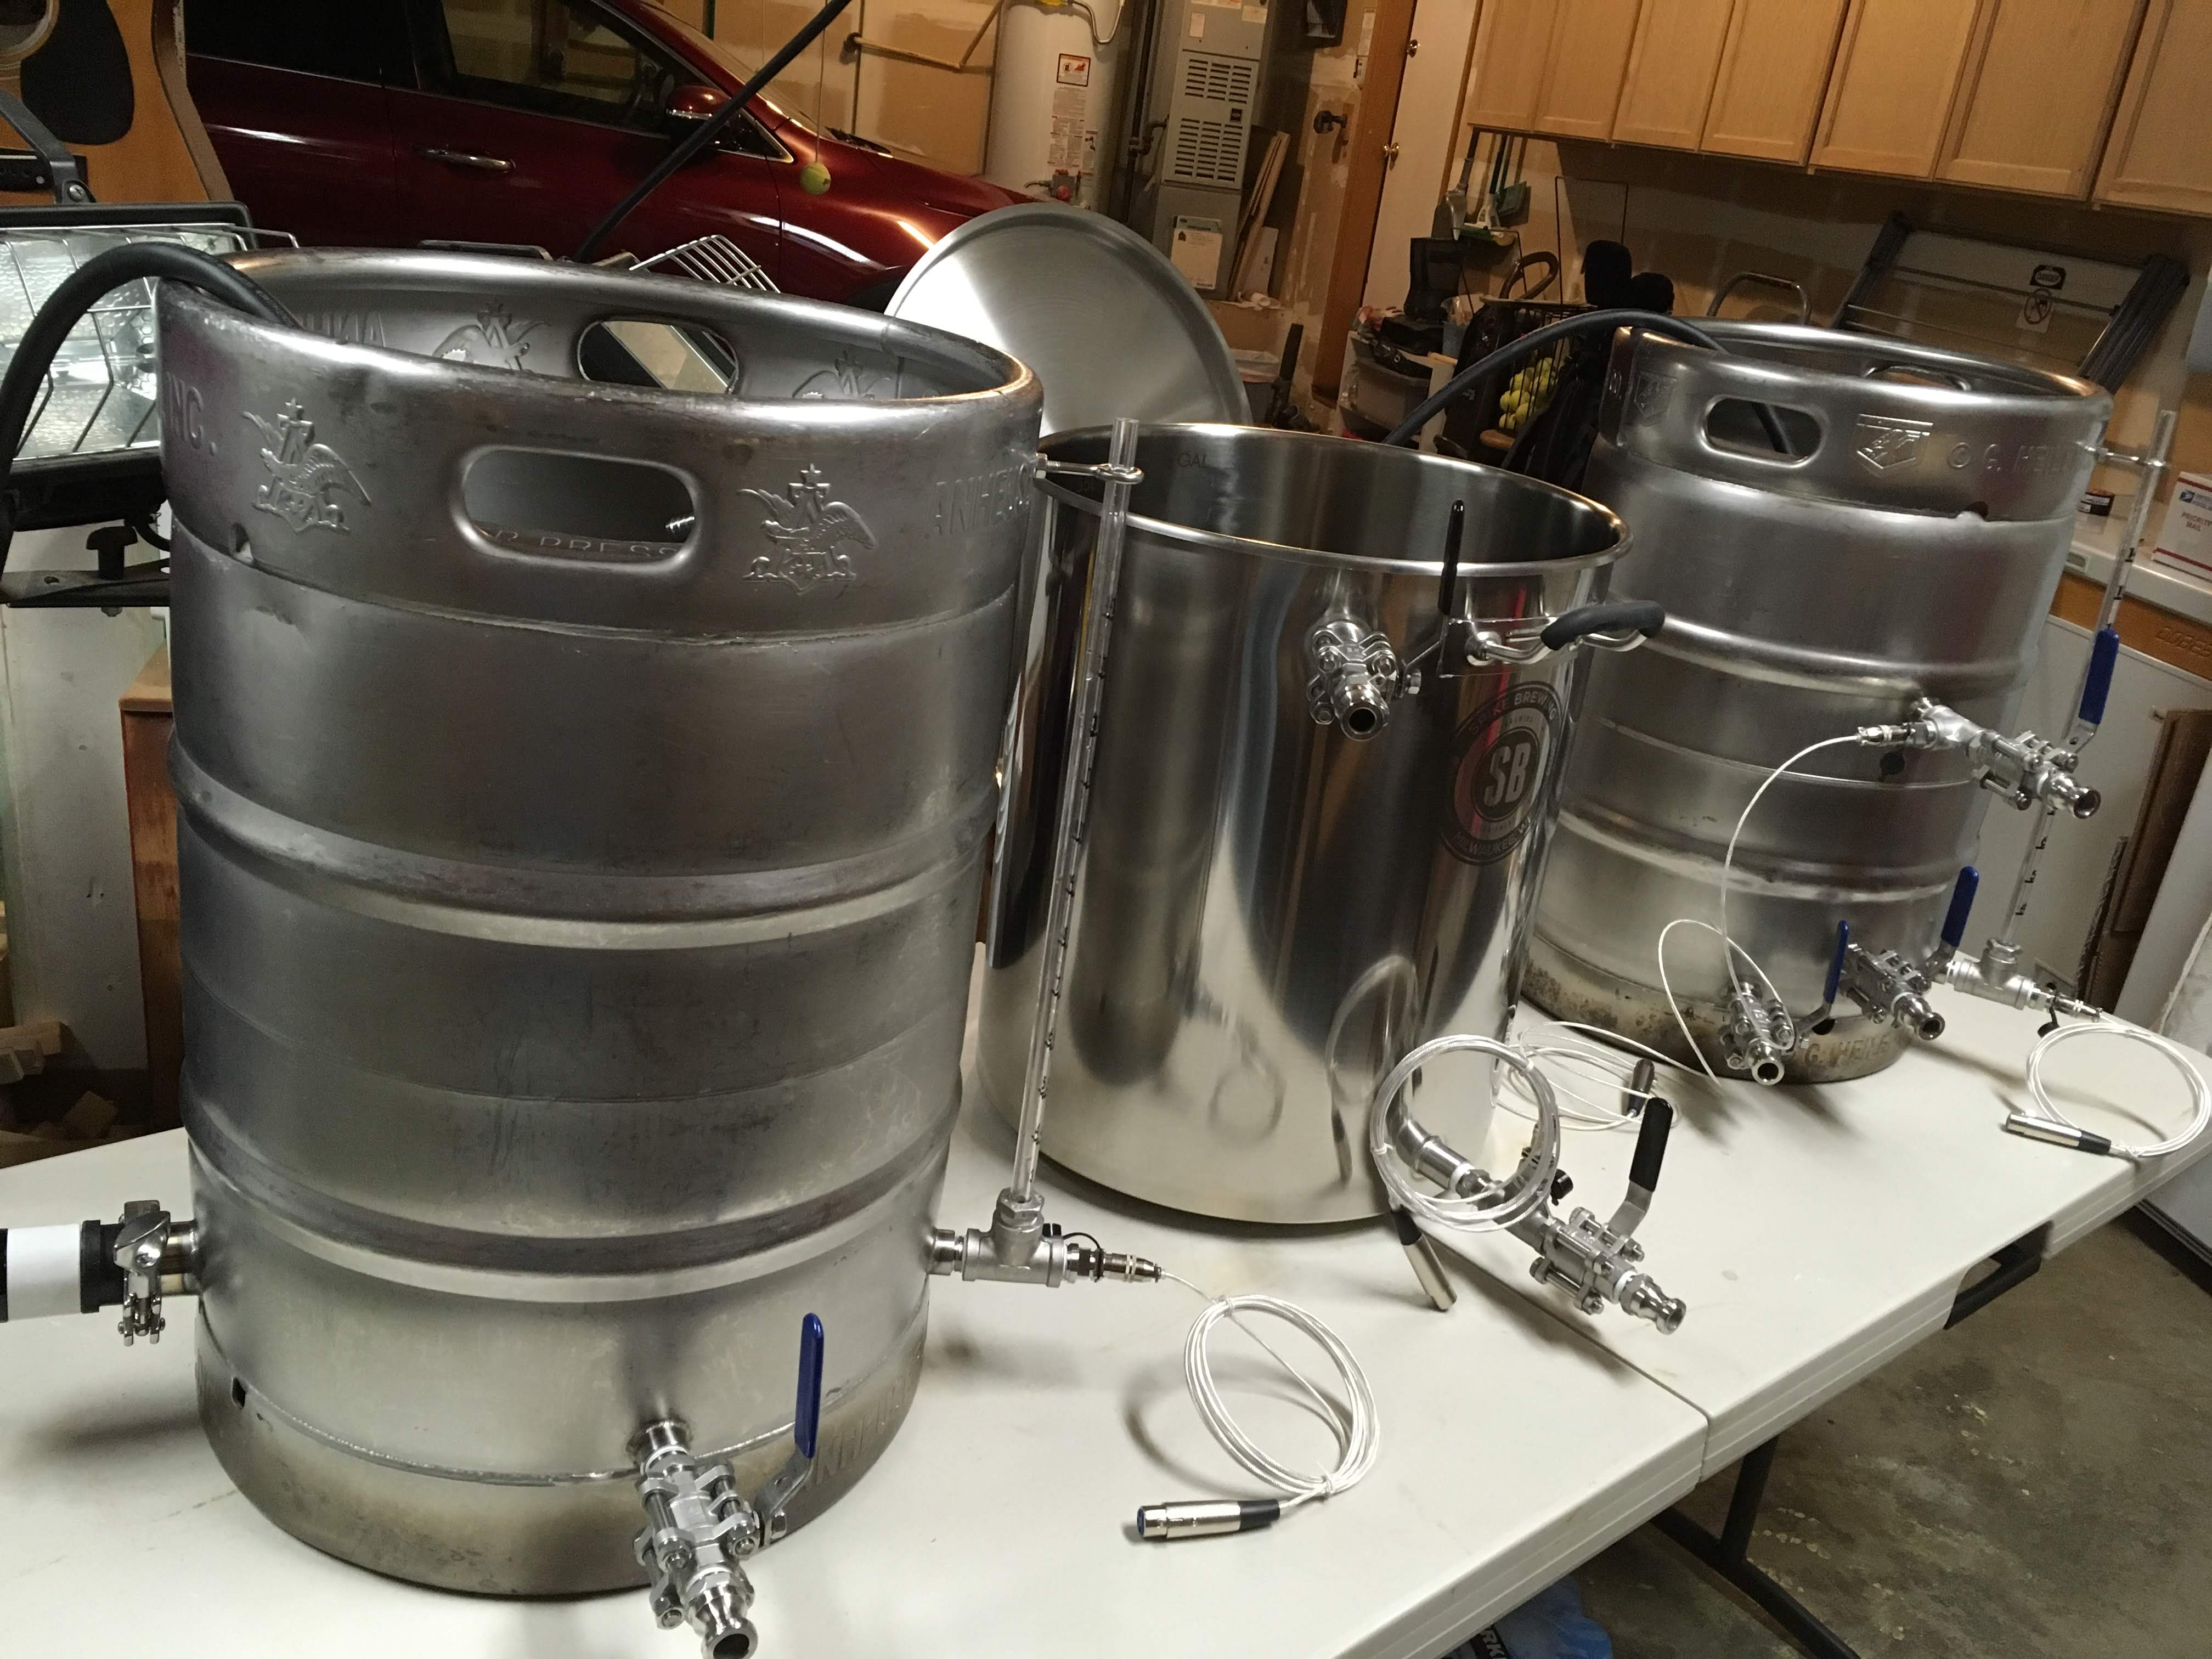
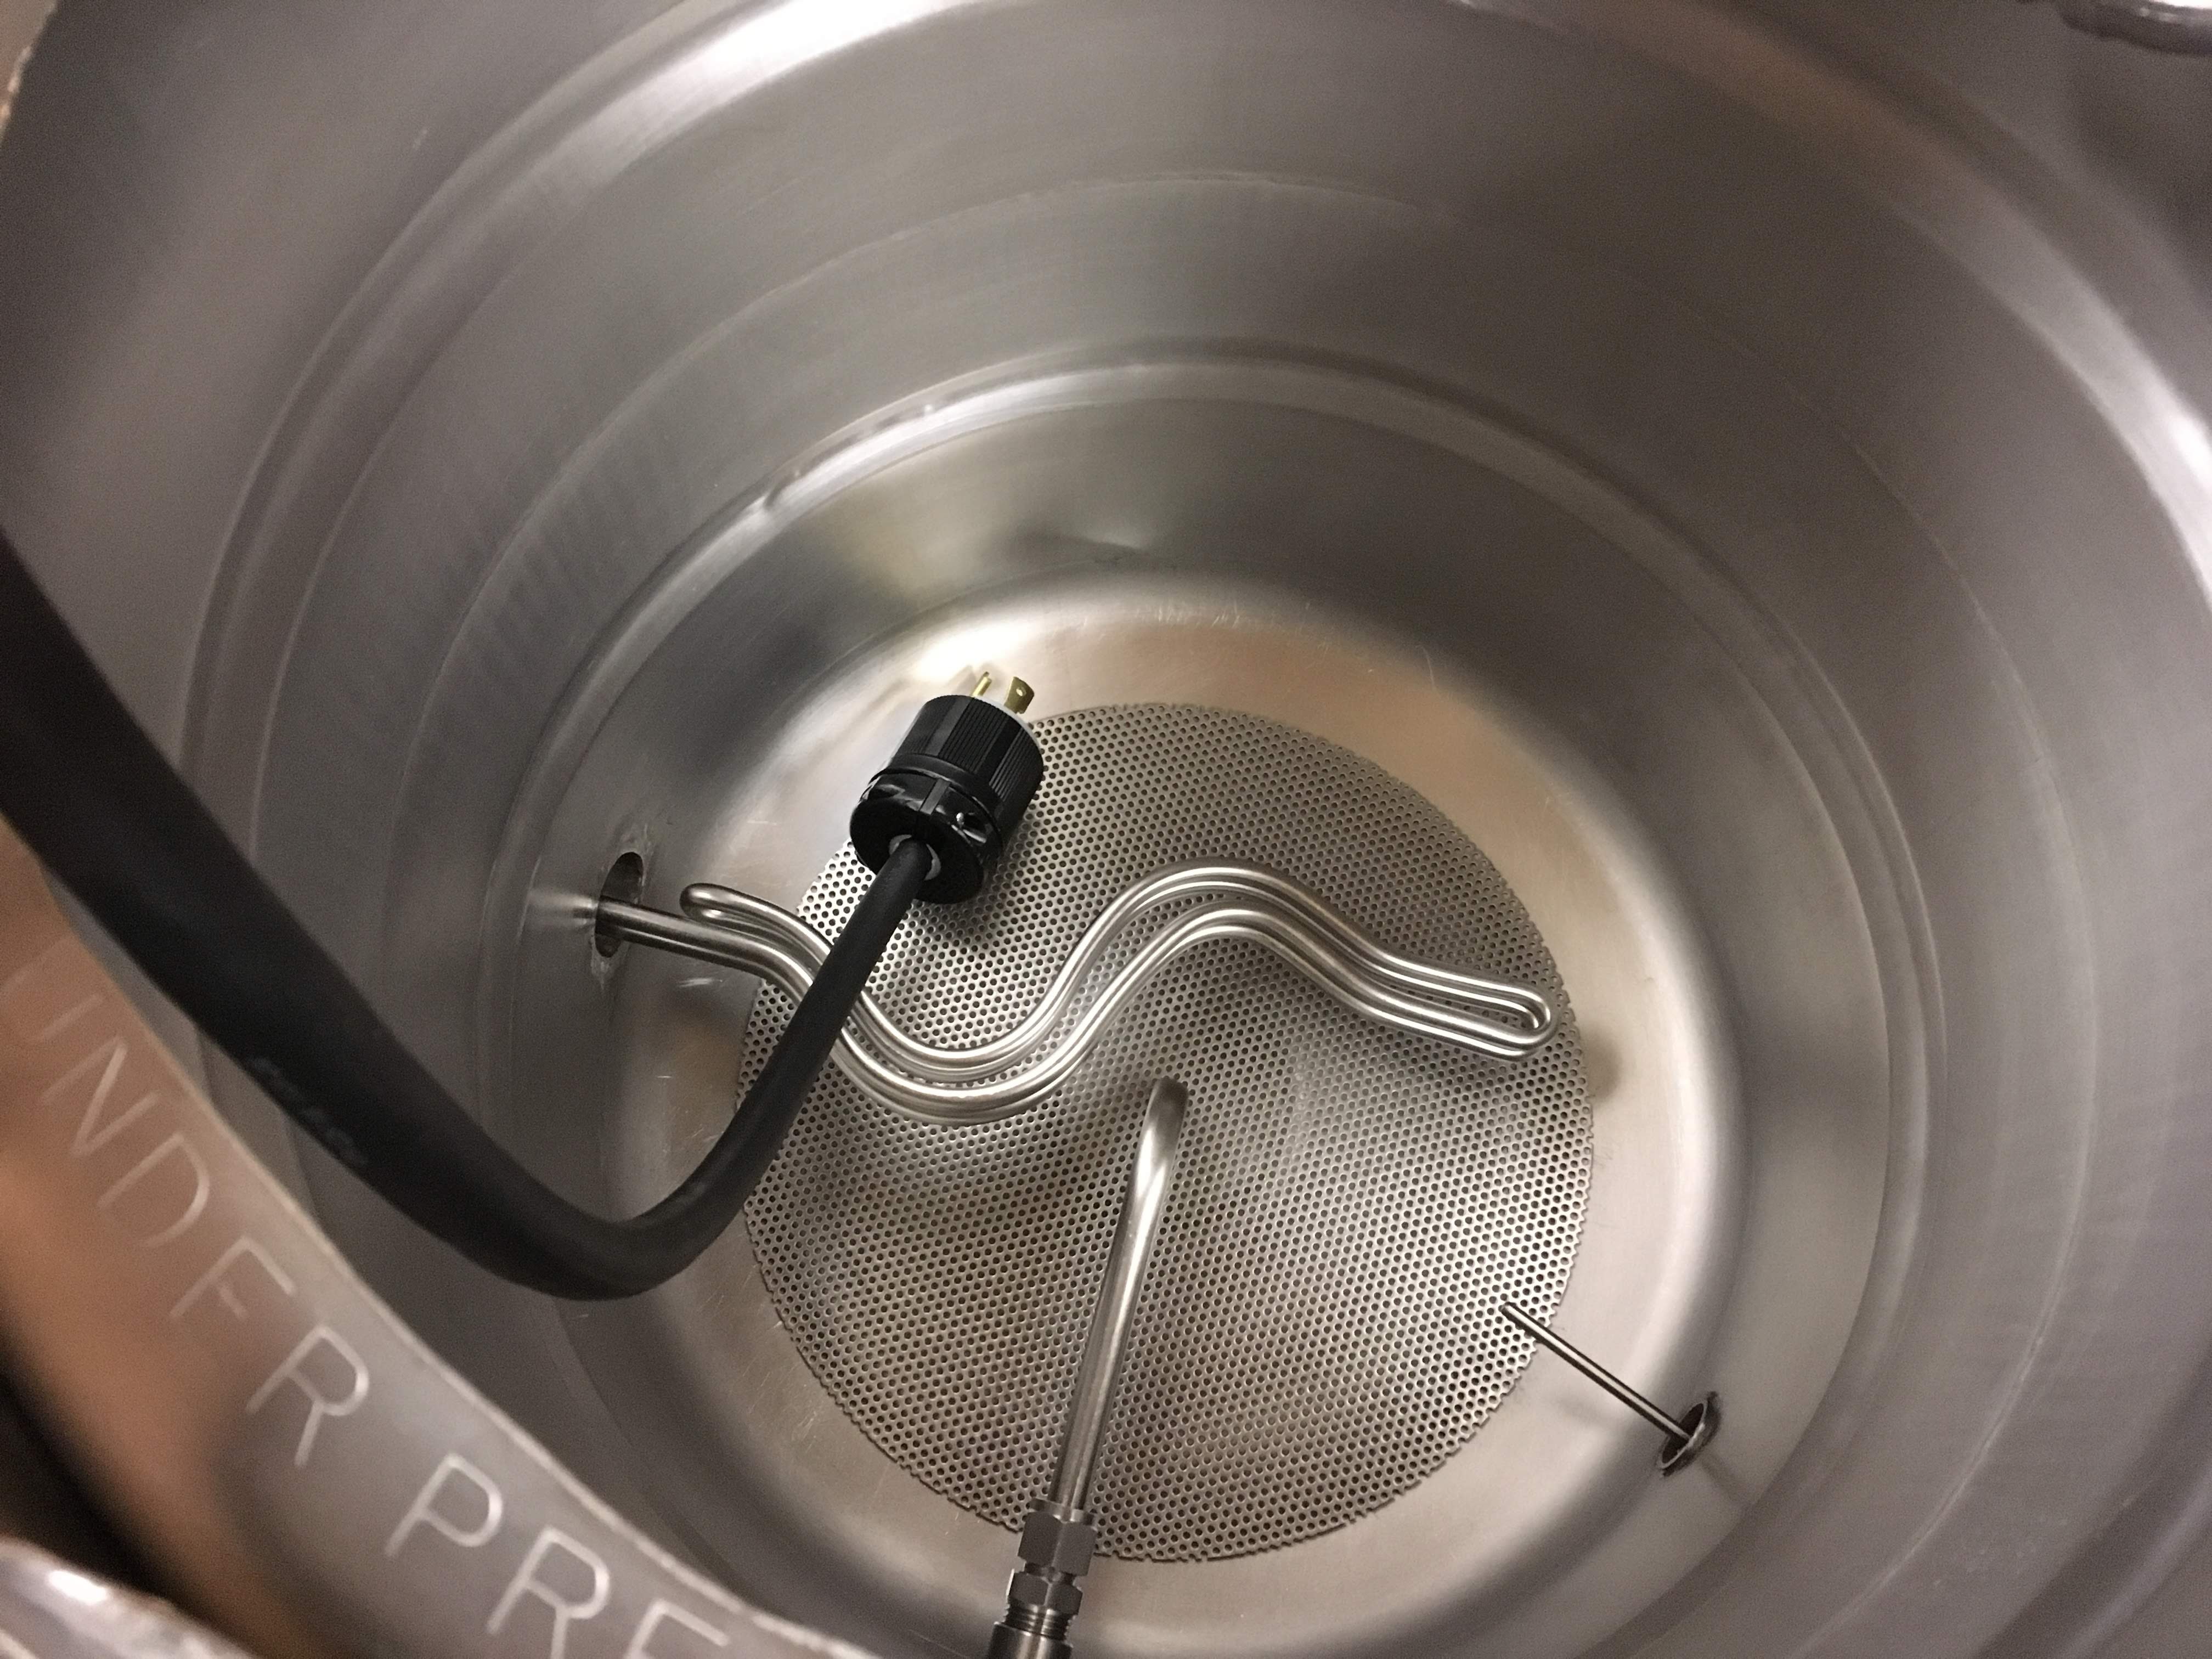
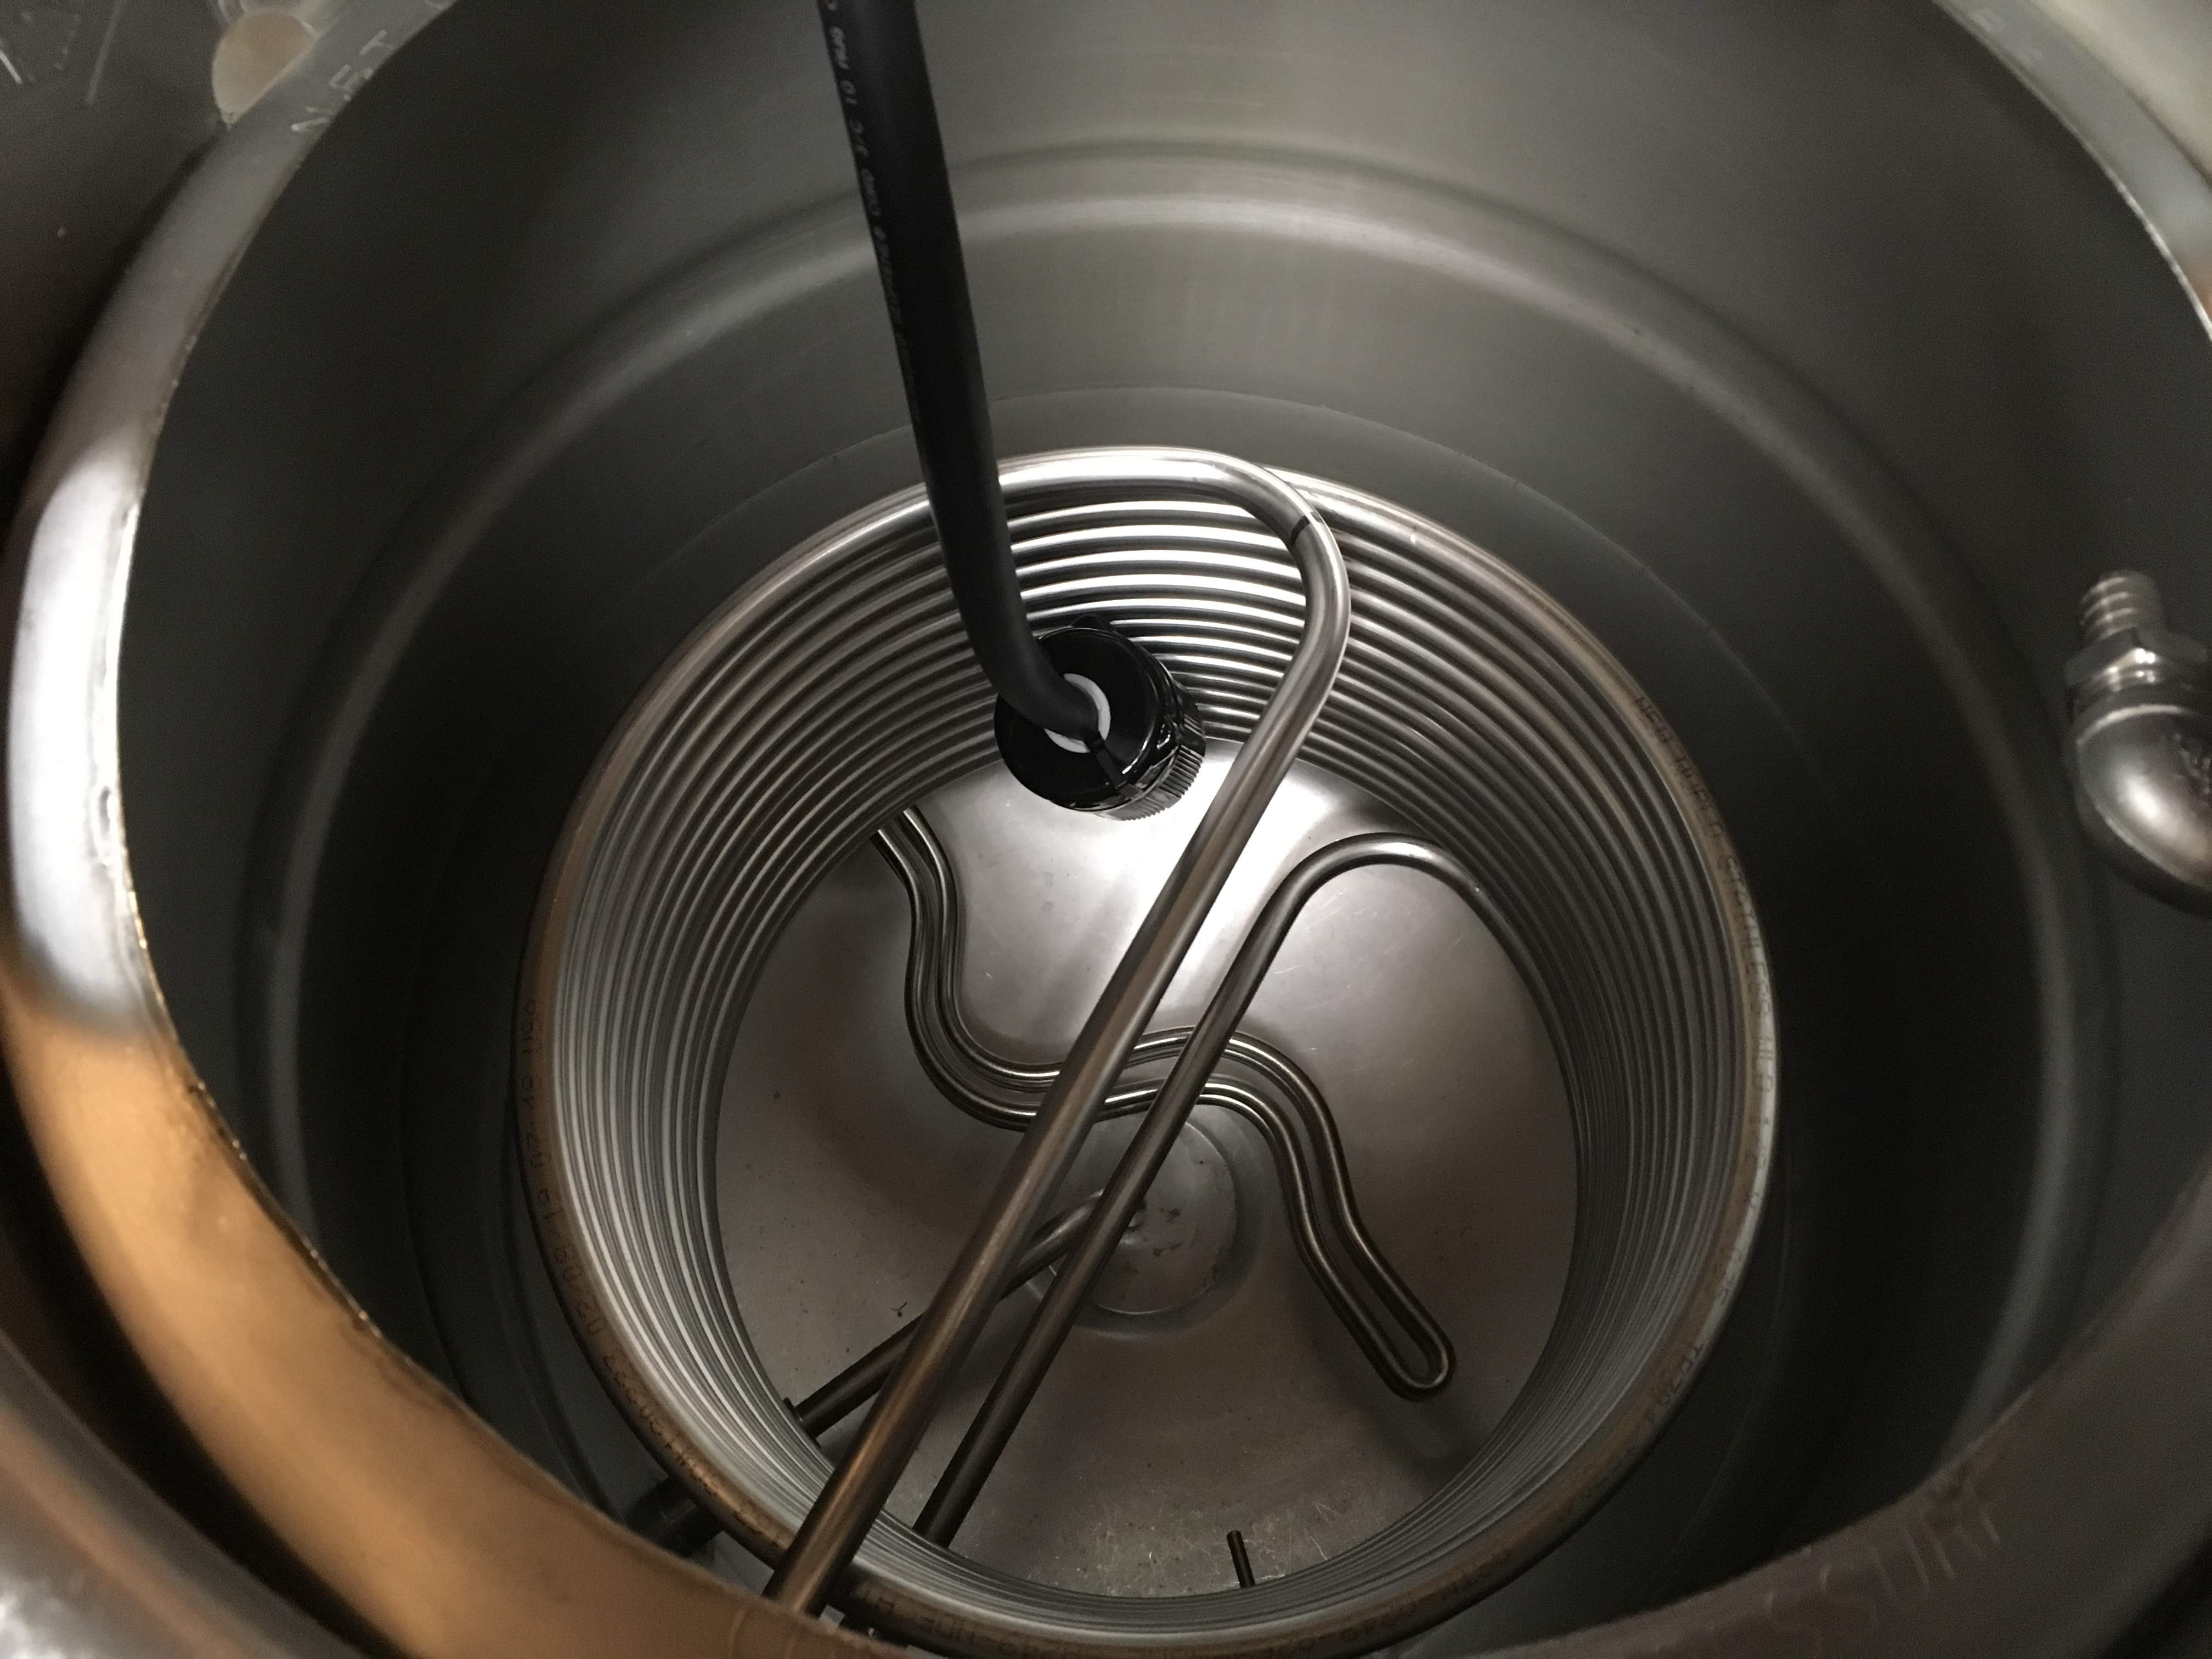
Pics of current set-up... Brew Rig 2.JPG Brew Rig 1.JPG
 
In my herms system, I put a probe in a tee on the output of the herms coil back to the mash tun. This one controls the HLT temperature. The second probe you could put in a tee on the mash tun out, but just use it to monitor temps. This will give you a good reading of what the wort is doing at the top and bottom of the mash tun. Ultimately though you want your wort going into the mash tun at your target temp
 
I've read every bit of theelectricbrewery.com at least 5 times over the years. Read the build and "brew day step by step" again yesterday.

Good advice for sure! Thanks!

Plan on putting one mash probe on the outlet of the mash tun and the other on the outlet of the HERMS coil. Parts start showing up tomorrow!
 
Got started on the panel today. Everything looks good so far. Holes for the plugs in the bottom of the panel were all tight but a quick zip with a sanding drum on the Dremel fixed that. All holes on the front were fine but the Amp/Volt meter. Took a couple minutes with a file and all was good. No screws are marked/labeled but they all seem to be there. Didn't like the screws provided for the DIN rail so swung by the hardware store and picked some up. Got all screw holes drilled and tapped. Time to start wiring...

All the elements, housings, cables and fittings from Brewhardware were delivered today.

Mash tun ordered from Spike.

Things are starting to happen.
 

Attachments

  • IMG_6638.JPG
    IMG_6638.JPG
    102.7 KB · Views: 130
Making progress. Panel is done. I over tightened the ground lug on the front door and it snapped off. Will need to drill a hole and bolt it. Kit came with plenty of extra wire, wire ties and crimp connectors. The set of hangers to wall mount the panel had 3 bottom and 1 top hanger - sent an email this morning and had a shipping confirmation for a replacement from Auber in minutes.

Got the new mash tun from Spike. Looks great!!! Need to order a few fittings to mount the temp probes. Hope to get the boil kettle and HLT welded up this week.

240V 50A GFI breaker and outlet installed. Did some reading last night and I think I wired it wrong. Tied the neutral to the ground buss instead of the breaker. Luckily the wire is long enough so I just need to move it and all should be good.

Plan on triple checking panel wiring tonight - hope to plug in and test in the next few days.

IMG_6714.jpg IMG_6716.jpg IMG_6695.jpg IMG_6696.jpg
 
Have an appointment with the welder tomorrow but may have to postpone. I'm now planning on using TC integrated elements from Brewhardware and 1.5" welded TC ferrules on the keggles. I order the wrong parts so don't have the elements to line up with the center dip tube before drilling/welding.

Anyone here use the same set up that can recommend a location for the element hole?
 
Thanks! A far cry from your setup but it's getting there. :mug:

Got the kettles back from the welder yesterday. Cleaned them up and have them mostly assembled. Got elements and the last few fittings I needed from Brewhardware today. Bobby's been a ton of help!

Rewired and tested the breaker and outlet. Traced through the controller wiring and found one minor mistake - I had the pumps reversed. Was easier to swap the labels on the outlets than rewire. Plugged it in and all initial testing is good.

Hope to finish assembling kettles and do a wet test this weekend.

Need to read up on the EZ Boil controllers.o_O
 
Kettles are done.

Plan on re-plumbing the pumps. I have 2 March 815 pumps. No real problems but occasionally get air bubbles in the hoses below/before the pumps on the inlet side. Pumps are oriented per March's instructions with the inlet at the bottom and out at the top. Been looking at pics of the Spike systems and noticed that they do the opposite with a bleeder valve on the output (bottom) side of the pump. This makes sense to me... Anyone try this? Comments and/or suggestions?
 

Attachments

  • IMG_6735.jpg
    IMG_6735.jpg
    657.6 KB · Views: 94
  • IMG_6736.jpg
    IMG_6736.jpg
    1.7 MB · Views: 92
  • IMG_6738.jpg
    IMG_6738.jpg
    1.3 MB · Views: 90
Pumps re-plumbed. Had to work this last weekend so didn't get to wet test. Hopefully test Friday/Saturday and brew on Sunday.

IMG_6749.jpg IMG_6751.jpg
 
Thanks!

Fired it up and did a wet test today. Heated, transferred, recirculated, tested for leaks, raised water temp in mash tun with HERMS coil, boiled etc.

Did find that my element switch labels on the panel were reversed. Doh!

Bleeder valves on the pumps are handy.

Grain ground and ready to brew tomorrow. :mug:
 
First brew is in the fermenter. Went pretty well. Missed our strike temp/mash in by a few degrees - shooting for 150. Started 145 ish. Finished fine. Electric heat sure is awesome/fast!

Whole brew day was probably an hour longer than we're used to but that was taking things very slow. So I think that's good.

Trying to figure out a new table. Then figure out if we need a stand/mount for the control panel or if it's fine on the wall. Also need to figure out/fine tune hoses.

And yes, after first real brew, bleeder valves are awesome!!!!


IMG_6759.jpg IMG_6761.jpg
 
Congrats on the maiden voyage! You will dial her in as you brew on her a few more times. The wall mount is nice. Keeps it out of the way. I have mine mounted on a welded portable stand on casters. My build thread is in my sig if you want to take a look. Very nice system you made, enjoy!

John
 
Thanks John! I've read through your build thread at least twice. Nice!

Looking at ordering a stainless prep table from webstrauntsupply.com Trying to figure out if the 16 gauge is fine or if we should spring for 14 gauge.....

https://www.webstaurantstore.com/re...al-work-table-with-undershelf/600TS2460S.html

https://www.webstaurantstore.com/re...l-work-table-with-undershelf/600TSS2460S.html

Either one will need to be cut down. Also plan on adding the heavy duty casters. Not sure if the 16 gauge will support all three vessels without sagging...it is quite a bit cheaper though.

Will also likely replace the keggles with matching Spike kettles as funds permit. Got a quote for the boil kettle....need to count my pennies.

Happy Thanksgiving!!!!!!!!!!!!
 
Thank you! Those tables look nice. It states 320 pounds weight limit for the 16 gauge. If you add the grain weight and then water weight (water weighs 8.34 pounds per gallon) and tried to max them out, as an extreme worse case senario example, it would look something like this:

An HLT with 13.5 gallons of water is 112.59 pounds. 15 gallons of water in Mash Tun (if you were able to do that in a 15 gallon keggle) would be 125.1 pounds, plus lets say max grain around 30 pounds so that is 125.1 + 30 = 155.1 pounds. So 112.59 + 155.1 = 267.69 pounds. Then the three vessels (keggles are 30 pounds a piece) so that is 60 pounds and whatever your other vessel weighs 267.69 + 60 pounds = 327.69. But seriously how many times are you maxing out your mash tun? Also you really wouldn't have 15 gallons of water in there as there would be no room for the grainbill. So you would save some weight there also. Most 11 gallons batches of average strength beer is 8 gallons of strike water (give or take) and 17 to 22 pounds of grain. So you can subtract some weight here also. Something to think about as you add up the total weight of everything.

Good luck and Happy Thanksgiving!

John
 
Thanks again for the input!

From what I can tell, the 16 gauge is rated at 580 lbs for the top shelf and 360 lbs for the bottom shelf so I think we'll be good. I guess I'll find out as it's ordered.;)

Got a quote form Spike for a new boil kettle and found out they no longer offer a sight glass option. Trying to decide if I should go without or just have them move the temp probe fitting to the front and then use the sight glass/temp probe set up I have on the keggle. Spike says it's not really needed with the etched markings inside the kettle...?
 
Wow I missed that rating on the top shelf and read the bottom rating by mistake. Sounds like your all set with the table! The sight glass is good to have and you can calibrate it by adding 8.34 pounds of water at a time and make the true gallon marks on it. I did that to my sight glass but I also use a long wooden dowel and I calibrated that too. So if you don't have one you can just use the same calibrated dowel every time and you will be fine.

Make sure everything is in your boil kettle that would normally be in there (electric element as an example) when you collect your pre-boil volume and calibrate the sight glass and the dowel. I am very persistent when collecting an accurate pre-boil volume on the beers I make. I stick the dowel in the boil kettle as I get close and then wait for the volume to hit 13.5 gallons (in my case for a 60 min boil, 14 gallons for a 90 min boil). I make sure it completely fills over the line on the dowel and I do it this way every time. Getting a consistently accurate pre-boil volume will enable you to dial in your system's boil off amount accurately and make you a better brewer. Just something to think about.

Good luck with the new table!

John
 
On our keggles we really only used the sight glasses for a guideline...calibrated them when we got 'em then "learned" them as we went. They did come in handy but as long as we can see the internal markings through all the steam we should be fine.

Table is ordered. New temp probes for the boil kettle and (future) HLT ordered (the 6" ones we have now that mount in a T with the sight glass will be too long...). Also order a temp probe to replace the dial thermometer in the chiller. A few more cam-locks and new smaller bleeder valves for the pumps on the way from Brewhardware - Bobby has been a TON of help! Working on a custom logo plate to replace the "Brew Buddy" logo plate on the control panel.... Spike must be out for the holiday weekend (good for them!!) so still waiting on an invoice so I can order the boil kettle.

Only things left are to figure out how I'm going to mount the pumps to the table.

And start saving my pennies for a matching Spike HLT.

:mug:
 
Second brew done.... Missed strike temp again but worked out OK. Still waiting on the table and new boil kettle. Temp probe on chiller worked great. Should have table and new boil kettle before next brew day.
 
Third brew done....

Got the new Spike Boil Kettle, table and new pumps.

Still struggling with strike temp. We've been heating strike water in the boil kettle then transferring to the mash tun. We lost ~9 degrees transferring to the mash tun. Pump and hoses had been recirculating so the they should have been up to temp. Ended up pumping back to the boil kettle and raising the temp then pumping back to the MLT. Only lost a 2 degrees the second time - I guess we need to preheat the MLT somehow....

Had a hard time maintaining mash temp when we realized the temp probe in the HLT is off by about three degrees. Adjusted for that and all was good for the rest of the brew day.

Still dialing in Beersmith to the new set-up. We were shooting for 1.065 and ended up at 1.070

Santa was good to us so matching Spike HLT is ordered. After that no more changes - just brew and dial it in.
IMG_6846.jpg IMG_6847.JPG
 
Your system looks great, I am in the process of converting my brewery as well. I also went with Spike kettles. I ended up having to make holes for the elements in mine. I went with Brewhardware weldless tri clover bulkhead. Also went with the steam slayer so I can brew without having my garage door all the way open. My brewery is all set minus the controller. I plan on getting the same one, how do you like it? Any changes you would have done?
 
Only 3 batches in but the controller is working great. Still learning - been struggling hitting strike temp but that's a process issue not a controller issue. Only thing I would have done differently is to get all 3 Spike kettles from the get go instead of converting the keggles - would have saved a few bucks....

Fedex delivered the Spike HLT today. Also got a package from Brewhardware with a Locline sparge arm, a couple more camlock fittings and some hose. Should have everything put together by the weekend then hopefully batch #4.
 
New Spike HLT is ready to go. Made a couple of new hoses...will wait to actually brew to finalize them. Not sure if we'll be able to brew this weekend...staffing issues at work, ugh!

Got a couple of Tilts and set up a Tilt Pi to monitor and log fermentation....

IMG_6867.PNG IMG_6871.JPG
 
Fourth brew in. Heated strike water in BK to ~8 degrees higher than target strike temp. Ended up 1 degree shy of desired mash temp. Was able to bring that up with the HERMS with no issues now that we have the MLT temp sensor dialed in. Hit all numbers but came up slightly shy on final volume to the fermenter - will tweak Beersmith to fix that.

Planning on brewing the same recipe the next 2-3 batches to finish dialing in the process.

Good brew day today! :mug:
IMG_6887.JPG IMG_6891.JPG
 

Latest posts

Back
Top