You are using an out of date browser. It may not display this or other websites correctly.
You should upgrade or use an alternative browser.
You should upgrade or use an alternative browser.
Brew Bucket by SS Brewing Technologies
- Thread starter Schumed
- Start date

Help Support Homebrew Talk:
This site may earn a commission from merchant affiliate
links, including eBay, Amazon, and others.
devils4ever
Well-Known Member
I didn't get the Brewmaster Edition as I was wondering the same thing...and wondered what would happen if the temp probe stopped working. Could I get a replacement, etc., etc.. What I do instead is use an infared thermometer on the outside of the Brewbucket (masking tape on the bucket as the infared isn't accurate on the shiny surface) and surprisingly it's quite accurate as compared to the temp of actual samples. During active fermentation the readings will vary depending on where I measure on the outside, most accurate is in the middle of the outside of the vessel. The infared thermometer was less than $25 for a dual laser (Etekcity lasergrip 630) and good for many other applications. Just another option, hope that helps.
My Brewbucket is coming Friday! I also ordered the Etekcity 630 thermometer as you recommended. I should be able to use this as well for the checking my mash temperature, correct?
JDWebb
Well-Known Member
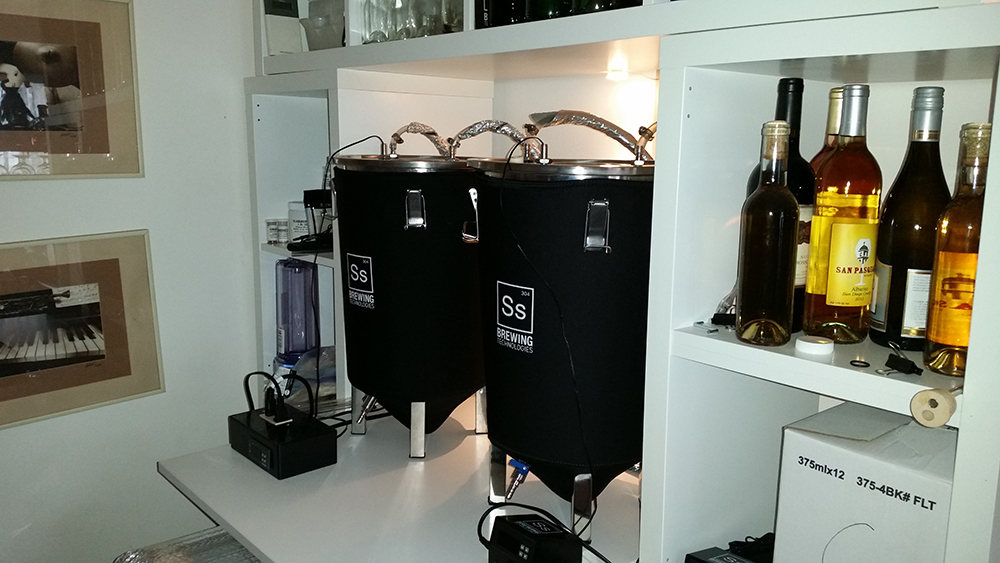
My twins, pictured in a post above, are temperature controlled. I use a hydroponics chiller (under $400) to circulate chilled water between it and a small cooler. I can circulate chilled (40º F) water through the two immersion chillers via pumps, plus each have a heating element under the neoprene insulation jacket of which both are controlled by dual STC-1000's. I can get temps within 1 degree hot or cold. It will also allow me to lager if I choose. These are great little brew buckets for doing beer, mead and wine in. Each holds 7 gallons to the brim, but will easily hold 6 gallons, I wouldn't do any more than that.
brew703
Well-Known Member
For those doing pressure transfers, did you install a gas post to the lid? Also if drilling a hole in the lid, is a titanium step drill bit the way to go? Thinking about adding a thermowell in addition to the gas post.
RevKev
Well-Known Member
Hole saw, if you have them. Stepper bits work well too. Really there isn't just one way to go at this, if you're using a dull bit sharper it or provide it with some cutting fluid.For those doing pressure transfers, did you install a gas post to the lid? Also if drilling a hole in the lid, is a titanium step drill bit the way to go? Thinking about adding a thermowell in addition to the gas post.
Can't speak for the pressure transfers. But I have seen people use the domed lid with the triclamp.
MX1
Texas Ale Works
The Anvil FIAK has the outside sealing gasket that is either a tad to small or tad to big depending on if you go with the 5 or 7 gallon version, think I am going to add that to the SSBT to help seal during pressure transfers, which is the next step in the process after I add a thermowell


$22.00 ($623.23 / Ounce)
AMZLMPKNTW Ball Lock Sample Faucet 30cm Reinforced Silicone Hose Secondary Fermentation Homebrew Kegging joyful
无为中南商贸有限公司

$49.95 ($0.08 / Fl Oz)
$52.99 ($0.08 / Fl Oz)
Brewer's Best - 1073 - Home Brew Beer Ingredient Kit (5 gallon), (Blueberry Honey Ale) Golden
Amazon.com


$33.99 ($17.00 / Count)
$41.99 ($21.00 / Count)
2 Pack 1 Gallon Large Fermentation Jars with 3 Airlocks and 2 SCREW Lids(100% Airtight Heavy Duty Lid w Silicone) - Wide Mouth Glass Jars w Scale Mark - Pickle Jars for Sauerkraut, Sourdough Starter
Qianfenie Direct


$58.16
HUIZHUGS Brewing Equipment Keg Ball Lock Faucet 30cm Reinforced Silicone Hose Secondary Fermentation Homebrew Kegging Brewing Equipment
xiangshuizhenzhanglingfengshop


$10.99 ($31.16 / Ounce)
Hornindal Kveik Yeast for Homebrewing - Mead, Cider, Wine, Beer - 10g Packet - Saccharomyces Cerevisiae - Sold by Shadowhive.com
Shadowhive


![Craft A Brew - Safale S-04 Dry Yeast - Fermentis - English Ale Dry Yeast - For English and American Ales and Hard Apple Ciders - Ingredients for Home Brewing - Beer Making Supplies - [1 Pack]](https://m.media-amazon.com/images/I/41fVGNh6JfL._SL500_.jpg)


$53.24
1pc Hose Barb/MFL 1.5" Tri Clamp to Ball Lock Post Liquid Gas Homebrew Kegging Fermentation Parts Brewer Hardware SUS304(Liquid MFL)
yunchengshiyanhuqucuichendianzishangwuyouxiangongsi

$176.97
1pc Commercial Keg Manifold 2" Tri Clamp,Ball Lock Tapping Head,Pressure Gauge/Adjustable PRV for Kegging,Fermentation Control
hanhanbaihuoxiaoshoudian

$53.24
1pc Hose Barb/MFL 1.5" Tri Clamp to Ball Lock Post Liquid Gas Homebrew Kegging Fermentation Parts Brewer Hardware SUS304(Liquid Hose Barb)
Guangshui Weilu You Trading Co., Ltd


$7.79 ($7.79 / Count)
Craft A Brew - LalBrew Voss™ - Kveik Ale Yeast - For Craft Lagers - Ingredients for Home Brewing - Beer Making Supplies - (1 Pack)
Craft a Brew


$20.94
$29.99
The Brew Your Own Big Book of Clone Recipes: Featuring 300 Homebrew Recipes from Your Favorite Breweries
Amazon.com
How did you attatch that fitting to the lid??
Edit-i may have posted on the wrong page/thread. I was referring to a pic where a guy did pressure transfers.
Edit-i may have posted on the wrong page/thread. I was referring to a pic where a guy did pressure transfers.
Last edited:
shoengine
Whale Noun Member
Chronical lid for the win.For those doing pressure transfers, did you install a gas post to the lid? Also if drilling a hole in the lid, is a titanium step drill bit the way to go? Thinking about adding a thermowell in addition to the gas post.

It can be done cheaper, but about $130 gives me more headspace and I can now blowoff directly from the lid without a cludgey airlock-to-blowoff setup with a rubber cork, a 3in hole to dry hop from, and a pressure transfer setup.
Last edited:
- Joined
- Feb 20, 2011
- Messages
- 395
- Reaction score
- 92
I'll take a pic of my next brew day/fermentation. I use a 90-degree join to attach a blowoff tube in the lid when fermentation is done I then attach my CO2 tank to the tubing for a pressure transfer.
Do you use their 90 degree blow elbow for this? I’m contemplating the actual pressure transfer kit. I guess the main benefit there is the relief valve preventing total destruction.
shoengine
Whale Noun Member
I had odds and ends so I didn't buy the kit, but I am using the barbed 90• elbow. I personally don't think the clamps on the BB will hold enough PSI to use the PRV on the fitting. I'm going to experiment on it when I clean it out today, since I finished my transfer.Do you use their 90 degree blow elbow for this? I’m contemplating the actual pressure transfer kit. I guess the main benefit there is the relief valve preventing total destruction.

You can see a little pool of beer below the cone, which I think leaked out past the ball valve o-ring.
I can also see the value of having a valve on the top as well as the bottom as I can seal both sides since I don't have quick disconnects on the gas side.
Yes, it is.
I use it for a blowoff tube during fermentation, then I cap it off during cold crash to avoid suck back (2nd pic).
Then when it is time to keg, I attach my CO2 line to the other end of the tubing.


I use it for a blowoff tube during fermentation, then I cap it off during cold crash to avoid suck back (2nd pic).
Then when it is time to keg, I attach my CO2 line to the other end of the tubing.
i was gonna buy a bucket, but didn't because i wanna do closed transfers and didn't wanna modify the bucket lid. i went with https://www.norcalbrewingsolutions.com/store/Ultimate-Sanke-Keg-Cross-Fermenter-Kit.html and i already had an empty 1/4 sanke.Chronical lid for the win.
View attachment 612995
It can be done cheaper, but about $130 gives me more headspace and I can now blowoff directly from the lid without a cludgey airlock-to-blowoff setup with a rubber cork, a 3in hole to dry hop from, and a pressure transfer setup.
i like your solution a lot too tho! (and may do it someday. easier cleaning has me intrigued)
shoengine
Whale Noun Member
It is interesting that you posted this. I am going to be getting an old sanke keg from a friend so I can have a big fermenter for wine.i was gonna buy a bucket, but didn't because i wanna do closed transfers and didn't wanna modify the bucket lid. i went with https://www.norcalbrewingsolutions.com/store/Ultimate-Sanke-Keg-Cross-Fermenter-Kit.html and i already had an empty 1/4 sanke.
i like your solution a lot too tho! (and may do it someday. easier cleaning has me intrigued)
As far as the bucket goes, I probably would have just modified the lid again (as @Kealia did above) because it is relatively trivial, but I wanted the extra headspace and the huge 3in flanged hole at the top will come in quite handy.
- Joined
- Feb 16, 2012
- Messages
- 4,660
- Reaction score
- 7,102
- Location
- At home, in the brewery in Maryland.
I had odds and ends so I didn't buy the kit, but I am using the barbed 90• elbow. I personally don't think the clamps on the BB will hold enough PSI to use the PRV on the fitting. I'm going to experiment on it when I clean it out today, since I finished my transfer.
View attachment 613569
You can see a little pool of beer below the cone, which I think leaked out past the ball valve o-ring.
I can also see the value of having a valve on the top as well as the bottom as I can seal both sides since I don't have quick disconnects on the gas side.
I do a very similar pressure transfer, but instead of using a CO2 bottle for pressure I bleed off the pressure in a pre-sanitized and CO2 purged keg to 2-2 1/2 PSI and then run a gas (white) fitting and hose from the keg to the barbed TC fitting on the top of the fermenter. Then just open the ball valve on the fermenter and watch the beer transfer (closed) under perfect 2-2 1/2 PSI without worrying about over-pressurizing the SS tank.
I've used this method on both Brew Buckets and Chronicals and it works great every time. You can even transfer "uphill" from the ball valve to the liquid fitting on the Corny keg like you're doing in your picture.
BTW, I have an SS fermenter lid that I drilled and fitted with a 2-2 1/2 PSI PRV to prevent any over-pressures as a precaution. Cheap insurance but I've never needed it. Just set your keg pressure to something less than that and it'll be impossible to over-pressurize the fermenter during transfer.
Brooo Brother
- Joined
- Feb 16, 2012
- Messages
- 4,660
- Reaction score
- 7,102
- Location
- At home, in the brewery in Maryland.
Yes, it is.
I use it for a blowoff tube during fermentation, then I cap it off during cold crash to avoid suck back (2nd pic).
Then when it is time to keg, I attach my CO2 line to the other end of the tubing.View attachment 613567View attachment 613570
Kealia,
Risky proposition capping the blow off fitting. In a partially filled brew bucket you could cause it to collapse when you crash chill. In fact, I'm surprised you can even get the lid off the fermenter due to the vacuum, unless you release the pressure first, thereby sucking in alot of O2 (or have an internal leak somewhere in the system).
Either way you risk oxidizing the beer at the very least, and crushing your fermenter at the very worst. If you're worried about suck back, just take a partially inflated party balloon with CO2 from your tank and attach it to the barb fitting on the 90 blow off port. That way you avoid oxidation and avoid collapsing your fermenter.
The SS Brew Buckets and Chronicals are extremely unforgiving to any over-pressures. They are even LESS forgiving of under-pressures, as are just about every pressure vessel.
Brooo Brother
shoengine
Whale Noun Member
For your method, are you using two vessels or three?I do a very similar pressure transfer, but instead of using a CO2 bottle for pressure I bleed off the pressure in a pre-sanitized and CO2 purged keg to 2-2 1/2 PSI and then run a gas (white) fitting and hose from the keg to the barbed TC fitting on the top of the fermenter. Then just open the ball valve on the fermenter and watch the beer transfer (closed) under perfect 2-2 1/2 PSI without worrying about over-pressurizing the SS tank.
I've used this method on both Brew Buckets and Chronicals and it works great every time. You can even transfer "uphill" from the ball valve to the liquid fitting on the Corny keg like you're doing in your picture.
BTW, I have an SS fermenter lid that I drilled and fitted with a 2-2 1/2 PSI PRV to prevent any over-pressures as a precaution. Cheap insurance but I've never needed it. Just set your keg pressure to something less than that and it'll be impossible to over-pressurize the fermenter during transfer.
Brooo Brother
Well, that is..........interesting and concerning. I won't take the fact that it hasn't happened yet as any indication that it won't happen in the future.
I can easily switch to a balloon as I never thought the pressure for the vacuum could cause a collapse.
I can easily switch to a balloon as I never thought the pressure for the vacuum could cause a collapse.
- Joined
- Feb 16, 2012
- Messages
- 4,660
- Reaction score
- 7,102
- Location
- At home, in the brewery in Maryland.
For your method, are you using two vessels or three?
Two vessels: fermenter (containing green, uncarbonated beer) and keg (cleaned, sanitized and purged with CO2). The 'beer' post on the keg is connected directly to the Brew Bucket ball valve (or sampling valve on Chronical). The 'gas' post on the keg is connected to the 'pressurizing fitting' tri-clamp on the top of the fermenter lid (or blow-off fitting).
The motive force in this case is the pressure inside the keg. Normally after cleaning/sanitizing/CO2 purging, I leave anywhere from 10-15 PSI head pressure (CO2) in my kegs. When it comes time to transfer from fermenter to keg, I reduce the pre-charge to 2~2 1/2 PSI, connect the hoses and open the ball valve (or butterfly valve on the Chronicals). The beer will flow from the fermenter to the keg, even "uphill", once the initial siphon has started since it is a closed pressurized system. The beer flowing from the fermenter displaces the CO2 in the keg which passes into the fermenter which pushes more beer into the keg until all of the beer ends up in the keg. The beer doesn't flow back into the fermenter since the gas pick up is above the level of the beer.
Neat system and process.
Brooo Brother
- Joined
- Feb 16, 2012
- Messages
- 4,660
- Reaction score
- 7,102
- Location
- At home, in the brewery in Maryland.
Two vessels: fermenter (containing green, uncarbonated beer) and keg (cleaned, sanitized and purged with CO2). The 'beer' post on the keg is connected directly to the Brew Bucket ball valve (or sampling valve on Chronical). The 'gas' post on the keg is connected to the 'pressurizing fitting' tri-clamp on the top of the fermenter lid (or blow-off fitting).
The motive force in this case is the pressure inside the keg. Normally after cleaning/sanitizing/CO2 purging, I leave anywhere from 10-15 PSI head pressure (CO2) in my kegs. When it comes time to transfer from fermenter to keg, I reduce the pre-charge to 2~2 1/2 PSI, connect the hoses and open the ball valve (or butterfly valve on the Chronicals). The beer will flow from the fermenter to the keg, even "uphill", once the initial siphon has started since it is a closed pressurized system. The beer flowing from the fermenter displaces the CO2 in the keg which passes into the fermenter which pushes more beer into the keg until all of the beer ends up in the keg. The beer doesn't flow back into the fermenter since the gas pick up is above the level of the beer.
Neat system and process.
Brooo Brother
I should also point out that the objective is to fill the keg with 5 gallons of beer, but the fermenter may have more than 5 gallons. So it's possible to set up a continuous flow between the two vessels if the level of the beer rises to the pick up for the 'gas' port of the keg.
What I do is put the keg on a bathroom scale and watch as the weight increases during the transfer. Since beer is 95% water and water weighs 8.3# per gallon, then 5 gallons should weigh approximately 41.3#, give or take. An empty keg (plus transfer lines and fittings) has a tare weight of 5.8#, so my 'nearly full' weight is somewhere around 47 lbs. This leaves the space above the weld seam (approx. an inch or so) for head pressure to force carbonate and dispense beer.
Not exact, but close enough.
Brooo Brother
- Joined
- Feb 20, 2011
- Messages
- 395
- Reaction score
- 92
Two vessels: fermenter (containing green, uncarbonated beer) and keg (cleaned, sanitized and purged with CO2). The 'beer' post on the keg is connected directly to the Brew Bucket ball valve (or sampling valve on Chronical). The 'gas' post on the keg is connected to the 'pressurizing fitting' tri-clamp on the top of the fermenter lid (or blow-off fitting).
The motive force in this case is the pressure inside the keg. Normally after cleaning/sanitizing/CO2 purging, I leave anywhere from 10-15 PSI head pressure (CO2) in my kegs. When it comes time to transfer from fermenter to keg, I reduce the pre-charge to 2~2 1/2 PSI, connect the hoses and open the ball valve (or butterfly valve on the Chronicals). The beer will flow from the fermenter to the keg, even "uphill", once the initial siphon has started since it is a closed pressurized system. The beer flowing from the fermenter displaces the CO2 in the keg which passes into the fermenter which pushes more beer into the keg until all of the beer ends up in the keg. The beer doesn't flow back into the fermenter since the gas pick up is above the level of the beer.
Neat system and process.
Brooo Brother
That’s pretty cool! I’ve been researching closed transfer heavily recently.
- Joined
- Feb 16, 2012
- Messages
- 4,660
- Reaction score
- 7,102
- Location
- At home, in the brewery in Maryland.
Well, that is..........interesting and concerning. I won't take the fact that it hasn't happened yet as any indication that it won't happen in the future.
I can easily switch to a balloon as I never thought the pressure for the vacuum could cause a collapse.
I remember a picture of an airliner being refueled by a fuel truck. The transfer rates of these trucks can be more than 1,000 pounds of fuel in a matter of minutes, or 600 gallons in a very short time. The fuel transfer pumps are emptying the tanker under pressure to the aircraft, creating a significant void (vacuum) in the tank.
The tanker in the picture had a failure of the negative pressure relief valve so the internal pressure of the tank (vacuum) could not equalize with atmospheric pressure. So the weight of the air surrounding the tanker exceeded the 'weight' of the air inside the tank which was 'holding up' the atmospheric weight. This resulted in the tanker (capable of holding several thousands gallons internally) to crumple like a used can of Coors Lite, after having transferred only a fraction of its load.
Think of it this way. An unsealed empty fermenter still has the 'weight' of its internal volume of air to support the external weight of the atmosphere (one bar). Drain it completely without equalizing pressure and you'd now have two bar of pressure trying to crush your 'empty Coors Lite can.' The suck back is a graphic display of this, with a column of liquid being raised from your container of sanitizer up through the blow off tube to enter the partial vacuum of your fermenter.
FWIW, vessels designed to contain pressure on the inside, whether it's the pressure from 15 PSI of CO2 gas or the 'pressure' from the weight of 5 gallons of liquid beer, are unusually poor at withstanding pressure from the outside. The tanker could withstand the pressure of thousands of pounds of fuel held internally but failed catastrophically under the pressure of 14.7 pounds per square inch of the atmosphere. In the same way, a fermenter capable of withstanding say 15 PSI of external pressure (roughly one bar) can fail catastrophically under a vacuum of negative 2~4 PSI (minus 1/4 bar). By extension a 2-2 1/2 PSI limited Brew Bucket might fail at minus 1/2 PSI.
That ain't much differential!
Brooo Brother
Similar threads
- Replies
- 0
- Views
- 1K
- Replies
- 14
- Views
- 1K
- Replies
- 7
- Views
- 1K
- Replies
- 0
- Views
- 681
