Blackharp Brewing Herms Build

Homebrew Talk - Beer, Wine, Mead, & Cider Brewing Discussion Forum

Help Support Homebrew Talk - Beer, Wine, Mead, & Cider Brewing Discussion Forum:

This site may earn a commission from merchant affiliate links, including eBay, Amazon, and others.

GC89

Well-Known Member
Joined
Jul 10, 2009
Messages
175
Reaction score
0
Location
Spokane/Pullman
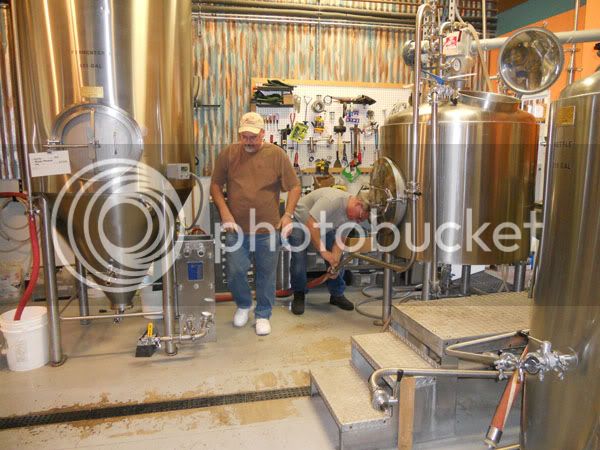
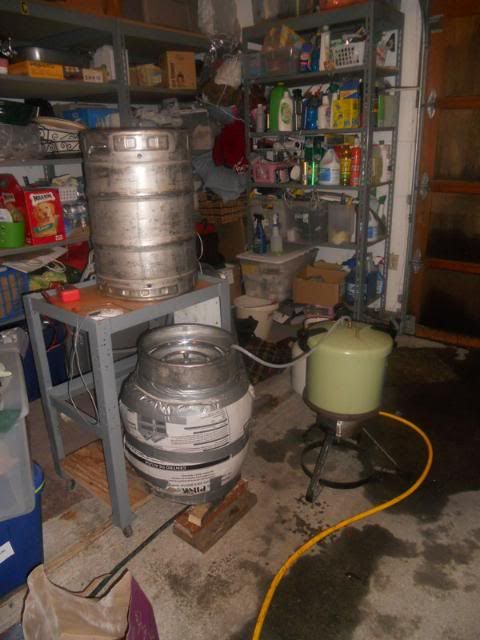
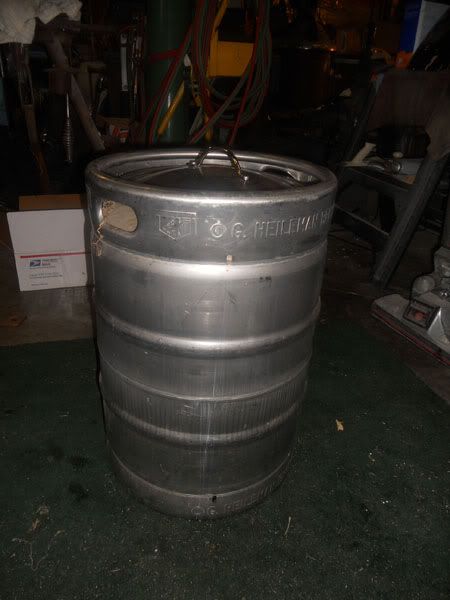
My set up has served me well, ok I take that back........ it has managed to pull off some damn good beers. However I am tired of moving kegs, having to run through all of my sparges before transferring anything to the boil kettle and struggling to maintain mash temps. I am also tired of dealing with my poorly designed and cumbersome bucket chiller so I figure its time to go HERMS. Im currently in the planning stages and looking for another keg to start the HLT, then when I get my hands on a second sanke I will convert my current BK to a MLT and be set.

Even though I will probably be completing this build in segment as funding and parts become available I want to do everything right. So those of you who have HERMS systems what features would you recommend and what do you wish you would have done.

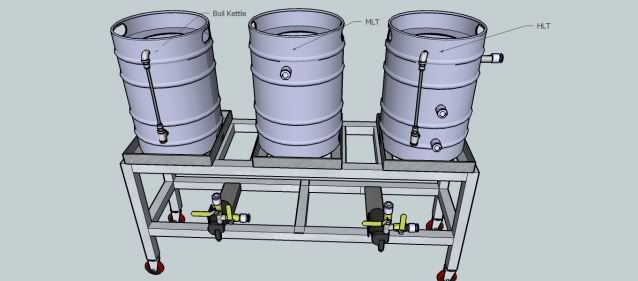
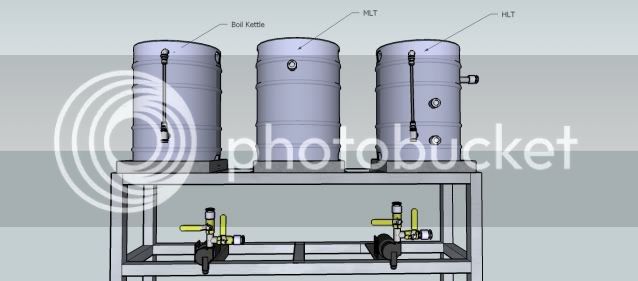
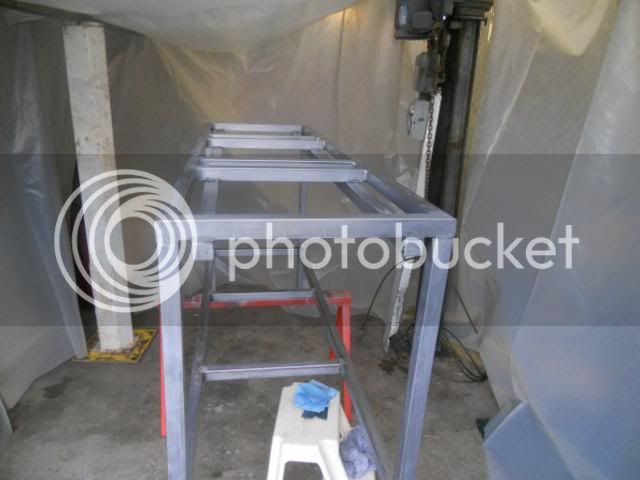
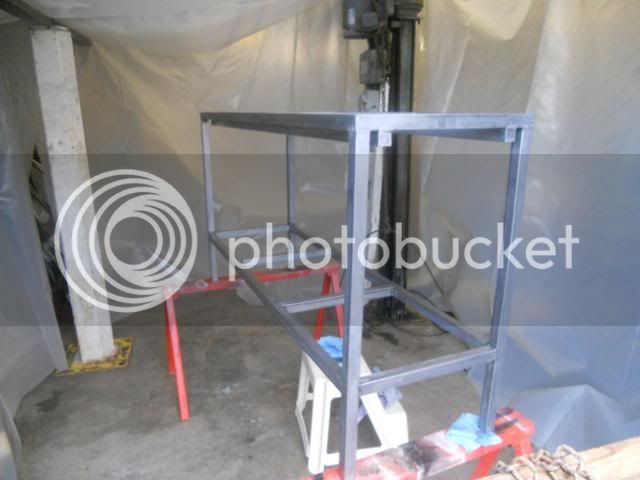
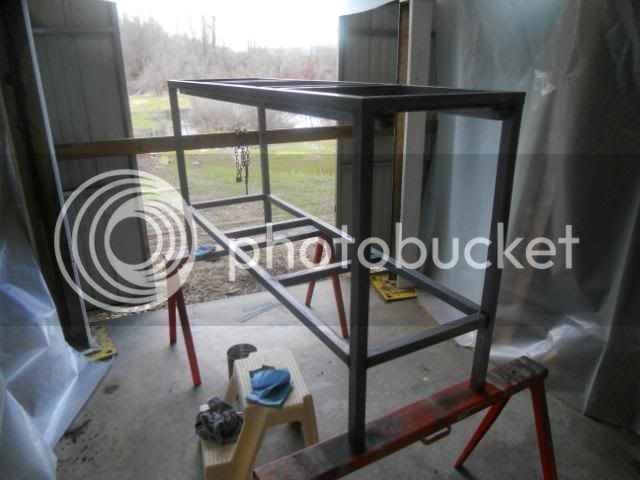
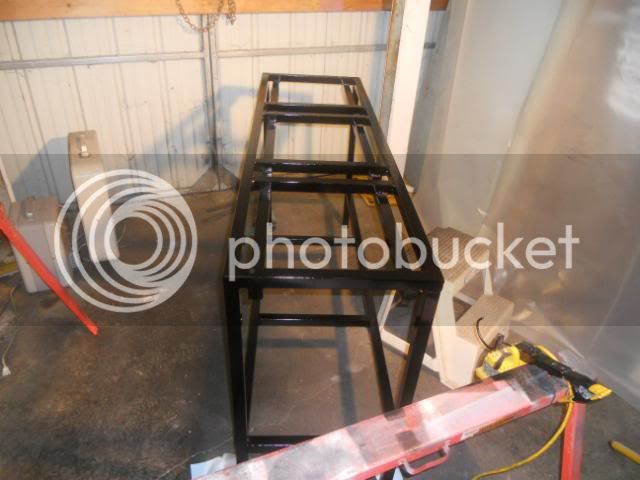
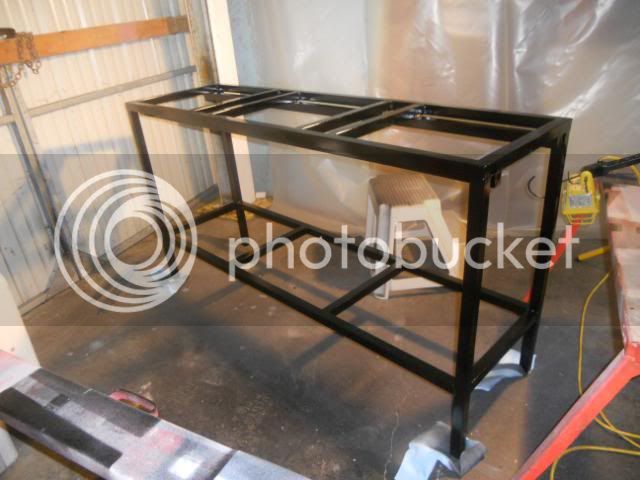
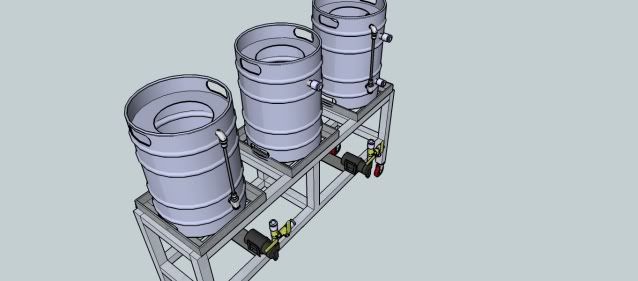
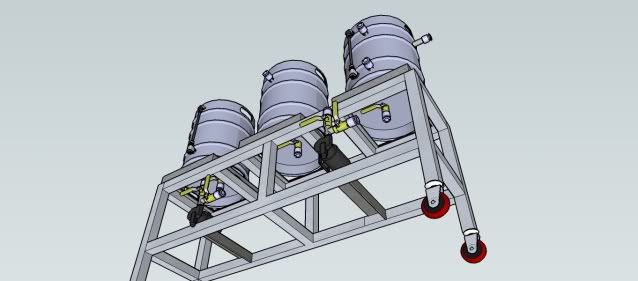
Here is what I would like my Stand to look like. BK on right, MLT middle, HLT left ( I will likely flip the order)

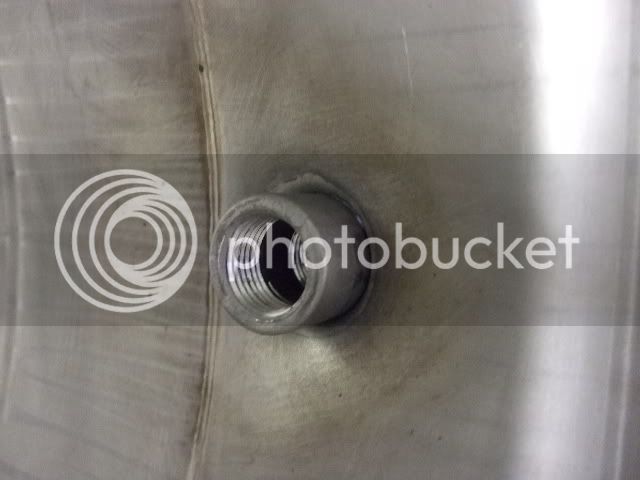
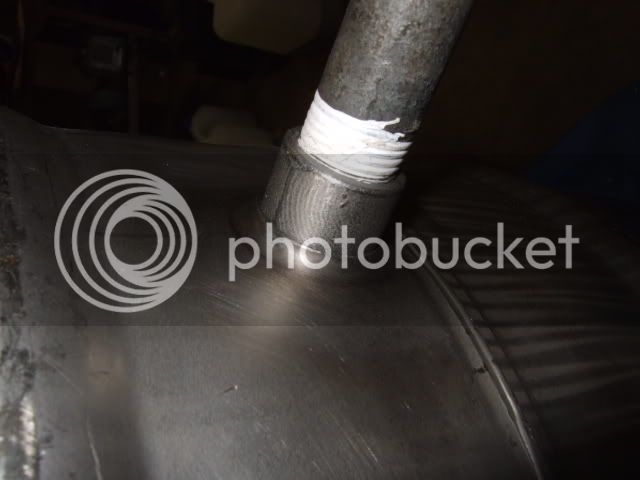
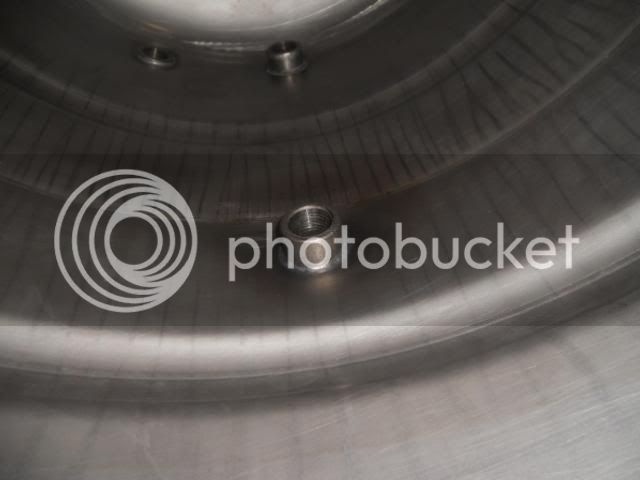
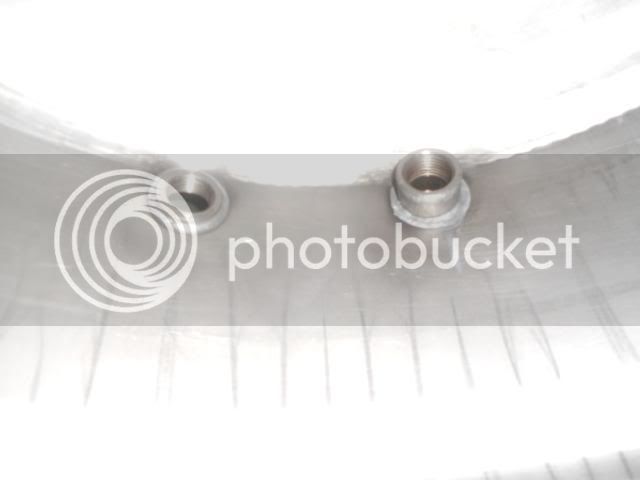
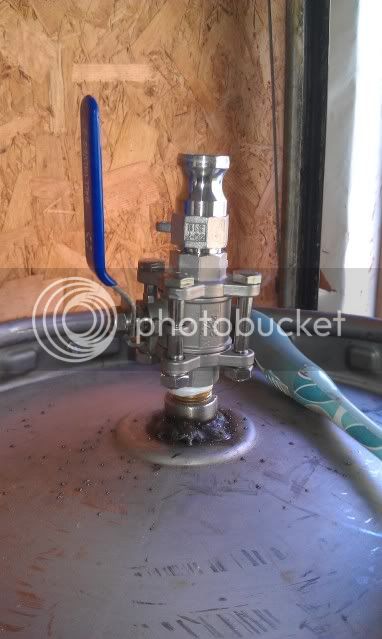
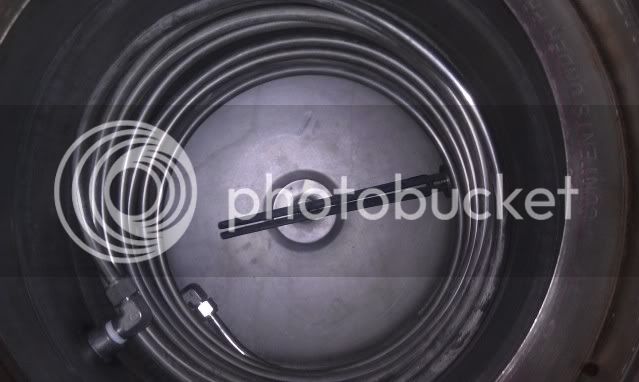
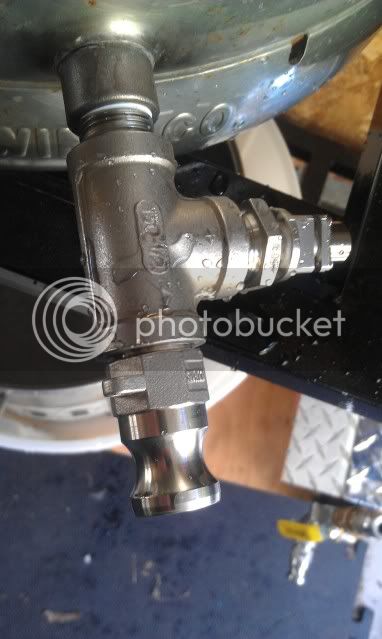
the two ports on the HLT will be for the HERMS coil in and out with male cam locks on both. The side port will be to hook a hose for filling, or to circulate the MLT water to even the temp out once I get a second pump.
BrewStand1.jpg


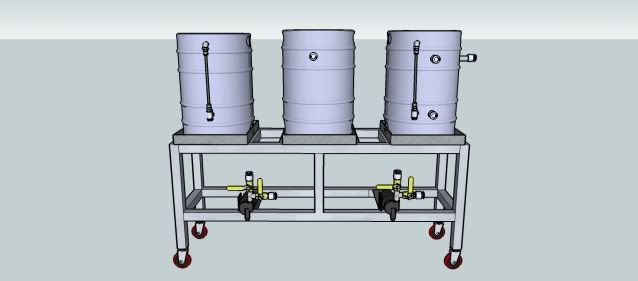
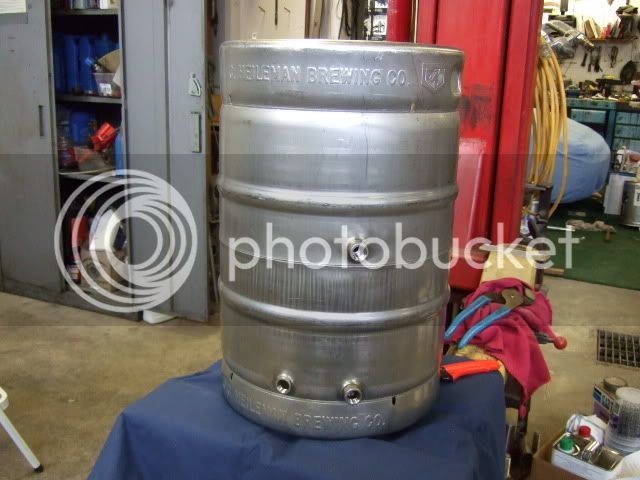
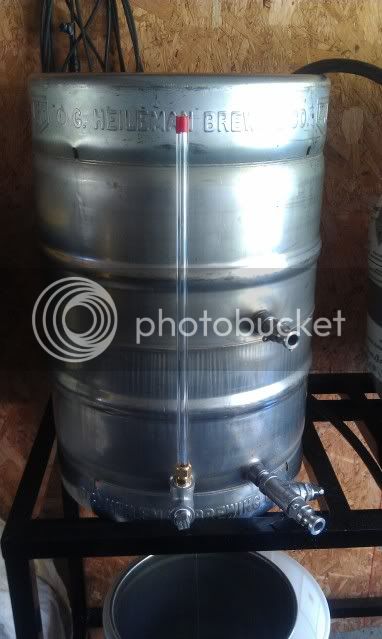
The Port on the MLT will be to pump initial and sparge water in. I was even contemplating building a QD manifold to lock on the inside if I go to fly sparging again once I get a second pump.
BrewStand2.jpg


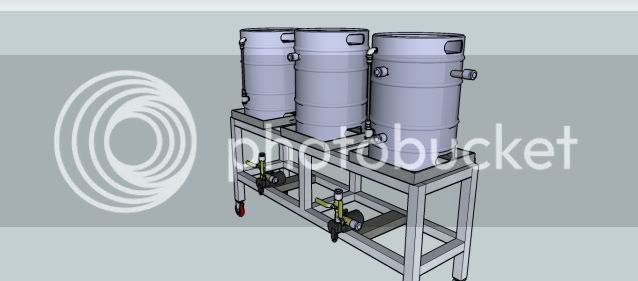
I was planning on filling the BK from the bottom port
BrewStand3.jpg


BrewStand4.jpg


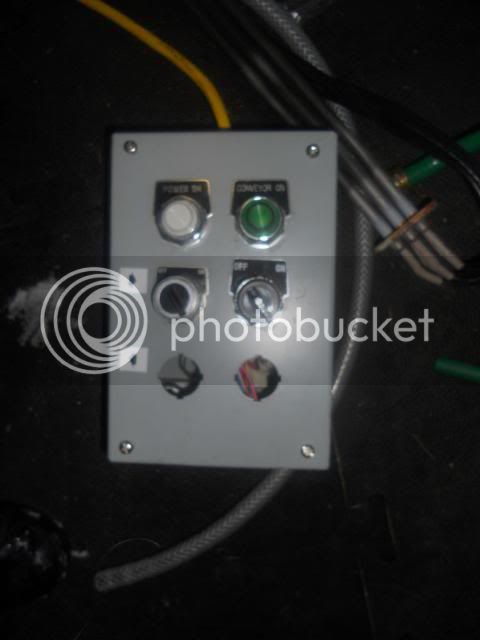
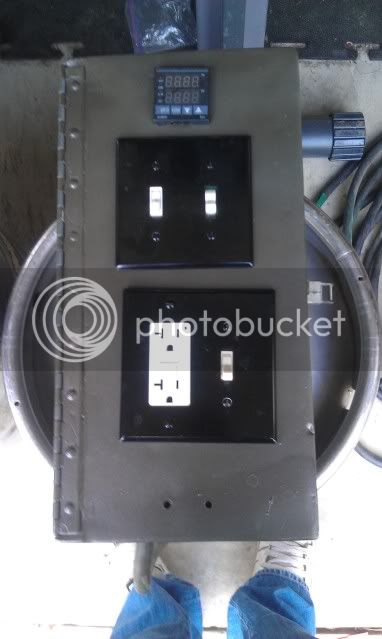
I currently have 1 auber PID, and will likely run only one for a short time. I have a 3 prong plug in my box with my element lead plugged into it so I could easily switch between the HLT and BK element and get by with only a temp probe in the HLT.

Eventually I would like to have
2 PIDs
A thermocouple in both the HLT and BK.
2 Pumps

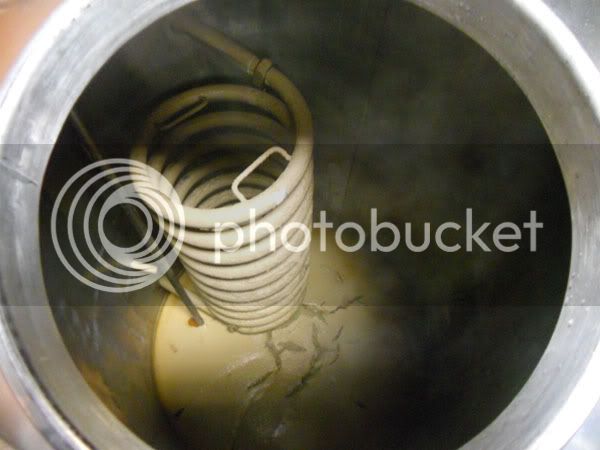
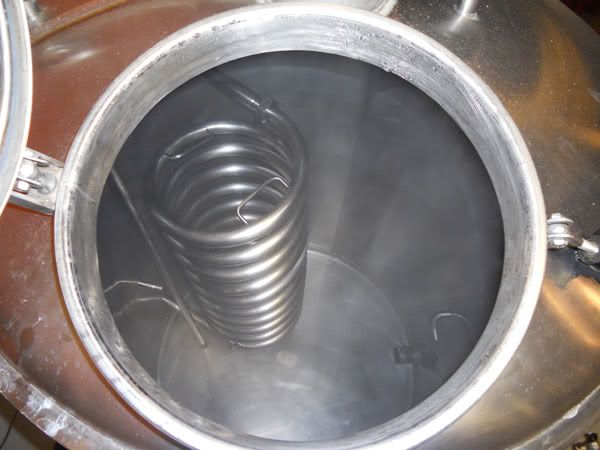
My first question is what is the optimum placement for the thermocouple in the HLT, the hot water will rise so near the top of the coil? or in the middle to take an average reading?

I have also seen people who monitor the output temp of the HERMS coil. This could be done with just a temp probe but only effective for monitoring. Or the PID thermocouple could be used so that it maintains the temp of the recirculating wort but then how do you properly heat your sparge water?

Im sure I will think of many more questions
 
I have also seen people who monitor the output temp of the HERMS coil. This could be done with just a temp probe but only effective for monitoring. Or the PID thermocouple could be used so that it maintains the temp of the recirculating wort but then how do you properly heat your sparge water?

The probe for my PID is mounted in a chamber at the output of my HERMS coil. After this chamber, there is a hose that carries the liquid to wherever it is going to go next.

When heating water to strike temps, I put that output hose right back in the HLT. SO, water comes out of HLT, through pump, through coil (which is sitting in HLT), past the probe, and then right back into the HLT. This keeps it stirred up and evenly heated, and controlled by the PID probe.

When it's time to mash, I move the output hose to that water flows back into the MLT and pump the right amount of water into the MLT. Then I dough in, and switch some valves so that the pump pulls from the MLT instead of the HLT. Now the flow is out of MLT, through pump, through coil which is sitting in the HLT, past the probe, and back into the MLT.

The water in the HLT stays roughly at mash temp through the whole mash, and then when there are about 10 minutes left in the mash, I up the temp on the PID to 170*F. It takes about 5 minutes to ramp the temp up to 170*F on the circulating mash, and in the process, my HLT water has been heated to sparge temp.

edit:here's a pic. my coil is not built into my HLT because I still use the coil it as an immersion chiller when I am brewing at someone else's house and want to be able to grab it and take it with me.
coil_and_probe.jpg
 
Diggin the bottom dump valves, kind of wish I had done the same.

What kind of element are you going with? LWD..ULWD..4500..5500?

I've got temp probes on the output of the HEX, middle of my HLT, and BK and three PIDs. I'm still building it, but when recirculating, I plan on adjusting my mash temperature by monitoring my mash temp on the HEX output and controlling the HLT using it's own probe. When I start testing, I'll have to find the correct temperature difference from the two places, but I figure the HEX output is the optimal measurement of mash temperature.

Good luck with the build!
 
Walker, thanks for the explanation that helps and makes sense.

Diggin the bottom dump valves, kind of wish I had done the same.

What kind of element are you going with? LWD..ULWD..4500..5500?

Good luck with the build!

Im currently running a 5500W ULWD RIP element in what is currently my BK and HLT and I love it. I plan to put the same thing in the new HLT. So what is the point of your 3rd PID with a probe in the HLT?

Although, if he has to do any hose switching it's going to be a pain. I could see it for a cip setup.

I currently have a bottom drain in the BK and MLT and havent had problems with it but I see your point. I guess it wouldnt matter if the HLT had a picup tube or bottom drain, so is it really an issue switching hoses on a bottom drain? I would like to keep it on the MLT. It makes for an effective complete draining and my false bottom setup is simple. On the BK I am also debating a bit, I like the current bottom drain....but I have been considering a whirlpool setup but how effective can this bee truly the concave bottom on a keggle? And how much wort gets left behind in a keggle with a whirlpool due to the bottom.

Thanks for the input guys these are the kinds of issues that I need pointed out to me to get thinking about
 
My HLT and BK PID's are the only ones that actually controls temperature. The MLT PID just monitors the temperature of the mash as it exits the HERMS coil. Overkill I know, I just wanted a consistent look. I have a probe in the HLT for strike water, step mashes, and mash out.
 
And how much wort gets left behind in a keggle with a whirlpool due to the bottom.

Why would you not be able to drain 100% of the wort with a bottom drain equipped concave keg bottom? You draining off to one side higher up the concave? Center drain will also drain 100% of the cone crap you created whirlpooling, a drawback in this design.
A bottom dump harder to connect hoses I never found this a problem as a short 90 with the stub ending at the face of the brewery no reaching up from the bottom to connect the hose. The stub stays fixed with the keggle for CIP.
 
My only critiques would be that I would make the HEX coil about 25' long and mount it in the bottom half of the keggle. After striking the HLT will be about half full and the top half of your HEX won't be submerged unless you refill the HLT (which you would if you were going to fly sparge).
I would also mount the probes and elements as low as possible, so they still function with minimum volumes and you will be monitoring where the cooler water is so that the whole vessel comes up to temp.
The bottom drain on the kettle could also be problematic as brewbeemer pointed out, you won't be able to whirlpool pellet hops and you'll need a false bottom or your hops and break proteins will be transferred to the fermentor.

Nice modeling skills BTW.
 
Why would you not be able to drain 100% of the wort with a bottom drain equipped concave keg bottom? ... Center drain will also drain 100% of the cone crap you created whirlpooling, a drawback in this design.

I meant that if going with a whirl pool set up you cant drain from the bottom and thus there will be wort left in the BK. Currently I have been using a stainer bag for the hops but all my break material gets drained into the fermentor. you can see the layer about 10 min after filling.

Turn those kegs upside down, use a 2" Triclamp with o-ring. I'd never go back.

If I wind up going bottom drain on the HLT and BK I will likely be looking into this. My current BK which will become my BK is already welded.

My only critiques would be that I would make the HEX coil about 25' long and mount it in the bottom half of the keggle.
I would also mount the probes and elements as low as possible, so they still function with minimum volumes and you will be monitoring where the cooler water is so that the whole vessel comes up to temp.
The bottom drain on the kettle could also be problematic as brewbeemer pointed out, you won't be able to whirlpool pellet hops and you'll need a false bottom or your hops and break proteins will be transferred to the fermentor.

Nice modeling skills BTW.

Thanks, the model is so so, there are a few things that are off.

I was planning on a 25ft coil, is this a good length? I would also be using it as a chiller. Mounting it as low as possible is something else I was planning on but didnt really show in the model. I was planning on mounting the out fitting as low as possible and the in as low as possible while still giving the coil a steep enough angle as it curves around to be gravity draining. I want both elements low as well, my current HLT/BK has to have at least 3 or so gallons to cover the element which is a pain.
 
Make the coils large as you can in diameter to keep the height to a minimum, this would also help with your whirlpool action.
A drain still from the bottom of the keg up almost against the skirt (room to weld) to keep the hops and cone material out of your draining process, towards the end tilt the keg a little and get the last bit of wort out. Tippy dump design feature added.
 
Ok so points to incorporate so far;
  1. HERMS coil as wide and as low as possible
  2. HLT will stay bottom drain so I removed the middle support for easier access
  3. I will also move the pumps in towards the center so they sit directly below the space in between the kettles.
  4. Temp probe for HLT PID will be on the output of the herms coil (should it be at the output of the HERMS on the HLT or the input fitting on the MLT?)
  5. Eventually I will likely add a panel mount digital thermometer to measure actual HLT temp.
  6. Im leaning towards putting a whirlpool in the BK but I have only seen this done with blichmann style brewpots not a keggle.

Still debating on;
  1. How to set up whirlpool in Boil Kettle
  2. Should the HLT be bottom drain or side drain with a pickup tube
  3. Brewing software is looking more and more appealing, what are the benefits over PIDs

Im also starting to think about wiring, I have a 50A GFCI breaker laying around but with my service 1 5500w will pull 23.3 amps so 2= 46.6/50 = %93 so even with that I wouldn't be able to start my boil until I was done with my final sparge. If I went with a 4500 in the HLT, that would put me at %84 which might make it doable.

BrewStand5.jpg


BrewStand6.jpg
 
A google image search of "whirlpool port" or 'keggle whirlpool" should give you some ideas.

Definitely bottom drain the HLT unless you want to either soak up a few cups of water after every brew or leave a few cups to get skunky until the next brew.

If you plan on further automation other than temp control, then a BCS would be the way to go. You have to weigh the price of the unit against the cost of however many PID's you'll need and give some consideration to how much you'll utilize the other functionality of the BCS.
 
Finally picked up a really straight keg so I plan to start on the HLT soon. So first thing I need to find a 25 ft 1/2 in ss coil for the HERMS. I figure 25ft should be adequate for both heat exchange and chilling after. So far ebay looks like the best option, anyone else have any cheaper suggestions? It comes loosely coiled which should help but has a .020 wall. Im still debating on if I should go with a bottom or side drain on the HLT. Side might be more convenient but also could get in the way of the coil due to needing a dip tube. I also looked into going with tri clamps over the cam locks but I think the price difference makes it not worth it
 
A nice thing about the bottom drain is the kettle is dry when you are done. I hate standing water in there.

Normally, I would recommend This One but it is out of stock. Something like THIS ONE will make your life soooo much easier. It is worth the extra to have it in that nice coil.

But, if you insist on saving a few bucks, then NY Brew Supply would be the place to go.

Also, on automation, the guys at BrewTroller have some great things available, and it is a very active place.
 
Google sketch up it is! I was leaning towards getting my stainless from northern brewer. I am planning on running a 25ft 1/2 coil since I feel that is all I will need for adequate heating and cooling. I havent had time to look into the brewtroller yet but what I have heard has intrigued me. Really it will come down to how much more expensive it will end up being over PIDs and the amount of added features. So in researching whirlpooling in the BK im wondering where the return fitting should be placed. As low as possible or up as high as possible for the minimum batch size you will run?
 
No progress on my new stand, I did however order my lid and stainless fittings to get rolling on the HLT so updates coming soon.

I have been going through brewing brewing withdrawals and guest brewed at Riverport brewery and thought you guys might like to see some pics

tuns.jpg


fermentors.jpg


Heres the MLT after finishing up sparging.

mash.jpg


The Hot break
hotbreak.jpg


Me and Pete on the platform, I was on boilover watch
meandpete.jpg


Hop additions
Hopadditions.jpg


Thats what I call a trub cone
trub.jpg


The inside of the boil kettle after cleaning it out
boilkettle.jpg


Pete and Marv hooking up the chiller
chilling.jpg


The Yeast ready to do work
yeast.jpg
 
So I brewed in the cold today, hopefully the last or at very least the second to last time on this set up. Its been in the single digits and negatives for the last week, luckily it warmed up to almost freezing today.

Stand.jpg


I started putting a layer of reflectix and then a layer of rigid foam insulation on top of my mash and it has helped my temp retention a lot.

Insulation.jpg


I decided to re-organize and clean the supply room today while waiting during the mash and boil

Room4.jpg

Room3.jpg

Room2.jpg
 
Here is the keg I picked up from Pete at Riverport Brewing. Its it perfect shape and should clean up really nicely. You can see the new stainless lid which just showed up on top as well.

keg.jpg


Here is the top along with my keg cutting guide ready for action.
KegTop.jpg


I picked up a control box at the scrap yard a few months ago and plan on using it with the new stand.

Panel.jpg


SO Now I need some help on a few things.

first does anyone know where I can get a female side for this connector?

pinout.jpg

Plug.jpg


Second the scrap yard has a ton of thin walled 1 1/2'' square tubing so I am starting to plan my stand. What advice do you guys have?
My current stand is 34'' high including the casters to the bottom of the kegs. This seems to work well for me and I am thinking I will stick with it. How much space would you recommend between the kegs? I was thinking of going with 5ft long which would give me about 6'' between kegs and I could just cut a few 10ft sticks in half. Too much? Im also going to go with the biggest casters I can find because the ones on my current one are terrible to move around.
 
I have a late shift tomorrow so I will be picking up my steel for a stand!

I have seen a wide range of widths and lengths for stands. Right now Im thinking 5 ft will still be good, giving me 6 inches between each vessel. and am happy with my current stands height of 34''. What recommendations do you guys have on width? is 18'' sufficient? I cant see why it would need to be much wider than a keg but have seen some that are 24''

I have sen comment where 6" between vessels will have some of the heat applied to one vessel get to it's neighbor.

The steel lengths at Lowes near me are standard at 6ft, so I'm thinking to go with that, less cutting.
 
I finally have a day to spend working on my stand and need some quick advise guys.

So I went with some 1 1/4 .049 wall tubing for the stand. Due to the thin walls I was planning on stacking 2 vertically for the two main supporting lengths and stitch welding them together. The kegs will sit in the tubing making the inside distance between the two top runners 16, and 18.5 total width of the stand. Seems a bit narrow for supporting 300lbs. Most stands I have seen arent much wider than the kegs anyone else have any stability issues?

I could run my double supports horizontally making the stand 21'' wide, sacrificing a bit of strength for width

If it were me I would make the stand wider plus use two horizontal tubes one above the other with spacing and build it a cantilever design. You could use 1/2 SQ tube cantilever and stronger than the basic single 2" SQ tube design.
Add your cross braces to support any size pots or keggles.
 
I realize I have been terrible at updating this thread but I have managed to make progress. The HLT turned out Awesome, the keg I got is in perfect shape.

Heres a pic of the fittings installed in my new HERMS HLT

DSCF5953.jpg


And from the outside

DSCF5956.jpg


And the fittings all soldered up

DSCN1049.jpg


Inside of the fittings for the sightglass and HERMS coil out

DSCN1050.jpg


Bottom drain from the inside

DSCN1052.jpg


All Three from the outside

DSCN1053.jpg


And the whole thing

DSCF5952.jpg


More pics of the other bits tommorrow
 
Here is the stand going in the makeshift paint booth.

DSCN1058.jpg

DSCN1057.jpg


After Primer
DSCN1056.jpg


And then a few coats of Epoxy gloss black

DSCN1060.jpg

DSCN1061.jpg
 
I picked up some 2 piece ball valves for this section of the build and plan to continue to phase out the brass ones.

utf-8BSU1BRzAwMzUuanBn.jpg


Heres a shot of the inside of the HLT

utf-8BSU1BRzAwMzQuanBn.jpg


I installed an RTD probe on the output of the HERMS coil

utf-8BSU1BRzAwMzMuanBn.jpg


The HLT all put together, I just need to calibrate the sight glass

utf-8BSU1BRzAwMzIuanBn.jpg


My Control panel

utf-8BSU1BRzAwMzAuanBn.jpg
 
Back
Top