• Please visit and share your knowledge at our sister communities:
  • If you have not, please join our official Homebrewing Facebook Group!

    Homebrewing Facebook Group

Beginning my EBIAB Brewery Build..

Homebrew Talk

Help Support Homebrew Talk:

This site may earn a commission from merchant affiliate links, including eBay, Amazon, and others.
In fact, I could even semi seal the gap on the bottom side of the box, cut holes in the side of the box on the same side, then the air draw would be from one side inside the box, across the fins inside the box, through the box on the top gap, then along the bottom fins and out..

but I doubt that is necessary...

We have some hot weather coming so perhaps, I can test by say starting out at 50% power and measuring heat sink temp, and then gradually increasing power on a scorcher day, and see what the measurements do?

If it means increasing the size of the opening in the MDF, then I can do that after the fact
 
I'm actually thinking of mounting the fan so that it 'pulls' air instead of pushing it.... That way it pulls it from inside the box too...


The gap on the top end is equivalent to a 3/4" hole... I might also drill a couple 3/4 " holes in the side of the box, and put some filter material over them, so that the air is actually going past the top fins too...

If I 'push' air and say I set a glass of beer on top of the box and spill it, I don't want it 'pulling' liquid into the box, but rather 'pushing' it away from it..

In that configuration, I was thinking it would cause 'high speed' air to flow past both sides of the heat sink...


I dunno, I night order a couple extra SSRs just to have on hand in case I screw up and need to reconfigure things a little...

My initial tests will be with just water, just as we're getting into the hot months, and I have a laser temperature meter I can use to watch behavior...
Pushing the air across the heatsink generally works better than trying to pull air across it, unless the fan is pulling thru a "wind tunnel" with the heatsink in the tunnel. Pulling does not generally produce high speed airflow across items on the inlet side of the fan.

I would recommend never putting any liquid containing vessel on top of a power control panel.

Brew on :mug:
 
I would recommend never putting any liquid containing vessel on top of a power control panel.

Brew on :mug:


I recommend that too, but I like to build to account for what 'might' be done that isn't recommended... and when alcohol is involved, people often do what is not recommended without really even having to try.. lol

I'm thinking the air on that side of the fan 'has' to go somewhere.. and it's right over the vanes of the heat sink.. Why is the volume that goes out of a fan, greater than what goes in? I'm thinking the fan pushes x amount of air, whether pushing or pulling, and if there is a restriction to slow that down, then it is the same either direction... I'm not wrapping my head around the difference it makes.. Why is it different?

Also, I'm wondering what impact the distance between the fan and the heat sink might make, pulling or pushing.. Is closer better, or a little farther away?


I just don't like the idea of pushing outside air at the box where there is an opening for dust, moisture, etc, to get in there, and this is a 'very' dusty environment.. (I live in the woods, so think a dust environment like that of 'camping')

Most people aren't even using fans from what I can see, right?

I calculated the fin square inches on both the tower type of heat sink that most are using without a fan, and it is approximately 16 square inches (not counting both sides) with out the mounting surfaces (fins only) vs the one I'm using and it is 24 square inches on just the half sticking out of the box (again not counting both sides of the fins), with another 19 square inches of fins on the side sticking into the box, and it has a larger mounting surface (11"sq vs 14"sq)... and a fan...

Or am I mistaken about how many people are using fans, and are those people that are not using fans having problems?

I dunno, maybe I'll make a new one... I just hate wasting material... 1" MDF ain't cheap.. ;)

You are correct. Conservation of matter requires the same amount of air going into a fan as coming out of a fan. The difference between inlet and outlet sides has to do with the air flow patterns. The air flow out of a fan is more directional, so that in the direct output stream the mass flow per unit area is higher than on the inlet side. You can feel this for yourself. Place your hand two inches from the outlet of a computer fan, and then the same distance from the inlet side. You feel much more air pressure on the outlet side. You can force the air flow on the inlet side to be more directional by creating a duct thru which all of the inlet air must flow. Placing the heatsink in the duct will then give optimal air flow over the fins.

Can't answer the question on percentage of people using fans vs. not, but many brewers, with external heatsinks, do not use fans. I would expect most of the brewers, with heatsinks inside the enclosures, do use fans.

Brew on :mug:
 
Eh, I just said the hell with it and made a new one... I also shifted the heat sink slightly away from that side, so that there is now 3/16" gap along that edge, and a 1/16" gap on the other, as opposed to 1/8" on both sides...

I thought about it and I can put a short skirt on the back of the wood box and not have to worry about any spilled liquids getting sucked in... I don't know what I'll do about dust, maybe put some sort of filter on the outlet side of the fan?

Just the portion of the heat sink that is outside of the box, still has 50% more fin area than the entire tower heat sinks people are using... and then I still have 80% more of that inside the box...

I can't imagine this will have heat issues, but you never know, I guess...

Brew-Control-001.jpg
 
So, yesterday, I decided to marathon it and wire the thing up...

I got it all wired up except for the ammeter coil.. That requires splicing of wires, and for that I absolutely must wait for the heat shrink to arrive.. All the heat shrink I already have is far too big..

I was going to heat shrink all of the connections, but didn't want to wait, and I'm glad I went this way and if every connection was heat shrunk, it would have made trouble shooting a bear..

Which brings me to an odd problem... Somehow (I know where it's coming from now), power was being back fed to everything through the various lights and devices when the power was applied to the unit but the switch was set to off... (see the video below)

It was a low voltage in the 40v range up to about 65 volts depending on whether the switch was set to off or pump.. when the switch was set to 'on' everything was wonderful...

So, after a bit of trouble shooting, I found that if I disconnected the black leg of the control circuit supply on the line side of the contactor.. The problem went away, and everything worked as it is supposed to except that the 240v system ready indicator light no longer worked...

So, I needed to find a way to switch that leg so that is stays off until the selector switch is set to 'on'... I was thinking I might have to add a relay, but it turns out there is an easy fix... It turns out that the switch I used is modular and all I need to do is order more 'blocks' to add contacts to it... So I actually order another switch, seeing as it was only 30 cents more than ordering two blocks.. I'll just take the blocks off of it, attach it to the existing switch and wire that black leg from the supply side of the contactor through it, then it can't back feed anymore, but will be reconnected when the switch is set to 'on'

 
Last edited by a moderator:
The other issue I have is that I made a mistake when I ordered the large LED indicators.. The blue one for the pump, I accidentally ordered as a 240v version instead of 120v...

I thought, I would be able to just swap the blue lens for the green one, and reconfigure the system so that the green system ready light would operate on 240v instead of 120v, but that is not the case.. The actual LEDs are the specified color as well...

So I ordered a new 120v blue one, and a new 240 v green one, and when they arrive, it will be easy peasy to swap them out..

Anyways, besides building the wooden case to mount it all in, all I have to do is mount and wire up the fan, finish installing the Ammeter coil and then lace out/organize the wiring and close it up...

I have some leaks to take care of in the plumbing.. Man, the Quality Control on these SS NPT fittings from China is 'atrocious! Need to go and buy a couple replacement fittings, and then redo part of it..

The new pump motor is awesome, and not only is it all quiet now, but pump volume has even increased...

Tested the system out last night, and it's awesome... Did a mock mash, rinse step, and boil down last night.. So nice, so quiet, no CO2 fumes, precise control... and it seems to be 'faster' too....

This is going to be a huge improvement over my prior system...

So, wait for the stuff to arrive, fiddle around with the plumbing, and take a break from this for a couple days in the interim...

Then on to the crane and the basket....

Getting there.. getting close! :rockin:
 
Did a practice brew session, and it took 2 hrs and 45 mins.. add an hour for set up and then clean up and tear down afterwards, and it will be under four hours.. That's providing I crush the grains measure out the hops, and calculate the recipe the night before...

But that was total time.. Initial fill, heat up to mash temp, figured 20 mins for mash (that 'could' go up depending on a lot of variables), then raise to rinse temp, and another ten minutes of soaking, then raise to boil, boil for an hour, chill to 68 degrees, 5 mins for circulating and oxegenating after pitching yeast, then complete pump out...

Nice! With the old set up, I spent two and a half hours doing the mash the day before, then probably 6 hours on brew day...

No more carrying heavy buckets of liquid, no more carbon monoxide fumes, much quieter, faster, precise.. no more rushing around connecting and disconnecting hoses at each phase.. No more getting propane bottles filled.. No more nasty soot... Gonna be really nice!

Still got a lot of work to do yet before I'm actually brewing though...
 
So, I got the parts to replace the lights and add contacts to the main power switch.. Installed it all, and that cured the issues with back feeding.. and now the proper color lights are where they're supposed to be.. :D

So, I decided to do a quick test boil with it all and with the fan in place and all that...

I measured the temp on the heat sink, and it was 80 degrees, where as it had been 120-150 before without it... I was smelling a mild 'electrical burn' condition but could not figure out where it was coming from... I felt all the components, but I could not find anything that was getting hot..

So I continued on, going back inside the house to gather some stuff, when it dawned on me... I had hooked up the 115v fan to a 220v supply! Too late! By the time I got out there the fan was dead...

I went online to Auber Instruments, and apparently, they no longer sell the fan.. So I found one on ebay for 10 bucks, same size, brand, and voltage as the now useless one, that should be here Friday...

So now, only one issue remains before I can close it all up and go onto the crane and basket, coming back later to build the wooden case for the controller...

I can't close the box.. The new contacts increased the height of the switch so that the connectors on the circuit breakers interfere with it.. I ordered some right angle spade lug connectors that 'might' give it just enough room.. But I might go to plan "B" anyways that I already picked up the materials for 'just in case' as it's just real tight in there after lacing everything out and trying to coil up the snake between the two halves...

That is to make a 3/4" spacer out of plastic.. I'm thinking I might build up a thick rectangle from 1/4" ABS (using ABS cement or acetone to weld it together), and then machine it to fit the box.. It will be a different color, but who will see it anyways..

Plan 'C' is to drill new holes for the circuit breakers on the side of the enclosure and then installing them sideways... But I'd rather keep them where they are, if possible...

Anyways, gonna start designing the crane today, and maybe start working on the basket and COFI tube... I have a week while waiting for the fan to arrive, to deal with a solution to closing the box...
 
Showing the inside of the lower box half, inside of the box upper half with the new switch contact mounted, how I mounted the (now burnt up) fan, and the new lights with the right colors in the right place (no back feed condition anymore either)...

brew-controller-002.JPG


brew-controller-003.JPG


brew-controller-007.JPG
 
Everything but the controller fits inside the kettle... Motor, element, brew sculpture bottom, hoses, everything...


I could have put the basket in there too and still fit everything in there, but I want to work on the basket yet.. The thing is, I'm thinking of mounting some Stainless screws sticking out every 90-120 degrees around the top of the basket so that it will sit at the top without the crane holding it, but then I will not be able to store everything in the kettle and still store it in the brew cart.. So, I may look for some other 'removable' way to hold it at the top without the crane.. Whatever I do, it has to be able to have some sort of clip on mount for the COFI tube too...

brew-controller-001.JPG
 
So I made a spacer for the enclosure today out of built up 1/4" ABS, everything closes up nicely, even without the right angle spade connectors, but the SS screws that came with it are too short now... hence the blue tape...

So I have to go get some at the bolt store this week.... Can't really button it up permanently till the replacement fan gets here next Friday, anyways.. sooo..

I love working with ABS plastic.. Machines like a dream, and all that is needed to glue it is acetone....

Have the crane structure mostly designed, and wouldn't you know it, I'm short about 30" of 1" square tube.. I might redesign it so that part of it is made from 1x2 rectangular tubing, or I might pick up another 20' of the 1x1 stuff.. (You can never have too much steel tube laying around).. Anyways, once I have settled on the design and have the material together, I can weld that up.. Then take a flap sander to the whole assembly and paint it..

After that, nail down what I want to do with the basket, get that together, pick up about 50' of 1/2" vinyl tubing to transfer the wort into the fermenters, clean out the fermenters and the chamber, and I might be ready to do a virgin brew... :rockin:

After that, start looking into replacing the glass carboys with a plastic conical...

brew-controller-002.JPG


brew-controller-003.JPG
 
Picked up longer screws to allow for box spacer... replaced spade lug connectors on circuit breakers with right angle versions... Box closes nicely/easily now.. Finished installing ammeter... Waiting on replacement fan and then the controller itself is done...

Still left to do:

*) Pondering how I want to hang basket in/on kettle and integrate COFI tube...
*) Starting design of wooden case for controller... Then need to make it..
*) About to begin crane structure.... Hoping to put a dent in that this weekend

Then the brew side is pretty much done...
Short list is genuinely getting short...
:ban:
 
Finished the wooden box for the controller... I may work on the finish more sometime down the line (fine sand and wax).. or not....

There is a 3D carving on each side of a hops leaf and a few hops... Then The Word "MountainCraft" above it and "Brewery" below it...

Finished-Controller-001.jpg


Finished-Controller-002.jpg


Finished-Controller-003.jpg
 
This is how the controller installs.. The pieces of MDO on each side connect the MDF plate on the back of the controller to the wooden Box giving support to the whole controller..

There is space underneath the controller, to roll up and store the hardwired cables...

The face plate sits flush in a routed pocket... Need to pick up some small detail screws for the face plate to finish it off...

Finished-Controller-004.jpg


Finished-Controller-005.jpg


Finished-Controller-006.jpg
 
And here's the beast in it's natural environment....

IT'S ALIVE!

:ban:

All that is left to do is the crane and basket... Then pick up 50' of 1/2" vinyl hose for transfer to the fermentation chamber and I'm ready to make beer...

Finished-Controller-007.jpg


Finished-Controller-008.jpg
 
Just picked up the finish screws for the panel face, and as soon as I install those, I can call this part of the build "DONE!"

Then I'll post this in the thread where everyone shows off their controllers.. ;)

I have another project I have to get to before I start on the crane, but I'm itching to get the crane done because as soon as it is, I'm like 'right there' on finishing the brew side of this system upgrade, and then I can brew a couple batches before I move onto upgrading the fermentation/kegging side of things...

:ban:
 
What are thinking for your basket? Are just going to recirculate into the top or where you doing to build/buy a brew boss cofi filter?
 
I have Bayou Classic boil/fry basket, and I plan to build a COFI tube..

As I've been reading in threads here and there, I can plan on a larger crush than I used before, and also will probably have to punch out some of the holes to increase open area, all to avoid stuck sparge/overflow in the basket.... :eek:
 
I am curious what you end up making. I am moving to BIAB myself but am likely going with a close sided basket similar to Colorado brew systems'.
 
Awesome!

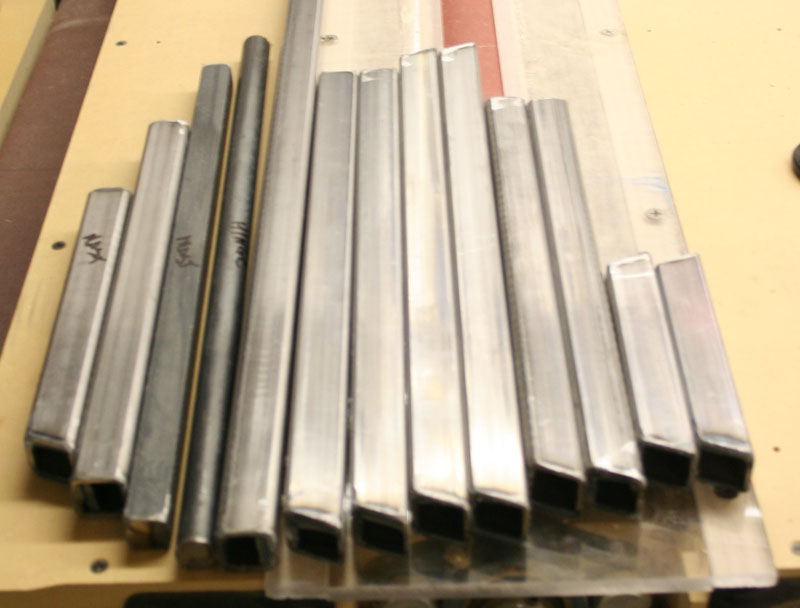
Cut all the pieces, angle cuts, round bar, square bar, square tube, everything to complete the crane for my Brewery!

All I gotta do is pick up some MDF to make a welding jig from and then once I cut that out, I can weld it all up...

Then I'll be 'real' close!
:tank:

Brewery---crane-pieces.jpg
 
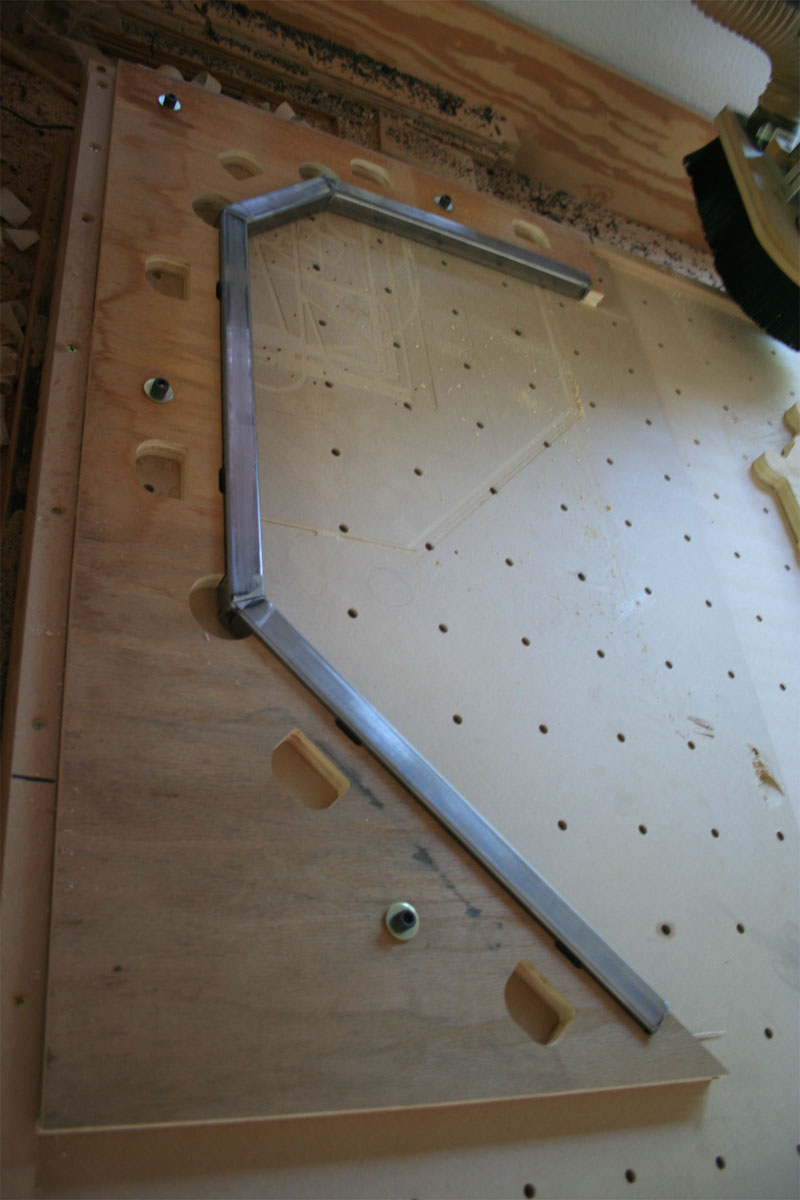
Just finished the welding jig for the crane boom, and test fit the pieces I cut last weekend..

I think it's gonna work awesome..

So because of the heat, I'm home for the rest of the week, and will have the early morning hours to start welding it up...

I have to make two of these assemblies, both must match identical.. So the jig was a necessity, at least with my limited welding skills...

So all I gotta do is take the jig out to the shop and start welding, grinding, sanding, drilling, etc..

Brewery-Crane-Welding-Jig.jpg
 
Welded up the two boom arms and the mast structure this morning...

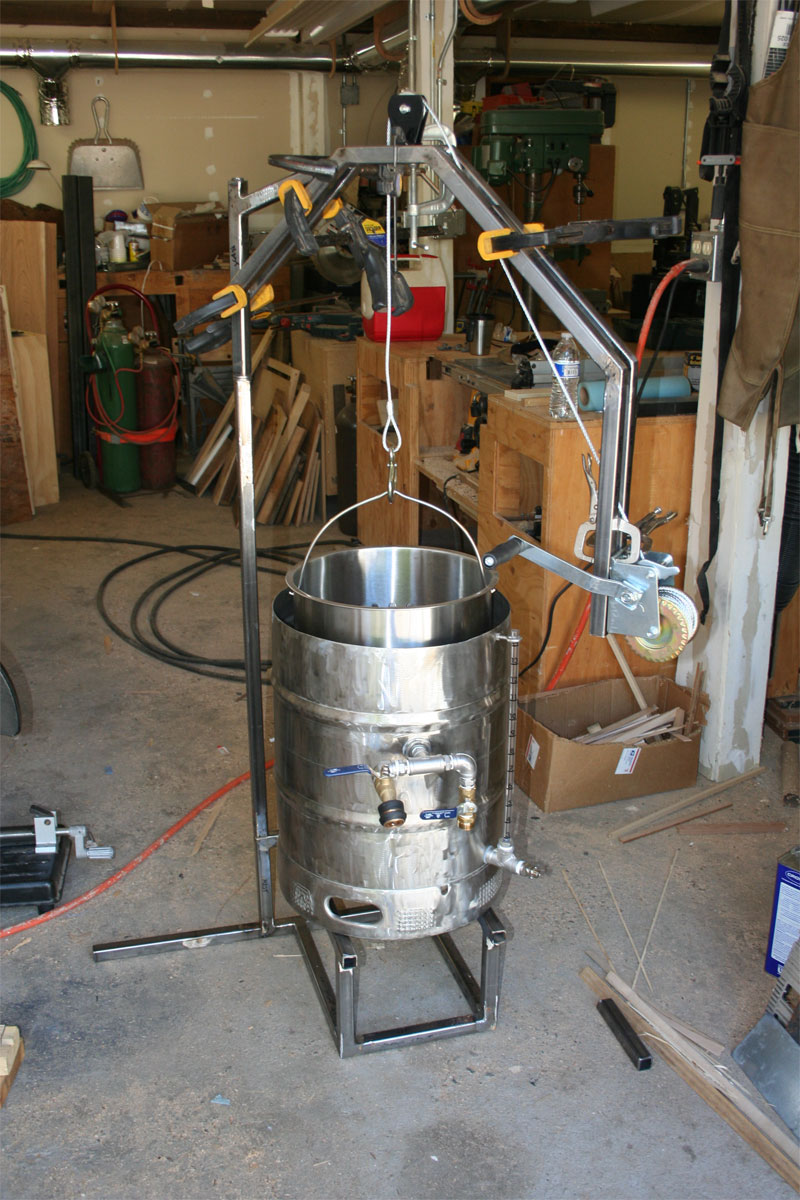
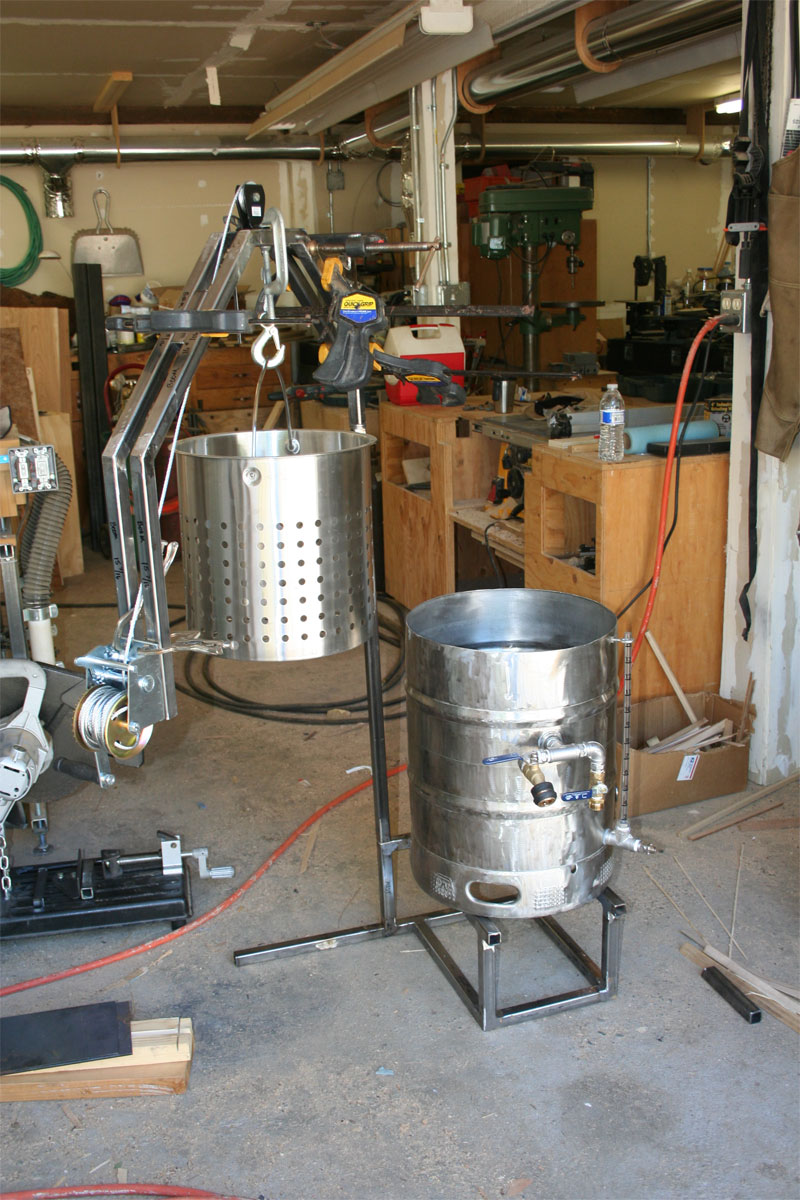
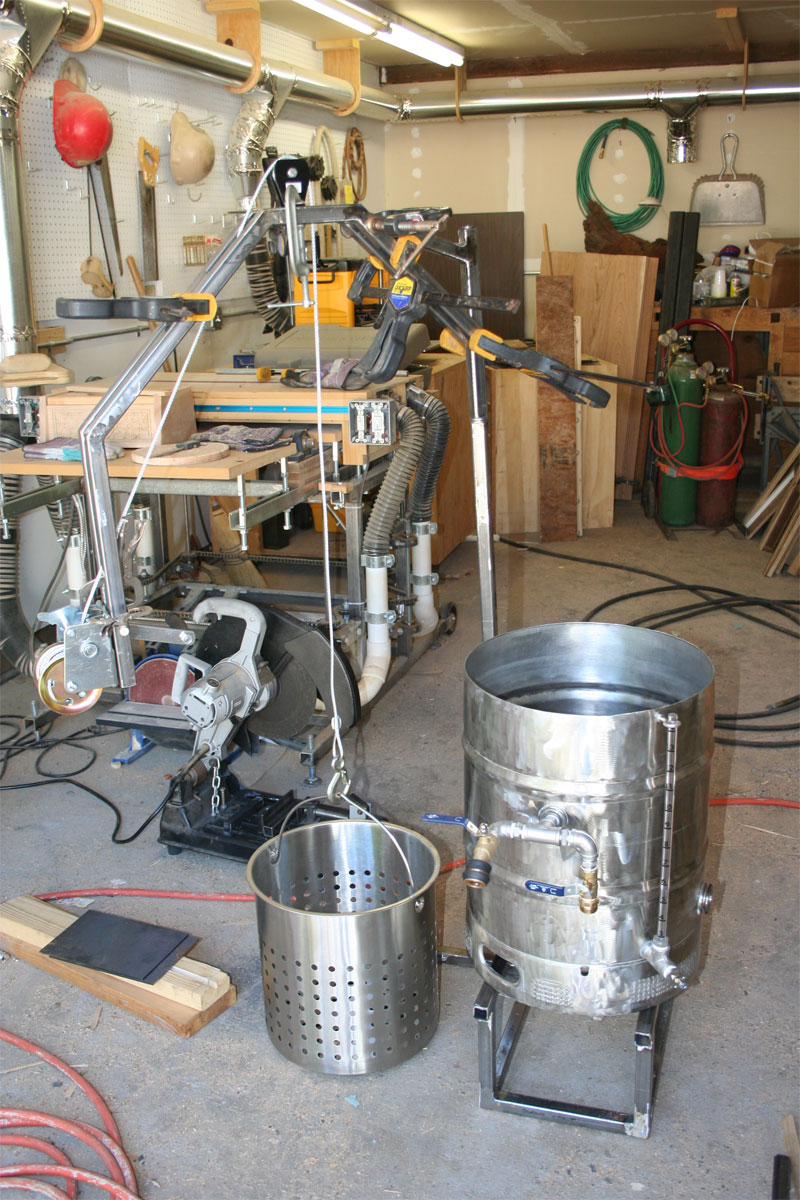
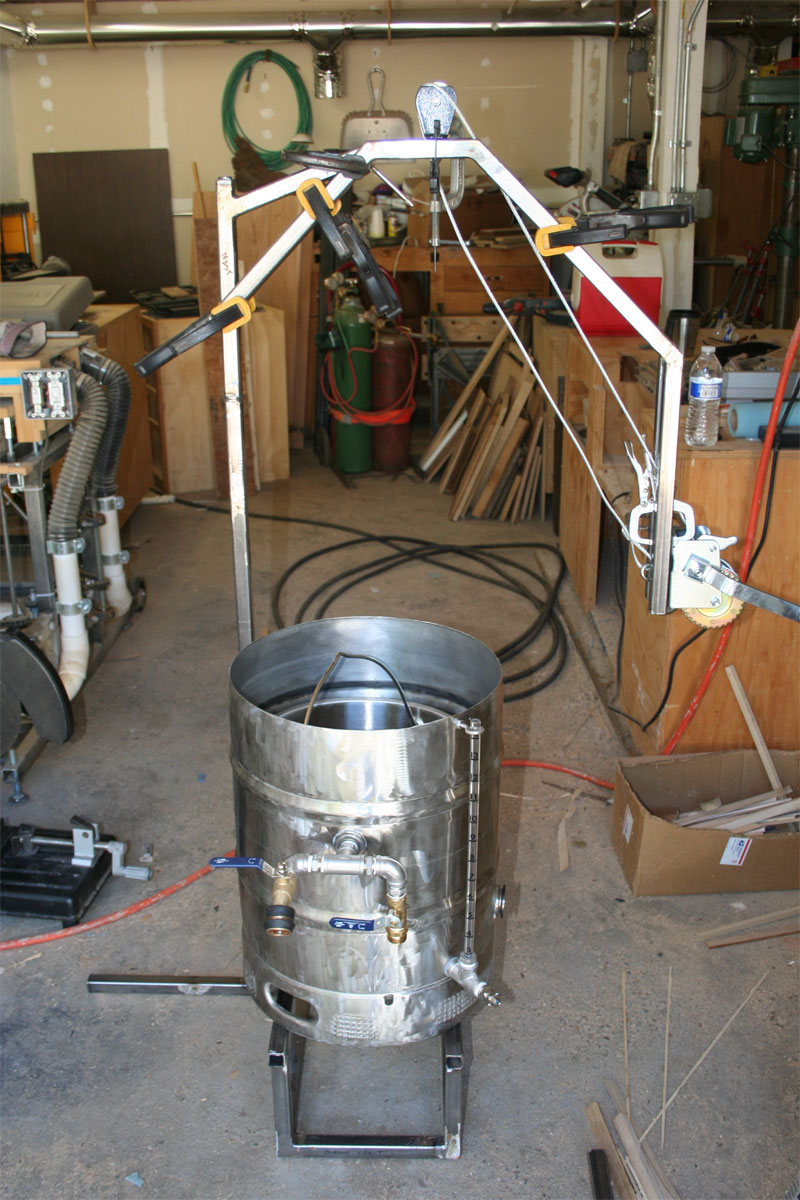
Put it all together using clamps, and put the kettle on it and tried it out.. Gonna work awesome!

Brewery---Crane-2.jpg
 
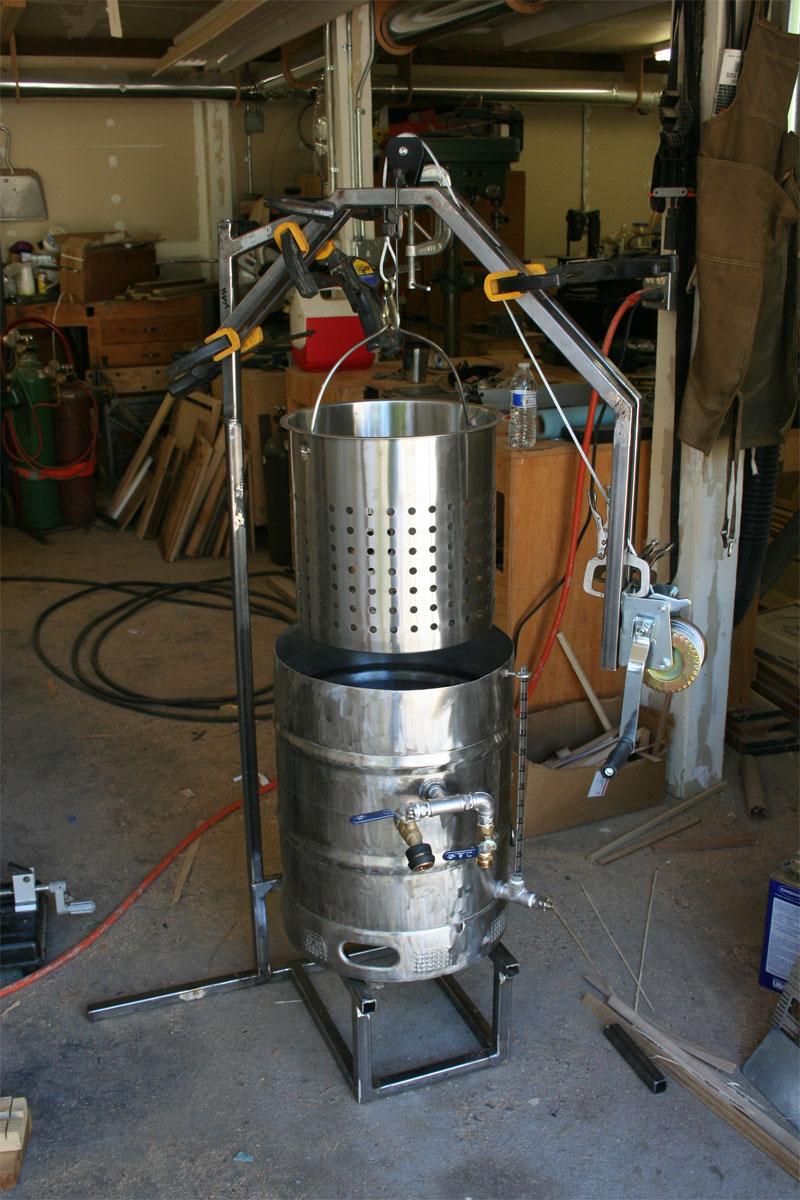
Basket lowered to ground (or table top).. Also, how it will all swing out of the way and back against the wall when not in use...

The mast leans a little one direction or the other due to slop in the slip joint I installed to allow disassembly.. It's not any issue structurally, but it bugs me.. So I will probably drop a few welds on the piece inside, and then grind them down to take up the slop but still allow insertion and removal without hassle...

So I need to make mounting plates for the winch and sheave, and then weld them to the two boom arms.. I need to drill a couple holes for pins to attach the boom to the mast, I need to drill and tap the 3/4" bar at the very top of the mast so I can install a keeper screw and washer... I need to resolve the slop issue, then just go through the hole thing and inspect the welds, making any repairs if needed, take a flap disc to the whole thing to clean it up, coat it with something.. Thinking I might use spray on truck liner or even that spray on rubber stuff.. then install some rubber feet, and some plastic skid plates on the two rails where the keggle will sit..

Then I can call the crane 'done' and I'll be like right there... Only need to mod the basket and make a COFI tube...

It's getting really really close now... I'll be brewing in no time!

Brewery---Crane-5.jpg


Brewery---Crane-6.jpg
 

Latest posts

Back
Top