BrewBeemer
Well-Known Member
Thanks for the photo that clears up my idea about NOT removing the cable to the probe besides the RTD idea.
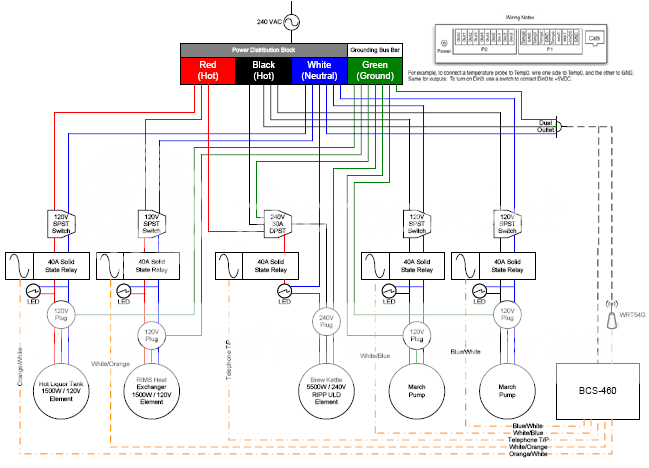
In the probe lead is that a two conductor with a grounding shield wrapped around the outside of the conductors and if so is it grounded at the 460 unit?
I'm thinking for my use to cut the probe cable close to the probe then using Radio Control model gold plated connectors in the right conductor count allowing for simple removal of the keggles for transporting, storage or cleaning of the brewing system. Silicone seal the cable entering the probe as well the cable cover, grounding shield and wires inside at the cut end behind the connector making for a waterproof probe as well.
 I can see how this may never end..


![Craft A Brew - Safale S-04 Dry Yeast - Fermentis - English Ale Dry Yeast - For English and American Ales and Hard Apple Ciders - Ingredients for Home Brewing - Beer Making Supplies - [1 Pack]](https://m.media-amazon.com/images/I/41fVGNh6JfL._SL500_.jpg)