ANVIL FOUNDRY ALL-GRAIN BREWING SYSTEM

Homebrew Talk - Beer, Wine, Mead, & Cider Brewing Discussion Forum

Help Support Homebrew Talk - Beer, Wine, Mead, & Cider Brewing Discussion Forum:

This site may earn a commission from merchant affiliate links, including eBay, Amazon, and others.
What pre-boil volume do you shoot for with a 2.5 gal batch? 3.5 into the fermenter?

a little more than 4 gals of initial water to start (no sparge) depending on the grain bill that gets me close to 4 gals pre-boil vol after grain absorption.

Boil off is .75 gals (I need to double check but I think i need to boil at 60% power at 220v).

I am allowing for .33 gal trub loss


That leaves 2.75 gals into a 3 gal fermenter (I have a cheap conical and a DIY bucket. prefer the conical but need blow off tube.

That leaves 2.5 gals for the torpedo keg.


Two things. I am using the default water volumes in beersmith so I will need to verify with my actual numbers. Secondly, I should be cutting back my volumes 1 or 2 quarts. While the kegs are 2.5 gallons, I end up spurting beer around the room when I purge the keg and fill with a layer of CO2.

I prime my kegs and let them age/naturally carbonate in my fermentation mini fridge. I mini fridge kegerator is too small to hold more that one keg at a time which means I can only have one keg on CO2 at a time.
 
Last edited:
You could keep the NEMA-5 plug (standard 120V) attached to the Anvil, then use the same receptacle on the end of your GFI cable that runs to your (hopefully) NEMA-14 (4 prong) dryer outlet. An older, NEMA-10 (3 prong) dryer outlet should still work, but realize that it's a deprecated standard that isn't allowed in newer houses (since 1996 code).

The ground/neutral situation has been addressed further up the thread.

TLDR: with the 11-12 amps at 240V the Anvil pulls to make 2800W, even using the neutral of a NEMA-10 should be sufficient for GFI protection, as the loads are purely resistive (most 240V breakers support minimum 20A) . With a NEMA-14, which has a dedicated ground, this isn't an issue, you'd just pull the 4th neutral bar from the plug and use just hot-hot-ground.

That way you can switch between 120/240 with just the switch on the Anvil and your adapter/GFI cable.


I am using a dryer cord from home depot to plug into the 220. I am splicing it to add the inline gfci :

https://www.amazon.com/gp/product/B004SBV6BE/ref=ppx_yo_dt_b_asin_title_o04_s00?ie=UTF8&psc=1
Then using this on the anvil side. It's 15 amps but as noted the anvil at 220 pulls 12-12 amps


https://www.homedepot.com/p/Leviton...P-_-V1_M1_CA-_-Product_URL&ecc_ord=WJ16025334

my dryer outlet is the older 3 prong type.

Am i good? Should I up my life insurance policy?


The house wiring/outlets are the old 2 prong no ground wiring (although there are a few more recent grounded lines added for the kitchen and bath).

Though it's not code compliant now to use 3 prong dryer outlets in new installs, the neutral and ground wires in all outlets ultimately get tied together, usually in the main junction box.

For the purposes of heating water/wort using resistive elements, only the two hots are used. The GFI has need to connect to ground, which even on the neutral line of a NEMA-10, is still tied to ground in the main junction box.

The 12A current is well under the load supported by the circuit breaker, you should be fine.


thank you
 
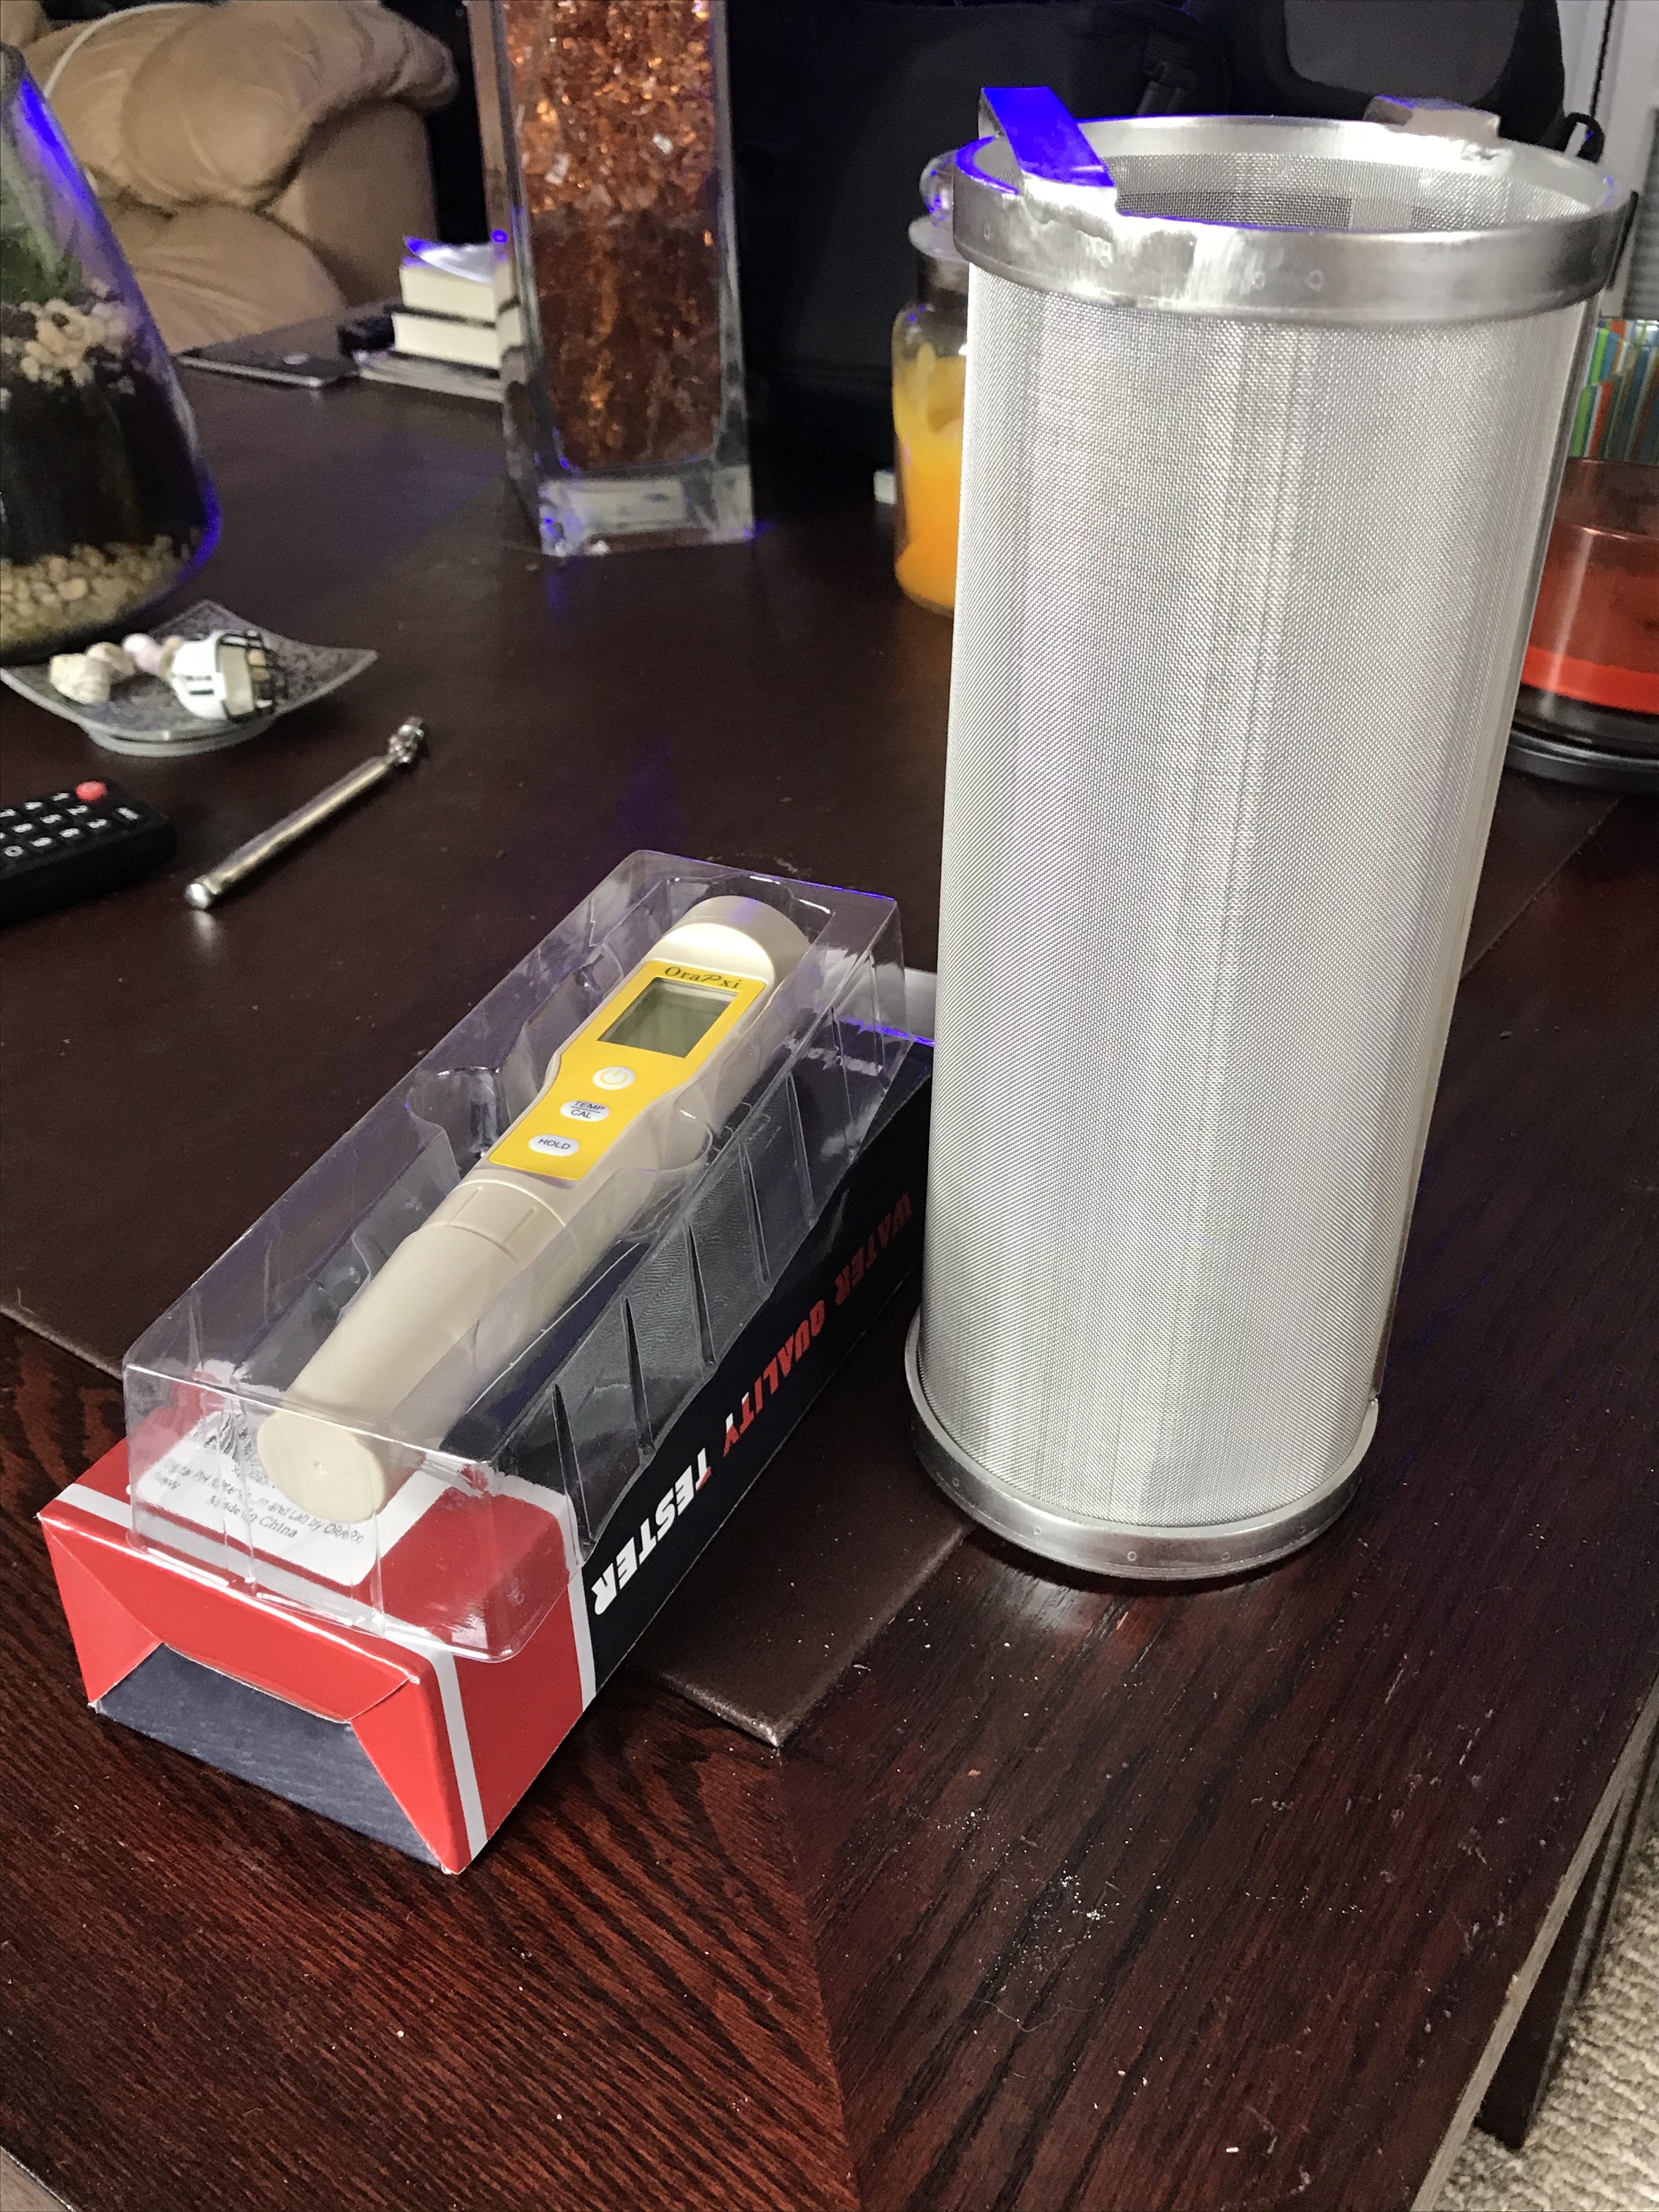
Getting ready for the inaugural brew when it arrives. Some goodies arrived today

IMG_2561.jpg


I've been using muslin bags for my hop additions as the hop spiders were to big for my brewpot. I am looking forward to being able to to drop into a single container as opposed to tying separate bags for each addition. A few years ago I dropped my Ph meter before I could even measure the first brew. I have been using a few water calculators and the municipal water report so I am confident I'm in the ballpark, however it will be assuring to measure a few minutes into mash to confirm my pH. Because I have a reef tank I always have 5 gals of RODI water on hand, but I find it harder to dial in a water profile starting with a blank slate. Granted the municipal water will vary with each brew, but until I can find the right "recipe" of water additions to use with the rodi, I'll continue to tweak the tap.


I ordered ingredients from More Beer today based on what I came up with on BeerSmith. Here is the plan of attack (note: I'll update BeerSmith with the alpha acids when the hops arrived, for now I am using the default numbers).


For my fellow number geeks who like this stuff:

Wile E. Pale Ale

First the water profile using EZ Water Calculator SpreadSheet 3.0 and the avg from muni water report
No sparge

4.15 gal Tap
2g Baking Soda
2g Calcium Chloride
2g Epsom Salt
2g Gypsum
2.5ml Lactic Acid (I plan on starting with 2ml and then see if I need the remaining .5 mls after doughing in)

CalciumMagnesiumSodiumChlorideSulfateChloride / Sulfate
(Ca ppm)(Mg ppm)(Na ppm)(Cl ppm)(SO4 ppm)Ratio
Mash Profile:861645801300.62
Palmer's Recommended Ranges:
50 - 15010 - 300 - 1500 - 25050 - 350Below .77, May enhance bitterness

Est Ph: 5.43

Grain Bill
5.5 lbs Pale Malt 2row
0.5 lbs Great Western Crystal 15

158° Strike
152° Mash 60 minutes
168°+ mash out

Boil 60 min

Hop Schedule

60min
.25oz Amarillo
.25oz Cascade

15 min
.25oz Amarillo
.25oz Cascade
.25oz Citra

Steep/Whirlpool 170° 10min
.25oz Amarillo
.25oz Cascade
.25oz Citra


Dry Hop 3 Days (days 11-14)
.25oz Amarillo
.25oz Cascade
.50oz Citra

1/2 Whirfloc tab 15 mn

1/2 pkg Safale 05. Pitch at 70°

Ferment @ 65° - 67°

Keg and prime with DME after 14 days.


Estimated OG: 1.053 SG
Estimated Bitterness: 47 IBUs
Color: 5.1 SRM
Estimated ABV: 5.5%
 
I’m leaning towards The Anvil Foundry and I’d plan on using a BIAB in the malt pipe because I double crush and I like the efficiency I get when using one now in my 10G Igloo cooler. What I’m wondering is how sorry would I be if I bought withOUT the pump? I ask because in researching the Mash & Boil, I’ve come across a number of people who don’t have the pump and seem satisfied with it. Would I be creating too much work for myself by not buying it?
 
I’m leaning towards The Anvil Foundry and I’d plan on using a BIAB in the malt pipe because I double crush and I like the efficiency I get when using one now in my 10G Igloo cooler. What I’m wondering is how sorry would I be if I bought withOUT the pump? I ask because in researching the Mash & Boil, I’ve come across a number of people who don’t have the pump and seem satisfied with it. Would I be creating too much work for myself by not buying it?
While you don’t need a pump, what’s your plan for getting the wort into the fermenter? The unit is pretty heavy when filled and I would rather not lift it to a higher surface at that point due to the weight and thin side walls. Prior to that, you’ll need to lift the malt pipe at the end of the mash. It’s tall, hot, and heavy - the height really doesn’t work in your favor there.
Some people run the entire process from a table and just use a step ladder to lift the malt pipe at the end of the mash. Others (still on a table) use a pulley system. I do use a pump but only because I already had it (riptide).
I missed something obvious 🤭😊 !! — The height of the unit. It makes sense it’d be on the floor. At 6’3” with back issues it might be easier for me to use on a 12-18” platform — but duh, I’d want a pump. Thanks for your kindness. It seems my avatar suits me 🤪
 
I missed something obvious 🤭😊 !! — The height of the unit. It makes sense it’d be on the floor. At 6’3” with back issues it might be easier for me to use on a 12-18” platform — but duh, I’d want a pump. Thanks for your kindness. It seems my avatar suits me 🤪

In my case I had a pump so bought without one. I did notice the pump kit is $100 or the same price delta between Foundry without and with the pump - so no price penalty if you add it later. At your height maybe elevate the Foundry and try without a pump and add one later if needed?

I use my pump for recirculation, whirlpooling, kettle cleaning, and even beer line cleaning.
It sounds like I should just do it right and purchase it at the same time. Thanks.
 
It sounds like I should just do it right and purchase it at the same time. Thanks.

I think you'll be happy with it. Recirculate water during heat up to get a more accurate temp, vorlauf, transfer... It's not needed if cost is a factor, but it sure is nice to have a pump. This is speaking from propane experience, I actually haven't' used my Foundry yet but I can't see it being different.

Getting ready for the inaugural brew when it arrives. Some goodies arrived today

Looks from the grain bill that you bought a 6.5. Mind sharing which speider you bought, and how well it fit? It's on my purchase list as well, what I use for my propane brew days will be too big for the Foundry. I figure I will find something but would like to know what you got and how it did.
 
View attachment 696563


I may be brewing this weekend.

So...did ya brew?

I brewed on Friday, had a work conference that ended early. Was around noon and figured...WTH, why not. 3 brews in I think on this thing...and the temp just doesn't seem to drop after adding grains...like at all. Stir, pour...stir...pour...stir...pour. So now I'm mashing at 158 vs. 152...great.....

Used the Wilser bag this time around...made cleaning so much EASIER!! However, despite the fact that I requested my LHBS to mill for BIAB, I was still 11 points off OG and that was creating a recipe for a 70%. I figured I'd end up a little high...definitely not low. Ended up with a 65% efficiency and....bleh. I'm really trying to keep this at a hobby level, continue to have fun, not take it too seriously and obsess over it like every other hobby I've undergone but I am getting a wee bit frustrated.
 
3 brews in I think on this thing...and the temp just doesn't seem to drop after adding grains...like at all. Stir, pour...stir...pour...stir...pour. So now I'm mashing at 158 vs. 152...great.....

Used the Wilser bag this time around...made cleaning so much EASIER!!

Ended up with a 65% efficiency and....bleh. I'm really trying to keep this at a hobby level, continue to have fun, not take it too seriously and obsess over it like every other hobby I've undergone but I am getting a wee bit frustrated.
Glad I’m not the only one on the temp experience. I recirculated my first two and the next couple just ended up mashing higher than expected. My last couple batches I just set for my desired temp and mash in then.
I've used disposable paint straining bags to aid clean up but I do lose a little wort due to it, I’ve noticed.
my system previous to the anvil I was regularly in the mid to high sixties and my five batches so far I’ve been average of 67 so I just roll with it and try to not sweat chasing a couple efficiency points.
 
I brewed on Friday, had a work conference that ended early. Was around noon and figured...WTH, why not. 3 brews in I think on this thing...and the temp just doesn't seem to drop after adding grains...like at all. Stir, pour...stir...pour...stir...pour. So now I'm mashing at 158 vs. 152...great.....
Glad I’m not the only one on the temp experience. I recirculated my first two and the next couple just ended up mashing higher than expected. My last couple batches I just set for my desired temp and mash in then.
I've used disposable paint straining bags to aid clean up but I do lose a little wort due to it, I’ve noticed.
my system previous to the anvil I was regularly in the mid to high sixties and my five batches so far I’ve been average of 67 so I just roll with it and try to not sweat chasing a couple efficiency points.

@Knightshade and @Jsmith2154 are you both measuring the temp in the top of the mash as well or just relying on the foundry temp? I have a 10.5g (240V) foundry and have found that the anvils temp higher as well. I typically hit to strike temp on foundry at 159 when targeting 152 myself. I also use a wilser bag inside the maltpipe. I use a thermapen which I trust to measure the top of the mash as well. So when I hit strike temps, I compare the anvil temp, which is measured at the bottom of the foundry close to heating elements but NOT in the actual grains, to the top temp with my thermapen. They are always identical before I mash in. After mashing in, the anvil generally reads 156ish but the top of the mash (with thermapen) reads around 151-153. Its usually about a 5 degree differential for me. After mash in, I don't recirc for 10 minutes and put lid on. After 10 minutes are up, I restir the mash and recheck temps which are usually 153-154ish by the foundry and 149-151 in the top of the mash. I start recirculating 5 minutes afterwards and the slightly cooler mash water leaves the maltpipe and the foundry temps read what you expect.

So, remember that the temp on the anvil doesn't always reflect actual temps in mash. I imagine that the mash is coolest at the top because the lid is least insulated yet the kettle walls are double thickness. So while the temp gradient is annoying to me as well, I think the most important thing is that it is incredibly consistent though. Consistency is key because you can then account for any error because it is systematic vs random temp fluctuations.

As for mash/lauter efficiencies, im consistently at 75-78% (beer smith calcs). This is with mostly sticky grain bills that have about 35% oats/wheat/adjuncts and 65%ish base malts. I think grain crush is most important here though. I use a cereal killer mill and have locked it at 0.028" for gap which is perfect for malted oats, white wheat which are smaller or more of a ***** to crush (Im looking at YOU malted oats!). At 0.028 I do get more flour especially from the pilsner and two row malts and I don't condition them. I also sparge most every time as well, about 1-1.5gallons depending on the grain bill size.

Hope this helps ya'll. In the end, its all beer! lol.

EDIT: I also forgot to mention that the power setting is also helpful. At 240V, after strike water is heated, I switch the %power to 50%. After I start recirculating (again I do this slowly) I may increase this to as much as 60-65% power to help with temps if the top is too low for what I want. After temps stabilize, I return to 50% power. My second brew, I forgot to adjust for the % power and it stayed at 100% after mashing in and the anvil read 158, while the top of mash was 151 after 10 minutes of not recirculating. recirculation is the key to temp stabilizations in these units for sure.
 
Per the user group on Facebook, the Foundry uses a calculation to estimate and report the temperature towards the middle of the column- not the bottom where the probe actually is. For those of you reporting less of a drop when doughing in, that’s why. Don’t forget your thermo and always be sure to calculate your strike temp based on your water volume, grain weight, and grain temperature.

I trusted the foundry temperature and found it only dropped 2-3 degrees at dough in, so I ran a couple batches with strike temp only slightly above my target mash temp. Didn’t recirculate (BIAB) and didn’t bother checking with my thermapen. Got curious one day and found that even though the foundry reported 156, the top of my mash after stirring was only 143.

So again: don’t forget your thermo. Calculate the proper strike temp based on water volume, grain weight, and grain temperature. The foundry is insulated- if you aren’t recirculating you could turn it off and it may lose a degree or two by the end of the mash.
 
Per the user group on Facebook, the Foundry uses a calculation to estimate and report the temperature towards the middle of the column- not the bottom where the probe actually is. For those of you reporting less of a drop when doughing in, that’s why. Don’t forget your thermo and always be sure to calculate your strike temp based on your water volume, grain weight, and grain temperature.

I trusted the foundry temperature and found it only dropped 2-3 degrees at dough in, so I ran a couple batches with strike temp only slightly above my target mash temp. Didn’t recirculate (BIAB) and didn’t bother checking with my thermapen. Got curious one day and found that even though the foundry reported 156, the top of my mash after stirring was only 143.

This is interesting as I did not know the foundry has this estimation calculation to predict the temps in the middle of the column. But since the foundry itself doesn't know how much grain there is in the maltpipe or the grains original temps, I wouldn't think it could adjust for these differences from brew to brew and the calculation estimation may be different from brew to brew if grain bill sizes/temps vary. But your comment about the top of the mach being 13 degrees lower than what the anvil shows after NOT recirculating suggests that this estimation calculation requires recirculating and seems to support the temp differential Ive experienced when NOT recirculating and using the malt-pipe.

I'm not on facebook, never had an account, so any other feedback peeps have there in facebook in regards to managing these temps especially in the early part of the mash when it seems most critical would be welcomed.
 
@Knightshade and @Jsmith2154 are you both measuring the temp in the top of the mash as well or just relying on the foundry temp? I have a 10.5g (240V) foundry and have found that the anvils temp higher as well. I typically hit to strike temp on foundry at 159 when targeting 152 myself. I also use a wilser bag inside the maltpipe. I use a thermapen which I trust to measure the top of the mash as well. So when I hit strike temps, I compare the anvil temp, which is measured at the bottom of the foundry close to heating elements but NOT in the actual grains, to the top temp with my thermapen. They are always identical before I mash in. After mashing in, the anvil generally reads 156ish but the top of the mash (with thermapen) reads around 151-153. Its usually about a 5 degree differential for me. After mash in, I don't recirc for 10 minutes and put lid on. After 10 minutes are up, I restir the mash and recheck temps which are usually 153-154ish by the foundry and 149-151 in the top of the mash. I start recirculating 5 minutes afterwards and the slightly cooler mash water leaves the maltpipe and the foundry temps read what you expect.

So, remember that the temp on the anvil doesn't always reflect actual temps in mash. I imagine that the mash is coolest at the top because the lid is least insulated yet the kettle walls are double thickness. So while the temp gradient is annoying to me as well, I think the most important thing is that it is incredibly consistent though. Consistency is key because you can then account for any error because it is systematic vs random temp fluctuations.

As for mash/lauter efficiencies, im consistently at 75-78% (beer smith calcs). This is with mostly sticky grain bills that have about 35% oats/wheat/adjuncts and 65%ish base malts. I think grain crush is most important here though. I use a cereal killer mill and have locked it at 0.028" for gap which is perfect for malted oats, white wheat which are smaller or more of a ***** to crush (Im looking at YOU malted oats!). At 0.028 I do get more flour especially from the pilsner and two row malts and I don't condition them. I also sparge most every time as well, about 1-1.5gallons depending on the grain bill size.

Hope this helps ya'll. In the end, its all beer! lol.

EDIT: I also forgot to mention that the power setting is also helpful. At 240V, after strike water is heated, I switch the %power to 50%. After I start recirculating (again I do this slowly) I may increase this to as much as 60-65% power to help with temps if the top is too low for what I want. After temps stabilize, I return to 50% power. My second brew, I forgot to adjust for the % power and it stayed at 100% after mashing in and the anvil read 158, while the top of mash was 151 after 10 minutes of not recirculating. recirculation is the key to temp stabilizations in these units for sure.


Very good info..

On two of my three AF brews I have see high mash-in temps too. On the last brew before adding the grain I mixed the water well and shut the power to 0% for 10 minutes after adding the grain without recirculating (saw others do this) then go to 50% as mentioned above with recirc.
 
I have neglected to use my thermo w/the Anvil, just been going off of the Foundry temp. I did figure though that after a fairly vigorous stirring, pause and no adjustment in temp that it must be correct. Just need to get it out of my head that the thermo is for measuring the temp of meat only.

I am recirculating also, which I didn't start until 15 minutes after mash in. Perhaps I'm recirculating too slow though, because I'm so paranoid about going too fast and overflowing, that it barely flows out. I'm also doing no sparge, so I anticipate my numbers to be lower...just not 60ish range low. (Brewer's Friend Calcs)

I'm also really, really trying to stay away from milling my own grain. I have a mental brick in my head that purchasing that piece of equipment signifies when I'm taking it too seriously.......and I'm already lugging a good deal of crap down from the attic to do anything associated with brewing, I really don't want to add more especially a bulky piece of equipment like a grain mill.

But I also had very little powder in my grains from the LHBS, which is why I don't think they milled it for BIAB like I asked. Which is..of course, disappointing. I had a one pound bag of light DME so I threw it in there, but that isn't something I'm going to want to do for every flippin brew.

Hope this helps ya'll. In the end, its all beer! lol.

and yes...this. I'm trying to keep that in mind.
 
Got around to that brew. A few thoughts

MASH TEMP. Firstly I forgot to turn off the heater or lower the temp as I doughed in at 158° with the temp on for the first half of the grain, when I looked it was still at 158°. I reduced the tempo to 151° but it took about 10 minutes to drop. At 100% power it did overshoot to 153°. I believe that affected the conversion as I was expecting a gravity of 1.044 and got 1.040. I mashed out at 170° for 10 min. No sparge.

BOIL. I ramped up to 100% to start the boil, I got a rolling boil at 206 hmmm, I reduced to 60% but thought the boil was weak. I upped it to 70° and turned the recirculation pump back on for a slow flow into the hop spider.

I was expecting a post boil volume if 3.21 gals and ended up with 2.9 g and post boil gravity of 1.053 but measured 1.048.

I also was expecting 2.75 gal into the fermentor and ended up with 2.25 (I added water to bring it to 2.5gal).


CHILLER: I can fix the above. What I can't fix is the design of the stainless steel chiller. It does not fit in the kettle. With the 90° bends, only half the chiller submerges into the wort. If you put it in at an angle, you get about 3/4 submerged but the hoses pinch against the side and thus creating back pressure causing leaks.

The stainless steel does not bend like copper. Until I can find a way to bend the chiller, I will be using my DIY copper chiller. It's disappointing.

BASKET SUPPORT RING. A bit of a PITA but I am confident I'll get better at not knocking it loose.
To recap:

1. As said, use water volume to calculate strike temp and use my own thermometer to confirm the the temp (of course stir the water to first to avoid thermo-climbs) . And don't forget to lower the temp setting before adding the grains.


2. Boil at 100% and change BeerSmith for 1 gal/hr evaporation.


3. Use my own chiller, until I can bend the anvil chiller to properly fit inside the foundry.


Overall, I liked the experience and was expecting to misstep here and there and discover real life nuances. My expectations were not far off and while I missed my numbers, I think the beer will be just fine.
It may take a few brews to nail down the boil volume and I think the strike.mash temp will be an easy fix.

Clean up was a breeze. It was a pleasure to sit the mash basket aside in a bucket to cool and collect the last drops of wort to add back into the boil.

So my pale ale may not be as dry as I intended, but it's in the fermentor and will be dry hopping next week,.

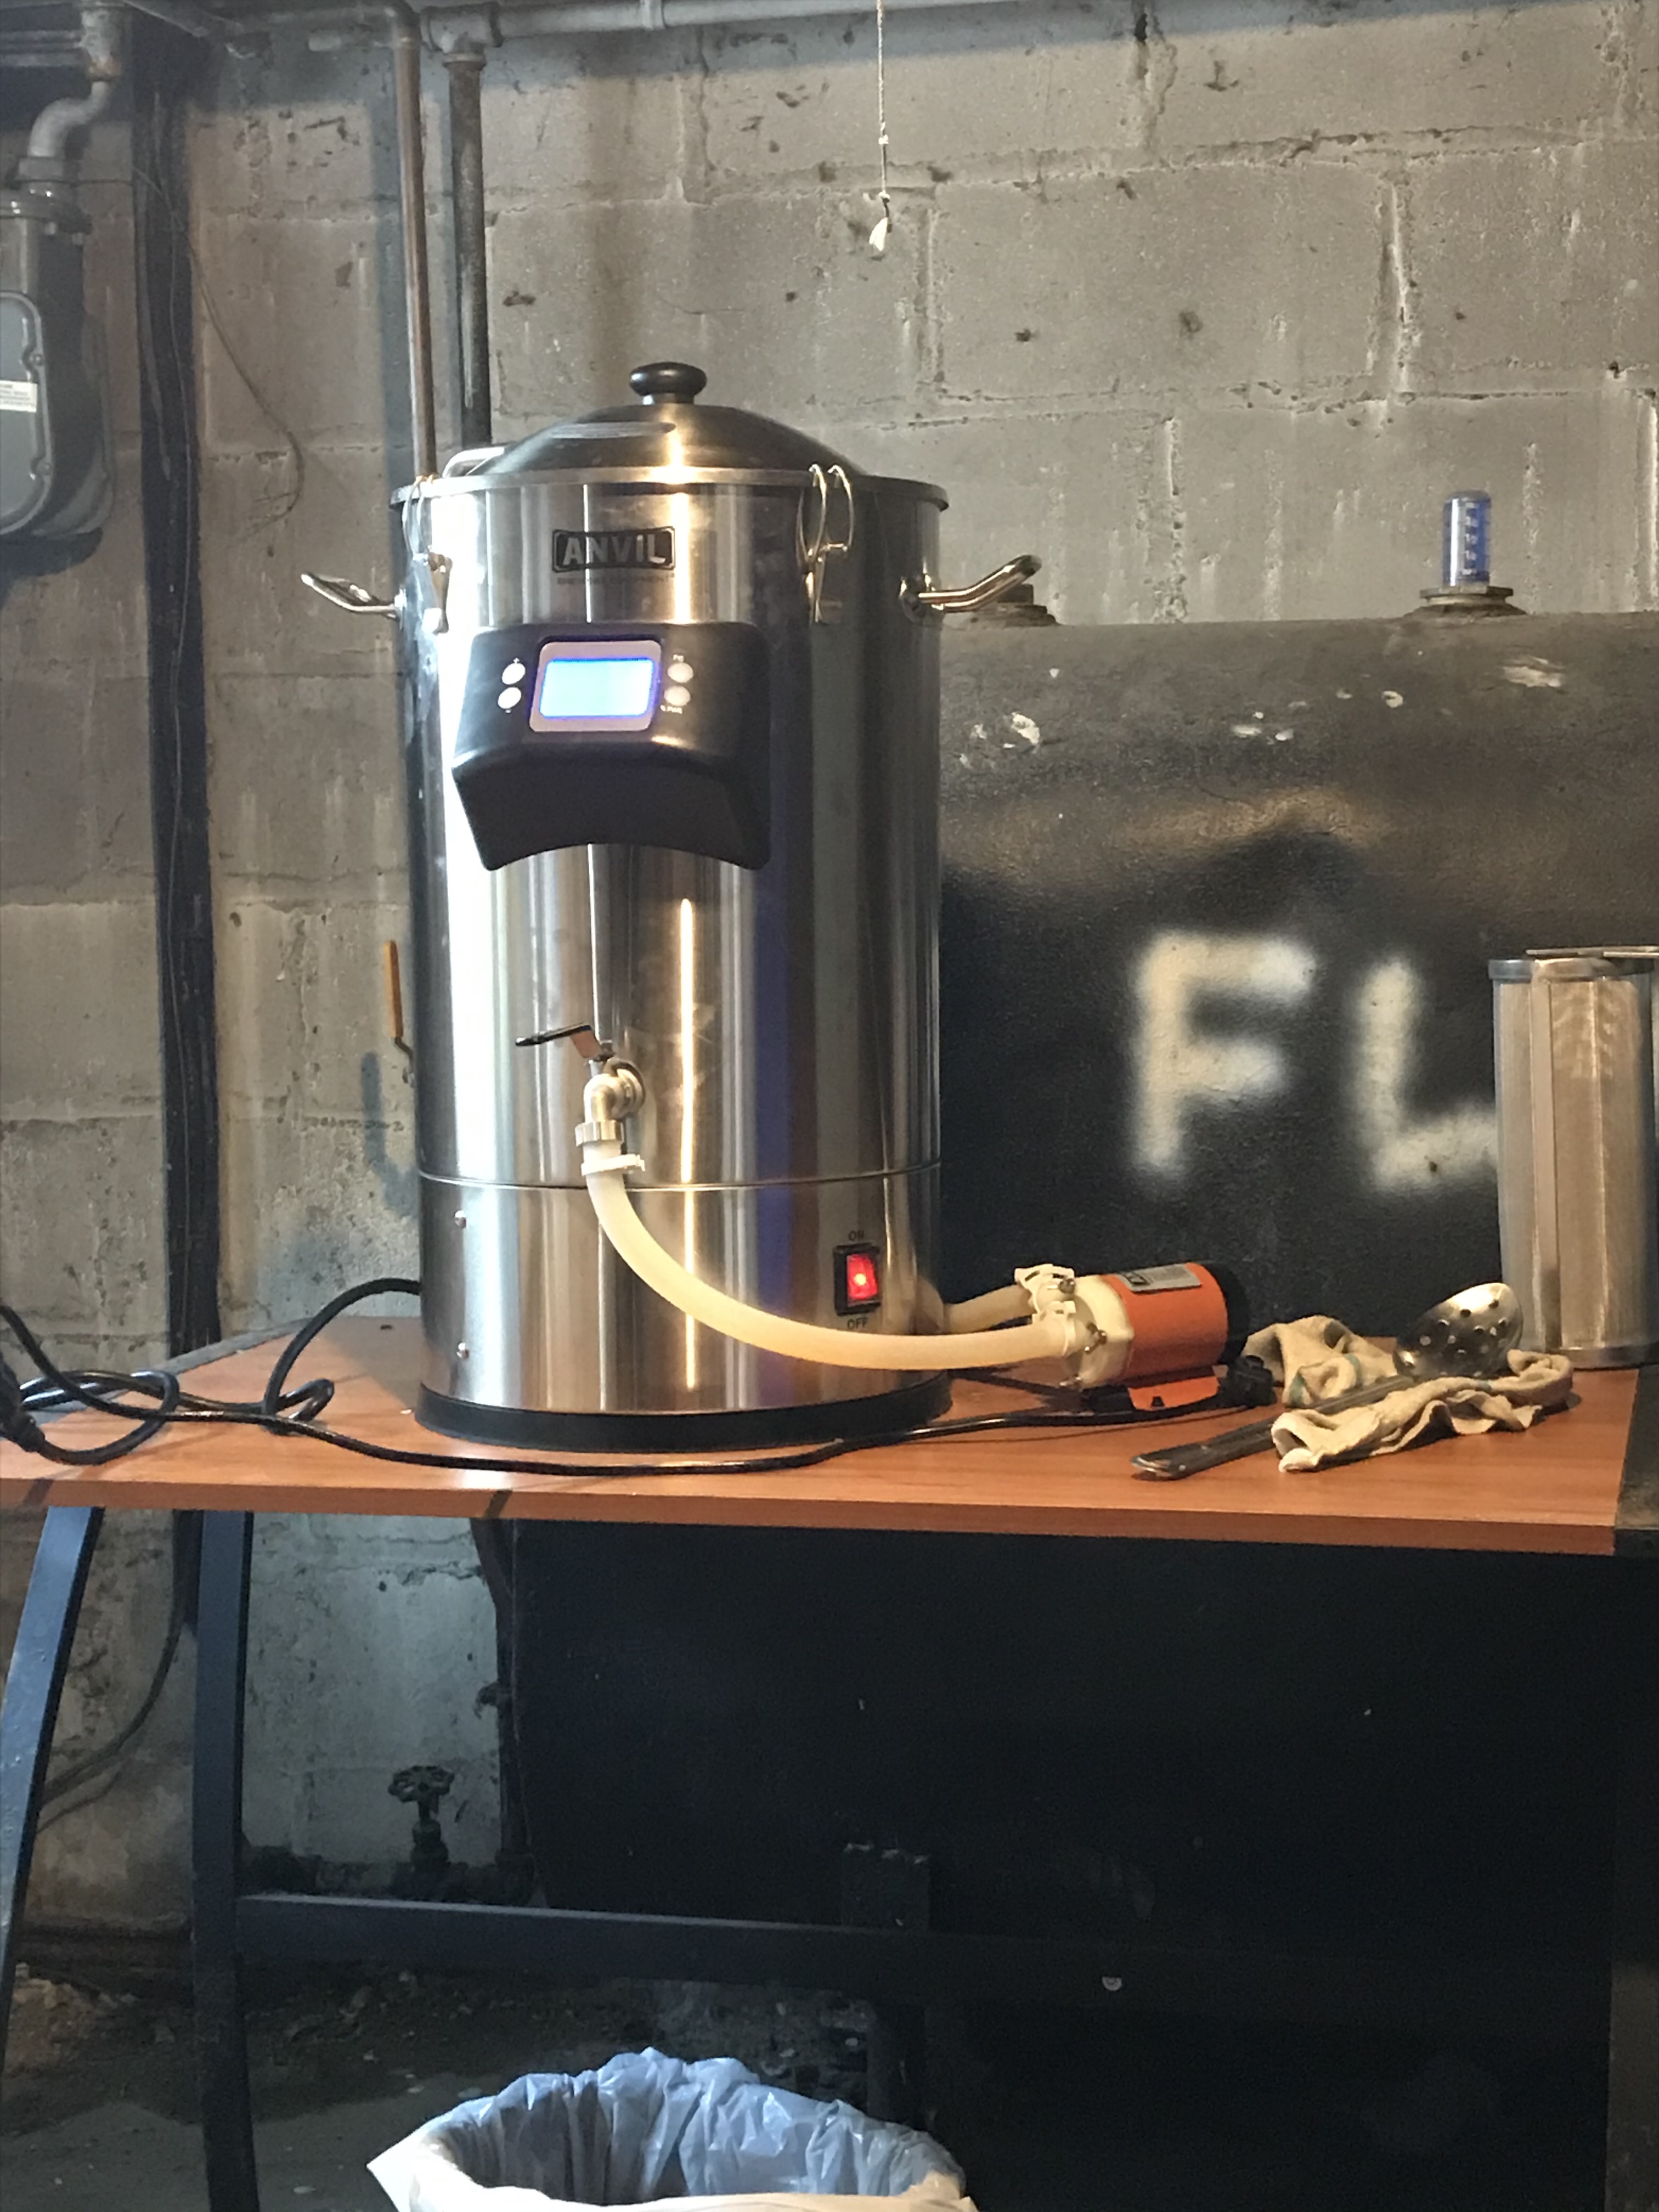
My brew area in the basement.

IMG_2583 2.jpg


This chiller, this is unacceptable. I was, however, able to cool down to 81° in a reasonable time. I think I will put this is an ice bath and then connect it to my DIY copper chiller. Two chillers. One to lower the tap water temp and the second to cool the wort fast. All it will take is a few connections.

IMG_2608.PNG
 
Last edited:
I think you'll be happy with it. Recirculate water during heat up to get a more accurate temp, vorlauf, transfer... It's not needed if cost is a factor, but it sure is nice to have a pump. This is speaking from propane experience, I actually haven't' used my Foundry yet but I can't see it being different.


Looks from the grain bill that you bought a 6.5. Mind sharing which speider you bought, and how well it fit? It's on my purchase list as well, what I use for my propane brew days will be too big for the Foundry. I figure I will find something but would like to know what you got and how it did.

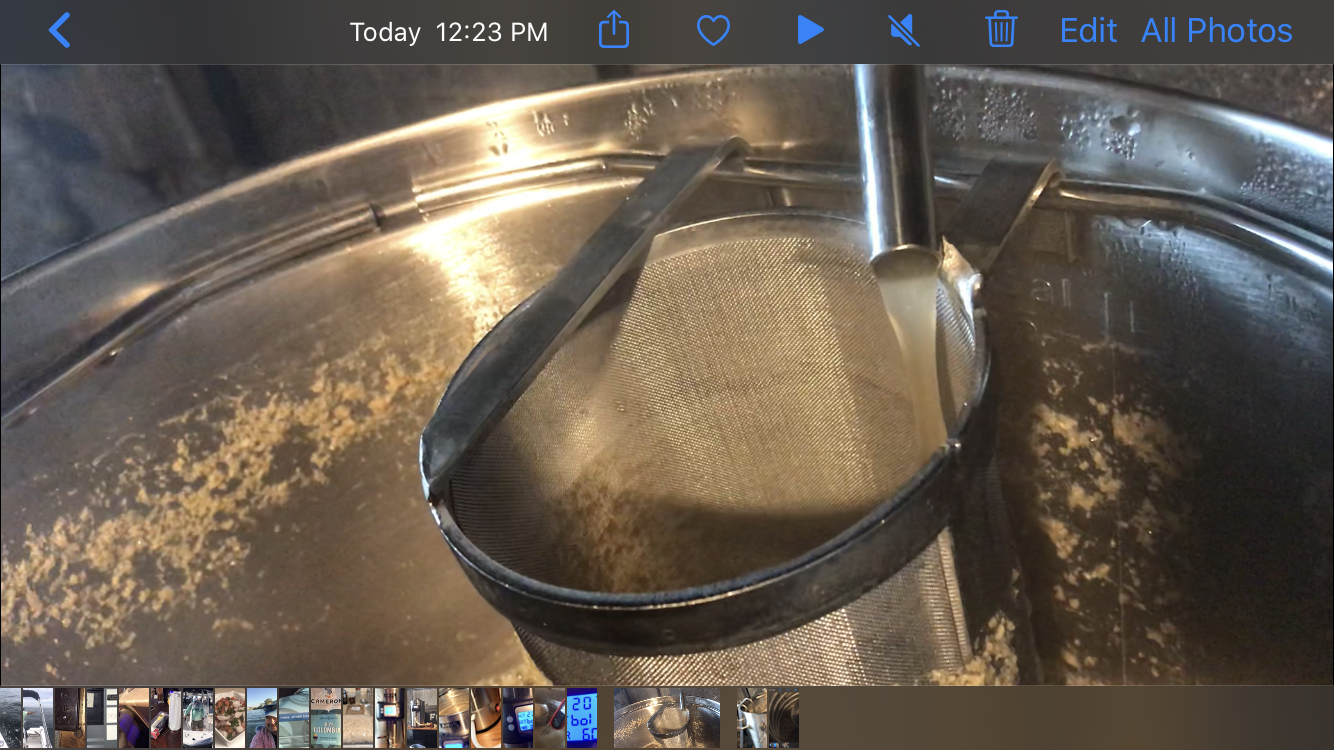
Yes, I have the 6.5. I picked this one up from amazon. I'm happy with it. Fits like a charm and clean up is night and day compared to the muslin bags.

https://www.amazon.com/gp/product/B077H6D6YL/ref=ppx_yo_dt_b_asin_title_o04_s00?ie=UTF8&psc=1

at 60% and 70% power I was not confident the weak boil would be enough movement so I used the recirculation pump with a low flow. That probably added to the wort loss, but I will gladly up my water volume and grain bill to ensure goo flow through the hops.

IMG_2609.PNG
 
Got around that brew. A few thoughts
BASKET SUPPORT RING. A bit of a PITA but I am confident I'll get better at not knocking it loose.

View attachment 698099


This chiller, this is unacceptable. I was, however, able to cool down to 81° in a reasonable time. I think I will put this is an ice bath and then connect it to my DIY copper chiller. Two chillers. One to lower the tap water temp and the second to cool the wort fast. All it will take is a few connections.
View attachment 698100
 
@Knightshade and @Jsmith2154 are you both measuring the temp in the top of the mash as well or just relying on the foundry temp? I have a 10.5g (240V) foundry and have found that the anvils temp higher as well. I typically hit to strike temp on foundry at 159 when targeting 152 myself. I also use a wilser bag inside the maltpipe. I use a thermapen which I trust to measure the top of the mash as well. So when I hit strike temps, I compare the anvil temp, which is measured at the bottom of the foundry close to heating elements but NOT in the actual grains, to the top temp with my thermapen. They are always identical before I mash in. After mashing in, the anvil generally reads 156ish but the top of the mash (with thermapen) reads around 151-153. Its usually about a 5 degree differential for me. After mash in, I don't recirc for 10 minutes and put lid on. After 10 minutes are up, I restir the mash and recheck temps which are usually 153-154ish by the foundry and 149-151 in the top of the mash. I start recirculating 5 minutes afterwards and the slightly cooler mash water leaves the maltpipe and the foundry temps read what you expect.

So, remember that the temp on the anvil doesn't always reflect actual temps in mash. I imagine that the mash is coolest at the top because the lid is least insulated yet the kettle walls are double thickness. So while the temp gradient is annoying to me as well, I think the most important thing is that it is incredibly consistent though. Consistency is key because you can then account for any error because it is systematic vs random temp fluctuations.

As for mash/lauter efficiencies, im consistently at 75-78% (beer smith calcs). This is with mostly sticky grain bills that have about 35% oats/wheat/adjuncts and 65%ish base malts. I think grain crush is most important here though. I use a cereal killer mill and have locked it at 0.028" for gap which is perfect for malted oats, white wheat which are smaller or more of a ***** to crush (Im looking at YOU malted oats!). At 0.028 I do get more flour especially from the pilsner and two row malts and I don't condition them. I also sparge most every time as well, about 1-1.5gallons depending on the grain bill size.

Hope this helps ya'll. In the end, its all beer! lol.

EDIT: I also forgot to mention that the power setting is also helpful. At 240V, after strike water is heated, I switch the %power to 50%. After I start recirculating (again I do this slowly) I may increase this to as much as 60-65% power to help with temps if the top is too low for what I want. After temps stabilize, I return to 50% power. My second brew, I forgot to adjust for the % power and it stayed at 100% after mashing in and the anvil read 158, while the top of mash was 151 after 10 minutes of not recirculating. recirculation is the key to temp stabilizations in these units for sure.

one of the main reasons I went to the anvil was the recirculation pump. IMO, in addition to the obvious recirculation lautering benefits, it makes for a more even mash temperature. What would I do without my knock off thermapen? I'm leaning to lowering my strike temp since, for me, I'd rather raise the mash temp than wait for it to lower. Case in point my 68.7% mash efficiency (as per BeerSmith). At 220 volts, the anvil is quick to raise temps and I think a few minutes in the beta amylase zone would be better than missing it altogether with a hot mash .
 
@NSMikeD —Thanks for this — very helpful, as I am strongly considering this unit. As for the basket ring, I believe it was in a YouTube video the reviewer referred to as a PITA as well - awkward and prone to slipping into the wort. Anyway, I thought he referred to some aftermarket clips or maybe someone has figured out a way to make it more stable? Hopefully someone has some experience with this.
 
Last edited:
I’m leaning towards The Anvil Foundry and I’d plan on using a BIAB in the malt pipe because I double crush and I like the efficiency I get when using one now in my 10G Igloo cooler. What I’m wondering is how sorry would I be if I bought withOUT the pump? I ask because in researching the Mash & Boil, I’ve come across a number of people who don’t have the pump and seem satisfied with it. Would I be creating too much work for myself by not buying it?


IMO, the temperature of the mash and fermentation as two areas that leave room for improvement as we move from novice to more expert brewers. Not only does the pump help filter the wort and to some degree, increase surface contact, it evens the temperature of mash. This may not be a huge deal, as we can make great beer with a single temperature that overlaps the narrow window between the beta amylase and alpha amylase happy zones.

The BIAB was meant to be simple mash brewing. We can really complicate the process attempting to dial in our beer. In the spirit of BIAB, I would say the pump is not needed.

In addition to mash benefits, I found the pump a huge plus with the using the hop spider and with moving water around the chiller (initially, as the pump generates heat and will defeat the purpose at some point).

I think if you want to dial in your beer, the pump is a plus. If you want to keep things BIAB simple, save the $100. And yes, you can add one later. Both ways will make very good beer.
Thanks for the input, it’s very much appreciated!
 
@NSMikeD —Thanks for this — very helpful, as I am strongly considering this unit. As for th basket ring, I believe it was in a YouTube video the reviewer referred to as a PITA as well - awkward and prone to slipping into the wort. Anyway, I thought he referred to some aftermarket clips or maybe someone has figured out a way to make it more stable? Hopefully someone has some experience with this.

thanks. I couldn't find the clips. I recall the link was no longer valid. It's ok. All one needs to do is pull the basket up straight and not on an angle. That muscle memory was a lot easier to fix than my golf swing. If you do pull the trigger and knock the ring loose, don't panic. Just put the basket back down and use both hands to reset the ring. The PITA design has some benefits, like being very easy to clean.
 
A quick note on the 220v and dryer cord. I have an older 3 prong receptacle for when the dryer was electric. That was no big deal. I made an extension cord ala Short Circuit Brewery on You Tube method with the inline GFCI.

Don"t Cut the Cord

The only thing I will add is that I used a 30 amp dryer chord from Home Depot as it was only cord I could find with the correct male 3 prong 220 plug. Being 10-gauge wire, it was a difficult fit, almost an hour fit the connections securely. In retrospect, I think I would have been better off searching for a plug and using thinner 12-gauge wire. I was really happy though, when I first pugged in and turned on the unit and it worked. (I had never used that outlet prior to then).
 
@NSMikeD —Thanks for this — very helpful, as I am strongly considering this unit. As for the basket ring, I believe it was in a YouTube video the reviewer referred to as a PITA as well - awkward and prone to slipping into the wort. Anyway, I thought he referred to some aftermarket clips or maybe someone has figured out a way to make it more stable? Hopefully someone has some experience with this.
I take two needle nose vice grips and clip the ring on at 6 and 12.
 
I take two needle nose vice grips and clip the ring on at 6 and 12.
The only time I had a problem with the ring popping out, it was self inflicted. I gently pull on the ring before installing it to make the gap at least an inch wide. The ring then holds in place with enough pressure to keep it from slipping with incidental contact.
 
Great 4th brew. I hit 83.5% 72.7% BHE and after water adjustments mash pH of 5.2! Think this even tops matches "good" #'s anything I previously brewed on my tun/kettle system.

One thing I didn't like was while cleaning a drip of water came off my hand and hit the corner of the display and it sucked it in like a sponge. So water was trapped between the glass display and plastic cover.

Was wondering do you see any issues if I silicone sealed around the display and black plastic controller cover that goes against the kettle?


Thanks
 
Last edited:
This chiller, this is unacceptable. I was, however, able to cool down to 81° in a reasonable time. I think I will put this is an ice bath and then connect it to my DIY copper chiller. Two chillers. One to lower the tap water temp and the second to cool the wort fast. All it will take is a few connections.

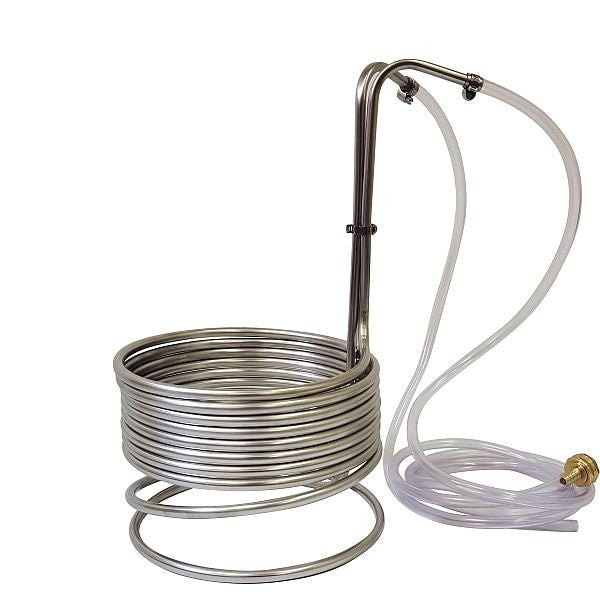
I replaced the chiller for my 6.5 Gallon Anvil foundry:

ANV-Foundry-6.5-2T.jpg


With this one, which I bought from NY Brew Supply (via Ebay):

w3825-sv_600x600_1621b786-b164-44ae-ac29-9883cd62f056_800x.jpg


Fits in the Foundry with all coils fully submerged. Pretty reasonable cost: $42 shipped.

https://www.ebay.com/itm/300358101173
I may use the original one in ice water as a pre-chiller.
 
I cut the tips today so the chiller lines are straight up and down. That should work, plus I still have me DIY copper chiller. One idea I have is to put the anvil chiller in an ice bath to cool the tap water and connect it to my DIY chiller in the wort.
I replaced the chiller for my 6.5 Gallon Anvil foundry:

ANV-Foundry-6.5-2T.jpg


With this one, which I bought from NY Brew Supply (via Ebay):

w3825-sv_600x600_1621b786-b164-44ae-ac29-9883cd62f056_800x.jpg


Fits in the Foundry with all coils fully submerged. Pretty reasonable cost: $42 shipped.

https://www.ebay.com/itm/300358101173
I may use the original one in ice water as a pre-chiller.

Too funny, I was thinking the same thing, but use the anvil chiller in the ice and my chiller in the wort.

Meanwhile, I cut the tips at their bends on the anvil today.
 
Years ago I made a 3-coil chiller like CuSSbrewing offers. Today (Chicago area) went from flame-out to 75F in just over 10 minutes.
 
Great 4th brew. I hit 83.5% BHE and after water adjustments mash pH of 5.2! Think this even tops anything I previously brewed on my tun/kettle system.

One thing I didn't like was while cleaning a drip of water came off my hand and hit the corner of the display and it sucked it in like a sponge. So water was trapped between the glass display and plastic cover.

Was wondering do you see any issues if I silicone sealed around the display and black plastic controller cover that goes against the kettle?


Thanks
That's the first thing I did when I got my new one. Had problems with my first one. Use a good high temp RTV
 
Maybe time to go back ao hop bag(s)? Or 4" diameter basket?

Something else I noticed on my last brew was how much surface area my hop basket takes up. I'm using my 6" diameter basket I had from my 15 gallon kettle. It takes up about 1/4 of the surface area! Was wondering how this impacts the boil off since you never see boiling wort inside the basket.
 
I have one w/same dimensions as NSMikeD, just purchased from homebrewing.org...and I was thinking I might try hop bags w/my next brew, because it does take up a lot of real estate, 6"...yoikes.

It was challenging having all the crap in there during chilling. Cuss chiller, whirlpool arm, hop spider.

and speaking of chillers....I unfortunately..now have 4 flipping chillers. The Cuss, the Anvil one..another SS one that is shorter, but wider for a kettle, and another slightly smaller one that is made out of copper. I was thinking I might push the "hot" water from Anvil through a chiller in my ice bucket vs. just having it go into the ice bucket directly to recirculate. Is the copper one going to be the best option due to material, even if it is the smallest of the 3?
 
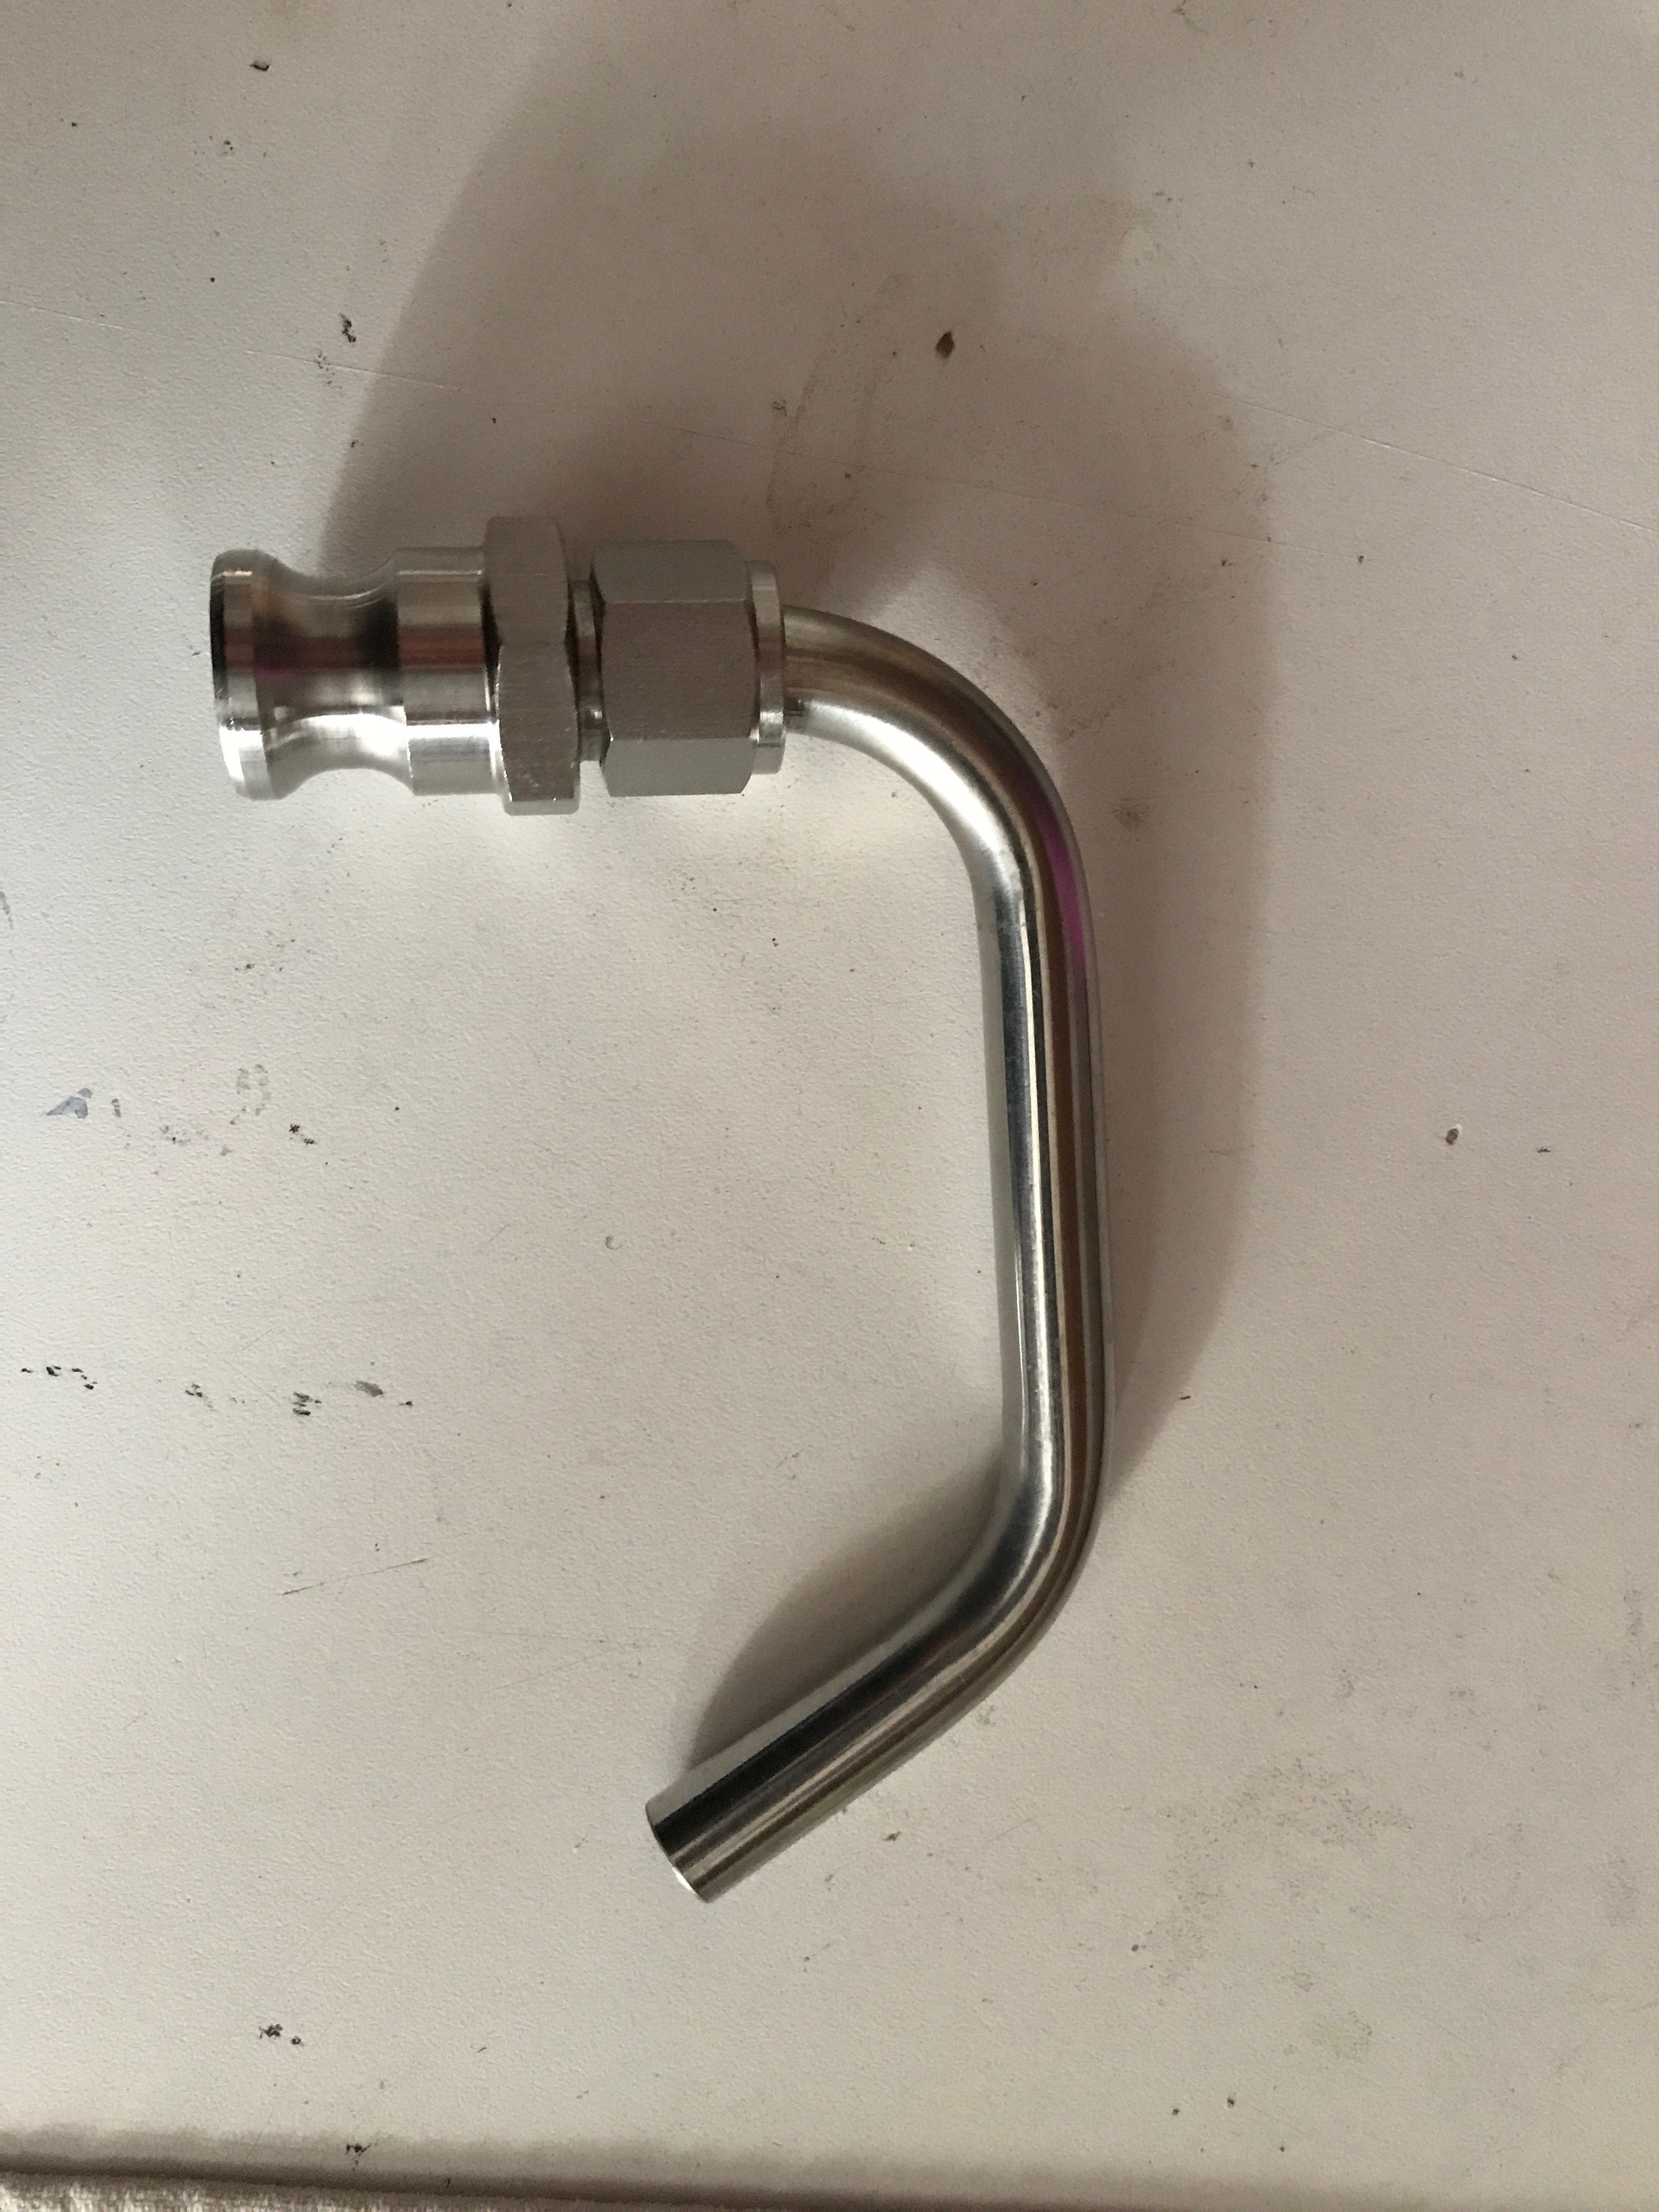
Oh..also, for anybody else that might interested. Happened across this little gem, haven't tested it yet but figure it will free up a little bit of time. This was the only bit of my current setup that didn't have a cam lock. Not having to switch tubing will be nice.

https://www.brewhardware.com/product_p/camcompression12.htm
IMG_3431.jpeg
 
Oh..also, for anybody else that might interested. Happened across this little gem, haven't tested it yet but figure it will free up a little bit of time. This was the only bit of my current setup that didn't have a cam lock. Not having to switch tubing will be nice.

https://www.brewhardware.com/product_p/camcompression12.htm
View attachment 698448

Have those in my cart - one for recirc and other for SpinCycle. I cheaped out and used short hose and barb fitting. Ha -kicking myself right now. Will probably end up with these.

I was almost going to have them quote out this tube with a welded fitting but the angles need to be pretty spot on.
 
Back
Top