a lot of your previous pics have disappeared too. Have you made changes to the pic host that you use? Moved renamed or deleted folders?
You are using an out of date browser. It may not display this or other websites correctly.
You should upgrade or use an alternative browser.
You should upgrade or use an alternative browser.
ANOTHER Basement Brewery Build
- Thread starter highland_brewer
- Start date

Help Support Homebrew Talk:
This site may earn a commission from merchant affiliate
links, including eBay, Amazon, and others.
highland_brewer
Short Circuited Brewers
Not to my knowledge. I always have trouble getting photos on here. What IS the best way?
Soulshine2
Well-Known Member
Got the drywall installed, not an exciting task! Someone has to do it.. And I don't want to pay someone! Now the mud work. Lol that might be a different story. Enjoy!
for future reference, those tv mount blocks you have off a single stud should actually span 2 studs . otherwise looks like a nice build
sicktght311
Well-Known Member
- Joined
- Oct 16, 2018
- Messages
- 686
- Reaction score
- 304
IMGUR is always my go-to. Works without issue.Not to my knowledge. I always have trouble getting photos on here. What IS the best way?
When you make a post don't you have a button at the bottom right called "Upload a File"? Just click that and navigate to the picture you want on your computer.
When on my pc, I just drag and drop onto the text editor from the file explorer.

$176.97
1pc Commercial Keg Manifold 2" Tri Clamp,Ball Lock Tapping Head,Pressure Gauge/Adjustable PRV for Kegging,Fermentation Control
hanhanbaihuoxiaoshoudian
![Craft A Brew - Safale S-04 Dry Yeast - Fermentis - English Ale Dry Yeast - For English and American Ales and Hard Apple Ciders - Ingredients for Home Brewing - Beer Making Supplies - [1 Pack]](https://m.media-amazon.com/images/I/41fVGNh6JfL._SL500_.jpg)
$6.95 ($17.38 / Ounce)
$7.47 ($18.68 / Ounce)
Craft A Brew - Safale S-04 Dry Yeast - Fermentis - English Ale Dry Yeast - For English and American Ales and Hard Apple Ciders - Ingredients for Home Brewing - Beer Making Supplies - [1 Pack]
BellaRae

$10.99 ($31.16 / Ounce)
Hornindal Kveik Yeast for Homebrewing - Mead, Cider, Wine, Beer - 10g Packet - Saccharomyces Cerevisiae - Sold by Shadowhive.com
Shadowhive

$53.24
1pc Hose Barb/MFL 1.5" Tri Clamp to Ball Lock Post Liquid Gas Homebrew Kegging Fermentation Parts Brewer Hardware SUS304(Liquid MFL)
yunchengshiyanhuqucuichendianzishangwuyouxiangongsi

$58.16
HUIZHUGS Brewing Equipment Keg Ball Lock Faucet 30cm Reinforced Silicone Hose Secondary Fermentation Homebrew Kegging Brewing Equipment
xiangshuizhenzhanglingfengshop

$7.79 ($7.79 / Count)
Craft A Brew - LalBrew Voss™ - Kveik Ale Yeast - For Craft Lagers - Ingredients for Home Brewing - Beer Making Supplies - (1 Pack)
Craft a Brew

$172.35
2 Inch Tri Clamp Keg Manifold With Ball Lock Posts, Pressure Gauge, PRV (0-30 PSI) – Homebrew, Fermentation, Kegging System
wuhanshijiayangzhiyimaoyiyouxiangongsi

$53.24
1pc Hose Barb/MFL 1.5" Tri Clamp to Ball Lock Post Liquid Gas Homebrew Kegging Fermentation Parts Brewer Hardware SUS304(Liquid Hose Barb)
Guangshui Weilu You Trading Co., Ltd

$22.00 ($623.23 / Ounce)
AMZLMPKNTW Ball Lock Sample Faucet 30cm Reinforced Silicone Hose Secondary Fermentation Homebrew Kegging joyful
无为中南商贸有限公司

$33.99 ($17.00 / Count)
$41.99 ($21.00 / Count)
2 Pack 1 Gallon Large Fermentation Jars with 3 Airlocks and 2 SCREW Lids(100% Airtight Heavy Duty Lid w Silicone) - Wide Mouth Glass Jars w Scale Mark - Pickle Jars for Sauerkraut, Sourdough Starter
Qianfenie Direct

$20.94
$29.99
The Brew Your Own Big Book of Clone Recipes: Featuring 300 Homebrew Recipes from Your Favorite Breweries
Amazon.com
highland_brewer
Short Circuited Brewers
Made some more progress on the basement. Got the ceiling painted and the back wall of the brewery started.
Last edited:
highland_brewer
Short Circuited Brewers
Quick update on the brewery. Had to get some running water and a drain for a brew day. Got the lift pump installed and the sink hooked up, sadly the sink will have to come out to do the flooring but.. I got running water for the brew day!
What size is your sink and where did you get it from? I'm looking to get a stainless sink with drainboard and flexible sprayer like you have. I have a 10 gallon Spike kettle and 20 gallon Spike kettle and wanted to make sure I got one that would be big enough to be able to clean/dry both.
highland_brewer
Short Circuited Brewers
I picked it up at a local restaurant supply store. Here is a link to it.What size is your sink and where did you get it from? I'm looking to get a stainless sink with drainboard and flexible sprayer like you have. I have a 10 gallon Spike kettle and 20 gallon Spike kettle and wanted to make sure I got one that would be big enough to be able to clean/dry both.
https://www.equippers.com/sauber-1-...8-drainboard-on-left-36-12w/s1c162012-18l.asp I would definitely check for a local restaurant supply store near you to save money on shipping.
Can't wait to see the sink sprayer installed and finished!Quick update on the brewery. Had to get some running water and a drain for a brew day. Got the lift pump installed and the sink hooked up, sadly the sink will have to come out to do the flooring but.. I got running water for the brew day!
How easy or feasible would it be to remove/troubleshoot if there are issues with your pump?
highland_brewer
Short Circuited Brewers
Very easy! That's why I put the 2 unions the unscrewed and the pump will be disconnected from the inlet and the outlet. So I can lift it right out. If you've never seen a PVC Union apart, it is a flat flange with an O ring that seals against the other flat surface. Almost like Tri clamp fittings.Can't wait to see the sink sprayer installed and finished!
How easy or feasible would it be to remove/troubleshoot if there are issues with your pump?
I just rewatched the video with sound... Clearly you addressed that. [emoji4]Very easy! That's why I put the 2 unions the unscrewed and the pump will be disconnected from the inlet and the outlet. So I can lift it right out. If you've never seen a PVC Union apart, it is a flat flange with an O ring that seals against the other flat surface. Almost like Tri clamp fittings.
highland_brewer
Short Circuited Brewers
I just rewatched the video with sound... Clearly you addressed that. [emoji4]


highland_brewer
Short Circuited Brewers
Well.. My hopes of doing the floor in Epoxy were not realized.. after the failure and talking to other people there is probably a missing step somewhere that is not in the instructions.. however I did get A coating on the floor. We'll see how long it lasts!
Just for asthetic purposes i would do the clear. Turned out pretty good tho!
highland_brewer
Short Circuited Brewers
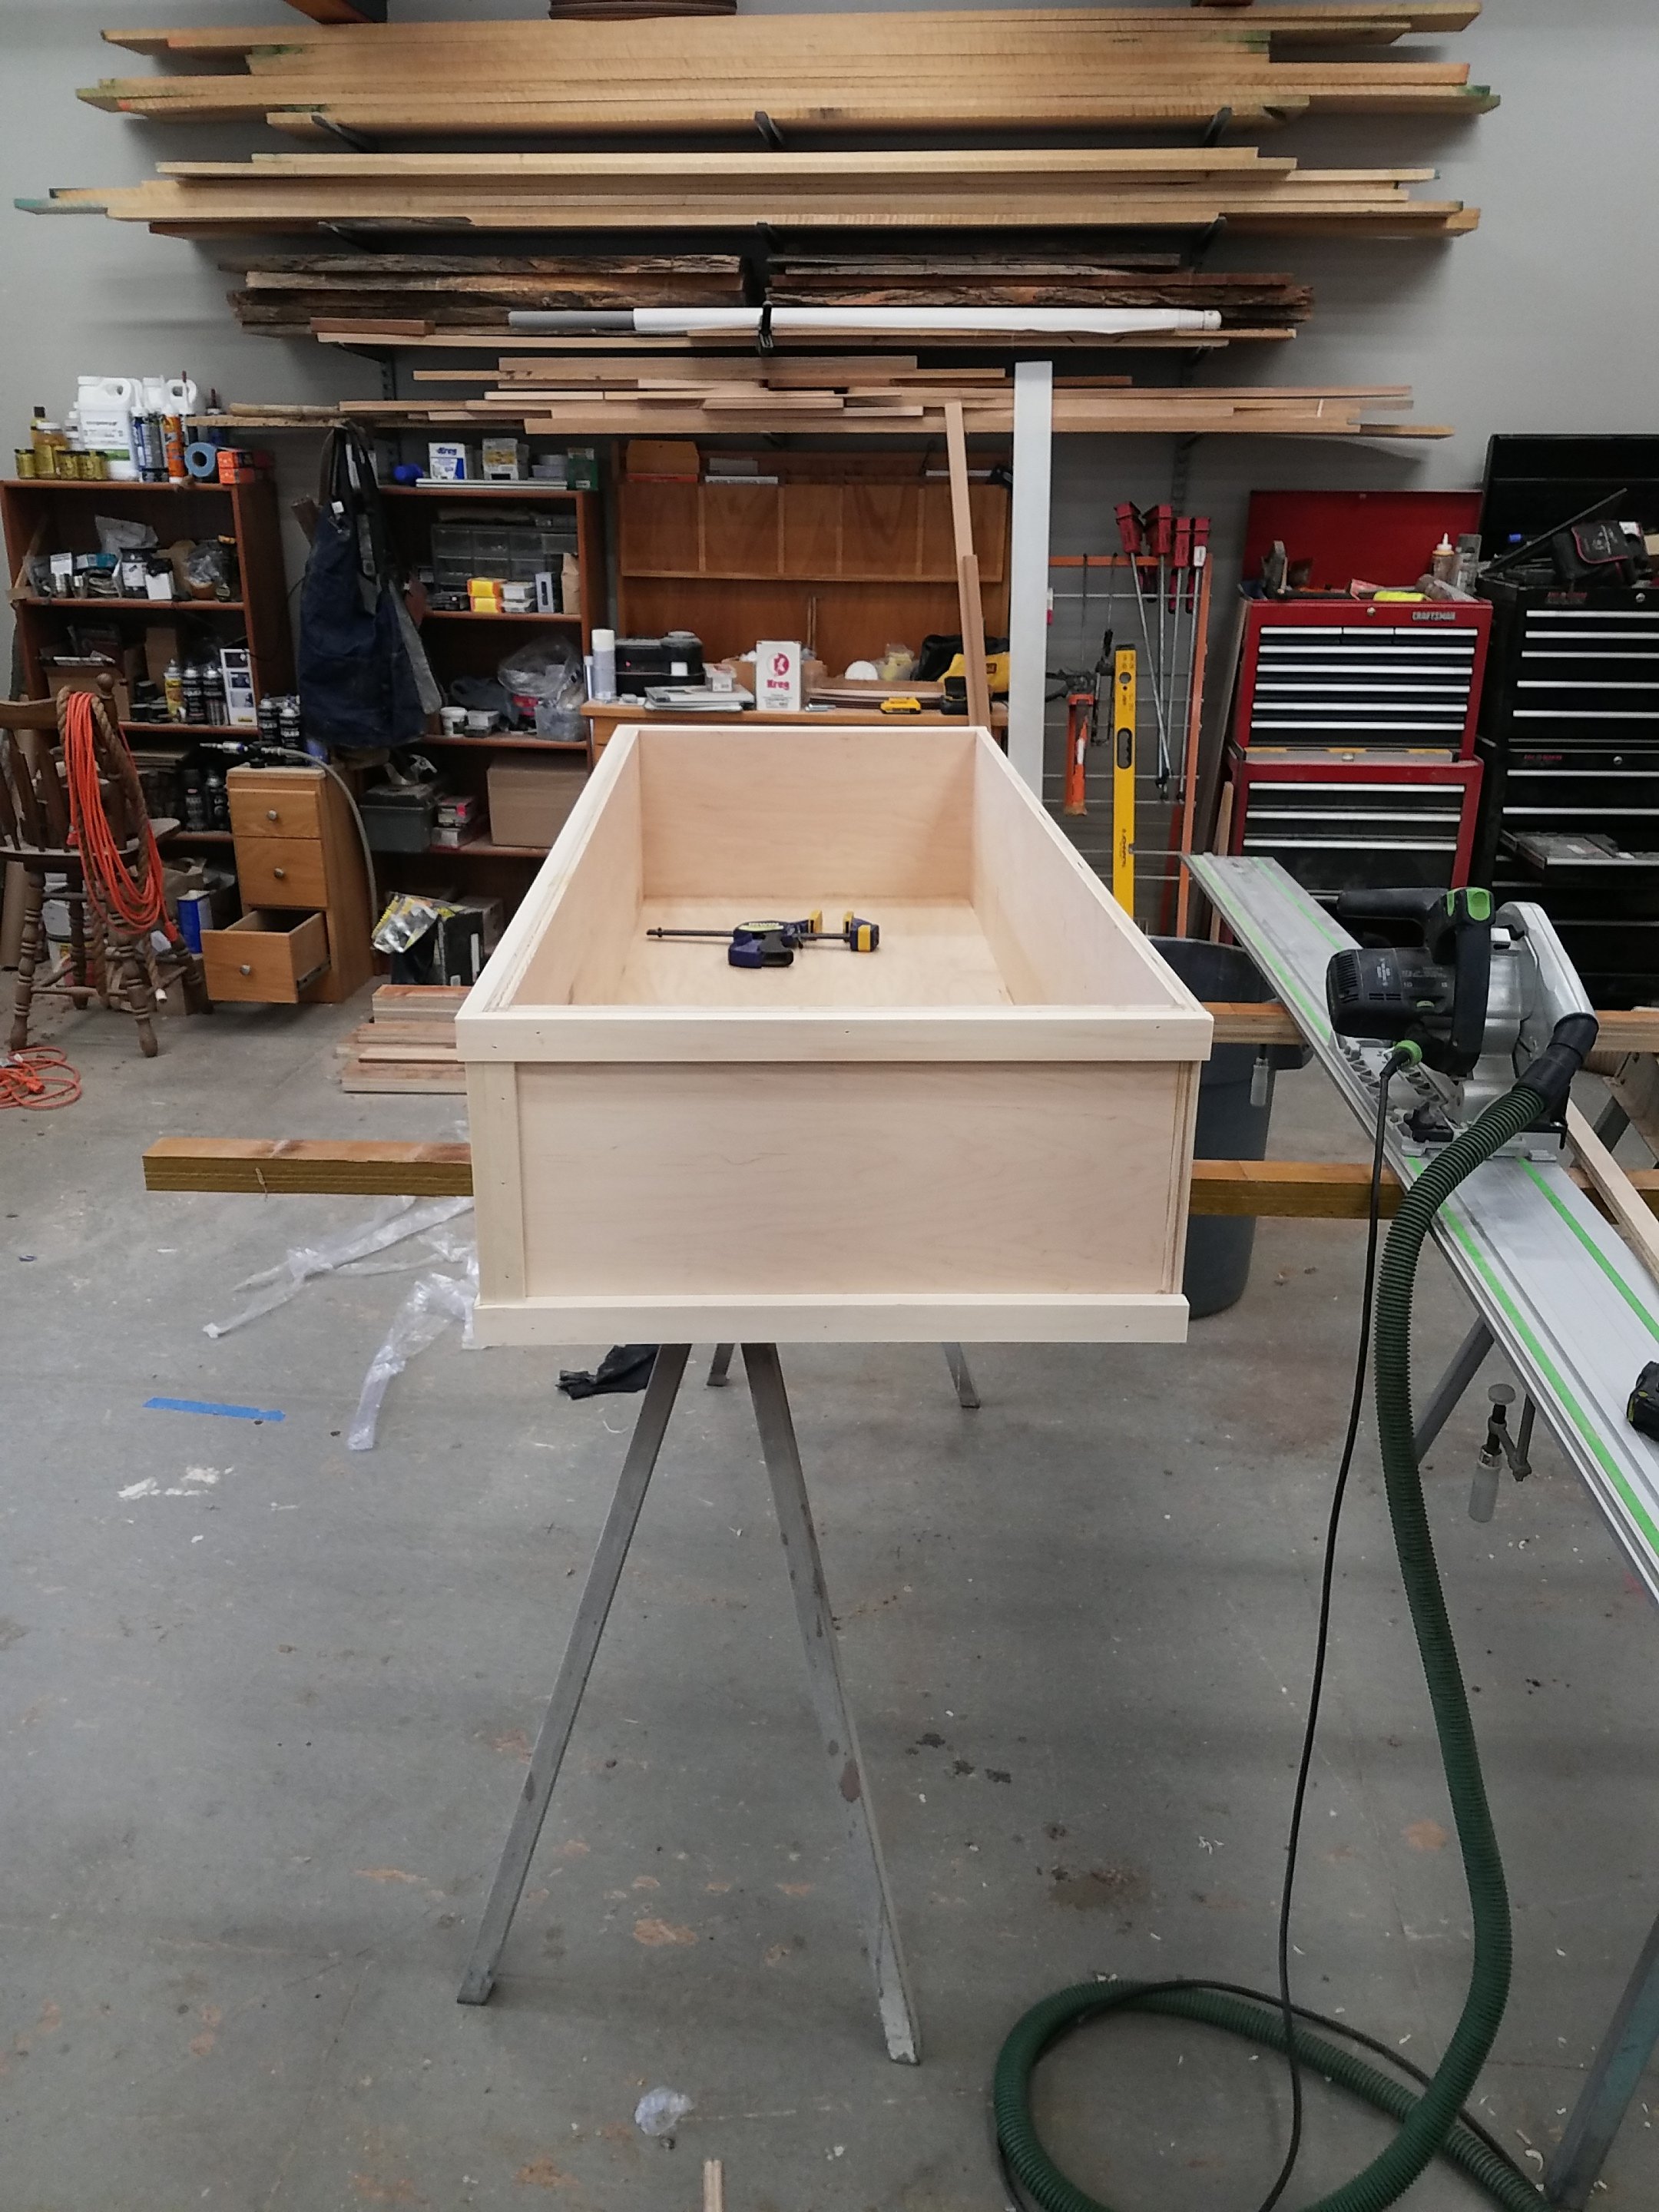
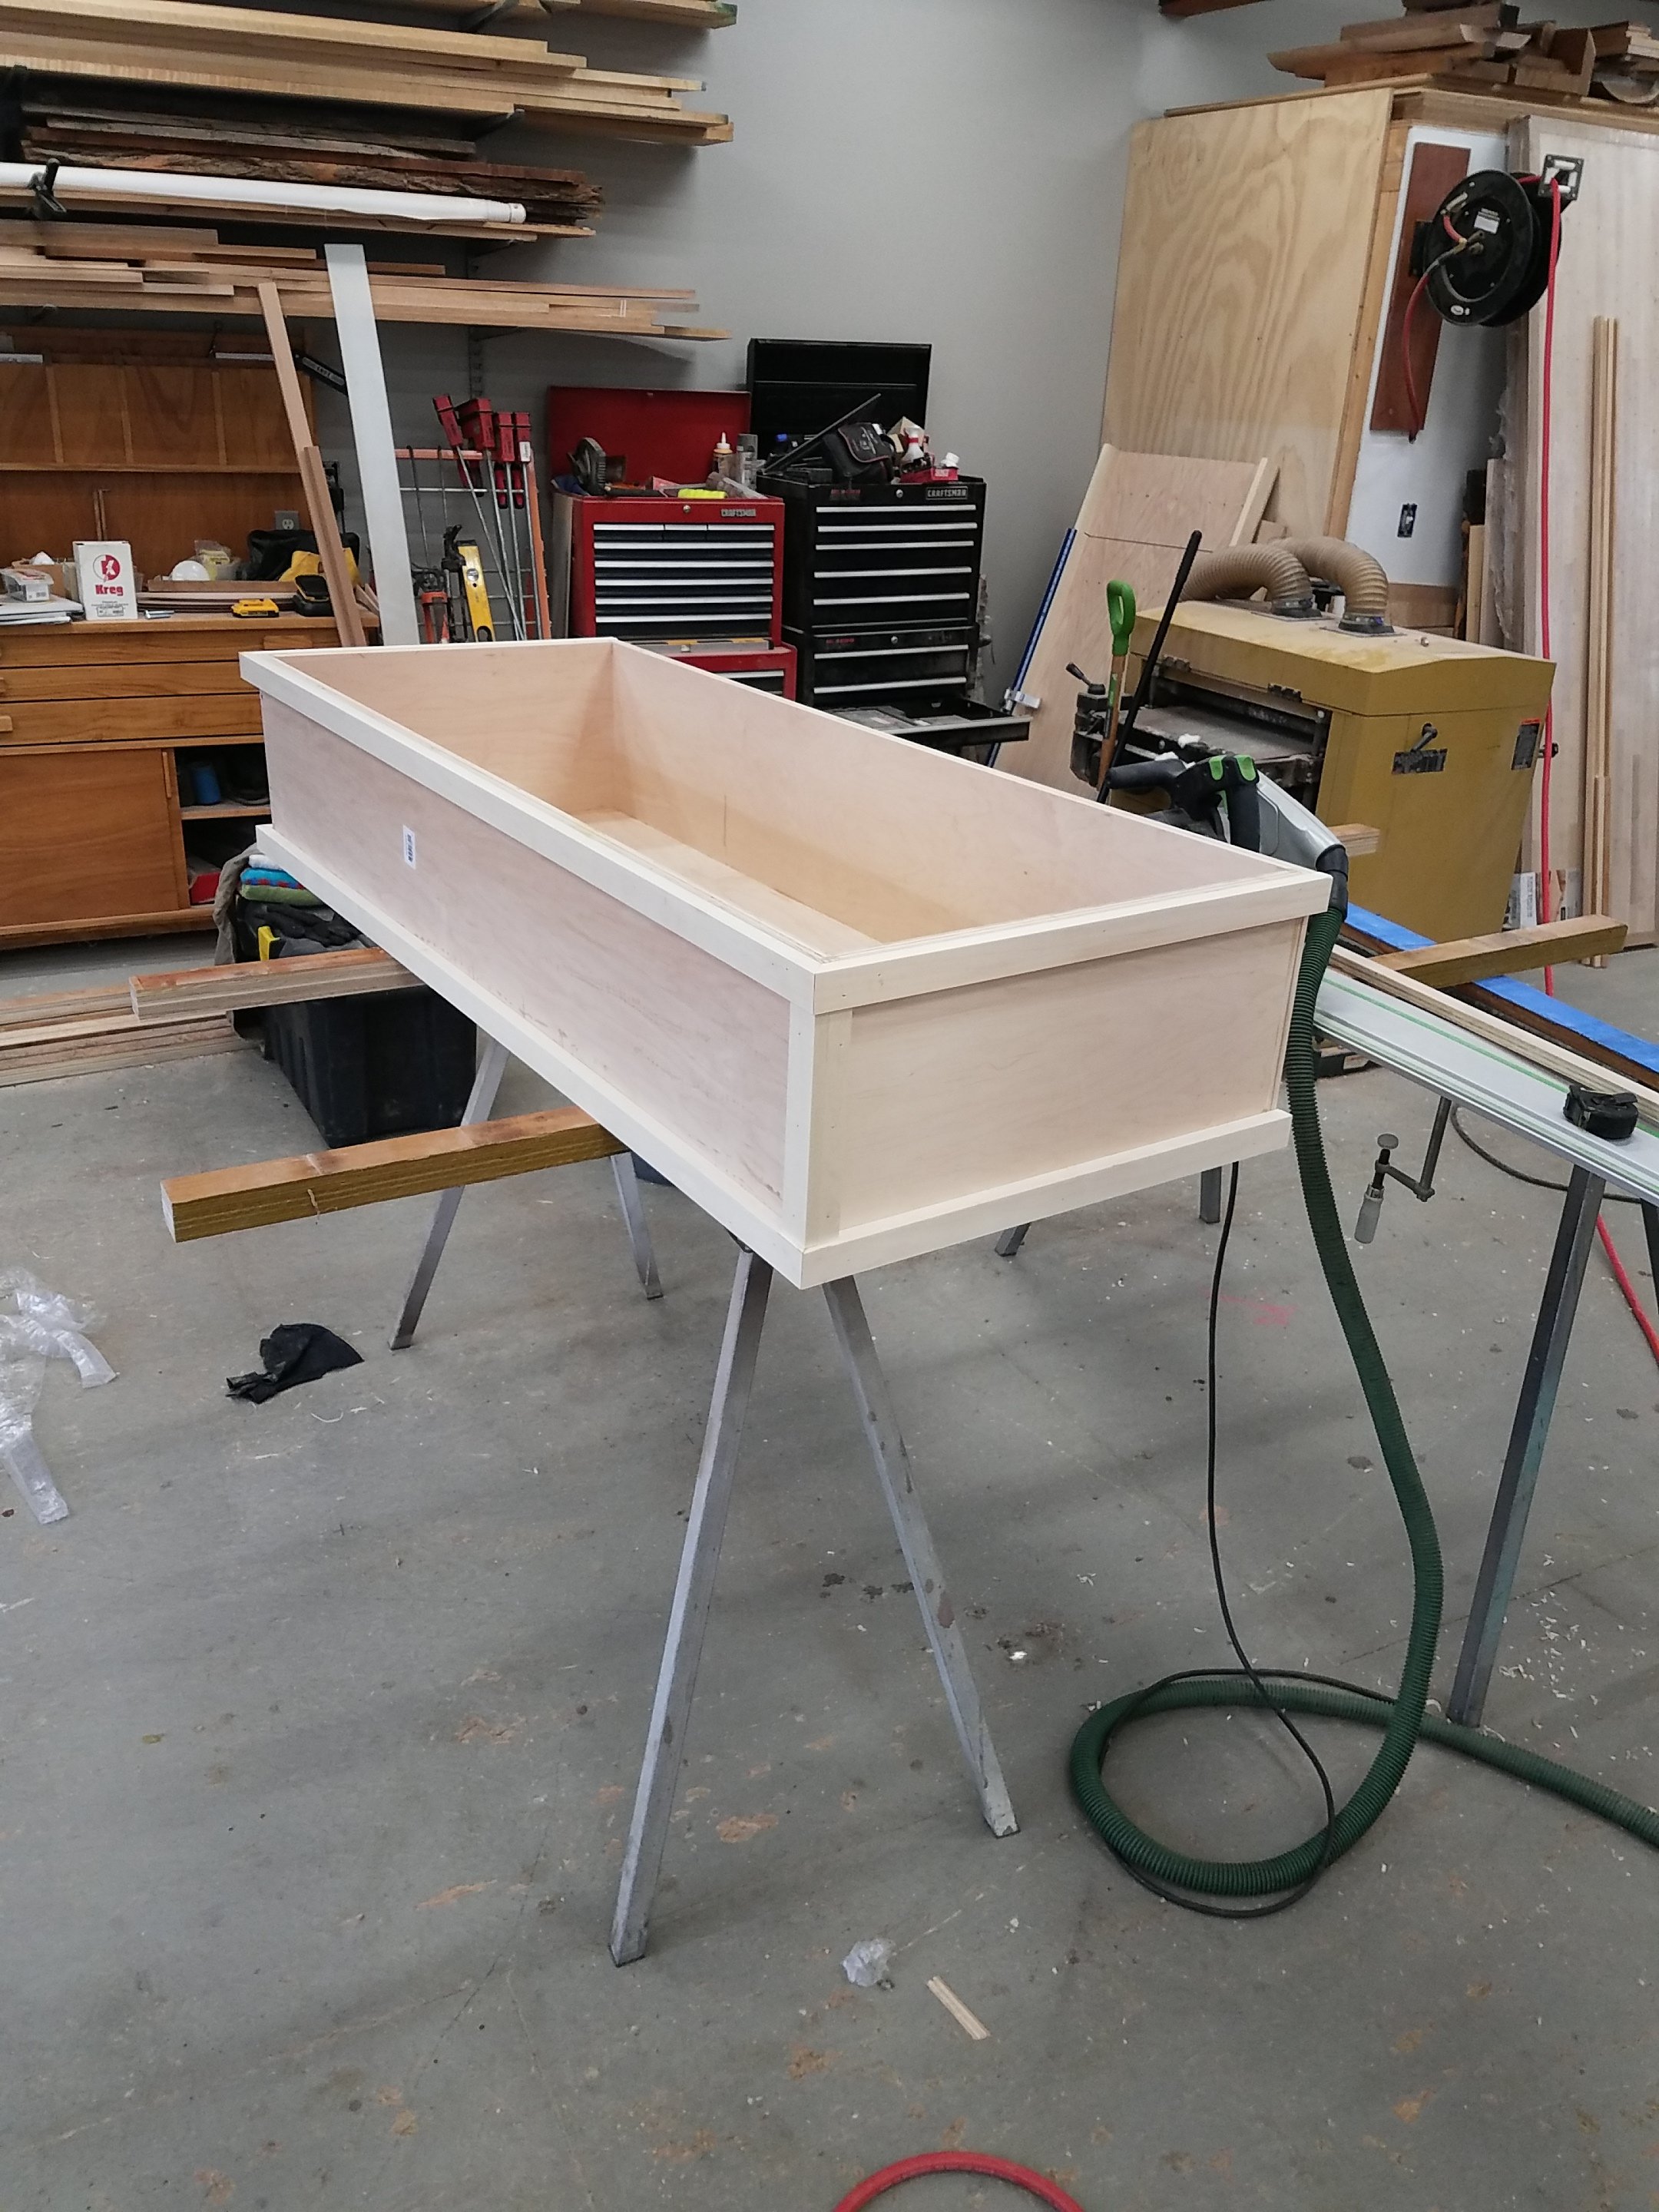
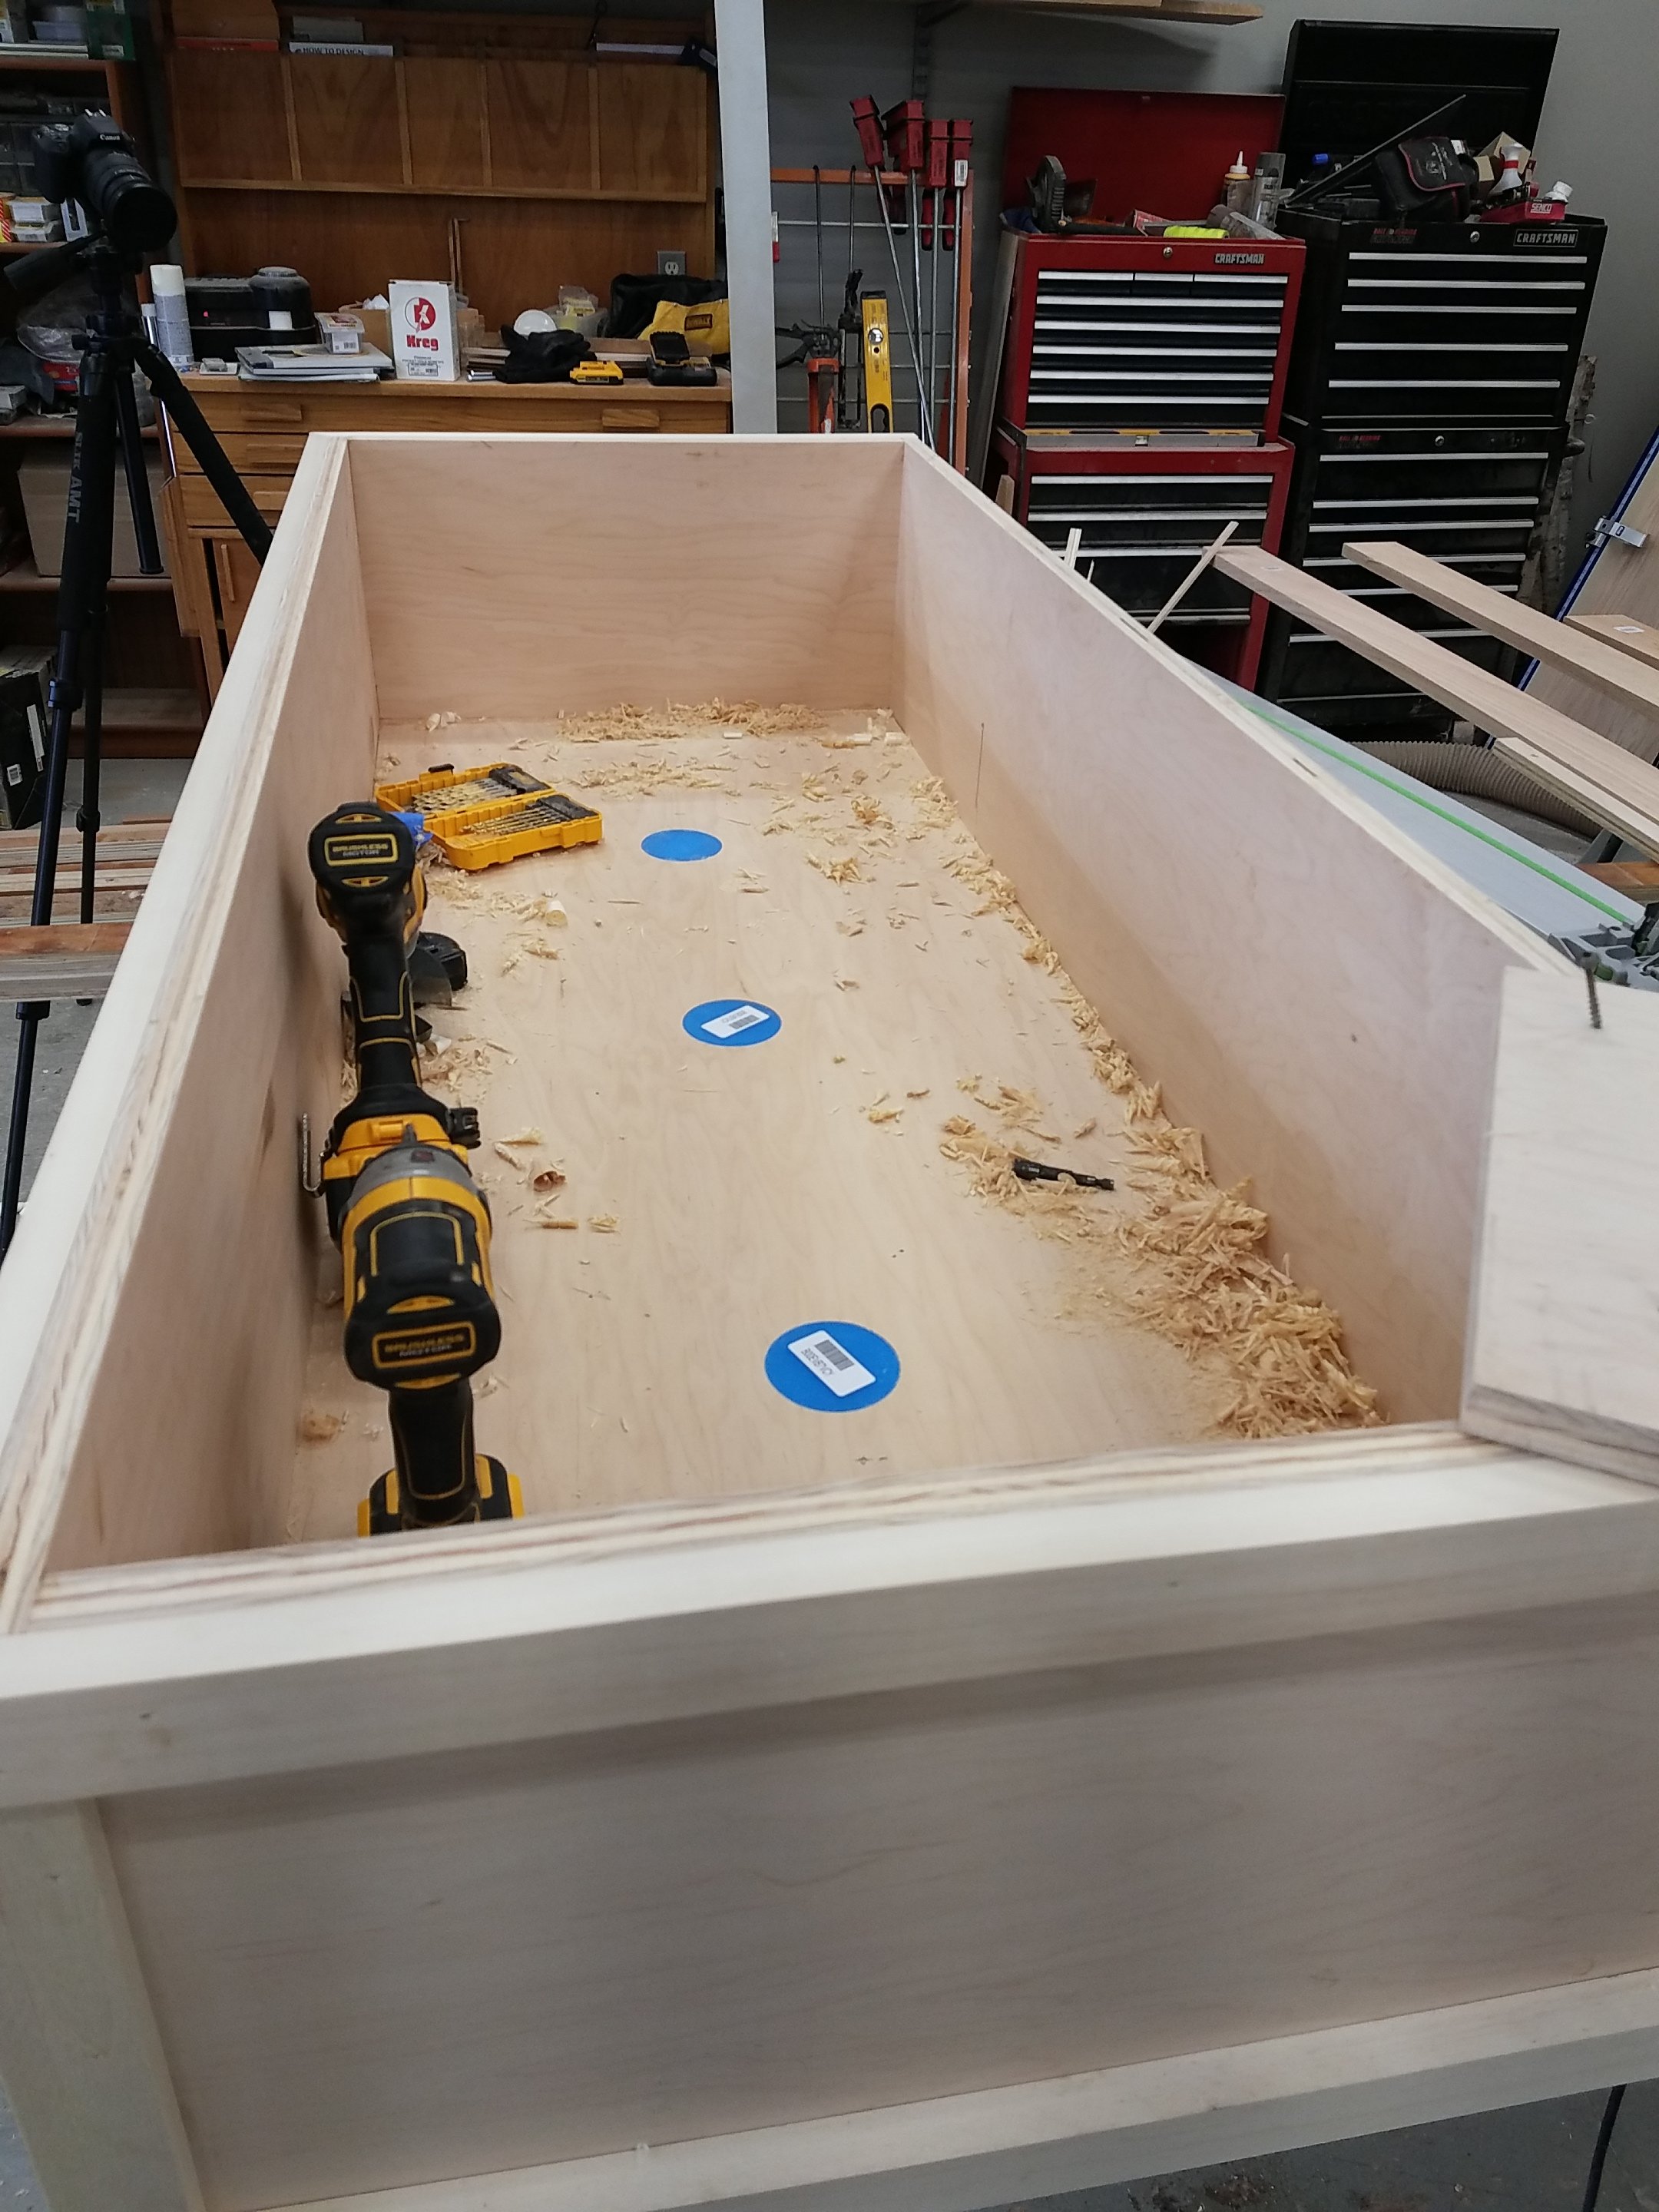
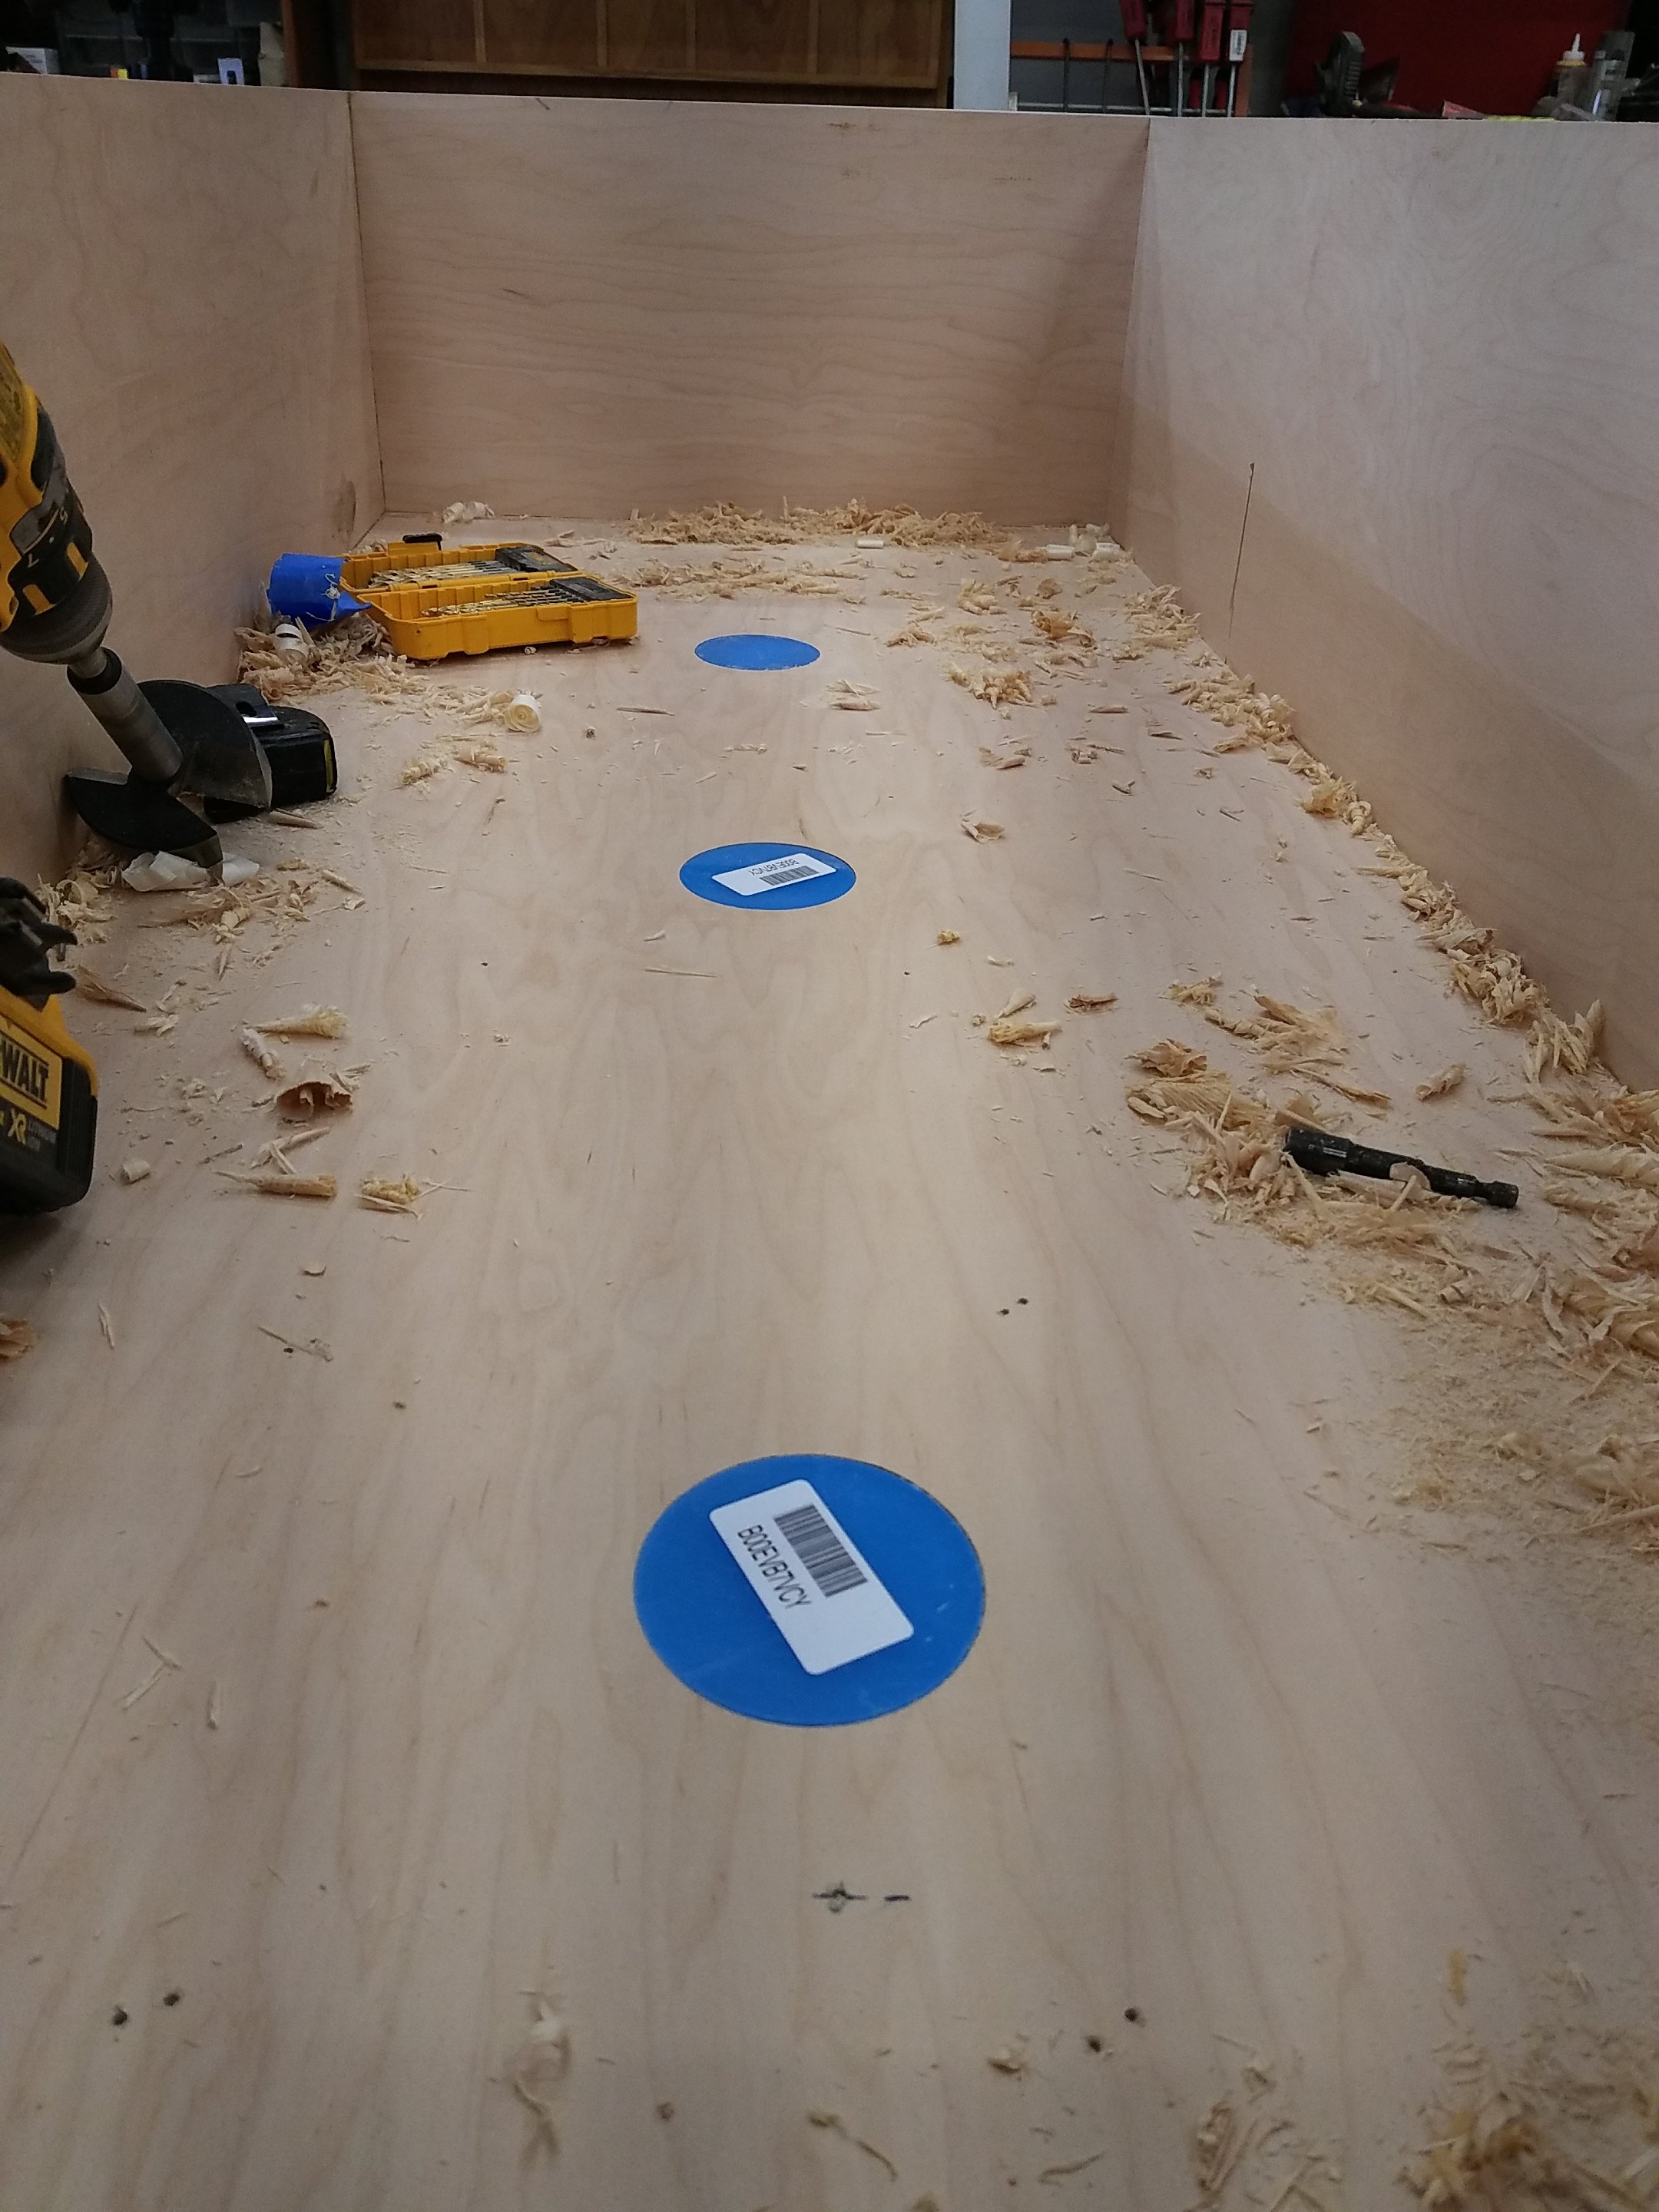
Got the hood started and is coming along nicely. Built it out of Birch plywood and instead of skinning it in stainless like the last one I'll be painting the exterior. On the inside I'll be using marine paint instead of flex-seal like last time. The blue disks are actually acrylic circles that the lights above the hood will shine through.
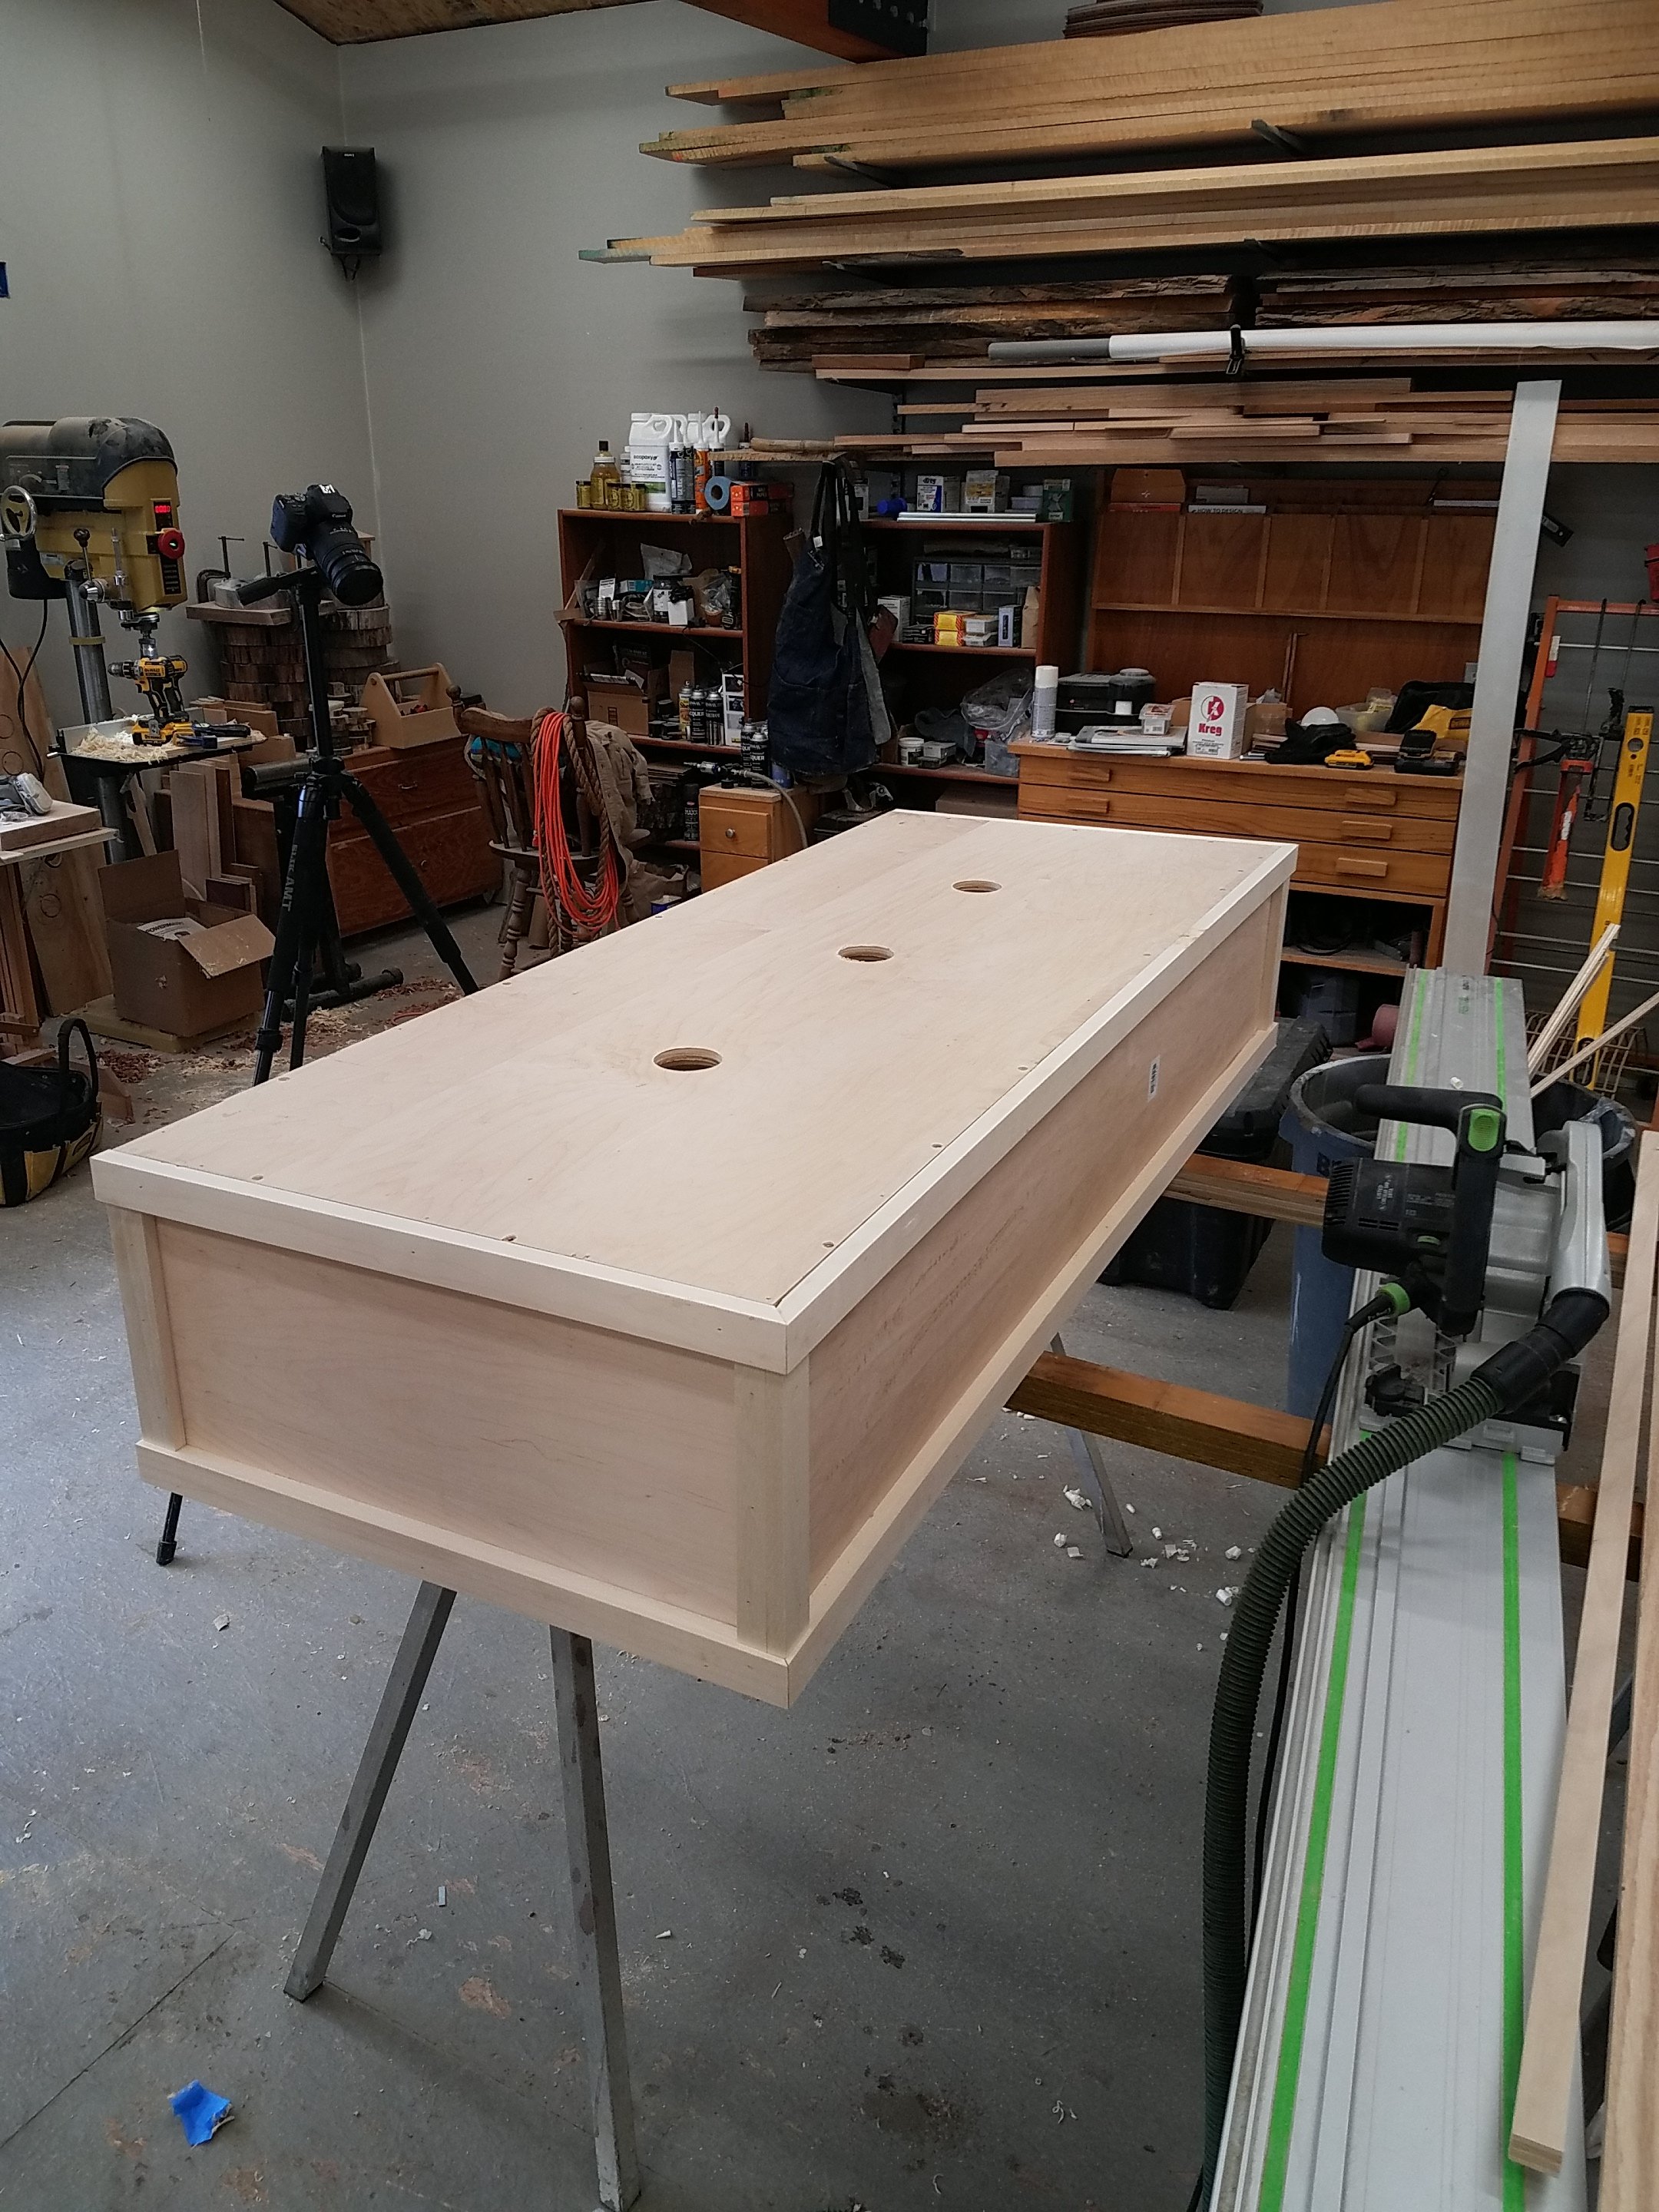


What about a stain and poly?
highland_brewer
Short Circuited Brewers
I wanted to but had some mistakes with the glue and my friend says the water proof glue won't let the stain adhere properly. Bummer I know! I could try I guess just not sure how successful it would be.What about a stain and poly?
highland_brewer
Short Circuited Brewers
Little more progress got the wall adjacent to the brewery done. Coming together nicely!
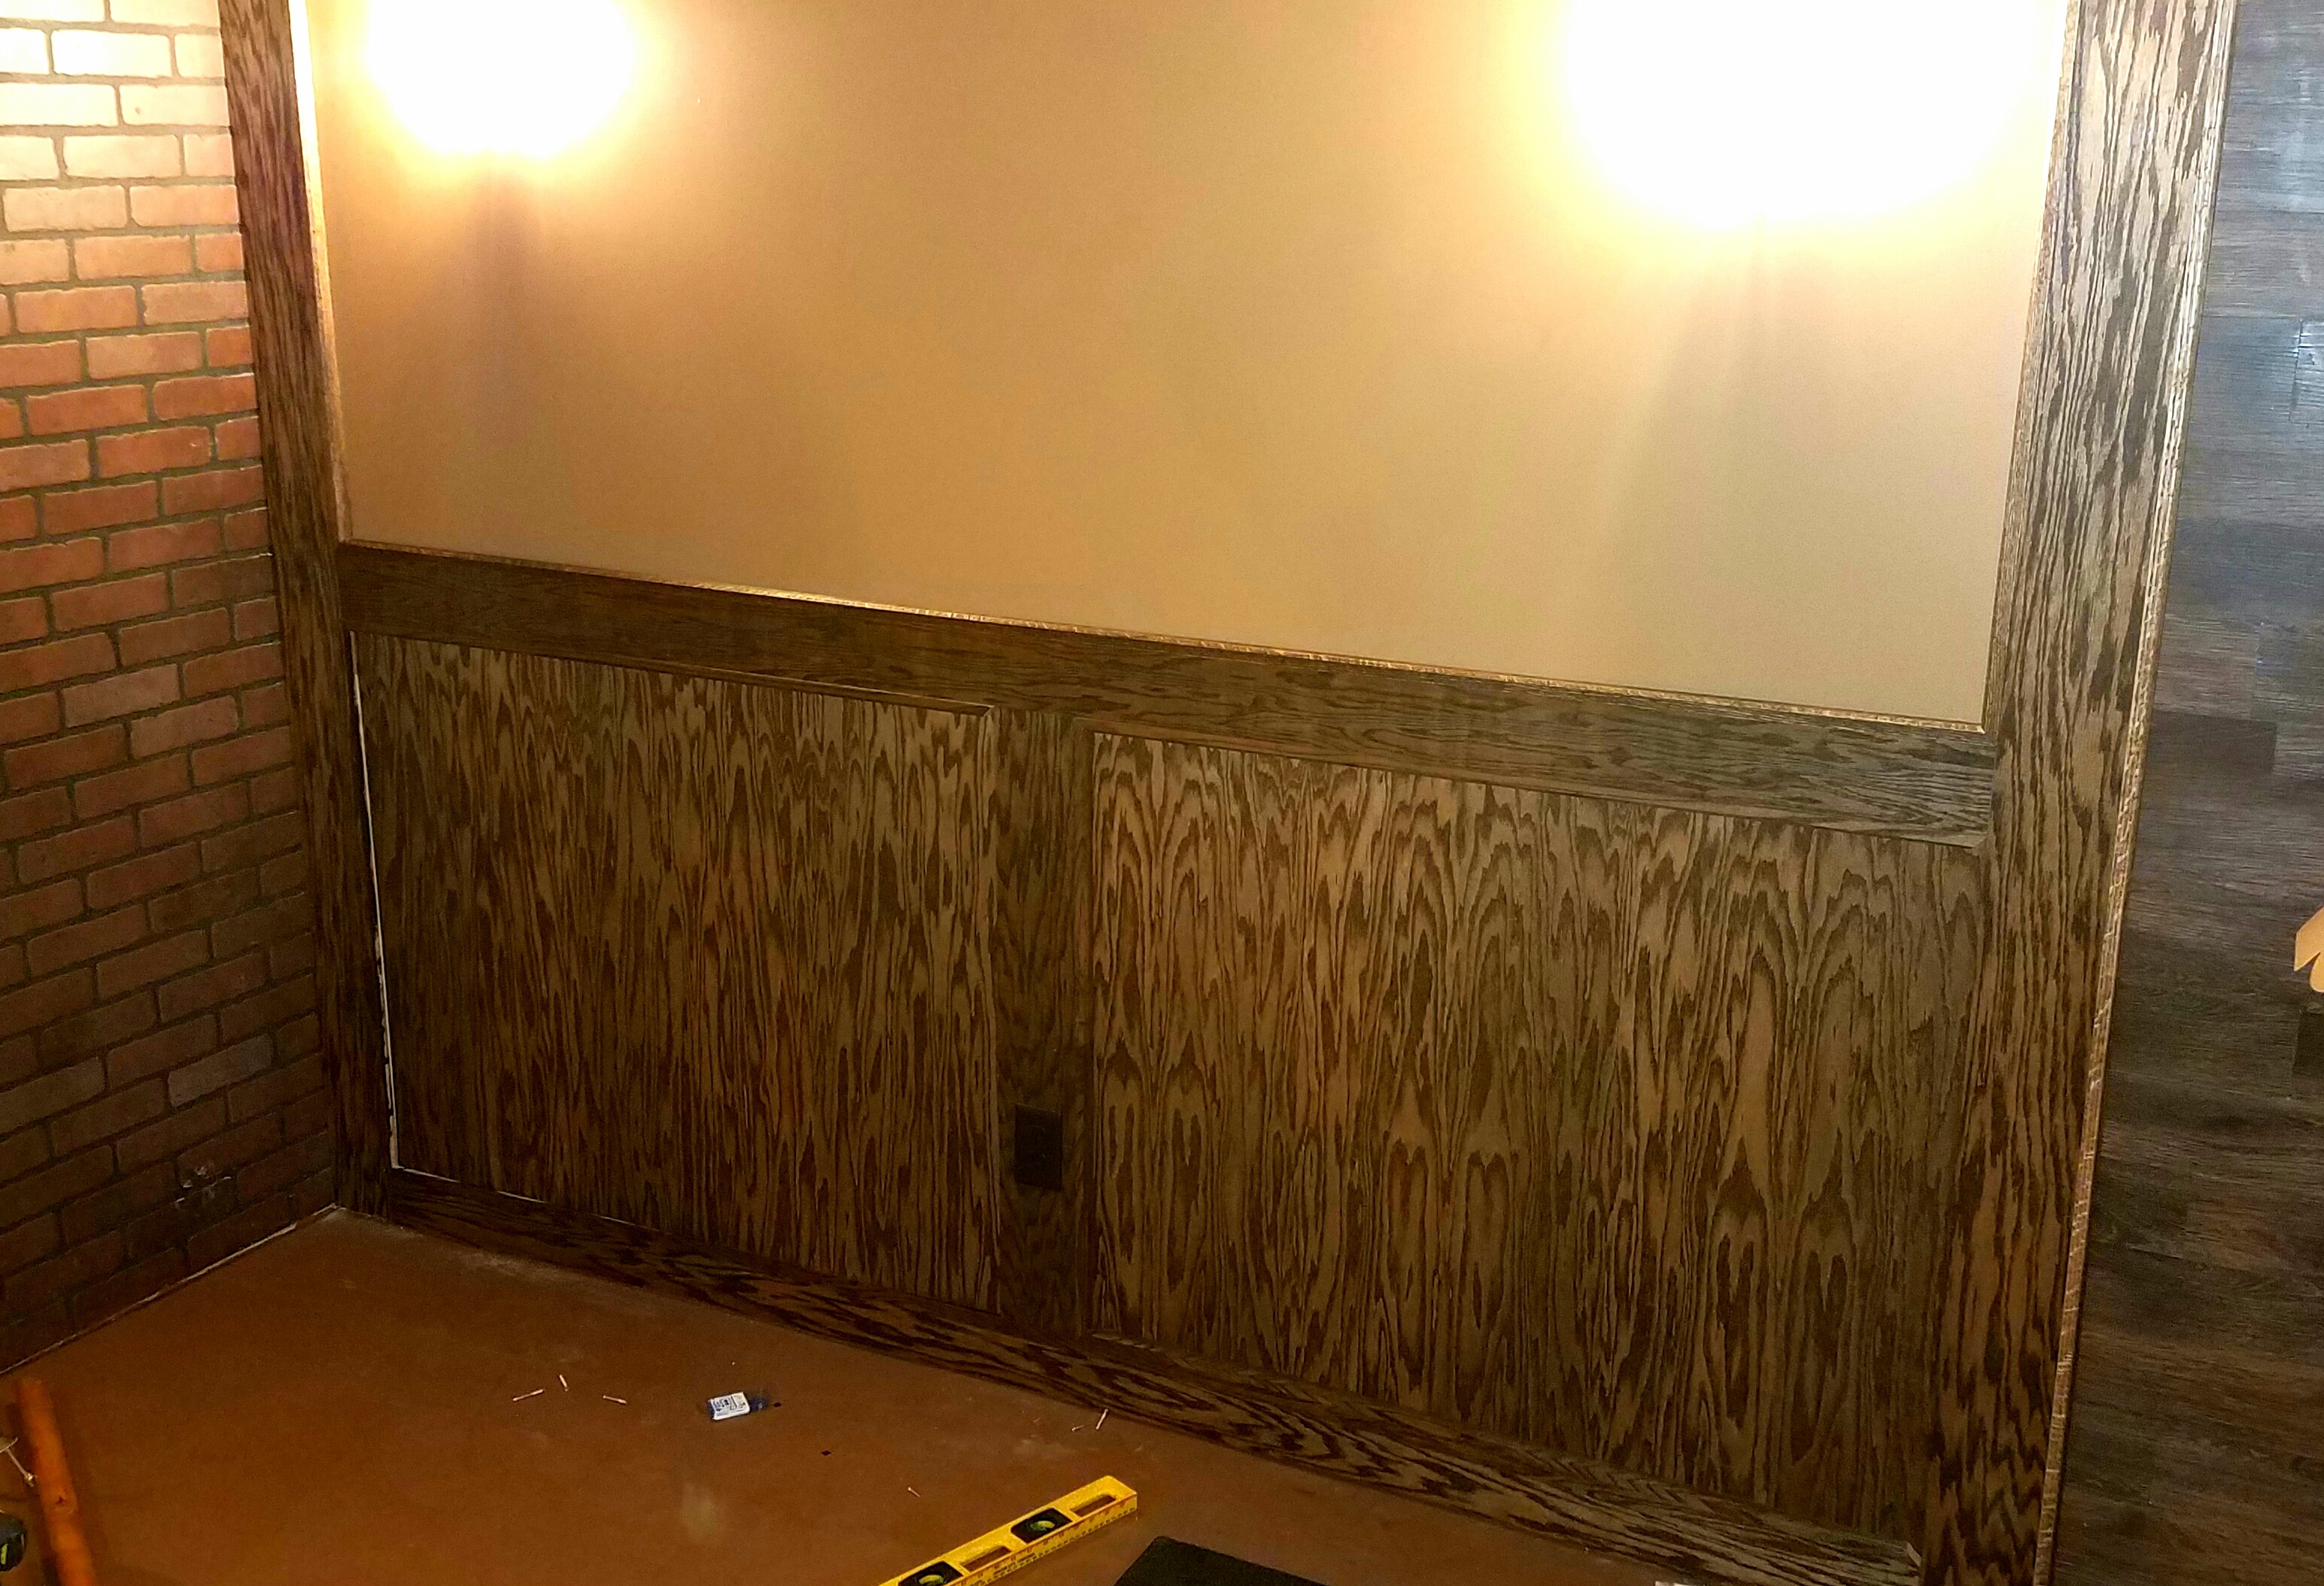

Ya I would try or use oil based products. Paint might not like the humidity over time and it would be a shame to cover up that nice grain and woodwork.
highland_brewer
Short Circuited Brewers
Definitely will be using oil based paint. I know it is unfortunate. BUT the border is out of aspen pine so it would not stain the same as the birch..Ya I would try or use oil based products. Paint might not like the humidity over time and it would be a shame to cover up that nice grain and woodwork.
You should try some scrap. Might like the contrast. Ain’t no rules here.
Nice gratuitous shot of your Festools.
I have a few myself.
Cheers
I have a few myself.
Cheers
Argh. Sorry to hear you had problems. I used a similar Rust-Oleum product in my garage, did an insane amount of surface prep, and it looked great when I was finished. Within a year it bubbled and cracked and came off everywhere. I dunno if it was the road salt or what, but it looks pathetic now. The sealcrete product looks great tho. What did you use to sand the epoxy down, one of those giant floor sanders with the diamond bits?Well.. My hopes of doing the floor in Epoxy were not realized.. after the failure and talking to other people there is probably a missing step somewhere that is not in the instructions.. however I did get A coating on the floor. We'll see how long it lasts!
highland_brewer
Short Circuited Brewers
Argh. Sorry to hear you had problems. I used a similar Rust-Oleum product in my garage, did an insane amount of surface prep, and it looked great when I was finished. Within a year it bubbled and cracked and came off everywhere. I dunno if it was the road salt or what, but it looks pathetic now. The sealcrete product looks great tho. What did you use to sand the epoxy down, one of those giant floor sanders with the diamond bits?
Just a palm sander with some 80 grit.. jury is still out on whether or not it stick for the long haul...
highland_brewer
Short Circuited Brewers
Been a while since the last update. Here is an overview of where I am on the progress to date.
Looks great, lot of good progress! Sucks that the floor is still giving you fits, that would drive me crazy. Can't wait to see that L shaped bar. [emoji57]Been a while since the last update. Here is an overview of where I am on the progress to date.
highland_brewer
Short Circuited Brewers
Been a little while since I have updated the thread. Been super busy with life and everything else that comes along with it.
Thought I would give an update on the BAR side of the room and what progress has been made there recently.
Started by framing out the bar.
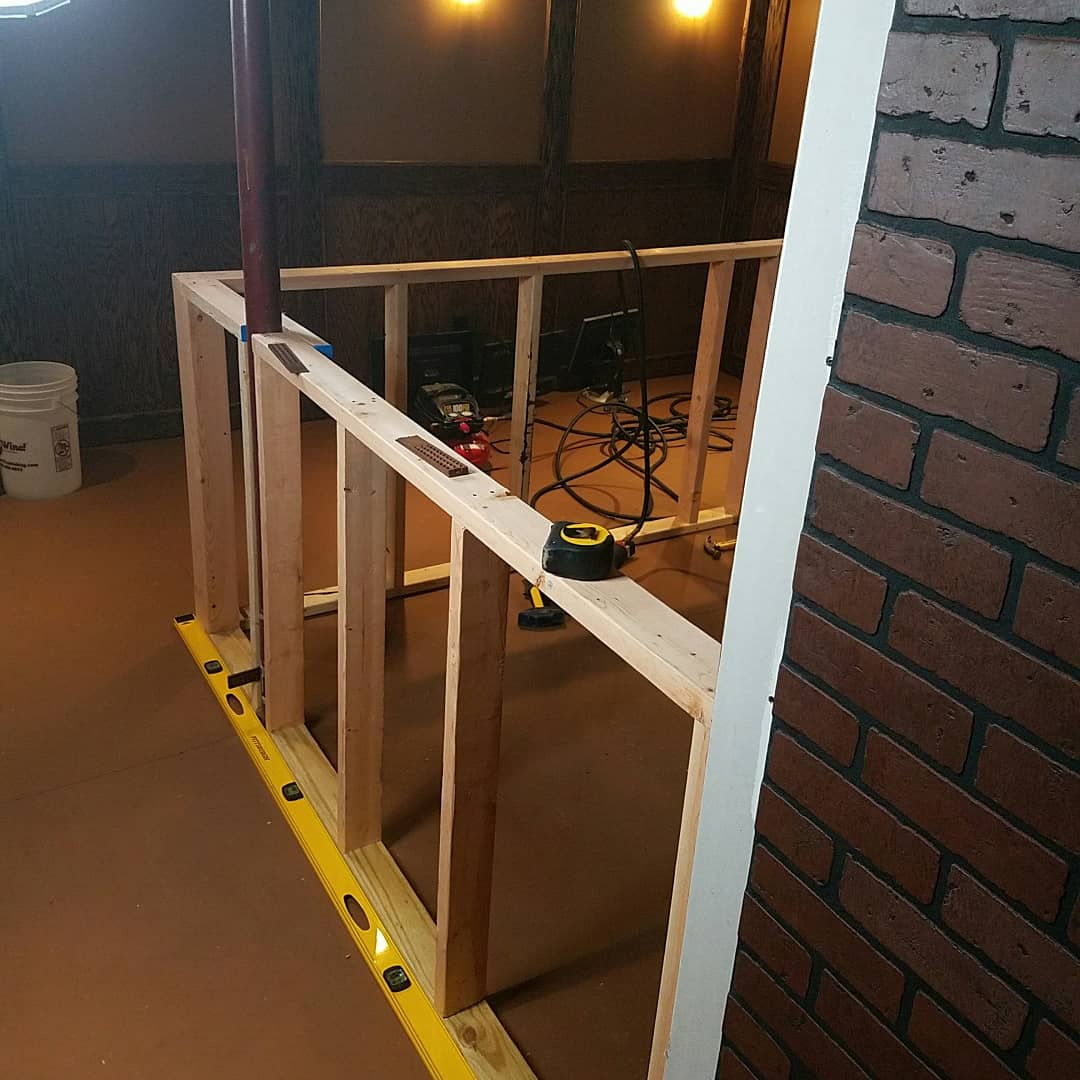
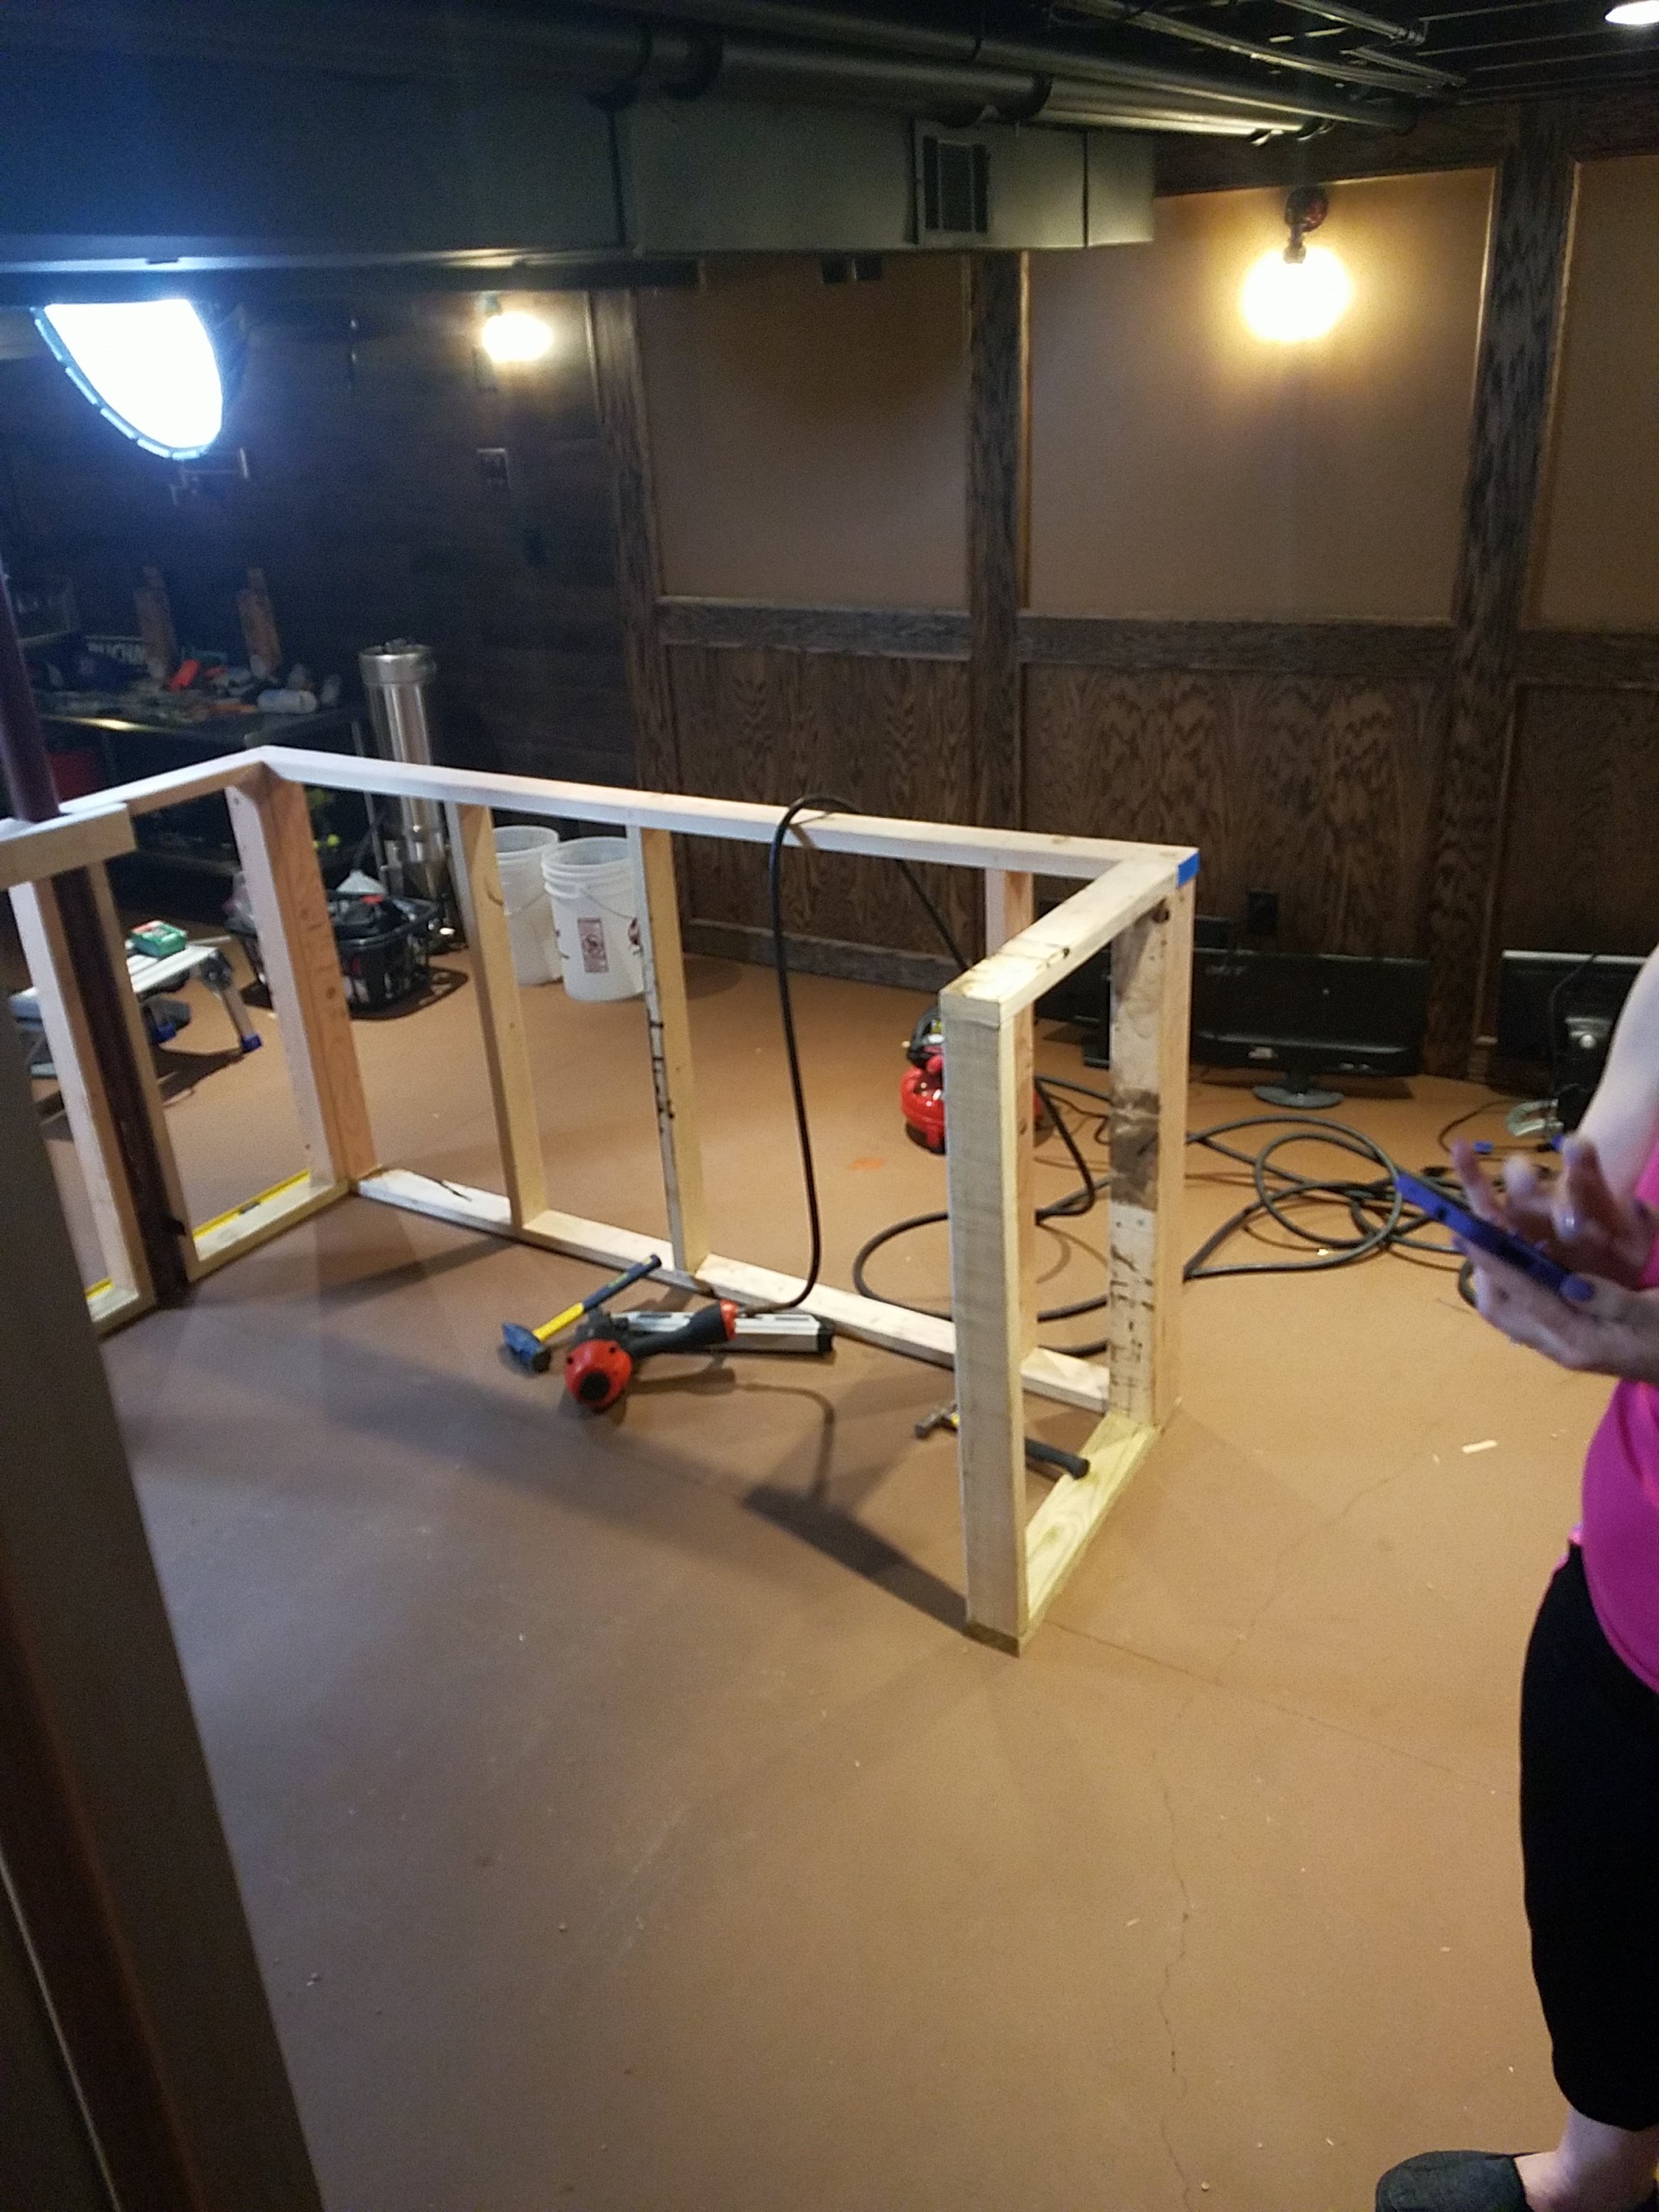
After the framing was completed I cut and stained the 3/4" oak plywood and faced the front of the bar and the top of the bar with 3/4 regular plywood.
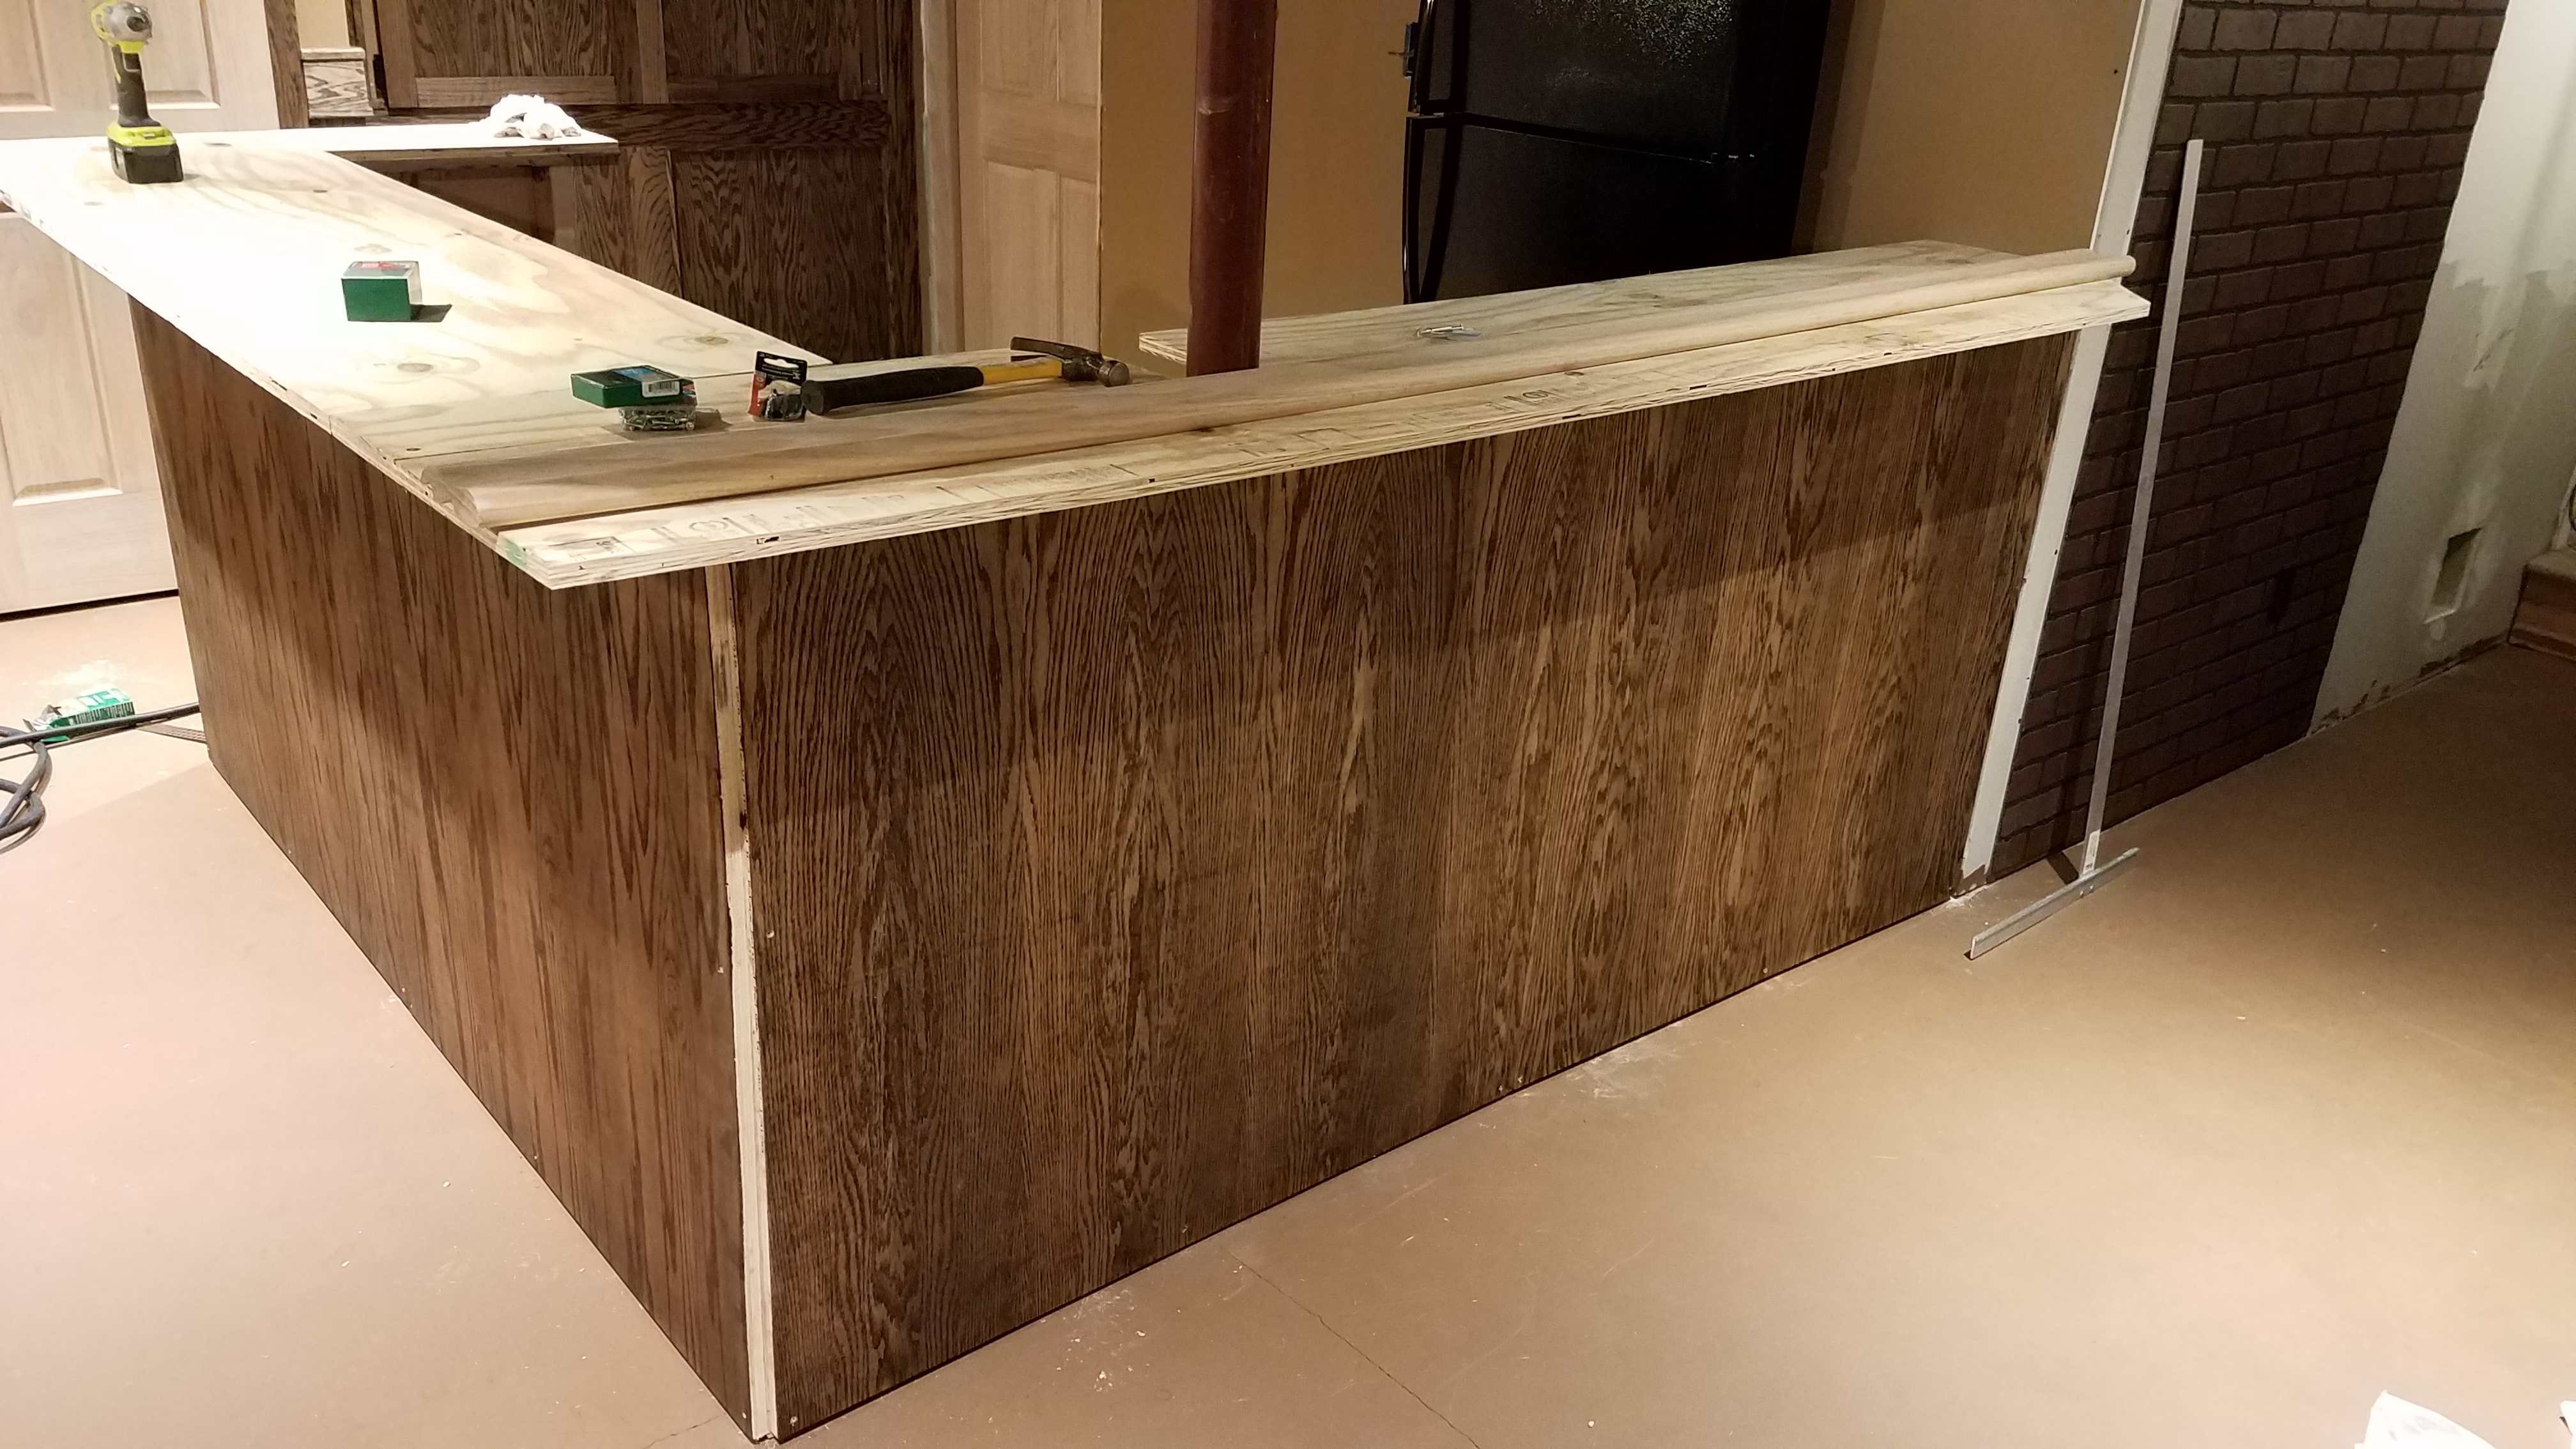
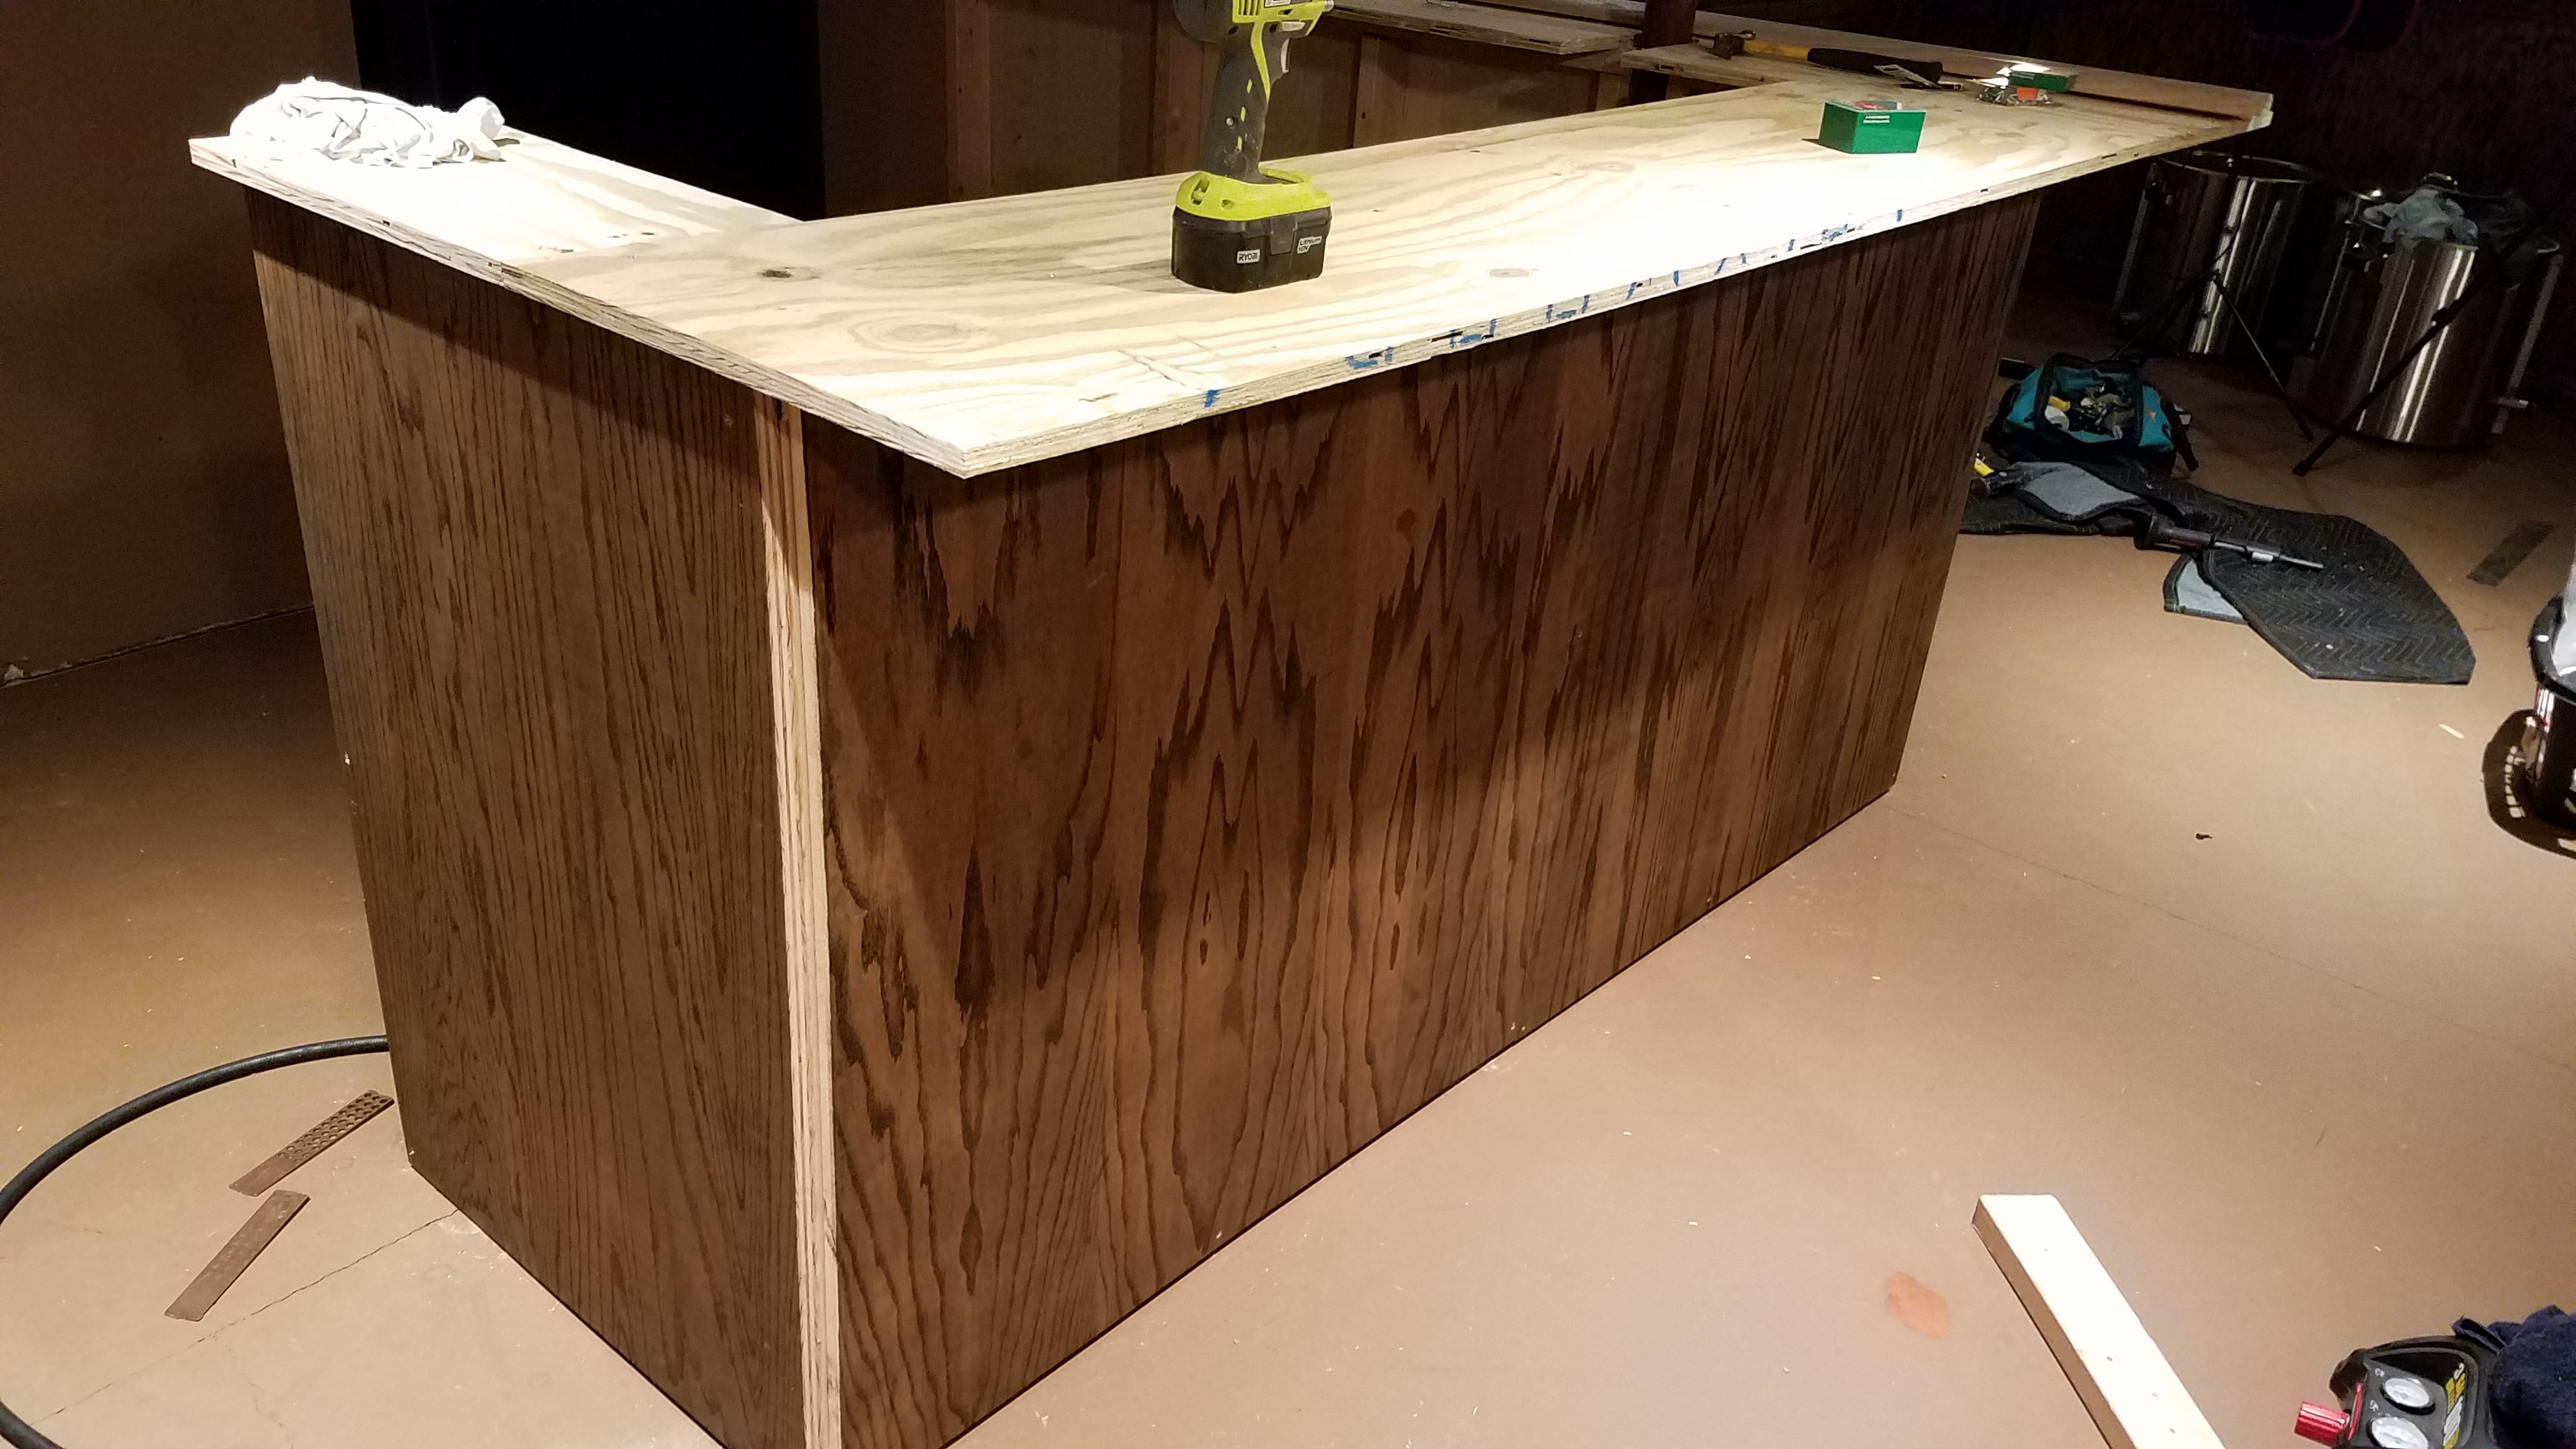
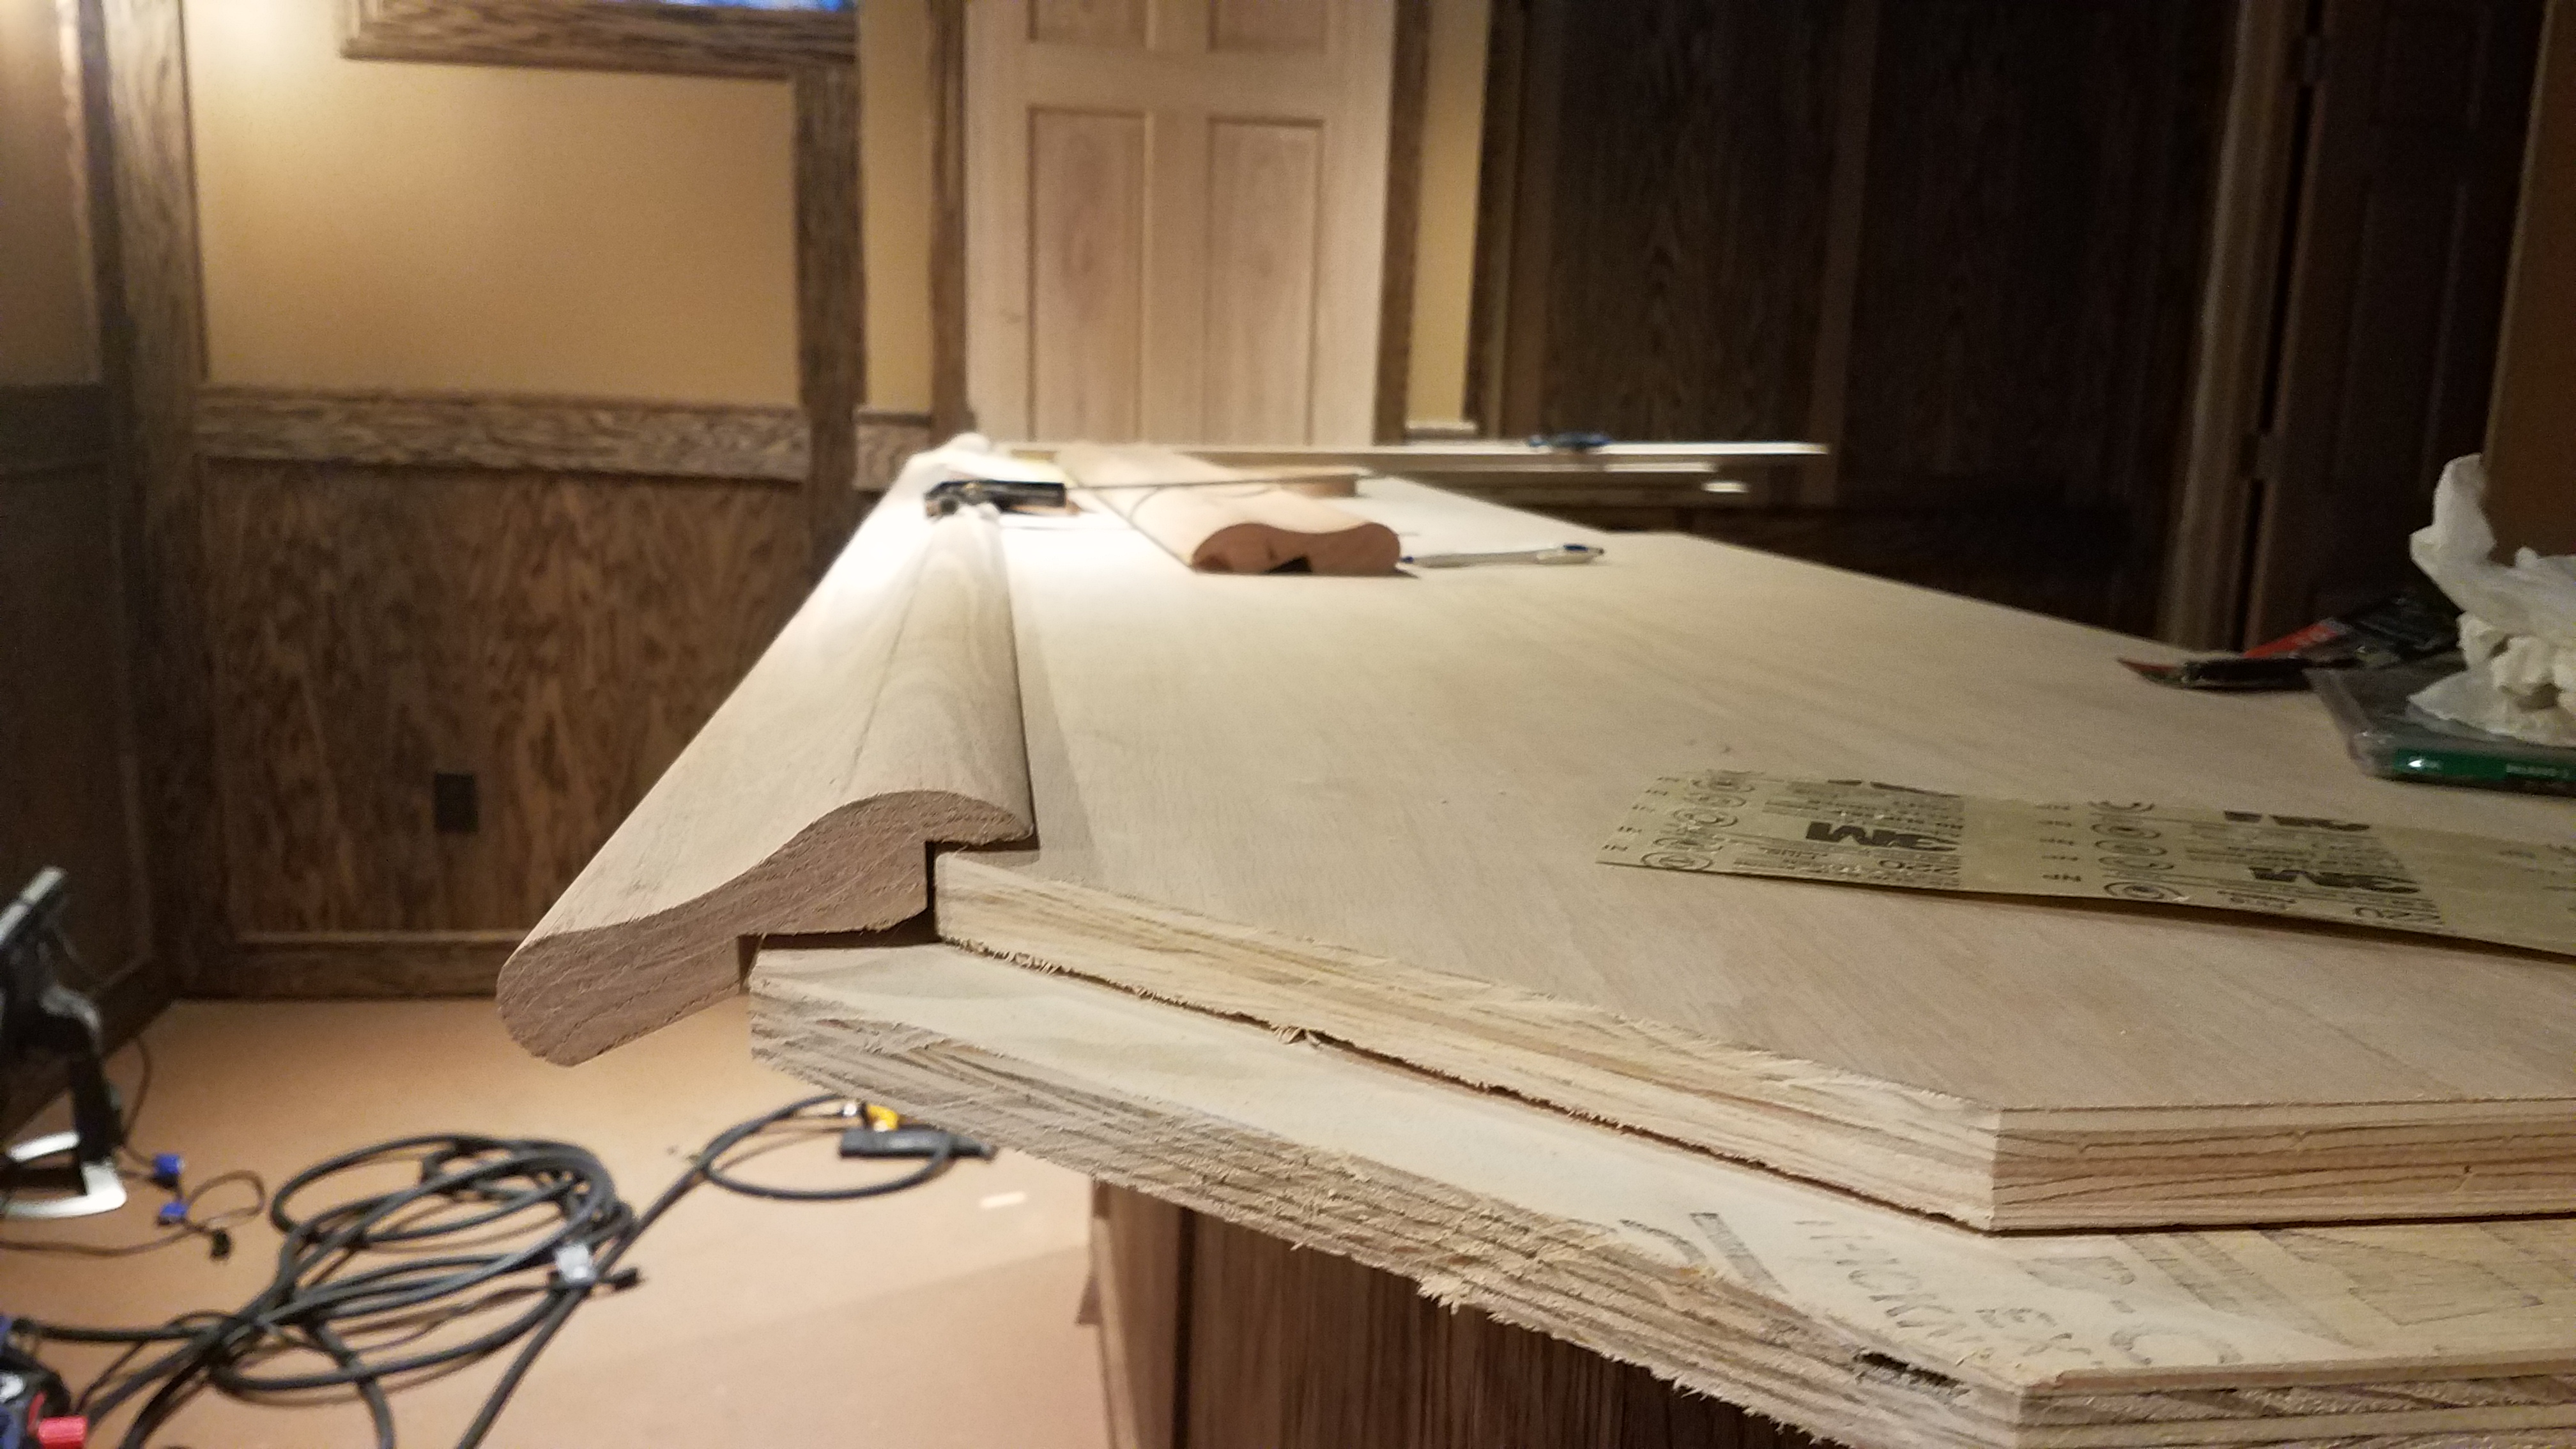
After completing the facing of the bar, I installed 3/4" oak trim on the bottom, top, and a 1/2" piece in the center of each side to cover the seam. I used the 1/2" just to give it some visual interest. At the corners I used 3/4 plywood cut on a 45 and edge banded one of the exposed edges to complete the look.
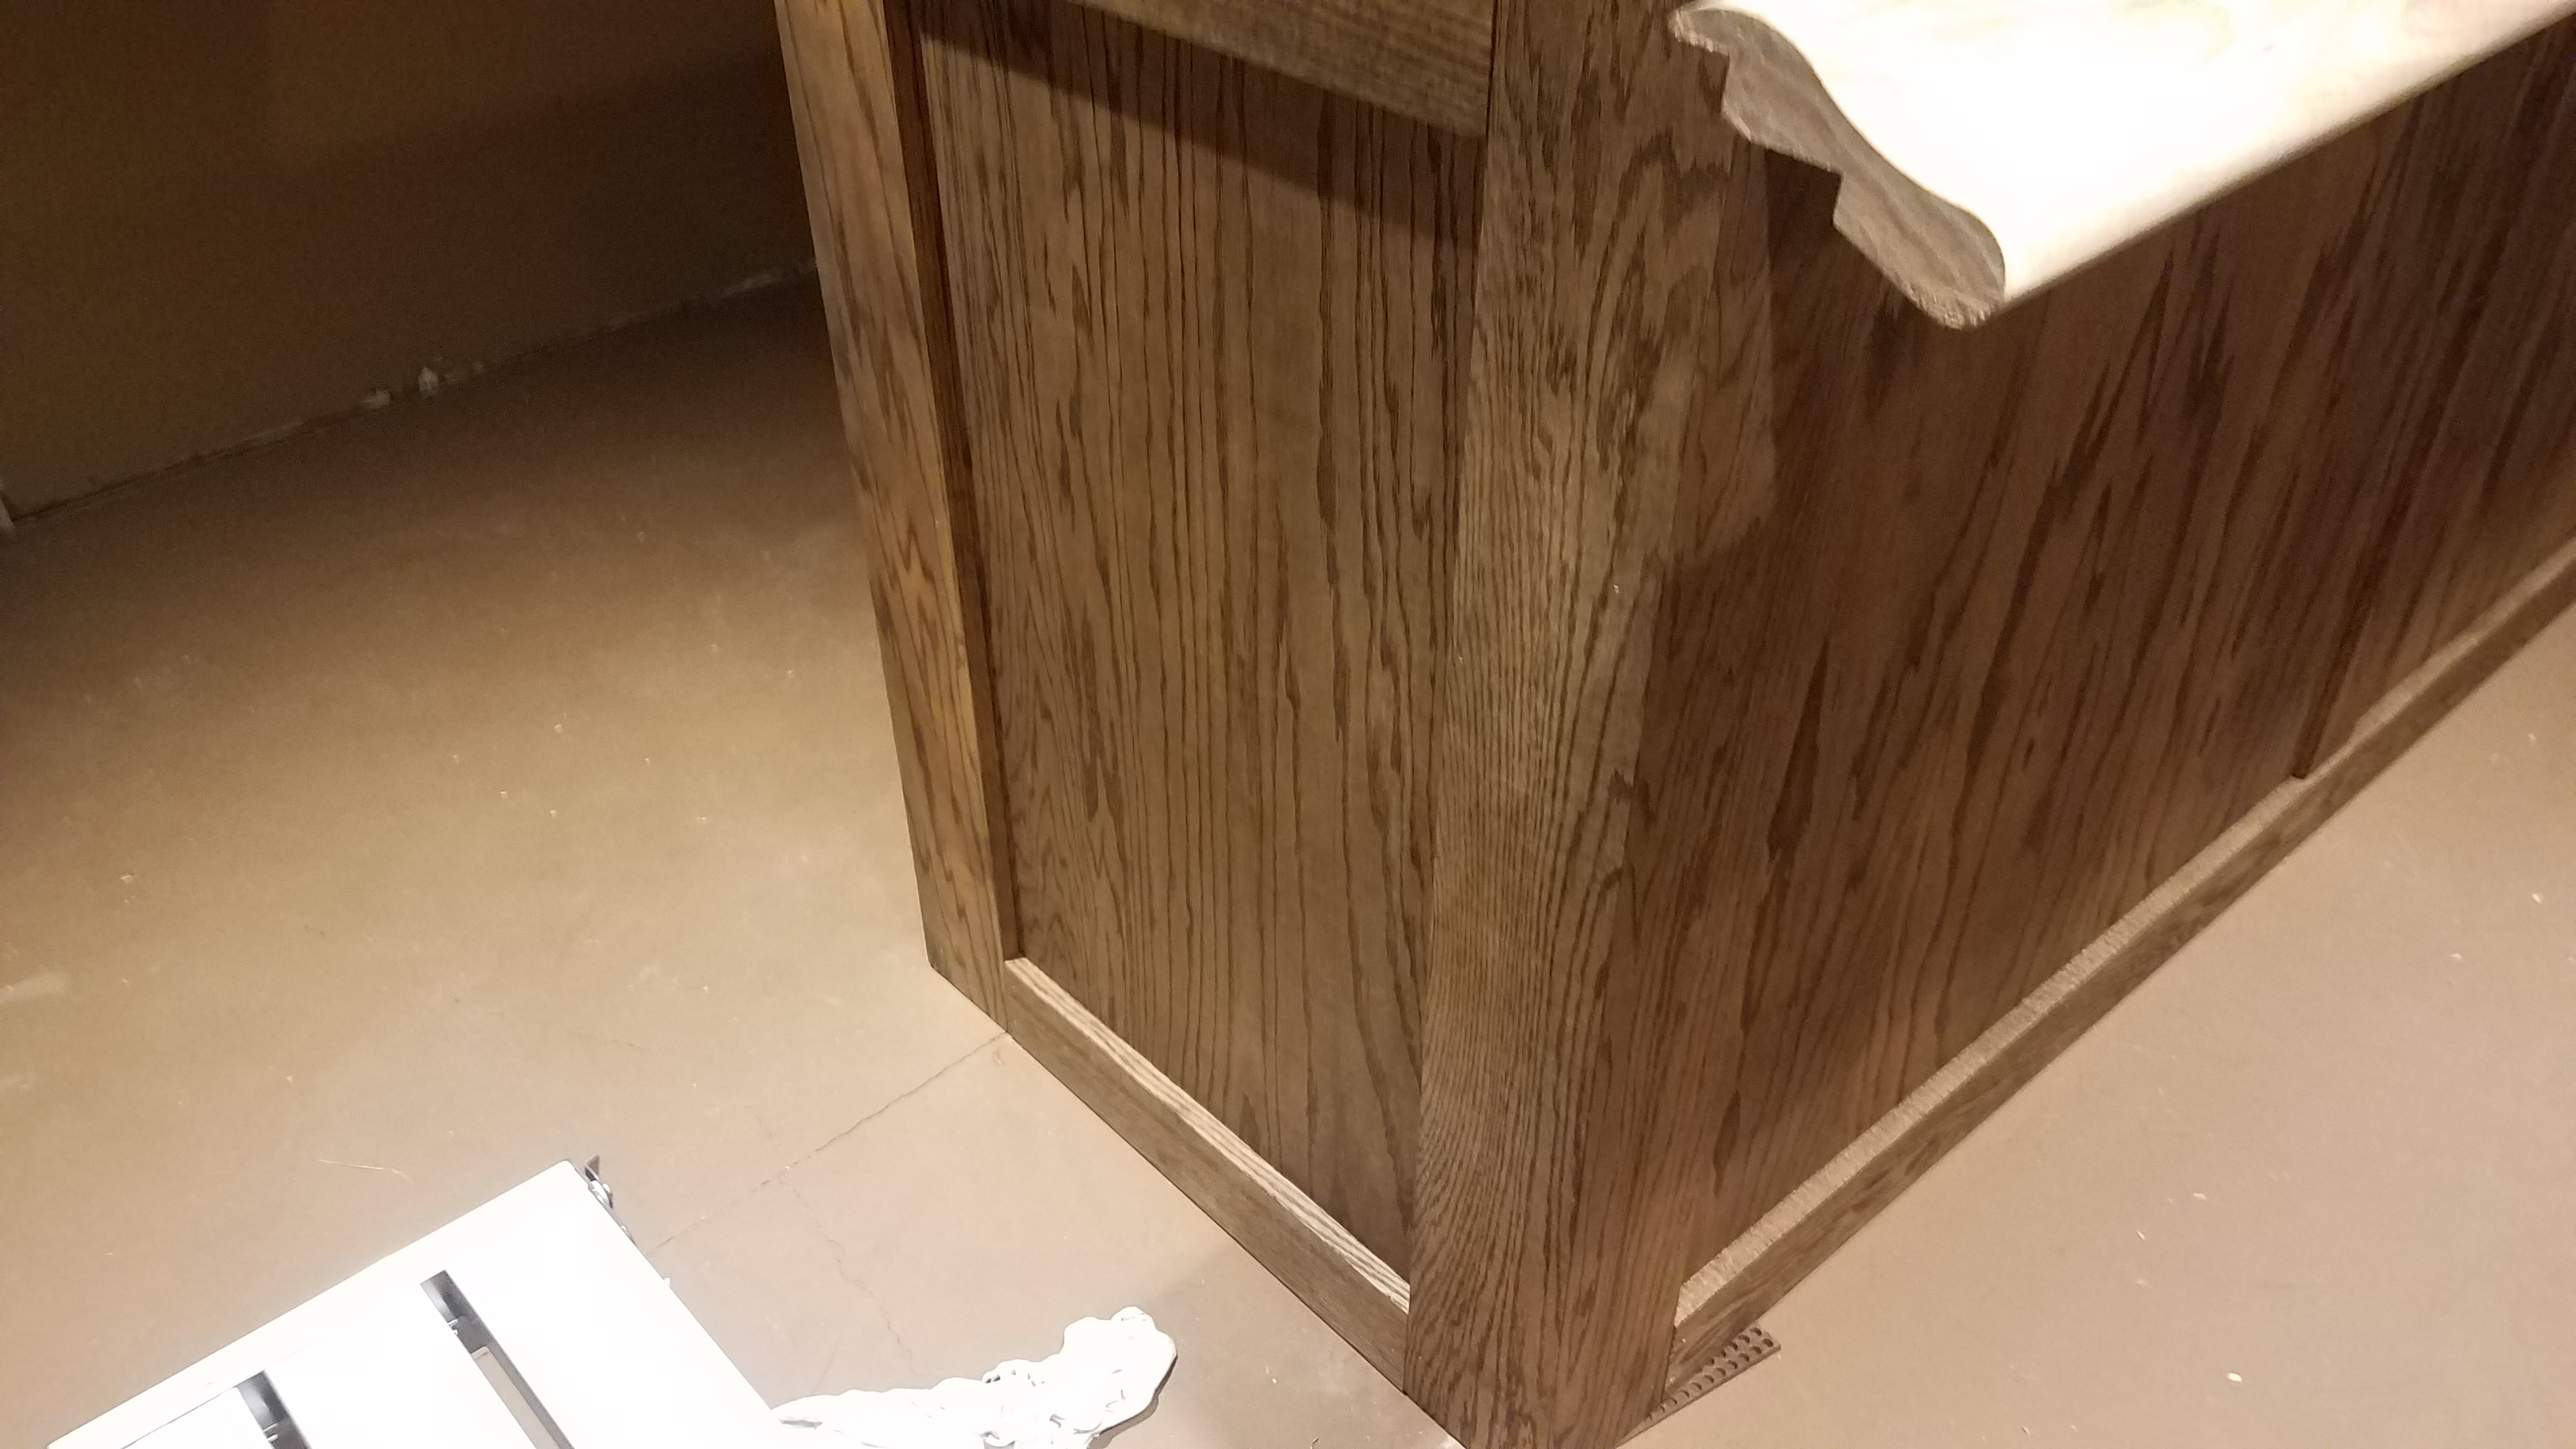
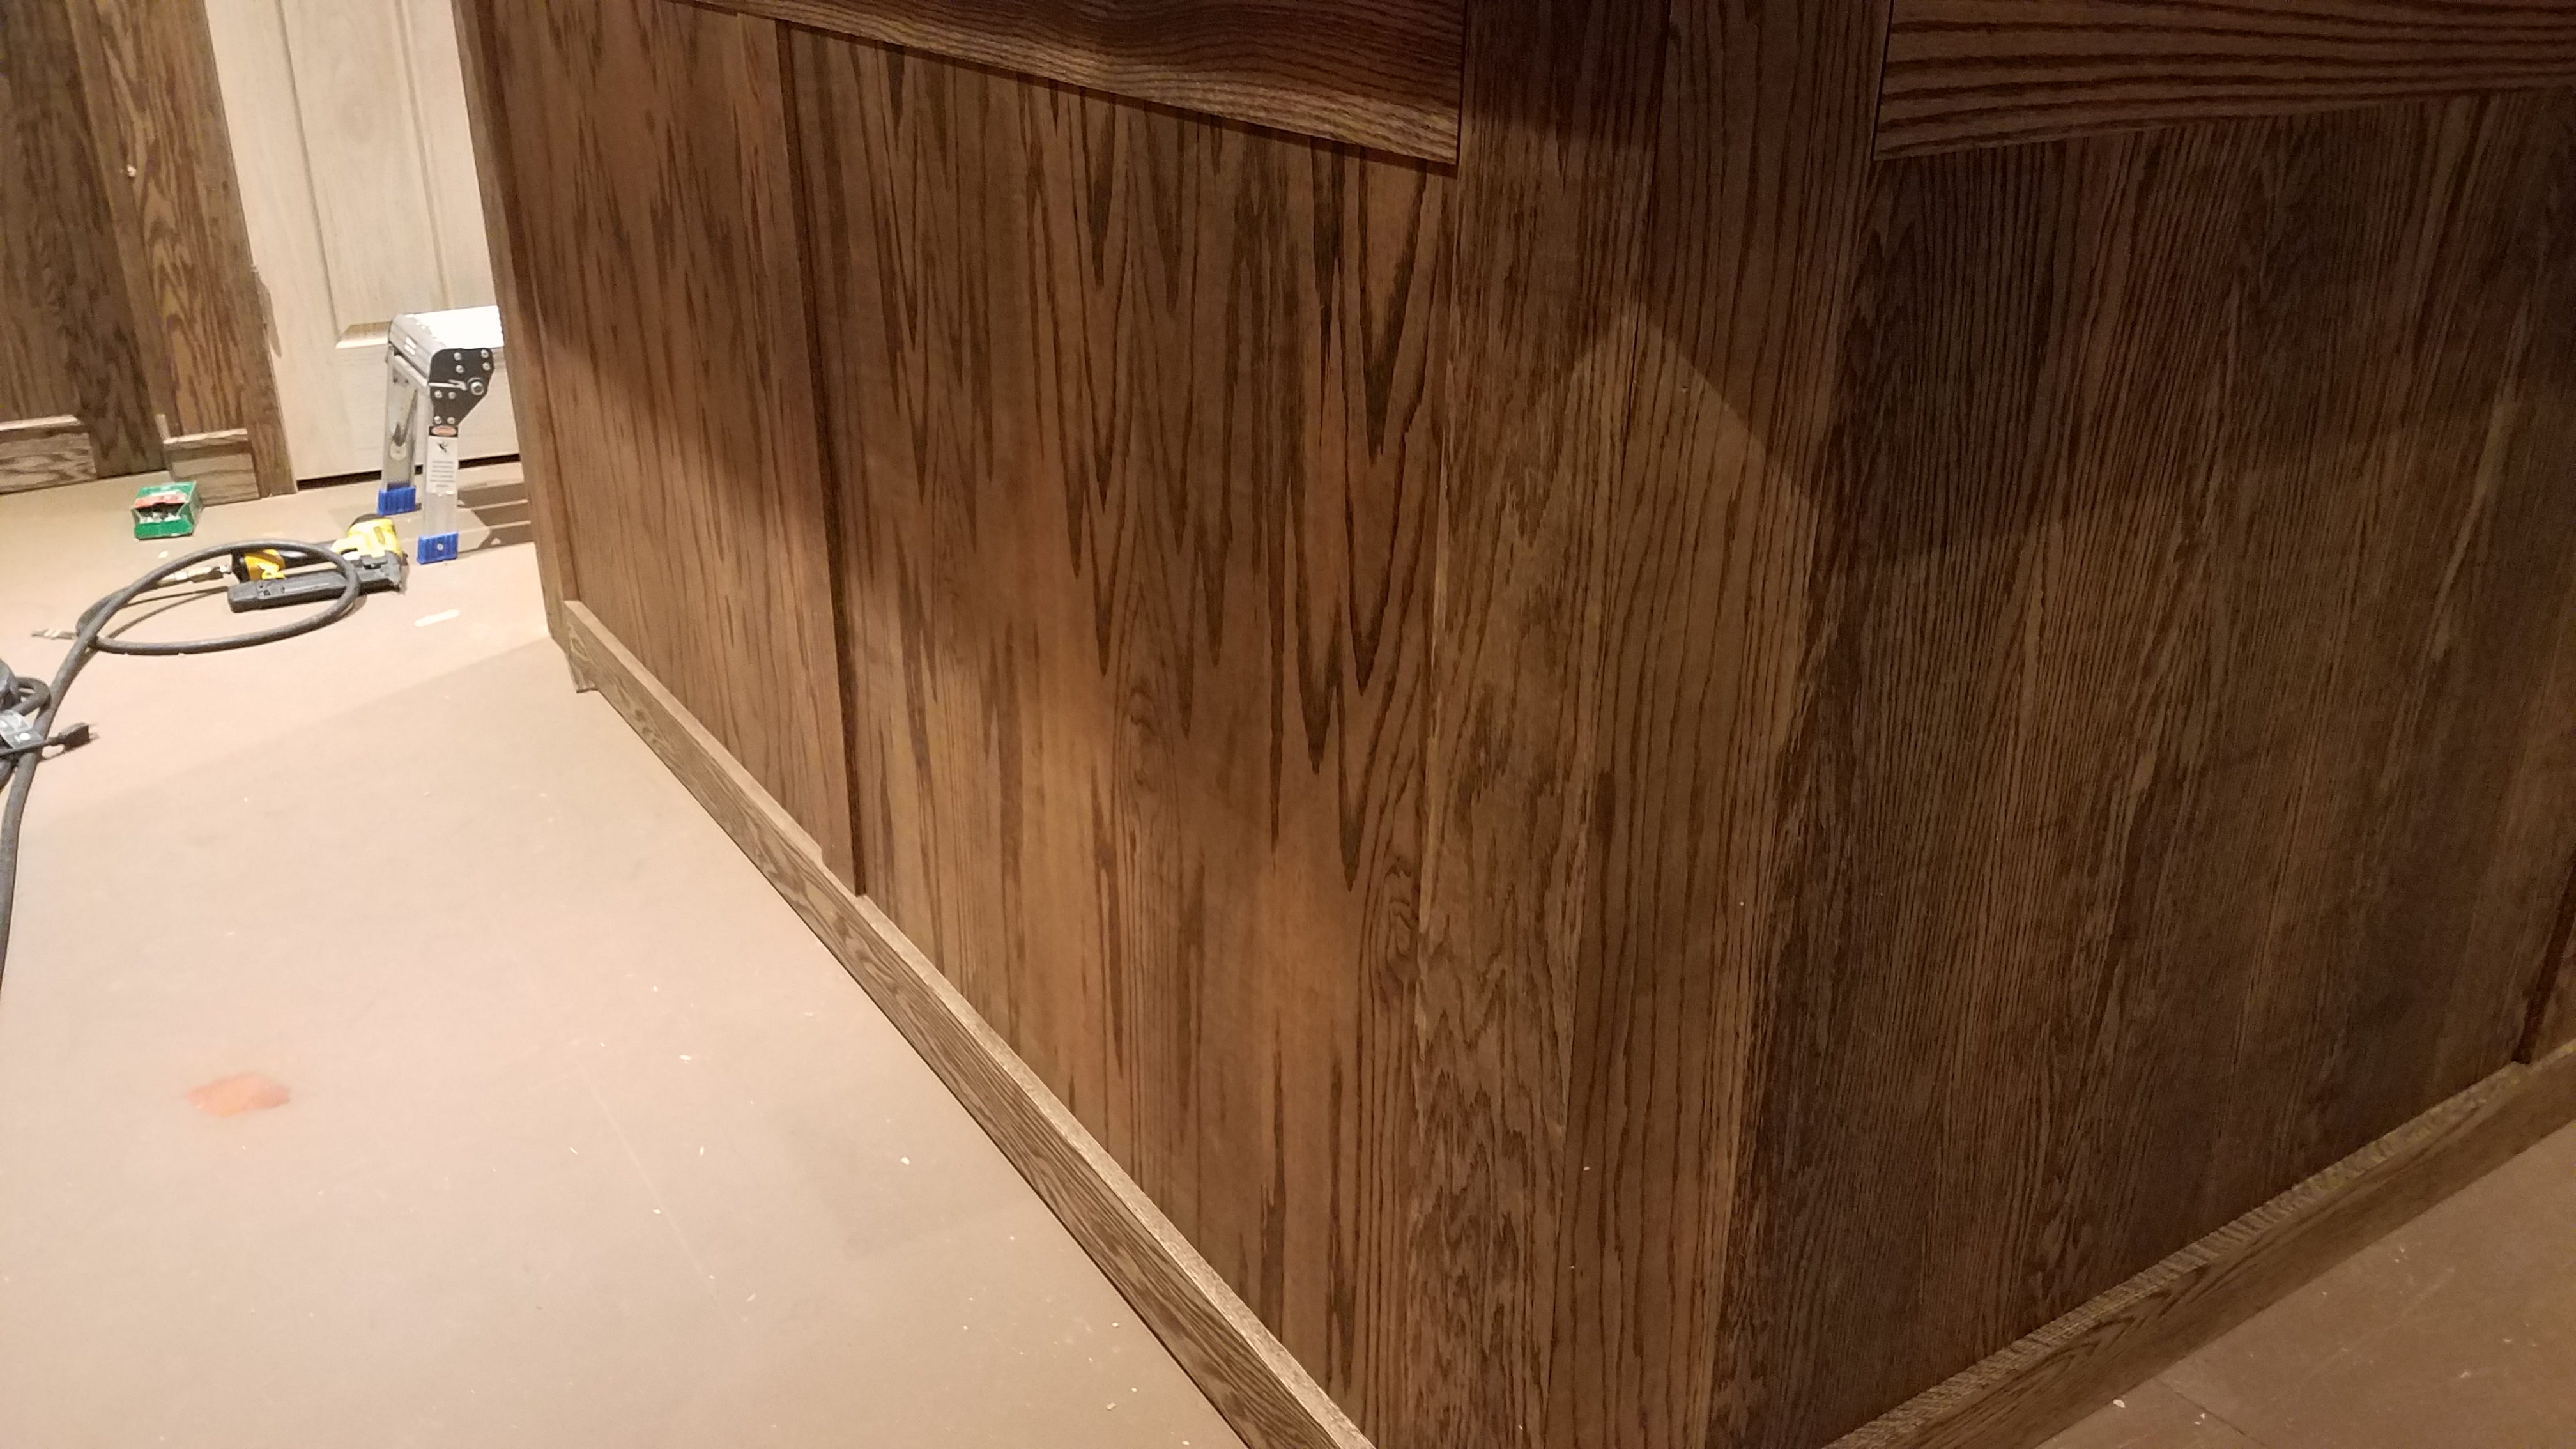
Here is a photo of the bar rail sitting in place with the final top surface just sitting on the bar top.
Thought I would give an update on the BAR side of the room and what progress has been made there recently.
Started by framing out the bar.


After the framing was completed I cut and stained the 3/4" oak plywood and faced the front of the bar and the top of the bar with 3/4 regular plywood.


After completing the facing of the bar, I installed 3/4" oak trim on the bottom, top, and a 1/2" piece in the center of each side to cover the seam. I used the 1/2" just to give it some visual interest. At the corners I used 3/4 plywood cut on a 45 and edge banded one of the exposed edges to complete the look.


Here is a photo of the bar rail sitting in place with the final top surface just sitting on the bar top.

highland_brewer
Short Circuited Brewers
After getting all of the lower bar "done" I moved on to the top of the bar. Here is a pic of the final top surface in place and ready to accept the bar rail.
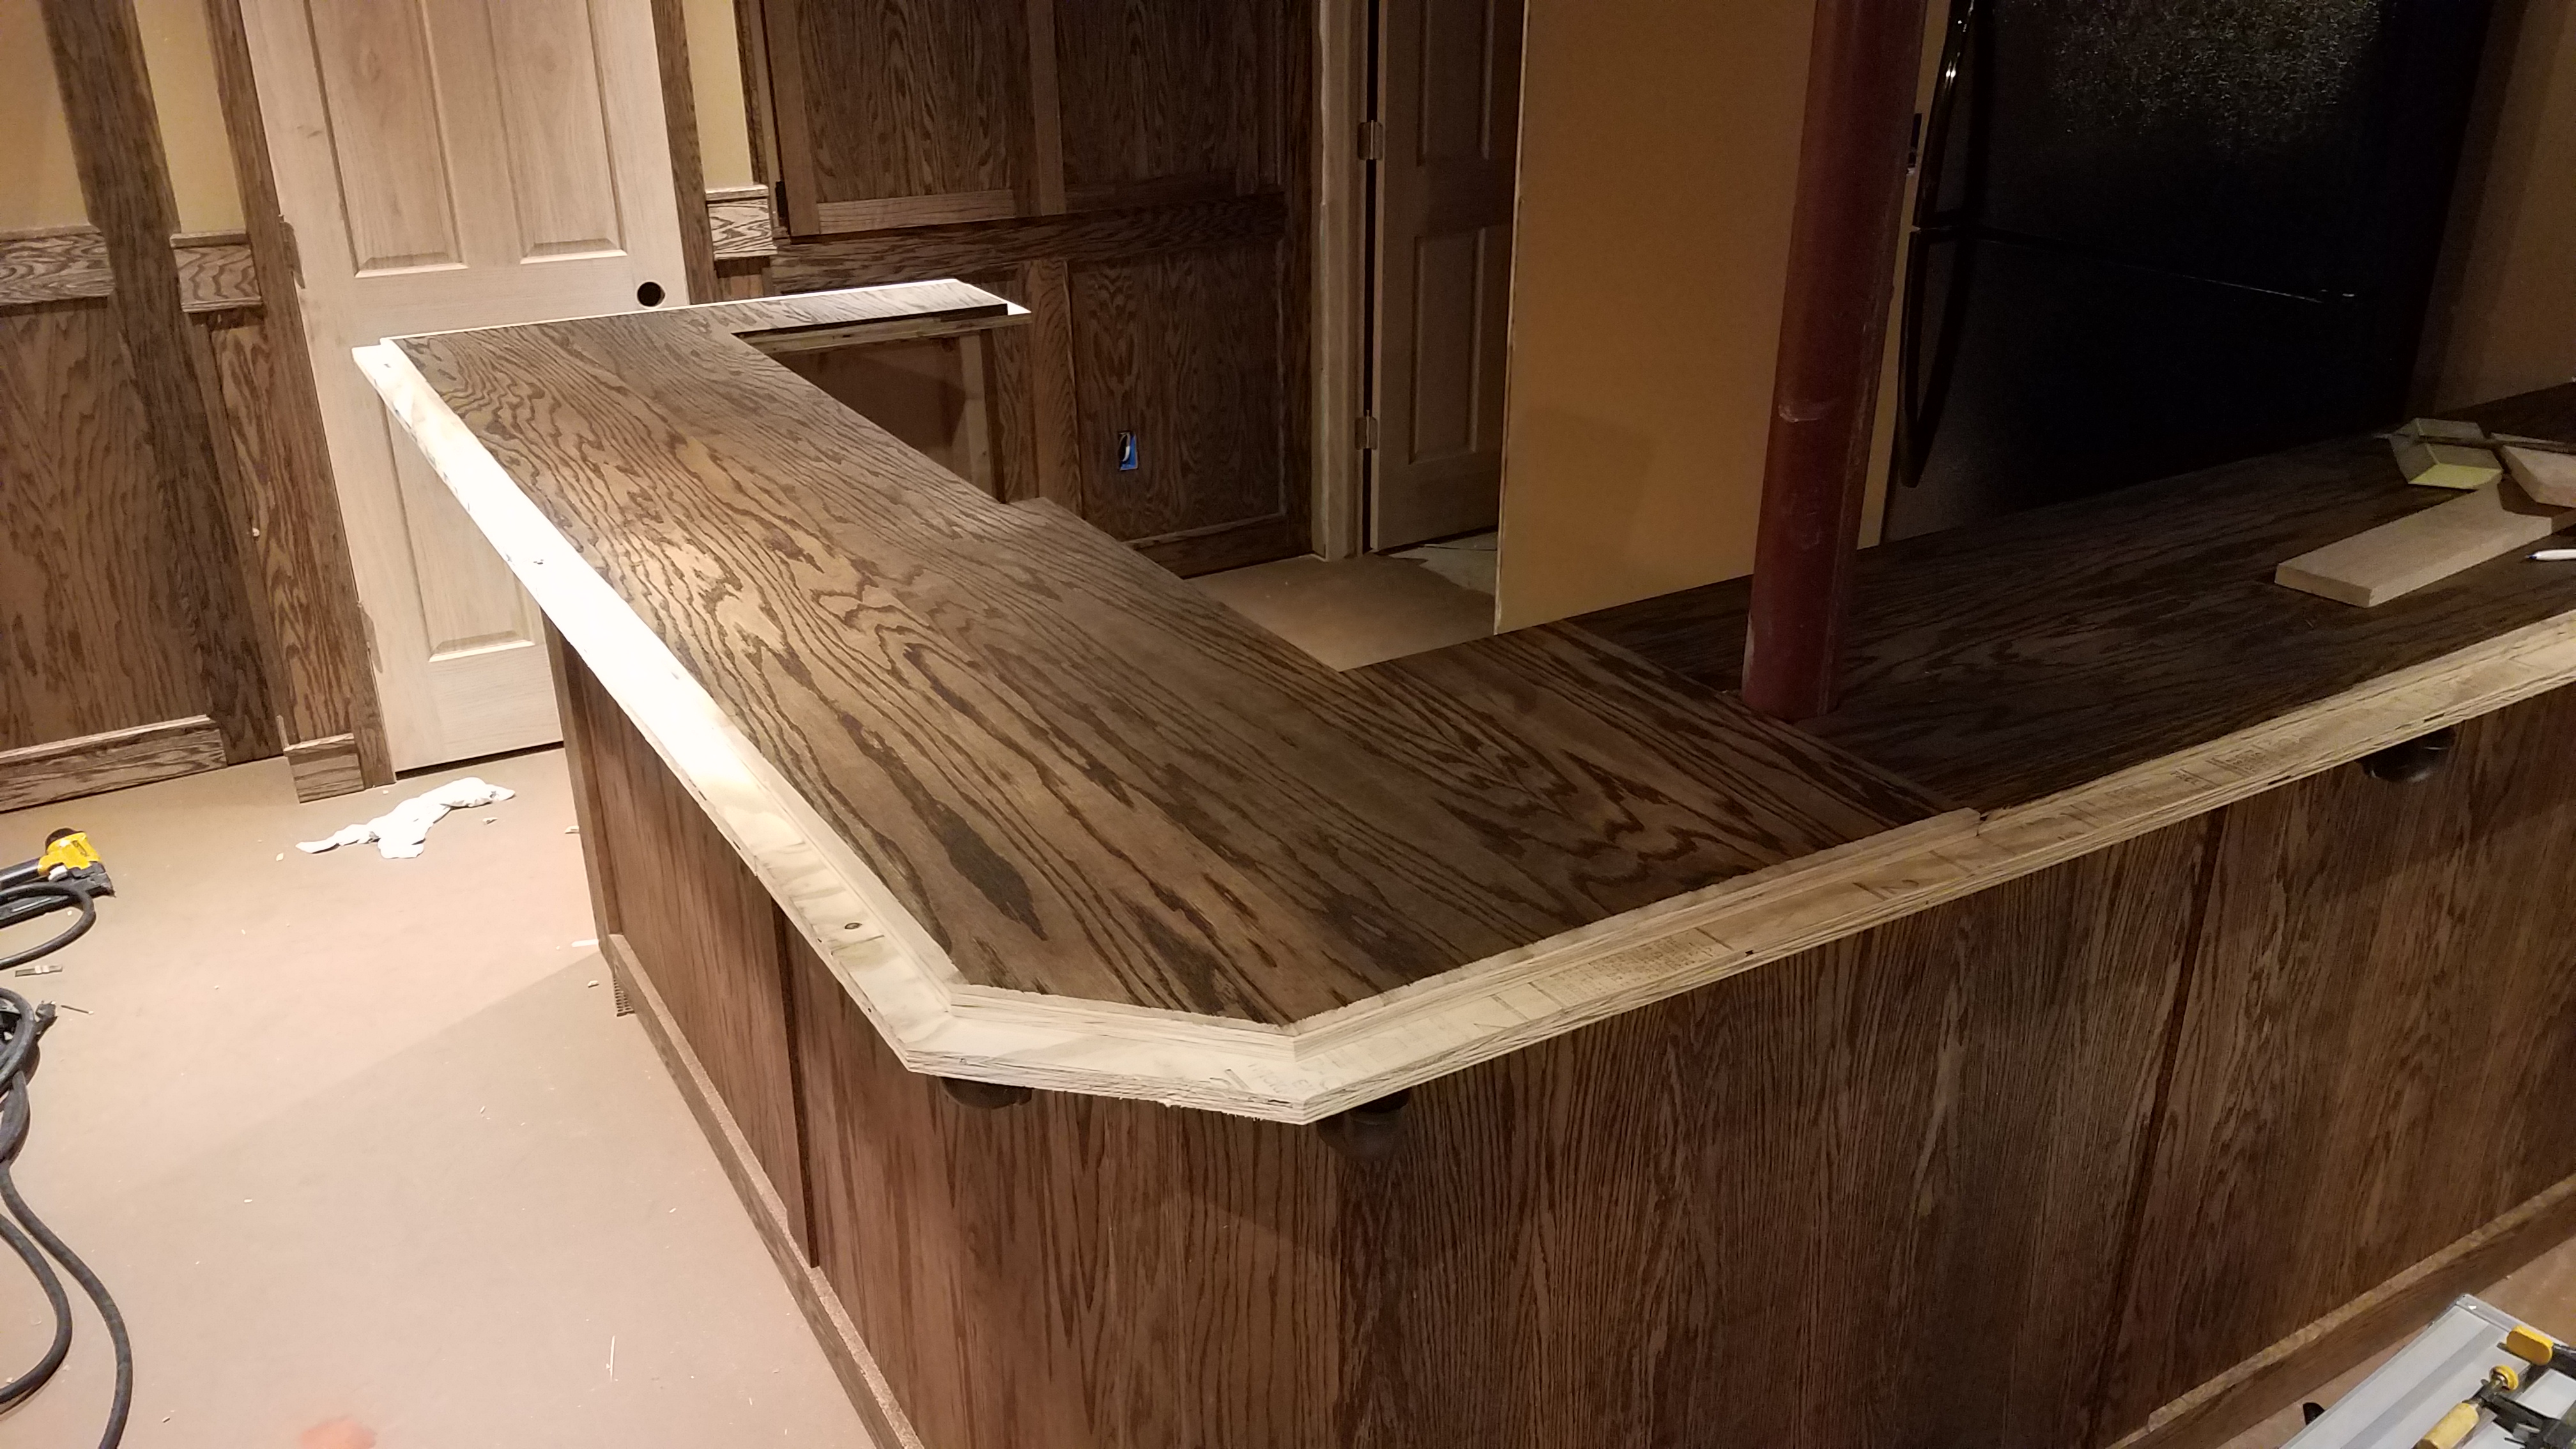
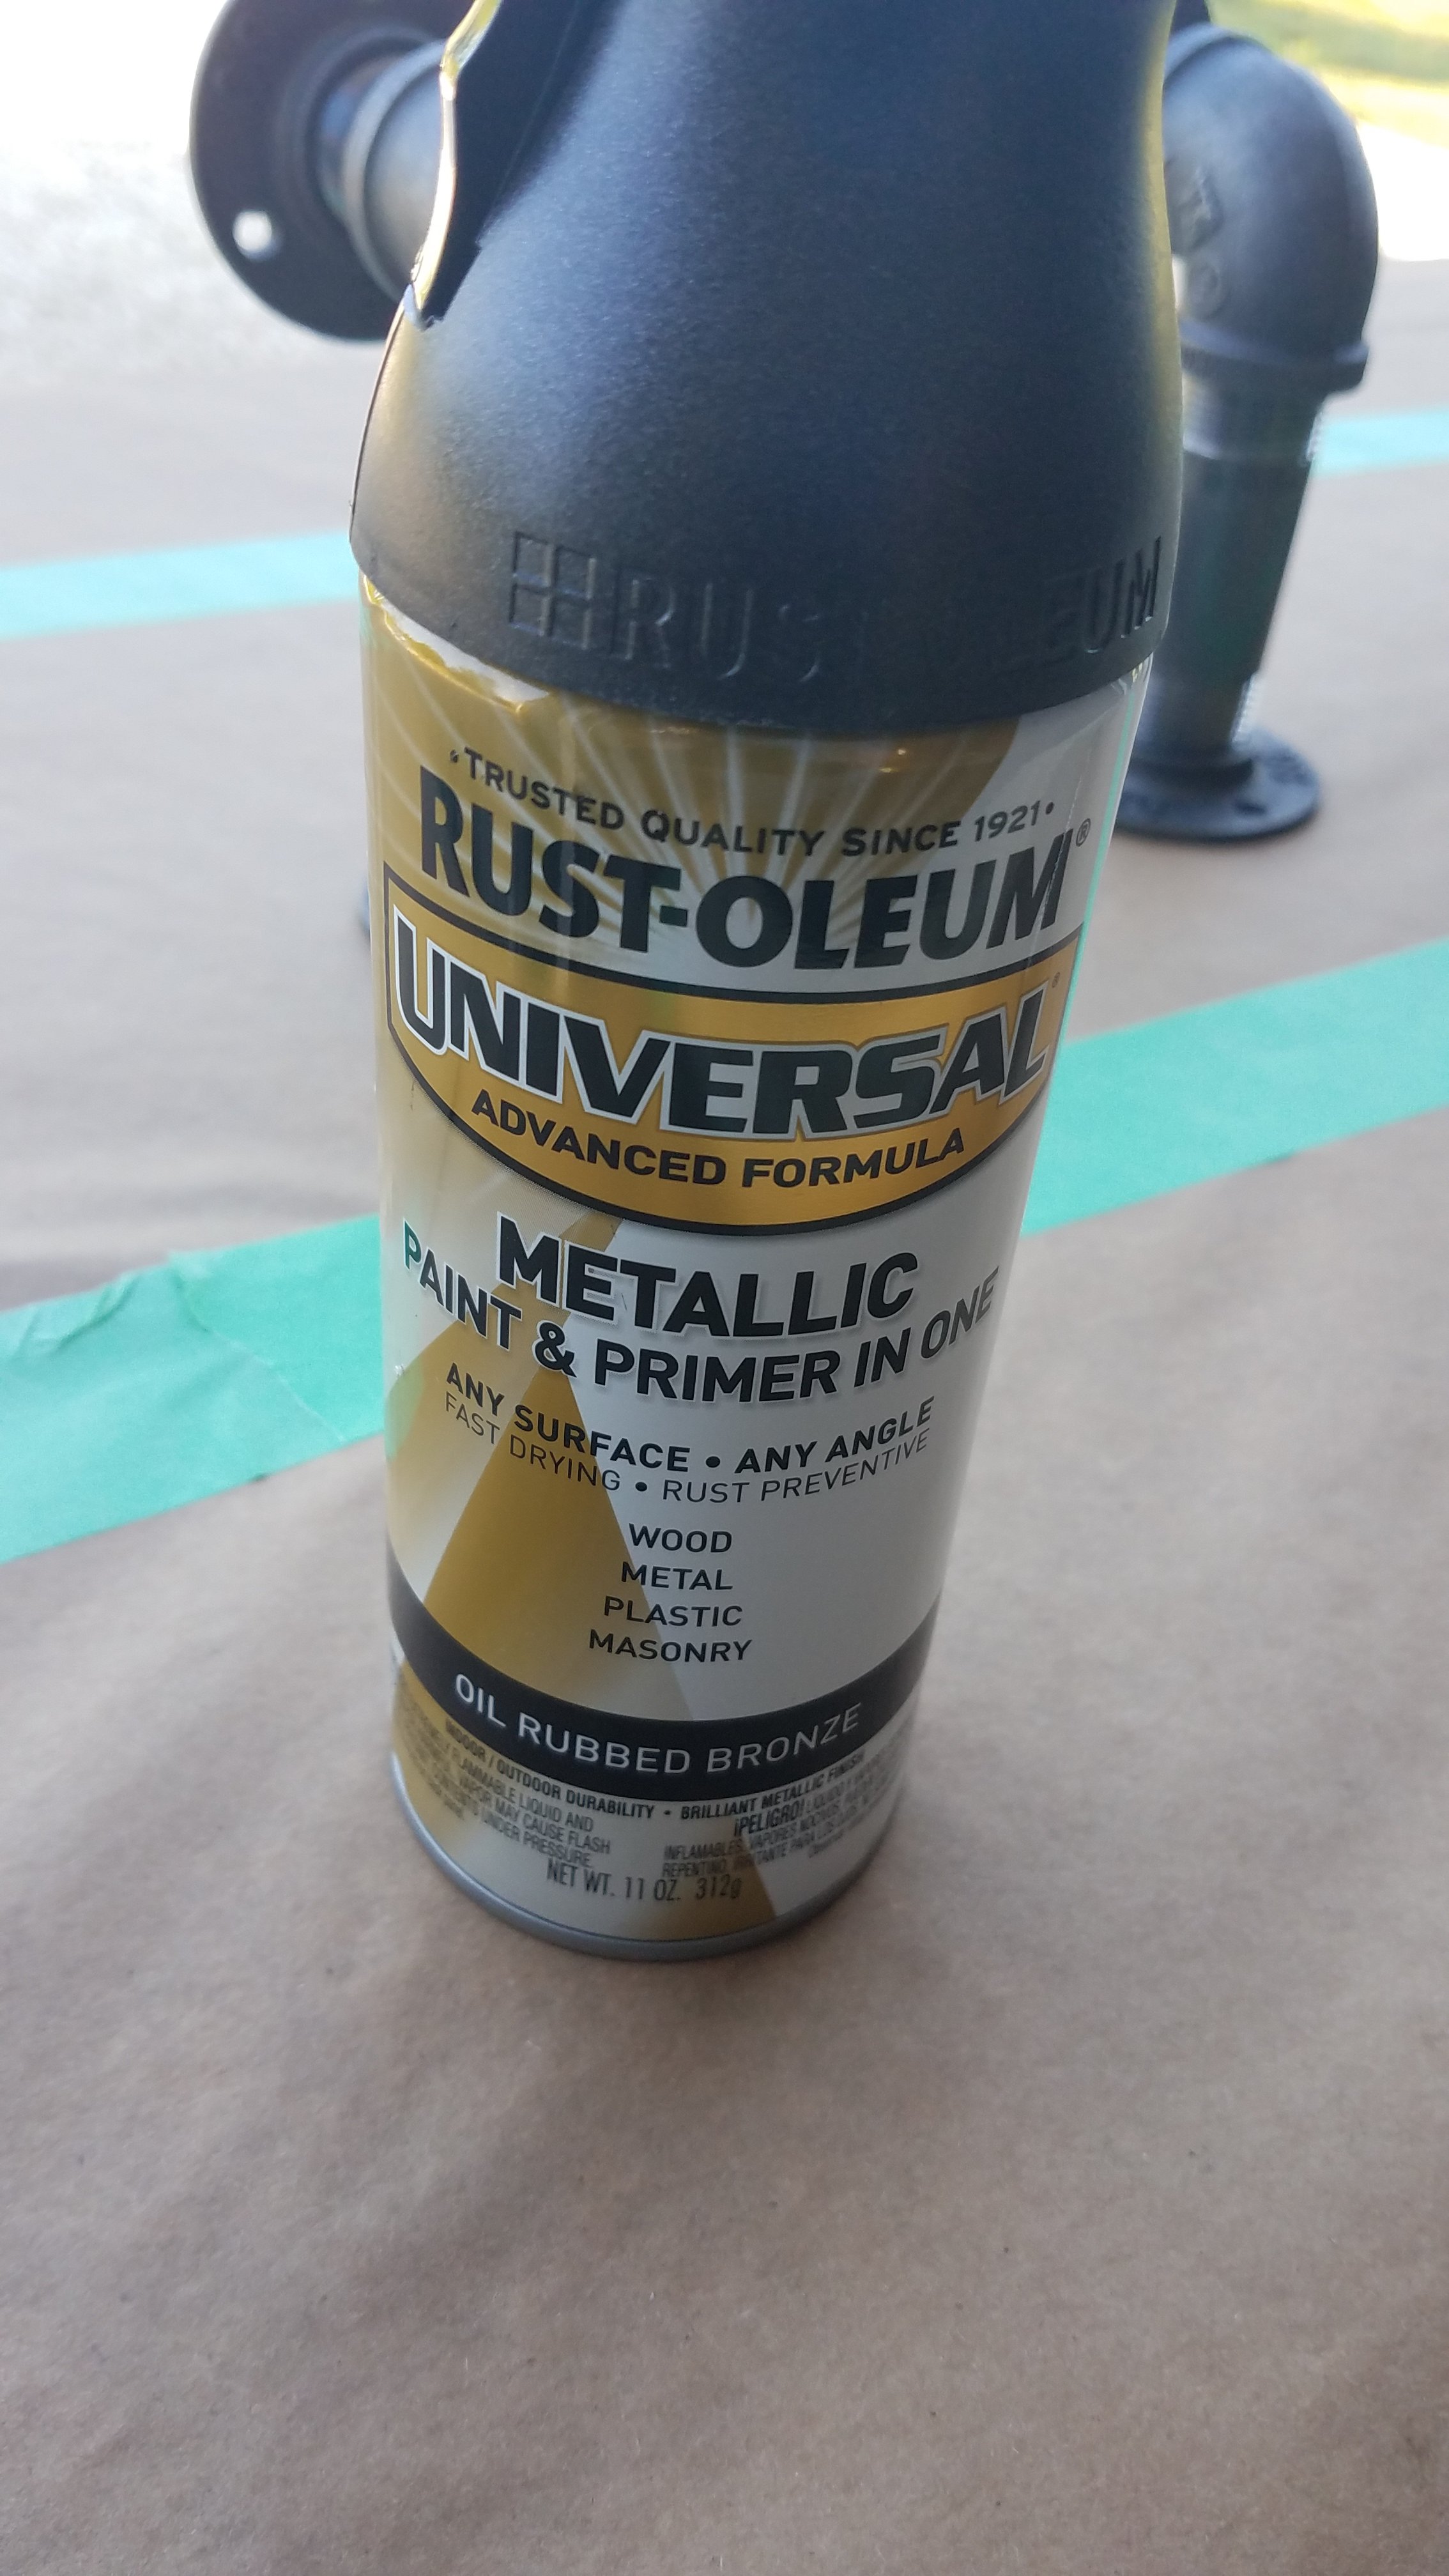
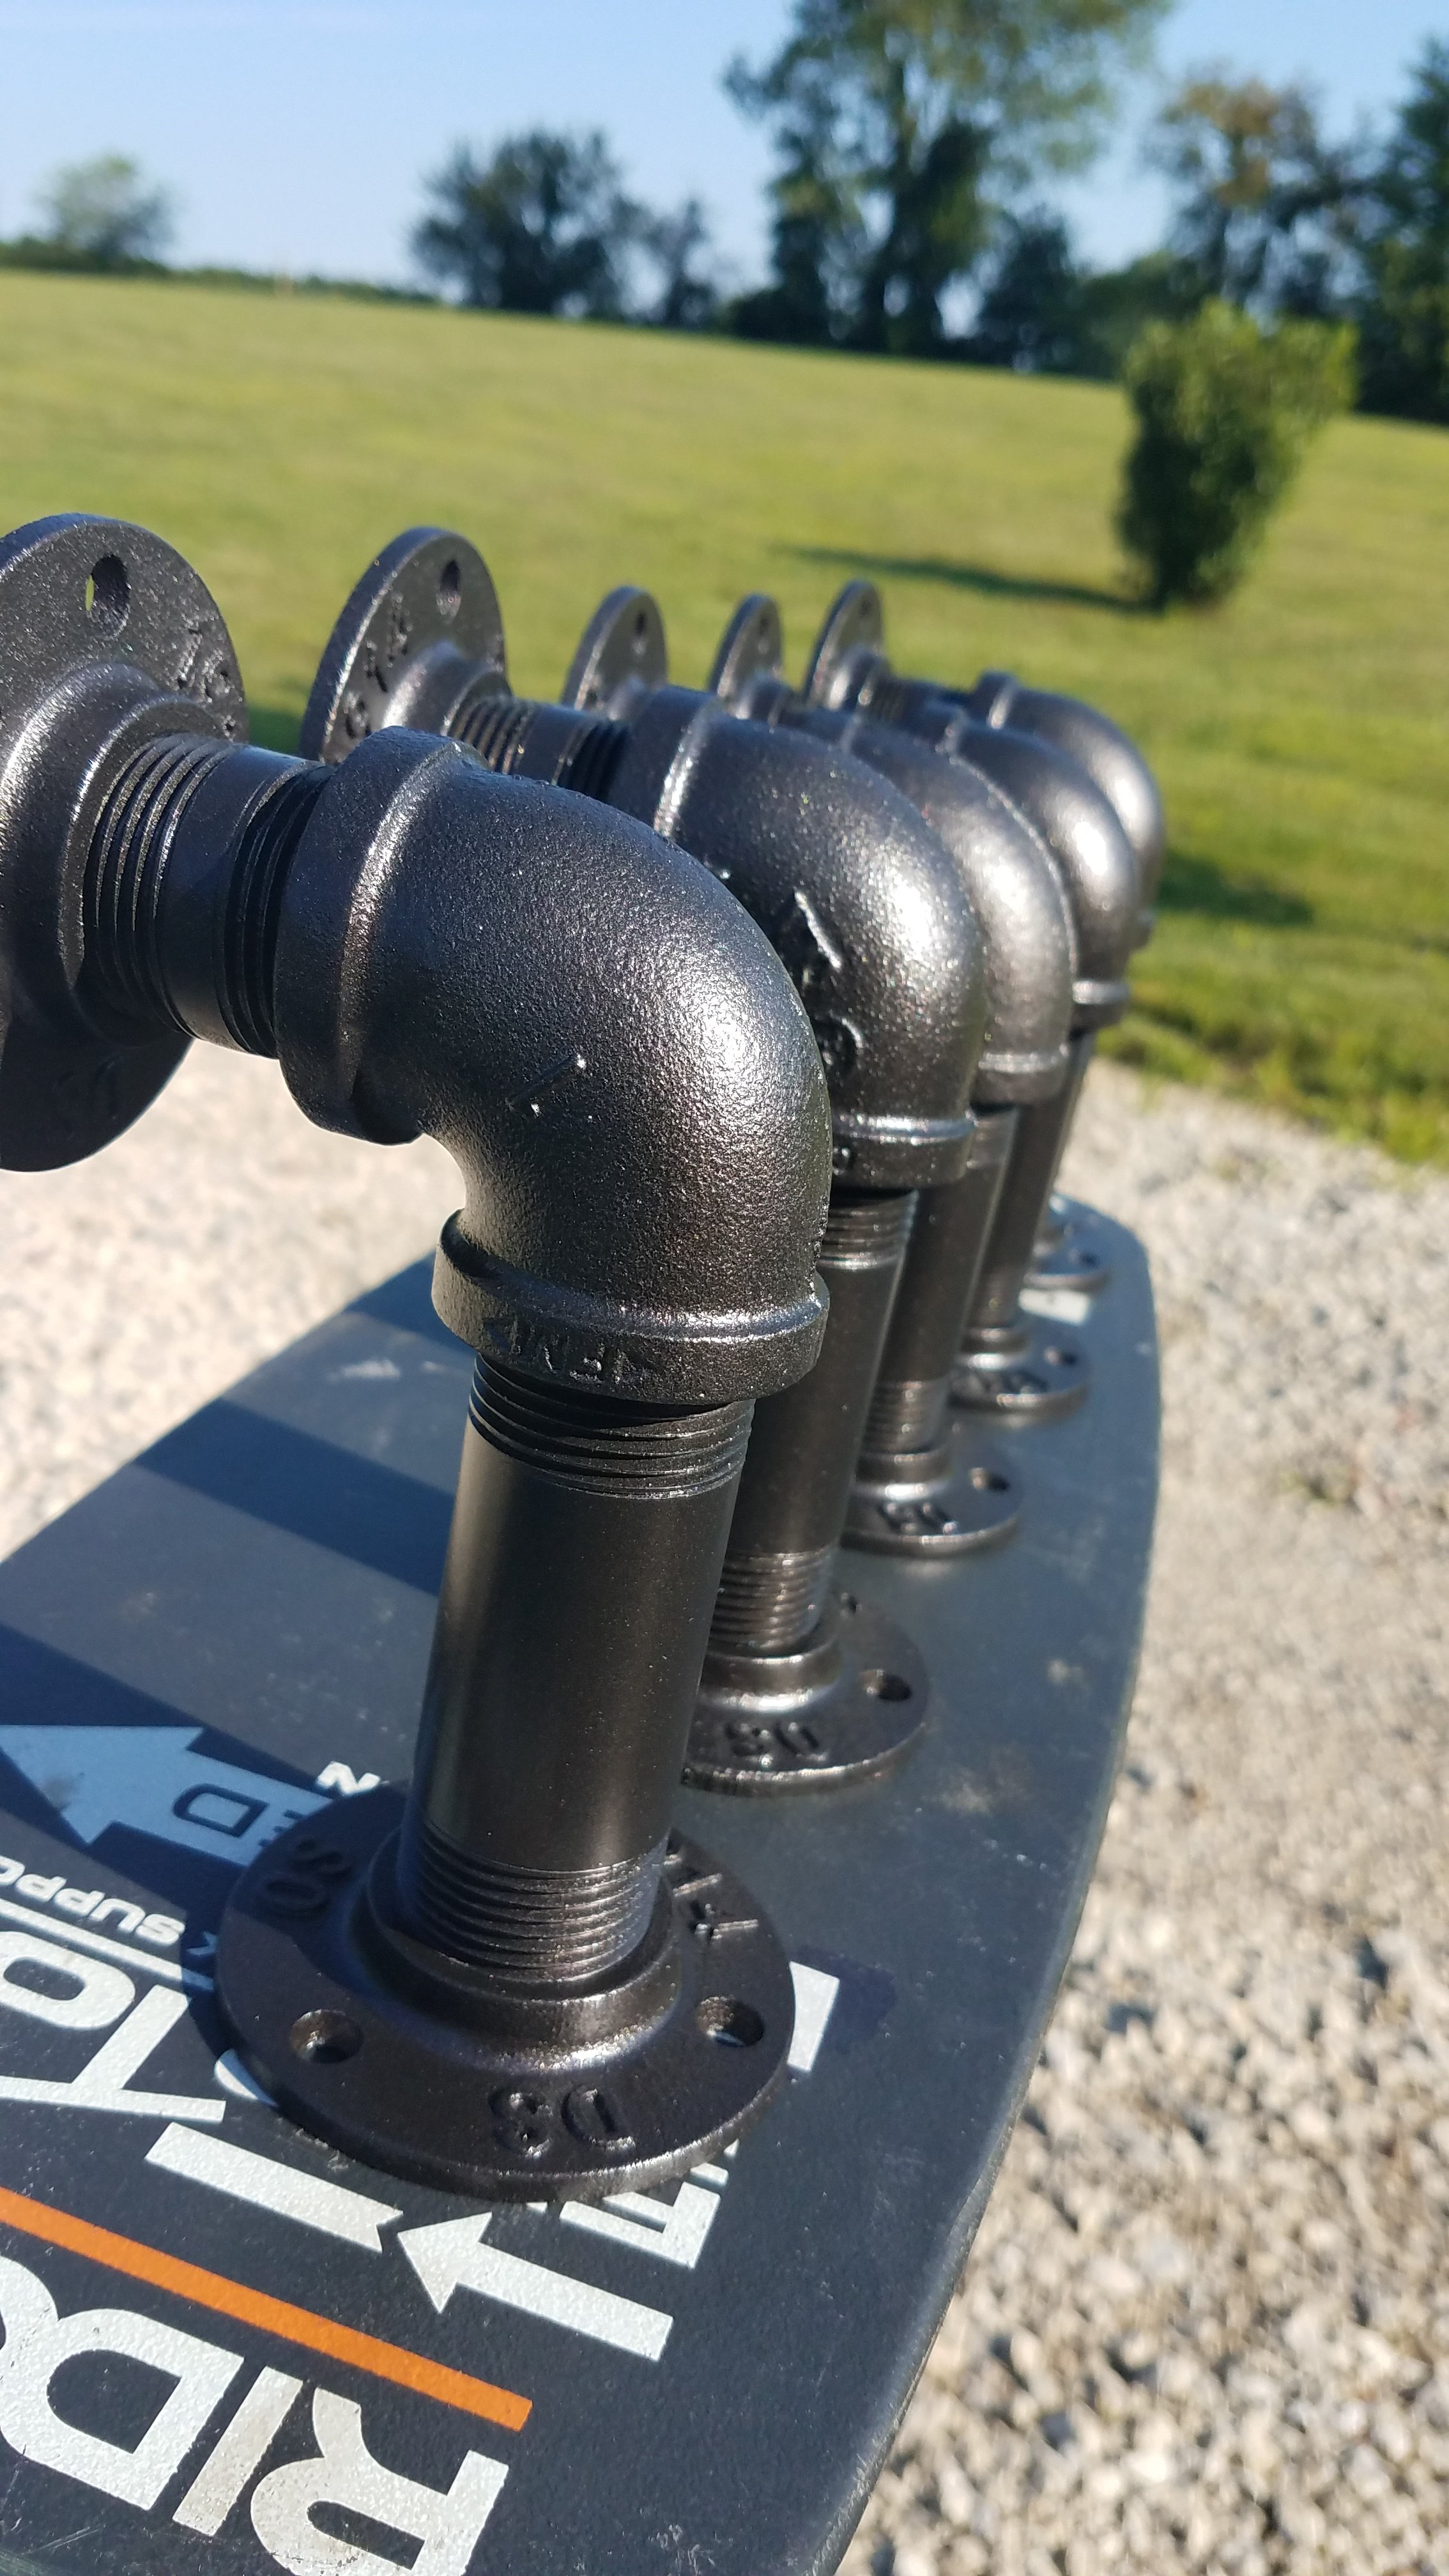
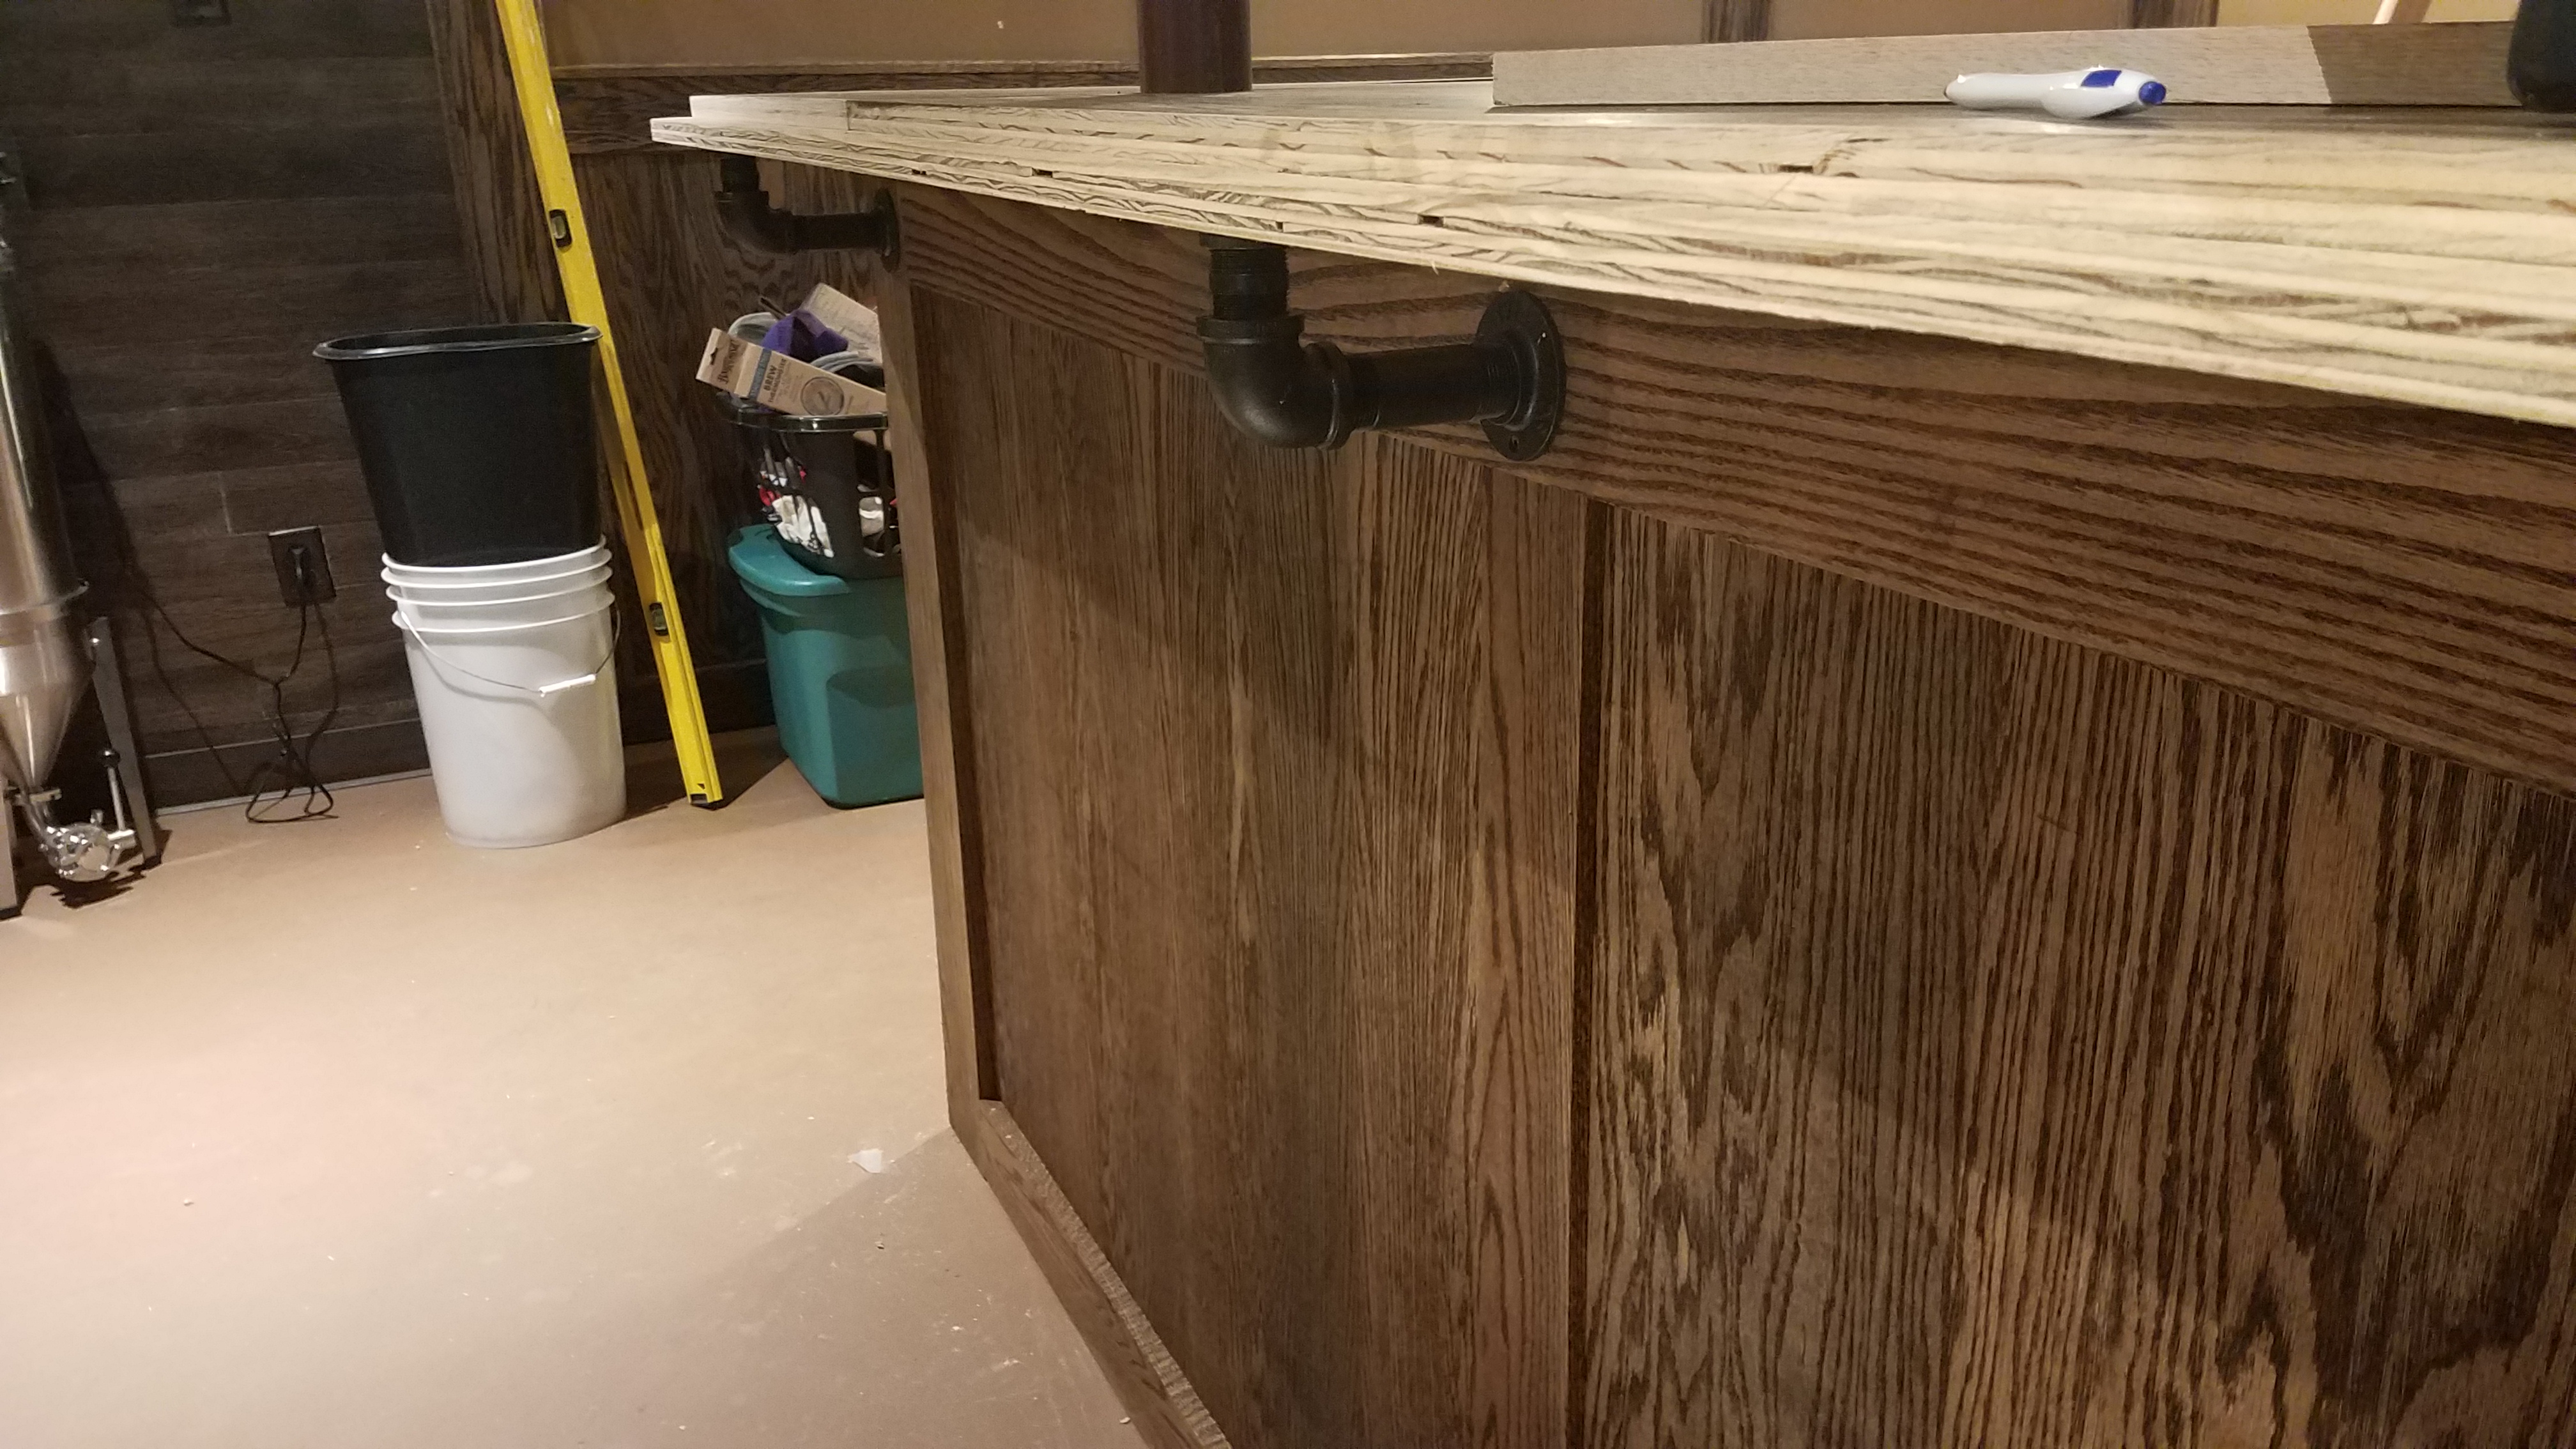
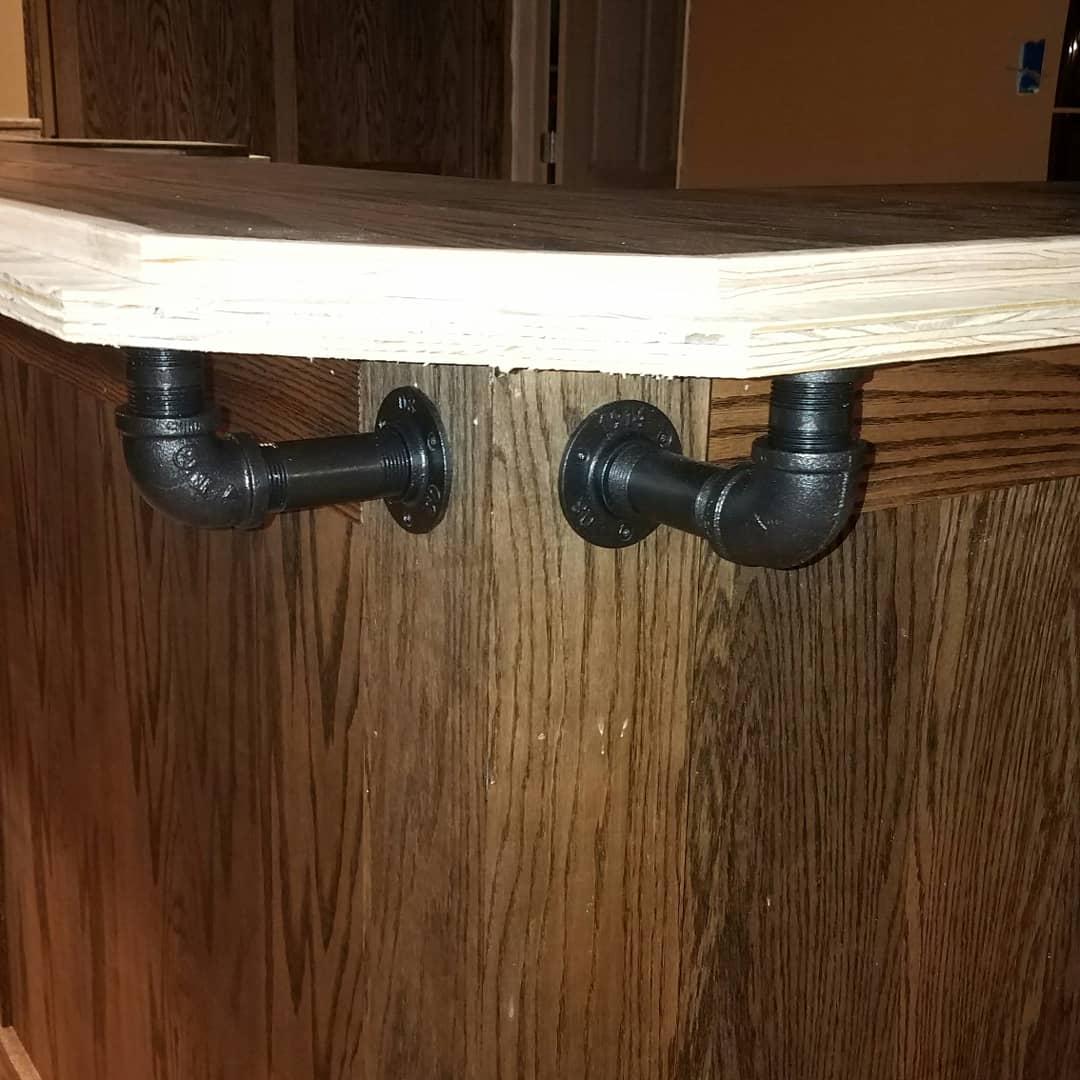
I have to decide on what I was going to use for corbels to support the bar top typically this is done with wood. However, singe I had a slight industrial theme going on from some of the other trim in the basement, I decided to go with cast iron pipe for the corbels. I assembled and painted them a bronze color and installed prior to putting the bar rail on to help make sure all of the surfaces were level. (Plywood is not straight these days no matter how much you cull from the stack!!)
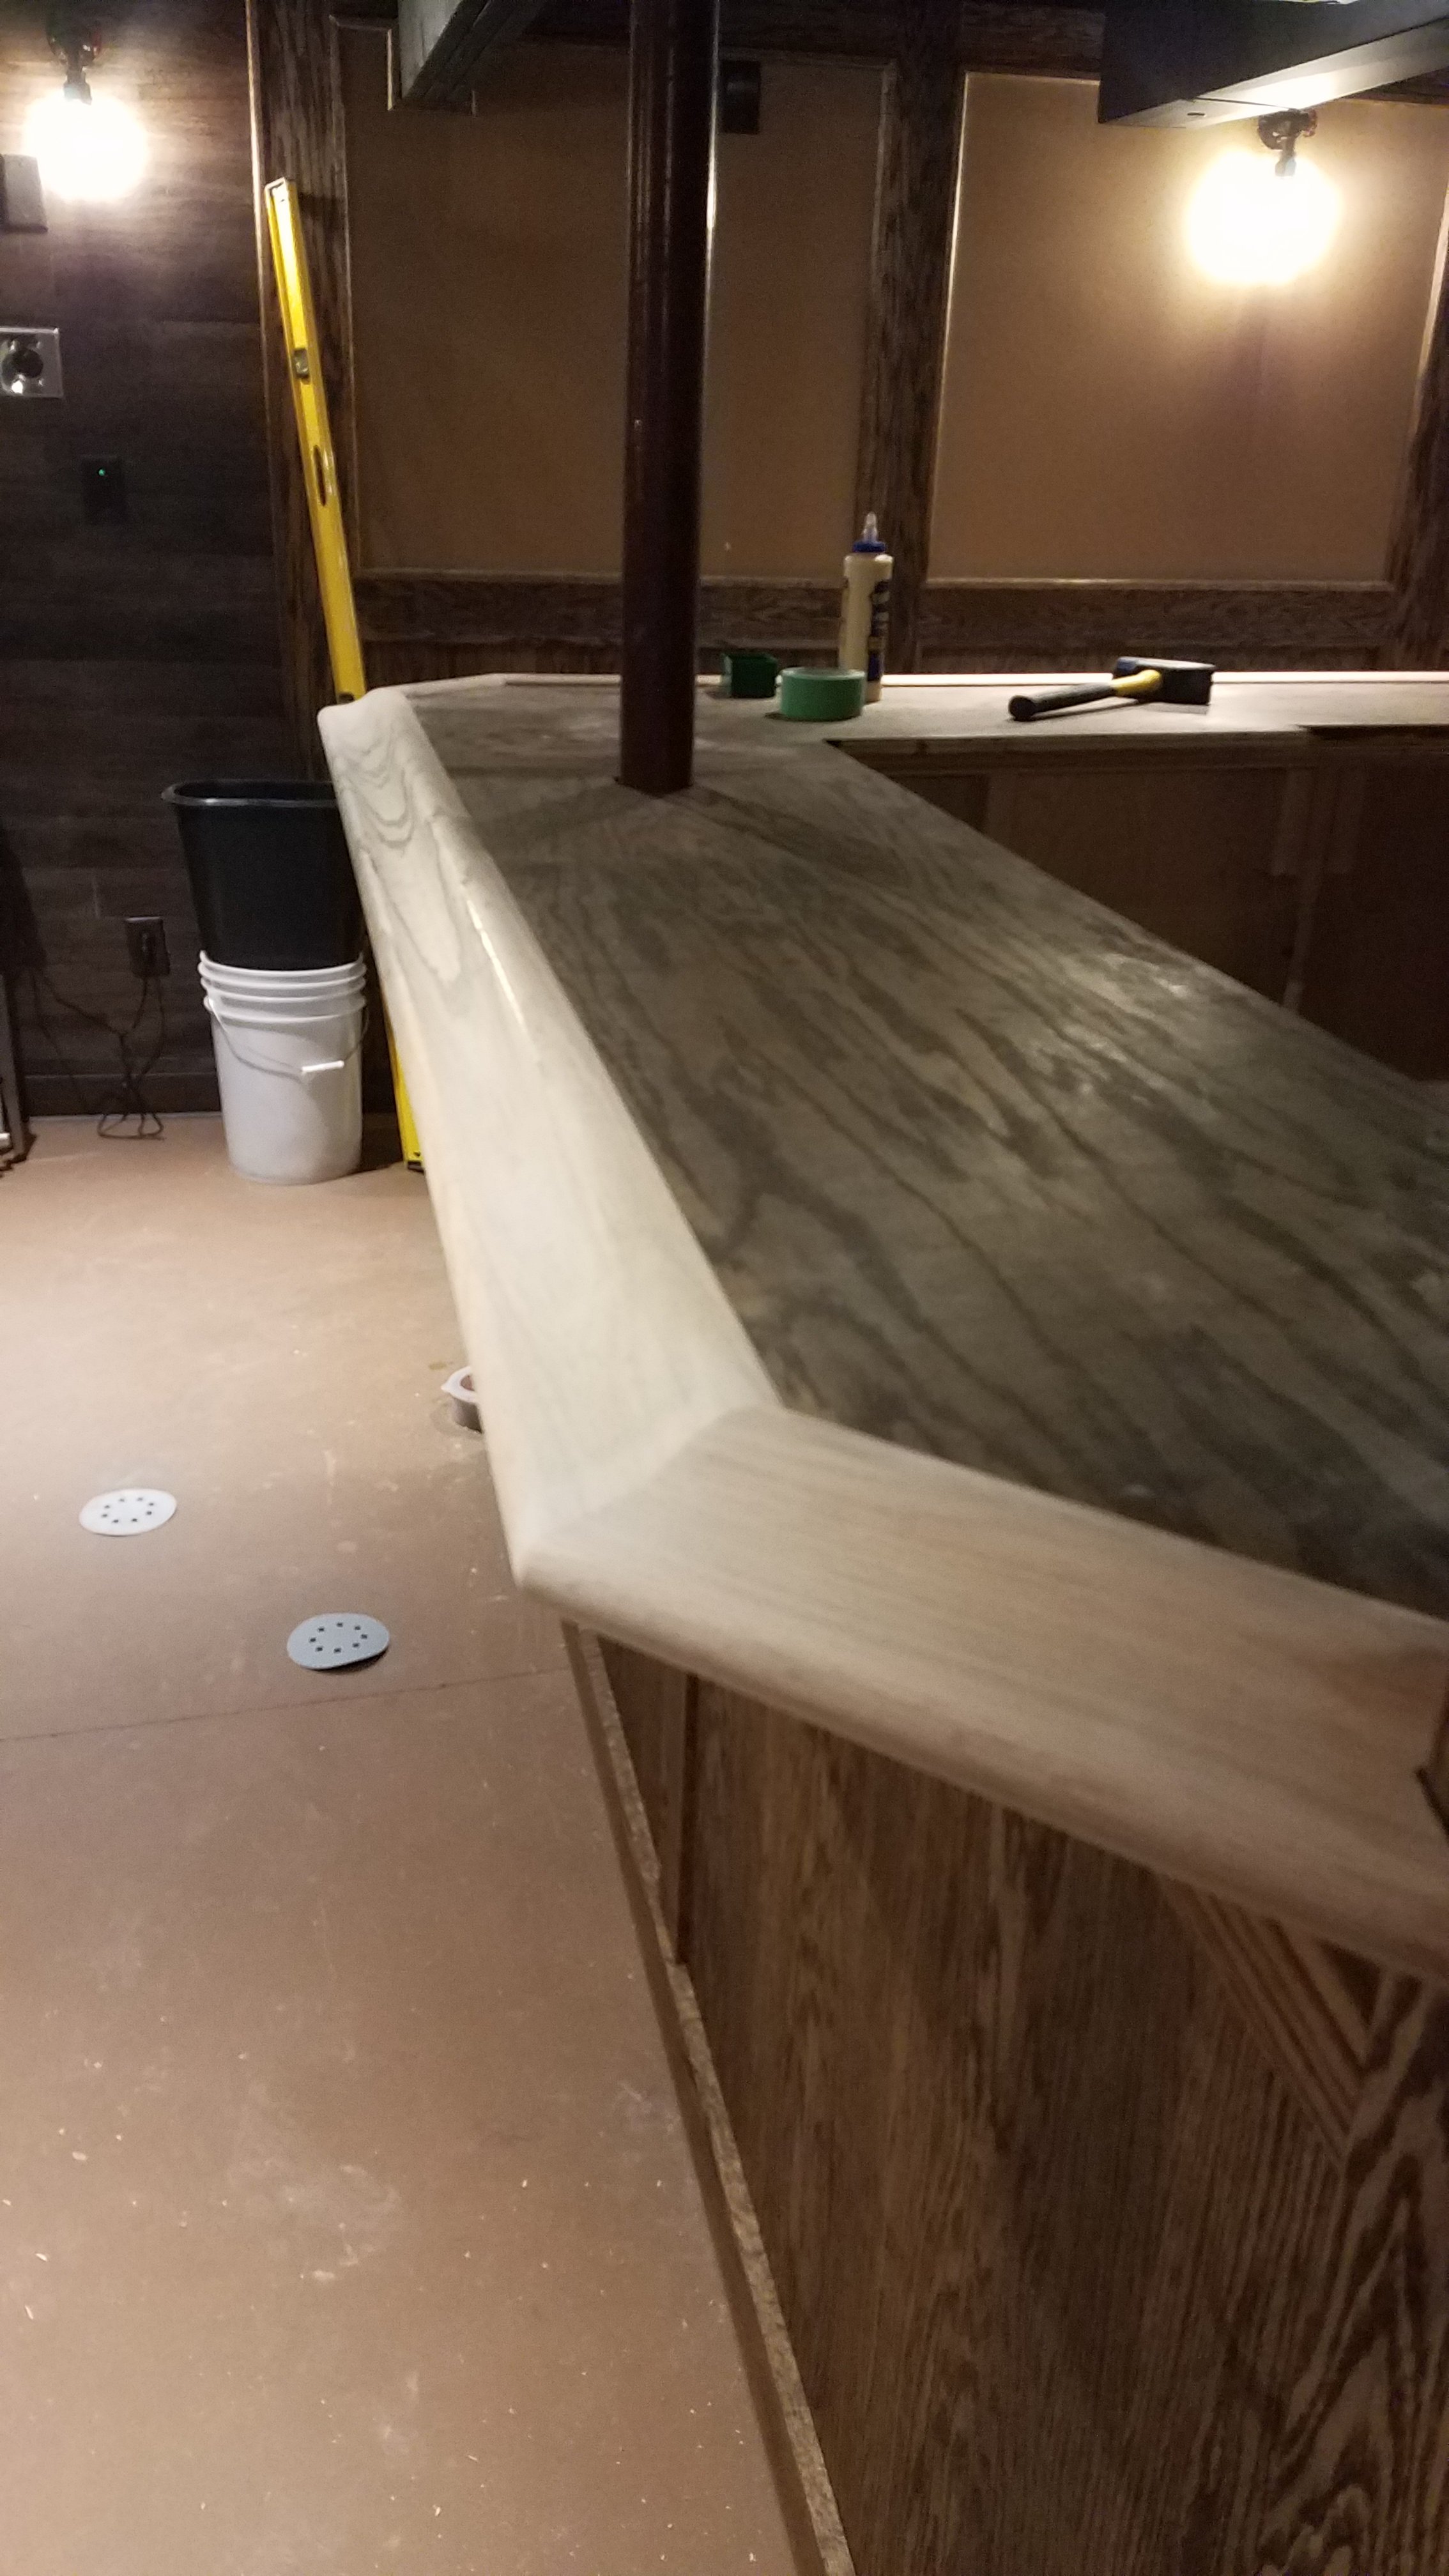
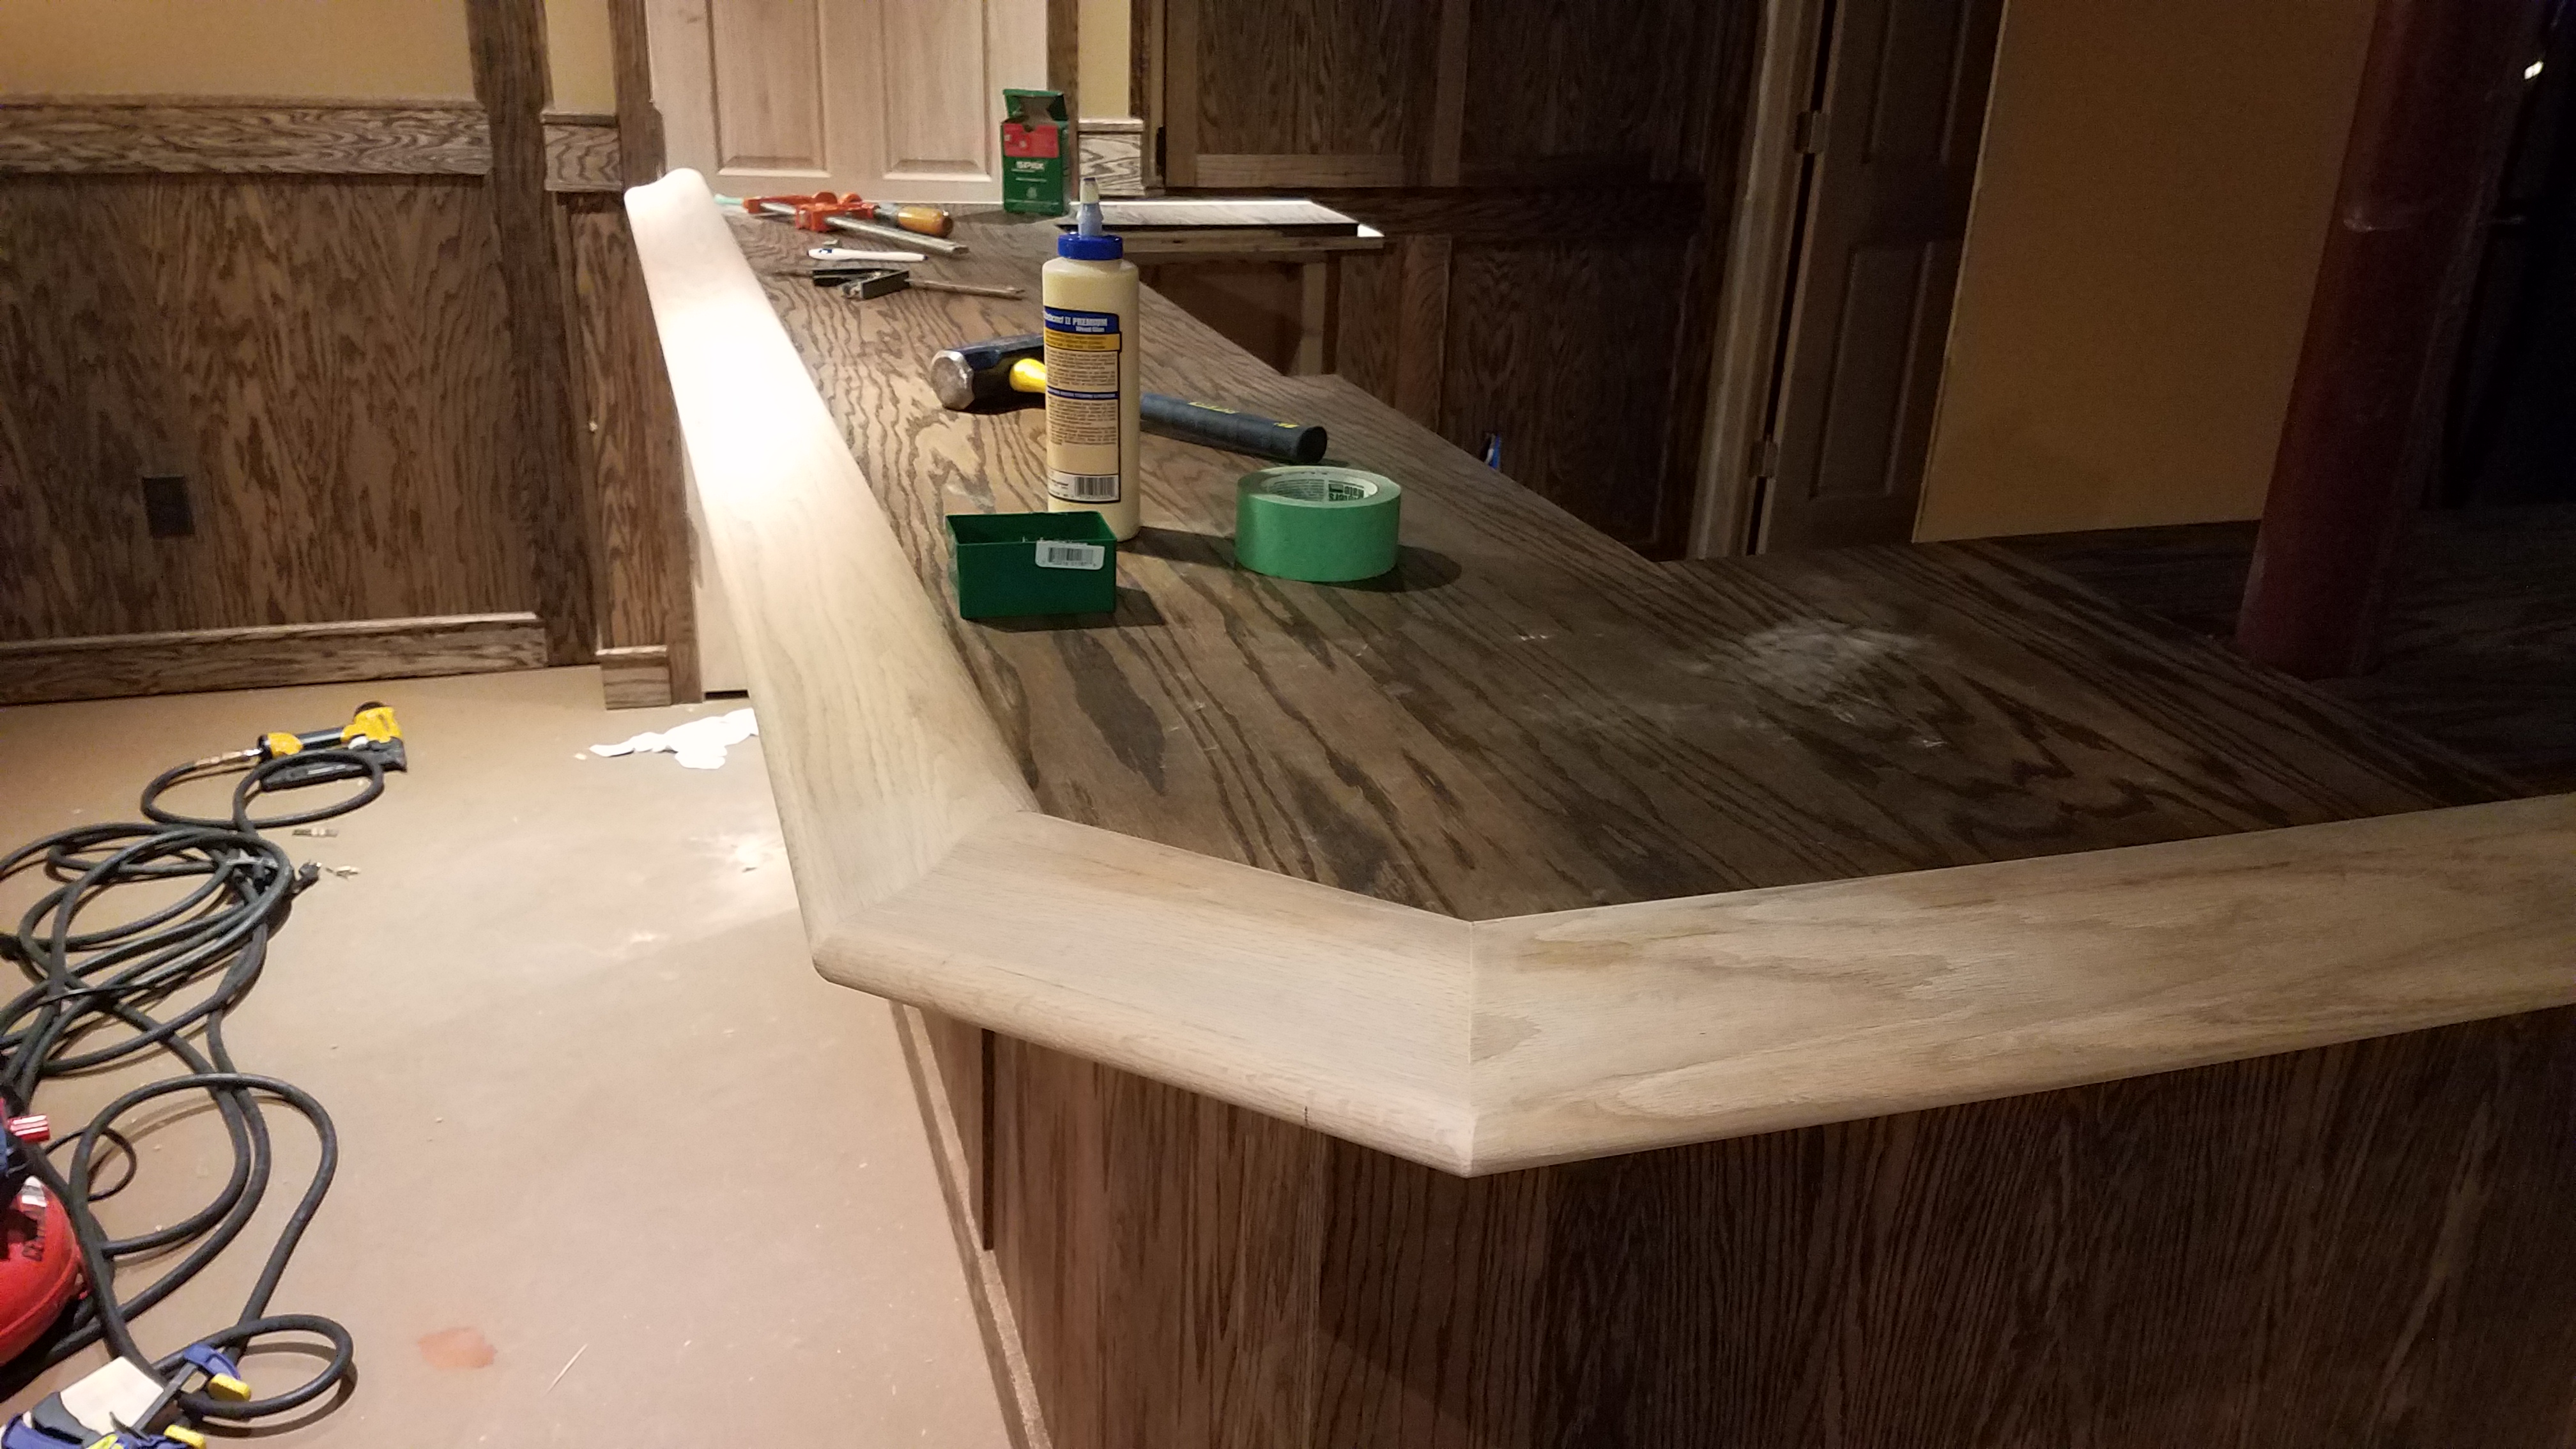
One all of the "corbels" were installed I began the process of fitting the bar rail. THAT is a process for sure. Lots of cutting and sanding, fitting, cutting, sanding... Repeat.. lol
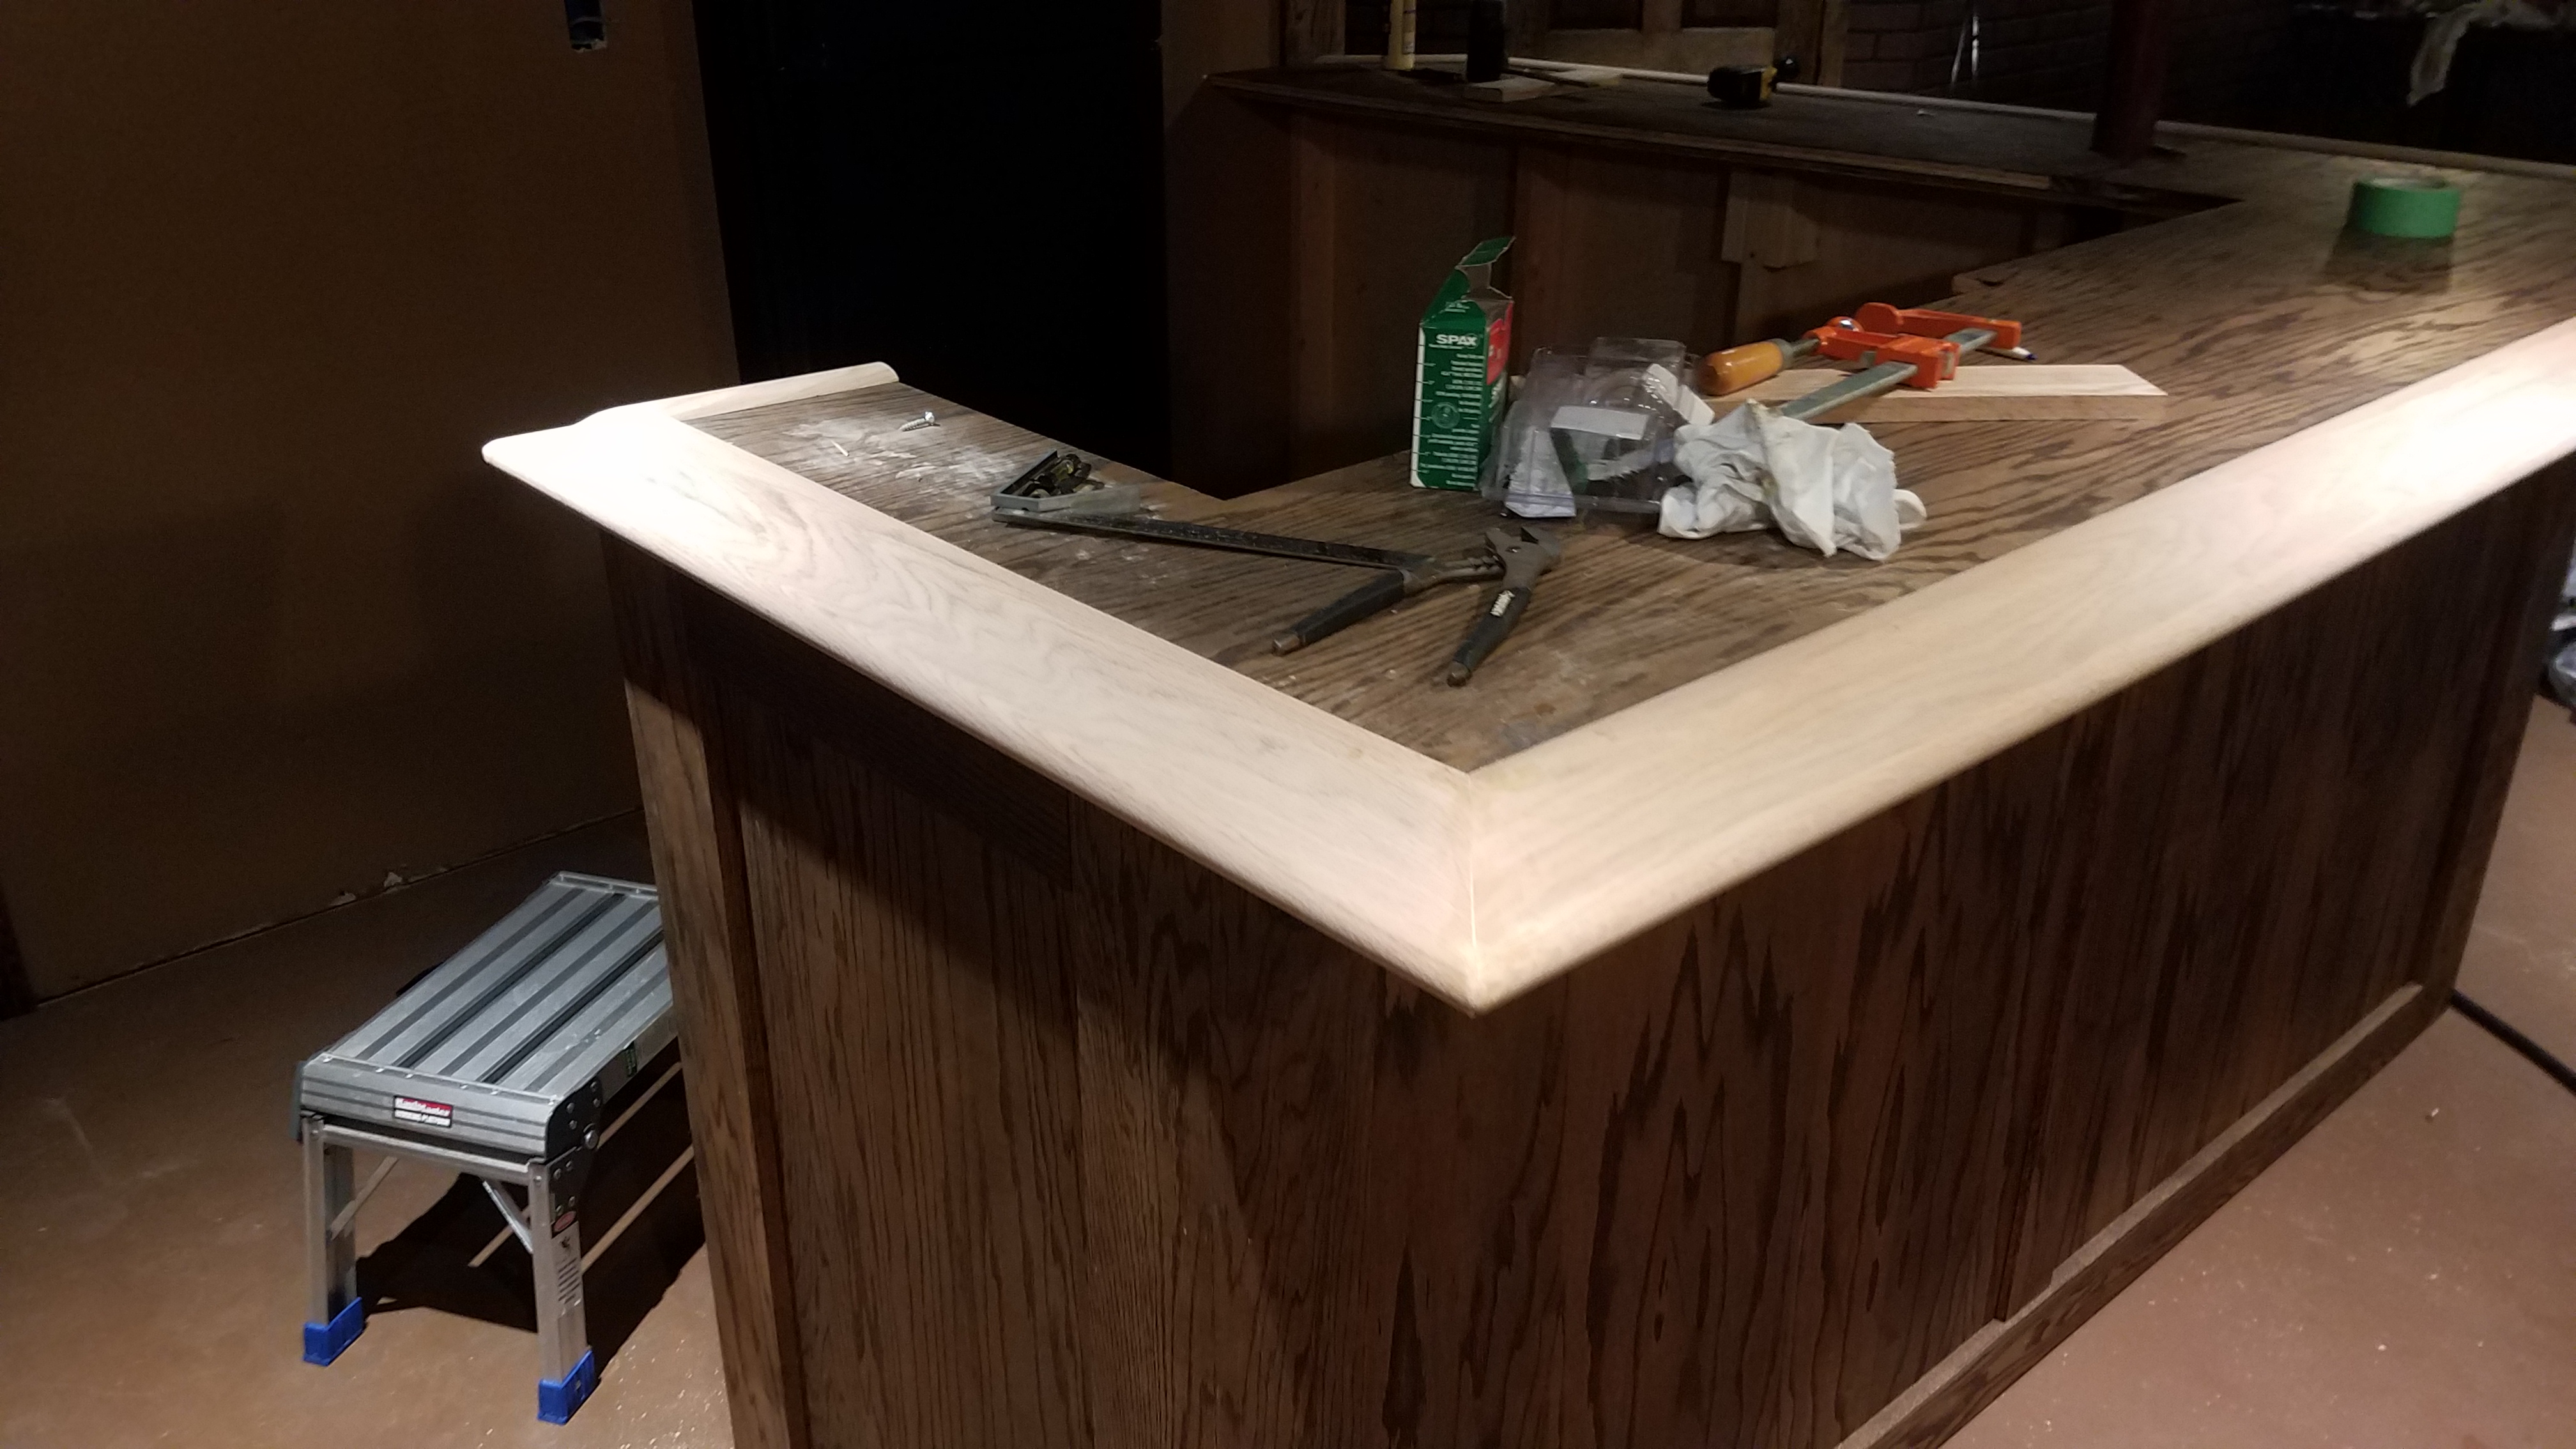
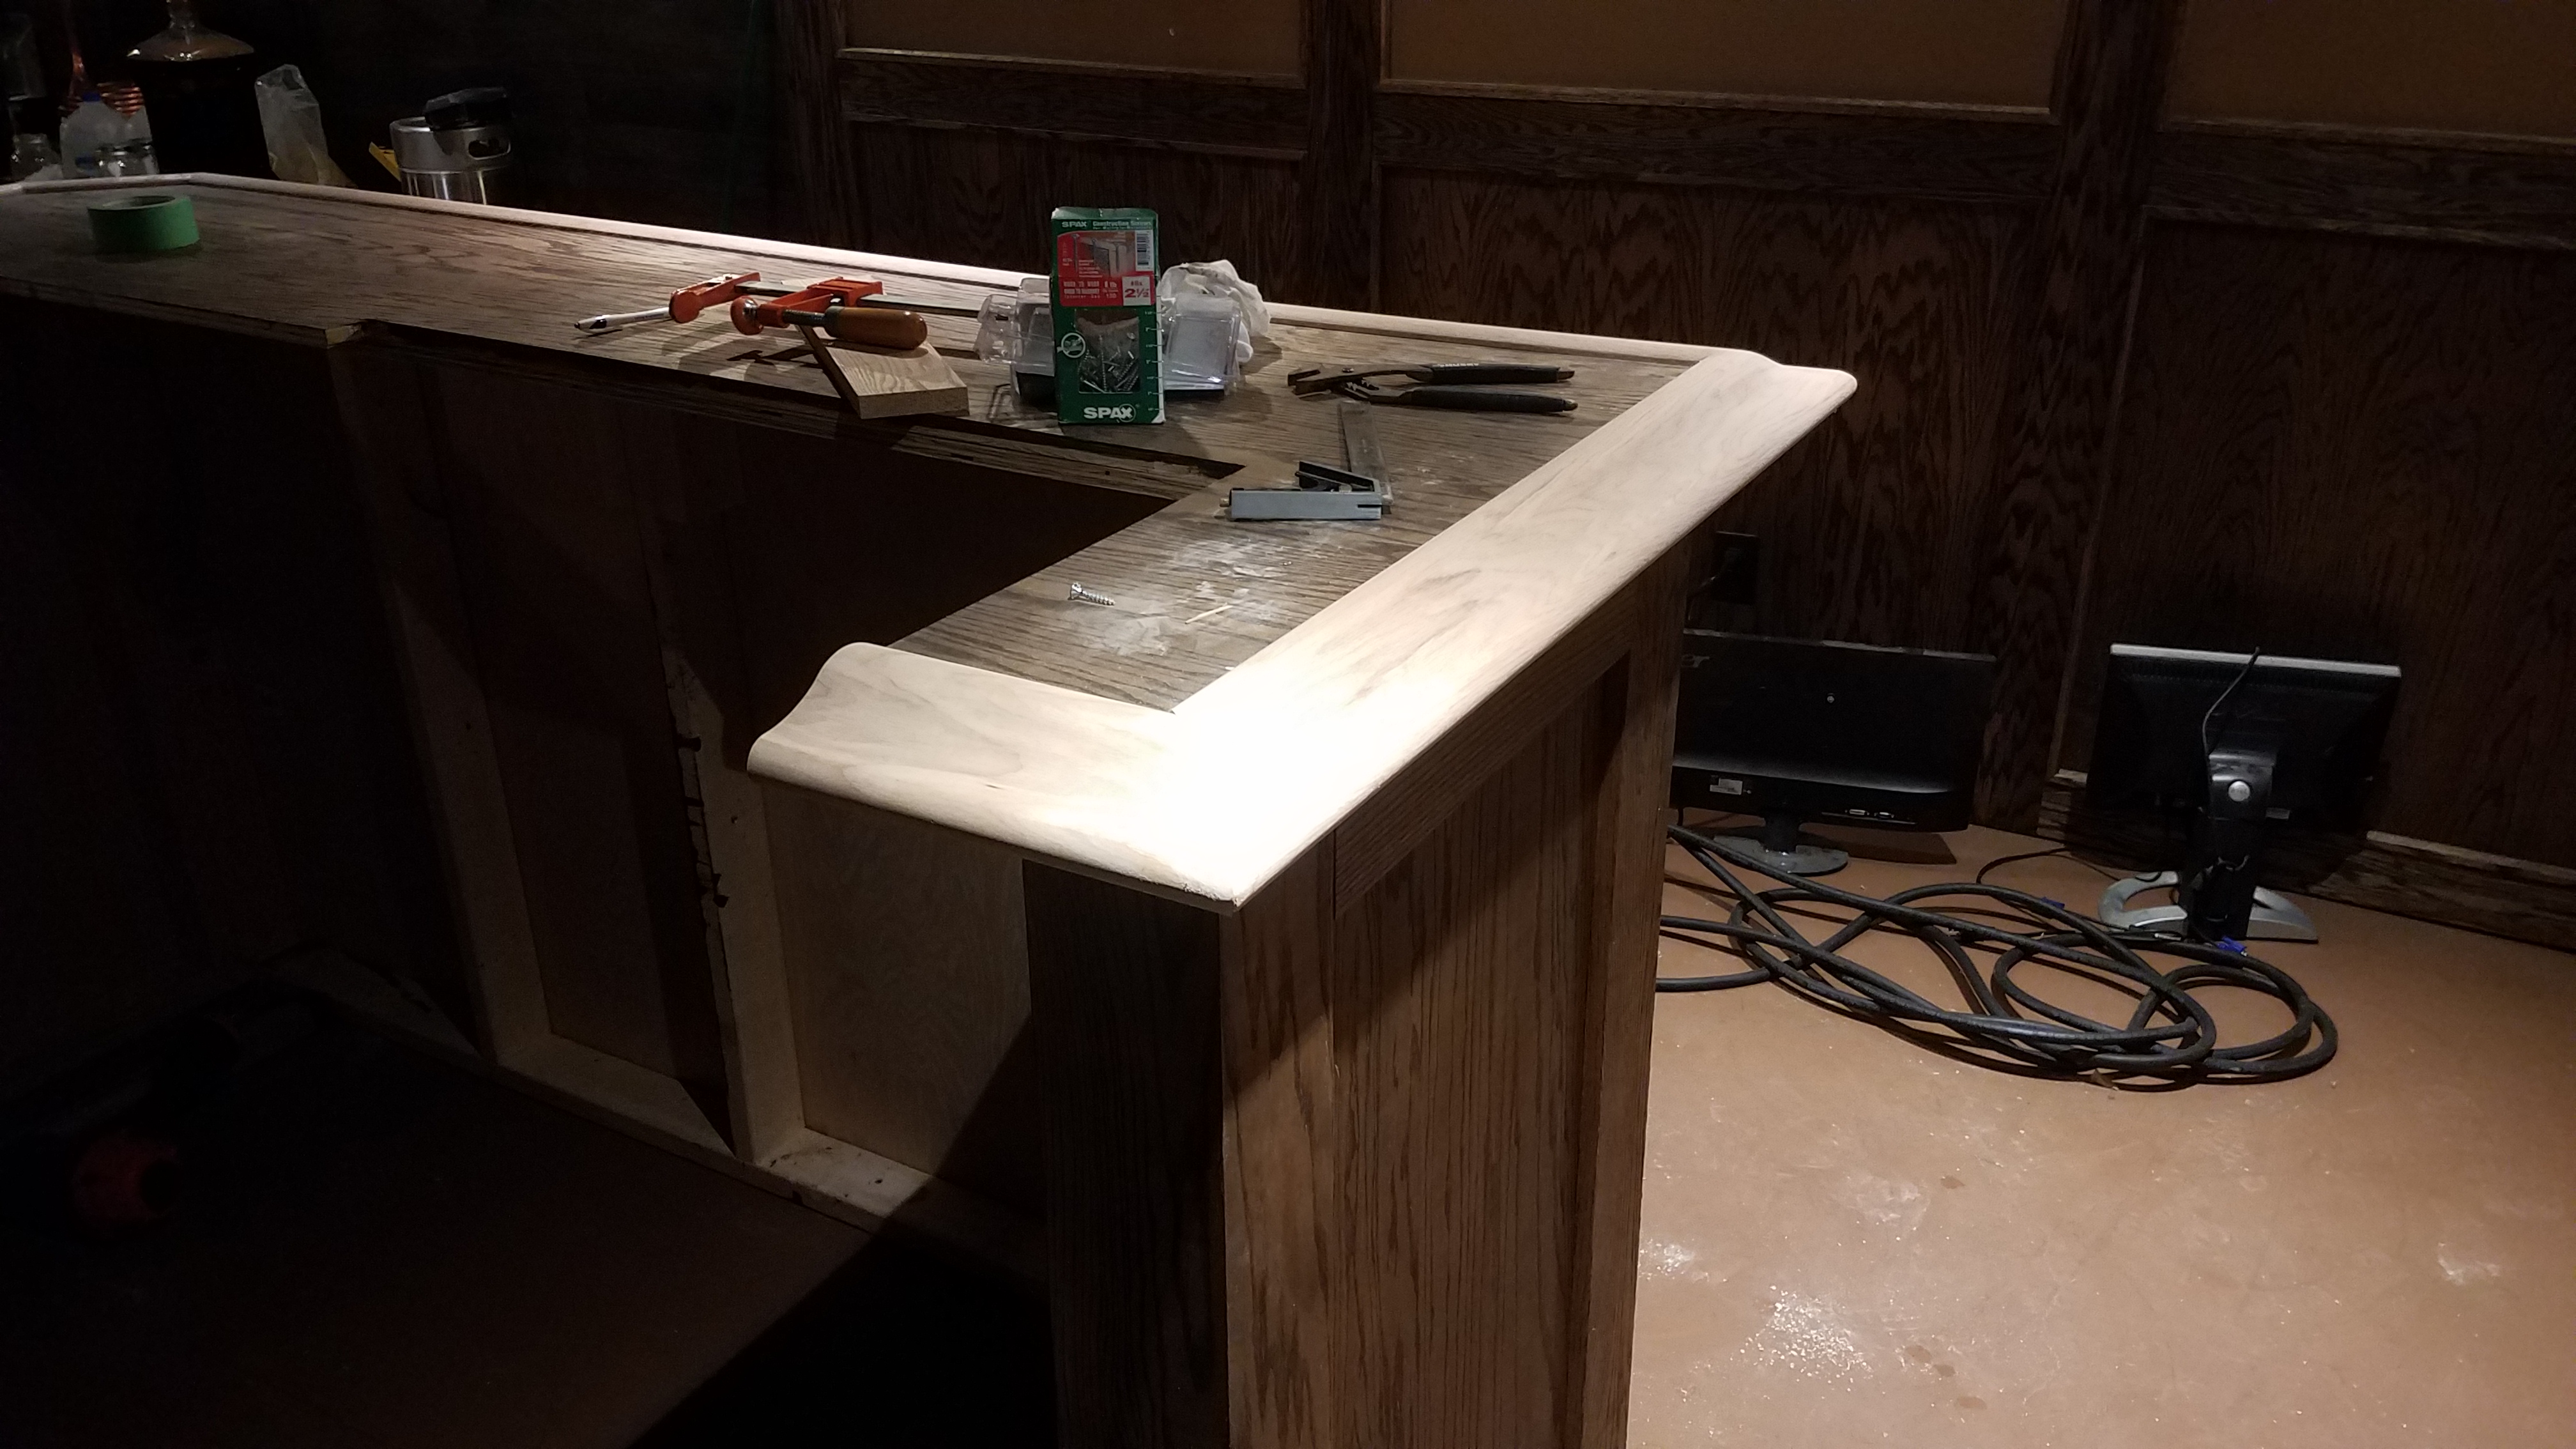
AND of course since the bar is custom... I needed to build custom cabinets for the back bar as well. I was fortunate to get a great deal on more oak plywood in a "cull" pile at Menards, ($22 per sheet ?!?!) Most of them had bad places on the ends and edges, but I would be trimming all of that off anyway so I bought several sheets and went to town making cabinets for the back bar.
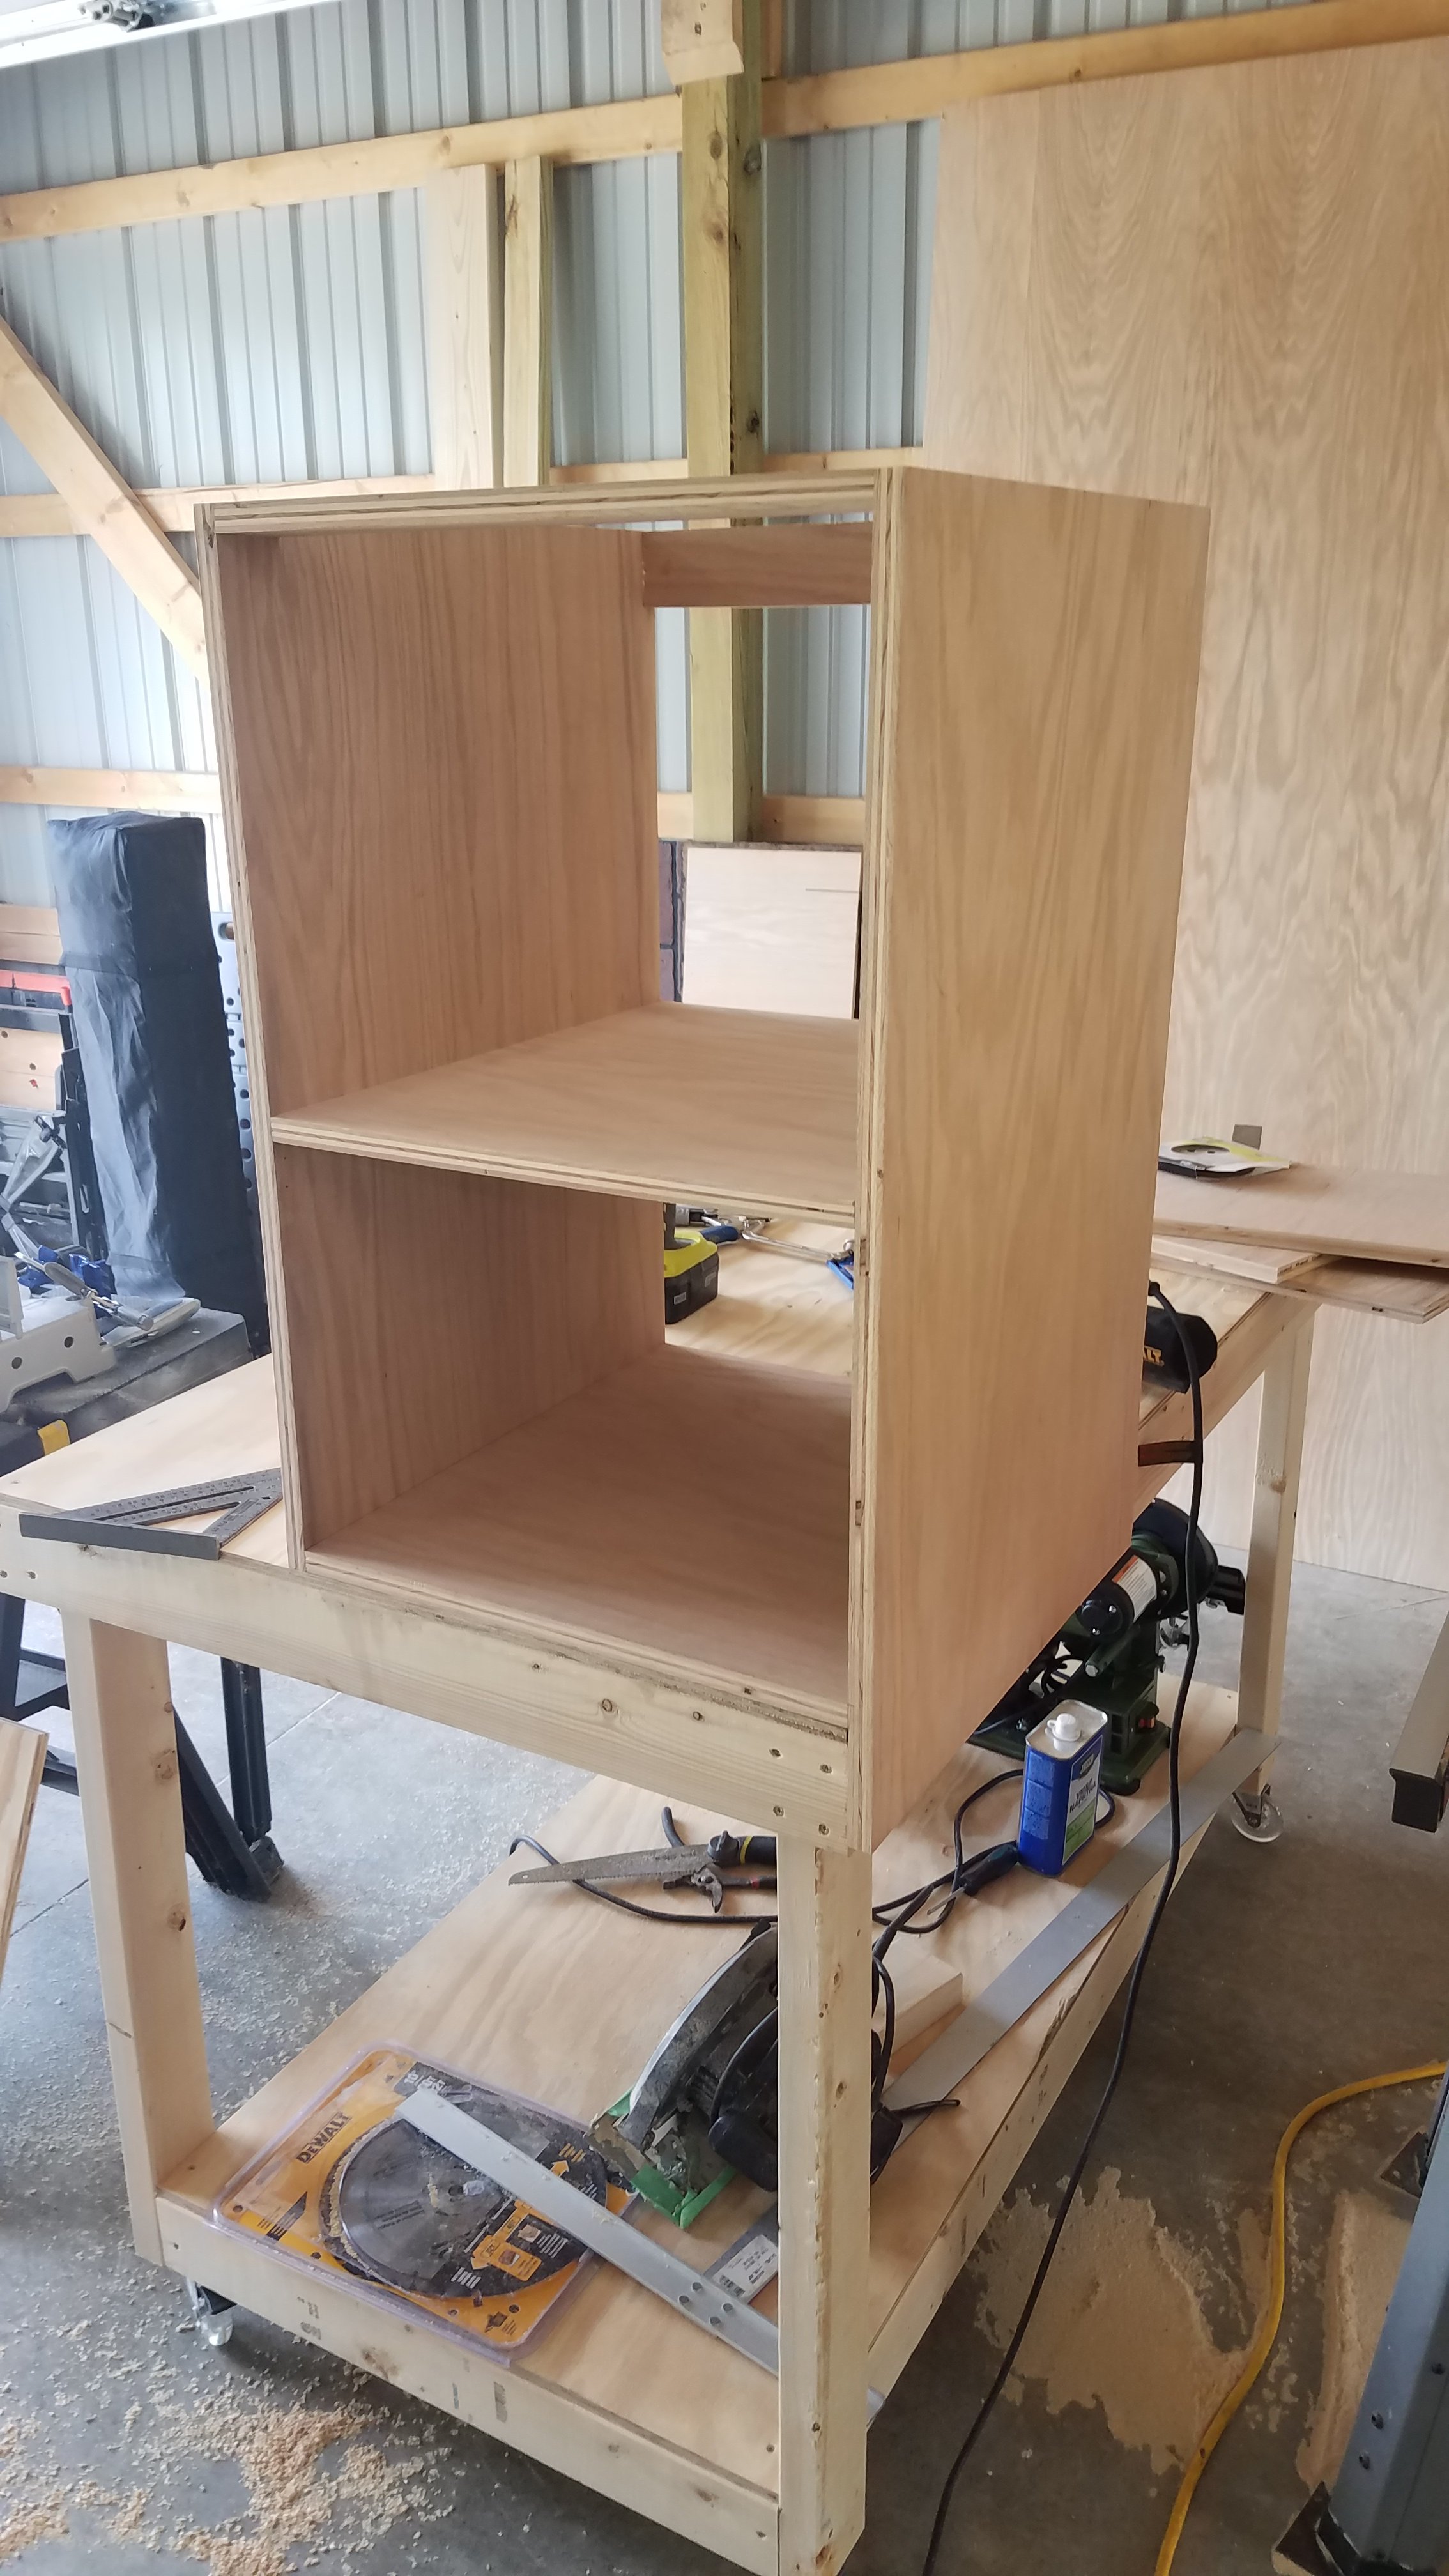

I have to decide on what I was going to use for corbels to support the bar top typically this is done with wood. However, singe I had a slight industrial theme going on from some of the other trim in the basement, I decided to go with cast iron pipe for the corbels. I assembled and painted them a bronze color and installed prior to putting the bar rail on to help make sure all of the surfaces were level. (Plywood is not straight these days no matter how much you cull from the stack!!)


One all of the "corbels" were installed I began the process of fitting the bar rail. THAT is a process for sure. Lots of cutting and sanding, fitting, cutting, sanding... Repeat.. lol


AND of course since the bar is custom... I needed to build custom cabinets for the back bar as well. I was fortunate to get a great deal on more oak plywood in a "cull" pile at Menards, ($22 per sheet ?!?!) Most of them had bad places on the ends and edges, but I would be trimming all of that off anyway so I bought several sheets and went to town making cabinets for the back bar.

Similar threads
- Replies
- 105
- Views
- 4K
- Replies
- 14
- Views
- 750


