
PasbitinusBluinusRibbinus
Well-Known Member
- Joined
- Mar 14, 2012
- Messages
- 284
- Reaction score
- 37
Over the past few months, I've amassed a large collection of keezer images. I wanted to make sure I knew exactly what I wanted to do with my build. I've never been one for sketching or plans (although someday I will learn to use Google sketchup) so I really just started making it and kept making changes as I went along.
I tried to take a bunch of pictures along the way, but obviously missed a few steps.
After a month and a half, learning about 50 new skills, and spending too much money...
She's pouring beer! A clone of Founder's Breakfast Stout... at 10AM. (C'mon, I just finished her, and had to celebrate)
The grungy old chest freezer.
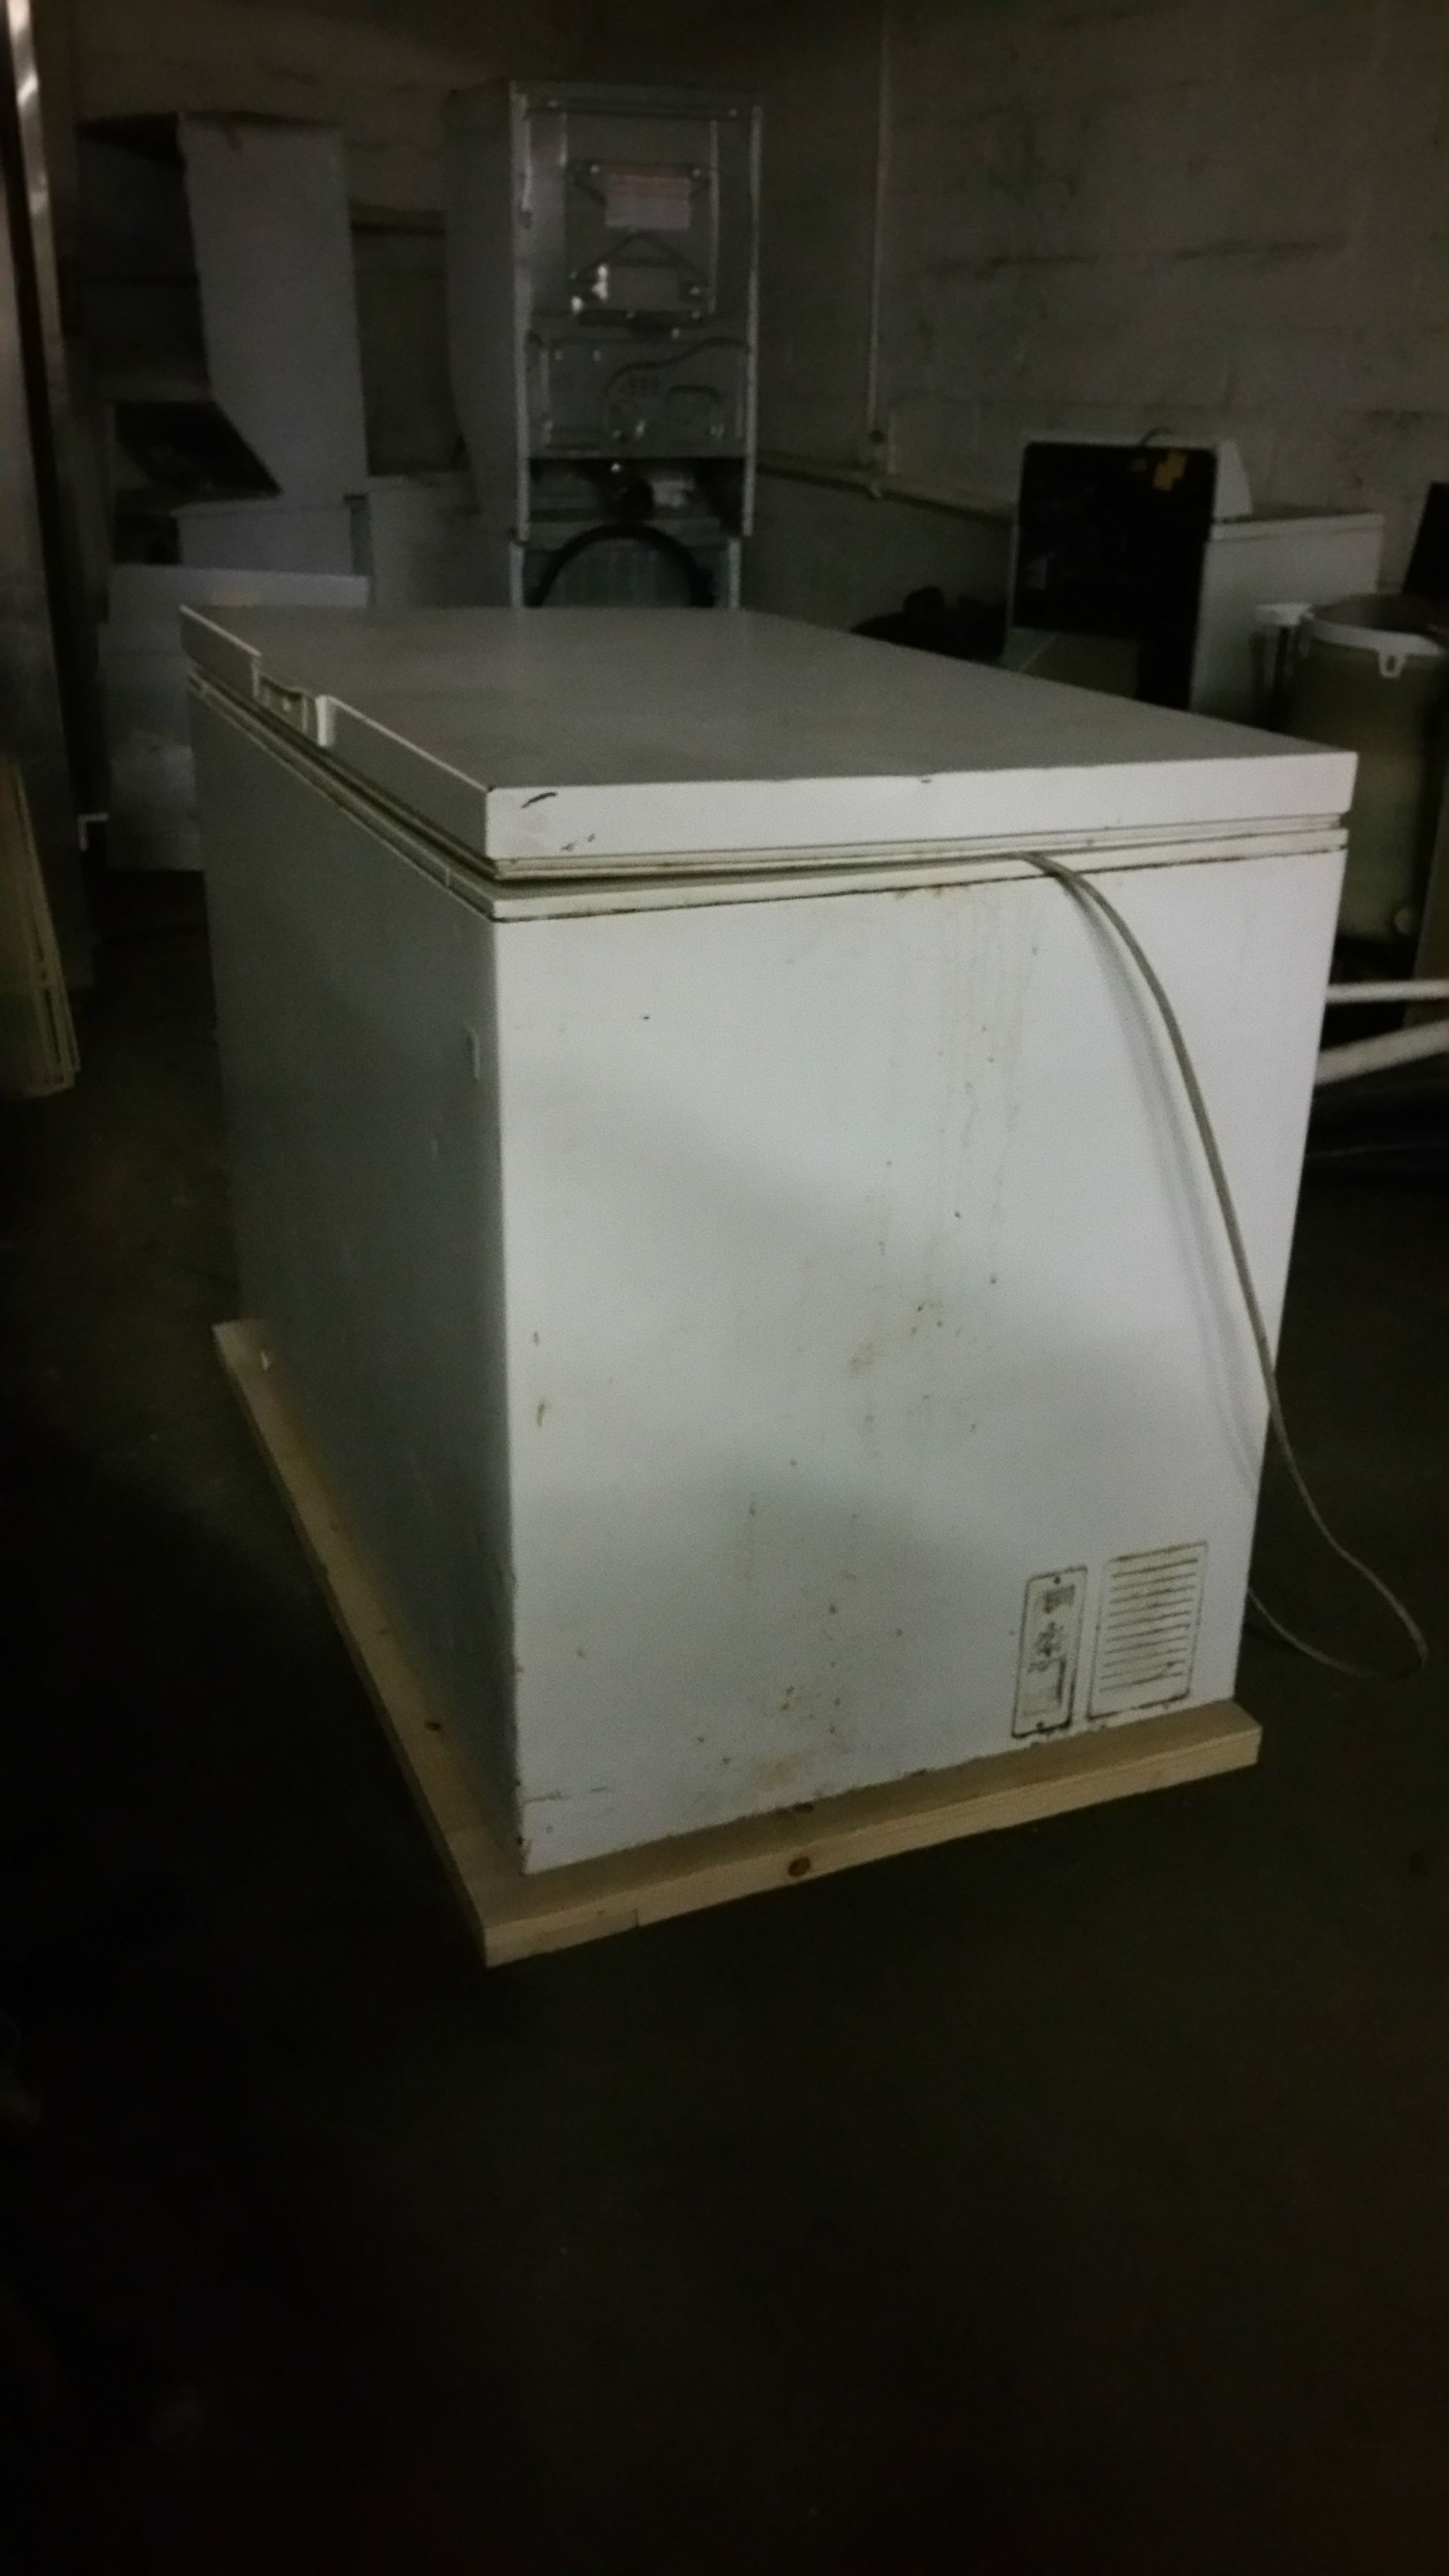
A $50 craigslist find. When I got later in the project, I realized that spending $500 on materials and $50 on a chest freezer was a little silly. Fingers crossed, but she seems to be running well. Let's hope, as the model is discontinued.
A basic frame and oak plywood.
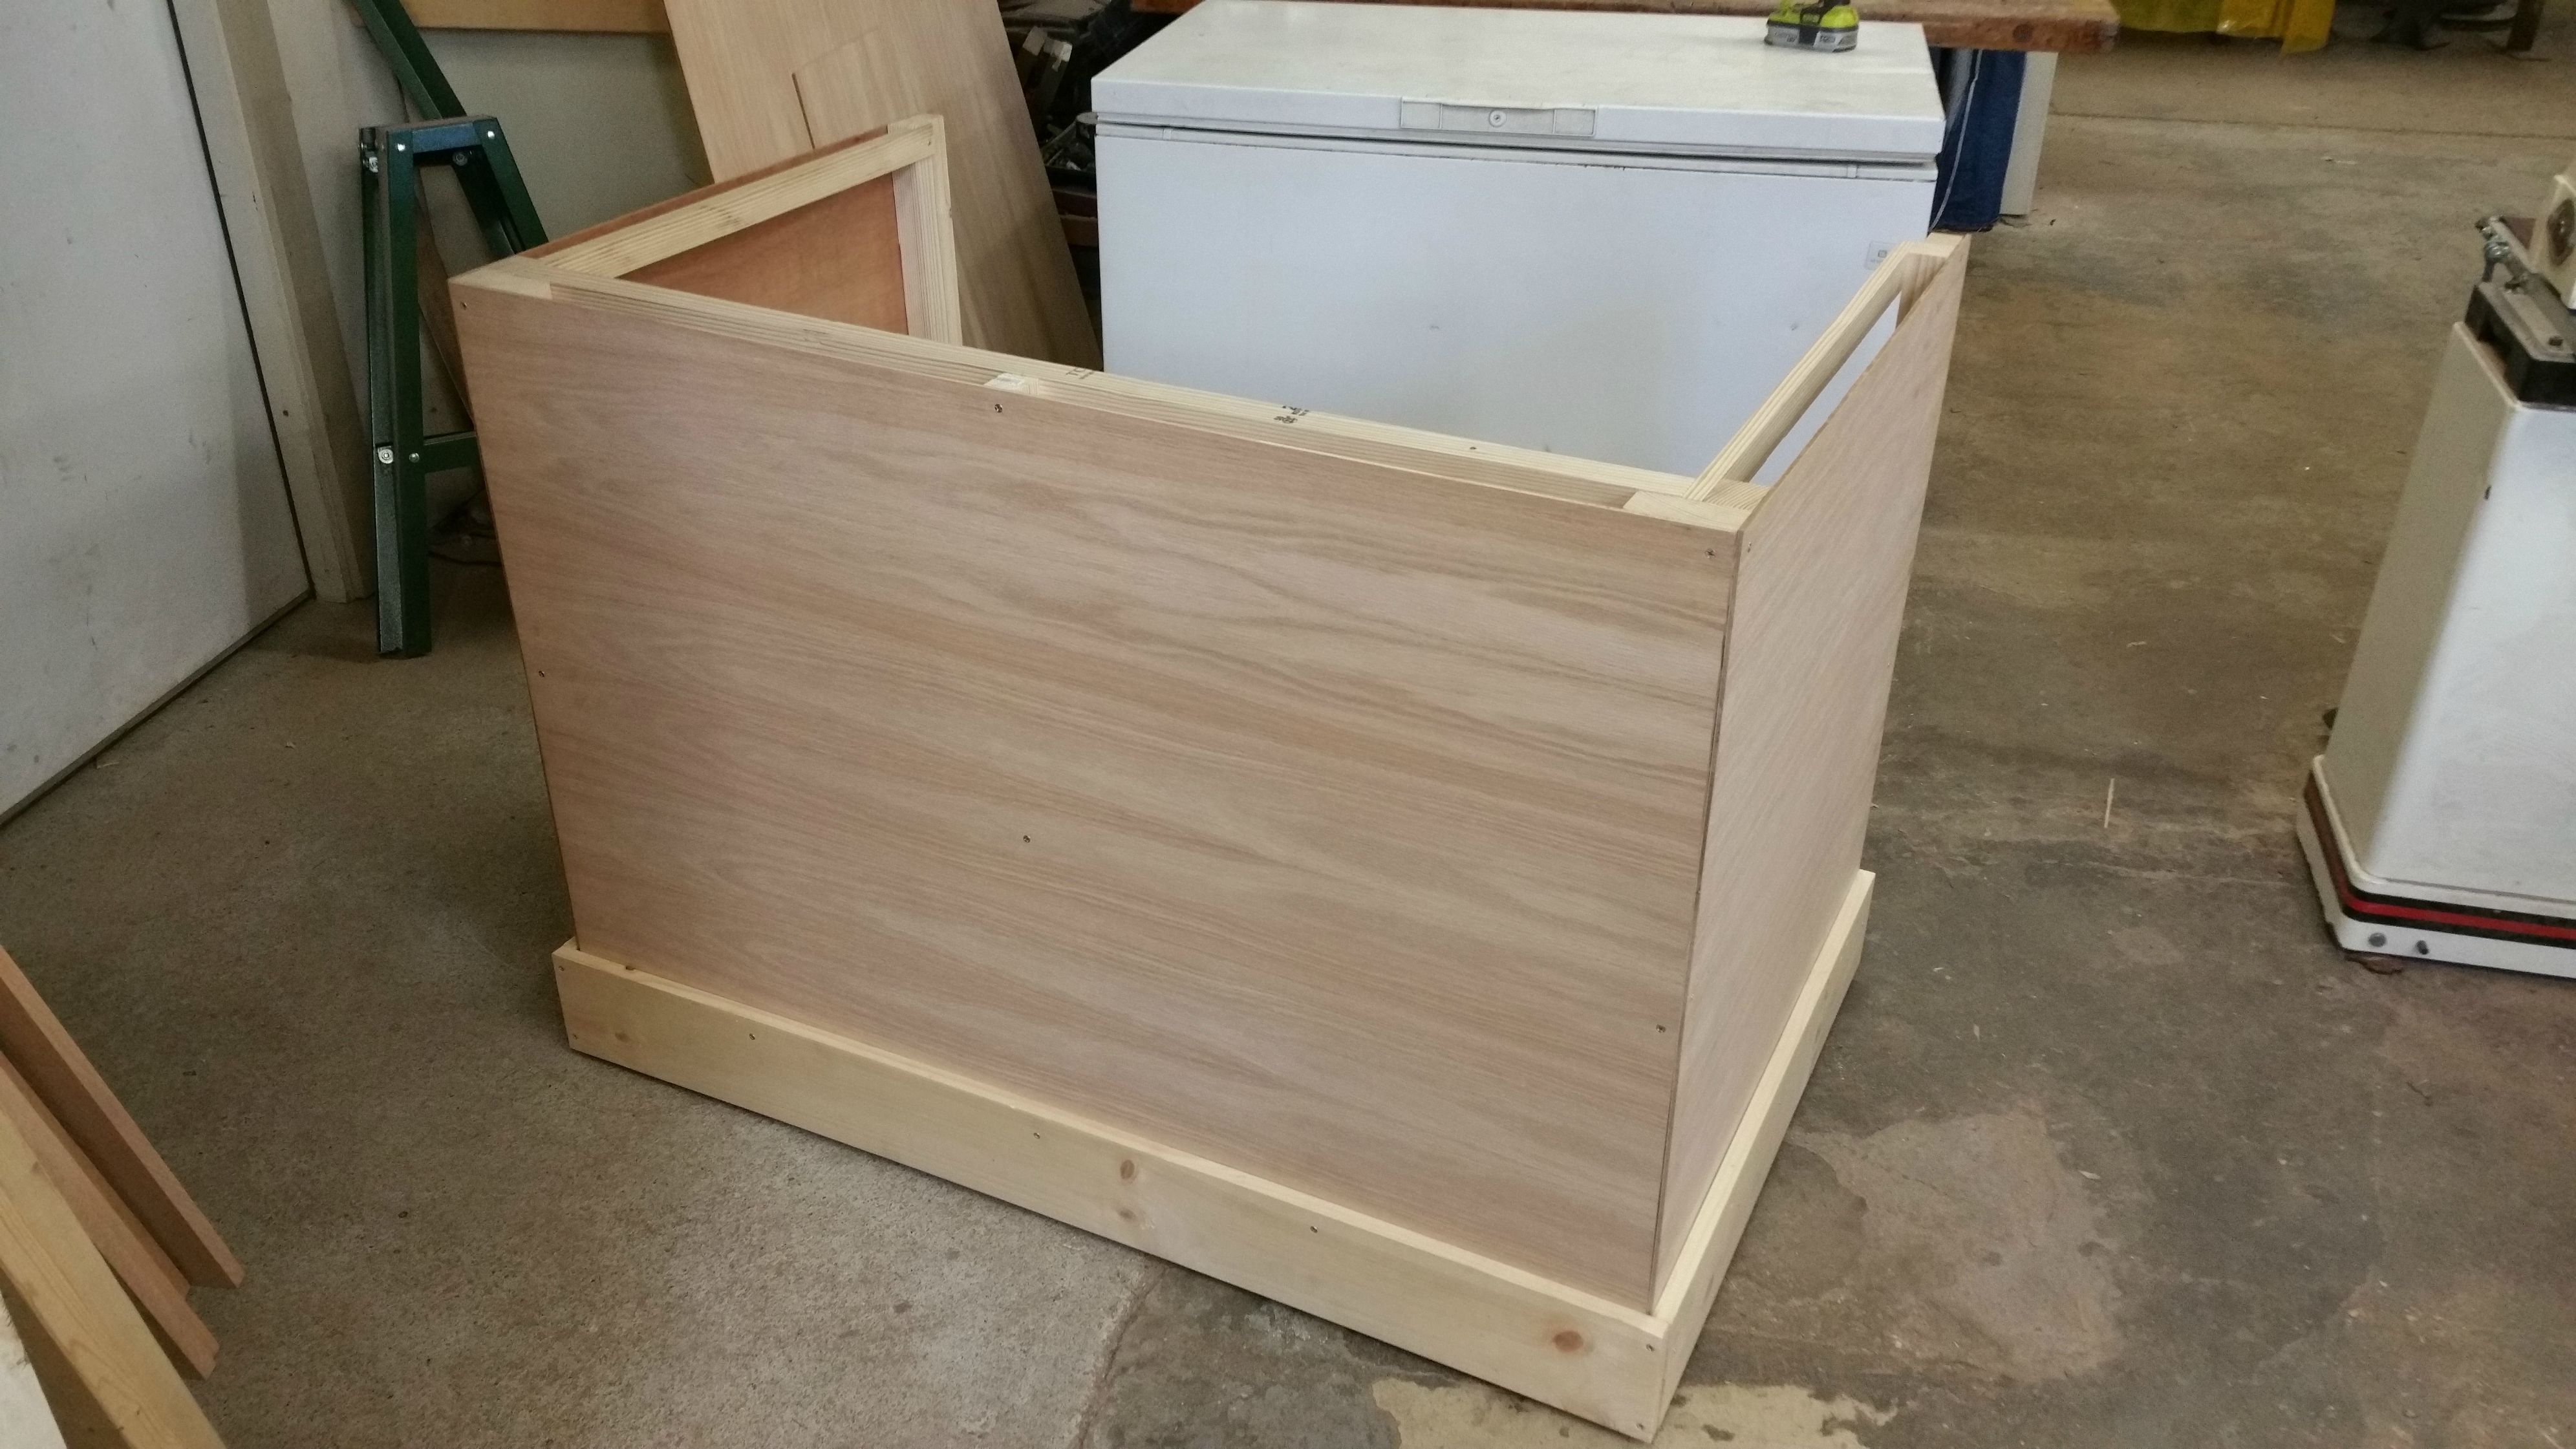
This will become the base of the cabinet.
Structurally sound... I hope.

The chest freezer weighs around 100lbs. Just add a 150lb lid and 50 gallons worth of beer, and things get serious. Thankfully, I was smart enough to put casters on.
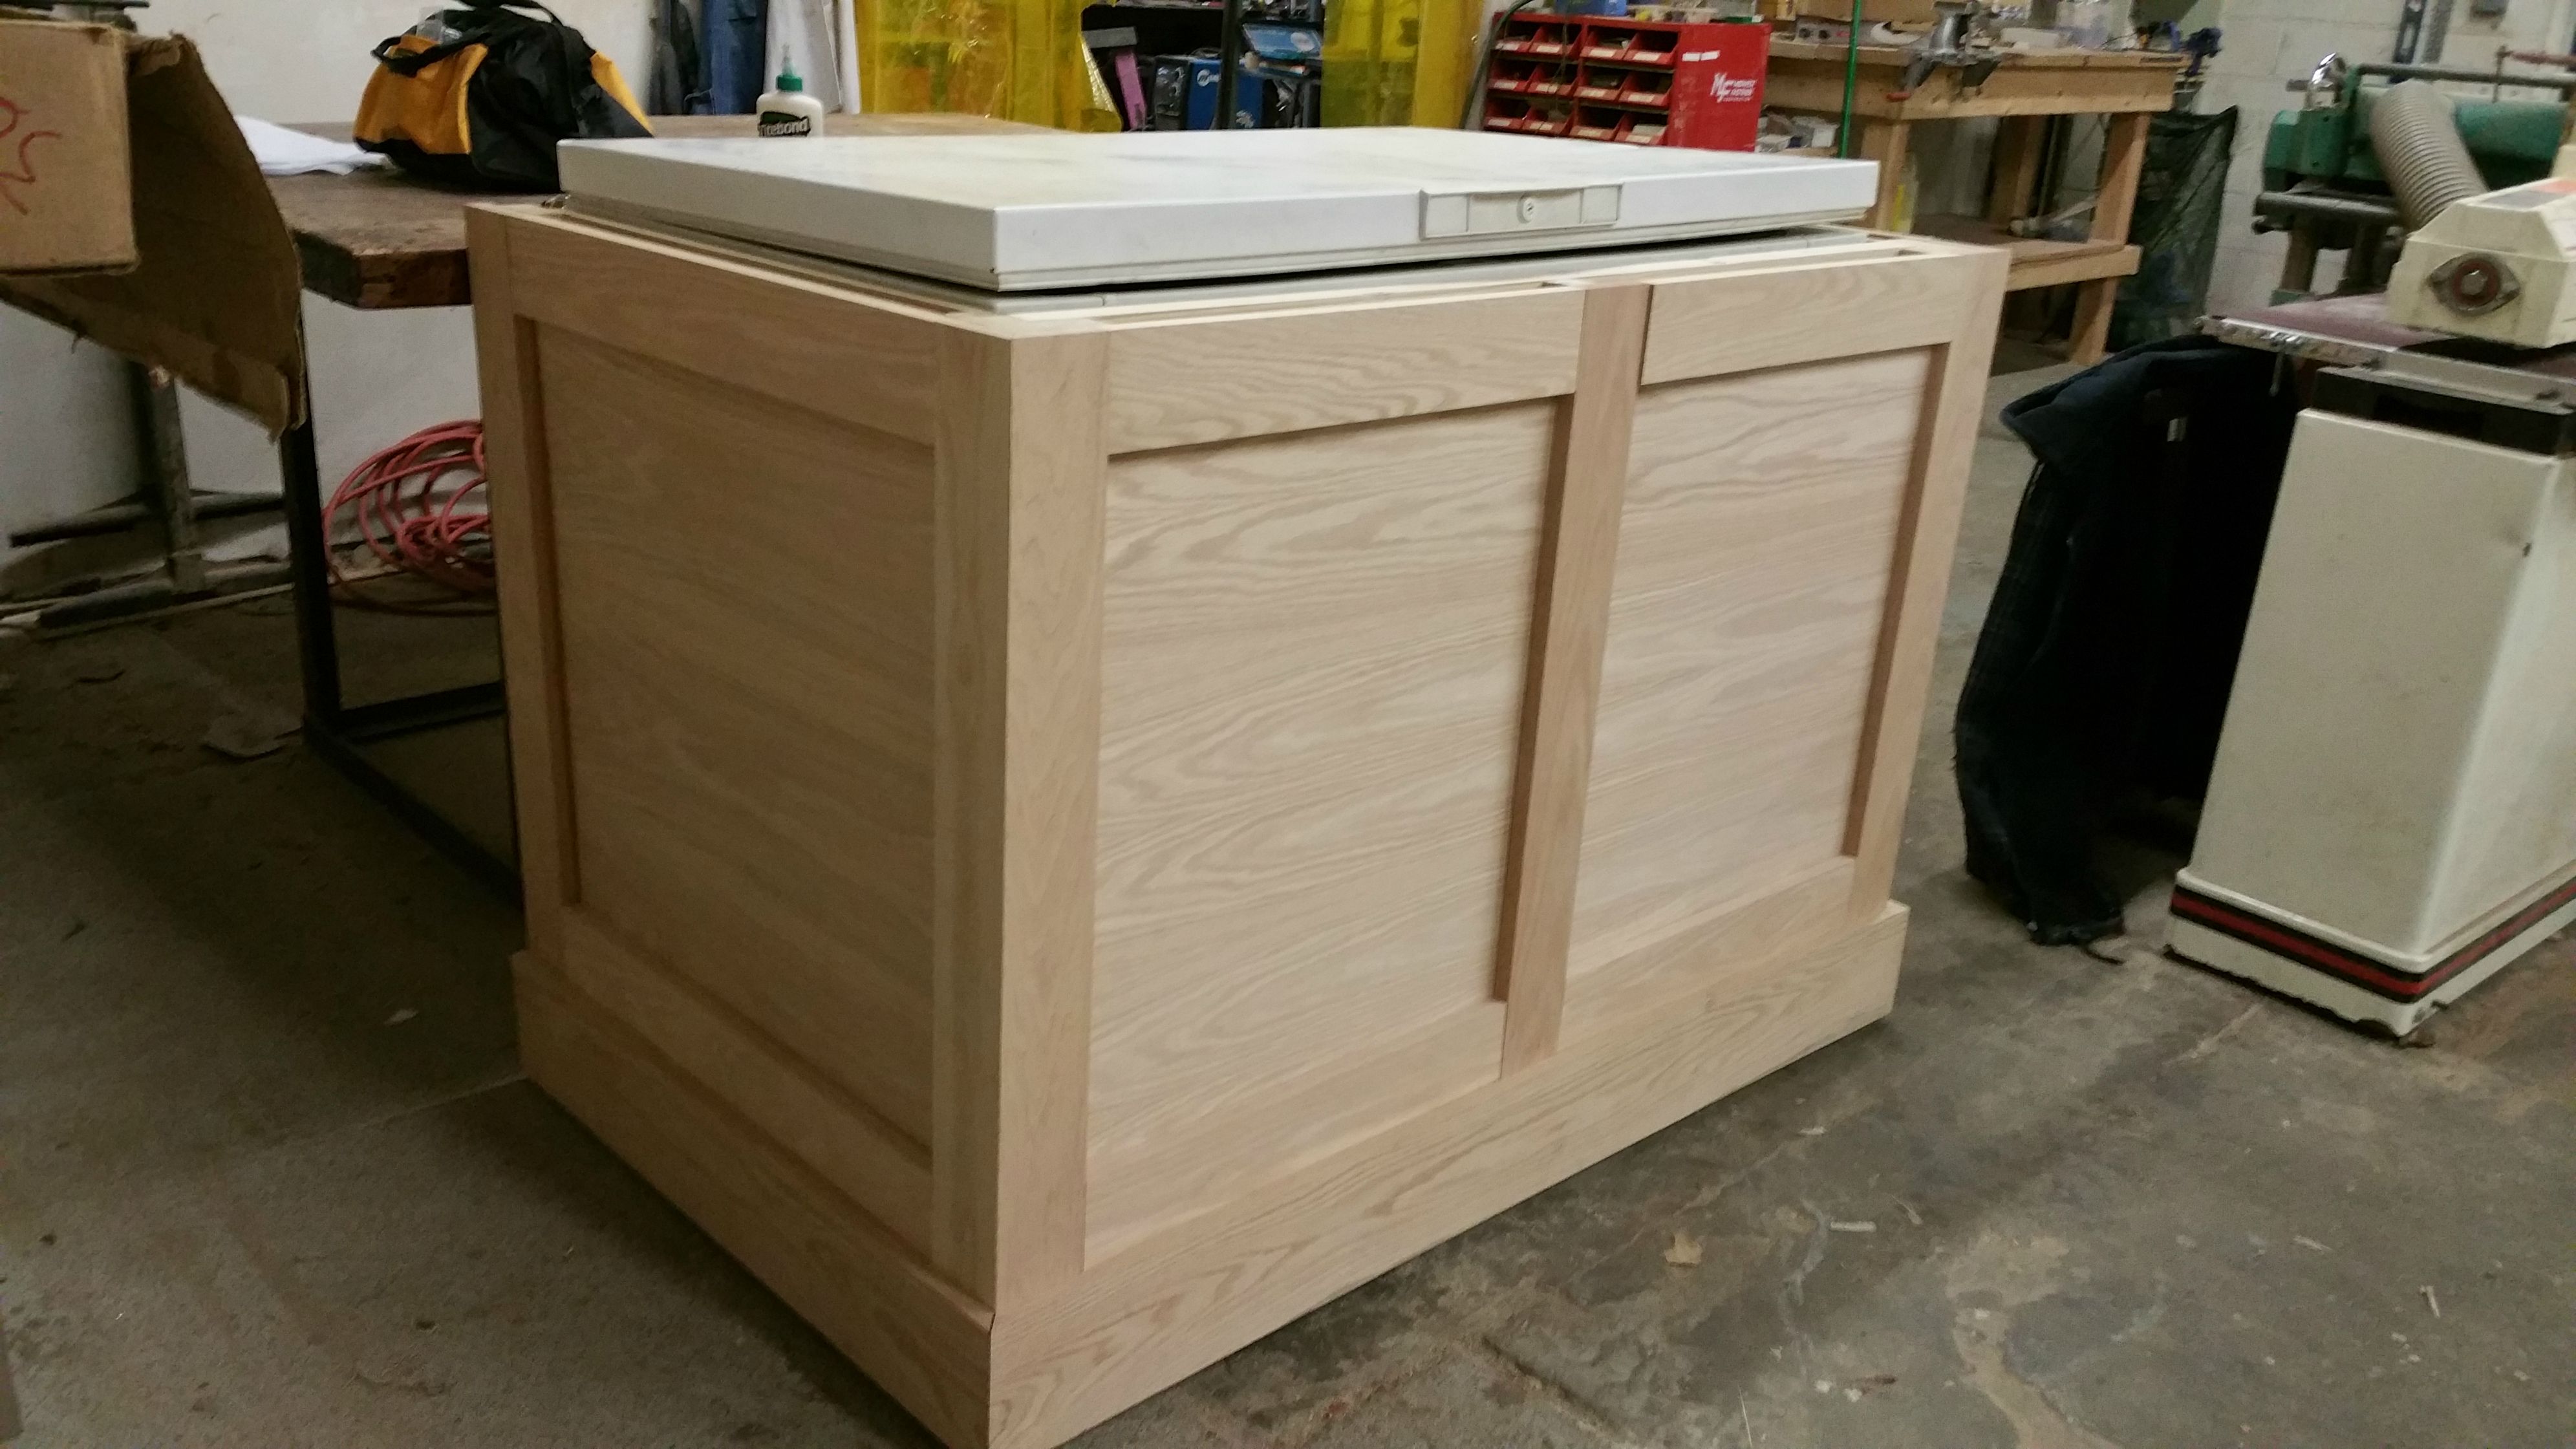
Oak trim is on.
Base of the lid is built, monitor test fit.
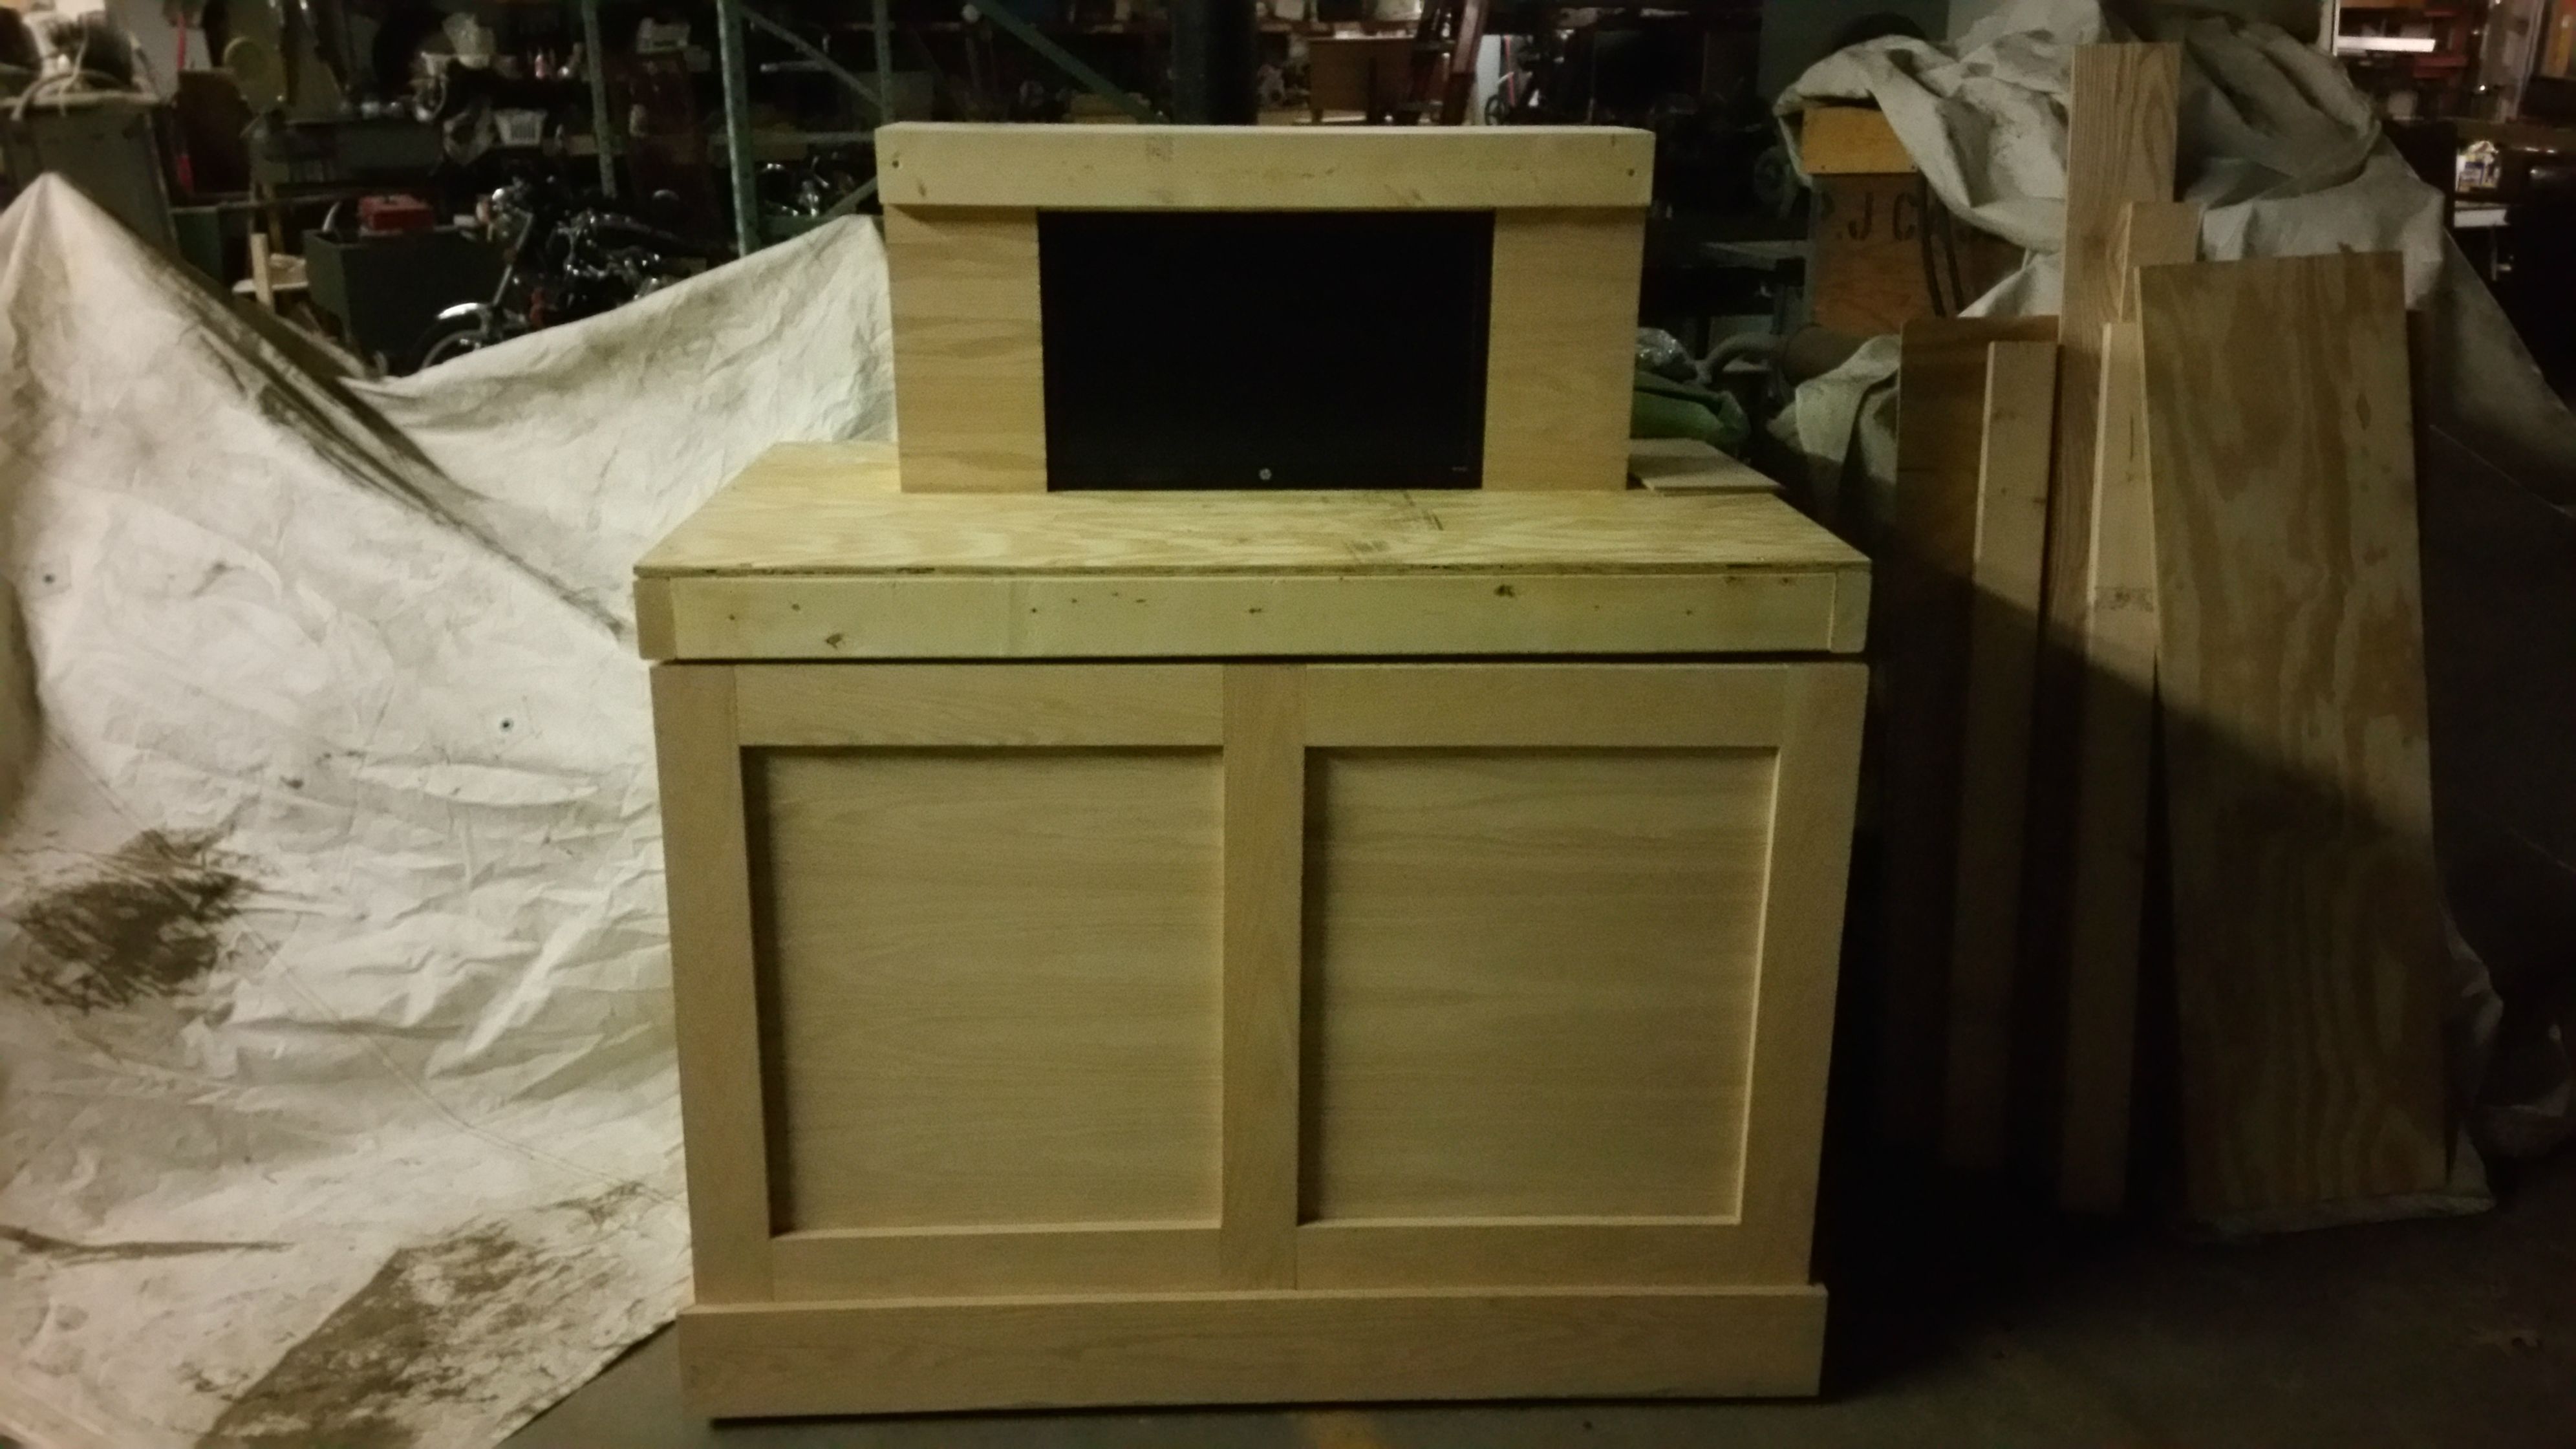
The monitor will be a digital tap display, Raspberry Pints.
Most of the trim is on, holes for the taps are drilled.
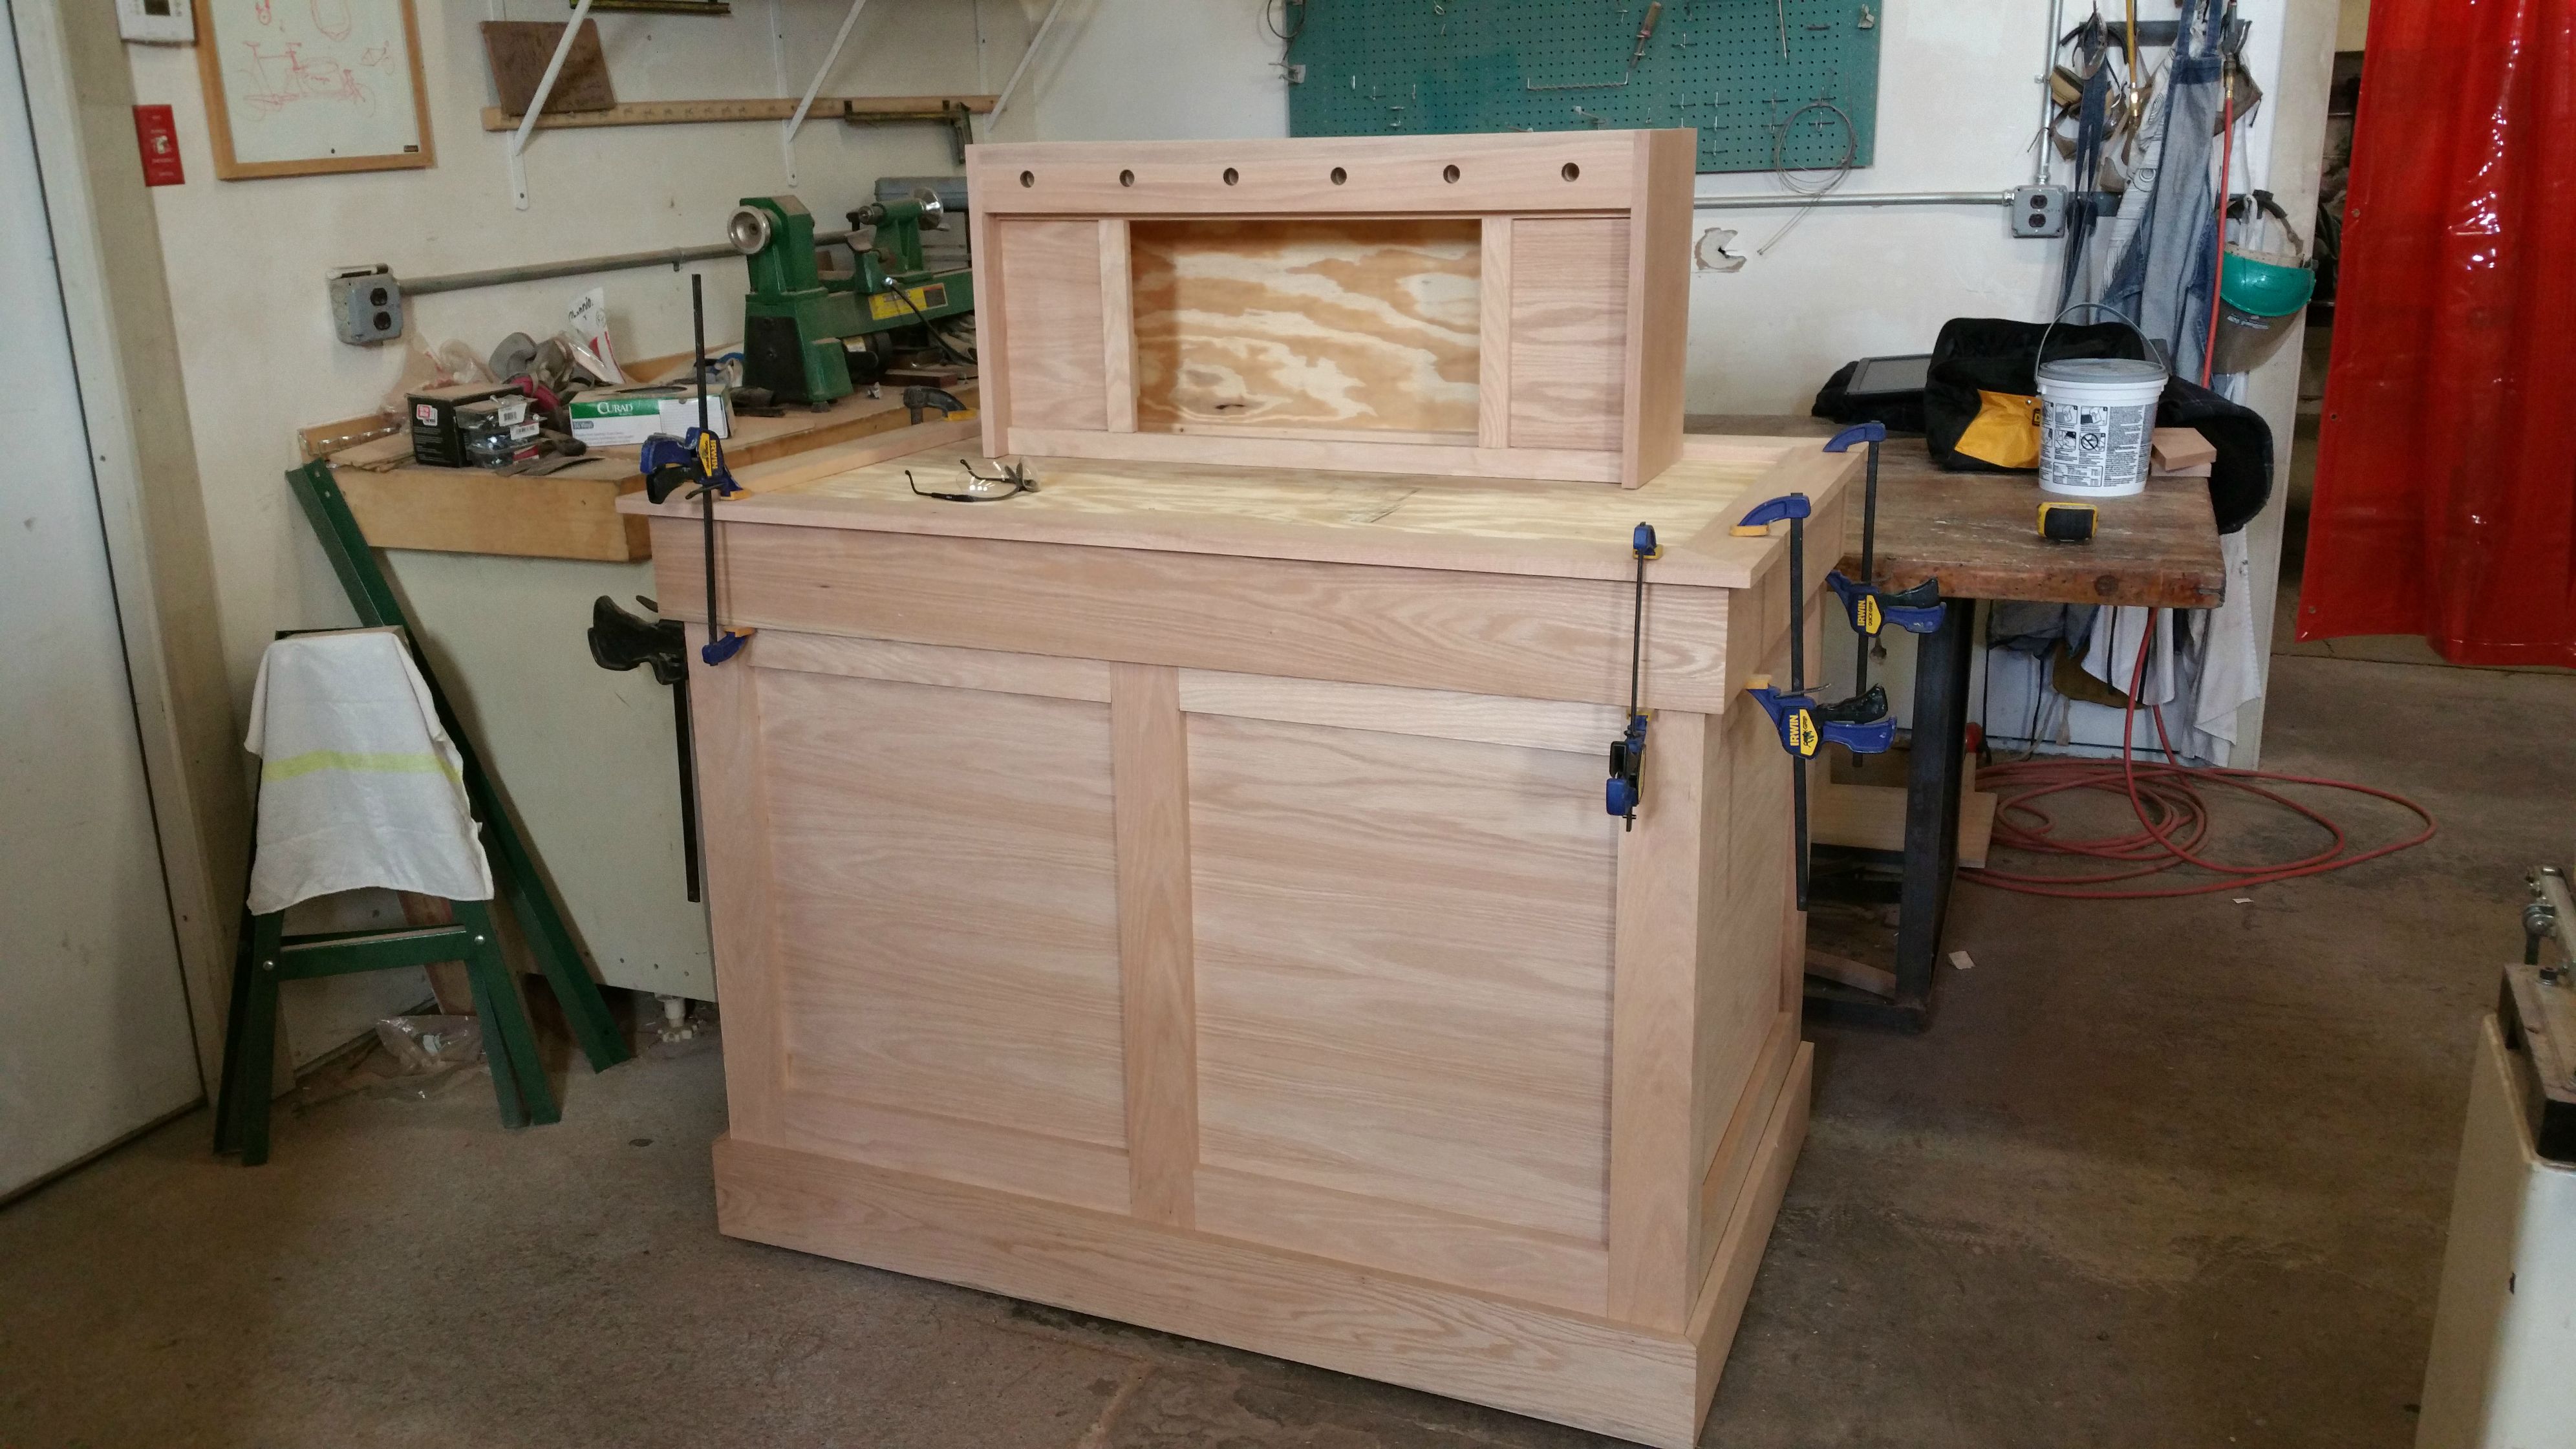
I'm about three pounds of hardware and two bottles of Titebond III deep at this point.
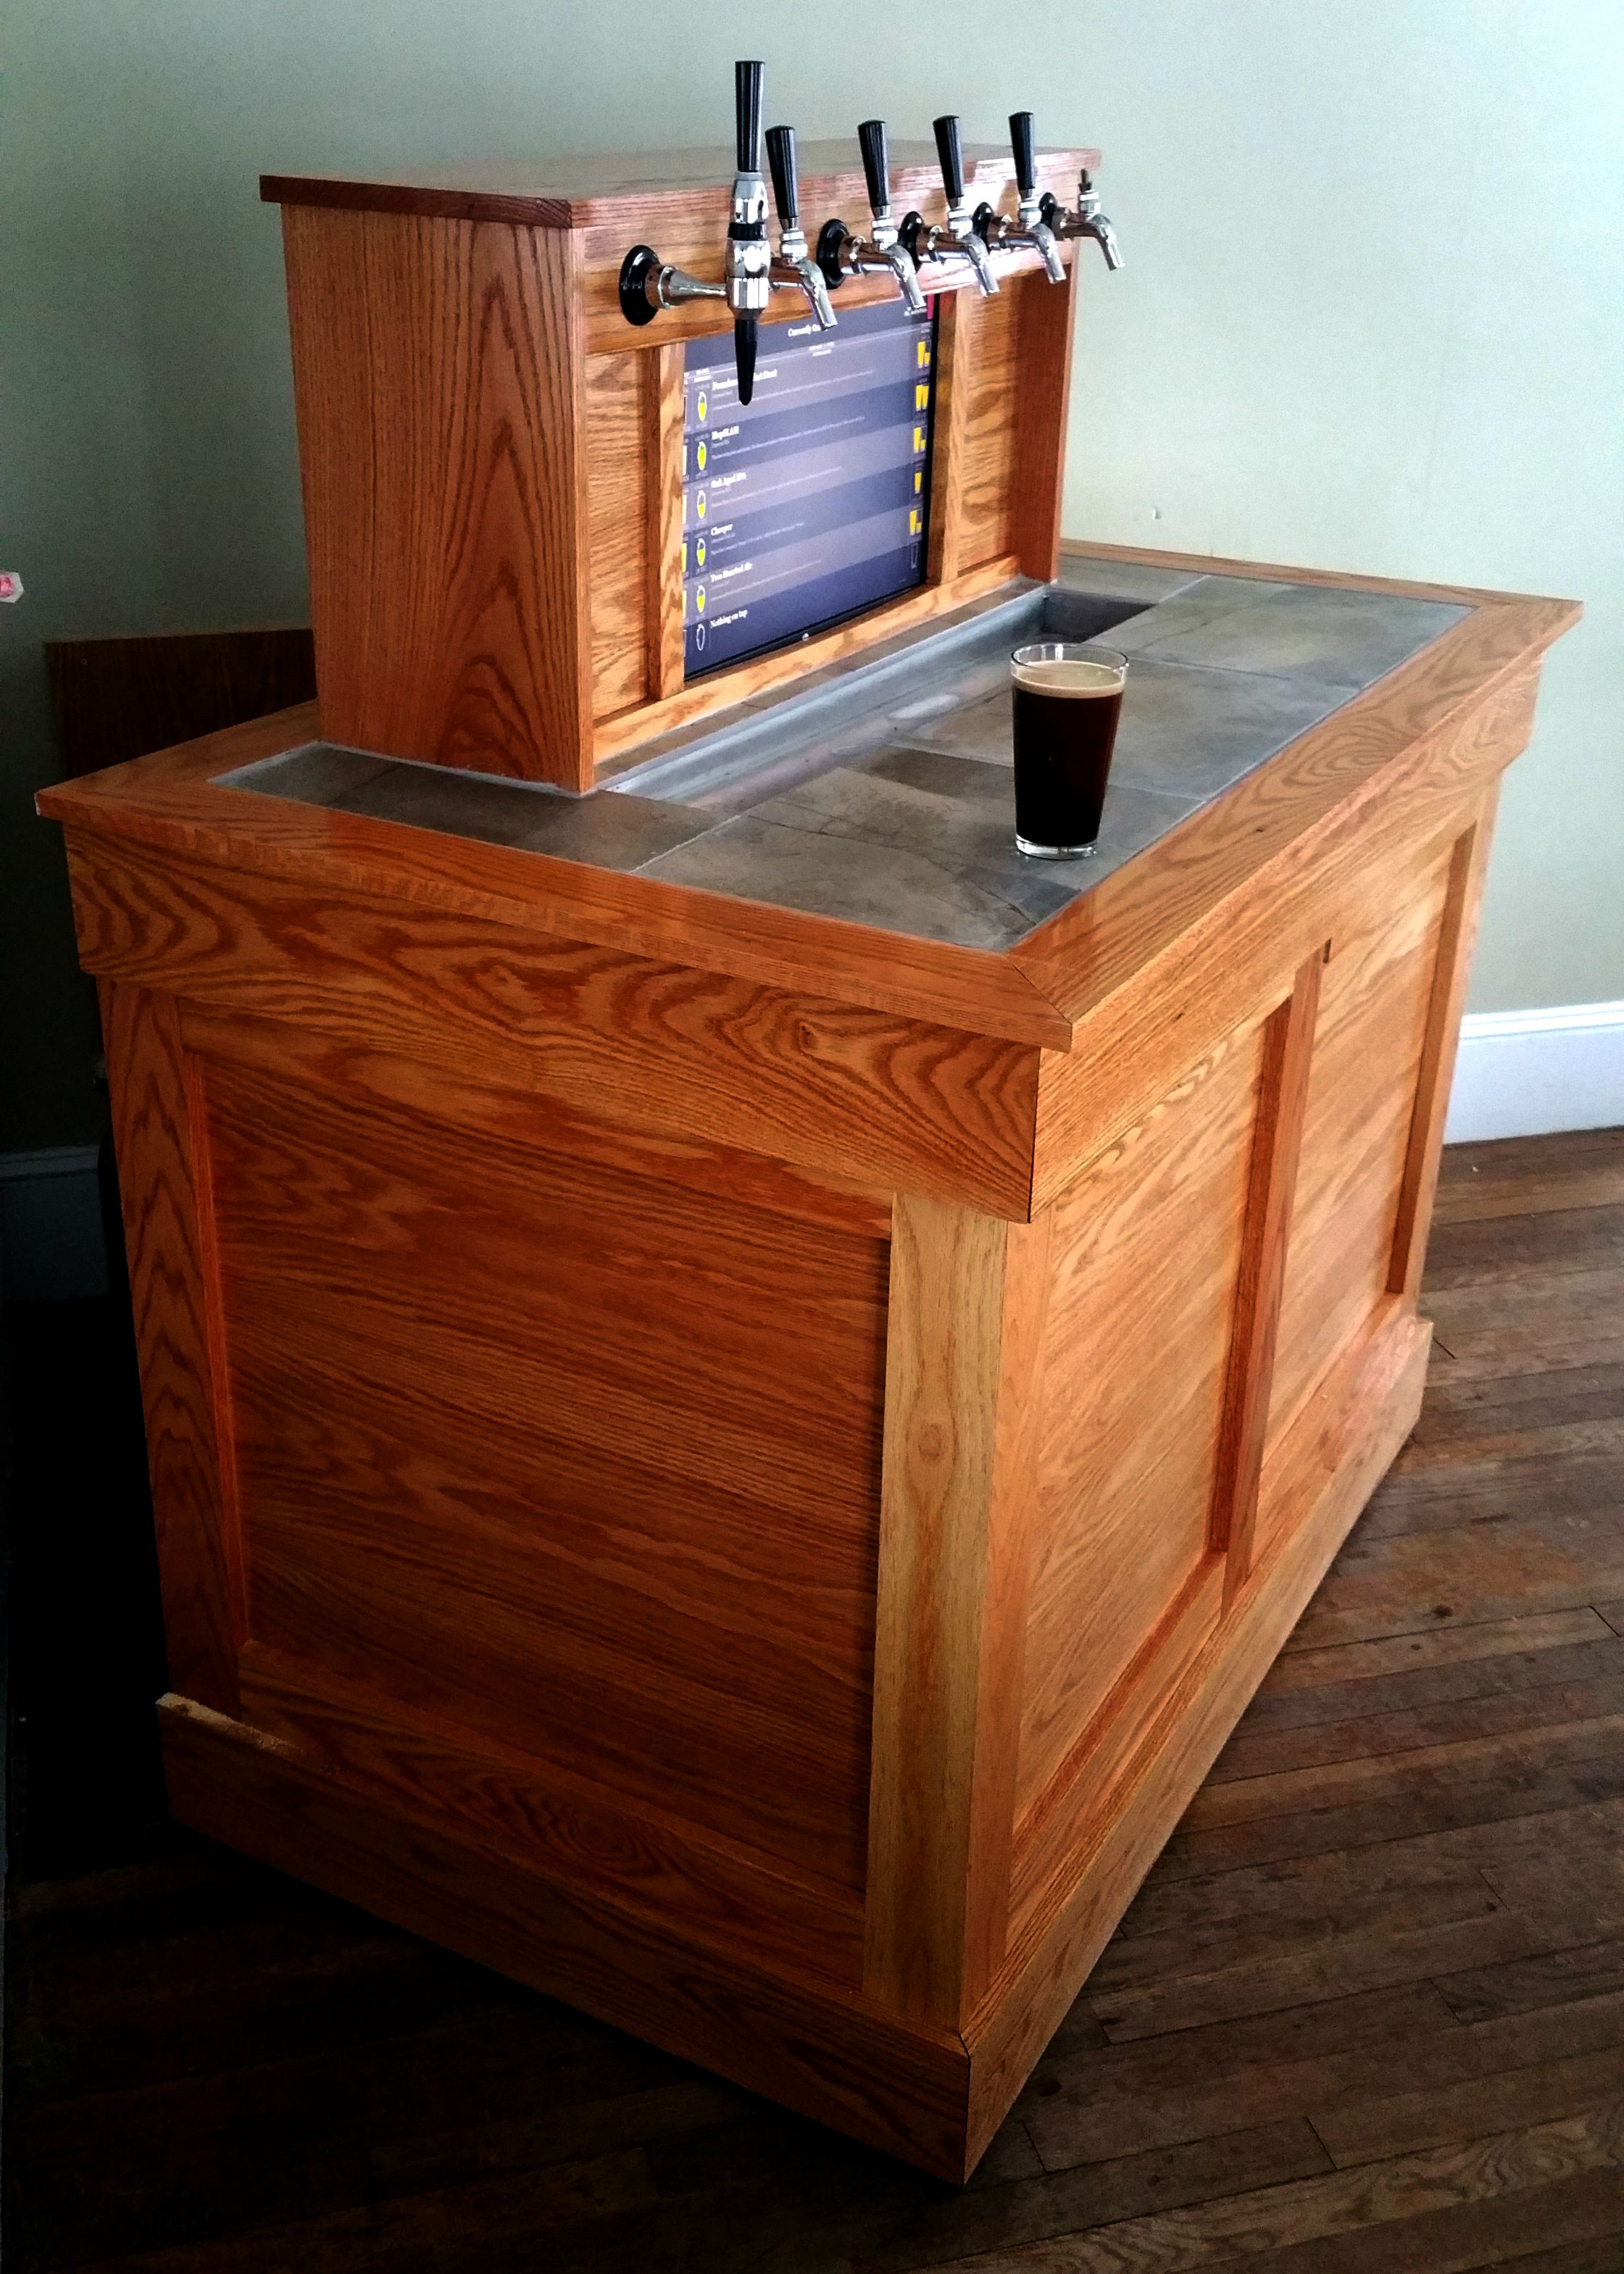
Well, I skipped some steps, but... she's done!
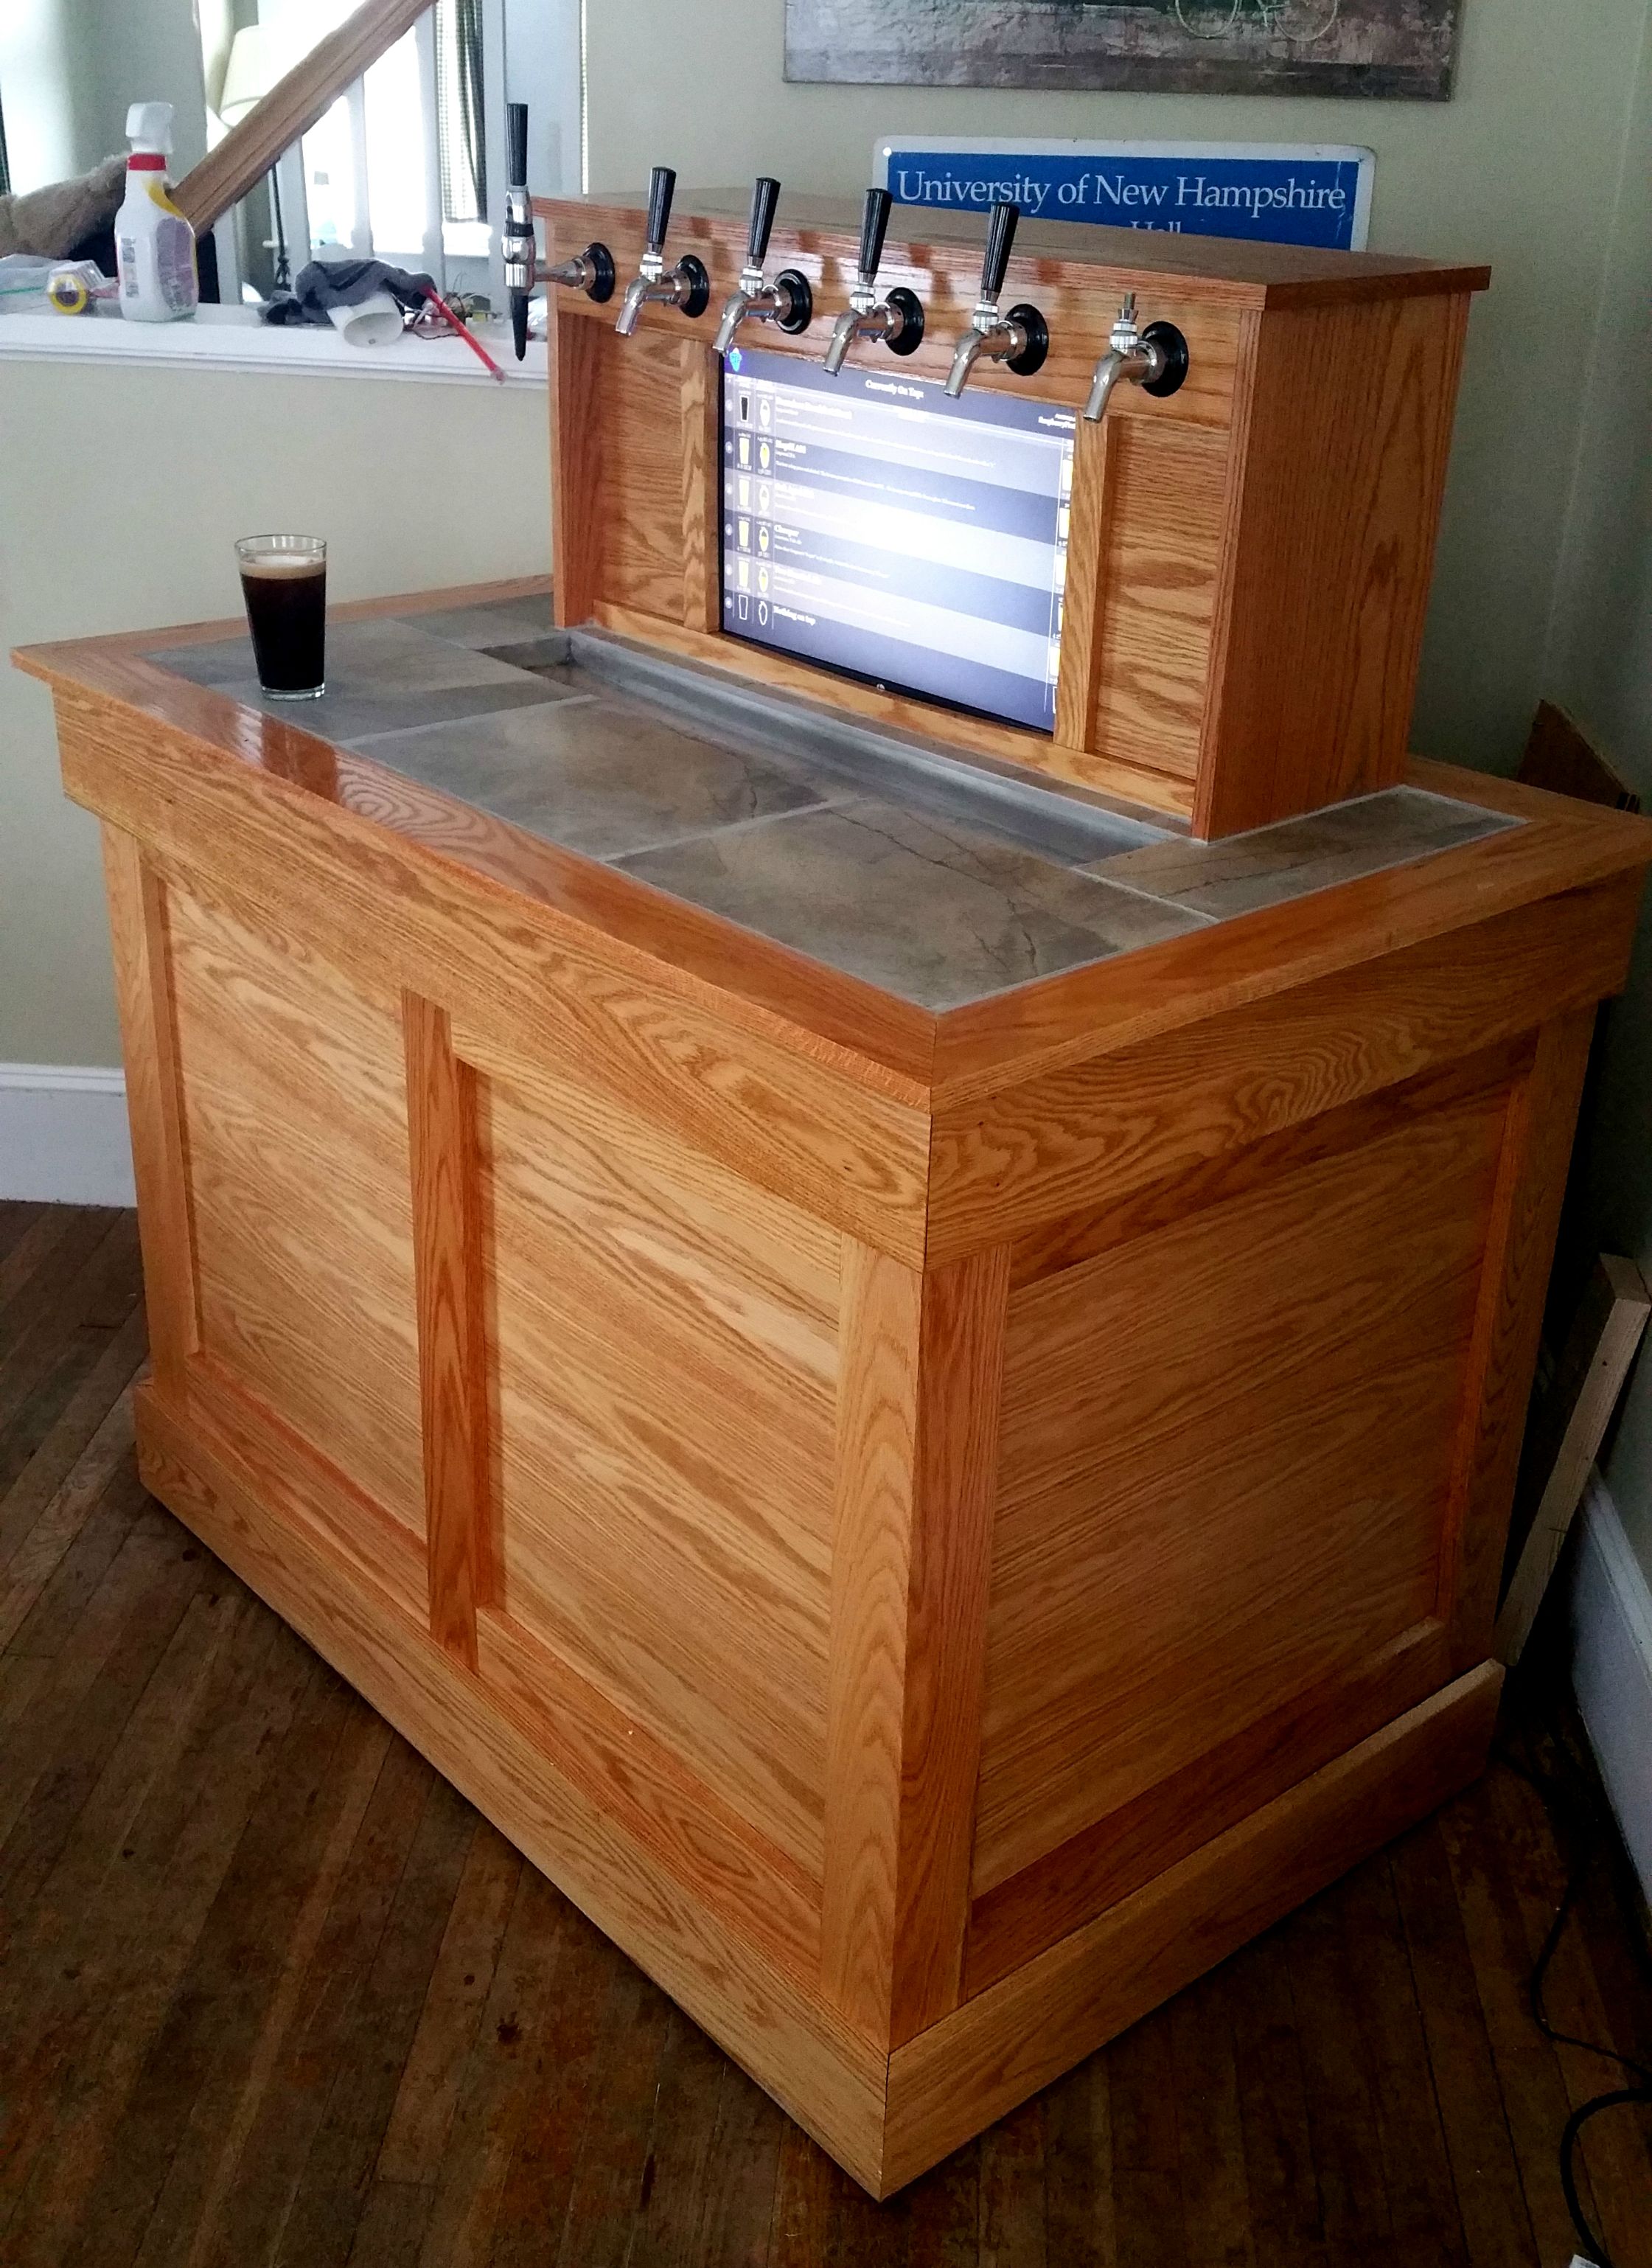
The counter-top is a porcelain tile, backed by cement backerboard and lots of thinset. Read: HEAVY! Monitor is mounted, taps are flowing (except for an undiagnosed leak in the last one)
Closeup of the taps and monitor.
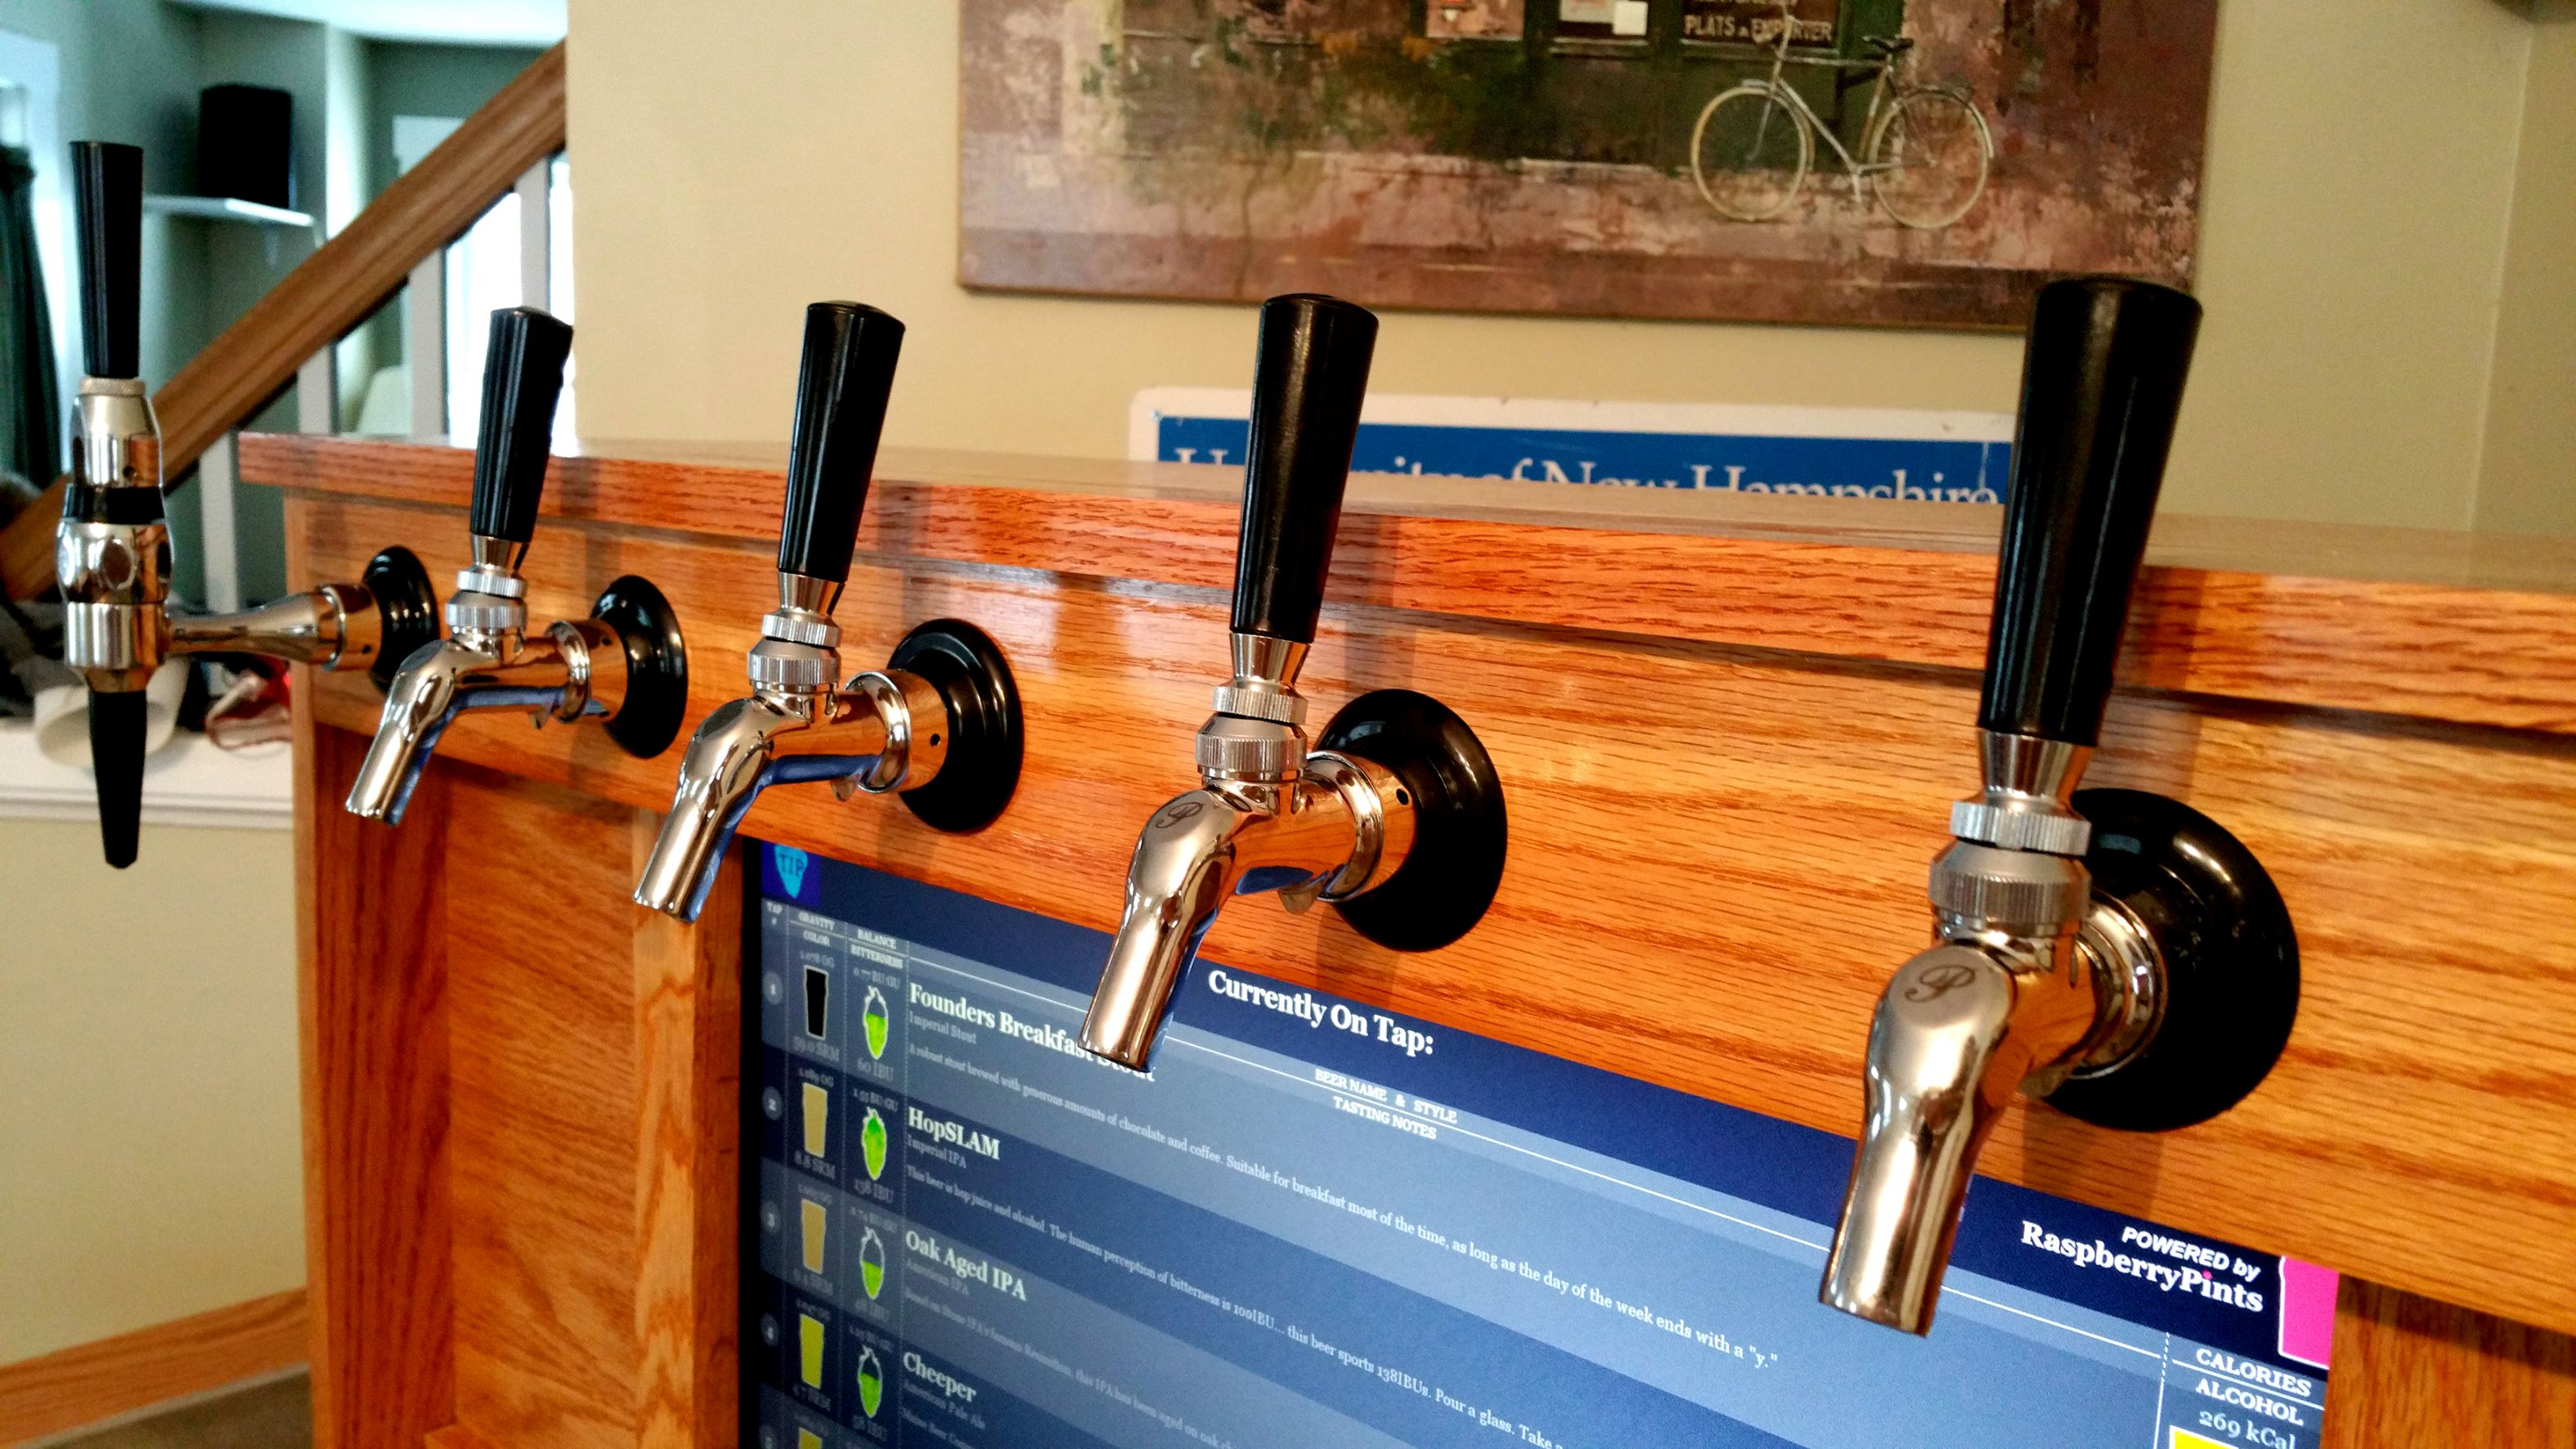
Raspberry Pints Display.
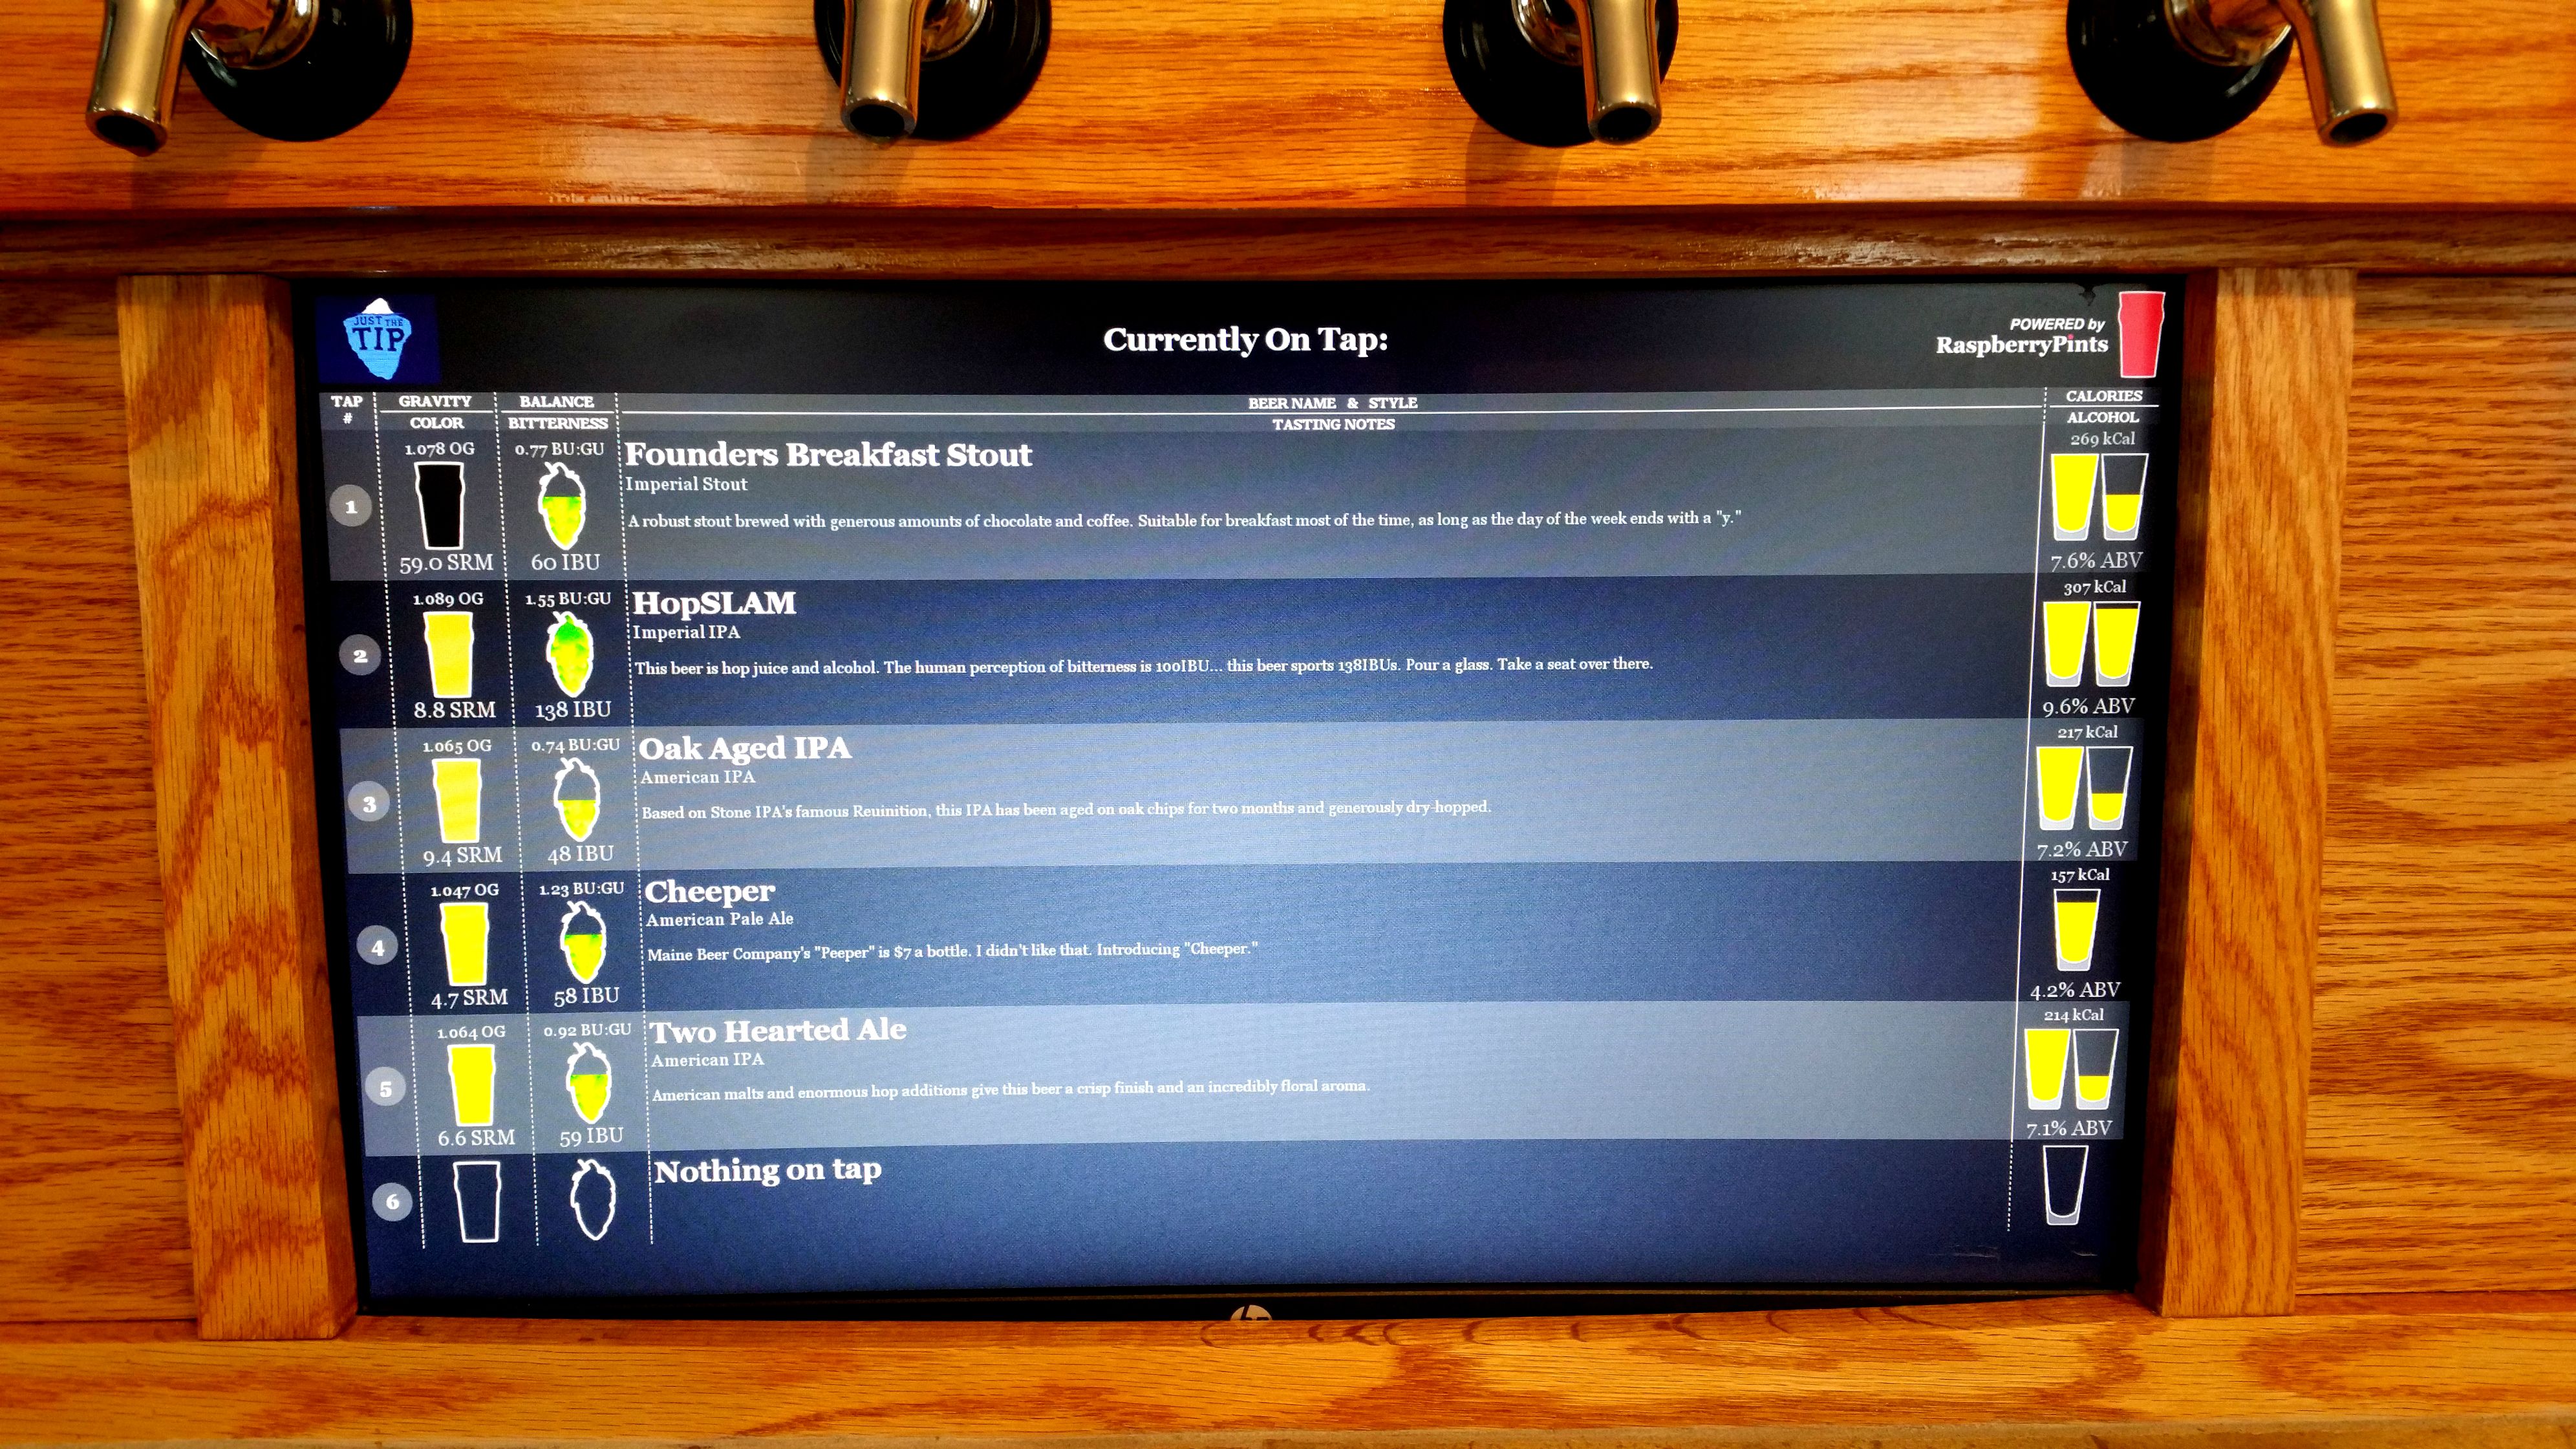
There are a lot of clones on right now! She fits 10 kegs, so beer can be conditioned, cold, and carbonated ready when something kicks.
Her final resting place.
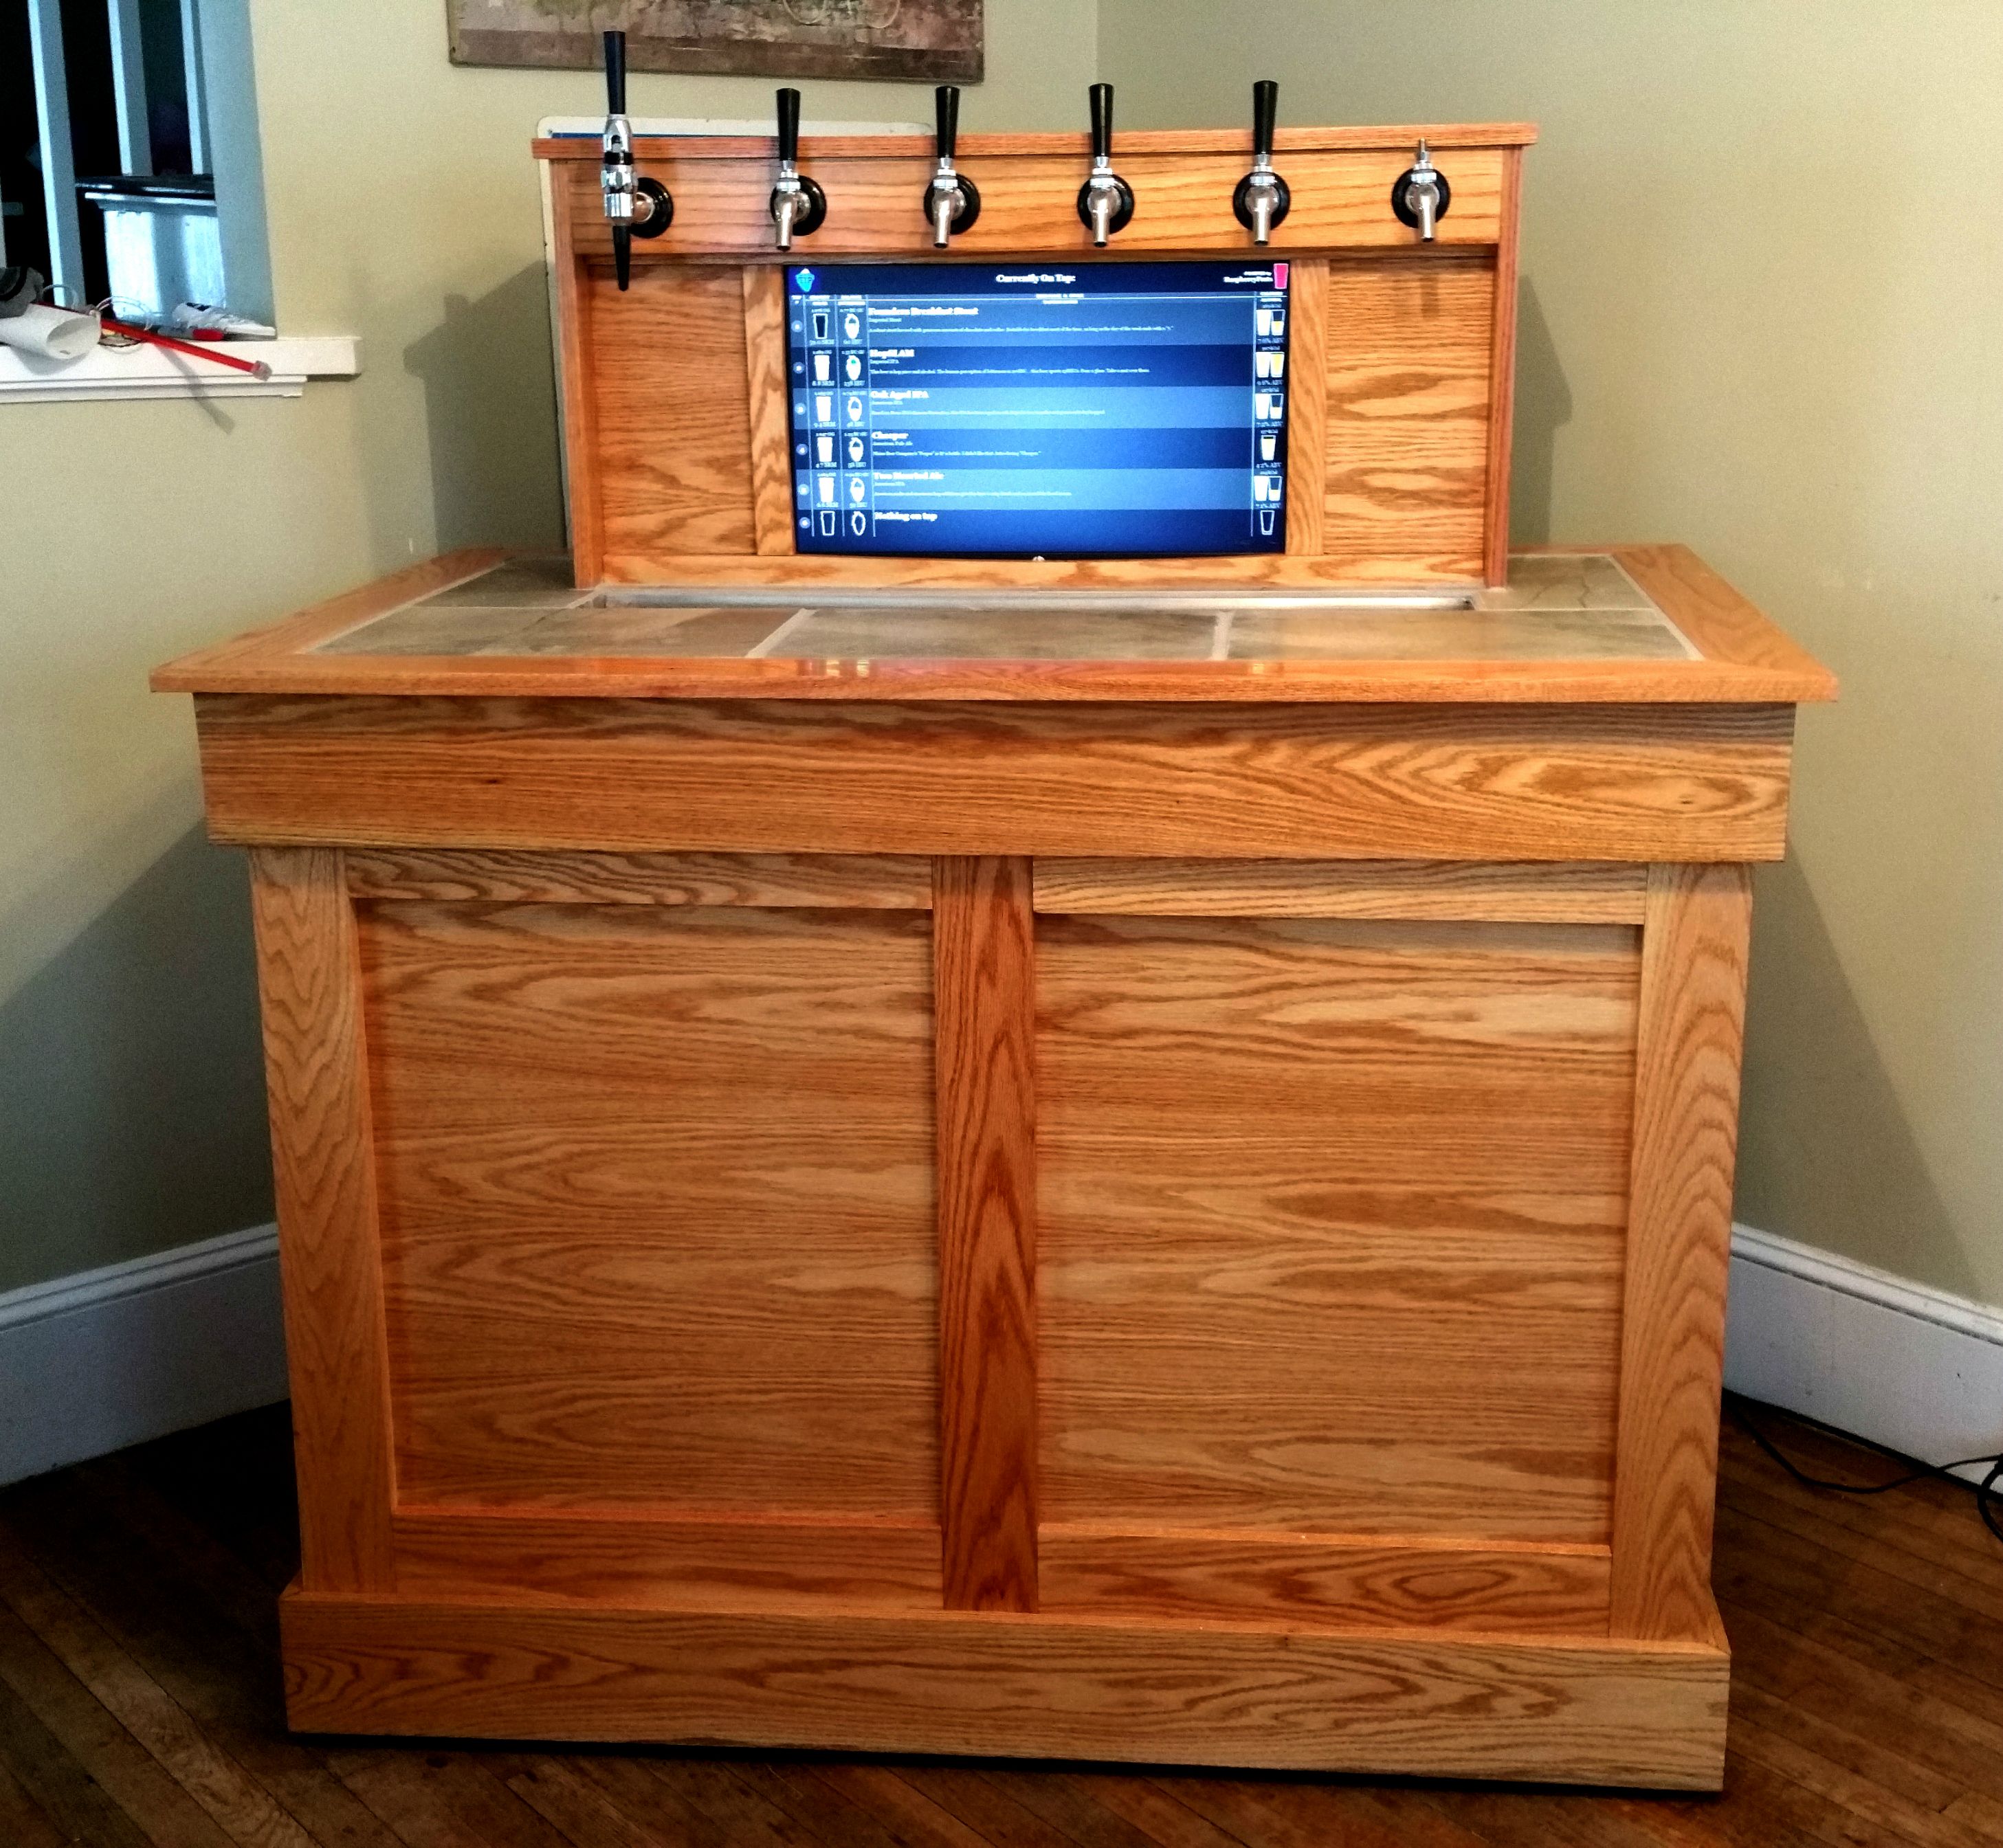
No, I literally cannot remove it from this room. It's too wide for most doors, so the lid gets removed and the back section has to come off before it will fit. The only things left to do are cut the top of the drip tray (sheet of aluminum w/ a lot of holes) and turn some nicer tap handles on the lathe. The finish is Waterlox over red oak.
I tried to take a bunch of pictures along the way, but obviously missed a few steps.
After a month and a half, learning about 50 new skills, and spending too much money...
She's pouring beer! A clone of Founder's Breakfast Stout... at 10AM. (C'mon, I just finished her, and had to celebrate)
The grungy old chest freezer.
A $50 craigslist find. When I got later in the project, I realized that spending $500 on materials and $50 on a chest freezer was a little silly. Fingers crossed, but she seems to be running well. Let's hope, as the model is discontinued.
A basic frame and oak plywood.
This will become the base of the cabinet.
Structurally sound... I hope.
The chest freezer weighs around 100lbs. Just add a 150lb lid and 50 gallons worth of beer, and things get serious. Thankfully, I was smart enough to put casters on.
Oak trim is on.
Base of the lid is built, monitor test fit.
The monitor will be a digital tap display, Raspberry Pints.
Most of the trim is on, holes for the taps are drilled.
I'm about three pounds of hardware and two bottles of Titebond III deep at this point.
Well, I skipped some steps, but... she's done!
The counter-top is a porcelain tile, backed by cement backerboard and lots of thinset. Read: HEAVY! Monitor is mounted, taps are flowing (except for an undiagnosed leak in the last one)
Closeup of the taps and monitor.
Raspberry Pints Display.
There are a lot of clones on right now! She fits 10 kegs, so beer can be conditioned, cold, and carbonated ready when something kicks.
Her final resting place.
No, I literally cannot remove it from this room. It's too wide for most doors, so the lid gets removed and the back section has to come off before it will fit. The only things left to do are cut the top of the drip tray (sheet of aluminum w/ a lot of holes) and turn some nicer tap handles on the lathe. The finish is Waterlox over red oak.


![Craft A Brew - Safale S-04 Dry Yeast - Fermentis - English Ale Dry Yeast - For English and American Ales and Hard Apple Ciders - Ingredients for Home Brewing - Beer Making Supplies - [1 Pack]](https://m.media-amazon.com/images/I/41fVGNh6JfL._SL500_.jpg)


")
