100% Manual eBiab build

Homebrew Talk - Beer, Wine, Mead, & Cider Brewing Discussion Forum

Help Support Homebrew Talk - Beer, Wine, Mead, & Cider Brewing Discussion Forum:

This site may earn a commission from merchant affiliate links, including eBay, Amazon, and others.

Onkel_Udo

Well-Known Member
Joined
Jul 5, 2013
Messages
1,998
Reaction score
622
Location
HAMMOND
So this is just my thread starter and pictures of the build will likely come this weekend. I experimented over the winter with stovetop BAIB after more than 20 years of brewing on the 3-tier. The winter was just too brutal to brew in the garage as much as I wanted. I liked it but the 5-gal limitation with a dunk sparge was just not doing it for me.

I am moving into this cautiously because I have a lot of existing equipment that I wish to re-purpose and continue to use in the 45 days of summer when I can brew on the deck and play with the dogs. When Mother Nature throws her worst at us, I can retire to the basement.

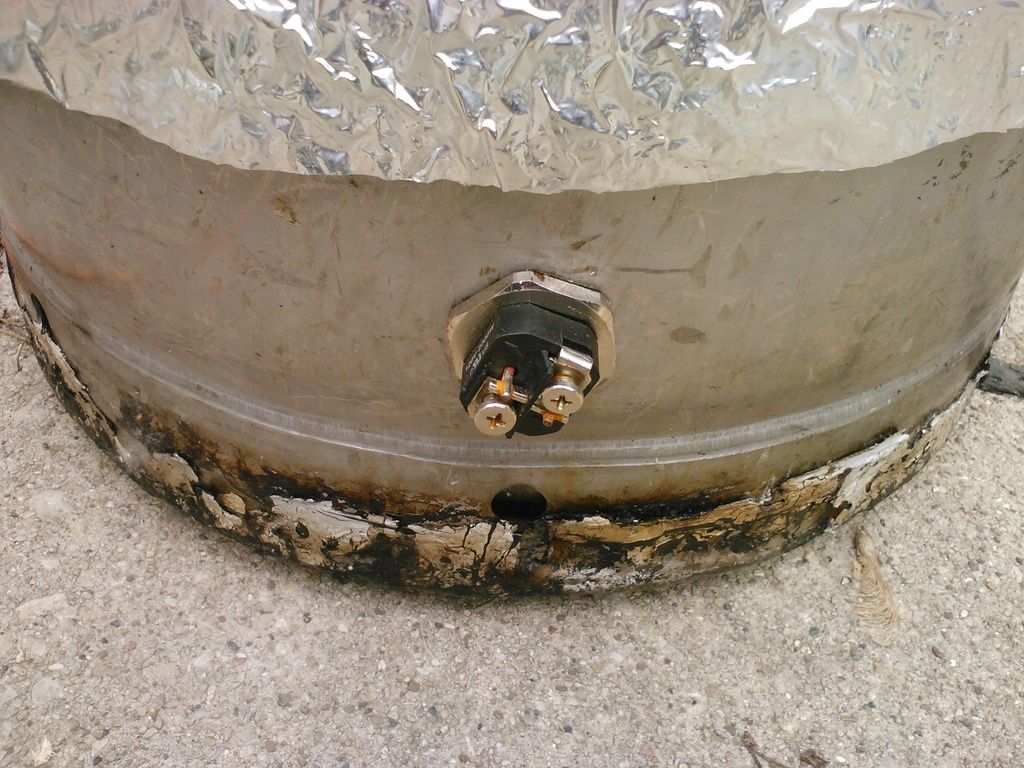
I have taken one of my keggles and drilled the first of two electric element holes. For the sake of portability and simplicity, I went with two LWD 2000W 110V elements. The first one is installed and leak free with a cold water test.

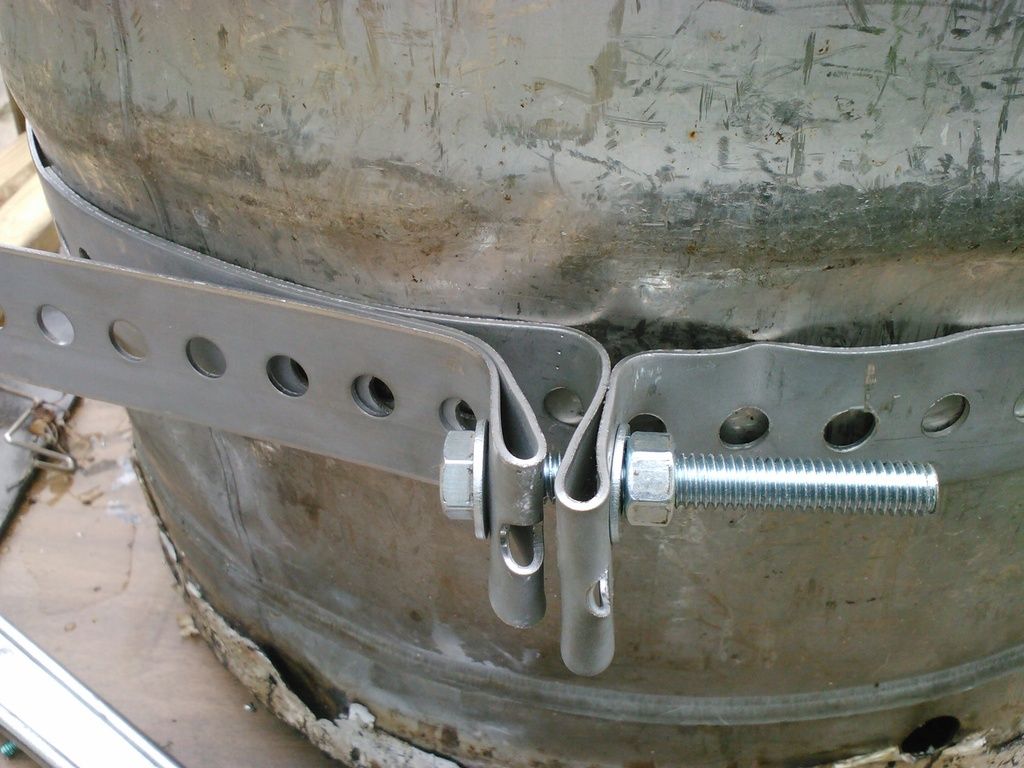
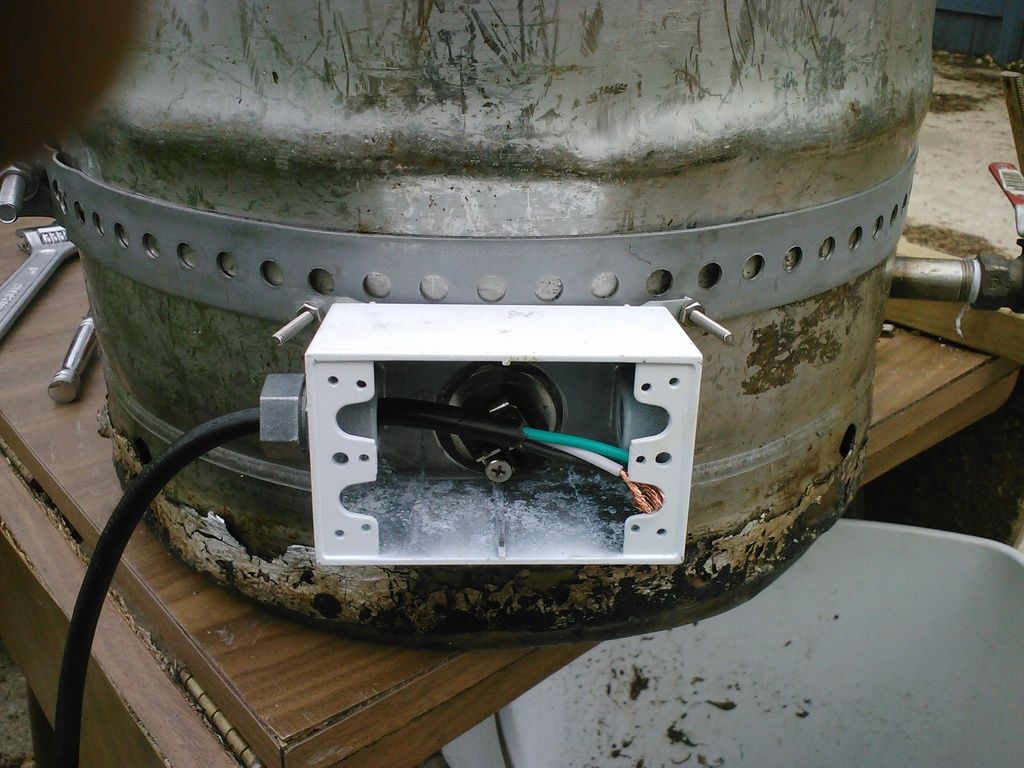
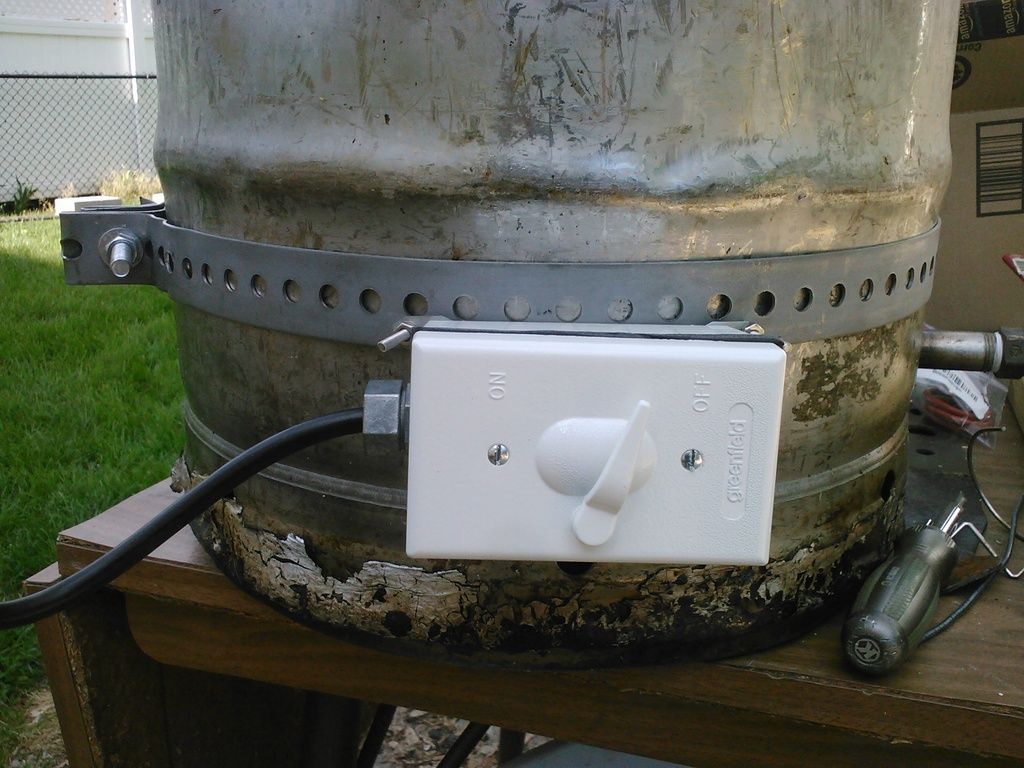
As the element enclosures I wanted were out of stock at the time, I decided to get creative. Using a piece of 2" wide 18 gauge strapping I built a compression strap for the outside of the keggle. #8 stainless machine screws, two per element, will be thread through the back of the strap and locked in place with a nut and star washer. Once the strap is tightened in place, a waterproof outlet box will slide over the screws (the ears of the boxes) and the back side of the element (the backside holes are already enlarged to 1 3/8" now I just need some Dremel work to knock the corners out). Ground wires with crimped and soldered ends will go over the ears of the box, a flat washer and nut over that. Waterproof cord compression with a 4' pigtail come out one side of each box and a waterproof switch cover over a 20 amp switch goes on the front. I still want to fabricate a foam gasket for around the element to box interface but I have not found the material yet. Assembly pictures will help.

The goal is to use my two dedicated 20 amp GFCI outdoor outlets in summer making this a boil kettle in my 3-tier and the same circuits, with different drops to use it in the winter, or when it is raining, in the basement as a BIAB set-up. If all goes as I expect it will, I will likely move the whole set-up to a 20 gallon kettle at some point to do all BIAB 10 gallon batches.

the plan is to work on this over the long weekend so progress pic's should be forthcoming.
 
Sorry, integrating a new rescue dog into my house has taken way more of the long weekend than planned. I got nothing done on it.
 
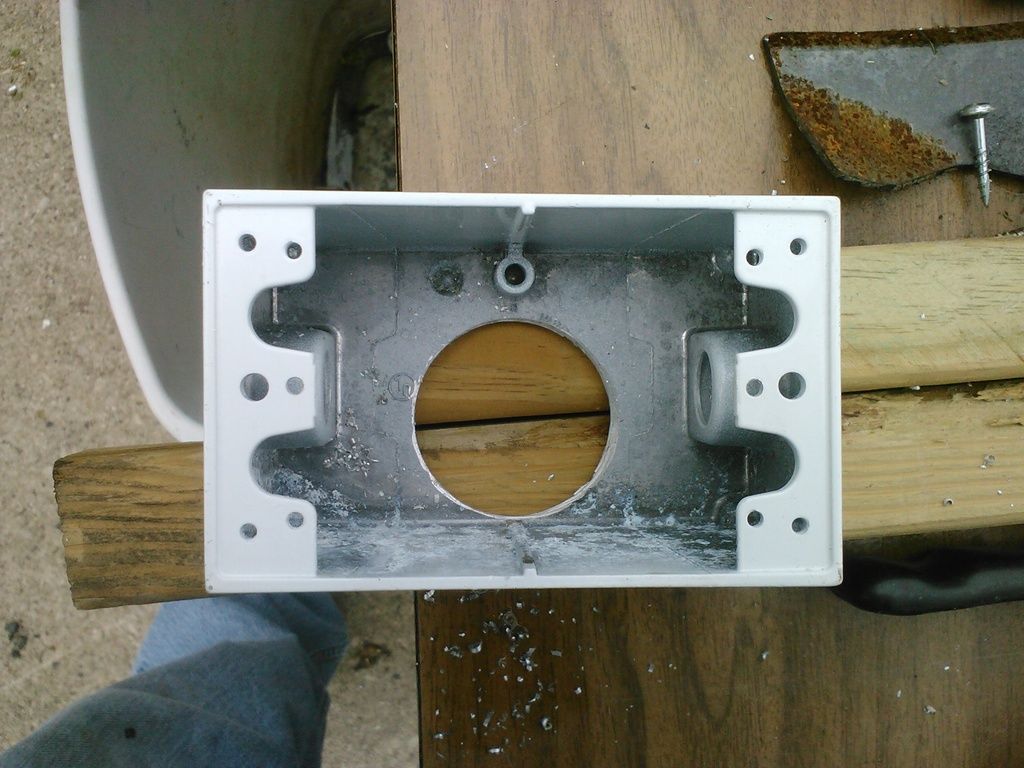
I did get time to work this on Sunday so pictures (I finally remembered) of the installation of the band around the keg, drilled-out outdoor the single gang boxes to 1 3/4" and the boxes attached to the band will be posted when I get home tonight. Need to pick up a few more plugs for the 1/2" threaded holes in the outdoor boxes (why two plugs in the package with a 5-hole box?).

Everything is going pretty much as planned so far. I should be able to wire everything up tonight and do a water test tomorrow or Thursday.
 
OK, I am giving up for the night...my Goggle + account will not play nice with picture linking and I am in the middle of a boil test.
 
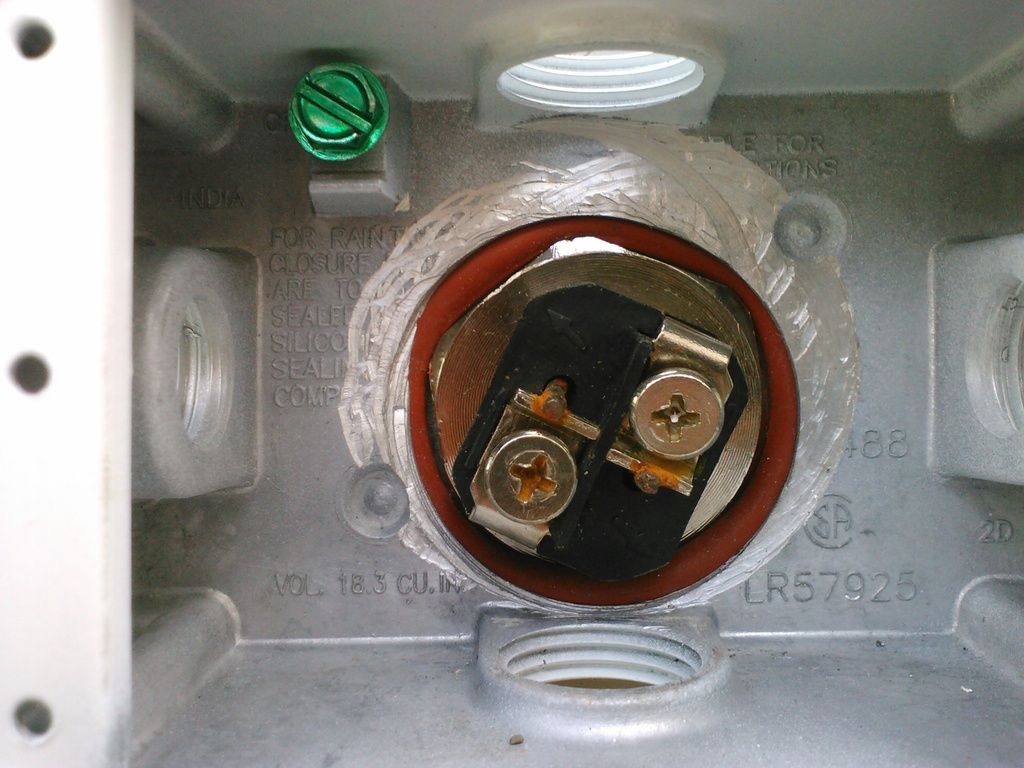
So no pictures of the process of drilling the holes in the keg or installing the elements but this has been covered many times before. I have two opposing 2000W 110V elements approximately 180 degrees apart using silicon o-rings, gas approved teflon tape and the special 1" NPT nuts sold on Amazon and elsewhere.

I took two single gang aluminum exterior boxes and drilled out the back to 1 3/4" (should be 1 5/8").

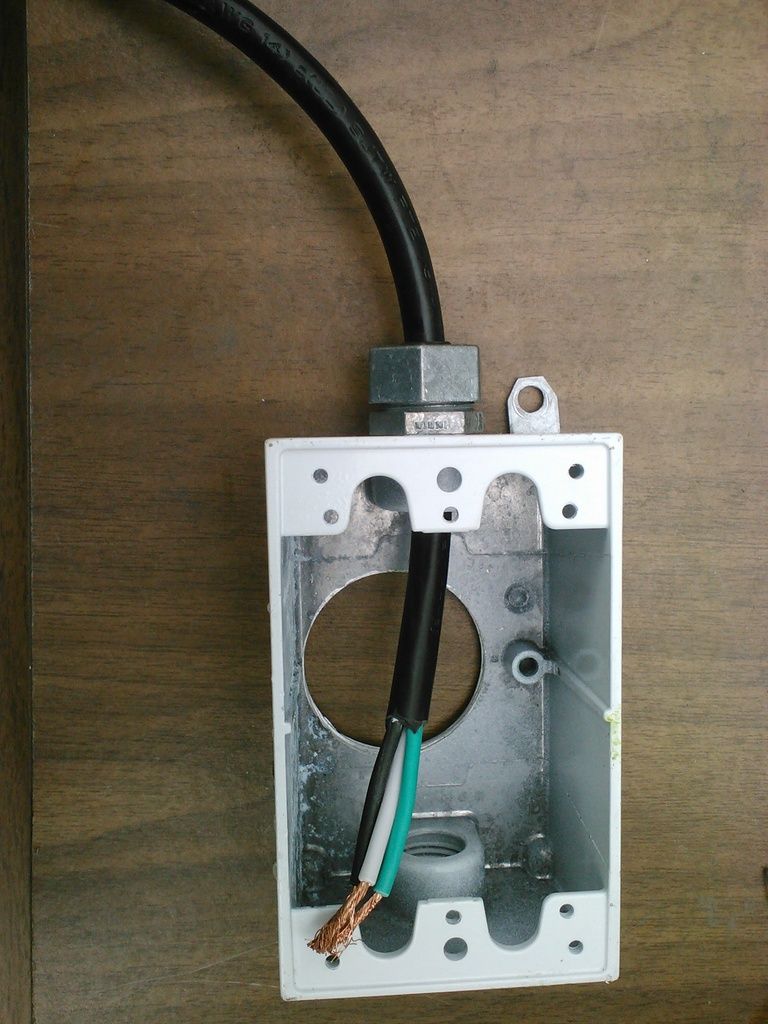
Then added a 12 gauge cord and cord clamp.

I then took a piece of 2" utility strapping from the misc metals bin at Menards. I bent it around the keg and marked where I thought the "brackets" should go. Using the highly sophisticated tools of vice grips, channel locks and 3# hammer I formed the 90 degree bends for the 3/8" tension bolt.

And tightened it down in approximately the right place.

I then set the switch boxes over the element ends and marked the locations for some #8 SS machine screws. The band was loosened those holes drilled, machine screws pushed through from the back side of the strap and nuts tightened down, the boxes mounted to the machine screws and the addition nuts and washers added and set hand tight.

1 7/8" OD, 1 1/2" ID silicon o-rings were placed over the hex of the element on the outside and the strap with switch boxes were re-installed.

Wiring in another post as I have to check on the water test.
 
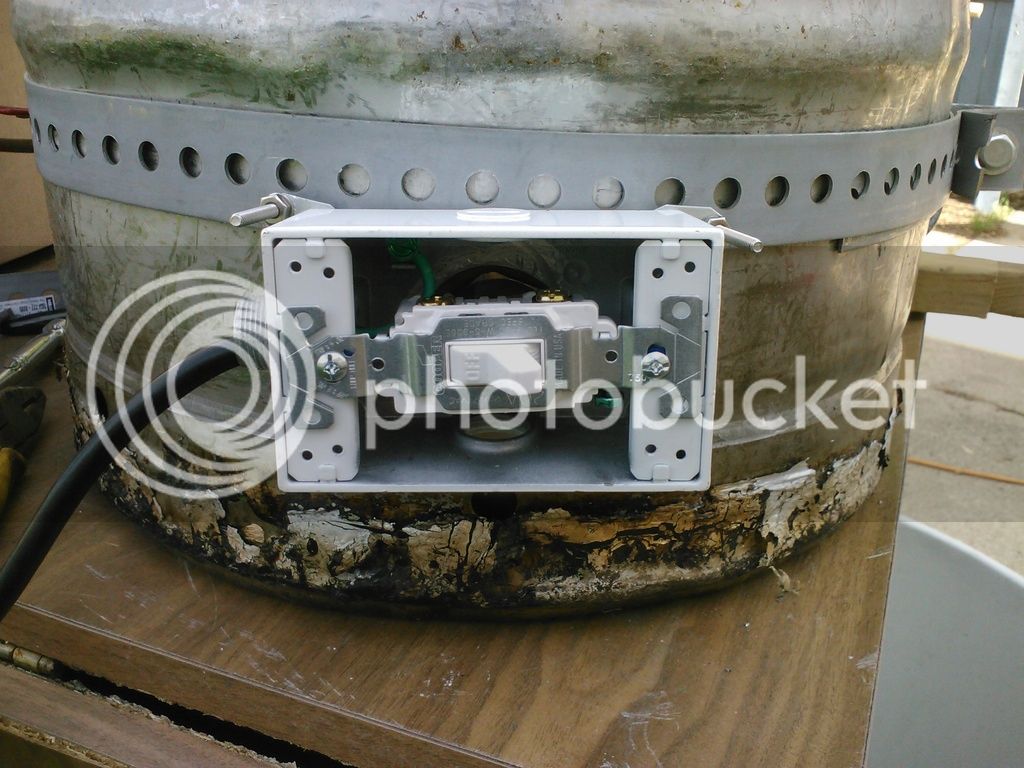
So only two photos left.

Wired in a 20 amp switch.

Install the lever-type, all metal waterproof switch covers.

I did a boil test last night and 11.5 gallons of water from 50 f to a gentle (but sufficient) boil in about 100 minutes. This is without re-insulating the keg. I am quite pleased.

Lessons learned:

Needs a second lower strap to compress the o-ring sufficiently. As is, I am splash-proof but not waterproof which is good enough for now.

An 1 5/8" hole in the back of the boxes would have been better. The ID of 1 1/2" and OD of 1 7/8's is about perfect to fit over the hex and allow enough compression to deal with the curvature of the keg.

Install the elements lower in the keg. I was really hesitant on drilling these holes so I erred on the side of caution and probably ended up and inch higher that I needed but I was afraid the nut would foul on the curved bottom of the keg.

Things yet to do:

Cut the top off. I see no real way around this if I plan to do larger BIAB batches.

Get a larger lid for the cut off top.

Make a REMOVABLE reflectix jacket for the keggle. This is important for when I want to do no-chill or just for chilling in general. It will also make clean-up easier.

After the small-batch test, measure for and order a big bag from Wilser.
 
I made a quick one-layer removable insulation jacket and bungied it on. Stupidly tried to do an 8-gallon batch right out of the gate. Lots of little stuff went wrong but that was not system related...it was operator error.

Going to order a bag from Wilserbrew as a paint strainer cannot hold 12.5#'s of grain.

My volumes were way off and end what should have been a 9-gallon-to-the-fementer batch at 10 gallons. Hit my mash temp but overflowed the bag. Had full conversion in 20 minutes but left it for 30.

Boil was incredibly easy to initiate with both elements burning...even with 12.5 gallons. Once going, a gentle but sufficient boil could be maintained with one element.

Did not think about ambient being over 80f and had trouble getting the wort down to 65 f, got drunk and pissed off and pitched anyway at 72 then dropped the fermenters into both sides of my laundry sink with a damp towel and a fan.

This is a very simple bitter that I split half to S-04 and S-05 and will only end up about 3.2% alcohol but should a great summer porch beer.

Wort came out clear but lots of brains left behind.

Really happy with the analogue eBiab but I think next week I will use the boil kettle as an HLT and Boil kettle in my traditional 3-tier set up.
 
Can't help much with the insulation thing or leaving brains behind....

As far as getting your volumes down, check out my calculator. pricelessbrewing.github.io/BiabCalc
 
Can't help much with the insulation thing or leaving brains behind....

As far as getting your volumes down, check out my calculator. pricelessbrewing.github.io/BiabCalc

Oh, the calculation was not the culprit (though I like your calculator better than the one I was using) it was the execution.

I did take one picture of the completed system while filling it with the strike water but before some fine tuning of the removable insulation jacket:

IMG_20150621_110524.jpg
 
And a Wilserbrew bag in action and my engine hoist getting a very mild workout.

Right after this picture I had a recoverable issue with the pully cord breaking. Still dialing in the system so this time I ended up under by about 3/4 gallon (8 gallon finished in the keg planned). Efficiency still hovered close to 78% so the process works, I just have to dial it in.

IMG_20150628_141536.jpg
 
I can say without hesitation that this is a complete success. I brewed my RyePA session beer Sunday...only mistakes were my own. I ended up over volume this time due to overcompensating for being under last time and forgetting that I was only doing a 45 minute boil.

One weird issue that I will have to watch on future sessions. One of the two heater elements was bent severely upward and when attempting to bend it back down it broke at the base. The is the original element from eHLT cooler so it could actually be age or a latent damage issue that just now surfaced or maybe I had too much slack in the bag and it somehow hooked it and bent it when hoisting. A new element is only like $15 so I am not too concerned.

This cuts about and hour from my brew day but I get about 2 gallons less per session so it is a wash. Man, is it easier than my 3-tier.
 
So moved this rig to the basement and have done two mostly successful brews. Lordy is it EASY. I mean, the hardest part is using my now 20 year old Phil Mill II to grind the grain.

I can see myself coming home from work with a pre-filled kettle and pre-milled grain to do a brew. I work 12 hour days so this is a big deal.

I am still missing volumes by a little but mostly that is either laziness or the massively variable trub loss due to my use of whole hops for a large portion of my hop bill.

I cannot stress enough if you do not have a keggle already prepped, buy a kettle. I had three keggles lying around from my three tier and still wish I had sprung for a cheap 20 gallon AL kettle even though all the parts are transferable.
 
I cannot stress enough if you do not have a keggle already prepped, buy a kettle. I had three keggles lying around from my three tier and still wish I had sprung for a cheap 20 gallon AL kettle even though all the parts are transferable.

Well, the day is coming soon as a fellow HBD'er hooked me up with a link to the ideal kettle for me to move over all the kit to. I have a 20 gallon AL pot with strainer and lid enroute for $48 delivered.

A couple for improvements this time will include:

Lowering the elements so that the hex nut is actually in contact with bottom of the pot

Attaching the top and bottom of the switch boxes to the band clamp

Attaching the band clamp (with attached boxes) to the kettle and THEN drilling the holes in the side of the kettle for the elements through the holes in the switch boxes

Size the bag to my basket and add three SS bolts to hover the basket a tiny bit above the elements

Place ball valve dip tube at edge of pot (no concave bottom like a keggle) or consider bottom drain (likely)
 
Inaugural brew went well except a few common problems. Way overshot the volume and even with an extended boil at two hours ended up a gallon over. Pictures later.

One note...the thin Bayou Classic AL pot has a lot more flex with than a keggle where the elements are installed so getting a seal was not as easy. I ended up having to use the flat silicon gasket from the SS elements and the traditional o-ring and grooved nut.
 
Back
Top