• Please visit and share your knowledge at our sister communities:
  • If you have not, please join our official Homebrewing Facebook Group!

    Homebrewing Facebook Group

100% homegrown

Homebrew Talk

Help Support Homebrew Talk:

This site may earn a commission from merchant affiliate links, including eBay, Amazon, and others.
2012-05-16_13-24-26_317.jpg


Hop flowers are already forming on the last 3-4 nodes of the 2nd year Columbus plant's longest bine! Didn't expect them so early. Does anybody know (or know another thread with the answer) how to change the nutrients you add to hops as they begin flowering? Switch from nitrogen to potassium maybe? I hit each plant with 2.5 g of 15-5-15 water-soluble fertilizer yesterday. Let's hope it just encourages growth but doesn't discourage cone production. I think because it's early in the season it will be fine.

Because I only have a six foot high fence to grow the hops on, I am planning to pinch the tip of any future bines that have reached the top but don't have any flowering nodes. The idea here is that the axillary shoots are more likely to flower than the main shoot, and because the main shoot typically wants to grow higher than six feet, you just want to stop it when it gets to the top, allowing all future resource to go to the side shoots. Is this crazy?

In other news, I practiced harvesting yesterday on one row, mainly to figure out a good technique. I used some barley at the very end of the field that I planted late, that has hardly had a mention on this thread. It's so far behind, I thought it would just be a long-shot bet to get maltable grains, and as you can see, it's still green in the photos below. Most of these plants are in soft/hard dough.

I ended up first cutting the plants and laying them down on the ground in a line:

2012-05-16_14-06-27_441.jpg


2012-05-16_14-07-38_621.jpg


Then I gathered the plants into groups, made sure they were all pointed the same direction, and removed weeds:

2012-05-16_14-26-47_577.jpg


Finally, I combined these little bundles into a big stack, and tied jute cord around the middle. With a little finagling, I was able to prop up the bundle:

2012-05-16_15-06-39_955.jpg


The idea here is to allow the plants to dry in the sun and the breeze for a week or two before threshing. The bundle keeps the grains off the ground, away from moisture and mice.

In an hour my buddy and I will harvest the four rows of bere barley. I'll use this for seed next year, so I want to harvest it early and make sure it doesn't get mixed up with any other parts of the crop. Bere is a six row, so if it does get contaminated with Conlon seeds, no big deal -- they will be obvious and easy to remove next year.

Anybody have any thoughts about the deformed heads and conjoined seeds (see prev post). If not, I will just have to make the Papazian decision to RDWHAHB.
 
My buddy brought a handsaw to hack into the Scottish bere barley.

2012-05-17_15-10-12_131.jpg


And just like that, the bere is out of the field:

2012-05-17_15-55-24_484.jpg


Most of it needed no further drying, so I set up the thresher with a box to collect seeds and a black tarp to check to make sure no seeds ended up in the chaff:

2012-05-17_17-13-46_374.jpg


Here's the problem -- this thresher is rough enough to break a few seeds out of every handful of finished product (they can't be malted once they're broken), but it is not thorough enough to remove the awns from every seed. As a result, on the highest setting, the fan will blow these awned seeds out with the chaff onto the grond. The black plastic tarp is very useful for spotting these seeds. I fixed this problem by stopping down the airflow until no seeds are blown out of the machine.

But that creates another problem. When you feed stalks into the machine (this happens whenever you have some heads on long stalks and some on short stalks -- the longer stalks always get fed deep into the thresher in order for the short stalks to be threshed), the long stalks are chopped up into large pieces. They should be blown out along with all of the smaller chaff, but because I had to decrease airflow to the fan, these stalks now end up in the box with my seeds -- half of which still contain awns! You have to turn the machine off after every few handfuls to unclog a mass of stalks and awned seeds from the seed shoot.

Ok, so the thresher sort of doesn't work properly for bere, but there's another problem that's more serious. The opening that receives plants is a 6" x 8' rectangle, but when you grab a handful of plants, the heads are sticking out all over the place, way wider than the mouth of the thresher. To get them all in, you have to guide the heads carefully using both hands, sometimes even sticking your hands a little ways into the hopper. That's a huge problem, because finger-gnawing mutilation awaits anyone foolish enough to let their hand slip down too far. The machine needs a much deeper and wider hopper before it would really be safe to use on large bundles of a grain.

So there you have it -- doesn't work quite right, and I have to constantly be cautious that it doesn't turn my hand into handburger. I decided after an hour to go manual.

I know, it sounds crazy, but with all the guiding, prodding, and stopping to unclog, it ended up not even being that much slower to thresh by hand. You can take a big bundle of grains in one hand and strip off the heads with the other into a plastic garbage pail. Then you bash the heads with a PVC pipe, and stir them around.

Threshing takes a long time. I think this is the very first annoying aspect of the entire experience of growing barley. Threshing is the bottling of farming. I'm sure that if I ever had the pleasure of a good combine, like kegging I would never go back.

I'll certainly try the thresher again for the 2-row Conlon barley when it's time. Seed size and stalk length are different, so there's another chance for ol' Threshy to do good.
 
Optimizing a combine is always a pain as well. Then the crop changes in different areas which I guess should be expected in 300 acre fields. Tweaking the combine is a constant job, so I feel your pain. How would the thresher work with just feeding in heads? Doesn't seem like a very big machine to also have to handle stalks?

I asked my father about your deformed heads and his response was, "that just happens". Not much help so I just RDWHAHB is a foo plan.
 
Hmmm, interesting, could you make a large hopper out of cardboard and duct tape, then set it so the output is optimum (Highest?), then just re-run the chaff a time or two to glean the maximum seeds?
 
Fife, thanks for the tip from your father. I definitely relaxed and had a homebrew after hearing that. Colo, that's a good idea with the hopper and re-running. I will definitely look into it -- it was a royal pain to cut the heads from the Scottish bere. It took about a half hour per row, so I'm looking at 40 hours of work with the manual method, and that's just removing heads. I have not given up on the thresher yet.

These next photos all were taken by Jesse Friedman.

The timing for the harvest was just about right for the primary tillers. They are uniformly straw-colored:


This next photo shows the massive extent of lodging. It definitely made harvesting a pain, and probably reduced yield. My best guess is that planting 6" rows with the appropriate seeding rate, and giving less frequent but deeper irrigation would fix this problem.


My girlfriend worked harder than anyone else yesterday, harvesting a huge amount of plants while the rest of us generally drank beer and posed for photos:


I did a little too, though. Here, I'm removing cut plants from the field and laying them in stacks, with the heads all aligned:


We worked our way down rows, clearing them out one at a time:


A big crew of excellent hard-working friends was crucial for getting the harvest finished:


Once enough rows were cleared out, we began stacking the cut grains in the field,


which sped things up a bit.

Once the grains were all stacked up, we tied them in bundles with jute cord and propped them up in shocks to dry:


Yesterday's harvest was finished by sunset, but I returned this morning to finish bundling and clearing out the shocks:

2012-05-22_06-40-35_430.jpg


The rest of the field is being watered intensively to prepare for corn planting, and some of the bundles were in the line of fire. It was a cold and wet morning that transitioned into a blistering day, but it's done!

2012-05-22_12-16-34_602.jpg


My buddy and I raked up the field to glean the heads that didn't make it into bundles. You might think this step wasn't worth it, but we got two heaping wheelbarrows full of plants that might have been left behind. Also, check out the collection of shocks in the back.

Nothing to do now but wait for the secondary and tertiary heads to mature and dry out. Thanks to you guys for all the advice and replies that got us here!
 
Wow!!! Those are some great pics. Awesome job on the barley, its a thing of beauty.

And kinda jealous you're getting cone production already on your hops. Here in the northern midwest, my 2nd year hops are only 3 feet tall and starting to put on length.
 
Oy, what a week! After an evening of harvesting on Monday and bundling, raking, and fertilizing on Tuesday, the field was roto-tilled by Webb Ranch on Wednesday morning, and then I hoed out rows for the corn people:

2012-05-23_14-42-10_791.jpg


and with that, my work is done!

Just for comparison, here's what the field looked like last November:

2011-11-16_11-14-07_31.jpg


I think I dug better rows back then.

Well, the timing was last-minute, just like I wanted it to be. The corn kids came in today setting up netting to protect their seeds and seedlings:

2012-05-24_14-56-21_883.jpg


Wow!!! Those are some great pics.

I know, right? The pics of harvest day were all Jesse Friedman from Almanac.

While the Conlon is drying, I got all the Scottish bere down to seeds. I cut heads off of plants last week:

2012-05-18_11-19-34_584.jpg


In retrospect, it was not the best to put these heads on the ground. The awns are super-catchy, and they pick up sticks and rocks, which remain with the grains, even through winnowing.

It was enough heads to fill up a 100 gallon garbage pail,

2012-05-18_11-22-37_755.jpg


and enough straw to fill up a giant wheelbarrow full of hay!

2012-05-18_11-25-35_700.jpg


Solo hayride, anyone?

The thresher really had some problems removing the awns from this variety -- it could be the fault of the thresher (fixed concave) or the landrace bere. Anyway, it wasn't working. So I put on my calf-high boots and climbed in the garbage pail! After stomping around while I watched an episode of Modern Family, the chaff was reduced to a free-flowing consistency. I poured the slurry in front of a box fan several times, and I ended up with 8.2 lbs of grain!

2012-05-24_22-14-39_209.jpg


8.2 lbs in 4 x 33' rows, spaced at 14" is 2300 lb/acre. Commercial bere yields are 2500-3400 lbs/acre. I'm not too far from the low end of commercial yield -- all right!

You might already guess that the commercial yield for bere is a lot lower than the yields for modern 2-row barleys; they are closer to 4-7k lbs / acre. Now check out the difference in the grains:

2012-05-24_22-24-43_463.jpg


The bere (right) is much longer and thinner than Conlon (left). (Conlon is an especially plump modern 2-row, and bere is a pre-industrial 6-row, so this is an extreme comparison.) This makes the ratio of protein to starch a lot higher in bere. My guess is that most barley used to be more like the bere, with skinnier grains. Academic and industrial breeding selected for more starchy grains, but bere never caught that train. Today, maltsters and brewers would never choose to include excess nitrogen in their products -- excess soluble protein can lead to hazing, and excess free amino nitrogen can lead to shorter shelf life and the proliferation of contaminating microbes. Still, I think it's pretty cool to at least have access to the old stuff. After all, the English word for barley used to match the Scotts word bere -- an etymological reminder that bere is a window into beer's past. Sadly, 8 lbs isn't enough to make a bere beer and have any left over for a future crop. This all must be used for seed. But next year...next year.


The Conlon is drying out nicely. Kernels from the slowest portion of the field still yield a bit to a fingernail, so they're not ready to thresh. But my girlfriend wants to get threshing, so I think we'll try some primary tillers from the most advanced bundles this weekend:

2012-05-22_08-53-13_976.jpg


On to hops!

More burrs from the precocious columbus bine. I think I misjudged the new nodes in a previous post, because these are definitely the precursors to cones:

2012-05-24_15-51-21_286.jpg


I realized I have really been slacking on the hops farming. To be fair, there wasn't much to do. But now that the barley is done, and the hops have a little bit of growth, I have been trying to learn more about how to prune them. It seems the consensus is to have two twines per crown, 3 bines per twine. That's a total of six bines per plant -- everything else gets pruned. All my plants are either transplanted 2nd years or transplanted crowns from Great Lakes Hops, so I'm not going to do the 1st year rhizome technique of letting every single bine grow.

That's the idea at least. Let's just say that in practice, mistakes were made. First mistake: if you see three bines crawling up a twine, don't assume they all have living tips! Sometimes the tips have died (due to transplanting damage in this case), and then if you prune away all the other basal bines, you're left with fewer than the desired six bines per plant. Oops. This mistake isn't so bad, because more basal shoots can grow, and the bine I mistakenly pruned wasn't very far along.

Second mistake: Don't forget to check if the bine you're pruning is an early lateral to a trained bine. I have no idea why my Cluster plant had such an early lateral. But I decided it needed to go, and didn't realize that it was connected to a strong main shoot. I followed the bine down to the ground and cut, instead of clipping the lateral off at the axil like I should have. Of course, I cut the trained bine off, which was already 3-4 feet up the twine. Will be painful watching it turn brown and crispy. This is a terrible mistake to make, because it destroys a lot of good growth. At least nobody likes Cluster.


Ok, enough with the hand-wringing. There is an interesting choice to make when growing with a low trellis. I have a 6' fence. I can either allow my bines to grow horizontally along the fence, or I can encourage them to grow laterally by clipping off apical tips when the bines reach the top.

Most of us would probably think to let the bines grow horizontally, because this is what we've been told to do, mostly because commercial hop yards are set up for 16' or 18' trellises. Well, it turns out you can get decent yields from common hop varietals with a low trellis. The technique involves planting rhizomes just 2-3 feet apart and cutting the apical meristem rather than training it to grow horizontally. Still, the low trellis system never beats a traditional 18' trellis unless you're growing a dwarf hop.

But what about the bushy low-trellis training vs. horizontal low-trellis training? Does anybody know if this low and bushy technique actually produces a better yield than the horizontal growing technique?

I want ahead and tried it on two bines. I don't know if I'll have a great comparison since I don't have any duplicate crowns, but there you have it -- an uncontrolled experiment:

2012-05-24_15-27-45_23.jpg


I also see brown tips and fringes on some of the older leaves:

2012-05-24_15-21-54_134.jpg


Anybody know what's going on here? I am watering at 1/3 gallon per plant 3 days a week. I upped it to 1/2 gallon just in case this is water stress.
 
Threshing breakthrough: Just take a handful of dried barley and bang it back and forth on the inside of a garbage pail. All the long tillers will be threshed in 15 seconds. Then go through the stalks to find any late short tillers and pull them off by hand. You can work your way through an average-sized sheath in 5-10 minutes with this technique -- much faster than using the machine!
 
Anybody know what's going on here? I am watering at 1/3 gallon per plant 3 days a week. I upped it to 1/2 gallon just in case this is water stress.

If they are getting brown near the edges, it might suggest a potassium deficiency

272. Hop Leaves

Potassium deficiency

Small; bluish green, may be slightly chloric near margins; margins brown scorch which later extends intervenally towards midribs.
 
Once again!

The internet puts yet another bee in the bonnet- it is contributing to my delinquency. I have six hop plants growing now, and have just started studying what types of barley and wheat will grow best in my area. I have an IPA fermenting in a closet, along with a Cooper's lager conditioning in bottles. If I would have just been content to sit around and watch TV, this never would have happened. Worse yet, I am finding the inner desire to make sausages and smoke meats. What's next? Cheese from raw milk?!?

Tragic, it is.

gnarlyhopper
 
Once again!

The internet puts yet another bee in the bonnet- it is contributing to my delinquency. I have six hop plants growing now, and have just started studying what types of barley and wheat will grow best in my area.

Gnarly, are you in WA? You should be fine. Barley is really a hardy crop, and it should do fine anywhere outside of the tropics. I was under the impression that there are regional varieties of barley that will only grow well in a certain region. Couldn't have been more wrong, at least on the small scale that I grew at. My barleys were from northern Scotland and the upper Midwest, and they did great here in coastal CA.

Like a lot of crops, barley doesn't like to be too wet, so if you decide to irrigate, control it carefully when rain's in the forecast!

Worse yet, I am finding the inner desire to make sausages and smoke meats. What's next? Cheese from raw milk?!

That's the spirit!
 
potassium deficiency

Could be...but the leaves aren't small or blue-green. Hmm...

I have been recently fertilizing with 2.5 g of 15-5-15 per plant per week, which should clear up any NPK deficiencies. But I got a really weird result! The new growth is a pale lime green:

2012-05-30_16-43-41_660.jpg


2012-05-30_16-44-45_308.jpg


2012-05-30_16-46-46_133.jpg


Is this a problem? Anybody else run into this? I don't know what to do besides give the fertilizer a rest for a week or two and see if it clears up. Any ideas?
 
New growth will do that sometimes. My Brewers Gold do something similar (just not so drastic.) Give it another day or two, they'll turn more into a forest green. The leaves need time to develop more chroloplasts (and, thus, green!!)

How long have you been fertilizing? What did you start with (ferts/soil)? You don't need a lot of ferts if you started with good soil. I've done one fertilization since I planted 45 days ago, and that was only because of a transplant.
 
It looks a lot like pictures of some iron deficient plants I've seen recently. If that's what it is some chelated iron will fix it. It doesn't look too severe whatever it is.
 
It could be iron, but the leaf veins are not the dark green color like they are with Fe deficiency.

New growth will do that sometimes.
That's good to hear!
How long have you been fertilizing? What did you start with (ferts/soil)? You don't need a lot of ferts if you started with good soil.

I started with a mix of the native clay soil and compost. I've added 5 g of 15-5-15 to each plant. Do you think this could just be encouraging a big growth spurt, and the chloroplasts haven't filled in yet?
 
My hops are doing the same thing. I was concered at first but it seems to go away in a day or two and the plants are still healthy and growing good.
 
My hops are doing the same thing. I was concered at first but it seems to go away in a day or two and the plants are still healthy and growing good.

Glad to hear it! Mine are turning a darker green now, but in the same pattern, from the stem to the outer portions of the leaf. I guess that the fertilizer encourages a growth spurt? Since the plants aren't dead (Far from it!) I will fertilize again next week and see if I get the same phenomenon.
 
I promised drummstikk I would post some pics of my barley. Forgot to take pictures while seeding but here is the little field by my house.

 
Whoa, look at all those rows! Looks great! You've also got a beautiful view there. Looks like paradise.
 
First, the hops:

The yellowness I observed led to the death of the yellow bines:

2012-06-11_15-20-26_325.jpg


I think they simply got too much fertilizer too quickly. They received 5g of 15-5-15 within an 8 day period. I haven't fertilized since May 24th, and I haven't seen any signs of disease since then!

I have been training 6 bines per plant and pruning every other shoot below 3 feet above the soil. Recently, the strongest plants have been sending out lateral bines above 4 feet or so:

2012-06-11_15-19-19_747.jpg


The Chinook bines that I decapitated at 6 feet high have not sent out lateral bines! But they have produced burrs from their last several nodes. My Columbus plant has also produced some early burrs:

2012-06-11_15-17-49_366.jpg


which are now cones.

Now that the summer solstice is past, what should I be doing differently? Is it time to stop giving Nitrogen and switch over to Potassium? Should I change my pruning strategy?

On to barley:

I've settled on a threshing technique: I just bang the plants on the inside of a plastic garbage pail. Then I climb in the pail and stomp on the material to finish breaking up heads and awns.

2012-06-15_19-59-33_744.jpg


To winnow, I pour the grains + chaff to another pail in front of a strong fan:

2012-06-15_20-04-32_766.jpg


2012-06-15_20-23-42_616.jpg


This slowly purifies the grains:

2012-06-15_20-05-21_69.jpg


After just a bit of manual stem removal,

2012-06-15_19-59-44_867.jpg


you're left with a nice end product and a lot of hay:

2012-06-15_20-00-28_126.jpg


So far, I've found than an hour of work produces one pound of grain. Oy, it's slow work! It really makes me appreciate how much labor this all took before industrialization. Here's to beer, which never ceases to open my eyes to the world!
 
I can't seem to get more than 1 lb grain / hour when I'm threshing by hand. I do not want to go this slowly. I could go faster by spreading out a bunch of plants on the ground and beating the hell out of them, but then I'll lose some grains that get scattered, or that I can't sweep up afterward.

Looks like I'm going to have to make a tough decision, and increase throughput at an albeit small but real loss in yield. Still thinking about how to do it, but leaning toward spreading out a tarp on pavement and walking all over the plants. I'm going to put on some boots and just tear their a$$es up. Seems simpler than using a flail, and less prone to projectile seeds.

At least winnowing is 100% solved.

 
Last edited by a moderator:
How about taking a saws-all and cutting all the heads off your bundles? Then put the heads in a big bag and beat the crap out of the bag. Finish it with your winnowing process. Or bring it all up to Montana and toss it in our combine. It will do 50,000lbs per hour ;).
 
How about taking a saws-all and cutting all the heads off your bundles? Then put the heads in a big bag and beat the crap out of the bag. Finish it with your winnowing process. Or bring it all up to Montana and toss it in our combine. It will do 50,000lbs per hour ;).

Most of the time is spent looking for late tillers with heads that don't line up with the rest. These late tillers are more often not plump, so I've wondered if I should even be going after them. I've experimented with just going after the early tillers manually. It's fast except in plants that were lodged -- in these the heads don't line up anyway so you have to spend time sorting through hay to find them.

Ha, I think my field would get lost in your combine. It's only 50,000x faster!
 
Wow, looks great! How often to you run the irrigator?

It looks like a lot less work than a ditch and irrigation tubes.
 
Wet years I will water twice...4" each time. This year is really dry....may do 4 waterings. Probably just 2" for the last.
 
Almanac recently let me know that their brewday is August 8! Oh boy, it's time to cram in a lot of malting.

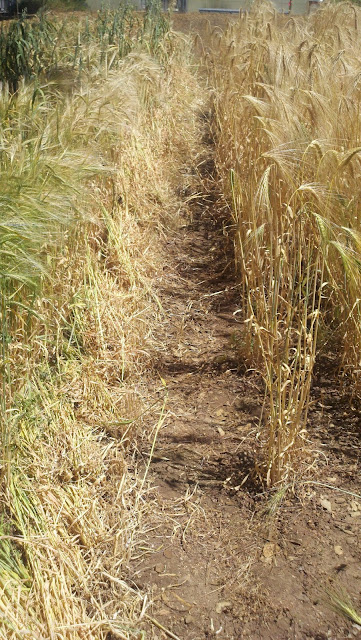
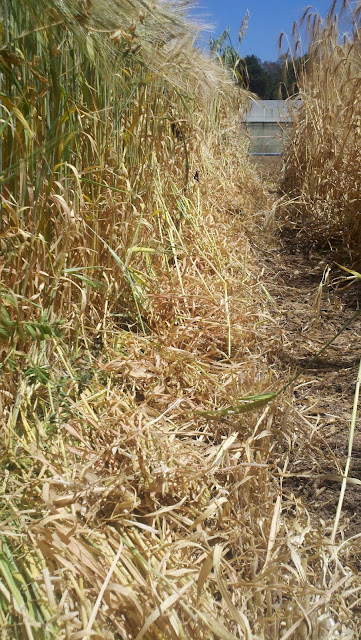
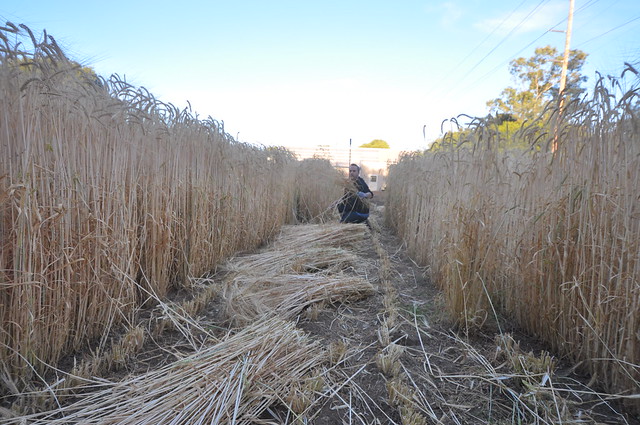
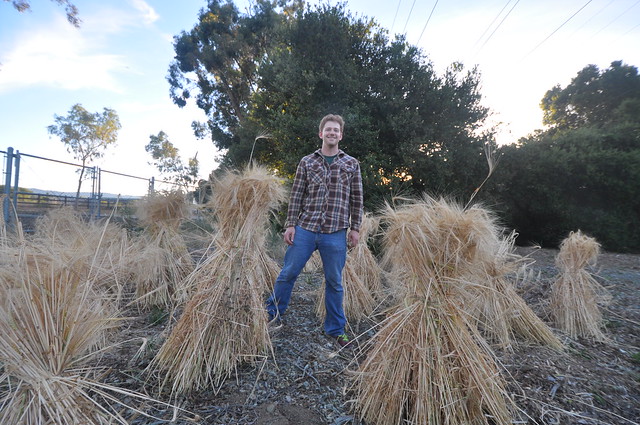
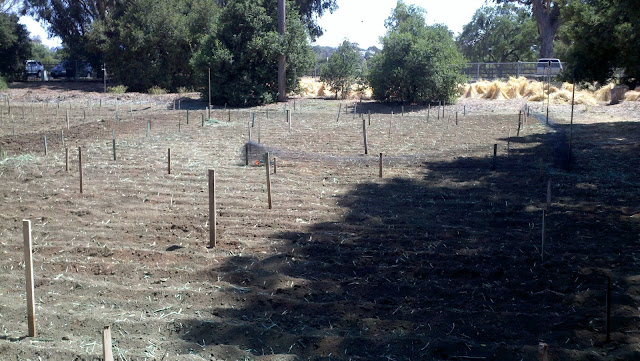
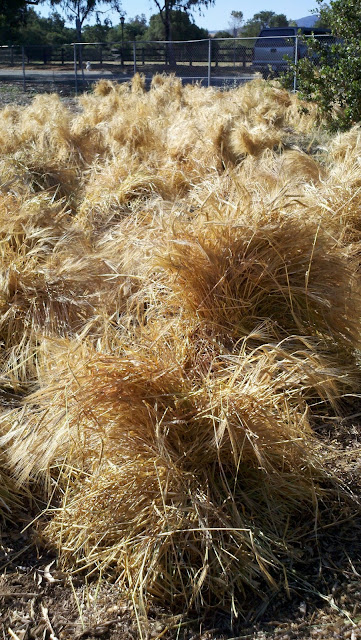
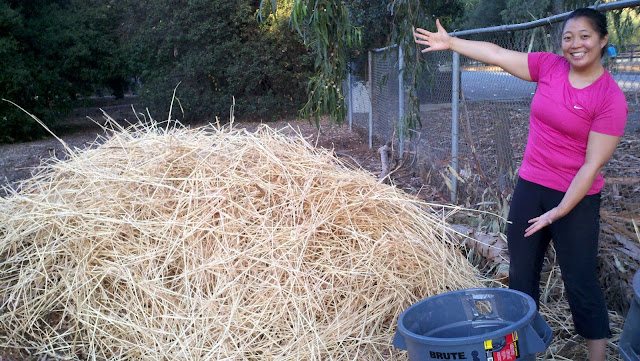
Actually, rewind -- it's time to finish the threshing! When I got the email from Almanac, I had only threshed 16 lbs! I've now worked my way through the whole field, and it produced 175 lbs of Conlon 2-row.

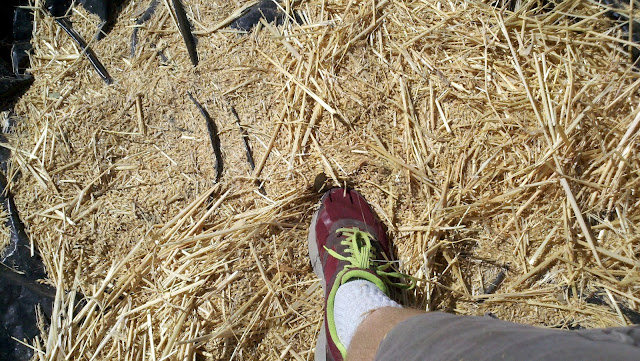
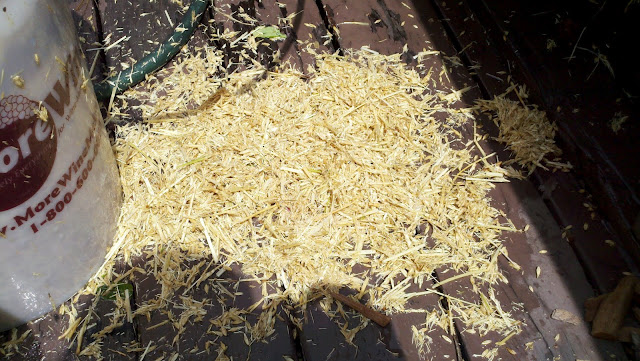
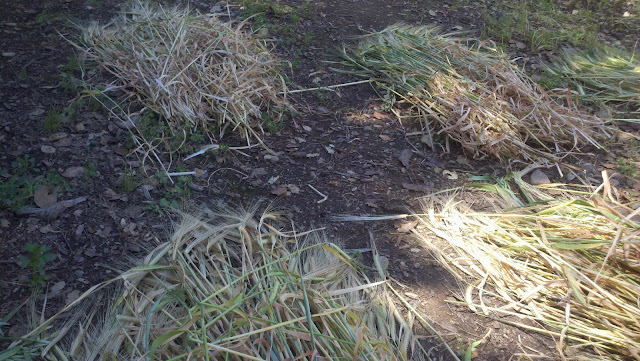
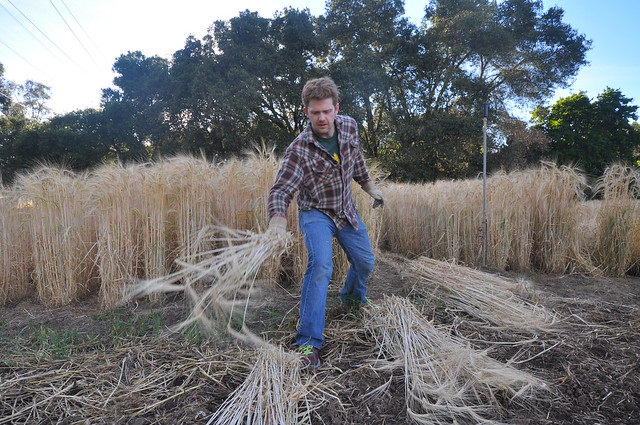
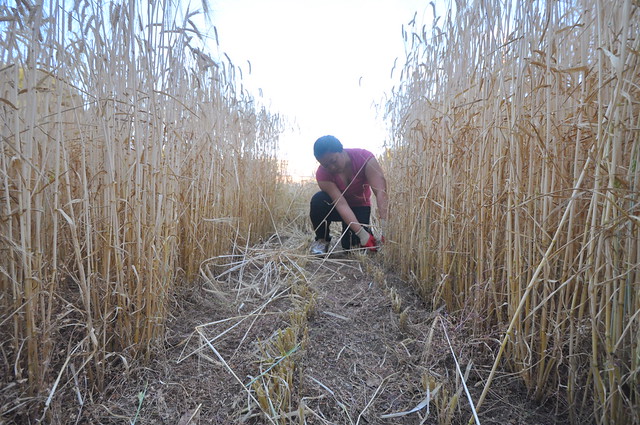
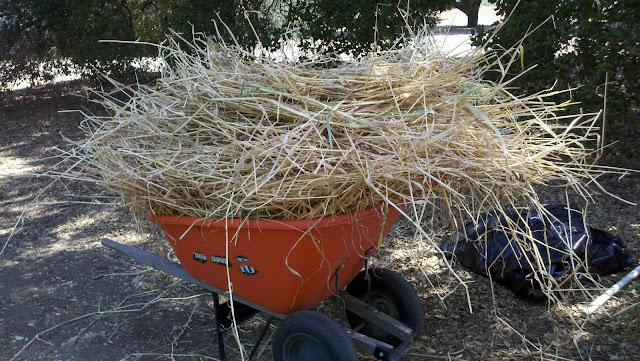
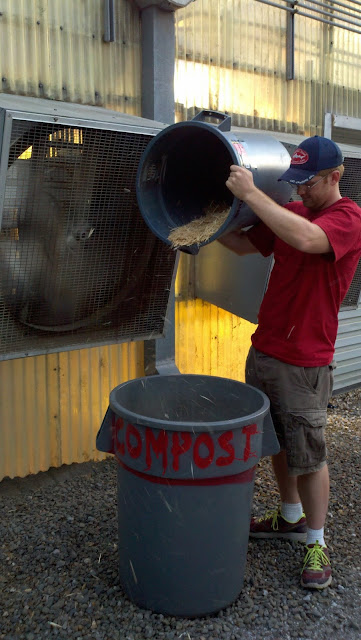
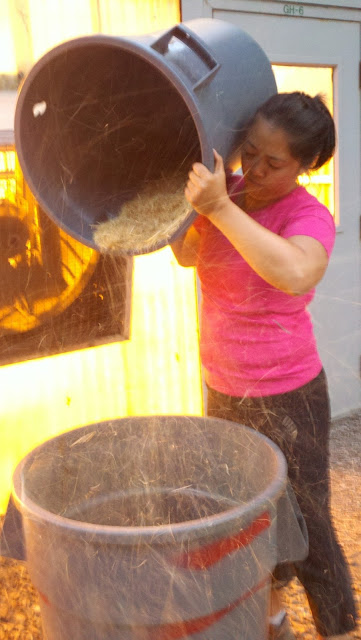
The trick was not trying to get every last grain. Previously, I was separating out each bundle and getting all the heads. I switched to spreading the bundles out on a tarp and stomping them en masse:

2012-07-16_15-45-01_124.jpg


2012-07-16_16-18-59_195.jpg


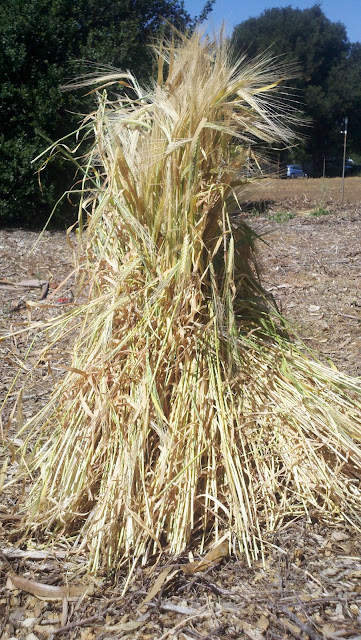
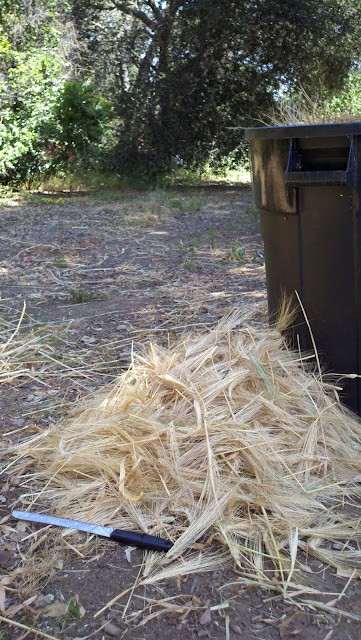
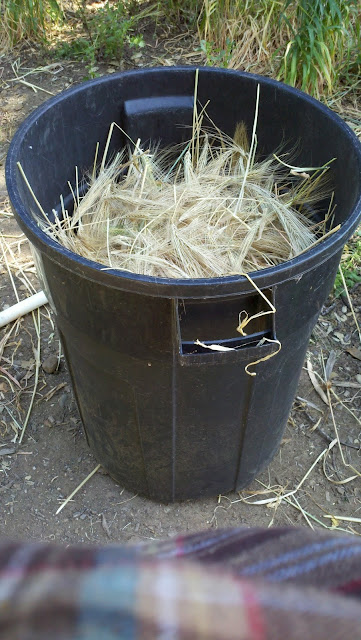
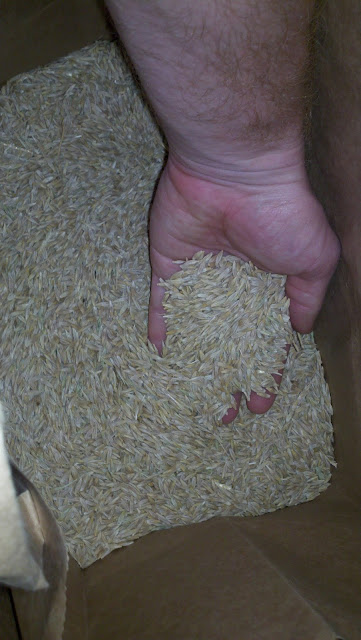
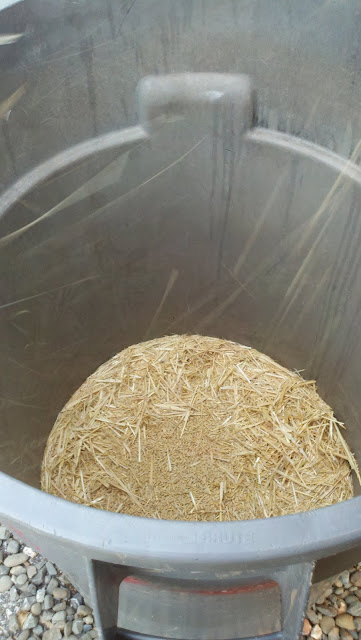
But even this was pretty slow. Now I'm taking the whole bundle of grain, shoving it head-first into a plastic pail, and using my hands to tear off the heads that are exposed. I don't untie the bundle, and I don't go after any heads on short late tillers. With this technique, my speed went up tenfold to about 10 lbs/hour. The efficiency has dropped a bit -- I know because I can see heads that I have missed, and they are everywhere!

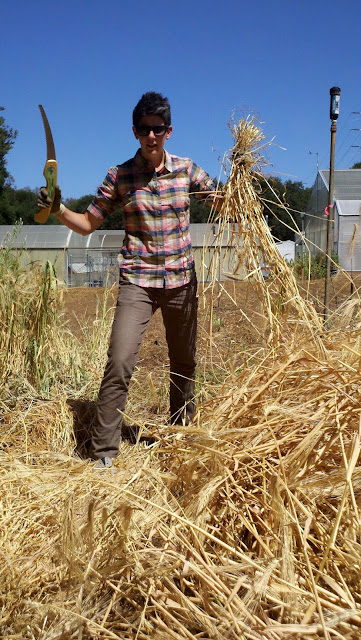
But hey, I'm done. I have a feeling that even people who grew grains for a living before industrialization didn't go after every last head of grain. They threshed on the dirt by dragging a wooden sledge over their grains with a donkey. Surely some grains were lost during this process, and surely some grains were never separated from the plants. I am convinced that threshing is like any other industrial process -- you balance throughput with accuracy, pick some point you're happy with, and call it a day. I just don't have 180 hours to put into it -- I barely even have 18, so I went for speed.


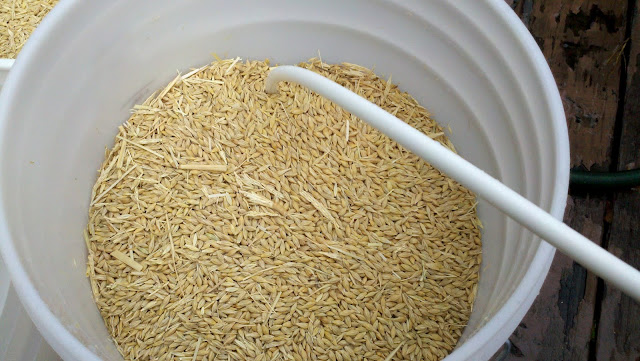
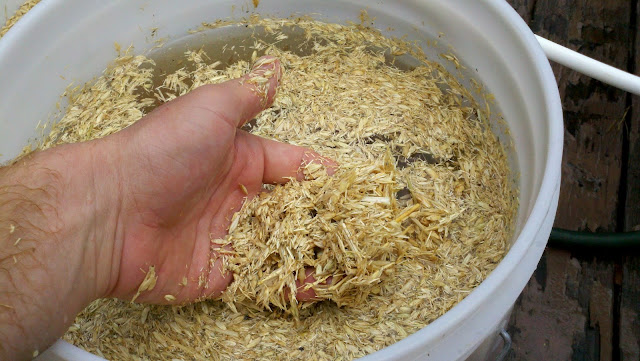
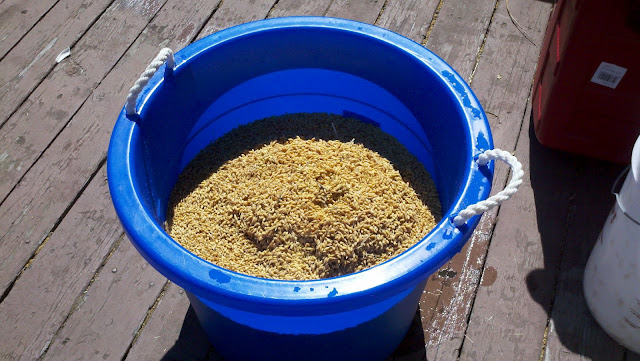
Now, on to malting. The first step is to wash the grains. I put them in plastic buckets and turn on the carbon-filtered water:

2012-07-17_11-21-05_724.jpg


2012-07-17_11-21-30_211.jpg


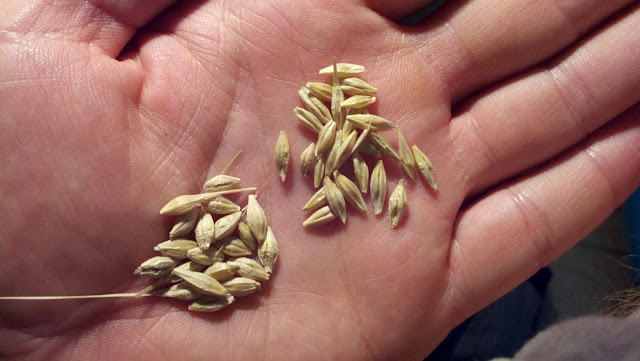
This washing step cleans the dust and dirt off the grains, but it also serves as the last stage of winnowing. There is a ton of chaff that didn't blow away -- it now easily floats to the top of the water while the grains sink:

2012-07-17_11-27-56_225.jpg


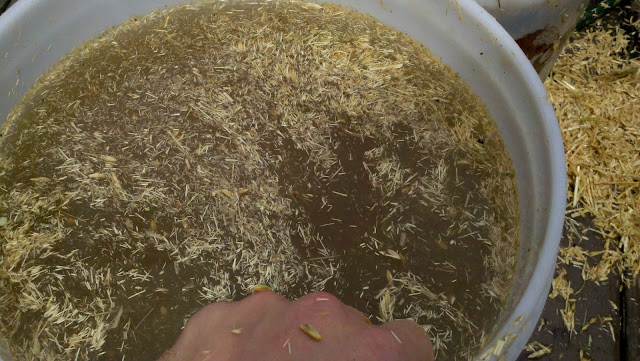
Unfilled grains also float up along with the chaff. You just skim it off the top:

2012-07-17_11-35-45_992.jpg


Eventually you're left with grains, very small pieces of chaff, and dirty water. You can pour off the chaff + water and wash the grains 2-3 more times:

2012-07-17_11-35-50_742.jpg


The water should be clear after the last wash. A little yellow color from the grains is okay, but any turbidity in the water is dirt that you haven't washed away yet. Keep on washing until the water turns clear.

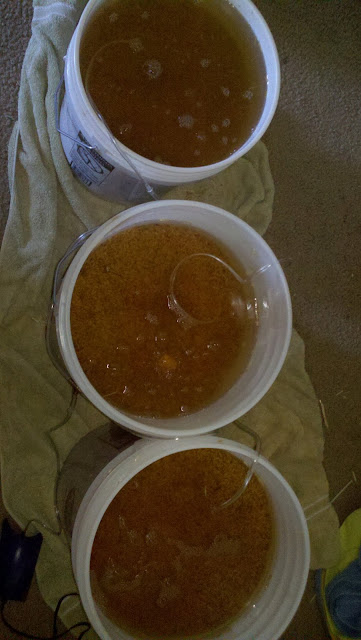
The next step is to soak the grains for about 24 hours total without depriving them of oxygen for more than 8 hours at a time. Sound tricky? One potential way to do it is to bubble air through the soaking water:

2012-07-17_15-36-48_188.jpg


This is what commercial maltsters do, but I have since stopped doing it. I am worried that some grains may have suffocated in the first batch, maybe the grains that were stuck down in the corners at the bottom of the buckets. To be very sure that the grains get enough oxygen, I just drain the grains after 8 hours of soaking by dumping them into a keg tub with a crack in the bottom. It works like the biggest colander I've ever seen:

2012-07-30_10-47-03_190.jpg


After an 8 hour soak, the grains should get at least 6 hours of breathing time, and more is okay. Total soaking time should be 24 hours, so they need three soaks of 8 hours each. Make sure to use water you would brew with, because any solids in malting water (like chloramines!) will make their way into your beer.

By the end of the last soak, the grains should all have rootlets beginning to emerge from one end, and the grains should be soft enough that you can crush them with your fingernails. They should have about the consistency of an unchewed stick of gum. Not bazooka joe (hard as a rock), and not trident (pretty soft), but maybe more like the consistency of old-school juicy fruit. Definitely not mushy, but...compliant. That's the texture you're shooting for. If you bothered to weigh a sample before and after the soak, you should be looking for a moisture % in the upper 40's, calculated by (wet weight - dry weight) / wet weight.

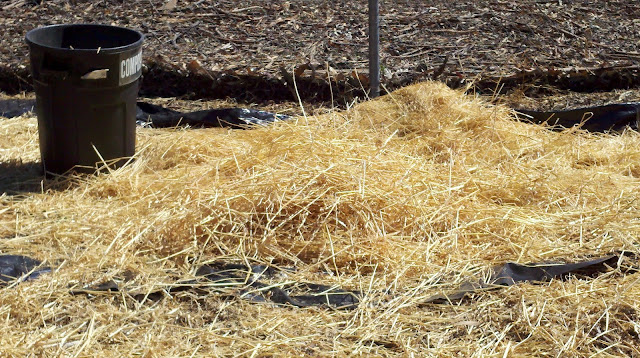
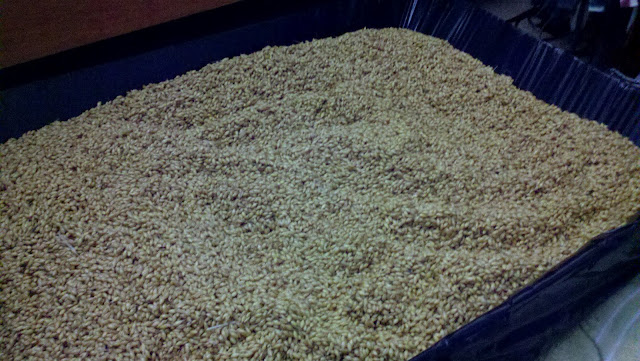
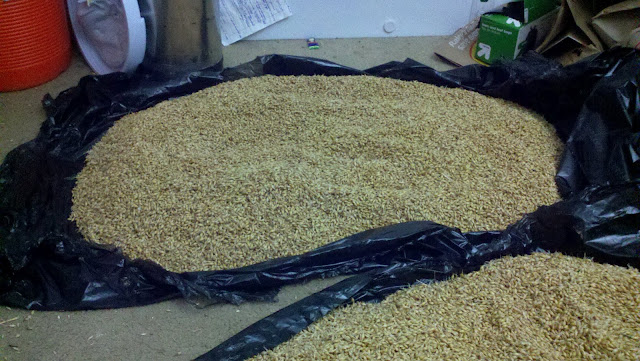
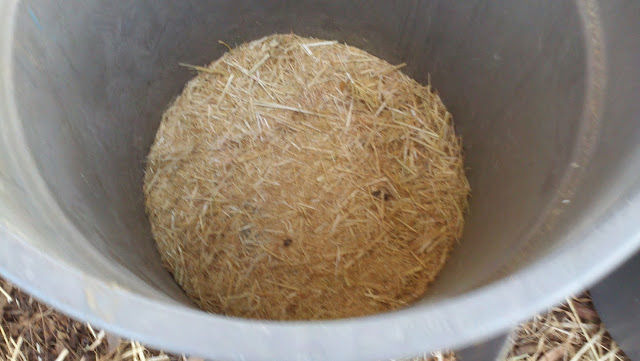
Now the grains should continue to germinate outside of water for several days. They will be generating heat and carbon dioxide during this time. To allow both to escape, the grains need to be in a relatively thin layer -- 6 inches deep at the most. I began by lining a large cardboard box lid with a garbage bag and putting the grains in it:

2012-07-19_10-38-49_0.jpg


This may have actually been okay, but laying the garbage bag on the floor and putting the grains in a pile in it works equally well:

2012-07-28_22-28-19_98.jpg


One thing is for sure -- that first batch of malt was not right.

It didn't smell right. That was my first clue that something was wrong. During the first few days of germination, when rootlets are first emerging, the malt is called chit, and it should smell like fresh cucumbers. As the rootlets grow, the malt switches to smelling more like alfalfa sprouts -- a pleasant but decidedly vegetal aroma. As the shoot (locked inside the hull) makes it way toward the end of the seed, the malt can begin to smell slightly earthy, like wet loamy dirt. It can even have a slightly sour note to it like fertile soil sometimes does, but it should never smell unpleasant or rotten.

I believe that I accidentally killed some grains during the soak for the first batch, because in addition to the normal aromas, the malt occasionally smelled like farts, and toward the end, it had a distinct rotting garbage smell to it. So wrong. To top things off, the entire batch began showing the fruiting bodies of white and blue/green molds just as it was finishing up, with the accompanying putrid smells. Needless to say, I threw it out, all 69 lbs of it! So sad!!!!!

I have malted grains successfully about 10 times now. But I've never malted 69 lbs at once. I should have practiced at that large scale with the inexpensive 2-row that I buy from Colorado Malting Company. Man, I sure would have minded throwing out 69 lbs. of that 2-row a lot less than I did throwing out my hard-earned grains.

I haven't completely identified what the problem was, but I have fixed it. The current batch of 60 lbs. of malt is going beautifully:

2012-07-30_23-42-41_884.jpg


Moving on! How do you know when the grains are done germinating?

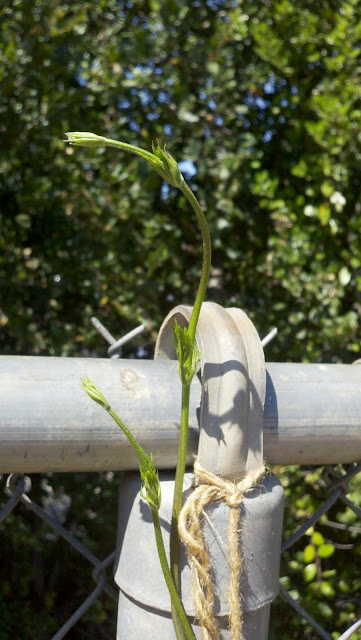
The rootlets stick out of the grain, and their presence tells you that the malting process is working. But rootlet growth is affected by things like moisture content and the type of material the rootlets are growing into. For example, the rootlets in contact with the plastic liner always tend to grow longer. You really shouldn't pay any attention to the rootlets as an indicator of malt conversion.

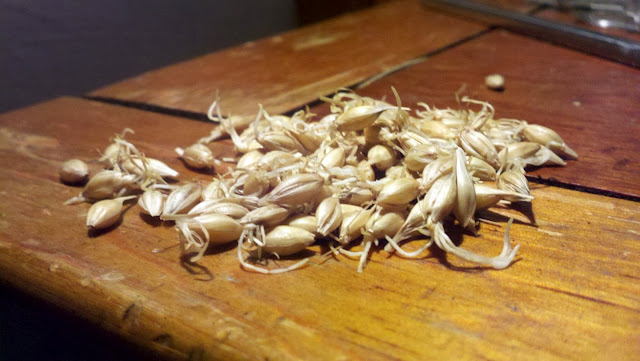
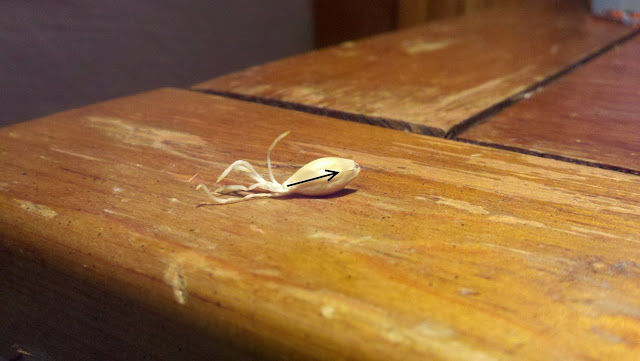
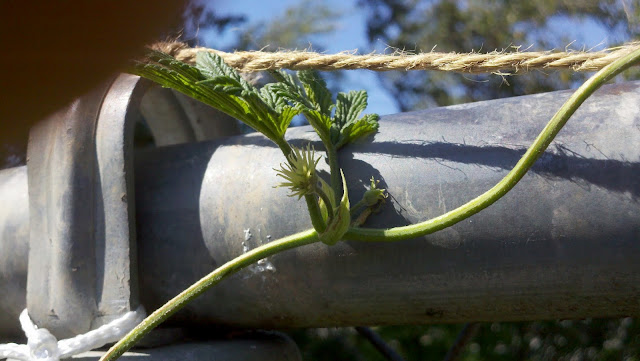
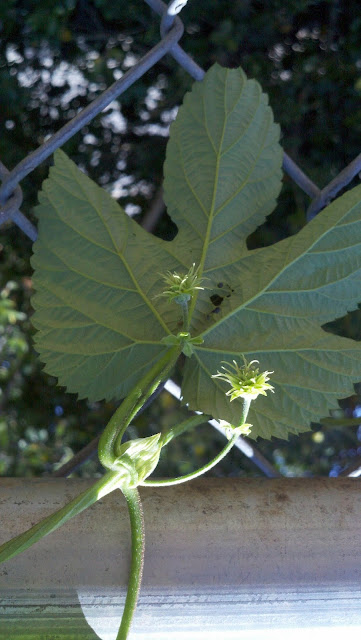
Instead, you should be watching the shoot, called the acrospire, which is visible underneath the husk. You don't need to slice open grains or tear them apart to see the acrospire. You can judge the length of the acrospire through the husk. Check it out; this grain's acrospire has grown to 75-90% of the total length of the grain:

2012-07-30_21-38-52_116.jpg


You can see it as the elongated lump that extends from the rootlets in a straight line to the other side of the grain. I layed an arrow over the acroscpire to show its location and length:

threequartersmalted.jpg


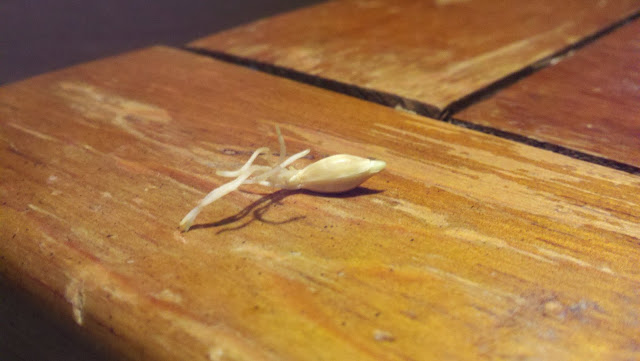
This grain's acrospire has grown to over 100% of the length of the grain, and it has just begun to poke out the other side:

2012-07-30_21-42-10_554.jpg


100percentmalted.jpg


Once you look at 10-20 grains, you will begin to be able to see the acrospire's length every time. Now, if I were making Pilsner malt, I would stop the entire batch right now by drying. 75% of the grain's length is long enough for the acrospire to grow for Pilsner malt.

But I'm making caramel malt for Almanac. For caramel (crystal) malt, you don't need to worry as much about the consequences of overmodificaiton (high free amino nitrogen). Still, this batch is almost done. When the acrospires of most grains get close to 100% of the grain's length, it is fully modified.

(BTW, most of the advances in malting that the British accomplished, allowing for efficient single-infusion mashing, were actually genetic changes in malting barley strains that cause the grains to be highly synchronized in their germination. In nature, some grains should sprout early while others wait, hedging their bets in case there is a late frost. As you might guess, this trait leads to more than a few undermodified grains, requiring a decoction. But all of our malting grains today, including Conlon, have been selected for synchronous modification.)

I will probably stop this batch tomorrow by spreading it thin and turning a box fan on it. This won't dry the grains completely, but it will slow down their growth enough while I take them through the next step, which is unique to caramel malts: converting starches to sugars in the husk. More on this when I know whether my current method for taking grains through the 68C temperature rest works or not!
 

Latest posts

Back
Top