You are using an out of date browser. It may not display this or other websites correctly.
You should upgrade or use an alternative browser.
You should upgrade or use an alternative browser.
Beginning my EBIAB Brewery Build..
- Thread starter r8rphan
- Start date

Help Support Homebrew Talk:
This site may earn a commission from merchant affiliate
links, including eBay, Amazon, and others.
r8rphan
Well-Known Member
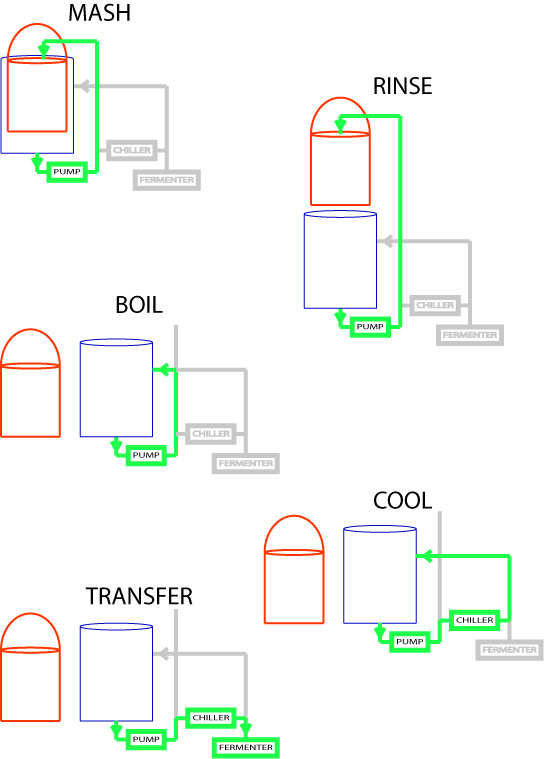
The general plan for plumbing purposes.. I am building a crane with a hand winch to lift the bucket full of spent grains from the kettle and set them to the side prior to boiling

r8rphan
Well-Known Member
There will be a single 5500 watt element, controlled by an Auber Instruments EZboil power regulator
A contactor to switch the high current portion in and out, with momentary push buttons to latch and unlatch the contactor... A separate circuit to control the pump, having a control switch (NO maintained) controlling a relay to put power to an outlet for the pump.. The relay is necessary because the switch is not rated for the current...
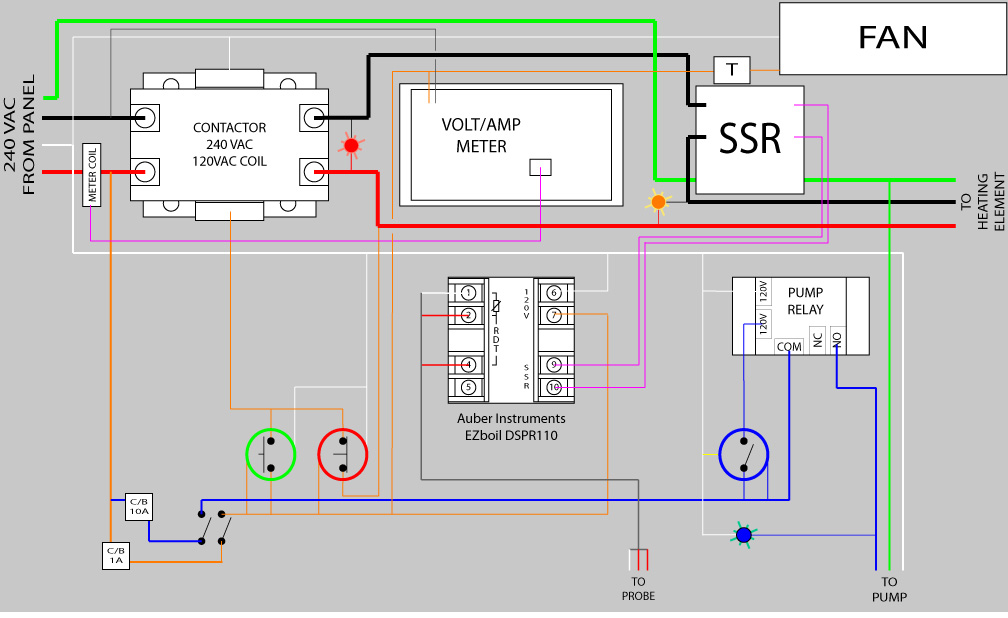
A contactor to switch the high current portion in and out, with momentary push buttons to latch and unlatch the contactor... A separate circuit to control the pump, having a control switch (NO maintained) controlling a relay to put power to an outlet for the pump.. The relay is necessary because the switch is not rated for the current...

r8rphan
Well-Known Member
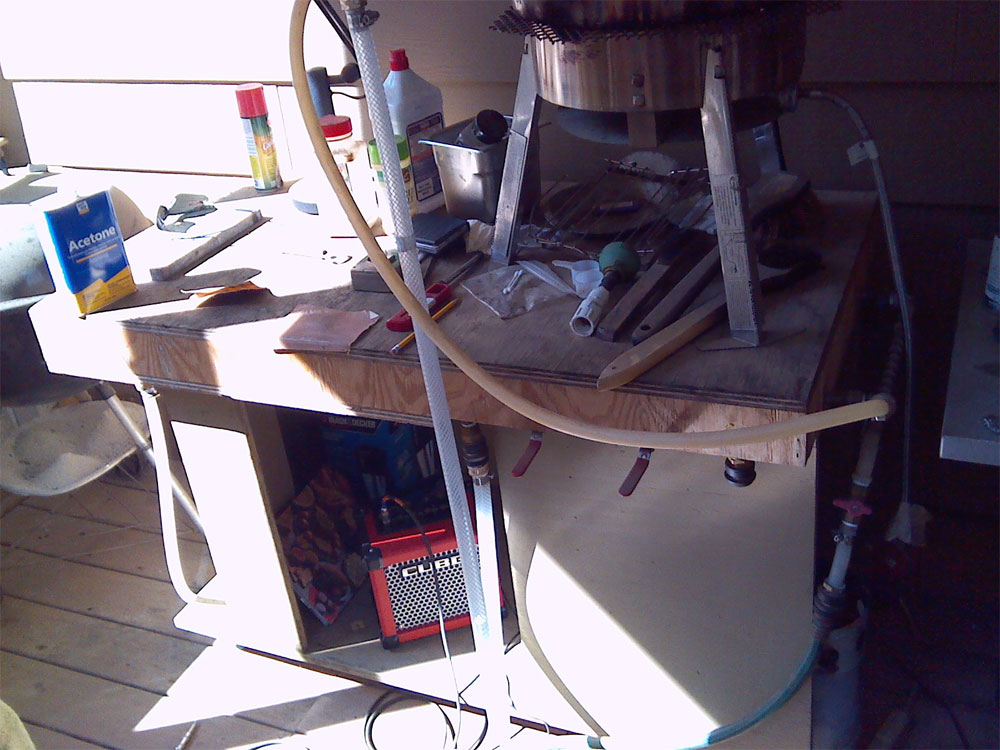
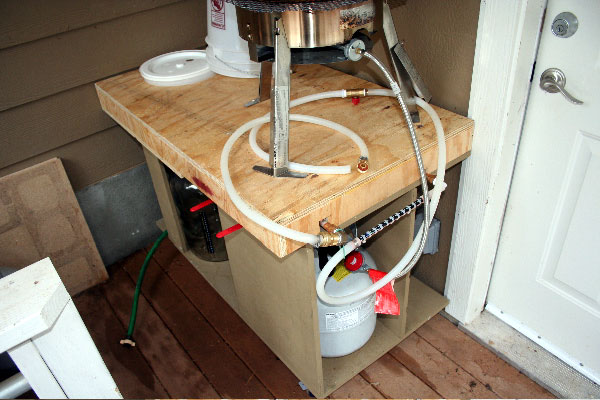
This is the old brewery and brew stand... I built a custom flat counter flow chiller that is in the table top, which I will be reusing in the new system... I used a cooler as a lauter tun and just did the 'guessing game' with trying to get temps where I wanted with infusion water, which was never accurate according to ambient temp, humidity, etc... Glad those days will soon be over...
I will be tiling the top of the old brew stand with some 12x12 floor tiles I already had left over from a job.. I already have the hardibacker, mortar, and unsanded grout, but still need to pick up some quarter round trim, and some screws short enough that they won't protrude down into the compartment where the chiller is before I can do that (early next week)..
I will be tiling the top of the old brew stand with some 12x12 floor tiles I already had left over from a job.. I already have the hardibacker, mortar, and unsanded grout, but still need to pick up some quarter round trim, and some screws short enough that they won't protrude down into the compartment where the chiller is before I can do that (early next week)..


r8rphan
Well-Known Member
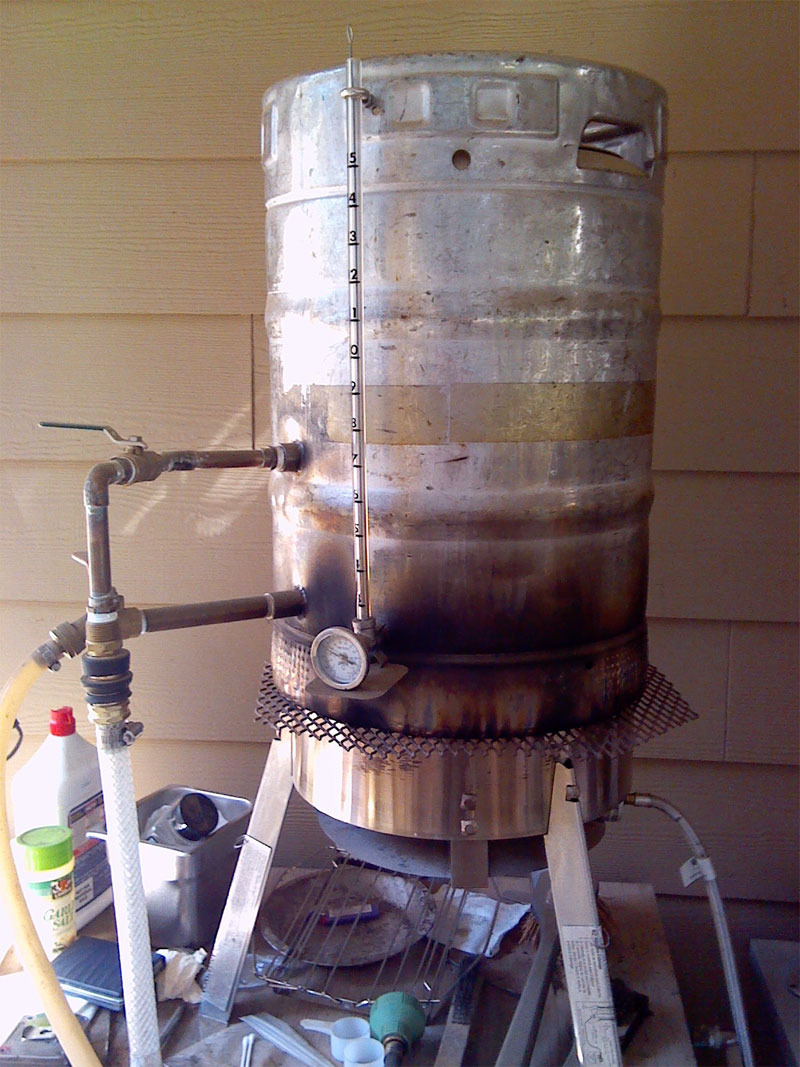
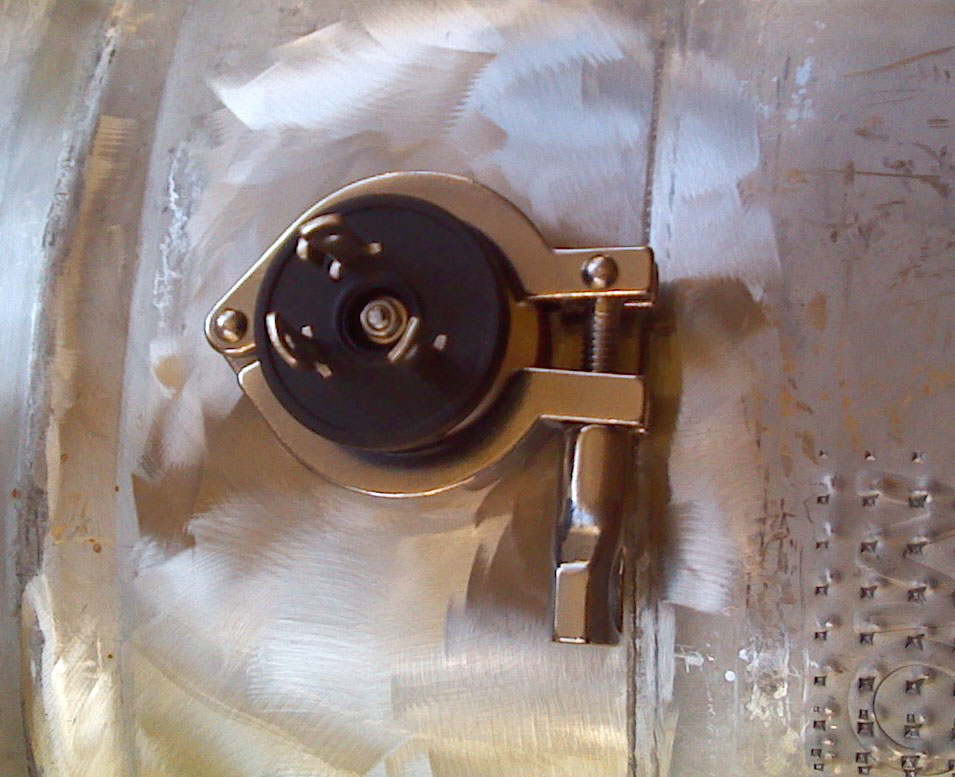
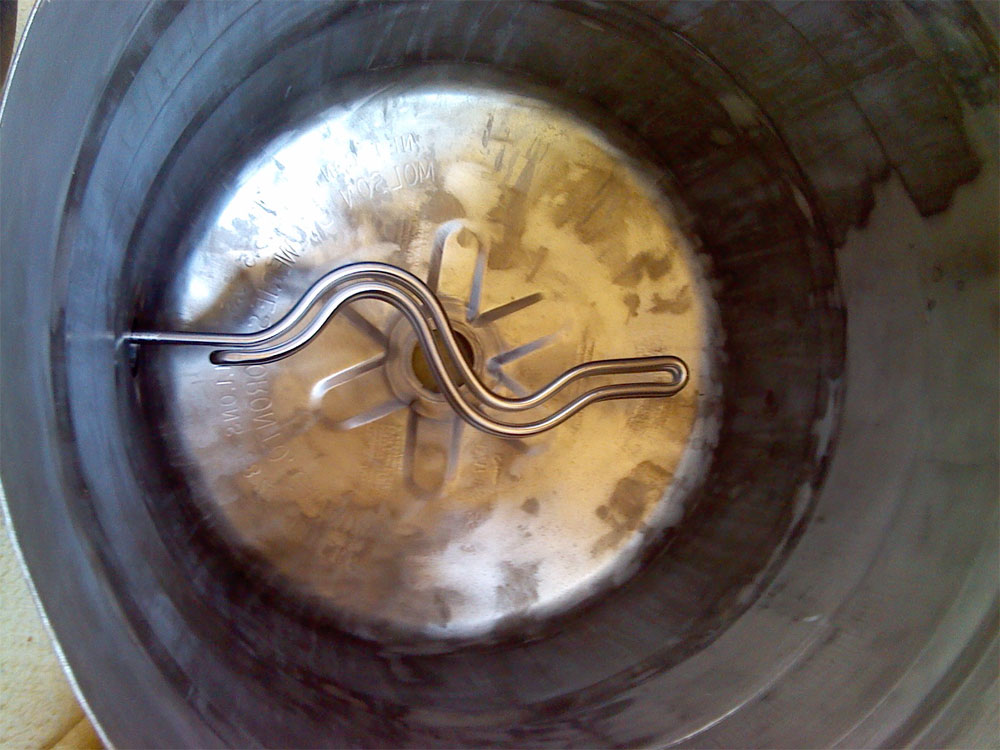
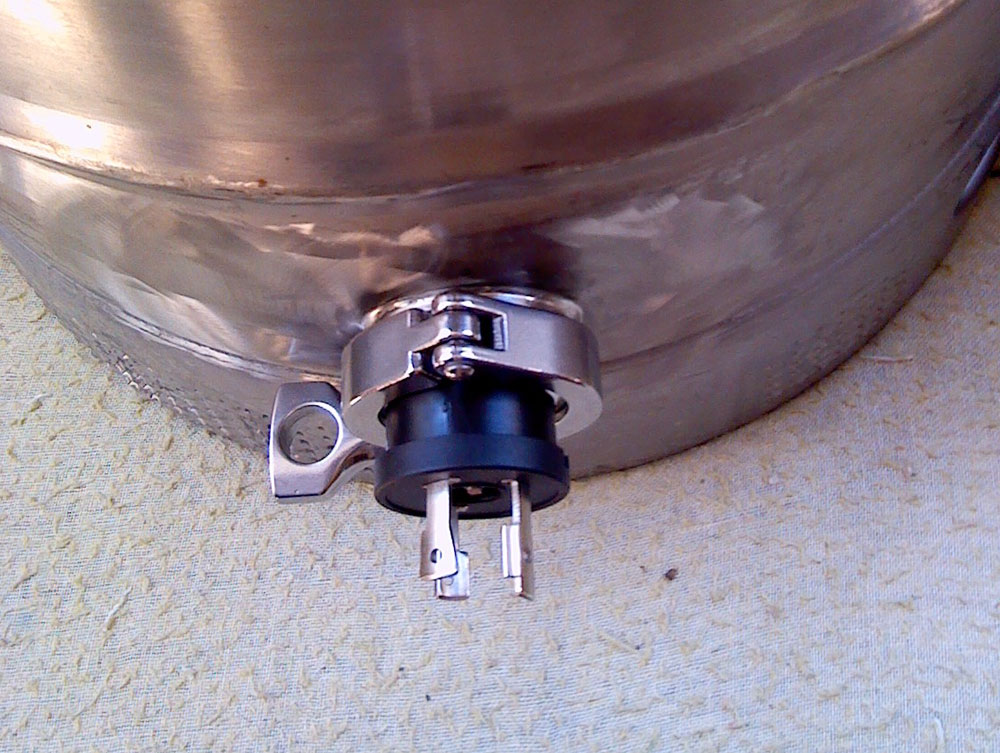
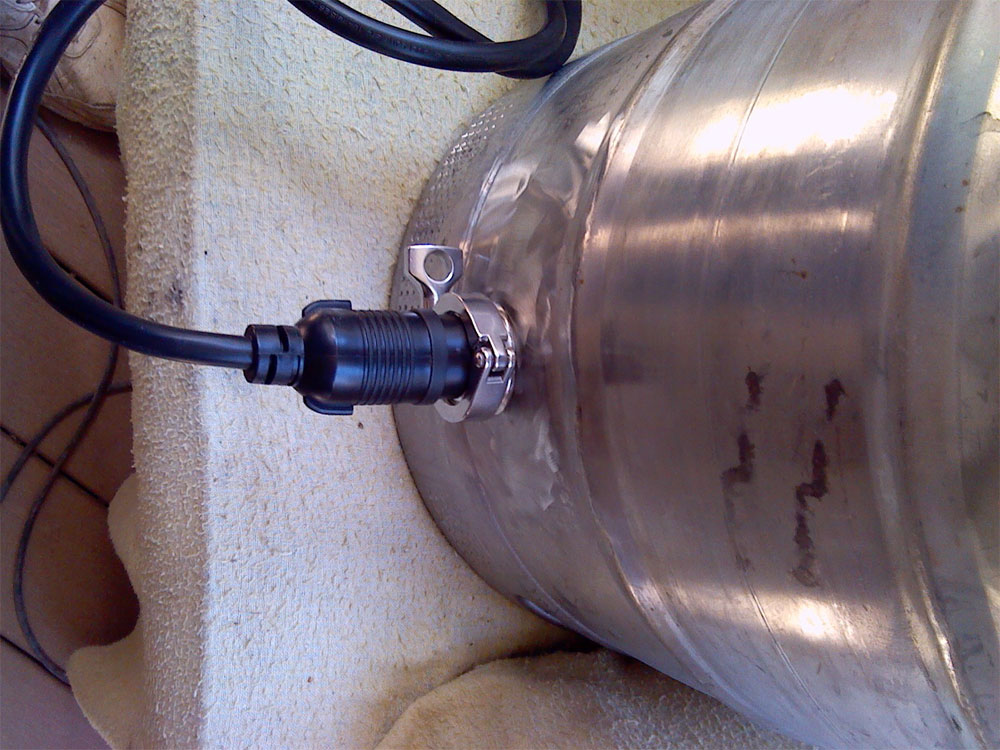
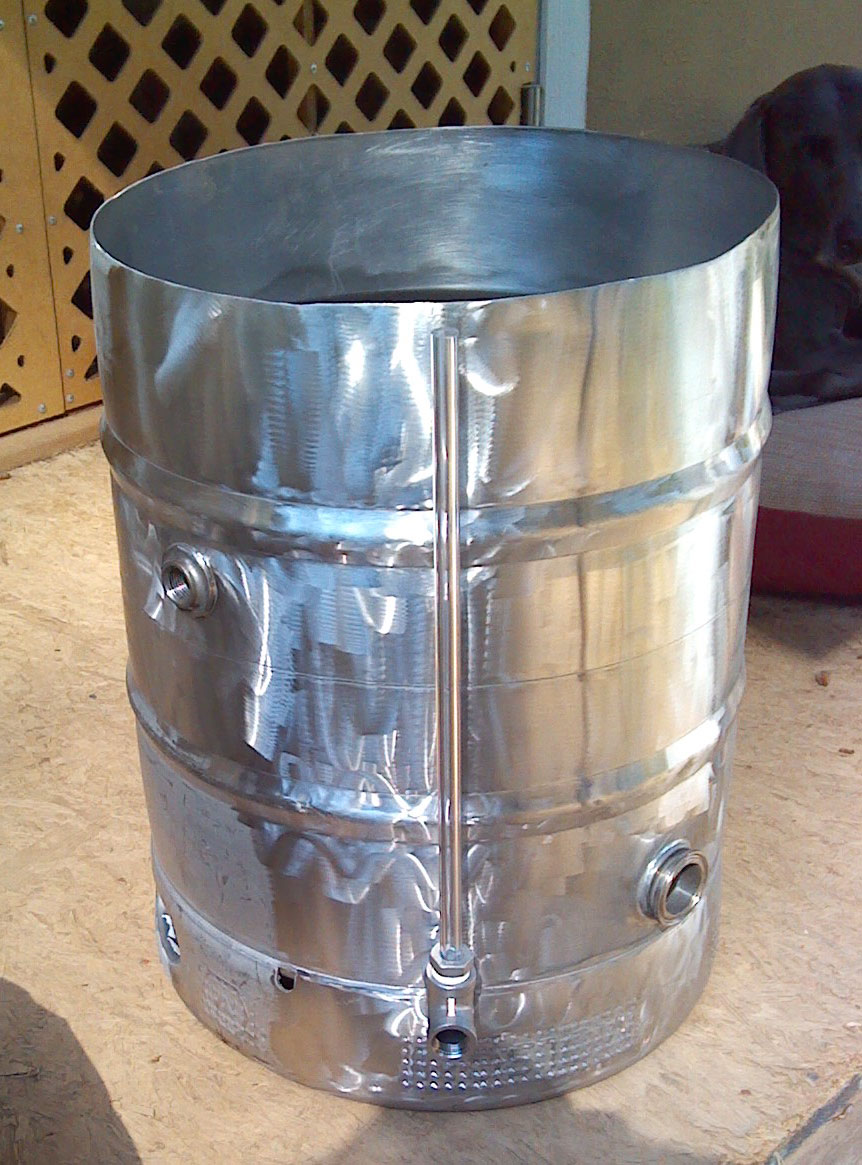
So yesterday, I cut the holes, silver soldered the TC fitting for the heater element, the spud fitting for the wort/water return, and installed the sight glass... Still have to plumb it and install the screw eye at the top...
I have a couple of fittings I need to pick up early next week (namely two ball valves with hose bibs, and a stainless Tee) before I can install the TC drain, fill it, test for leaks and calibrate the sight glass...
I took a flap sander to the kettle and did about a third of it in a few minutes.. Looks better than before, so I'll do the rest of it... Maybe, I'll polish it more after that, or maybe I won't... Or maybe I'll paint it..


r8rphan
Well-Known Member
I have the layout done for the steel structure that will hold the kettle and the crane, but don't have any pictures yet... Maybe I'll do it in 3D later this weekend and post that...
But for now, I have the winch, the sheaves, the steel, the bearings for the crane to pivot on, and the rubber feet... I'll order some end caps to fill any exposed open steel tubing ends after it's all fabbed up...
That part of it will take the most time of any phase, but I can probably get it mostly done in a day or two once i get into it...

$58.16
HUIZHUGS Brewing Equipment Keg Ball Lock Faucet 30cm Reinforced Silicone Hose Secondary Fermentation Homebrew Kegging Brewing Equipment
xiangshuizhenzhanglingfengshop

$22.00 ($623.23 / Ounce)
AMZLMPKNTW Ball Lock Sample Faucet 30cm Reinforced Silicone Hose Secondary Fermentation Homebrew Kegging joyful
无为中南商贸有限公司

$44.99
$49.95
Craft A Brew - Mead Making Kit – Reusable Make Your Own Mead Kit – Yields 1 Gallon of Mead
Craft a Brew

$719.00
$799.00
EdgeStar KC2000TWIN Full Size Dual Tap Kegerator & Draft Beer Dispenser - Black
Amazon.com

$7.79 ($7.79 / Count)
Craft A Brew - LalBrew Voss™ - Kveik Ale Yeast - For Craft Lagers - Ingredients for Home Brewing - Beer Making Supplies - (1 Pack)
Craft a Brew

$28.98
Five Star - 6022b_ - Star San - 32 Ounce - High Foaming Sanitizer
Great Fermentations of Indiana

$479.00
$559.00
EdgeStar KC1000SS Craft Brew Kegerator for 1/6 Barrel and Cornelius Kegs
Amazon.com

$53.24
1pc Hose Barb/MFL 1.5" Tri Clamp to Ball Lock Post Liquid Gas Homebrew Kegging Fermentation Parts Brewer Hardware SUS304(Gas MFL)
Guangshui Weilu You Trading Co., Ltd

$176.97
1pc Commercial Keg Manifold 2" Tri Clamp,Ball Lock Tapping Head,Pressure Gauge/Adjustable PRV for Kegging,Fermentation Control
hanhanbaihuoxiaoshoudian
![Craft A Brew - Safale S-04 Dry Yeast - Fermentis - English Ale Dry Yeast - For English and American Ales and Hard Apple Ciders - Ingredients for Home Brewing - Beer Making Supplies - [1 Pack]](https://m.media-amazon.com/images/I/41fVGNh6JfL._SL500_.jpg)
$6.95 ($17.38 / Ounce)
$7.47 ($18.68 / Ounce)
Craft A Brew - Safale S-04 Dry Yeast - Fermentis - English Ale Dry Yeast - For English and American Ales and Hard Apple Ciders - Ingredients for Home Brewing - Beer Making Supplies - [1 Pack]
Hobby Homebrew

$159.99 ($26.66 / Count)
3M High Flow Series System BREW120-MS, 5616001, For Brewed Coffee and Hot Tea, Valve-in-Head Design
SpaceCityProviders

$76.92 ($2,179.04 / Ounce)
Brewing accessories 1.5" Tri Clamp to Ball Lock Post Liquid Gas Homebrew Kegging Fermentation Parts Brewer Hardware SUS304 Brewing accessories(Gas Hose Barb)
chuhanhandianzishangwu

$10.99 ($31.16 / Ounce)
Hornindal Kveik Yeast for Homebrewing - Mead, Cider, Wine, Beer - 10g Packet - Saccharomyces Cerevisiae - Sold by Shadowhive.com
Shadowhive

$53.24
1pc Hose Barb/MFL 1.5" Tri Clamp to Ball Lock Post Liquid Gas Homebrew Kegging Fermentation Parts Brewer Hardware SUS304(Liquid Hose Barb)
yunchengshiyanhuqucuichendianzishangwuyouxiangongsi

$33.99 ($17.00 / Count)
$41.99 ($21.00 / Count)
2 Pack 1 Gallon Large Fermentation Jars with 3 Airlocks and 2 SCREW Lids(100% Airtight Heavy Duty Lid w Silicone) - Wide Mouth Glass Jars w Scale Mark - Pickle Jars for Sauerkraut, Sourdough Starter
Qianfenie Direct
r8rphan
Well-Known Member
Got probably one of the most labor intensive parts of this project probably 1/2 done today..
That is cleaning out the garage enough so that I can roll the welding table out of it..
It's gonna take another few hours of that, before I can start on the crane/support structure...
I have so much hardware/parts of every kind for all sorts of industries and what not that I have accumulated over the decades...... I should think about trying to sell some of it off.... If such a thing is possible or worthwhile...
r8rphan
Well-Known Member
So last night I plumbed the pump, and partially plumbed the kettle (also finished hitting the rest of it with the flap disk so that when the sun hits it I have to squint.. lol)..
Filled it all up with hot water, and oxyclean and ran it all through the kettle, pump, and chiller for an hour or so....
No leaks!
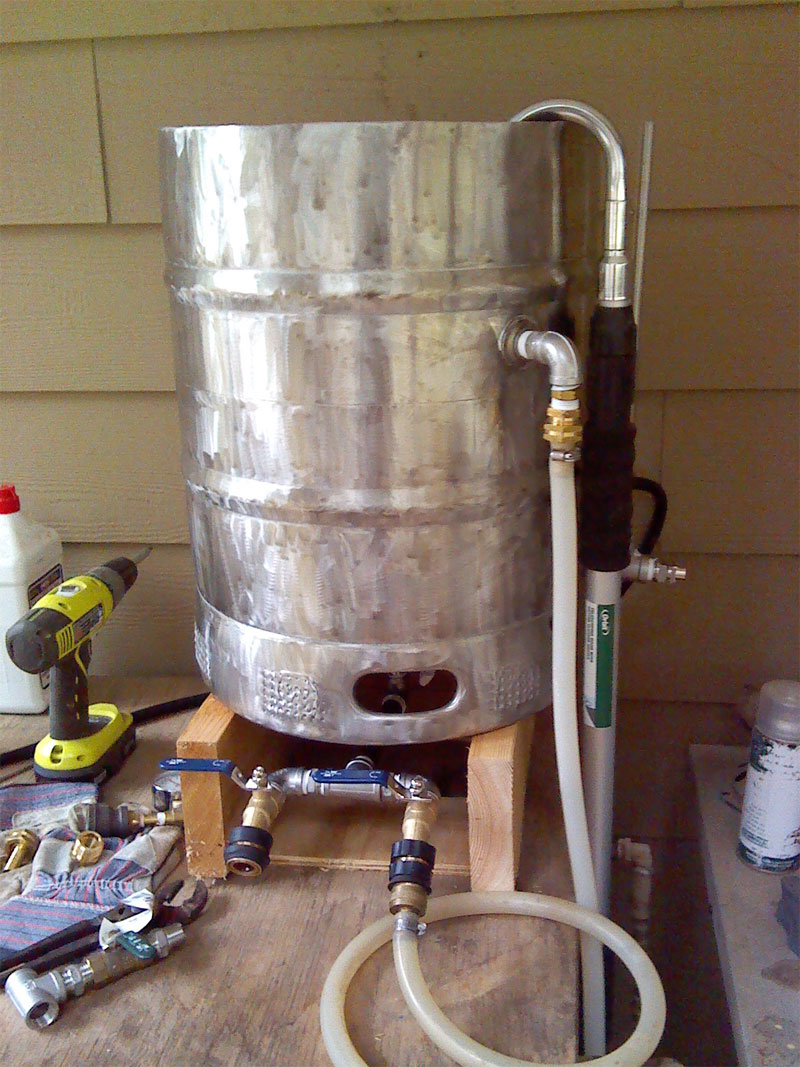
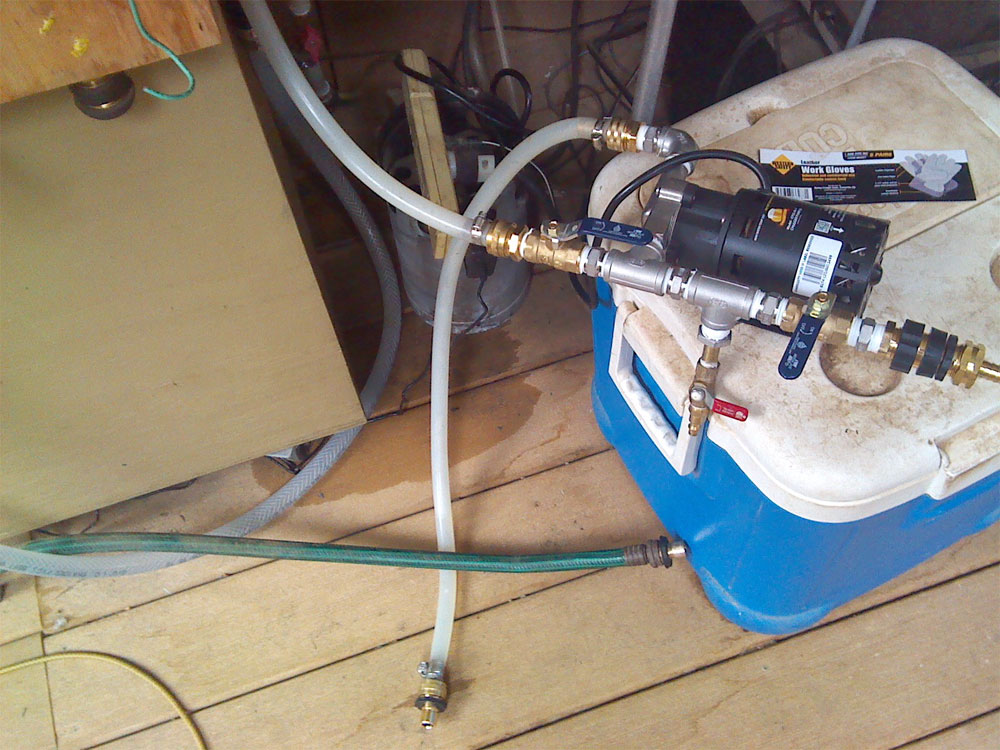
Filled it all up with hot water, and oxyclean and ran it all through the kettle, pump, and chiller for an hour or so....
No leaks!


r8rphan
Well-Known Member
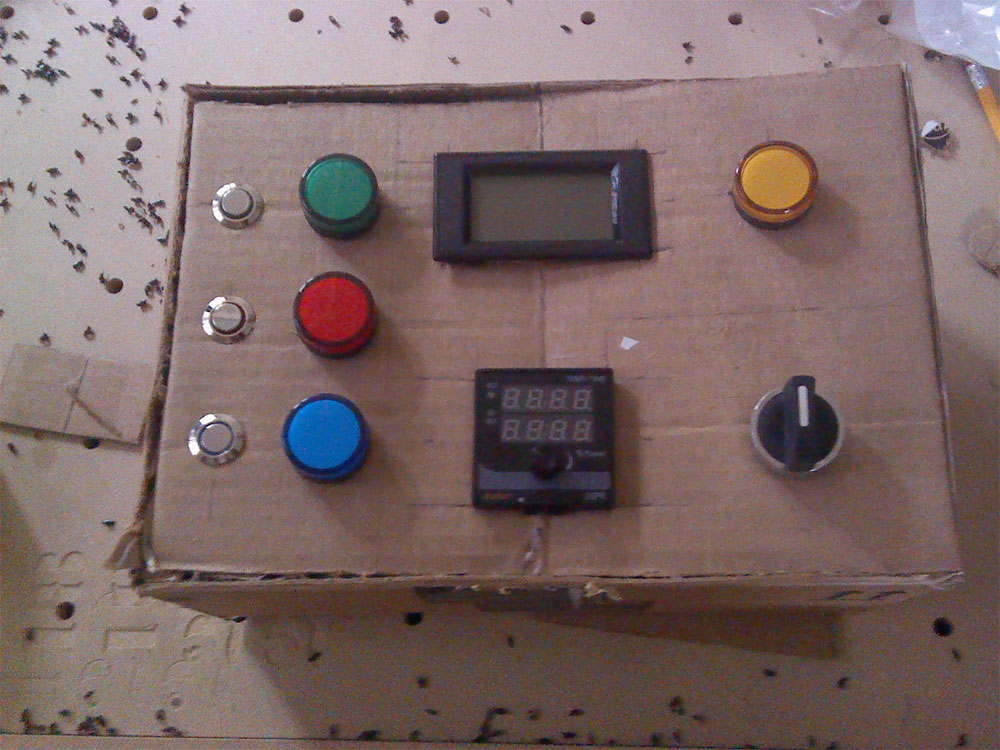
So I did a mock up of the controller this morning.. I wanted to try it all out in a mock up box the same size (actually a little smaller than) the one I want to order... It's a little tight, but I think I can make it work..
The box I want to order is pretty inexpensive, and everything I've found bigger, isn't...
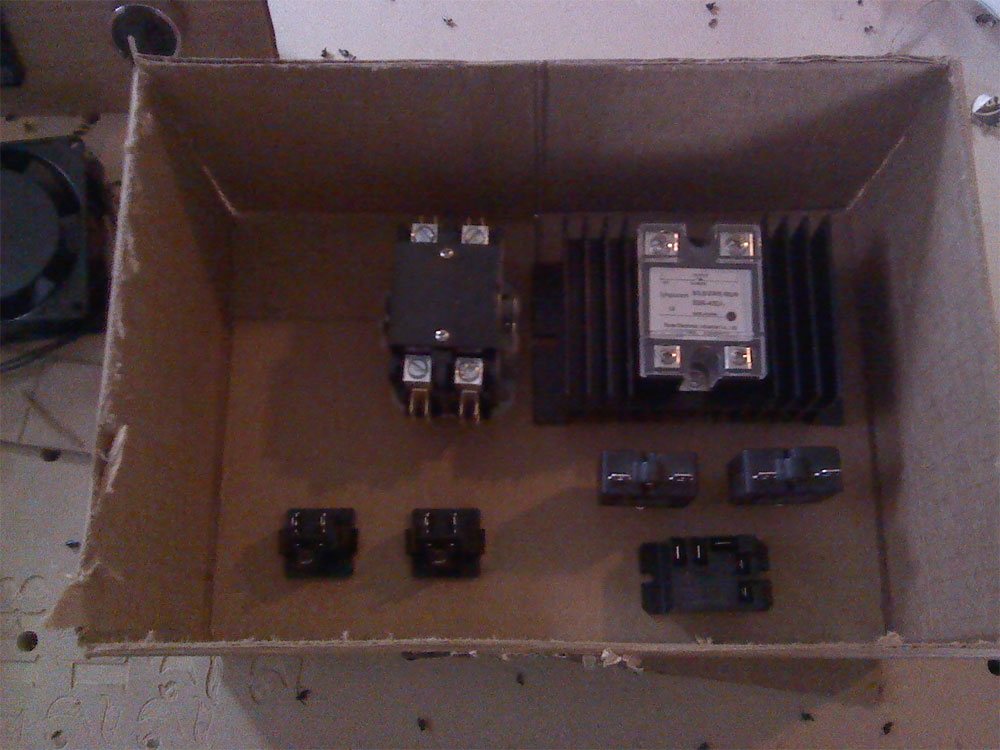
The box I want to order is pretty inexpensive, and everything I've found bigger, isn't...

r8rphan
Well-Known Member
This is what the thing will look like from the front...
The cover will actually be a bit bigger than this as I plan to make a larger one (add probably 3/4" border all the way around) out of engraving plastic, so I can engrave all the labeling into it as I cut the holes with my CNC...
The entire thing will be mounted in a nice finished wooden box, held at a comfortable viewing angle...
At the moment, the plan is to make a complementary, detachable box for the pump that the controller will sit on top of..
But we'll see how that all goes down, when I get there..
Will probably raise the auber unit up about a half inch, now that I know I have room...
I'm thinking of cutting a hole the size of the heat sink and actually mounting it on standoffs on the back of the box so that only enough of it is in the box to place the SSR in the enclosure.. I can then mount the fan on the heat sink itself, outside of the box...

r8rphan
Well-Known Member
Of course, in my waiting to make a mock up, the box I want is now out of stock till next Wednesday.. Went ahead and ordered it, but it's gonna be a while till it gets here...
I have other stuff to work on though.. sooo
Have all the steel I need for the support/crane structure, just waiting for some good weather to start fabbing it up...
Ordered the quarter round tile for the brew cart... Won't be available for pickup till next Week either...
So I guess I'll just sit around and play my V and drink beer...
I could clean house and stuff though... Nawww... Beer and guitar sounds better.. :rockin:
r8rphan
Well-Known Member
I also ordered a Mager SSR which will be used instead of the one pictured.. The one that came with the heat sink pictured will be kept as a back up...
r8rphan
Well-Known Member
The flow is significantly reduced when I drain through the chiller before going to the pump.. Is this normal?
This is the flow with the pump hooked directly to the output of the kettle and then pumped directly back into the kettle...
[ame]https://www.youtube.com/watch?v=DnY5HqhQGC8[/ame]
This is the flow with the pump hooked directly to the output of the kettle and then pumped directly back into the kettle...
[ame]https://www.youtube.com/watch?v=DnY5HqhQGC8[/ame]
r8rphan
Well-Known Member
This is the flow, now going through the chiller before going to the pump, before being pumped back into the kettle...
The flow is significantly reduced.. Is this normal?
[ame]https://www.youtube.com/watch?v=9aE4k_grVpI&feature=youtu.be[/ame]
The flow is significantly reduced.. Is this normal?
[ame]https://www.youtube.com/watch?v=9aE4k_grVpI&feature=youtu.be[/ame]
r8rphan
Well-Known Member
Okay, I tried sending it to the pump first, directly from the kettle, and 'then' through the chiller and back into the kettle after the chiller...
Still reduced flow, but not near as much..
I think the issue was that the chiller was reducing the flow 'to' the pump, and therefore it just didn't have enough liquid coming in to work with....
Anyways, does this seem about right in as far as flow through the chiller? Do you guys experience any reduction in flow when putting the chiller in line with the pump?
[ame]https://www.youtube.com/watch?v=E28xA5LgBF8&feature=youtu.be[/ame]
r8rphan
Well-Known Member
Damn!
Just realized that moving the chiller to the output side of the pump instead of the input side means I have to completely redo my plumbing plan...
I now have things that I bought that I no longer need, and no longer have everything I need to plumb it all..
:smack: :smack: :smack:
Just realized that moving the chiller to the output side of the pump instead of the input side means I have to completely redo my plumbing plan...
I now have things that I bought that I no longer need, and no longer have everything I need to plumb it all..
:smack: :smack: :smack:
r8rphan
Well-Known Member
Can someone tell me if the flow rate in the last video (where the pump pushes the wort through the counterflow chiller) is high enough for recirculating during mash?
I'm thinking that the simplest way to solve my now complex plumbing issue is to just always have the pump pushing through the chiller...
If the flow rate is high enough in the last video, then does this cause problems with temperature of the wort when it returns to the grain?
I would not be running the cooling water while this is going on, but the wort would be traveling through about 25-30' of tubing most of it copper before being returned to the mash...
r8rphan
Well-Known Member
Or an alternative question is; Is the flow rate in the second video (where the pump is being fed through the chiller before being pumped back into the kettle) enough flow rate for recirculating during the chilling process?
If so, then I have to change nothing and can keep my original plumbing plan...

If so, then I have to change nothing and can keep my original plumbing plan...
r8rphan
Well-Known Member
The chiller definitely should go after the pump. These magnetic drive pumps can handle restrictions on the output side, but not on the input side. You should change your plumbing accordingly.
It's not the things you know you don't know that get ya.. It's the things you don't know you don't know..
Arggg....
Now I gotta figure out how to do all this so that I can drain the wort from the chilller at the end of the brew... Because once there is no longer anything coming into the pump, it will lose prime, and then there is nothing to push the wort/beer still in the chiller out of the system...
I suppose I could just drain it into a sanitized bucket and dump that in the fermenter (or perhaps back in the kettle if I pump directly from the kettle into the fermenter), but that is not very elegant and adds the potential for infection problems...
Can you tell me if the flow in the last video is enough for recirculating during mash?
Or should I find a way to cut the chiller out of the circuit during mash so that I have the flow that is in the first picture?
Savagejair
Well-Known Member
- Joined
- Oct 16, 2014
- Messages
- 86
- Reaction score
- 11
Hi I have a thought and a question to any or all that might have an answer. Using silicon tubing can be switch to rigid less flex tubing or pipe to maintain line pressure through system? Or does it matter? How about line lengths is shorter better? R8rphan your system looks great I'm sure you'll get worked out. Love the controls mock up[emoji482]
Beernip
Well-Known Member
What chiller do you have? My guess is that it has internal piping that is 1/4 - 3/8" and not 1/2". That would cause a reduction.
r8rphan
Well-Known Member
What chiller do you have? My guess is that it has internal piping that is 1/4 - 3/8" and not 1/2". That would cause a reduction.
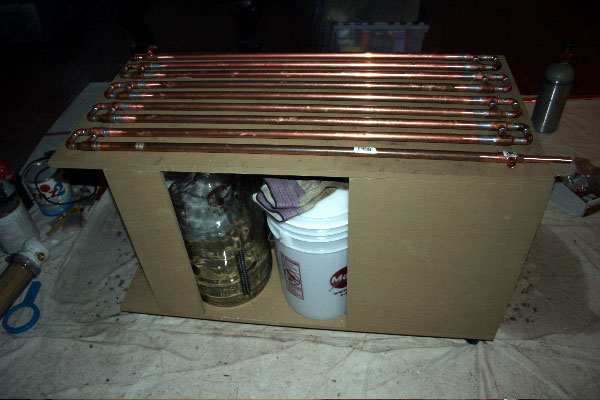
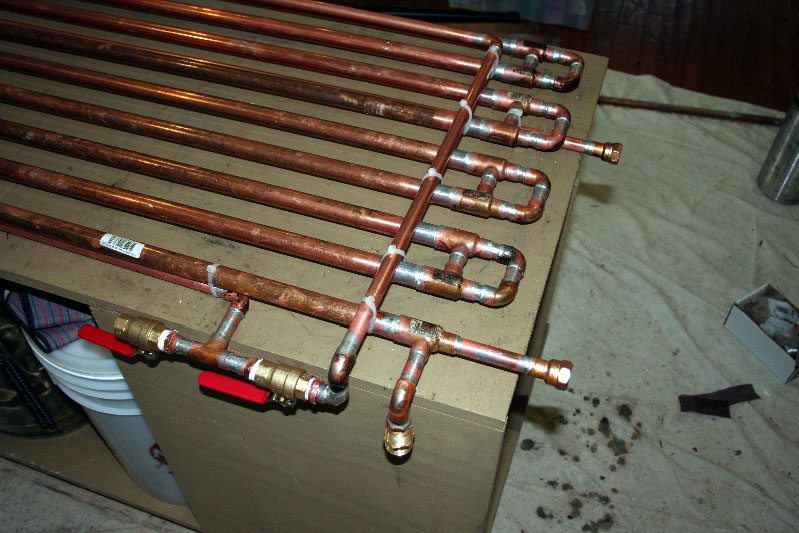
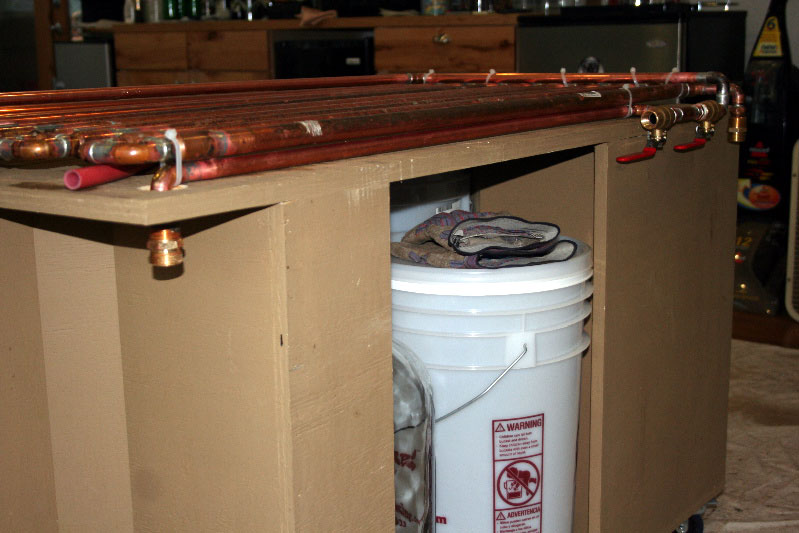
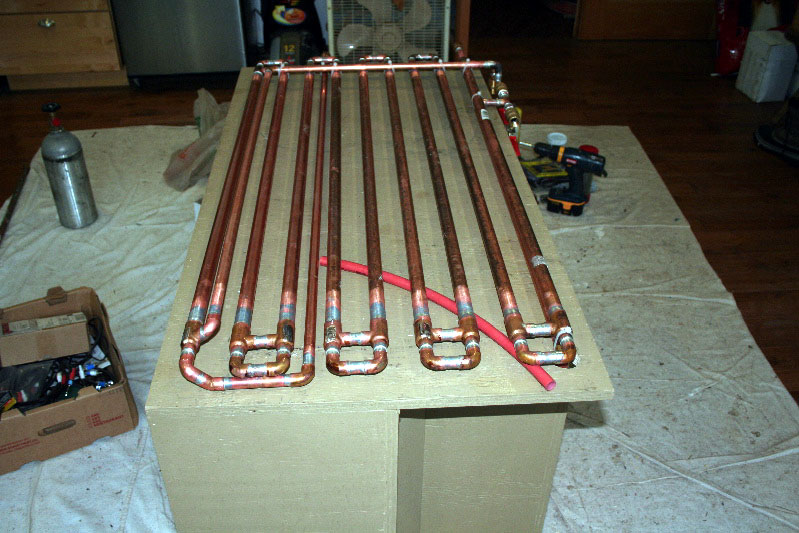
It's one I custom built several years ago.. It's flat, made of 1/2" copper tubing going through 3/4" copper tubing, and the path is basically I think (9) or so 42" (approx) lengths of straight 1/2" copper tubing with two 1/2" elbows at each turn... It is a 'switchback' configuration that is built into the brew stand table top...
r8rphan
Well-Known Member
Hi I have a thought and a question to any or all that might have an answer. Using silicon tubing can be switch to rigid less flex tubing or pipe to maintain line pressure through system? Or does it matter? How about line lengths is shorter better? R8rphan your system looks great I'm sure you'll get worked out. Love the controls mock up[emoji482]
Like anything with air/water flow involved, I'm thinking the shorter the lengths, the better, the larger the diameter of the pipes/tubing the better, the straighter the better, and the less it has to push uphill, the better...
But accomplishing that with all the plumbing these systems need is the trick..
r8rphan
Well-Known Member
I think I have it figured out.. I'm gonna need a couple more SS tees, one or two more ball valves, the return to kettle during mash (or boil) is gonna be through a nozzle over the rim 'only', and at the very end, after everything has been transferred, I will need to open the 1/4" air bleed/sampling valve at the output of the pump and collect a bit of wort into a container as it drains from one or two lines and then dump it into the fermenter....
I am going to scrounge up a couple of 25' garden hoses today, and put them in line with the output of the pump and let it pump back into the kettle, to make sure that the pump will indeed be able to pump the chilled wort all the way to the fermenter in the house...
Otherwise, I will have to move the fermenter out onto the porch with the rest of the brewery, and then deal with heating it in the winter.. I doubt the little 60 watt light bulb I have been using will do the trick when the fermentation chamber (an upright freezer) is sitting out in 10 degree weather..
The flow I am getting from through the fermenter in the last video is likely as good or at least close to what I was getting using gravity through the same fermenter into the carboys before (probably better), so I'm confident it will work...
r8rphan
Well-Known Member
What chiller do you have? My guess is that it has internal piping that is 1/4 - 3/8" and not 1/2". That would cause a reduction.
I found some pictures of it during construction, as the links are broken to them on the old build thread here..
Looks to be about 31.5' of 1/2" chiller
This was back in January of 2011
Beernip
Well-Known Member
That's a lot of copper.  You can always just hook up the pump to the in/out of the chiller direct and see if the flow rate differs going in vs out.
r8rphan
Well-Known Member
That's a lot of copper.You can always just hook up the pump to the in/out of the chiller direct and see if the flow rate differs going in vs out.
See the short videos I posted..
r8rphan
Well-Known Member
I actually tried putting the pump before the chiller, then added 25' of garden hose to the output, before returning it to the kettle.. and the flow wasn't that bad...
It gave me confidence that I will indeed be able to pump the wort directly through from the kettle into the fermenter 50' away (at most)...
Yay! no more carrying heavy assed carboys! Oh happy day!
Starting to research what all i need to pull off replacing them with a 15g plastic conical...

It gave me confidence that I will indeed be able to pump the wort directly through from the kettle into the fermenter 50' away (at most)...
Yay! no more carrying heavy assed carboys! Oh happy day!
Starting to research what all i need to pull off replacing them with a 15g plastic conical...

r8rphan
Well-Known Member
To-Do list
(Public Service Announcement)
Ordered the engraving plastic that I will use for the control panel face, last night... Should be here mid week next week.. I have the artwork pretty much done in the CAD/CAM software from which the tool paths for the CNC will be created....
Ordered some more terminal strips from BangGood for the high current circuits, and my other terminal strips arrived today...
I got a shipping notice on the controls enclosure.. It's coming from China... I wish they would have said so when I was ordering.. So, that's probably another 10 days out...
Cut up the hardi-backer to size for tiling the brew stand.. Just waiting for the tile trim and to get some short screws I can use to fasten it down.. Tile Trim is coming in 'by tomorrow' I am told, so when I pick that up, I'll stop by the fastener store and see if they have the screws I need...
Ordered 10 more 1/2" SS close nipples from China last week and I expect to have them by around the first of June...
Gonna pick up 3 more SS Tees tomorrow, and a few 1/2" MIP x 3/4" MHT adapters tomorrow as well... Then I 'should' have all the parts to finish the plumbing side of things once the nipples come in... at least for the initial configuration....
Took the old brew keggle apart and grabbed what pieces off of it I might need, and stuck it, the burner, and most of my plastic buckets up in the attic... Nice to have all of that stuff out of my hair and out of view... I can't see why I'll need more than 2 of them from here out.. One for sanitation, and one for milling the grain into....
Waiting for the weather to clear up so that I can roll the welding table out of the garage and start on the support/crane structure...
The new subpanel is installed on the patio, I just have to run a circuit from it to over by the brew stand.. I already have almost all I need for that.. I just need to pick up a 4s Deep J-box and an industrial raised cover for the L14-30R receptacle...
I'll probably order some more tile trim and build a matching cart/countertop later on to put end to end with the brew stand out on the screened porch.. Might even put a bar sink in it!
Gotta still clean out the fermentation chamber, which involves getting a dolly and wheeling it outside where I can blow out all the rust that formed on the coils due to leaving two small buckets of star san in there for like a year and a half without realizing it... But I need to wait for better weather for that too.. From here out, blow off buckets will be 'out side' of the thing...
Will probably run a batch or two using my old carboys, while I get all the stuff together to convert over to a plastic conical... Then no more lifting of 'anything' heavy anymore... Yay! Getting too old for that crap...
Anyways, short of drilling the hole for the little eye bolt for the sight glass and calibrating it, I've done just about all I can until I get more parts.. Starting to look like the control panel will be the last thing done due to waiting on the enclosure.. I expected the steel support/crane structure to win that prize...
Anyways, now you all know as much as I do...
r8rphan
Well-Known Member
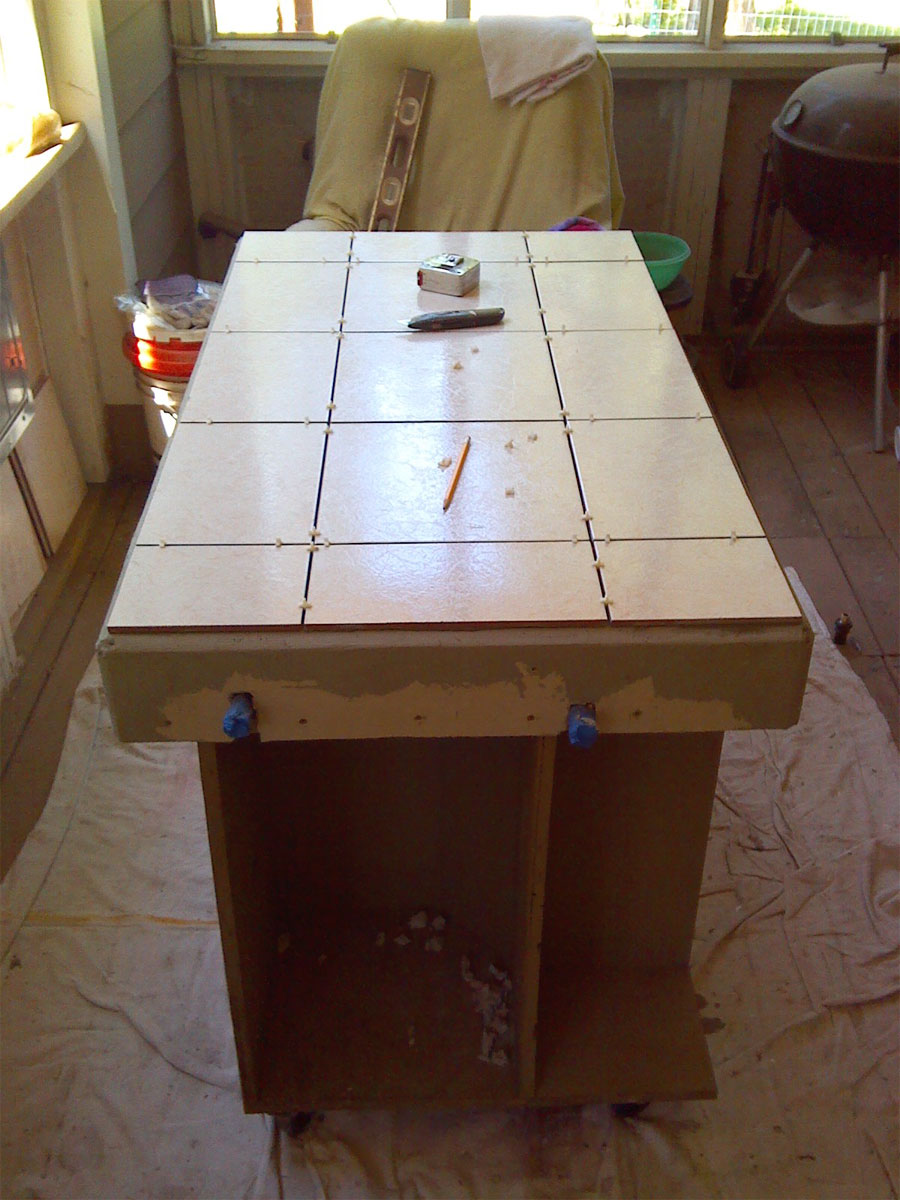
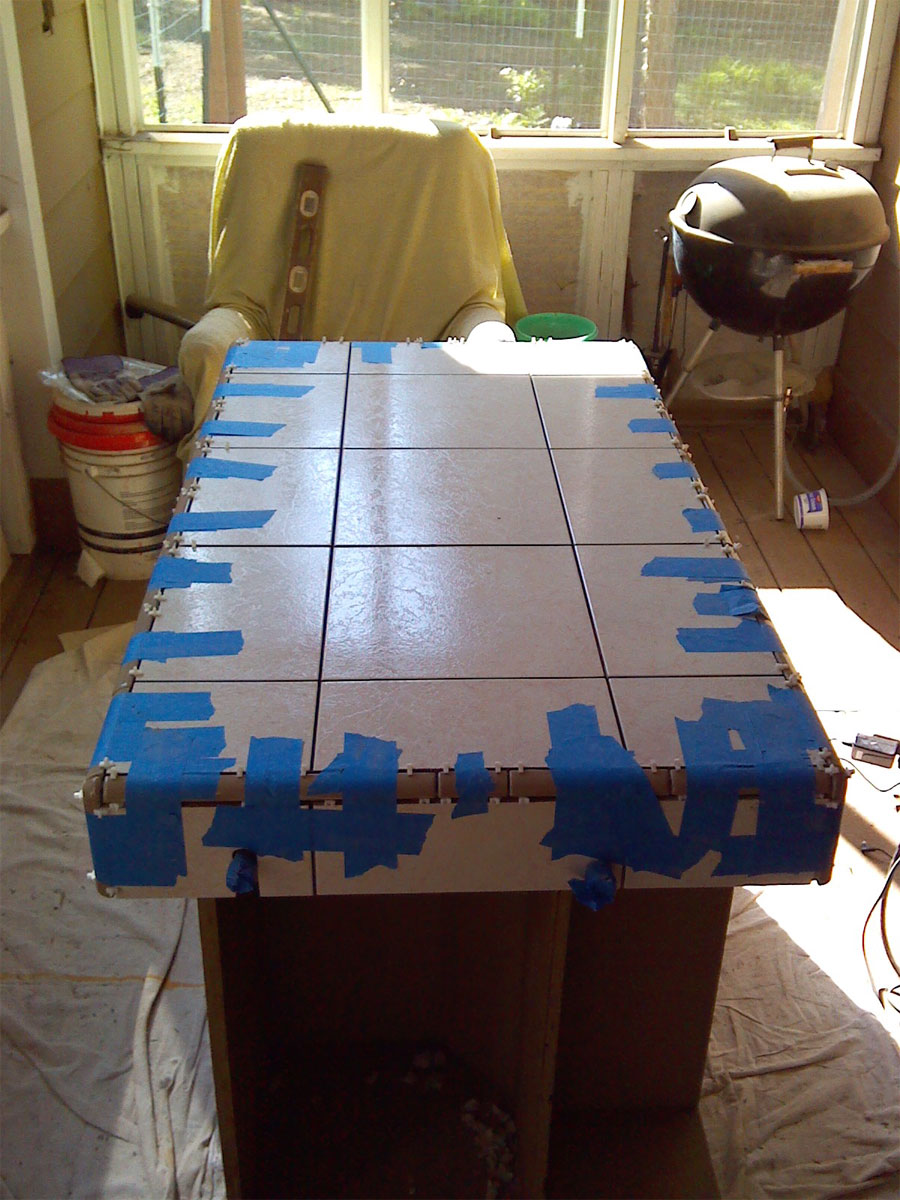
So, Thursday after work, I started tiling the brew stand... Thursday I put in the hardibacker, mortared/reinforced the edges, and set the reference tiles...
Friday I finished tiling the thing.. Quarter round tile is a PITA to install...
Saturday morning, when I removed the tape, a couple of pieces of the quarter round came loose, so I re-mortared them...
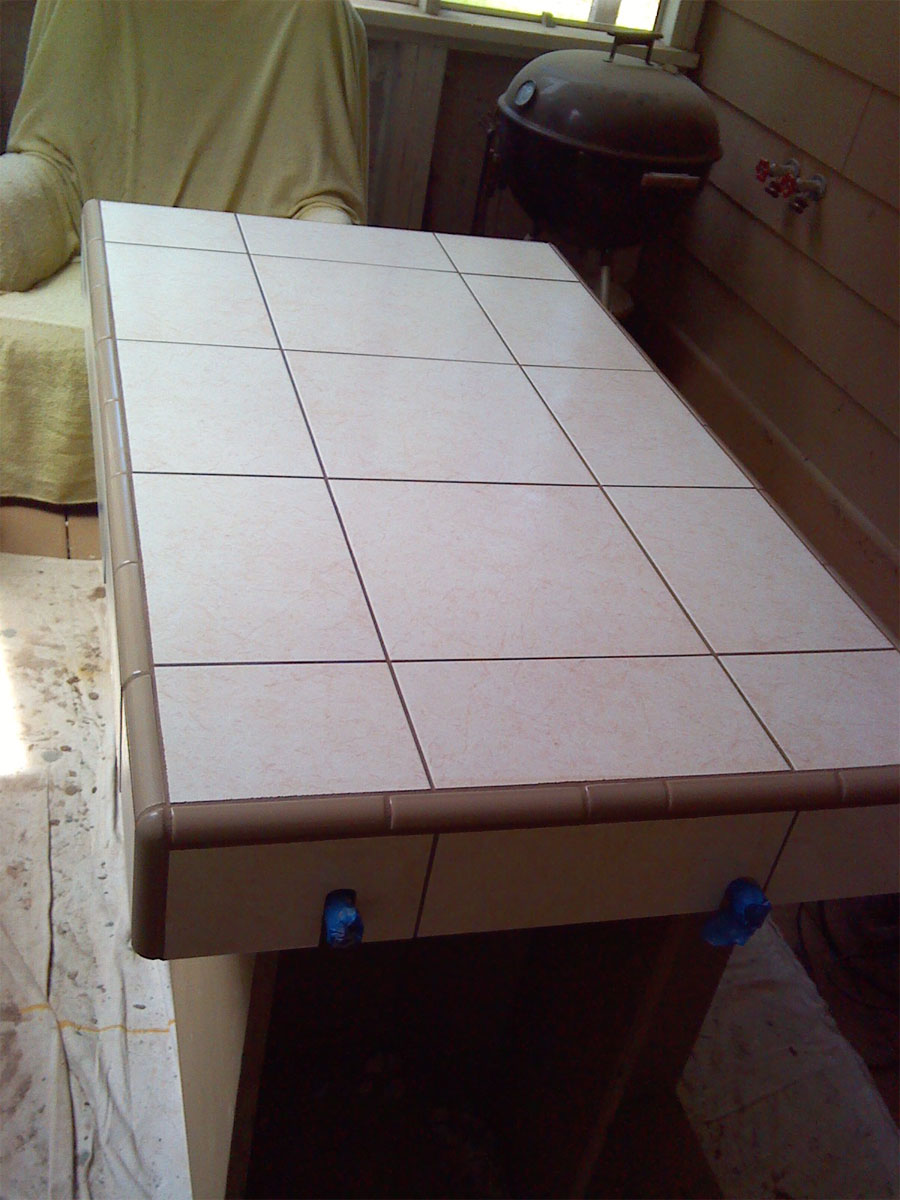
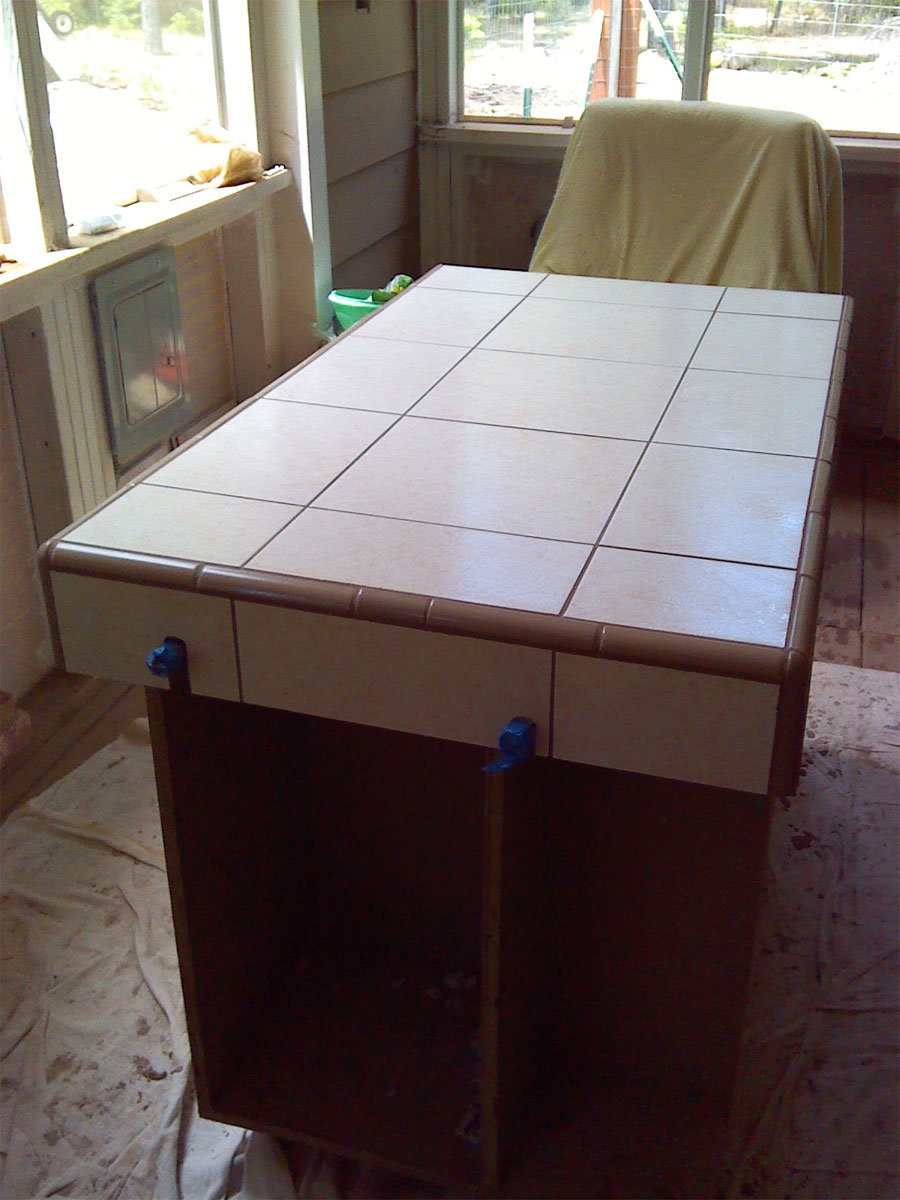
This morning (Sunday), I went into town to exchange the unsanded grout for sanded version, as I had originally planned on having no grout lines, but that plan would have left me running out of quarter round trim...
So, then I came back and grouted it in, all before noon.. When the grout dries, it should be the same color as the quarter round...
So, the brew stand is done.... Will seal it in about a month... Next up, I need to run some convenience outlets along the back wall behind the brew stand and the table next to it, and also run a 240v 30a dryer outlet to power the brewery...
Later this week I plan to start on the steel kettle stand/grain crane....
I'm waiting for the enclosure for the electronics to arrive, and other than that I have all the parts to finish this side of the brewery... Will probably brew a couple of batches before I deal with upgrading the fermenter and kegging side later this ummer....
Progress... Glad that part is over... Later on, I'm planning to build a matching table to sit next to it, and a matching end table to use next to a chair...
Time to relax for the rest of the holiday weekend... Smoking a fat Tri-Tip tomorrow...
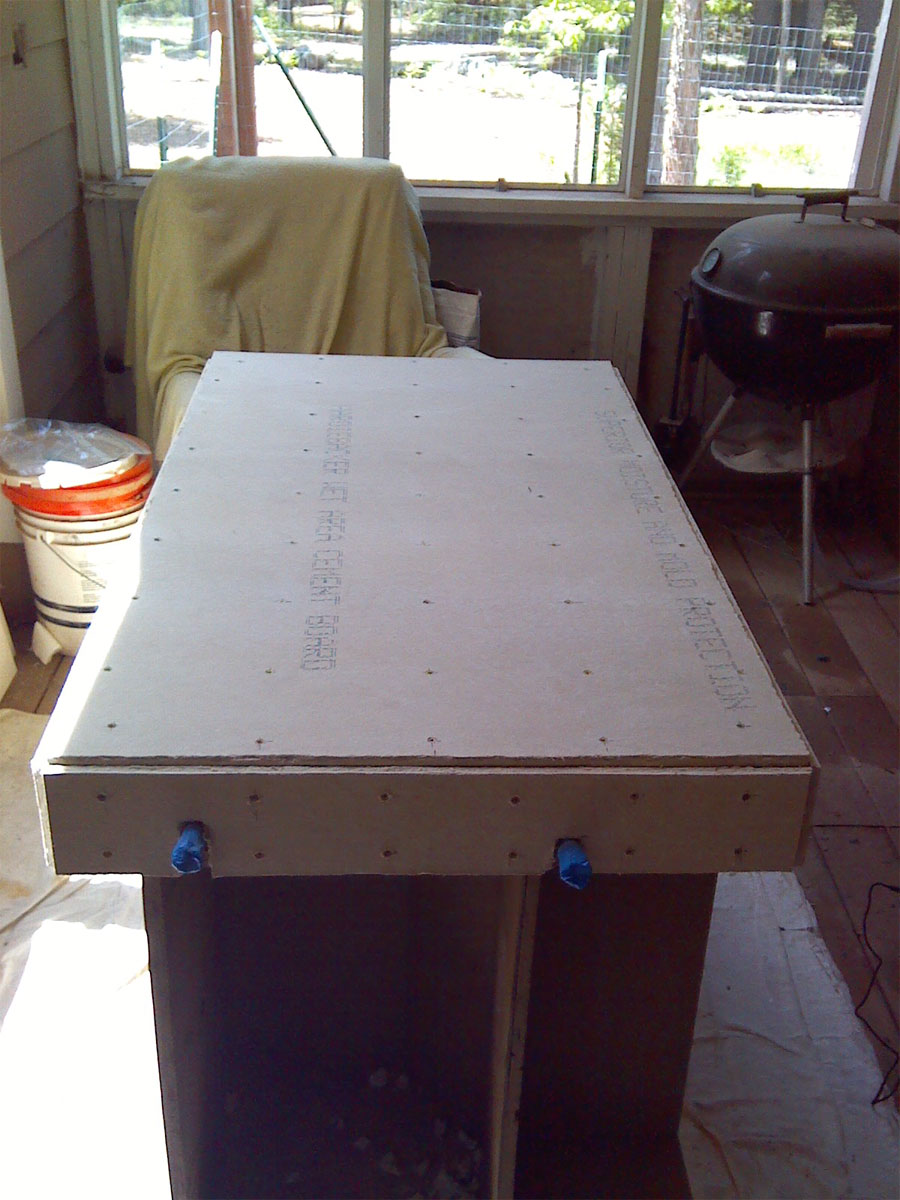
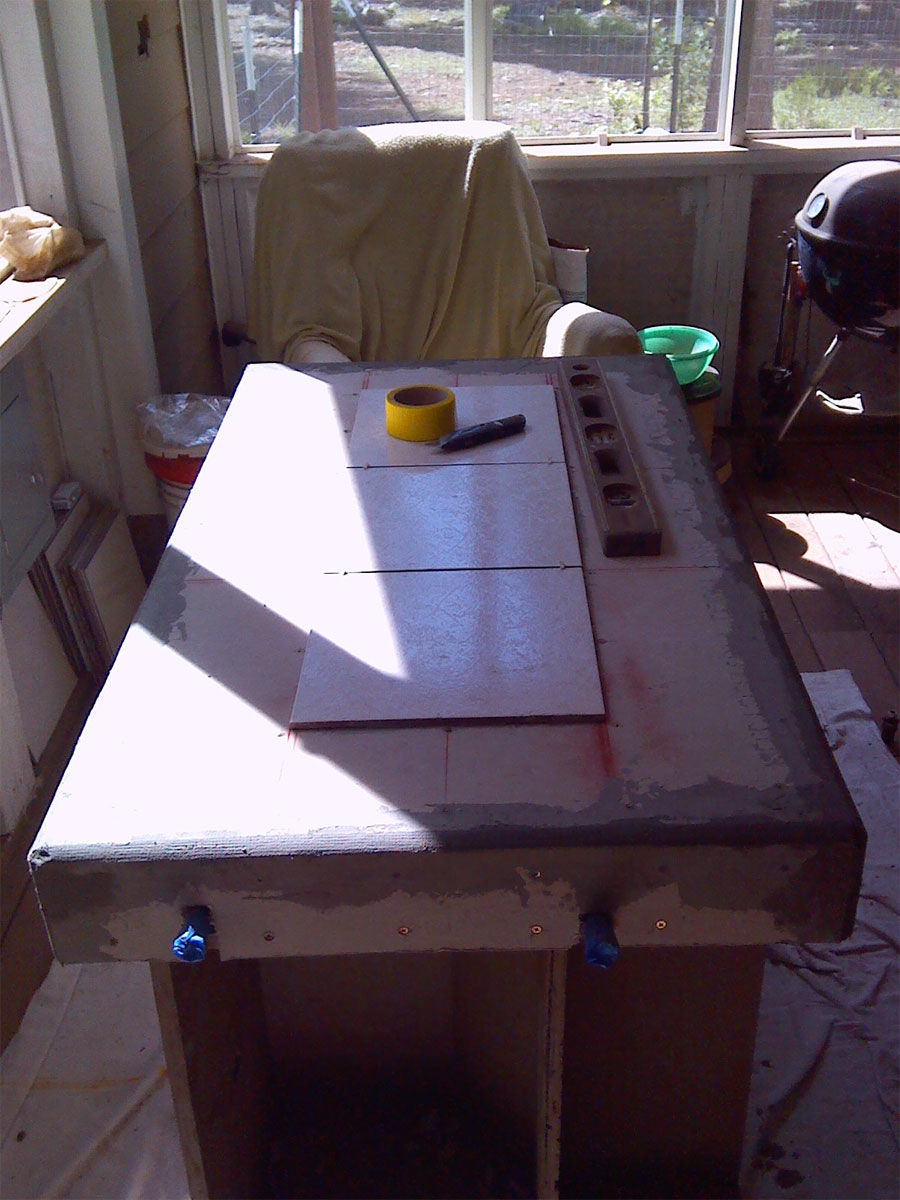


r8rphan
Well-Known Member
Tiling Day


r8rphan
Well-Known Member
Grouted! 


r8rphan
Well-Known Member
Progress!
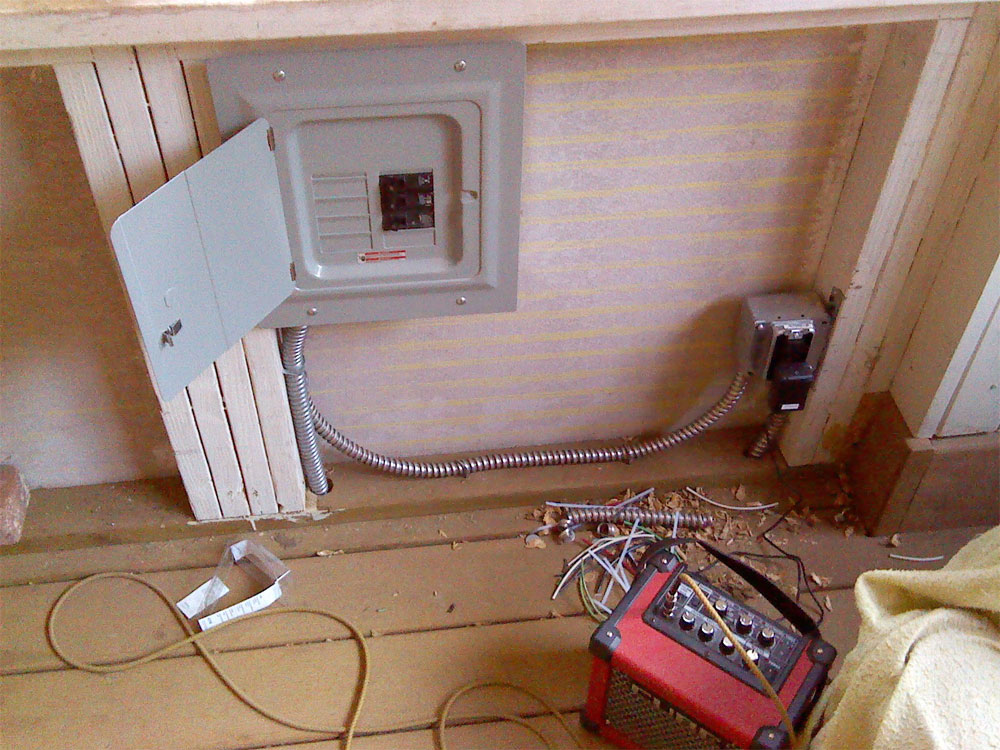
The new panel out on the porch... This is fed by a 50A 2P GFCI breaker located in the emergency power panel in thehouse...
30A 2P breaker will feed the brewery, and 20A 1P breaker feeds that plug next to the panel, as well as two quads for general purpose power along the same wall as the brewery (see th enxt picture)...
Later, this panel will feed several more outlets on the porch, as well as a couple outlets out on the deck, and power out to the picnic/firepit area..

r8rphan
Well-Known Member
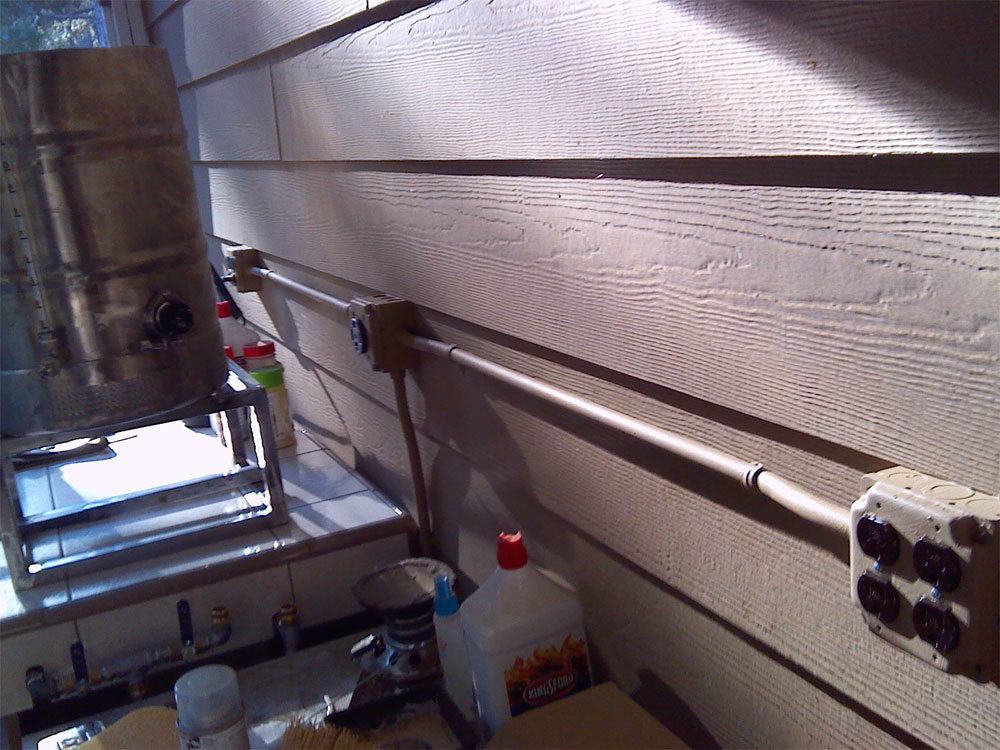
Here's the 30A 2P receptacle for the brewery an d the quad general purpose outlets...

r8rphan
Well-Known Member
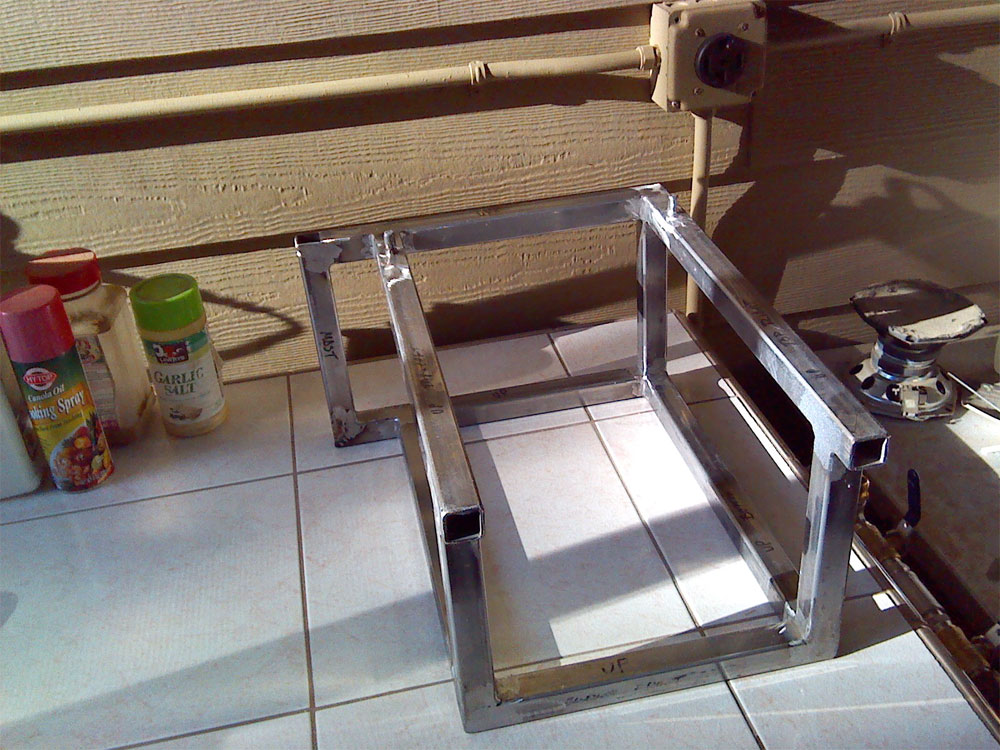
Here's what I spent today doing... Made the brew stand out of 1 x 1 x.109 steel square tube, welded it all up, and ground down all the welds

r8rphan
Well-Known Member
Here is is with the extension brace installed, this will be necessary to keep the whole shebang from tipping over when the crane swings the basket full of wet spent grains out to set them down next to the kettle after the mash..
I made it removeable, as I'm hoping to be able break everything down and store it in the bottom of the brew cart it's sitting on now...
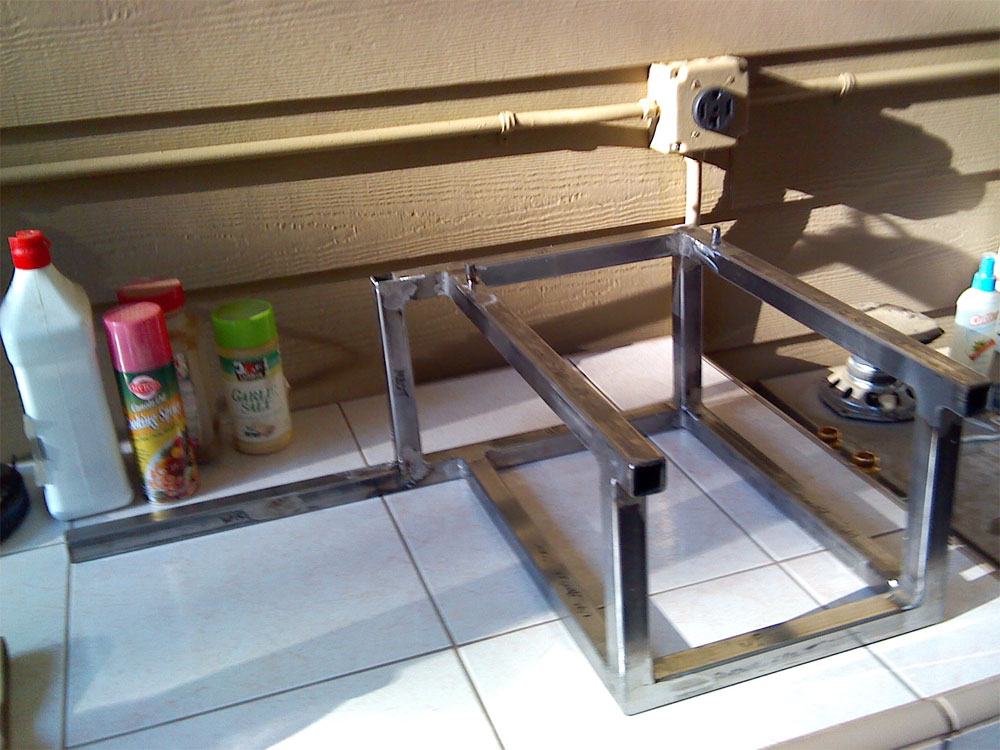
I made it removeable, as I'm hoping to be able break everything down and store it in the bottom of the brew cart it's sitting on now...

r8rphan
Well-Known Member
Here it is with the keggle sitting on it...
The mast will install into that square hole just to the left of the keggle (it says mast :; ) and then the swing crane will install on top of that...
I need to order some plastic caps for the ends of those tubes at the front and for the extension brace too...
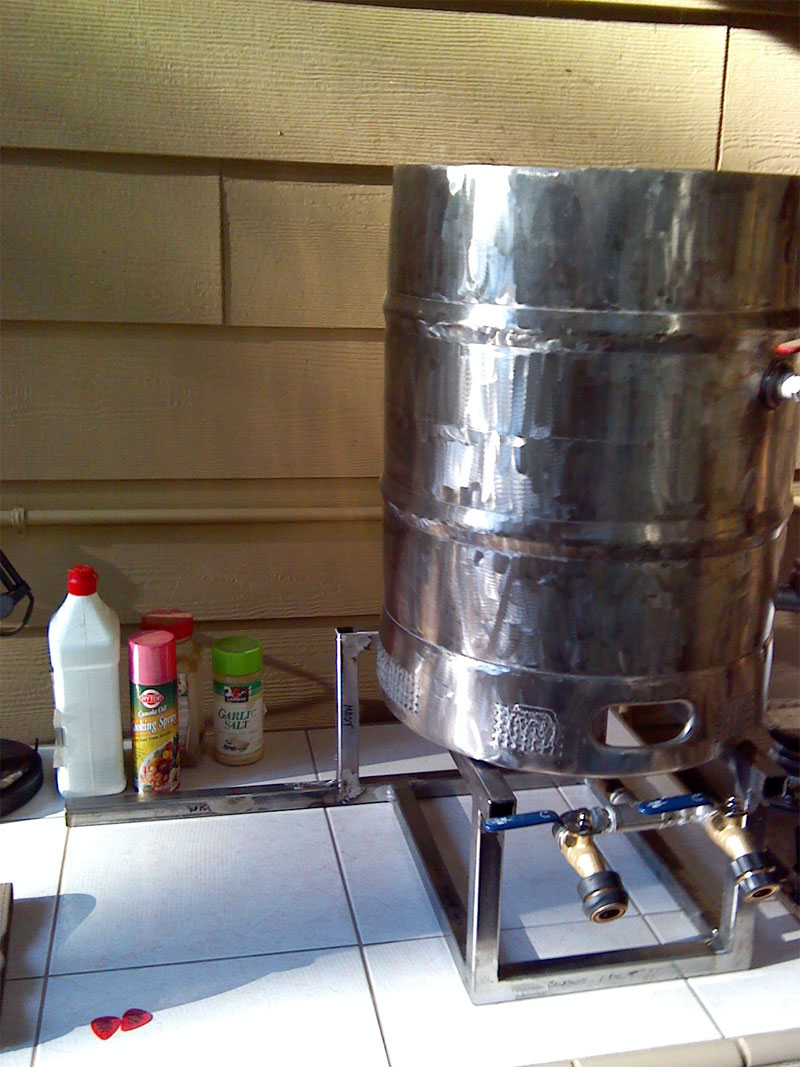
The mast will install into that square hole just to the left of the keggle (it says mast :; ) and then the swing crane will install on top of that...
I need to order some plastic caps for the ends of those tubes at the front and for the extension brace too...

r8rphan
Well-Known Member
This shows the 3/4" square steel bar that I welded into the extension.. it slides into the other section as shown in prior pictures...
Now, I gotta build the mast section and the swing crane assembly.. Then I gotta take the flap disk and some sandpaper to everything, paint it, and install the rubber feet on the bottom, and the pulleys and winch on the crane, as well as the bearings on the mast...
The electronics enclosure finally arrived yesterday, so now I can start designing all that, wiring it up, and putting it all in a nice wooden box..
I may have this thing to a point where I can do a basic test of the system... But will still have to build the crane assy, the COFI for the Mash, and finish up the plumbing..
I want to install another 1/2" spud in the keggle too for hooking supply water up the the system....
getting there.. progress...
I'm tried.. That little steel sculpture took all day... out in the hot sun...
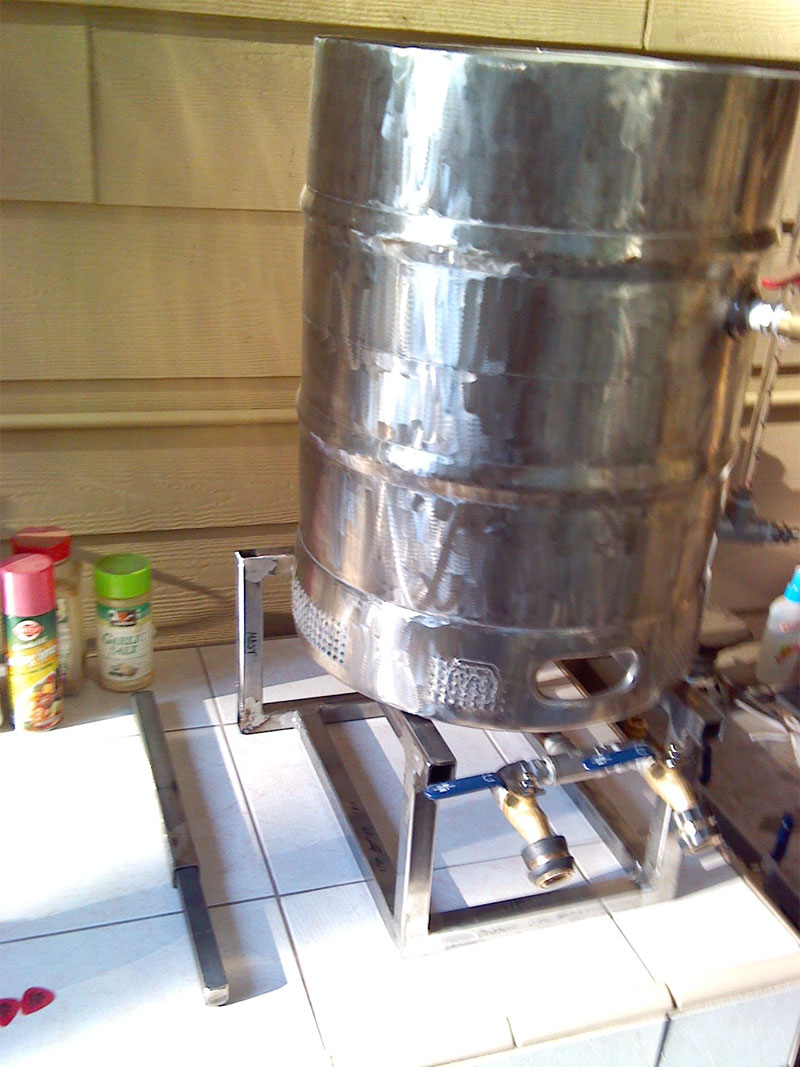

r8rphan
Well-Known Member
Started on the controller today, since work got rained out...
So, I made a panel face for the controller, engraving text and cutting holes in a piece of dual layer/color engraving/label plastic...
Came out awesome.. Then I took the bottom half of the enclosure I got (finally), which I'm using for the top half, and cut matching holes in it, A larger one for the meter, and installed the boil controller, the meter, the indicators and switches...
Hoping I have to morrow off too, as I'm on a roll and want to keep going.. Want to do the back half where the contactor, heat sink/SSR, relay, plugs, connectors, etc, will all go, so that I can start wiring it up this weekend...
Anyways, here's the user side of the controller and the inside of that half.. Very pleased with how it came out..
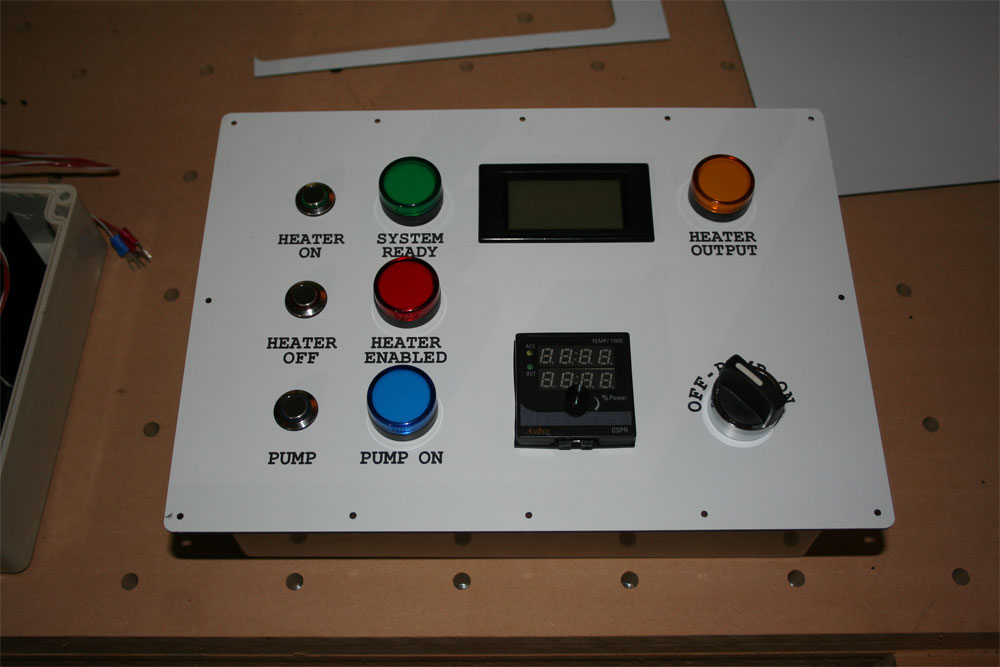
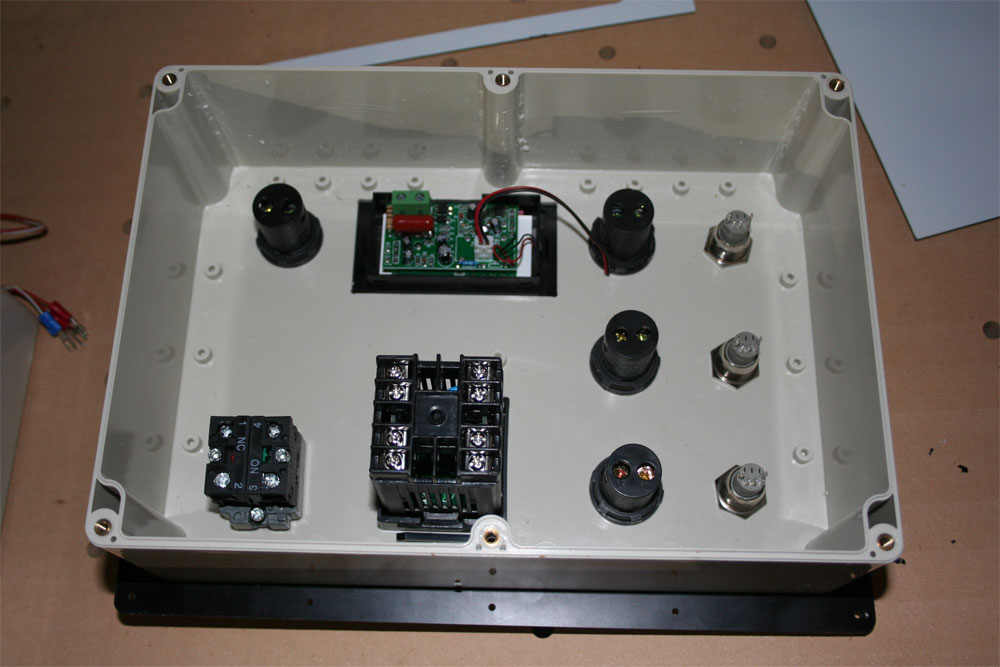


Similar threads
- Replies
- 12
- Views
- 3K


