My wooden jockey box

Homebrew Talk - Beer, Wine, Mead, & Cider Brewing Discussion Forum

Help Support Homebrew Talk - Beer, Wine, Mead, & Cider Brewing Discussion Forum:

This site may earn a commission from merchant affiliate links, including eBay, Amazon, and others.

Supergrump

Well-Known Member
Joined
Mar 29, 2011
Messages
97
Reaction score
40
Location
Abbotsford
I offered to serve beer at my cousin's wedding last weekend and I needed something nice to serve it in. I could have gone with a regular colman cooler style jockey box, but for a wedding I wanted to serve it in style. So, I build a wooden Jockey box:


jockey-box-front-60868.jpg

jockey-box-side-60870.jpg


The box is made from pine, stained and varnished. The fittings are brass.


jockey-box-back-60866.jpg


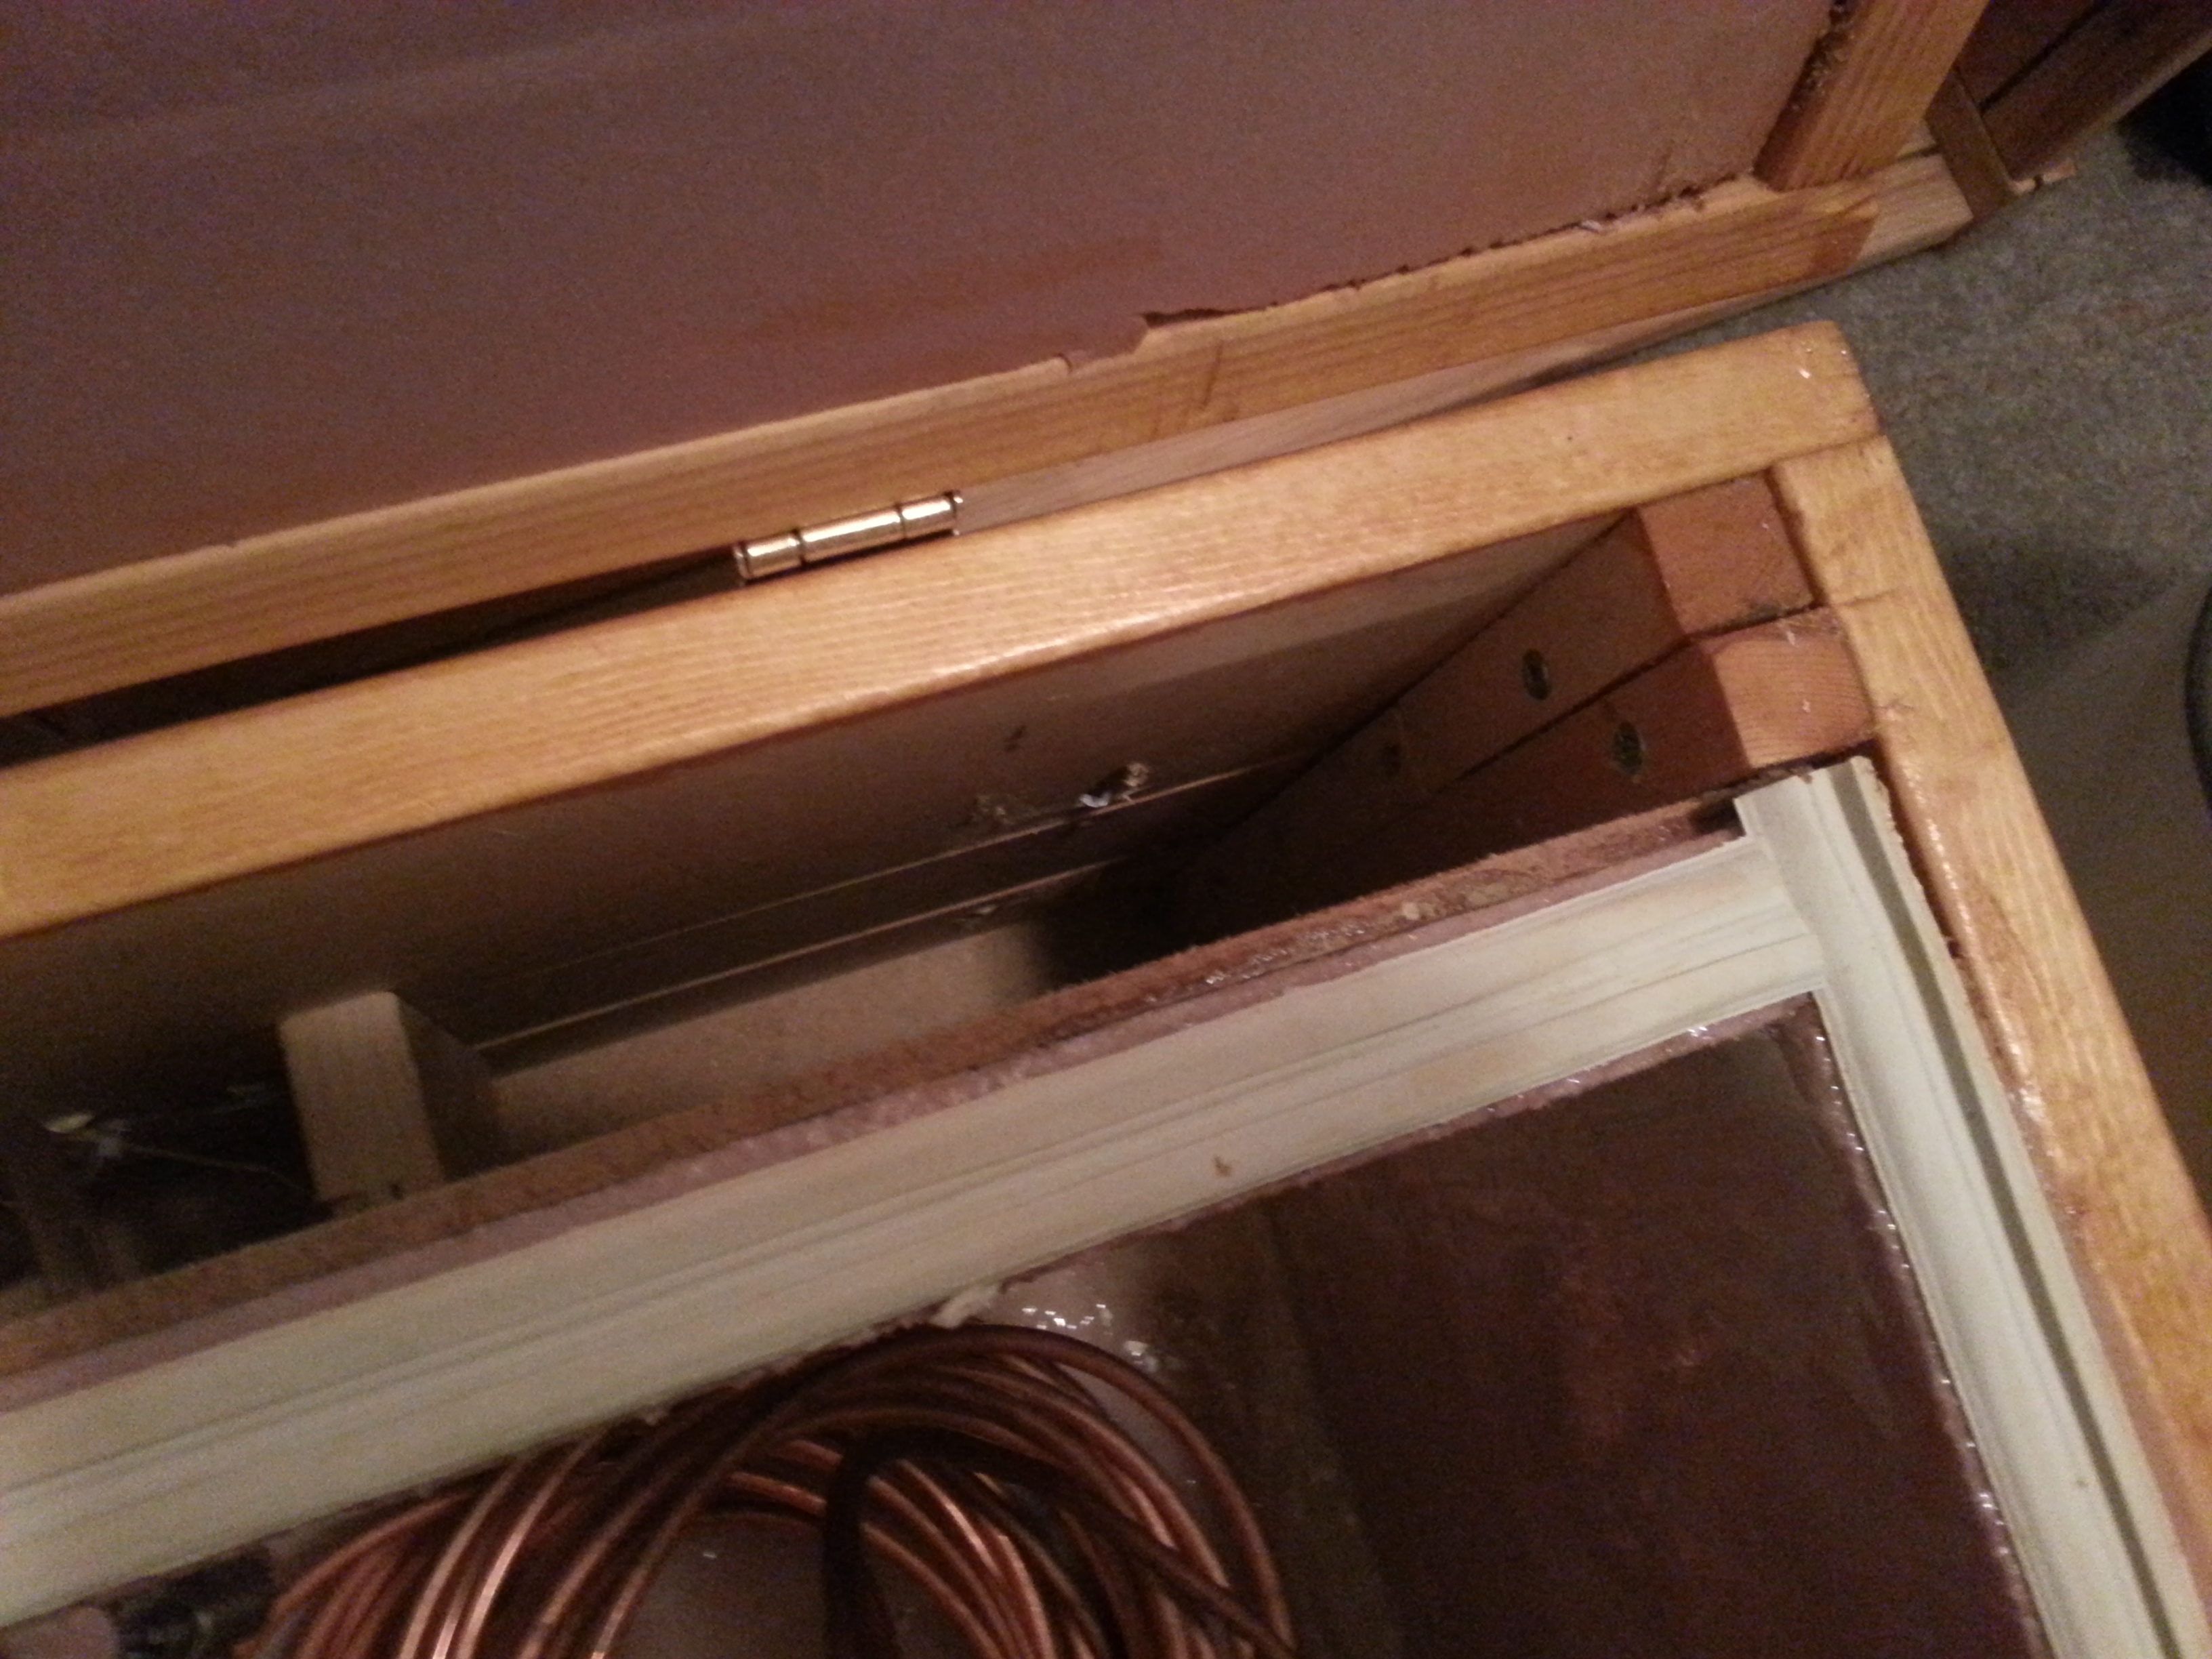
I made a false back on the inside so I could route the beer lines discretely out the bottom of the back. I can alternatively send the lines out the front near the drip tray if I'm serving with the back facing the 'customers'.


jockey-box-drawer-closed-60867.jpg


The drip tray is a drawer that closes for easy transport.


jockey-box-inside-60869.jpg


The inside is insulated with 1 inch pink insulating Styrofoam. I sealed the entire inside with 2-part epoxy (West System brand) to water-proof it. You can also see the false back that routes the beer lines down to the bottom of the box as it exits.

Regarding the use of copper - I'm very aware that "copper post-fermentation is a no-no". I decided to go with copper, then started reading these forums and saw that phrase quoted everywhere like a broken record. I did get a bit worried and tried to source out either a chill plate or stainless coil, but by that time I only had 1 week till the wedding and couldn't get either locally on time. I intend to upgrade to stainless eventually (probably before it's next use, next summer) so no need to freak out in the replies. I'm mostly looking to show off the box itself, not the functional parts of the jockey box.

I served 30 gallons with this last Saturday and it worked flawlessly. Despite the warnings of copper use - there was no off-taste imparted, and the beer poured cold for 8 hours.
I did have one snag - I filled it with ice while the lines had water in them (I flushed the sanitizer out just prior to setting up) and had a small panic when the beer wouldn't flow after hooking up the kegs. After frantically pouring water over the copper coils to thaw them with a long queue of thirsty wedding guests waiting, the beer started flowing and everything worked great for the rest of the evening. Lesson learned for the future.

This has been a source of stress for the past 4 weeks (building the box and worrying about the quality of my beer). I'm really glad it all came together in the end.
 
Awesome build, man. All looks good. To prevent freezing next time, maybe stick to 30% ice by volume until you're actively pouring?
 
I figure if I just prime the lines with beer it won't freeze when I put the ice in. Or if I put some water in the box first it will distribute the cold a little better so the lines don't freeze right away. I guess that was your suggestion regarding 30% ice per volume. I can't be the only one who's experienced this?
 
I had a good talk with one of the guys from Switchback, who was operating a similar device to yours... his was in a cooler, but internally it was very similar. He didn't mention any freezing issues, but his cooler was two-thirds water... which is where I got the 30% figure from.

With coils as long as yours are, I really doubt you'll need water that's any colder than your desired serving temperature. The coils in his chiller were about half the length and it served just fine!

Edit: He used copper too, and it was official brewery hardware. I really doubt it matters for the amount of time the beer is in it.
 
The slide out drip tray is slick.

Did you chill the kegs as well? Or warm keg > jockey box > cold pint. Any foaming issues?
 
That looks great, it looks like something that would be in a wedding. I've never had the freezing problem as long as the lines were purged. Jockey boxes are a lot of fun. When you show up to an event with the beer and the box, it's like "OK start the party, he's here". I've taken mine to BBQ cook off's, camping, fishing, and other peoples houses. It's an all around great way to share home brew.
 
That's very cool. Nice job. :rockin:

I have a recently acquired plate chiller looking for a good home. Unfortunately my woodworking skills would most likely result result in something that resembles an orange crate more than a treasure chest.
 
Treasure chest is an appropriate description, thanks.

I researched whether the old bootleggers had a traditional type of case that they used to store (or hide) their beer but couldn't come up with anything. I tried to model it loosely from a hope chest or a sea chest.
 
responding to some questions from above:

BennyHaHa: I didn't chill the kegs, they were room temperature going into the box. I tried it with 25 Ft of coil earlier and had to double up to get the desired temperature. I measured and the output was about 2 degrees Celsius (Im Canadian). I have no concerns serving from a warm keg in the future, but in hindsight I'll try to chill the kegs for carbing. I had a difficult time getting the proper carb levels with room temperature kegs.
No foaming issues at all - at least no undesired foaming, as long as it was poured properly...

AcidJazz54: the drip tray is just a reservoir that has to be emptied periodically. I might add a drain line as a later enhancement.

I naively assumed the tray would only have to catch the odd drip, but you know what they say about Ass-U-Me. I cringed when I saw wedding guests drop their cup on the drip tray (10 inches below the taps) and open up the tap to let the beer flow freely. After quickly ending up with a cup of foam they dumped it into the drip tray and tried again. I had to eventually write a friendly note to please not dispose of beer into the drip tray or it will overflow. I also spend a lot of time educating people on the proper way to pour.
 
I received a PM asking for some details on the build. I didn't take photos of the build so I'll describe it as best I can:

the dimensions are 24 in. wide, 15 in. deep, and 16 in. tall (including the lid). The lid is 1 1/2 in. tall so the box without the lid is 14 1/2 in. tall. I tried to follow the Golden Ratio ( 1 : 1.6) for the width and depth dimensions so I set the width at 2 ft (seemed like a nice round number) and therefore the depth needed to be 15 inches. All wood is 3/4 thick. The side walls need to be 1 1/2 inches less than the total 15 in. depth because the front walls add 3/4 each to the overall thickness of the side wall when the box is assembled. This means the side walls need to be 13 1/2 in wide.

I build the walls out of 6 in. and 4 in. pine planks. The 6 in. planks are actually 5 1/2 in wide and the 4 in. planks are 3 1/2 in. wide (true measurements) so a 4 in. board sandwiched between two 6 in. planks makes the box 14 1/2 tall. You can probably get away with buying two 8 ft planks of the 6 by 3/4 boards and one 8 ft plank of the 4 by 3/4 pine. I just bought the pine boards from Home Depot in their moulding section.

I used glue and pocket holes to screw the 6 in and 4 in planks together to assemble each wall. The pocket holes may not be necessary if you don't have a pocket hole jig. Also, you could make life easier and just buy a pine board that's 16(ish) inches wide. I know Home Depot sells pine shelving that is 16 inches wide which would work well as the walls.

Before screwing the walls together to form the box, I dadoed a recess into the inside of each wall to keep the false bottom of the box secure. The false bottom of the box is made of 1/4 inch hard board (I had some on supply) so the dado had to be 1/4 in thick. I also made the dado 1/4 in deep. This means the false bottom needs to be an extra 1/2 inch wider than the inside dimensions of the box because 1/4 of it is inserted into the inside walls on each side when the box is assembled. I overlooked the fact that the dado would be exposed on the side of the front walls, so its visible from the outside. I had to fill it with wood putty:
20131007_201021-61164.jpg


more in the next post...
 
I assembled the box by gluing and screwing together the walls with a simple butt-joint (front walls overlap the side walls and screw into the front walls through the edge of the side walls). If you look at the original post you'll see small circles near the edges of the front walls. I counter-sank the screw holes and then glued wood plugs to cover up the screw holes and hide them somewhat.

Before assembling the box I ripped a 2 inch strip off of the bottom of the front wall. That 2 inch strip serves as the front of the pull-out drip tray drawer. The dado for the false bottom was cut 2 1/8 in. above the bottom edge so it sits just above that 2 inch space I cut for the drawer.

I mentioned the pocket holes that hold the walls together are unnecessary. The counter-sank holes that hold the walls to each other were unnecessary as well (If I thought it out properly I would have avoided them). Inside the box I added a 3/4 by 3/4 riser in each corner to add stability. I could have screwed the entire box together by inserting my screws from the inside of the box out, into the walls, through these risers. The risers act as a brace and hold the corners together securely.

The box also has a false back. I used 1/4 hardboard for that as well (again, I had it handy). I added another 3/4 riser in the back, doubling up, to create a space for the false back:

20131007_200956-61163.jpg


I just screwed the false back over top of that additional riser. I also added some spacers near the middle out of scrap wood (1 1/2 in thick) to give the false back some stability.

I lined the entire inside of the box (bottom first, then walls) using 1 in. thick pink insulating Styrofoam. Don't know the dimensions - I just measured once the box was complete and cut it to size. I discovered that you should cut that stuff with a saw, not an exacto blade. I used contact cement to glue the Styrofoam to the inside of the box. I then used drywall mesh tape on all edges and coated the Styrofoam with 2-part quick-set epoxy - WestSystem brand... its NOT cheap. I also had to thicken the epoxy to seal the corners and inside edges. WestSystem sells special thickener but I just used talcum powder. After sealing the edges I used 3 coats on the inside walls and floor.

I used cheap weatherstrip for the top edges of the Styrofoam where it would touch the underside of the lid.

The lid is simply 1/2 in thick pine plywood. I also had some of that lying around, but you could get away with buying a quarter sheet if you can find one. I wrapped the plywood with 1 1/2 by 3/4 pine to give the lid some depth. Again, I just screwed the pine board to the edges of the plywood and hid the screw holes with wooden pegs. You can see the 'hidden' screw holes in the original post. With the 1 1/2 in by 3/4 pine wrapped around the 1/2 in plywood, the lid is exactly 1 inch deep which holds more 1 inch Styrofoam. I didn't bother sealing the lid Styrofoam with epoxy because I didn't anticipate it being in contact with water too much.

The entire box was given 2 coats of oil based stain and 2 more coats of oil based flat (or was it semi-gloss?) polyurethane finish.

I won't bother listing any details on the functional parts of the jockey box. Theres lots of posts on how to build a jockey box out of an existing cooler or box. Basically, just drill holes for the shanks in the front, and send the beer lines out the back.

I'll post more on the build of the drawer when I'm less tired of typing...
 
Back
Top