• Please visit and share your knowledge at our sister communities:
  • If you have not, please join our official Homebrewing Facebook Group!

    Homebrewing Facebook Group

Countertop Brutus 20

Homebrew Talk

Help Support Homebrew Talk:

This site may earn a commission from merchant affiliate links, including eBay, Amazon, and others.

jkarp

Well-Known Member
Joined
Jun 15, 2008
Messages
2,089
Reaction score
58
Location
Elizabeth, CO
OK, so my pic generated a number of requests for a detailed write up of my little system so here it goes...

What is a Brutus 20? In a nutshell, it's a no-sparge, constant recirculation direct fired mash system. Lonnie Mac, the creator, has since taken his Brutus 20 page down for some reason but the original is reachable via archive.org here. It's definitely worth a read if you're unfamiliar with the concept. Right or wrong, superstition or whatever, I had found from my brewing experience over the years that my beers got a LOT better when I quit playing the efficiency game. The beers just tasted better when I worked to keep efficiency in the 70-75% range. When I stumbled across Lonnie's design, I knew its efficiency "limitations" were exactly what I wanted. I also immediately saw some simple design improvements I could make that would result in an extremely compact system that would allow me to keep my brewing indoors. I'm just not a fan of spending 5 hours in the garage in the heat of the summer OR when the snow's flying in the winter.

OK, so let me knock out a few of the questions I frequently get asked about my rig right off the bat:

  • Could this be scaled to 5 gallon? - Maybe. I did a lot of testing of the boiling ability of a single 120V 2KW element. 5 gallons seemed to be the limit for a good rolling boil. Considering a full 5 gallon batch would start with 6-7 gallons pre-boil, you'd want to do two 120V elements or better, go 240V. Also realize the 5 gal MLT will limit your mash size.
  • Does the high watt density element scorch the beer? - No! I've done everything from pils to barleywine on this system and have never seen or tasted a hint of scorching.
  • Can you do high gravity beers? - Absolutely. In fact, my efficiency varies more from the amount of adjuncts in the grist than it does wort gravity. I saw 74% on the last 1.100 barleywine I did.
  • Can you step mash? - Sort of. It's more of a ramp than a step however. I've doughed in at 145 and recirculated the system up to 158 with good results. It takes 15-20 minutes to ramp through the mash range.

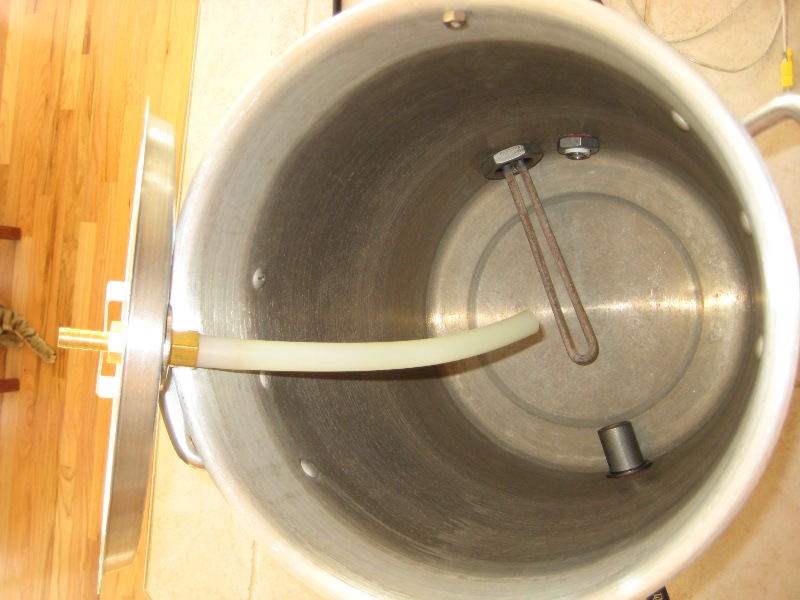
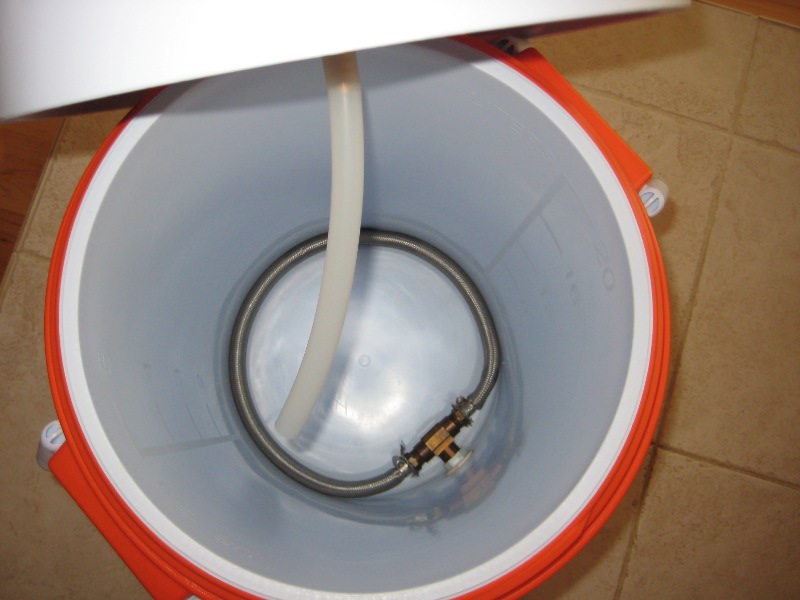
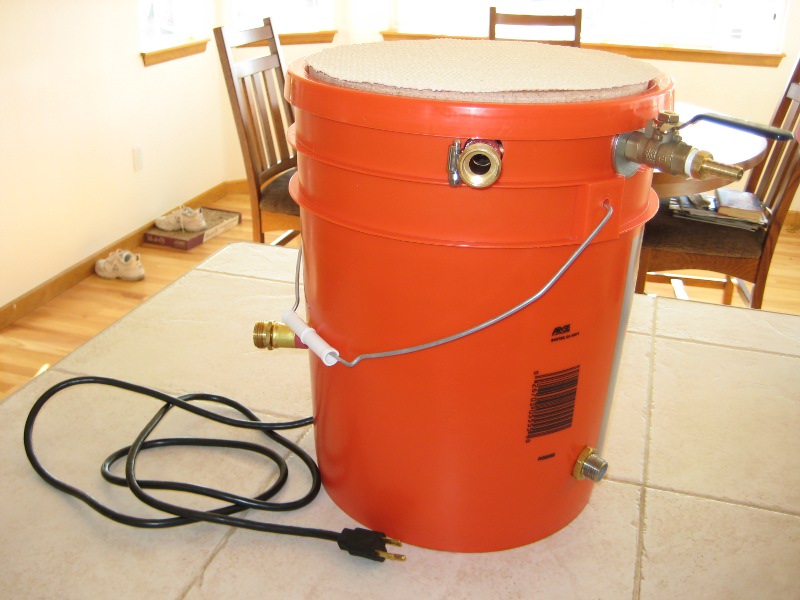
So here's a cheesy diagram of the system. The kettle is plumbed to a HD bucket that has the pump and counterflow chiller inside. The CFC doesn't do anything until chill time, but having it permanently plumbed minimizes plumbing changes during a brew session (keeping drips to a minimum indoors) and it's extremely space efficient. The CFC output runs to the top of the MLT and the MLT output flows via gravity back into the kettle. Using gravity eliminates the 2nd pump from Lonnie's design.

Setup for mash (pic 1)

Setup for chill (pic 2)

Coming up next, more pics! Stay tuned...

brutus20-1.jpg


brutus20-2.jpg
 
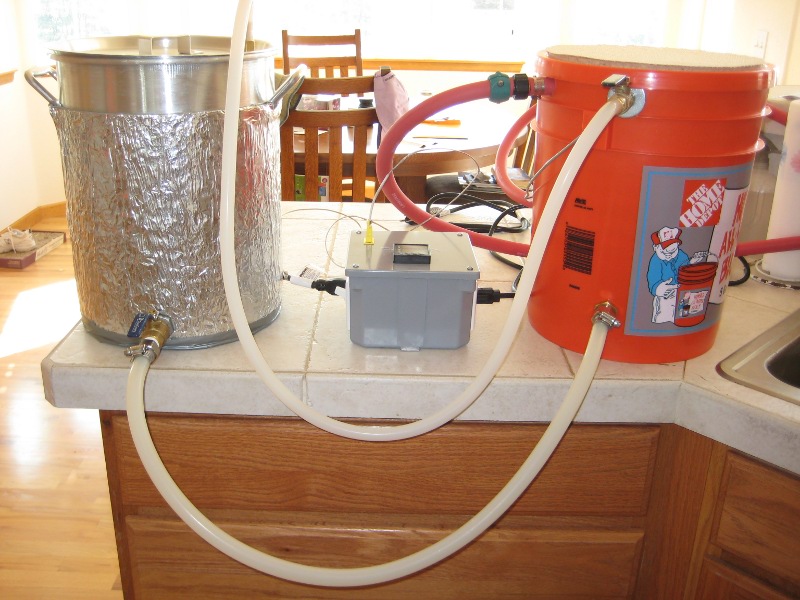
Full setup, ready for mash recirculation (pic 1)

Full setup, back view (pic 2)

Full setup, chill mode (pic 3)

Coming up next, parts list! Stay tuned...

brutus20-10.jpg


brutus20-11.jpg


brutus20-12.jpg
 
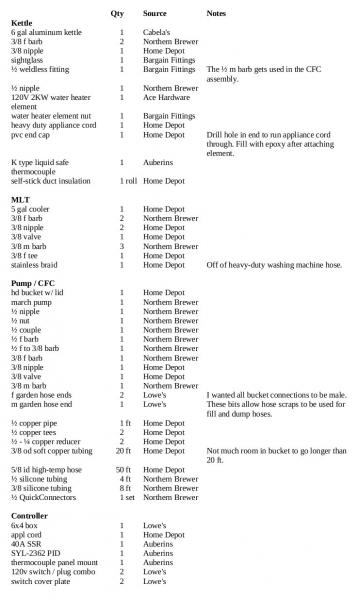
I haven't included pricing because one, I built this piecemeal over the Winter and don't remember everything, and two, lots of the bits came from my scrap bins. Pretty sure this is a relatively complete list though and I've included the sources where stuff should be available. All total, it should cost $400-500 to build this system.

Two things that are NOT included in this list are fender washers and hose clamps. Lots of both are needed. Just get a big bag each of stainless clamps for 3/8" and 5/8". Fender washers are used to shim up various bits around the 3/8 nipples. Get a bunch of zinc ones and at least 2 stainless ones for the insides of the kettle and MLT lids.

brutus20-13.jpg
 
That's really impressive. I might have to look into something like this for the winter months.
 
So how do you step mash? Just recirculate? Doesn't this dilute the mash?

I like it, nice and simple.

Edit: or do you use the CFC in a HERMS like setup?
 
Cheers JK! And thanks for taking the time to post this. This looks so very cool.
 
So how do you step mash? Just recirculate? Doesn't this dilute the mash?

Yup. I run the system with the full pre-boil target volume, much like the brew-in-a-bag guys do. I've never hand any problems with conversion and frankly prefer a thin mash. That said, I rarely do step mashes. Most of the malts I use convert so fast there's little point in stepping.
 
Yup. I run the system with the full pre-boil target volume, much like the brew-in-a-bag guys do.

Hmmm, so it's kinda like BiaB, but you don't need a huge boil kettle (to hold all the volume) or lift all the grain plus water in a bag, just let gravity do the work. I think you're on to something. Do you ever recirculate just to main temps? I guess the cooler eliminates the need for that.

I found your other thread, so you recirculate before doughing in? So need to worry about the initial heat loss of the cooler.

Also, you ever have any problems with the grain sticking and the recirculation going very slow?

I currently have a 2.5 tier all-electric RIMS rig and have been wanting to simplify (I got 4 kids, so anything to simplify/save time). I've been serious thinking of a BiaB rig, but yours is very intriguing. I tried some Brutus 20 style brews before, but hadn't thought of it in over a year.
 
JKarp -
2 Questions for you....
In your kettle, do you see much grain left from the initial circulations until the recirc clears it up? I ask because your BK is your RIMS heater. Other systems don't dump to the BK until after it is all running clear already.
Would mashing thicker and heating the extra water on the side in the BK affect your efficiency? I mean not circulating until after conversion. So in total your system is holding the full boil - but you start with a thicker mash and not circulate. (I know it's a RIMS as in recirculating; just wondering.

-OCD
 
Cool design, I like the compactness of it all, but I have a couple questions.

How do you drain the cfc after mash and before boil, or do you recirc during boiling? For that matter, why have the cfc inline during mashing? Is that so you don't have to swap hoses?
 
Do you ever recirculate just to main temps? I guess the cooler eliminates the need for that.

Not unless I'm ramping to a new temp. Cooler holds temp great.

I found your other thread, so you recirculate before doughing in?

Well, the strike water needs to be pumped up to the MLT, of course. I recirculate as the strike temp approaches to warm up the MLT. Once strike temp is reached, I close the MLT valve and allow it to fill to the desired infusion amount.

Also, you ever have any problems with the grain sticking and the recirculation going very slow?

Actually, the number of problematic mashes I've had has dropped to zero since I built this. I guess it's because there's always plenty of water in the MLT so the risk of compaction is reduced. Even if I did have a stuck mash, I'd just reach in and stir it up and reduce the recirculation rate.
 
In your kettle, do you see much grain left from the initial circulations until the recirc clears it up? I ask because your BK is your RIMS heater. Other systems don't dump to the BK until after it is all running clear already.

I've never seen actual grain get past the braid, but runoff does start very cloudy. After 30-45 minutes of recirculation, the wort in the kettle is so clear I can see the bottom.

Would mashing thicker and heating the extra water on the side in the BK affect your efficiency? I mean not circulating until after conversion. So in total your system is holding the full boil - but you start with a thicker mash and not circulate. (I know it's a RIMS as in recirculating; just wondering.

Not sure I fully understand, but there's any number of ways you could play with mash thickness and infusions really. Maybe start with a 1:1 mash and then heat and pump up additional infusions as desired w/o recirculation. You'd have to take into account a little heat loss from the CFC but that shouldn't be a big deal.
 
How do you drain the cfc after mash and before boil, or do you recirc during boiling? For that matter, why have the cfc inline during mashing? Is that so you don't have to swap hoses?

No need to drain the CFC. By design the wort is the same throughout the system after mash recirculation. When the boil is done, I make the single plumbing change necessary by routing the CFC-out to the lid of the kettle. Then I recirculate the boiling wort to sterilize the pump and CFC.

Not swapping hoses is exactly my reason. Plumbing changes can get messy and being indoors, I wanted to minimize spills.
 
JK, how long is your brew day?

Varies a bit with recipe, but it basically goes like this:

30 min heating to strike temp
60 min mash
30 min recirculation
60 min boil
20 min chill
40 min cleanup

So it's 4-5 hours, depending on boil time and how efficient I am at multitasking. I will say ANY system that uses PIDs is a lot more hands-off as you're not worried about checking temps all the time.
 
Hey Lonnie! I definitely owe you a beer sometime for your design.

I have family in CO! Maybe one day! Keep the pics and ideas coming!

You know you made a pretty profound statement at the start of this thread that is very dear to me...

"I had found from my brewing experience over the years that my beers got a LOT better when I quit playing the efficiency game."

Good going my friend...

Brew on!
 
This is a great compact system... and not too poorly priced... I may have some questions after thinking about it later...

One thing about efficiency for you (and/or Lonnie)--> How do you figure you produce repeatable beer when not monitoring efficiency? I understand that you can use the same amounts of grain, same times, temps, AAUs, fermentation temps to contribute as well... but if your % extraction is different then the amount of fermentables you have will be different effecting IBUs....and so on.

Either way, I love the system!
 
One thing about efficiency for you (and/or Lonnie)--> How do you figure you produce repeatable beer when not monitoring efficiency? I understand that you can use the same amounts of grain, same times, temps, AAUs, fermentation temps to contribute as well... but if your % extraction is different then the amount of fermentables you have will be different effecting IBUs....and so on.

I do monitor efficiency, taking OG and FG readings like everyone else. Just like any brewing system, you get to know its performance characteristics with use. I know that mine, along with my "normal" brewing process, produces wort in the 70-75% efficiency range so I build my recipes with that number in mind.
 
JK-

Ok, so I am a bolt on kind of guy, when it gets to wiring, I usually seek out an expert. I think I have most of this figured out except for the controller. What level of skill is required to put this together? Can you provide a quick how to, or point me in the right direction for wiring this up? Thanks.
 
Ok, so I am a bolt on kind of guy, when it gets to wiring, I usually seek out an expert. I think I have most of this figured out except for the controller. What level of skill is required to put this together? Can you provide a quick how to, or point me in the right direction for wiring this up? Thanks.

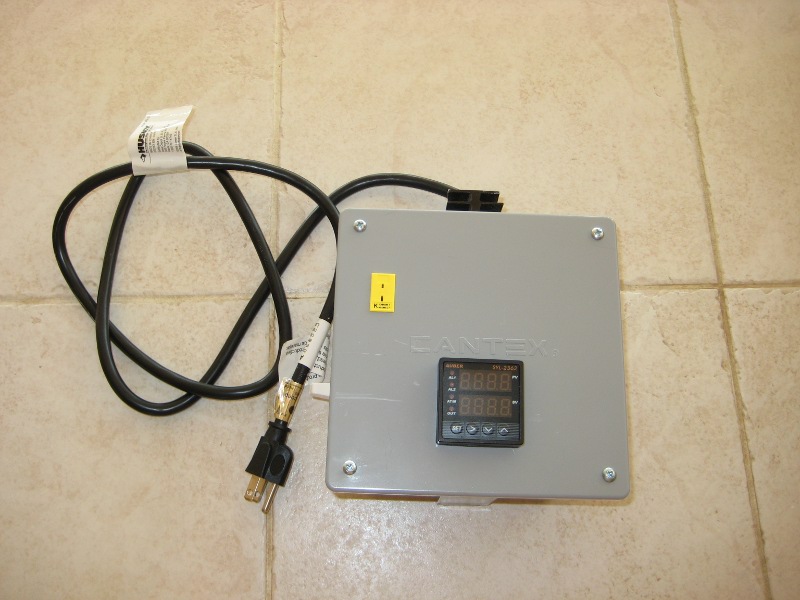
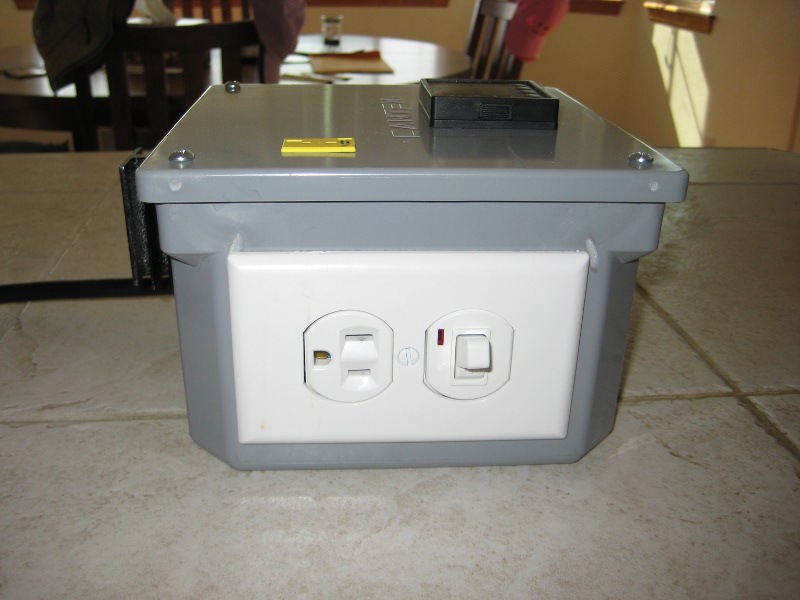
Wiring the PID, thermocouple, and SSR are really pretty simple - just follow the included directions. Switches are going to vary depending on what you buy at the hardware store, but they'll also include directions. I found these combo outlet and switch (with indicators) at Lowe's. Setting them up to have the switch drive the outlet was as simple as breaking off a little tab on the outlet, per directions, and wiring a jumper so the switch feeds the outlet. On the kettle switch I wired the SSR inline as this jumper. This way, the physical switch has the ultimate say on when power goes to the kettle. If the switch is on, then the SSR opens/closes the jumper, ultimately delivering power to the kettle outlet under PID control. The appliance cord was WAY long so I cut it to a manageable size and used the excess for the inside wiring.

I'll pop open the box and take a pic of the inside. It's really not tough. Having a simple multimeter to test continuity during the build can help to make sense of things as you go along too.
 
Do you constantly recirculate during the mash, or do you mash, then recirculate everything (including sparge water)? I like the idea of just throwing the sparge water into the recirculation, seems like it would work well.

How many gallons do you brew with this setup (I see you said < 5)? Is the underpowered element the only limitation on going to 5gal?

Unless I'm doing a step (ramp) mash, I don't normally recirculate until the mash is complete. I normally do 3.5 gallon batches. Yes, the 2KW element is the biggest limiting factor on going to 5 gal, but the 5 gal MLT would also limit mash size a bit.
 
Thanks for the quick response, I might be building something similar to this soon, I only have 120, so that's a limiting factor for me, but I would love to do bigger batches than the 2.5 gal I have been brewing lately.
 

Latest posts

Back
Top