Through wall taps

Homebrew Talk - Beer, Wine, Mead, & Cider Brewing Discussion Forum

Help Support Homebrew Talk - Beer, Wine, Mead, & Cider Brewing Discussion Forum:

This site may earn a commission from merchant affiliate links, including eBay, Amazon, and others.

BullGator

Supporting Member
HBT Supporter
Joined
Apr 16, 2011
Messages
314
Reaction score
3
Location
Charlotte
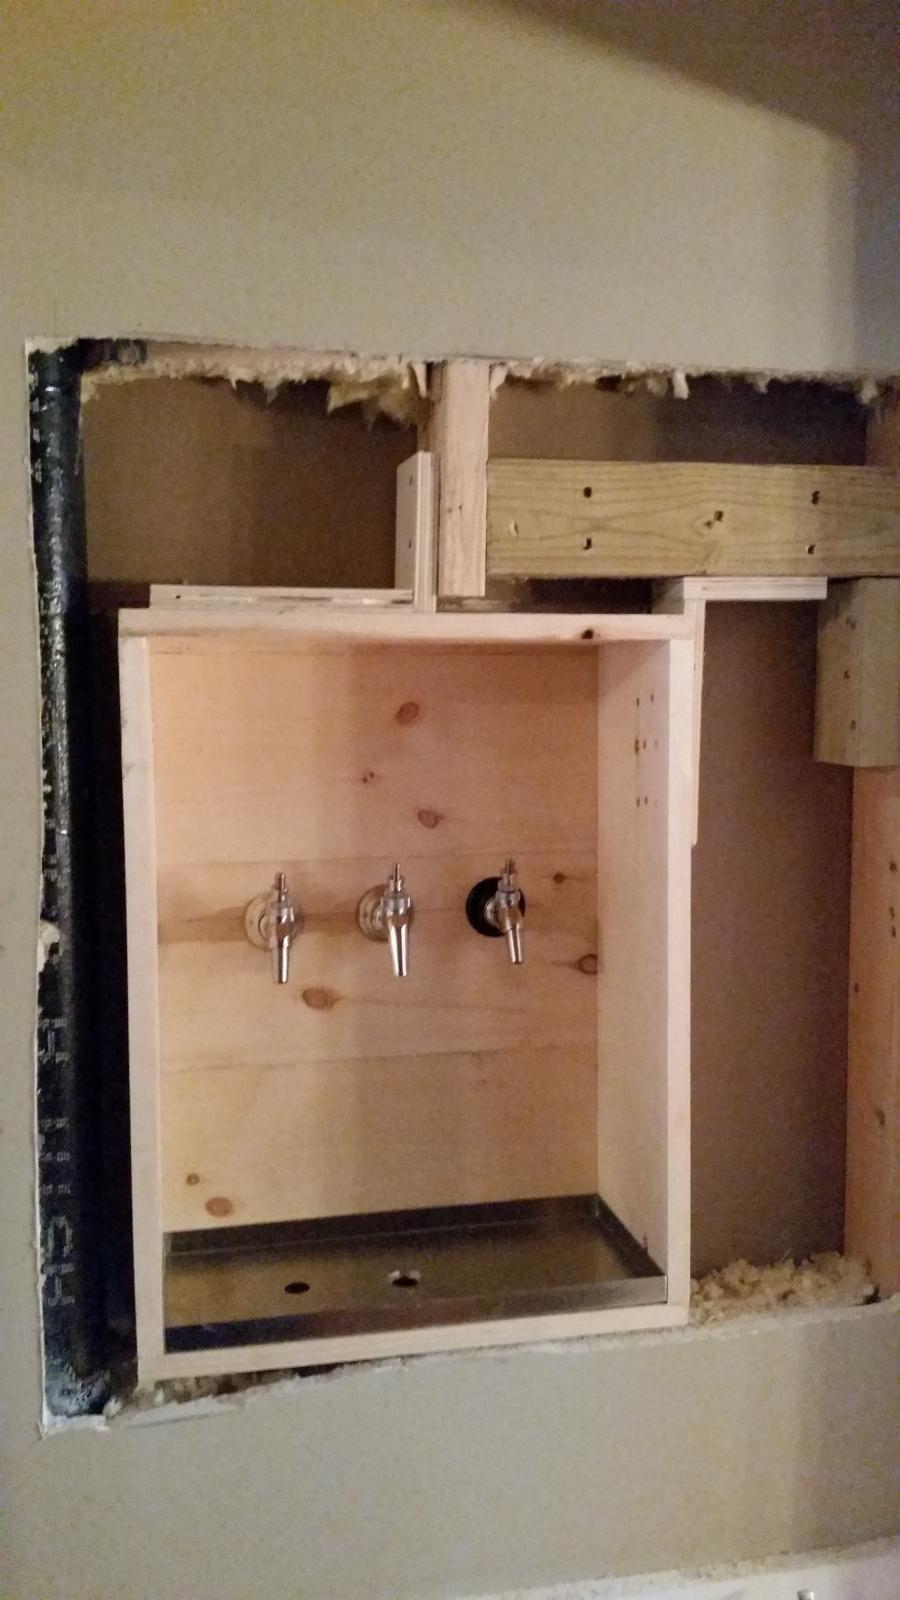
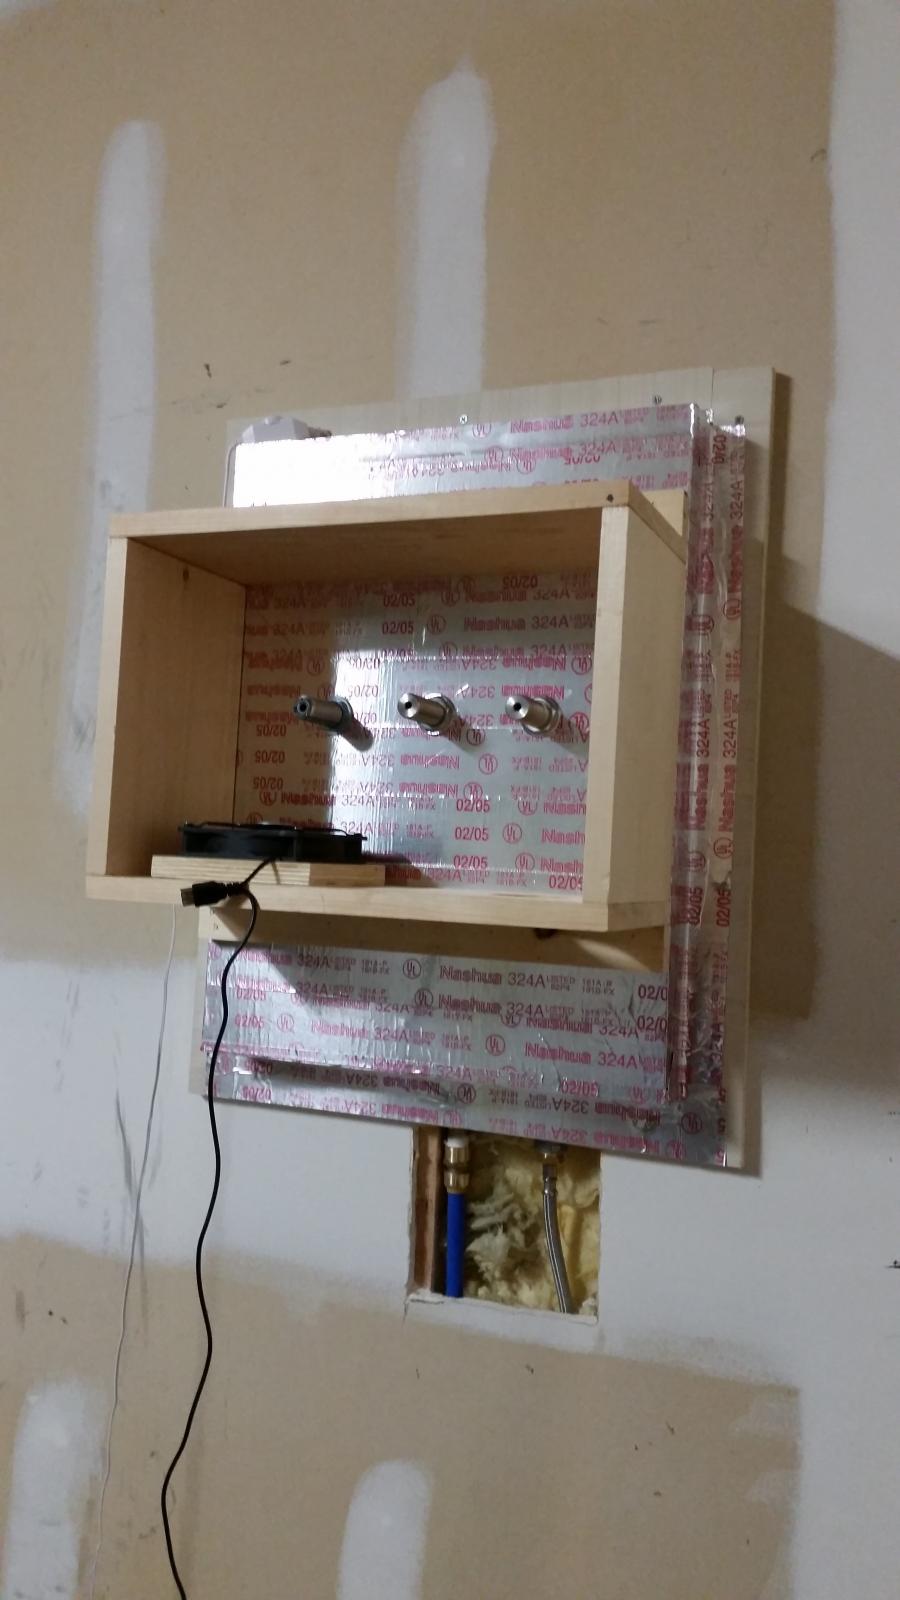
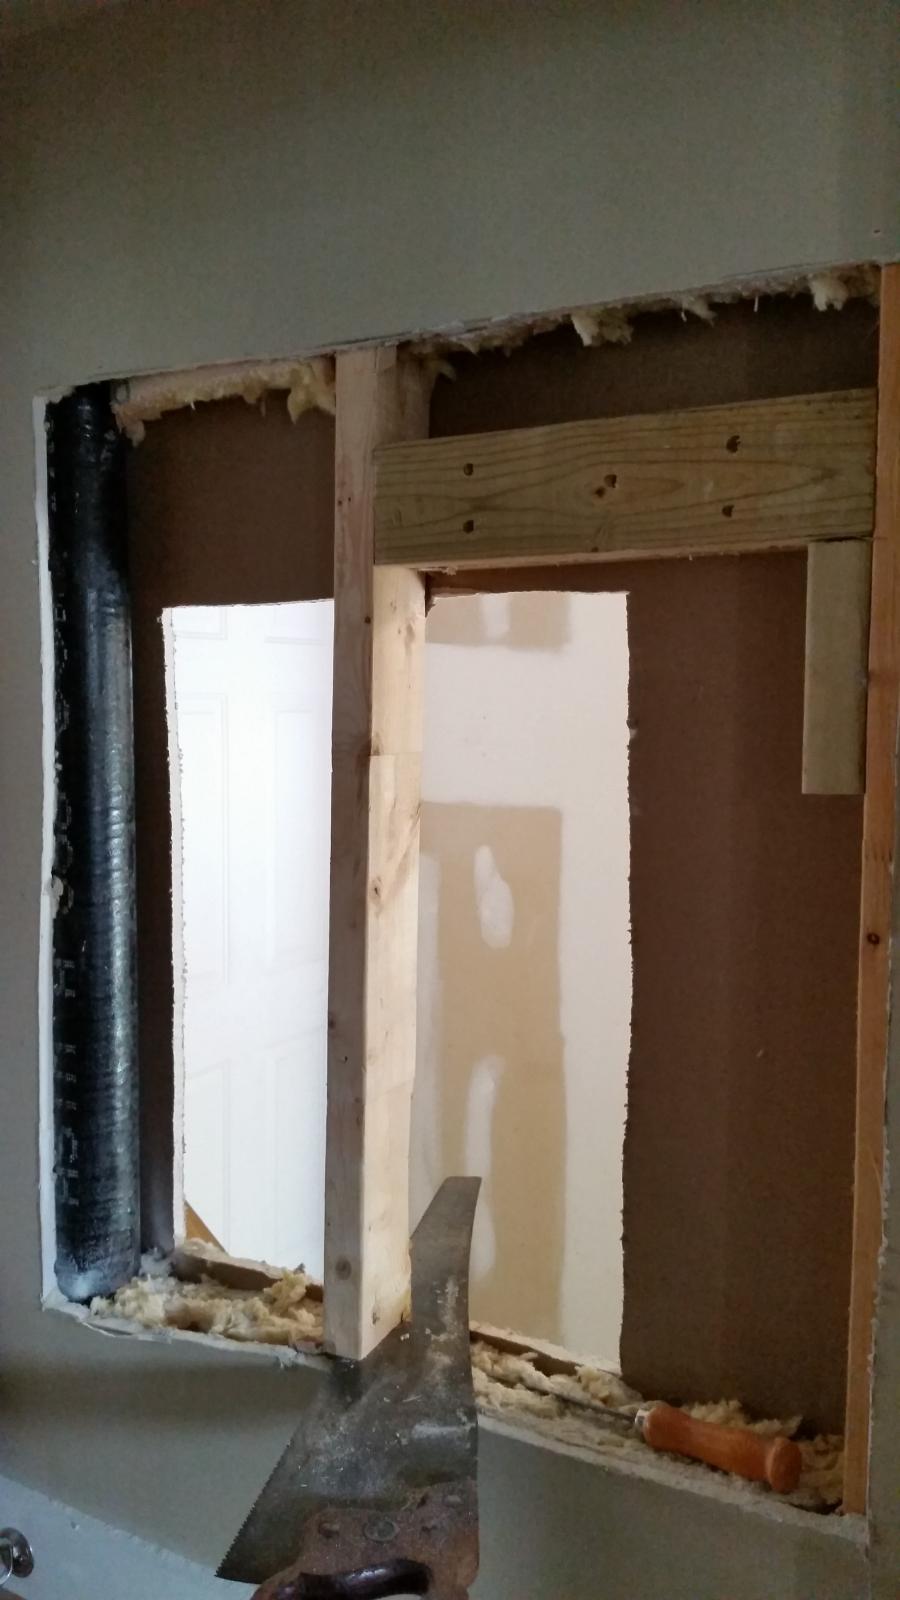
So my wife and I were house hunting in the Charlotte area and this one particular house has a small area between the kitchen and the dining room that I think was intended originally for some sort of wet bar or something. Right now, all that was in there is some small cabinets, one drawer, and some counterspace. The wall opposite of this is the same wall as the garage. I thought it would be perfect to have a keezer there in the corner of the garage and put a few taps in the wall. I started researching this and found a few things here and there, but not as much as I would have hoped. So I thought I would write this up in case anyone else is interested and needs ideas. I will have to say, the biggest influence I got was from Martianpc (https://www.homebrewtalk.com/showthread.php?t=421282). By influence I mean I pretty much just copied everything he did. So while I may have made some small tweaks, Martianpc is the mastermind behind all of this.

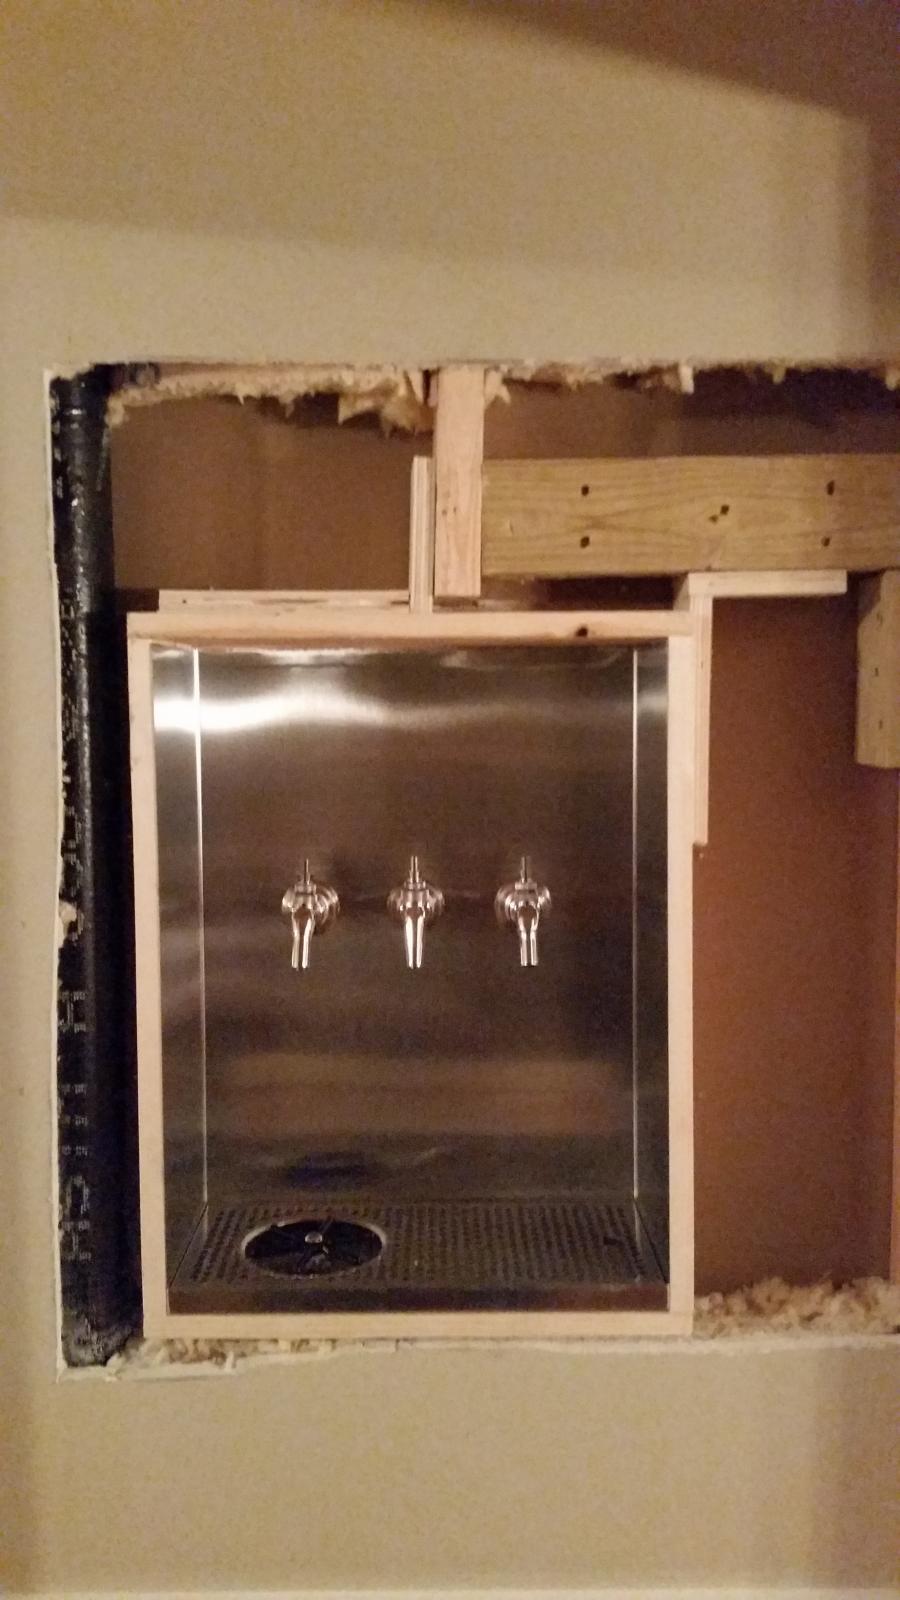
I wanted at least three taps and I wanted to have a glass rinser so I can legitimize my baller-ness. The size of my opening had to be based on the drip tray I went with. It was difficult to find a drip tray that would work for my application. One important thing that influenced my build was that the wife didn't want the taps out in the open. In order to get authorization to actually do this whole thing, I had to agree to this. So this meant the taps had to not protrude from the wall. The opening or tap enclosure would be hidden using a picture frame on hinges. One thing this also did was limit the size based on the size of the picture and the width of the frame itself. I found a few drip tray enclosures that had stainless steel backing but nothing that was quite right. I then decided to go with this one:

http://absone.com/en/drip-trays-rin...drip-tray-with-center-rinser-7-x-78-x-16.html

In order to get the interior stainless I looked into getting something fabricated. However, it was several hundred dollars. I considered using the aluminum flashing material from home depot as it would result in that clean metallic look but I then stumbled upon this site:

https://www.stainlesssupply.com/ord...0/Custom-C-Channel-304-Stainless-4-Finish.htm

I went with the #4 finish and it looks great. Similar to the finish on my stainless steel refrigerator. For the thickness, I went with 26G (0.0178"). I could probably have gone one more size down and still been ok. Every bit of the stainless will have wooden backing so it really is not structural at all. Since I had to recess it, I had to get the backing material in a 'C' shape. The above site makes custom c-channel shapes in about any dimension you need. So once I got my drip tray, I could build my wooden box enclosure and take measurements to order the stainless c-channel shape. I just had to drill three holes in the stainless steel c-channel once I got everything ready.

20150927_083015.jpg


20151004_140340.jpg


20151004_174540.jpg


20151017_190908.jpg


20151004_174502.jpg


20151013_215716.jpg


20151018_194135.jpg
 
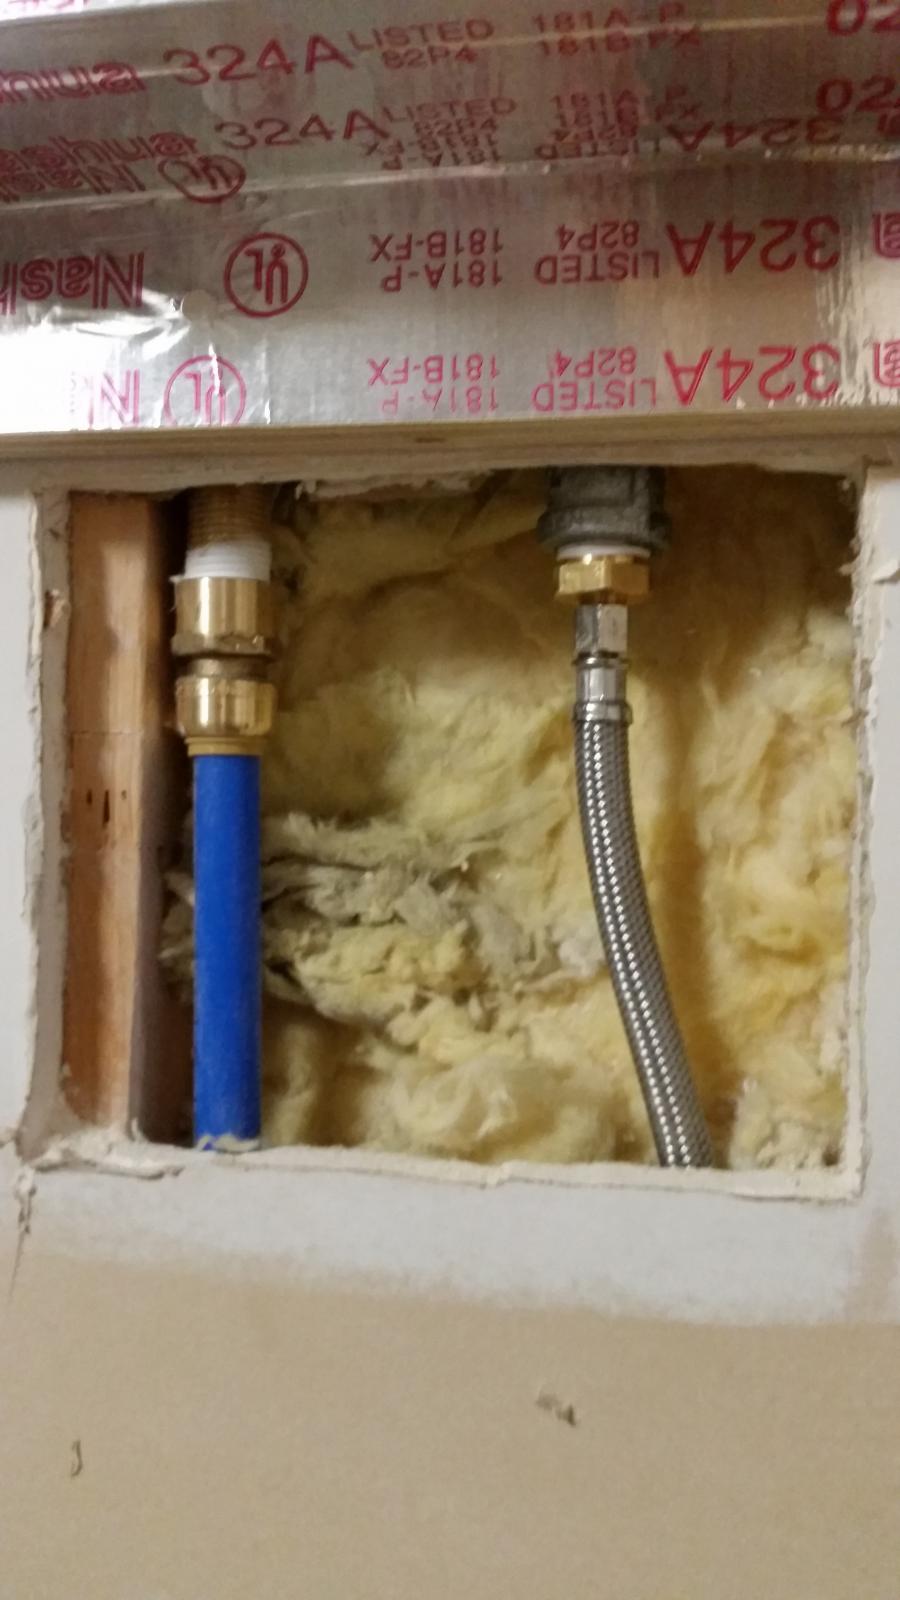
The next big item to work out was where to get water from and where to run the drain to. I knew I wanted to use my ice maker water line. I found a 'tee' for the ice-maker hose and got a short piece of ice-maker line (they have like 6 or 8" pieces). I connected the short piece to the where the line already was connected to the wall. Then connected the tee to this. I now had the ability to supply my ice maker and also the drip tray. I just had to get two 10 ft pieces of the ice-maker line so I could make it all the way over to where the taps were. I got lucky because my house has a crawl space so i was able to easily run it over. For the drain, I originally wanted to somehow tap into my main drain line for the house. I called a plumber and he said it would be too much trouble and would be expensive. He said to just plumb it outside the house with pvc or pex. I looked into using pex, but I found out you need to buy a special fitting crimper for around $50 (the fitting would need to connect to the drip tray drain. So as soon as I bought all the PVC and was about to start installing, a friend told me about shark bite fittings. The allow to to join pieces of pex (and other types of pipe) without special tools. The reason pex was advantageous was that it allowed me to make the drain run without any other joints as the pipe is flexible. Because of how high my crawlspace is and where the taps were located, I was able to have the pex pitched down the whole way outside. I brought it through a penetration that already existed for my air-conditioning drains. it goes to where my air conditioning units are which was stone all around them. So the drain water will just go there and it shouldn't cause a problem. One my buddies told me I should put a p-trap of some sort in this to avoid any issues with odors down the road. I am not sure how to do this with pex. I plan to do a couple of extra rinses with each glass so clean water is rinsed through. I will also try and pour some diluted bleach through every once in awhile as well.

20151017_192125.jpg
 
Interesting build, im looking at a similar project of putting my kegerator in a space under the stairs with the taps through a decorative wood panel.
 
so I can legitimize my baller-ness.

This is important.

Looking forward to seeing the rest of the build. Sharkbite is pretty cool stuff eh? Especially handy when you're working on copper that's wet - can often be quite a bit easier than soldering. Anyway, good luck on the project and let me know if help testing out those taps when you get up and running. :mug:

Cheers.
 
You seem to have really thought this through, and far be it from me to insult your intelligence or overstate the obvious, but did you check local codes regarding wall penetrations into the garage? In Wisconsin, attached garages are required to be two hour fire rated. What you have there would equal a non fire rated penetration, or so it would seem.
That being said, I love th concept and wish I had a spot in my house that something similar would work!

Roland

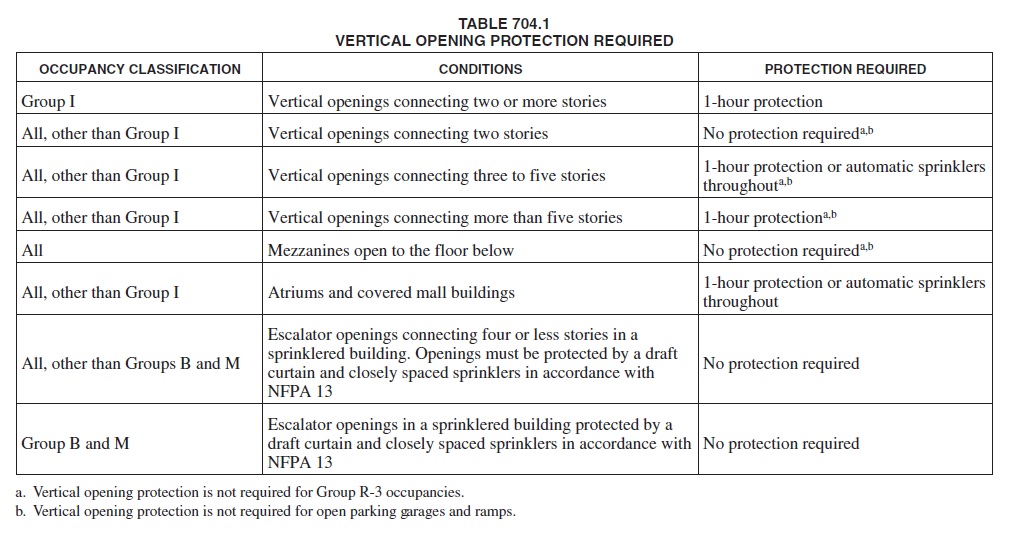
I never thought to check for any fire rating requirements. I looked through the North Carolina Fire Code and, while it not 100% clear to me, it looks like I am ok. My house classifies as an R-3 (definitely not Group I as that is hospitals, old folk homes, prisons, etc.). I do have a two story house and the second row is the one that I think applies to me. Good call though. Let me know if you interpret the table differently.

Fire Rating.jpg
 
This is important.

Looking forward to seeing the rest of the build. Sharkbite is pretty cool stuff eh? Especially handy when you're working on copper that's wet - can often be quite a bit easier than soldering. Anyway, good luck on the project and let me know if help testing out those taps when you get up and running. :mug:

Cheers.

Finding the shark bite was huge. Prior to that I was looking at having to either buy a $50 tool just to make one connection or use PVC which would have resulted in around 10 joints. Using the PEX pipe, I just used one continuous piece and bent the pipe as necessary to get down into my crawlspace and through the wall.
 
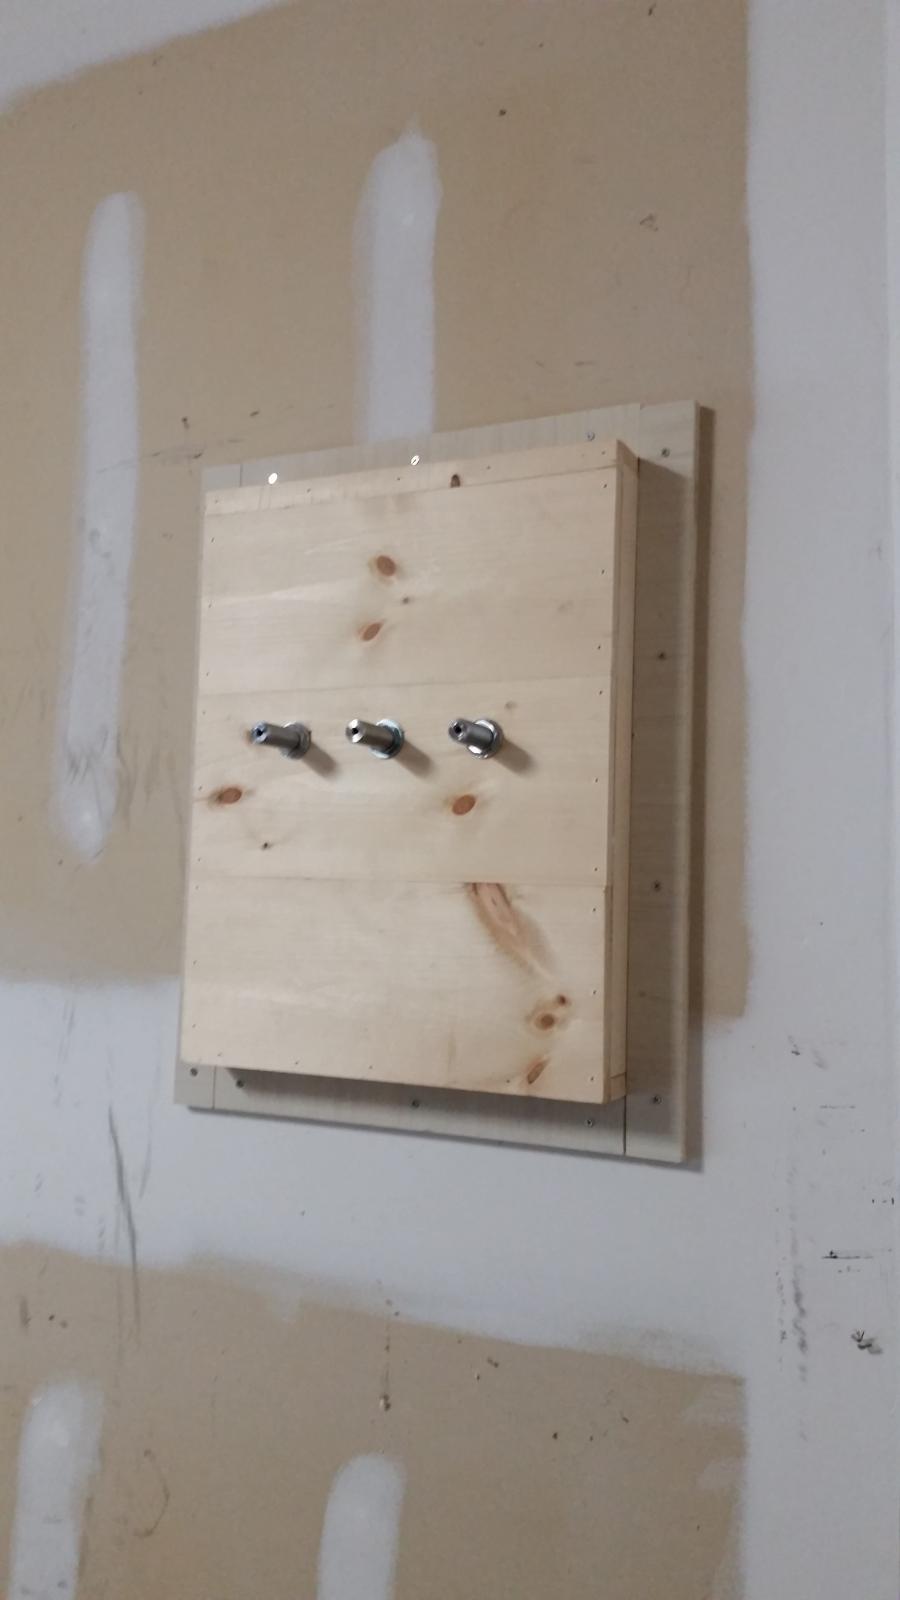
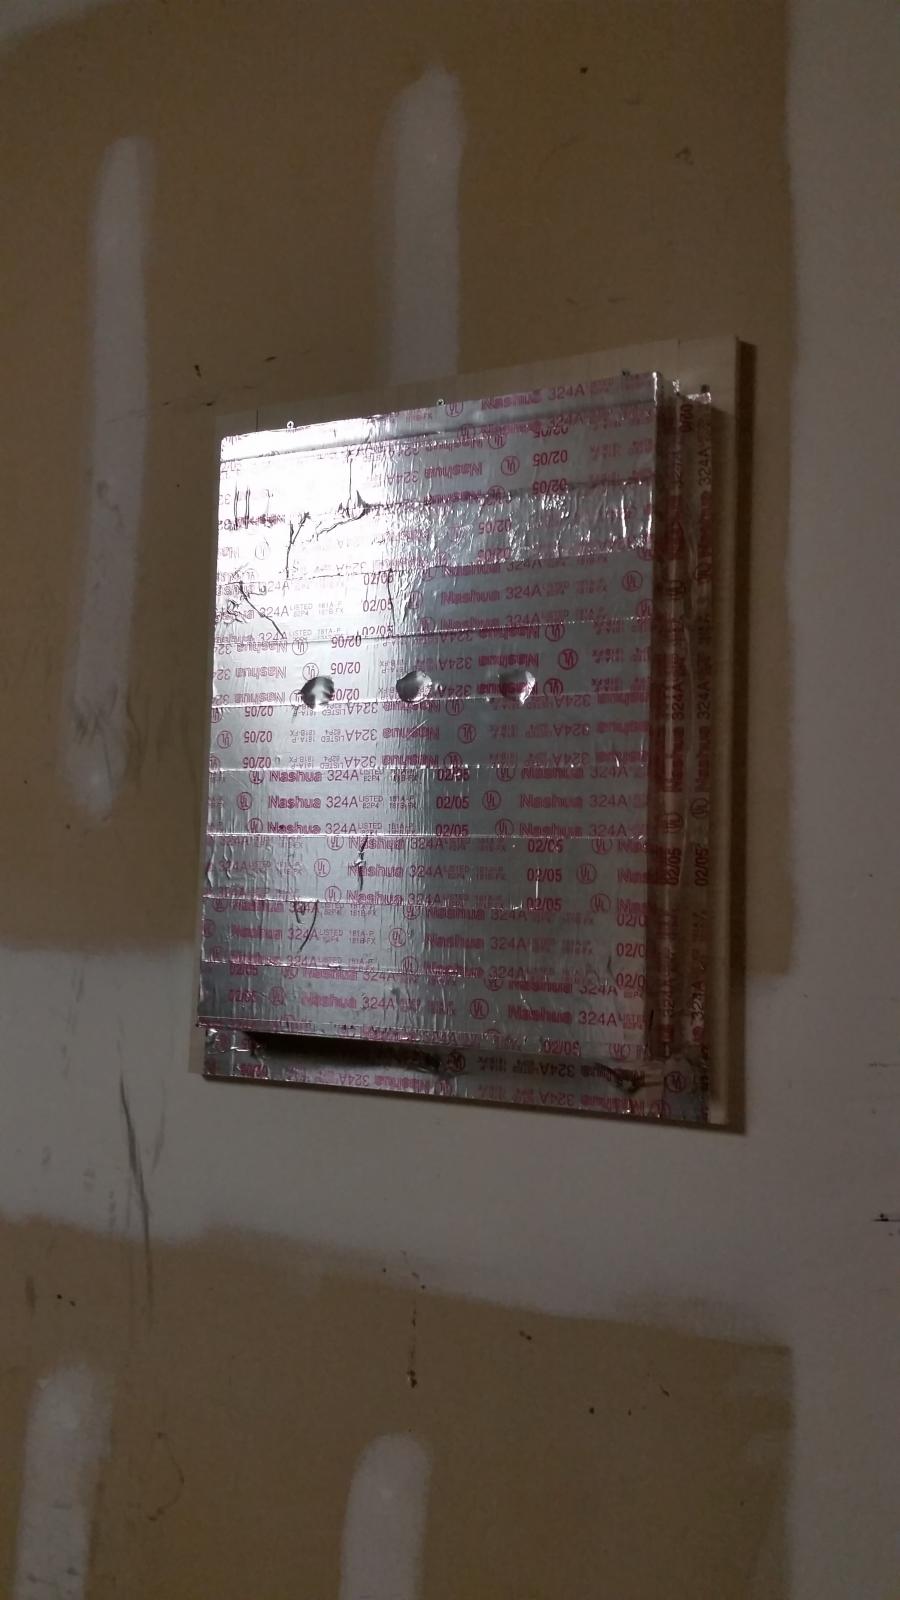
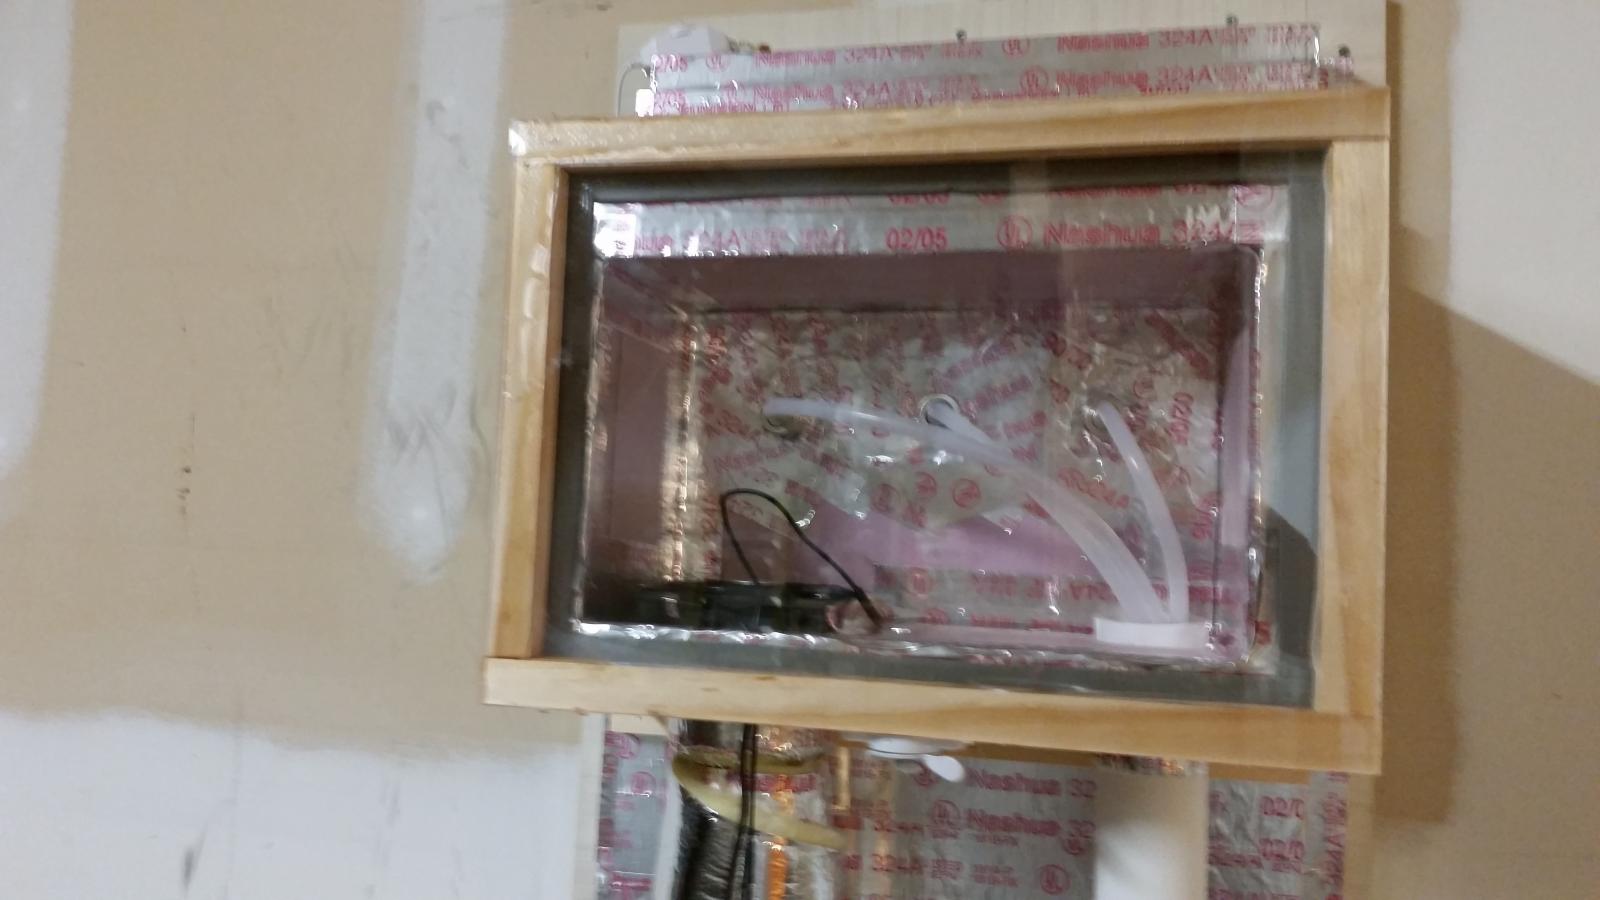
The tap box is nothing special. I think I built it a bit too big but I designed it to match the width of the tap enclosure. I also left room for 1 inch foam board for insulation. Before installing the insulation, I put that heavy duty metallic duct tape on the inside first to insulation as well as seal it up better. When installing the foam, I tried to put some air gaps where I could to help with the insulation properties. I also liked MartianPC's idea of using plexiglass so you can see inside the tap box. Really thick plexiglass is expensive so I went with two pieces of 1/4 inch plexiglass and sandwiched wood around the edges. The air gap increases the insulation properties and the wood allowed me to install the hinges. One thing I realized after getting everything together was that you need to make sure your shanks and shank nuts are tight before you get everything together. It was hard to tighten because there is little room in there.

The computer fans I got had another accessory associated with them that I found which is a temperature read-out box. I haven't read everything that it can do yet but you can plug two fans into it and it reads the temperature outside and inside the tap box. I am hoping it can control the fans based on the temperature reading so the fans can be turned on and off as necessary. More to come on this.

In order to run the beer lines and get the air to flow, I went with 2 PVC pipes like MartianPC did. However, I used 2 inch PVC so I can try and get more air flow. I installed one fan on the side of the tap box and directed the fan to blow down towards the keezer. After installing the fan and turning everything on, I realized that the air flow isn't what I expected. I am going to install one somehow on the PVC pipe that has the beer lines so I can push the cold air better up to the tap box. I haven't finished insulating everything but the tap box is at around 48 deg and my keezer is set for 36 deg. This fluctuates quite a bit based on ambient which tells me my insulation isn't what I thought. I haven't finished insulating though. I have the keezer set a little cold to try and make sure the beer stays cold as it travels up through the warmer tap box. Once I get the temp differential down a bit I will set the keezer a little warmer. If this doesn't get the temp differential down, I will have to move to plan B. So far though, even with a temp differential of around 10 to 15 degrees, there doesn't seem to be excessive foaming.

20151101_180507.jpg


20151101_200136.jpg


20151104_203235.jpg


20151106_231252.jpg
 
Again, I don't know what the local codes are. Perhaps check with your insurance guy. It would suck to have an accident and then find out it was not covered.....just playing devils advocate.
 
Again, I don't know what the local codes are. Perhaps check with your insurance guy. It would suck to have an accident and then find out it was not covered.....just playing devils advocate.


I'm a property claims adjuster and assuming he has a special perils policy (which I would be very surprised if he didn't), if something happened because it was not up to code or "improperly installed" they would likely cover all of the other damages, but not pay for the items not up to code. So say a fire happened in the garage, they would likely pay for everything except the two SF of missing drywall and insulation. I say likely because although most policies are pretty much the same in terms of language, different states and different companies have different interpretations of what that policy language actually means, based mostly on lawsuits filed in the state or against the company. On the downlow though, I'd look the other way for a fellow homebrewer!

It's looking awesome, good luck finishing it!
 
I think your issues are due to your PVC runs being much longer than Martianpc's. Is there insulation around the PVC pipes? I would try a larger/stronger fan to push air through the pipe.
 
I would also look into using different fans. Those flat PC fans don't create a lot of pressure which is what you need for blowing air into a pipe. Look for a blower fan. Something like this.

http://www.ebay.com/itm/like/331396...7290-0%26rvr_id%3D949012171586&chn=ps&lpid=82

Also as saltph said you probably need to insulate the pvc pipes. The plexiglass isn't going to help at all either. I would change it out for some plywood with insulation glued to the inside of it.
 
I never thought to check for any fire rating requirements. I looked through the North Carolina Fire Code and, while it not 100% clear to me, it looks like I am ok.

That code section relates to vertical openings, which is for duct penetrations and such through a floor/ceiling assembly. In most cases, the wall that separates a dwelling unit from a garage is required to be 1 hour rated. That is why most doors in those walls have self-closing mechanisms on them. Any thru-penetration would need to be 1-hr fire-rated. That being said, I doubt the U.L. directory has 1-hr rated assembly for a tap line.

You would most likely find the separation requirements in the Building Code rather than the Fire Code.

If North Carolina uses the I.B.C., I could do a little more research if it is something you are concerned with.
 
Back
Top