Thermoelectric (peltier) Fermentation Cabinet Build

Homebrew Talk - Beer, Wine, Mead, & Cider Brewing Discussion Forum

Help Support Homebrew Talk - Beer, Wine, Mead, & Cider Brewing Discussion Forum:

This site may earn a commission from merchant affiliate links, including eBay, Amazon, and others.

timbudtwo

Well-Known Member
Joined
Jan 9, 2008
Messages
325
Reaction score
12
Location
San Ramon
So with the weather getting warmer and my lagering fridge now a kegerator, I needed a place to ferment by beer. I had an old igloo cooler that would plug into your car or the wall and keep things nice and chilly. It wasn't going to be used anymore so I figured I would cannibalize that into what I needed. These types of igloo coolers use thermoelectric coolers, or peltiers, that pump heat from one side of a small ceramic plate to the other via electricity to keep the inside of them cool. I pulled my unit along with its heatsinks out of that old electric cooler.

I went down to home depot looking for some insulation sheet. I found the rigid polyiso stuff and the thinner, slightly less insulate-y soft foam type. The price was within 5 bucks for each other so I oped to go for the polyiso stuff because it was damaged. Brought it up to the cashier, mentioned the damage (a couple chunks along one edge had broken off) and she gave me 50% off. What a deal!

I also picked up 4 2x2's to make the frame. I made a box that would be large enough to fit a glass carboy and only have a little extra room inside. Buckets obviously will fit too, and seeing as I only have those currently that is what will be used!

So I cut the pieces, applied glue very liberally and clamped for a few hours. Once I was done I started cutting up some 3/16" birch plywood to go on the outside:
img2297q.jpg


I used a brad nailer to get all the sides on, and then I caulked the inside edge.

Then on to the insulation. I marked out the size of the spaces on the foam, cut one edge, scored the other and snapped it. After putting it in I realized the size was just a tad too thick, so the foam piece on the adjacent wall would not be able to fit in there, so all I did was bevel the edges so that would fit in there neatly. I wasn't ginger about this, just got it done:
img2299y.jpg


For today I stopped at finishing three walls as I ran out of 3/16" ply. But now that I think about it putting heavier ply on the top and bottom wont be an issue so I will just use some other stuff I have tomorrow.
img2300kj.jpg


I stuffed some extra foam in where the edges of each piece didn't quite meet and I taped it up with aluminum tape:
img2301ny.jpg


So the plan is to get the top and bottom and front finished tomorrow. The front is what is going to be removable, obviously. I am going to glue the foam to the wood and then put some foam weather stripping around it so that I can use bungees to hold it on. I wont have much room for a swinging door where it is going to be (closet) so no hinges on this one.

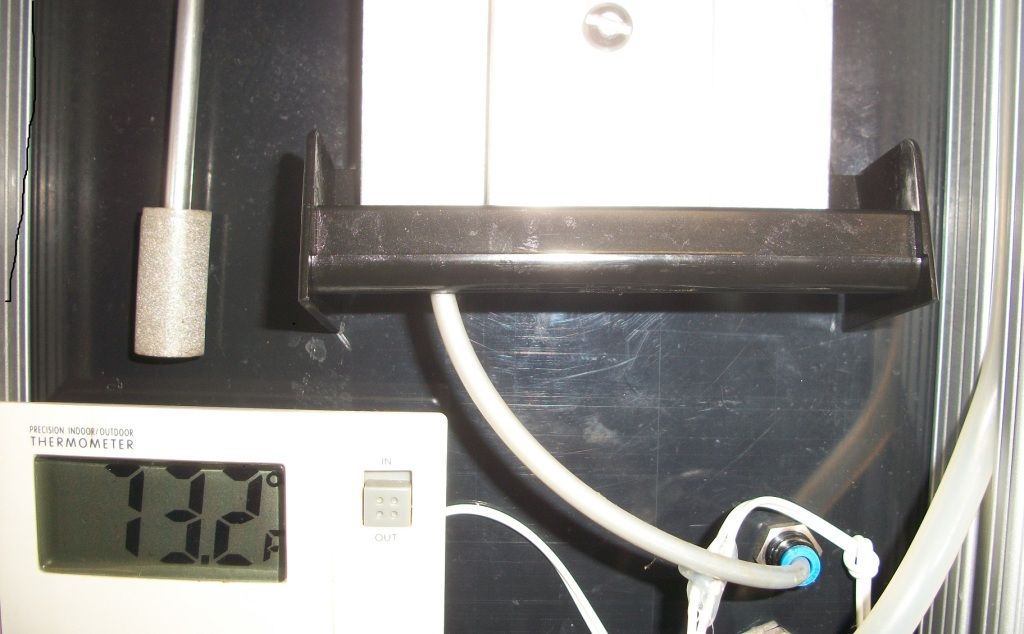
The thermoelectric cooler (peltier) is going to be on the top, powered by an old computer power supply. A hole will be cut in the top of the cabinet to allow the cold plate to come through. The interior and exterior heatsinks will have a computer fan on them to expedite the transfer of heat so that the cooler will work well. Hopefully I am able to finish this tomorrow.
 
Like the design of your box - with the 2X2 structural pieces, it should be no problem to move it small distances with a full jug inside (unlike mine).

I might be pointing out the obvious here, but, use a much higher volume fan on the hot side of the cooling module than on the cold side. I have 120mm, 85cfm fans on the hot side, and 40mm 30cfm fans on the cold side in my box - the cooling modules can exceed their rated temp. differential by 10 to 15 degrees set up this way. You will probably find that your box will sufficient for controlling fermentation at ale temperatures, but might not do for lager fermentation.
 
Did you already buy the peltier unit(s) and if so what did you get?

I clarified my first post, didn't really finish that first paragraphs thought.

I pulled it out of the igloo cooler. It was an electric cooler that had one in it.
 
I might be pointing out the obvious here, but, use a much higher volume fan on the hot side of the cooling module than on the cold side. I have 120mm, 85cfm fans on the hot side, and 40mm 30cfm fans on the cold side in my box - the cooling modules can exceed their rated temp. differential by 10 to 15 degrees set up this way. You will probably find that your box will sufficient for controlling fermentation at ale temperatures, but might not do for lager fermentation.

You aren't pointing out the obvious. Or rather, you may be, but it is something a lot of people don't know. These devices work off of a temperature differential. So the cooler you can get the hot side, the colder the cold side gets (up to a delta max, science, blah blah.)

Planning on just doing ales for now. If I want to do a lager I have another peltier sitting around that I can wire up. Honestly, I can't complain at the utility of these little guys. Its only pulling around 60 watts and it can keep things nice and chilly.
 
So today was a less that optimally productive day, but I did get some things done.

So, I was unable to locate any older power supplies hanging around my house. This is amazing considering all the computers I have made. I must have done some spring cleaning and forgotten about it, or they are buried in my mess. I suspect both.

Anyway, I asked my friend who is lending me a hand if he had any old power supplies he would be willing to sacrifice for a noble cause. He brings over a very old power supply. Predates the 20/24 pin plug that all power supplies for the past 10 years have. If you have built a computer you will know what I am talking about. It is that monstrous rectangular plug with over 9000 wires that you plug right into an annoying part of the motherboard, usually where only infant fingers can reach. To use one of these power supplies it needs to think its plugged into a computer with the power switch on. All you need to do is short the green wire to any black (usually wire 13 to any black) and it will turn on and give you clean DC power at 12v and 5v, whatever flavor you like best.

This had none of that. It had the standard plugs you would see on any power supply, but then 4 wires that really were foreign to me. there was white, black, brown, blue. Well, after trying combinations of getting this thing to work, shorting out 120v ac and frying a power strip, I found out that a switch was made for this thing and was elsewhere. Awesome, would have saved me a good scare. I don't blame my friend. Not really...

On to the goodies:
I glued a piece of foam board to the plywood that will be the front of my cabinet with contact cement. The kind of stuff that holds formica veneers down. I have it clamped because the plywood was warped and I couldn't get perfect contact on all the edges.
img2306lm.jpg


After that had been clamped and the glue had dried, I put some silicone caulking around the edge of the foam so that there wouldn't be any sneaky air working its way behind there and getting into the low R value of thin plywood. You can see how I trimmed the edge of the foam here. I also sanded it down to make it slide in easily. This stuff smooths up like a dream when you sand it with 100 grit.
img2308vn.jpg


Then I moved on to working with the power supply WITH a switch attached to it. Below is a picture of the peltier sandwiched between its two heatsinks. I had to make some thermal grease as I only had a liquid metal type that I use on my computer that has gallium in it. Gallium makes aluminum rust so I couldn't use it here. I just used 600 mesh aluminum powder and a few drops of silicone oil to make a pretty close equivalent to what you would buy at the store. Worked really well in fact!
img2307n.jpg


So now that I had everything working I needed to figure out some way to get the power to the peltier and two fans that would be moving air across the cold and hot heatsinks. I decided to use some old molex (not plugs, and solder the peltier and two fans to them to make things easy to use and modular. In the process of this I found out that the wires delivering power to the peltier are incredibly fragile and pop out easily.
img2311z.jpg

That made me feel like this:
fuuuufffffuuuupizzas508.jpg


This happened not once, but three times because I am a glutton for punishment and clearly love to solder small contacts in tight quarters. Here I am soldering it up for the last time, do note the molex fitting in the back in case you were unfamiliar with that style of plug:
img2314br.jpg


After that laugh and half I put some epoxy over the soldering points and along the edges where they meet the peltier.

I did the same with two fans. They are controlled via one molex fitting so they are both on or off at the same time:
img2316l.jpg


Right now I only have an 80mm fan to put on the hot side. I will be moving up to a 200mm or greater fan once I get one, but for now it will be adequate.
 
Subscribed.
Been thinking about building something like this for a while, so I'm very interested to hear your results!
 
Today was brew day (Irish Red Ale) so I probably wont get any pictures up from the cabinet until tomorrow evening. I wanted to have it done yesterday so that todays fermentation could go in, but oh well. Temps are about 70 in the house so I feel okay with that. Once the summer heat waves hit I will def need it to bring things below 78.

For those considering something similar:
I don't expect for this thing to get cold. All I am trying to do is get the temperature down from what we normally keep our house at to something that resembles ale temperatures. It took a few hours to get the igloo cooler down, but once it got going the cooler was quite cold inside. But if I it isn't enough, I could add another peltier easily. Still, 120 watts is not a lot to ask from a cooler. Many house fans are more than 120 watts and all they do is blow air around (plug for whole house fan!)
 
So I WAS able to get some work done on it today. In fact, I was able to finish most of it :D
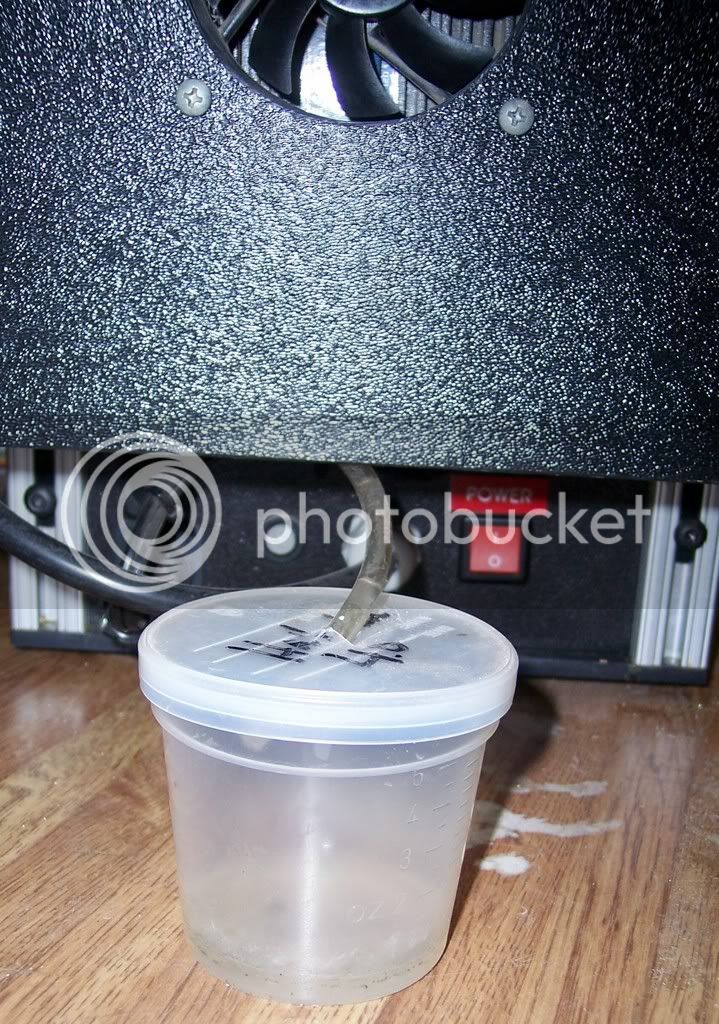
! Enough to be useable if I wanted.

Here is what today yielded:

I decided to make the top and bottom out of osb plywood because it is what I had on hand and it would be sufficient for the top of the cooler as it was a little bit thicker, but would have a hole in it for the heatsink to stick through.

img2318u.jpg


After getting the bottom on and taped up I cut a piece for the top and dry fit it into the top. I put the heatsink system on top of it and cut a hole about 1/4" wider on each side to accommodate a little bit of movement inside.
img2319p.jpg
img2320s.jpg


I flipped the top piece over so that the white would give me a surface to write on and I traced in the shape from the hole in the foam and then I marked the area inside where the bridge between the two heatsinks is. I don't need a huge hole because the heatsinks can be separated which makes it less likely to leak more with smaller holes. I used a cutout tool from harbor freight to get the job done.
img2321y.jpg


Once that was all assembled, and the wires were going where they needed to go, I put a little but of weather stripping under the top heatsink to seal any holes up.

Here is what it looks like with two five gallon buckets nestled inside. Size is a little bit bigger than a fermenting bucket. More than enough and good enough for a 6.5 gal carboy :D

img2324ef.jpg


This is just a piece of plywood that I cut to put on the bottom piece of foam so that it distributes all the weight. A glass carboy wouldn't really be a problem but buckets have that small lip along the bottom that would cut into the foam right quick full of beer.

img2326rw.jpg


As I mentioned before I don't have tons of room where this is going to have a hinged door so it is held fast with two elastic bungees going across the front. Ghetto but it does the job.

img2327f.jpg


Doing a dry run right now. Will report back with details soonly.
 
+1 on your use of polyiso insulation the stuff rocks!

As you mentioned though, the skin would get broken easily inder the weight of a full fermenter, I used some vinyl flooring in the bottom of my chamber to help distribute the weight more evenly so the insulation underneath wouldn't get damaged, seems to have worked so far with the pails I have used.

Anyhow, sweet idea with the peltier coolers.

IMG_2535.jpg
 
I used some vinyl flooring in the bottom of my chamber to help distribute the weight
View attachment 24358

Ooooh. I do like that. That is easy to cut and is really thin. Might have to see if I have any hanging around. We redid our house with bamboo flooring 1.5 years ago so its been awhile since I have seen laminate around here 0_0.
 
Ooooh. I do like that. That is easy to cut and is really thin. Might have to see if I have any hanging around. We redid our house with bamboo flooring 1.5 years ago so its been awhile since I have seen laminate around here 0_0.

We tiled our house last summer, but the flooring was actually from the new build and has been hanging around for about 5 years, glad I found a use for the stuff, I was getting ready to toss it :).

It does really work well, and will clean up easily in the case of a spill or if a blow off spooges all over the place.
 
More information and mostly irreverent data!

I was able to put the Irish red ale into the fermenter. Do revel in the visible trub line from my no-sparge biab beer :D. That does compact down during fermentation.

img2329pl.jpg

Lovely

Anyway, I have the bad boy running overnight and I am able to feel a distinctive temperature difference! The plastic is cool to the touch during fermentation, when normally you can feel the warmth of fermentation. Fermentation is quite active with the bubbler merrily going along.

I have no information on the actual temperature other than my personal impression of "cooler than normal."

To give some semblance of science to this thread I have placed a small vessel of an unnamed fluid in the chamber and will leave it overnight to acclimate to its environment and will accost it tomorrow with a temperature probe. Like I said, my only working digital thermometer (fried my brew thermometer, literally, made some delicious fish and chips) is my ranco for the kegerator.


On the practical side of things I did notice one thing. I initially aimed the interior fan at the cold heatsink to create turbulance in there but in reality this did not get the air moving that much and I just got a lot of condensation on the heatsink. I repositioned the fan to blow down, thus drawing air over the heatsink instead of across it. This created a VERY noticeable cold draft.

More information to follow.
 
Any updates on this? I'm looking into using a peltier cooler/heater to change out the dang jugs of ice in my son of fermentation chamber. Do you know, by chance, how many watts the cooler is?

I'm also considering using the peltier to cool water to pump through a jacket. I don't know if it would be enough.
 
Any more information on this? My TEC experience leads me to believe the fermenter built above will not cool much more then a few degrees below room temperature. For one TEC to get that much air cool you would need to see ice forming on the cold side. Getting the beer down to 50deg would need the surrounding air to be at around 30. To get the air at around 30 the TEC would have to be at 0deg or less. Are you seeing these results? To cool a TEC you need to cool the hot side. What kind of air movement do you have on the hot side? What is the cfm rating of the fan.

My experiment using two 5amp TECs hooked up to a 120mm fans moving 79cfm could only cool the hot side to 70deg. The cold side was 35deg.

I would really love ot know the details of the parts you are using and what temperatures you are reaching inside your fermenter and of the actual liquid.

I hope you have it working! Iwould love to create one similar.
 
Yes what's up with this?? Is it working? I read some where online a peltier thermoelectric system will lower cabinet temp 40*F from what ever ambient temp is in the room it's in. So, if it's say, 85*F in my garage, it would be able to maintain ~45*F inside the cabinet. Which would be more than cool enough for ale ferm temp.
I am really interested in this, thinking about building a cabinet about the same size, just big enough for two buckets or carboys.
 
While I never went as far as actually putting a system like this in place, I did look into to it quite a bit. The possibilities are pretty alluring. A fairly low energy consuming device that can cool or heat depending on current flow. In the end, it's really hard to beat the good ol' chest freezer and temp controller. You still need the temp controller and unless you have all the materials to build a home for the peltier, you're going to end up spending a fair amount to build a well insulated box. A chest freezer may cost a little more, but it's dependable and powerful enough to freeze your brew solid if you felt so inclined. Also, if your main fridge dies, in a pinch, you could use the chest freezer as a backup...or a kegerator.

I'd still love to hear solid results of a peltier cooler/heater though. I still use my son of fermentation chamber occasionally when the chest freezer is occupied and it would be nice to lose the ice jugs.
 
A friend and I have spend the last couple of years messing around with peltiers and I can confirm that they are certainly not capable of cooling much below ambient without going to a fair amount of effort to optimize them with large heat sinks and preferably water cooling blocks and radiators.

My setup contains a 120w peltier that heats/cools a cabinet that is approx 1m high x .5m wide x .5 m deep (roughly 3' x 18" x 18". while the internal heatsink I can get to about 8 degrees I cannot cool the cabinet below an ambient of 20c and a 60litre water load of 22 degrees. Water has a very high heat load apparently which is the real killer.

image-313446128.jpg

That is my cabinet and a regular size fermenter inside. My usual fermenter is 60 litres (twice that fermenter size) as I brew double batches. (sorry about all the metric and Celsius data but thats what we work with down under in Australia!)

My friend who is working with me with all this stuff has a dual peltier config and is currently upgrading it to work with water cooling blocks. But his cabinet is much smaller than mine as he only brews in a single batch fermenter. He has managed to get pretty good results with cooling but it's actually the middle of winter here so temps don't exceed high 20's Celsius.

It's been a lot of fun but from a cost point of view the post suggesting using a freezer it pretty much on the money as i have worked out it would cost about the same as getting the peltier stuff working. I can get a pretty decent 2nd hand fridge for $300 with warranty.

The beauty of peltiers is they are low voltage and pose very little risk of burning your house down with dodgy 240v wiring.

At the moment mine only really heats due to the low ambient temps here at the moment and I only brewing a 22c. For me to upgrade my system with dual peltiers and water cooling blocks etc is going to cost about as much as a pretty decent 2nd hand fridge. When summer comes I will need to do something so I'm in 2 minds whether or not I push forward with the peltier upgrade or take the easy way out with a fridge.

We are working on quite a bit more than just a peltier heating/cooling system. We have designed a home brew server that manages the temp control. It is written in php and MySQL and allows us to remotely manage our home brewing via mobile phones. The computer has 1-wire temp sensors that are read through owfs software and we have a USB relay board that we control the switching on/off of the peltiers. We use a basic circuit using relays that allow us to switch from heating to cooling by a rivaling certain relays. With all this data it's much easier to quantify the effectiveness of the peltiers as the data is there in black and white, or pretty colours if we do desire!

Here is a screen shot from my phone showing the current sensors and temps. Data is collected every minute and stored in a MySQL database. We have pages displaying graphs of all the sensor data and make very interesting reading.


image-797535779.jpg


We are by no means experts but we have spent many hours and money trying to get peltiers to work. Based on that IMHO they are not a silver bullet solution. They are extremely inefficient but are excellent for heating. They are quite amazing devices for what they are.

Ideally I would like to brew lagers which need to sit at around 12c. This will be impossible in summer with a water load of 60 litres. Talk to any refrigeration mechanic and they will set you straight on peltiers.

Cheers and happy brewing!

Greg J
 
i'm working on a peltier-based system with heat exchangers and a radiator. preliminary tests showed pretty good cooling, first real test coming soon. the fermentation vessel is a corny with copper coils soldered to the outside for direct heat exchange. the 'hot side' (if in cooling mode) is a pump to a radiator and computer fan. everything is controlled by a rabbit computer via wireless (set point and temp tolerance) and the computer decides if it needs to heat or cool. it's a bit rube goldberg, and right now it's all wires, hoses and suspicious looking water reservoirs, but with good insulation it just might work (if the hoses don't leak onto the electronics- the final build won't be so dangerous). this is holland so there are no extremes of heat to overcome. if it works i'll write up a proper description in a couple weeks...
in the pic the blue thingys are heat exchangers as the bread to a peltier sandwich, and the black thing in the back is the radiator. there are also thermistors on either side of the peltier, for emergency high-temp shutoff and to see the temp differential in real time. there is also a fair bit of duct tape involved at this stage.

photo21.jpg
 
Here's a tip to optimize the cooling.

We found that at a certain point the heatsink attracts moisture and will eventually ice up if it gets cold enough, otherwise it just gets really wet. As soon as it does this the cooling effect is hindered.

Here in australia we have things called a "damp-rid" bucket. They are designed to put in your wardrobe so Tor clothes don't go moldy in humid weather. You put these crystals in the top and it removes the humidity from the cabinet by soaking up the water which eventually collects at the bottom It keeps the heat sink as dry as a baby's bum. As a result we were able to get the temp of the heatsink down a further 5 or more degrees.

You can buy dehumidifying eggs on eBay for a few bucks. I don't know how effective they are tho.

Cheers

Greg J
 
We are working on quite a bit more than just a peltier heating/cooling system. We have designed a home brew server that manages the temp control. It is written in php and MySQL and allows us to remotely manage our home brewing via mobile phones. The computer has 1-wire temp sensors that are read through owfs software and we have a USB relay board that we control the switching on/off of the peltiers. We use a basic circuit using relays that allow us to switch from heating to cooling by a rivaling certain relays. With all this data it's much easier to quantify the effectiveness of the peltiers as the data is there in black and white, or pretty colours if we do desire!

Here is a screen shot from my phone showing the current sensors and temps. Data is collected every minute and stored in a MySQL database. We have pages displaying graphs of all the sensor data and make very interesting reading.

View attachment 69585

Very cool. I have something similar going myself. I have an Arduino-like based temp controller that can be controlled via home brew hand control. It also acts as a data server. It's c#. It sends and receives data from a cloud based app on heroku.com written in node.js. This app also acts as a web server that can be called to from any computer or mobile device via web browser. I can monitor, set target temps, heating/cooling mode, etc from my phone at work. I can also do the same from the hand control so I can plug my HLT into it while I brew. I love it. I'd like to get the database worked into the system so I can log temps like you guys are doing. I may opt to do that locally though. Maybe have the controller send queues to my main PC in the house or something.

Cheers to tech and beer:mug:
 
I admire your DIY attitude, and by no means am I trying to rain on your parade.

Having said that, peltier elements are only ~8% efficient at what they do. They're great for cooling small things like microchips, where a compressor setup would be complete overkill, but they suck a bigger things.

That means a 100W element will only use 8 of those watts for the heat exchange, and that will depend entirely on the thermal isolation between the 2 mediums, in this case its surface and the heat sink (and then again the heat sink and air). It is a tremendous waste of energy.

IF you're not worry about the amount of energy the system wastes in order to achieve your results, then disregard everything I said :D
 
Here's a tip to optimize the cooling.

We found that at a certain point the heatsink attracts moisture and will eventually ice up if it gets cold enough, otherwise it just gets really wet. As soon as it does this the cooling effect is hindered.


Cheers

Greg J

I solved the problem on my small scale stir plate cooler with a miniature fan blowing over the cold plate.

Cold_Plate.jpg


All the condensate drains into a container on the back

100_1411.jpg


Condensate_Return_Ver3.jpg


I did not like the overall performance of my Peltier cooler, used a cube fridge
for my other stir plates.

Finished_View.jpg


Cheers,
ClaudiusB
 
Back
Top