HOWTO - Make a BrewPi Fermentation Controller For Cheap

Homebrew Talk - Beer, Wine, Mead, & Cider Brewing Discussion Forum

Help Support Homebrew Talk - Beer, Wine, Mead, & Cider Brewing Discussion Forum:

This site may earn a commission from merchant affiliate links, including eBay, Amazon, and others.
Status
Not open for further replies.
Do you mean access a running BrewPi web page using a host name instead of IP address?

This is the BrewPi instance running on my keezer's RPi2 (hostname BPINTS) that actually controls the keezer.
I used the netbios name in the url from a Windows peecee on my lan (set in the /windows/system/drivers/etc/lmhost file).

bpints.jpg

That isn't going to work well outside the lan, but if all you want is a named reference inside the LAN, that'll do it.
If you only had a single-instance configuration, you'd literally access it using just http://hostname...

Cheers!
 
Do you mean access a running BrewPi web page using a host name instead of IP address?

This is the BrewPi instance running on my keezer's RPi2 (hostname BPINTS) that actually controls the keezer.
I used the netbios name in the url from a Windows peecee on my lan (set in the /windows/system/drivers/etc/lmhost file).

View attachment 356879

That isn't going to work well outside the lan, but if all you want is a named reference inside the LAN, that'll do it.
If you only had a single-instance configuration, you'd literally access it using just http://hostname...

Cheers!

I do believe so. I would like to type a hostname vs the ip address just like you have done in the picture. As far as outside the lan that is fine since I don't plan on accessing from outside the lan.
 
These days Raspbian usually has Avahi (aka bonjour or zeroconf) turned on. You might find that it is possible to see your Pi on your home network by adding .local to the hostname. e.g. if your hostname is brewpi then you may be able to browse to http://brewpi.local

This is beyond the scope of brewpi itself, but there are many tutorials on the web about getting local names to work. I'd recommend googling for avahi, bonjour, or zeroconf and see if you can get it going.
 
Thank you for pointing me in the right direction. I will take a look and see what I can find.
 
If you type the hostname in and you instead get forwarded to your isp's search page, its because you are using their dns servers. And your isp is a jackass. You can change this to Google's dns or an opendns server and your hostname will magically begin working.
 
If you type the hostname in and you instead get forwarded to your isp's search page, its because you are using their dns servers. And your isp is a jackass. You can change this to Google's dns or an opendns server and your hostname will magically begin working.
Or you can add a trailing slash and helpful search engines will quit trying to search for 'brewpi' rather than browse to it.
 
the easiest thing to do is setup your router to use 10.0.1.1 for the lan side so it's easy to type in. My pi is on 10.0.1.8 very easy to remember and type in the browser. You can setup to have a name but generally it's a hosted server name. Or a website accessible from public yadayada. So depending on your needs. If it's just to have name instead of longer IP. I would switch to 10.
 
While waiting for my other sensors to arrive I have the brewpi up and running to familiarize myself with the logging and graphing part. Right now I am just logging the room temp and it seems to log the points on the correct day and time. I notice on the lcd that the idle time does not count right. When I originally started, it started from zero and counted up until it hit roughly 18 hrs then it seems to go back to roughly 10hrs and continue counting until it hits 18 hrs then will go back to 10 continue counting and so on. I stopped the current log and started a new and the exact same thing happened went from 0 to 18 then to 10 up to 18 back to 10. When it is counting it counts on time meaning it will take 8 hrs to count 8 hrs. Any ideas on why it does this? Im guessing it really won't matter anyway since it should never idle for that long when in use.
 
While waiting for my other sensors to arrive I have the brewpi up and running to familiarize myself with the logging and graphing part. Right now I am just logging the room temp and it seems to log the points on the correct day and time. I notice on the lcd that the idle time does not count right. When I originally started, it started from zero and counted up until it hit roughly 18 hrs then it seems to go back to roughly 10hrs and continue counting until it hits 18 hrs then will go back to 10 continue counting and so on. I stopped the current log and started a new and the exact same thing happened went from 0 to 18 then to 10 up to 18 back to 10. When it is counting it counts on time meaning it will take 8 hrs to count 8 hrs. Any ideas on why it does this? Im guessing it really won't matter anyway since it should never idle for that long when in use.
I can't answer the question, but you have just answered one of mine I think.

To clarify, if you build a fresh BrewPi and turn it on, what does it display on the LCD at first?

Thanks in advance.
 
I can't say the exact words.... It will say starting script then it eventually loads and displays the temps and the idle time starts counting from 0h 0m 0
 
Ok. That's fine. Thank you.

I am working on my own version of the code, and I had it displaying "Mode Off" and "Temp. control OFF" at startup. But now it matches the original code more closely it says "Mode Off" and "Idling for xx" and starts counting the time.

I wanted to know what the actual Arduino code did, but I feel that if the mode is 'off' at startup then it should also say "Temp. control OFF" and not "Idling..."

Thanks!
 
Or you can add a trailing slash and helpful search engines will quit trying to search for 'brewpi' rather than browse to it.


Not here, I've had ip requests bounced back by charter before.... theyre ruthless. change the dns to anything else and no problems.
 
"Temp. control off" = more code than "idling…" at one point the brewpi guys had completely exhausted the usable code space. plus the term idling is what it's doing when not controlling temp, ie temp control off. technically, since the beer is alive and producing its own heat, idling is actually a form of temp control. I've seen setups that use the natural process as the only heat source.
 
So we had some power flickering this morning. It went on and off a few times before I could unplug my Brewpi. Once it came back on and I plugged it in again, the charts have been slow to load (20-30 seconds maybe). Is there anything I can do to check the integrity of the SD card and files?

EDIT: It seems to have sorted itself out when I threatened to do a fresh install of everything. I think it was actually super slow wifi causing the delay.
 
"Temp. control off" = more code than "idling…" at one point the brewpi guys had completely exhausted the usable code space. plus the term idling is what it's doing when not controlling temp, ie temp control off. technically, since the beer is alive and producing its own heat, idling is actually a form of temp control. I've seen setups that use the natural process as the only heat source.
I disagree. The code is actually there, but there is a bug in the decision tree that chooses that state.

The term idling means that it is controlling the temperature, just not actually heating or cooling.

I believe that "idling" should only appear in Fridge constant, Beer constant, or Beer profile mode.
 
If that's the case then the display shouldn't show anything when it's in off mode… because it would be off. if you aren't actively using the controller or the chamber, then why would it need to say anything. it's a waste of power and a it lowers the lifespan of the device to have it powered up and actively alerting you to fact that it's not active.
 
If that's the case then the display shouldn't show anything when it's in off mode… because it would be off. if you aren't actively using the controller or the chamber, then why would it need to say anything. it's a waste of power and a it lowers the lifespan of the device to have it powered up and actively alerting you to fact that it's not active.

Again, I disagree. In off mode the system is still reporting the temperature of the various sensors, and logging and graphing them.
 
Then it's actively monitoring temperature so it's active and therefore not off
 
Then it's actively monitoring temperature so it's active and therefore not off

It's logging the temperature, but not controlling it. Hence the message "Temp. control OFF".
 
If I just want to monitor temps and not control a ferm chamber, do I need the relay? Or will the Pi and probs be sufficient enough?
 
If I just want to monitor temps and not control a ferm chamber, do I need the relay? Or will the Pi and probs be sufficient enough?

No, you would also need to include the Arduino (Uno or alternative) as that is the interface to the temperature probes.

If you want a solution that only needs a Pi and probes (up to 5 channels) there's this.

Cheers!
 
No, you would also need to include the Arduino (Uno or alternative) as that is the interface to the temperature probes.

Yep, I should have included the Arduino in my question. I'm just stepping into fermentation control one foot at a time (aka, I don't have a fridge) and had almost all components necessary anyway.

Thanks all! :tank:
 
Well...let's be careful out there. If a fridge has a door switch it certainly will be tied to the interior lighting, which just as certainly will use a 120vac circuit. If one were to grab that particular circuit and plumb it into an Arduino, they're going to have a bad time ;)

Forsaking interior lighting is one way to go. Take the wires off the switch, ground one side of the switch (note: all the way back at the Arduino. The fridge chassis ground should not be connected to the RPi/Arduino DC ground) and plumb the other side to the Arduino with a light pull-up (eg: 10K) to 5VDC and you'd be in business.

You'd just have to figure out whether the switch opens or closes with the door open and toggle the polarity (inverted or non-inverted) in the Device Setup pane.

An alternative that would be preserve interior lighting would be to mount a magnetic reed switch to the cabinet and a matching magnet to the door...

Cheers!
 
Good point day tripper. That in fact is what I did. I had an extra reed switch in my tool box from my old alarm days. If your going to use the door switch that's built in you will need to disconnect the wires leading to it. Which will have power on it if your plugged in. Those wires will connect to the relay controlled by your Arduino to turn the light on instead of the switch. Then you can wire the switch to the Arduino inputs. This works nicely if you choose to heat with your light bulb. My climate is so hot heating is not needed so buying a heater for that purpose would be a waste.
 
Well...let's be careful out there. If a fridge has a door switch it certainly will be tied to the interior lighting, which just as certainly will use a 120vac circuit. If one were to grab that particular circuit and plumb it into an Arduino, they're going to have a bad time ;)
Yes excellent point. In my case I just wanted to exercise that portion of the code on my bench - so the "switch" is a little yellow dupont jumper.

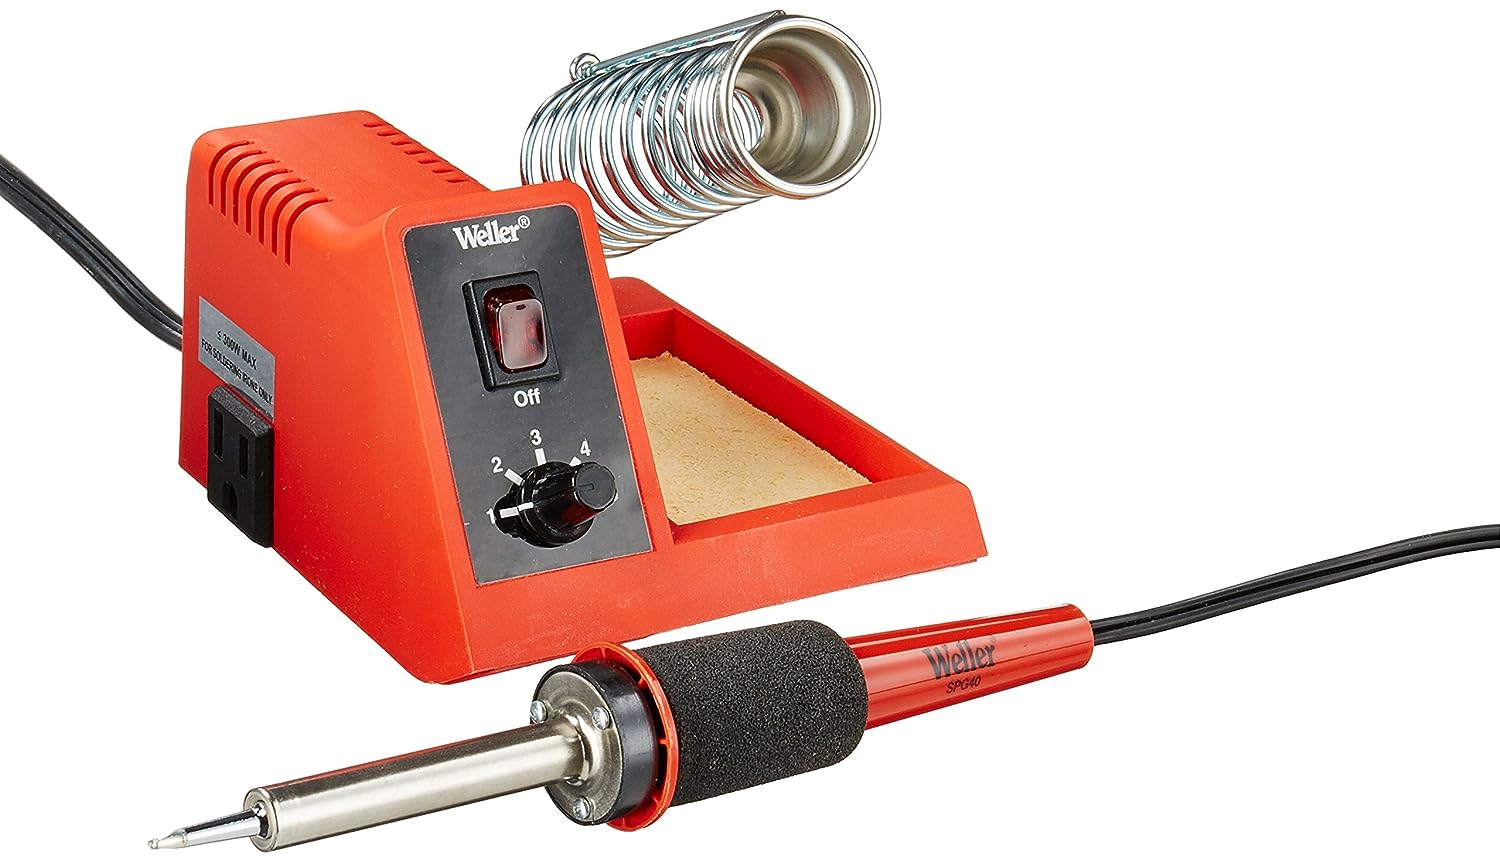
This might be a good thread in which to ask since we have so many people starting out and so many people helping: Any recommendations on a soldering iron that's not more expensive than the whole project? I have no idea where my old Weller station got to. I found this one for $38 but that's what I spent on my Pi:


Weller WLC100 40-Watt Soldering Station


I know a decent setup will make my life easier, but then again I don't want to spend needlessly. :)
 
Last edited by a moderator:
So I just went through the install on a clean RPi 3 with the latest Jesse a couple times and believe it can be distilled down pretty simply:

git clone https://github.com/BrewPi/brewpi-tools.git ~/brewpi-tools
sudo ~/brewpi-tools/install.sh
sudo ~/brewpi-tools/updater.py --ask


(choose legacy branch both times when prompted)

*** Updating BrewPi web interface repository ***
The path '/var/www' does not seem to be a valid git repository
What path did you install the BrewPi web interface scripts to? /var/www/html

The update script can automatically check your controller firmware version and program it with the latest release on GitHub, would you like to do this now? [Y/n]:n


At this point I was working but my Arduino was already programmed. I'd guess the instructions to program via the web interface would pick up.

This seems simpler than following the completely manual instructions. The install script does all the prerequisites, supporting software, users, etc. Using the updater rolls it back to the legacy branch correctly, the only caveat being you have to correct the www path.

If I knew a way to wipe my Arduino I'd give it a go with that in the process too.
 
If I knew a way to wipe my Arduino I'd give it a go with that in the process too.

You can wipe the Arduino by loading onto it a different hex file using xloader or the Arduino IDE with it hooked up to your laptop or computer.
 
Ah ... okay I may try that. Thanks. I'm still just controlling a couple light bulbs on my bench so no big deal if I fubar it. :)
 
Okay I did it with a clean Arduino too. Had to add support for the Arduino before it would install the firmware. Pretty simple process start to finish:

sudo apt-get install arduino-core
git clone https://github.com/BrewPi/brewpi-tools.git ~/brewpi-tools
sudo ~/brewpi-tools/install.sh
sudo passwd brewpi
sudo ~/brewpi-tools/updater.py --ask


(choose legacy branch both times when prompted)

*** Updating BrewPi web interface repository ***
The path '/var/www' does not seem to be a valid git repository
What path did you install the BrewPi web interface scripts to? /var/www/html

The update script can automatically check your controller firmware version and program it with the latest release on GitHub, would you like to do this now? [Y/n]:Y

Is your controller unresponsive and do you wish to try restoring your firmware? [y/N]: Y


(Choose 0.2.10 release)

sudo nano /etc/apache2/apache2.conf

Change "KeepAliveTimeout 5" to "KeepAliveTimeout 99" to deal with LCD text refresh bug.

sudo /etc/init.d/apache2 restart

Do regular setup and configuration from within web interface.

Done.
 
Status
Not open for further replies.
Back
Top