dataz722
Well-Known Member
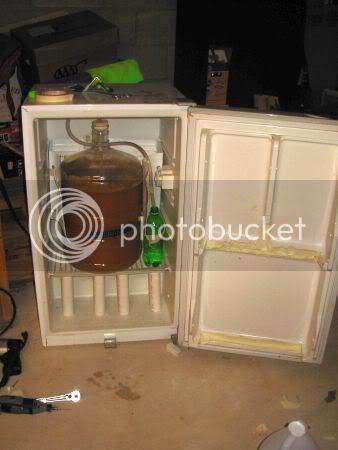
I came home tonight to check the American Wheat that I had brewed yesterday only to find out the it was really hot. It actually wasn't even getting a reading on my stick on thermometer and that goes up to 84F. I think it was probably in the high 80's. Keep in mind the basement temp is around 70 and it was sitting on the concrete slab so it must have been mainly because of the fermentation. It just so happened that a buddy of mine actually gave me a mini-fridge yesterday that we planed on using to lager. We weren't planning on converting it for at least another month though when we could really plan it out and get everything we needed ready but I didn't really have a choice but to do it immediately.
I have decided to at least post what I did just in case anyone else need to covert the same or similar fridge. Please keep in mind that it is pretty ugly and crude right now but that is just because i was completely unprepared and had to work with what I already had. I will be making it more aesthetically pleasing in the near future.
It is a Haier 4 Cubic Foot Mini Fridge Model HSL04WNAWW
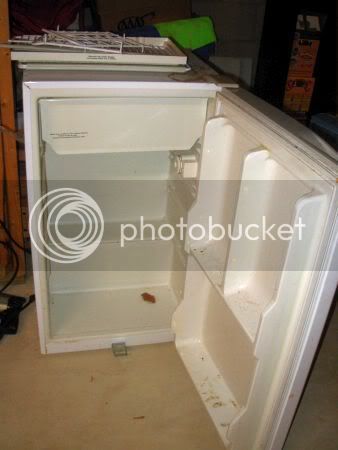
The fridge has the little freezer on the top that also works as the refrigeration unit and that made it so that there was not enough clearance. Also the shelves and whatnot in the door made it so the door wouldn't close.
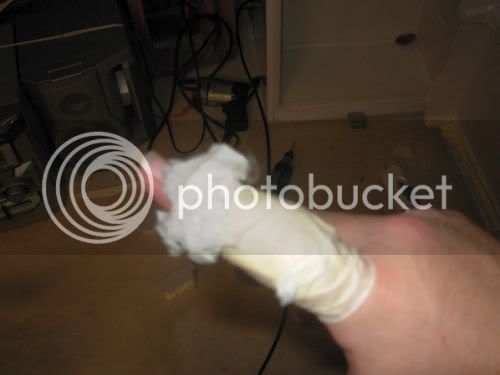
The first to go was the shelves in the door. I tried using multiple tools for this from a hacksaw to different bits for a dremel and various of things. Either they didn't work well or SWMBO was complaining that I was being too loud In the end a good old utility knife and new razor blade actually worked the best and it was quiet too. I just cut away as little as possible so that the body of the BB would fit and the door would close. There is alot of insulation in there so I wanted to leave as much of it as I could.
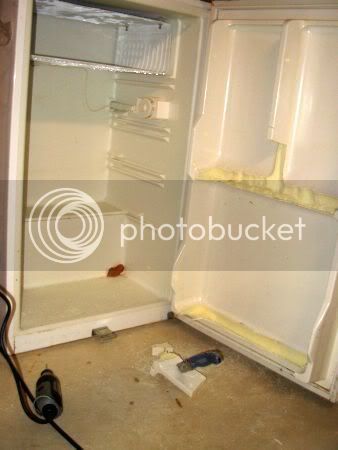
That Plastic is sharp as hell though, but nothing like a workshop band-aid to fix it.
Now onto the little freezer compartment!
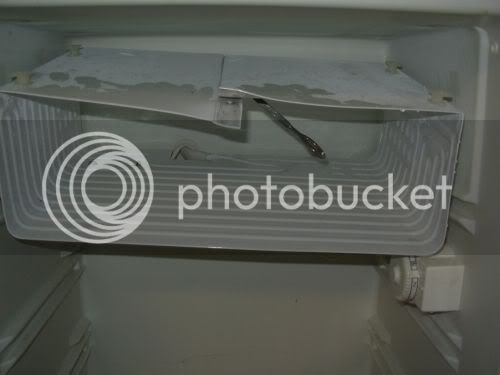
There were 4 screws holding it to the top of the fridge. These turned out to be the biggest PIMA out of the whole project. They were damn near impossible to get at and took about 5000 1/4 turns of a ratchet!
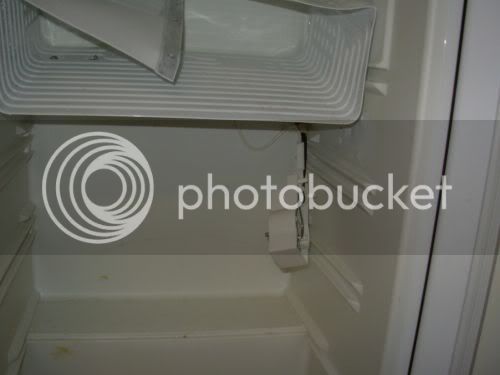
Once those were out I found out the metal making the freezer was bent around and riveted at the top. There are three rivets holding the two sides together. If I had tin snips I would have just cut this section but I ended up using a paint opener to pry the rivets apart. This top section can be cut or scraped or messed up just make sure to do as little damage to the other 3 sides as possible (the sides that have all the ridges on them) these are where the refrigerant flows through.
I have decided to at least post what I did just in case anyone else need to covert the same or similar fridge. Please keep in mind that it is pretty ugly and crude right now but that is just because i was completely unprepared and had to work with what I already had. I will be making it more aesthetically pleasing in the near future.
It is a Haier 4 Cubic Foot Mini Fridge Model HSL04WNAWW
The fridge has the little freezer on the top that also works as the refrigeration unit and that made it so that there was not enough clearance. Also the shelves and whatnot in the door made it so the door wouldn't close.
The first to go was the shelves in the door. I tried using multiple tools for this from a hacksaw to different bits for a dremel and various of things. Either they didn't work well or SWMBO was complaining that I was being too loud In the end a good old utility knife and new razor blade actually worked the best and it was quiet too. I just cut away as little as possible so that the body of the BB would fit and the door would close. There is alot of insulation in there so I wanted to leave as much of it as I could.
That Plastic is sharp as hell though, but nothing like a workshop band-aid to fix it.
Now onto the little freezer compartment!
There were 4 screws holding it to the top of the fridge. These turned out to be the biggest PIMA out of the whole project. They were damn near impossible to get at and took about 5000 1/4 turns of a ratchet!
Once those were out I found out the metal making the freezer was bent around and riveted at the top. There are three rivets holding the two sides together. If I had tin snips I would have just cut this section but I ended up using a paint opener to pry the rivets apart. This top section can be cut or scraped or messed up just make sure to do as little damage to the other 3 sides as possible (the sides that have all the ridges on them) these are where the refrigerant flows through.