First All Grain brew and my new 3 Tier (ish) wood stand

Homebrew Talk - Beer, Wine, Mead, & Cider Brewing Discussion Forum

Help Support Homebrew Talk - Beer, Wine, Mead, & Cider Brewing Discussion Forum:

This site may earn a commission from merchant affiliate links, including eBay, Amazon, and others.

groundchuck

Well-Known Member
Joined
Apr 11, 2013
Messages
90
Reaction score
29
Location
Caledonia
I just completed my first all grain brew yesterday. My brother and I have been doing extract kits for a while and wanted to try All Grain. We recently attended the Big Brew Event at Calder Plaza (Grand Rapids, MI) and got lucky enough to be schooled by some very good brewers. So we decided we wanted to give it a go. We did a 5 gallon Oberon clone. The local brew store hooked us up with the proper grain bill and instructions. Over all it went very smooth. Our OG was 1.057 and the target for the recipe is 1.055. After about 18 hours the fermentor is beginning to bubble away. So, we'll see how it turns out in a few weeks.

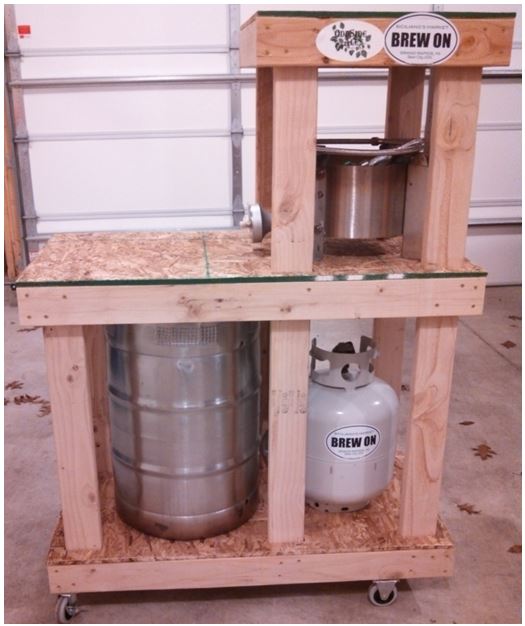
There's lots of great information on this forum for newbies like us. Thanks for all the information and ideas for equipment and gravity stand construction (I tried to attach a pic, hopefully it works).

image-3926105220.jpg
 
I need to build something like that. Looks good!

Thanks! It was actually pretty simple to do.
1 - 4'x8' sheet of OSB
7 - 2"x4"x8' boards
1 - box 2.5" deck screws
4 - roller casters

It took a couple hours to finish and is pretty rock solid.
 
Have you found anything you would like to change with your rig over time?

So far I have only done one brew so its hard to say what specifically I may tweak next. I do know that this design is very solid so I am not worried about any wobbling or difficulty carrying the load of the two coolers when they are loaded. I think as I do more brews I may add conscience items like places to hang stuff and make it easier to keep stuff handy. Other than that I love it as is.

Eventually when I get another boiler and kettle for up top all I have to do is unscrew the upper level, cut the 2x4s shorter then screw the level back on and I am good to go.
 
Have you found anything you would like to change with your rig over time?

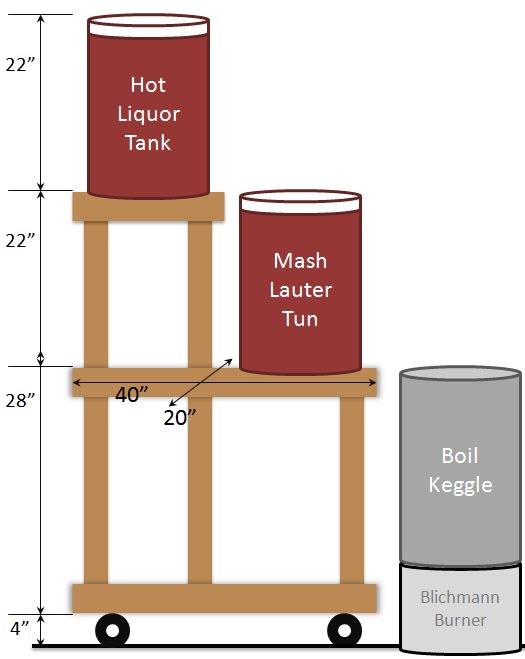
OK, I found something I would like to change. We did our second brew this weekend and as we were doing the clean up I discovered a necessary change for storage purposes. In my quest to make the smallest possible gravity stand I didn't not fully study the storage configurations. I would like to put the keggle on the bottom shelf so it is nicely out of the way and the opening is covered from dust/dirt when not in use. The problem is that space is about 2" shorter than the keggle :smack:

Here are the dimensions of the one that I built. If I were to do it again I would raise the middle shelf up about 2" to allow for keggle storage on the bottom shelf.

Dimensions.JPG
 
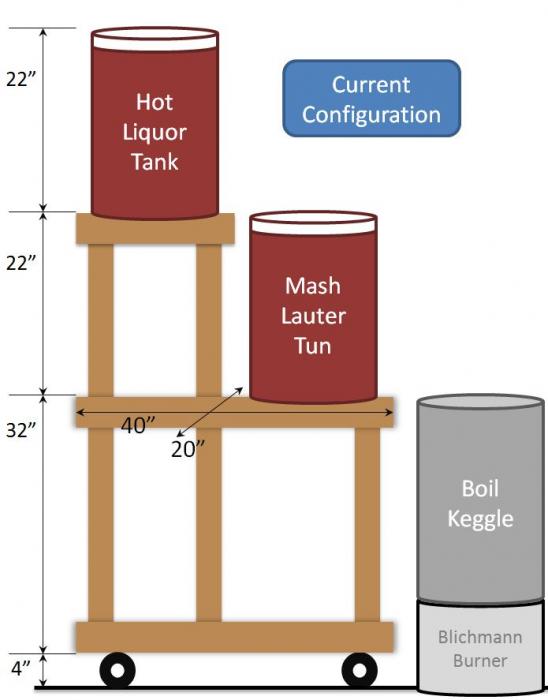
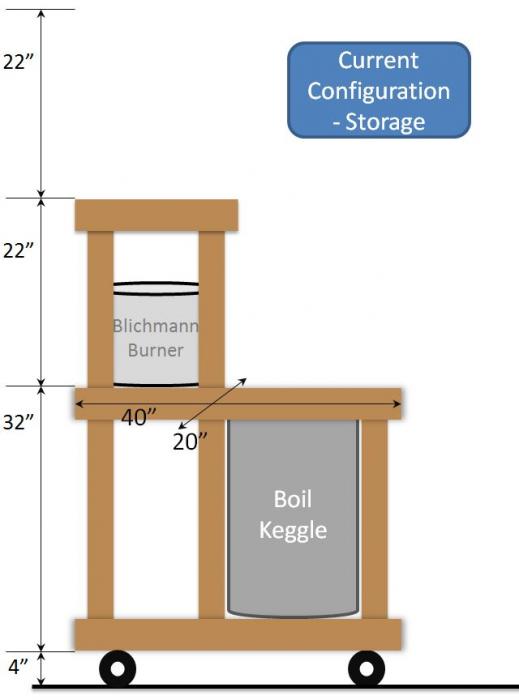
I did a minor update to my brew stand to allow for keggle storage while not in use. I also included the dimensions of this stand based on these updates. If you plan to build one of your own and store the keggle in the same way, definitely measure your own specific keggle and coolers to get the proper spacing.

Here are some pics and dimensions for anyone interested.

GravityStand_InUse.jpg


GravityStand_InUse2.JPG


GravityStand_Storage.jpg


GravityStand_Storage2.JPG
 
What is the width in between your 2x4's. QUOTE]

Thanks for the kind words :mug:

In the picture with the dimensions I noted the outside width as 20". That's the width of the shelves and also the outside of the 2x4 frame underneath. The Vertical 2x4s are mounted inside the frames of the shelves (if that makes sense). The 2x4s are actually 1.5" thick so accounting for the frame size and the vertical 2x4s the distance between the vertical 2x4s is 14" (sorry for the long math problem :).

IF you plan to make one just like mine do it this way:
1) Cut the shelves (2 are 20" x 40" and 1 is 20" x 20")
2) Cut the 2x4s for the "picture frames" to go underneath each shelf
3) Screw the "picture frames" together
4) For the middle and bottom tiers, place the shelf on top of the picture frames and hold them in the proper location. Then turn the shelf and frame over (so it's laying upside down on your driveway or wherever) and hold a 2x4 in the vertical orientation into each of the 4 corners and mark where they will go through the shelf.
5) Pull the top shelf off the frame and use a jig saw or small circular saw to "plunge cut" the holes for the 2x4s to pass through. (if you don't want to mess around with this detail you can just use a regular saw and cut the full corner off but I like the look of the 2x4s passing through the shelf).
6) Screw the Shelves to the picture frames
7) Cut the Vertical 2x4s to your desires heights (based on your own coolers, keggles, etc.)
8) Get a friend to help with screwing the vertical 2x4s through the shelves
9) Add some rolling casters
10) Take pictures and post on the interwebz :mug:
 
Back
Top