• Please visit and share your knowledge at our sister communities:
  • If you have not, please join our official Homebrewing Facebook Group!

    Homebrewing Facebook Group

Sanity check

Homebrew Talk

Help Support Homebrew Talk:

This site may earn a commission from merchant affiliate links, including eBay, Amazon, and others.
So I built out the toolbox sans wiring yesterday, but didn't get any pictures. I'll put one up when I wire it in tomorrow.

Today I cut up my enclosure, made a back plate, and mounted a few components.

A word of advice: don't buy an enclosure with a clear front. That stuff scratches like nobody's business, and it's a beast to cut through since it's so thick. It just melts. Go with a metal box.

PC120179.jpg

PC120181.jpg

PC120182.jpg

PC120183.jpg

PC120184.jpg
 
Today I cut up my enclosure, made a back plate, and mounted a few components.

A word of advice: don't buy an enclosure with a clear front. That stuff scratches like nobody's business, and it's a beast to cut through since it's so thick. It just melts. Go with a metal box.

Looking good! :)

That clear front is intriguing for us who want to see how stuff works.

The PIDs seem to gobble up a lot of space behind the panel. Will you be able to mount stuff on the back plate underneath them?

My enclosure is taking its sweet time to arrive. Maybe next week.
 
Quaffer, yes the PID's are pretty deep, and the enclosure I got isn't, but with some creative arranging there's about 1/2" of clearance between the bottom of the PIDs and the terminal blocks. Now way they'd clear the relays.

Here's some pics. The wiring is completely done, and I ran continuity checks on everything. I'm going to think about it for a while, replumb my RIMS, wire in the BK element, and generally do anything I can to avoid turning it on. I'm just nervous as hell, even though I'm confident that everything will be fine. Something about powering up $400 for the first time...

PC130192.jpg

PC130191.jpg

PC130188.jpg

PC130190.jpg

PC130189.jpg


I didn't shield the RTD wires inside the panel, but then I saw TB's post about doing it after I'd wired them in. Is this really necessary? I'm thinking of giving it a whirl without shielding first and seeing how it goes.
 
As promised, here's some pics of my RIMS toolbox. I put the pump in the lid so I can use the full bottom space for storage, and the pump cord winds back inside. I should be able to get the RTD cords in there, along with a lot of odds and ends hardware wise that I may need on brewday.

PC130193.jpg

PC130194.jpg


Finally, I had some issues getting the sleeving over the powercords for the elements. It wanted to hang up and fray and generally be disagreeable. I found that wrapping a bunch of electrical tape into a cone on the insertion end made the whole thing super easy.

PC130185.jpg

PC130186.jpg
 
So I Finished the plumbing and cut my hoses. I need to get one FTPxbarb fitting, and a bunch of hose clamps and I'll be ready to run a full water test cycle. Oh, when I finally worked up the courage to hit the power button nothing happened. My heart sank. I pulled out the multimeter and ran continuity tests on EVERYthing again, and it all looked great. After about 45 minutes of head scratching I realized that I had all the breakers in the off position... Not cool, but once I flipped them everything worked perfectly.

PC140198.jpg

PC140195.jpg
 
Congratulations! I am really impressed how fast you got your brewery together. It looks like you are just about ready for the inaugural brew. Well done, man!

I like your CFC coil. Did you make it yourself? Mine is made out of an old garden hose and does not look anywhere near as good. I will be hiding it under a shelf.

You made good use of the space in your panel. It is packed.

I just had a big setback. A power surge last night killed my computer with all my plans and CAD files, literally weeks of work. And it was supposedly protected by a surge strip. The strip has the "Protected" light still on, but the computer hangs during boot, fan howling.

I wish you good luck on your first brew. It's going to be great!
 
Quaffer, thanks for the compliments. The panel is packed, it was a bit of a challenge finding a way to get the wires from the bottom to the lid without pinching them. It happened fast because I'm single and in college. I just finished up finals last week and I had been collecting all the pieces, so it was just a matter of building it all once finals were over.

I did DIY the CFC. It's 3/8" inside 5/8" and 25' long. I had a 15' before with 1/2" inside a 3/4" garden hose. That one was OK, but not very efficient. When the incoming water was 50F I had to run it full blast to get the wort down to 65F, and the output water was about 100F. I found that there just wasn't enough surface area for a good heat transfer, so I made the new one smaller and longer. I tested this on a couple batches using gravity to drain through the CFC. I had to throttle back the cooling water to a trickle to keep the wort at 65F, and the water coming out was about 180F, perfect for cleanup. I went with copper in copper so I could run boiling wort through to sanitize, rather than dealing with loading it full of starsan.

I'm really sorry to hear about your computer. Hopefully the drive is still good. Since the fan is ripping it sounds like it's the motherboard that got cooked. Have you tried contacting the power strip manufacturer? They usually have a guarantee of some sort. If I were you I would get one of these. Pull your hard drive out, stick it in there and you should be able to plug it into another computer and boot from it to access your data. I hope that helps. It's only $10 plus shipping. I'd be willing to risk that to try to recover all my lost files.

Right now I'm running a PBW cycle through the brewery. I've found a lot of leaking fittings, which was a bit disappointing. It was all leak free at room temp, but once it got hot that changed. I'm headed to the LHBS later today to pick up a couple batches of ingredients and to HD to get some insulation. I'll fix the leaks this evening and run a couple more hot water tests, but hopefully I'll have picks of popping her cherry tomorrow or Thursday.

I can't decide what I want to brew first, though. I'm thinking of doing a batch of my RPA, but seeing as how it's the shakedown brew I'm not too sure about having 3.5lbs of rye in there. I'd hate to start out with a stuck mash...
 
The IDE to USB gizmo is a great idea! And cheap. Thanks. I just remembered another trick to try that helped me out a couple years ago on the same computer (DELL XPS410). I need to find the jumper to reset the CMOS chip. Perhaps it got corrupted.

I have a few pounds of rolled rye looking for a brew to end up in. If you're putting in 3.5 lbs it must be a 10 gallon batch, right? I have not seen a confidence-inspiring recipe yet so I was just going to bastardize a regular IPA and see what happens.

I veered a bit off topic here. Your CFC sounds very efficient. Mine has 20’ of 3/8” copper in an old, stiff garden hose. It chills 5.5 gal to 65-70 degrees in about 20 minutes with water running at about ¼ full speed, gravity fed into fermenter. Chill water output is only lukewarm, but I have plenty of 50-60F water so not a big deal. I should have convoluted the copper with a wire to improve efficiency. I have used Iodophor so far, but I will subject it to hot sanitation like your all-copper one. If it holds it holds. There will be no pressure on the hose while it is hot, and only a little while chilling. If it breaks I will be building an all-copper one myself.
 
I would surely try the CMOS reset first, save some money and time if it works. I hope that it does.

That's actually in a 5.5 gal batch. I really like rye, but everyone that tries it likes it too.
8# two-row
3# malted rye
0.5# crystal rye
2.0 oz glacier 5.0% 60min
1.0 oz glacier 5.0% 10min
1.0 oz glacier 5.0% 0min

The spicy glaciers are so nice with the rye bite. I used 1469 for the last batch, but I think any British strain will make a nice beer.
 
The word of the day is CMOS. There was no jumper, it must have been an older system I remembered, but there was a battery of course. I popped it out, shorted the terminals with a pair of tweezers, went to pour a home brew, came back and put it back in and, voila! It is back up again. I had to screw around with a few BIOS settings, but I believe it is back to normal now. Phew. One of these days I will back up my data. Not today.

I will try your recipe, but of course I have NONE of the ingredients. I have a couple of sacks of Pale malt and it is close enough to 2-row. Freezer full of hop pellets, but no glacier. I think I will have to take liberties the first time to move my stock. I'm guessing that you can use so much rye because it is malted. Mine isn't so I will scale back a little. I love rye bread so I bet this will be a winner. Now if I only had a brewery put together.
 
Wow, nice save on the CMOS. Glad to hear it's worked out. Now, before you do anything else...BACK UP YOUR DATA!!! I'm sorry, but I lost a 17 page research paper once to a corrupted sector. Since then I back up the system, and backup all my school and work related stuff online through school. I just can't have that happen again.

With the recipe, I'm using great western for the base malt, so your pale malt will be just fine. For the rye I'd sub 2lbs of rolled and up the base malt by a pound to compensate. As far as the crystal rye, just go with half a pound of some crystal/carmel 100ish barley. That will get you most of the way there, and if you decide that you like the dry, spicy rye flavor just up the amount next time. As far as hops, I chose glacier because they're my current favorite, and the spicyness plays really well with the rye, but I imagine it'd be great with any spicy/earthy hop variety that you have handy. Let me know what you do and how you like it. I'm always interested in improving my recipes.

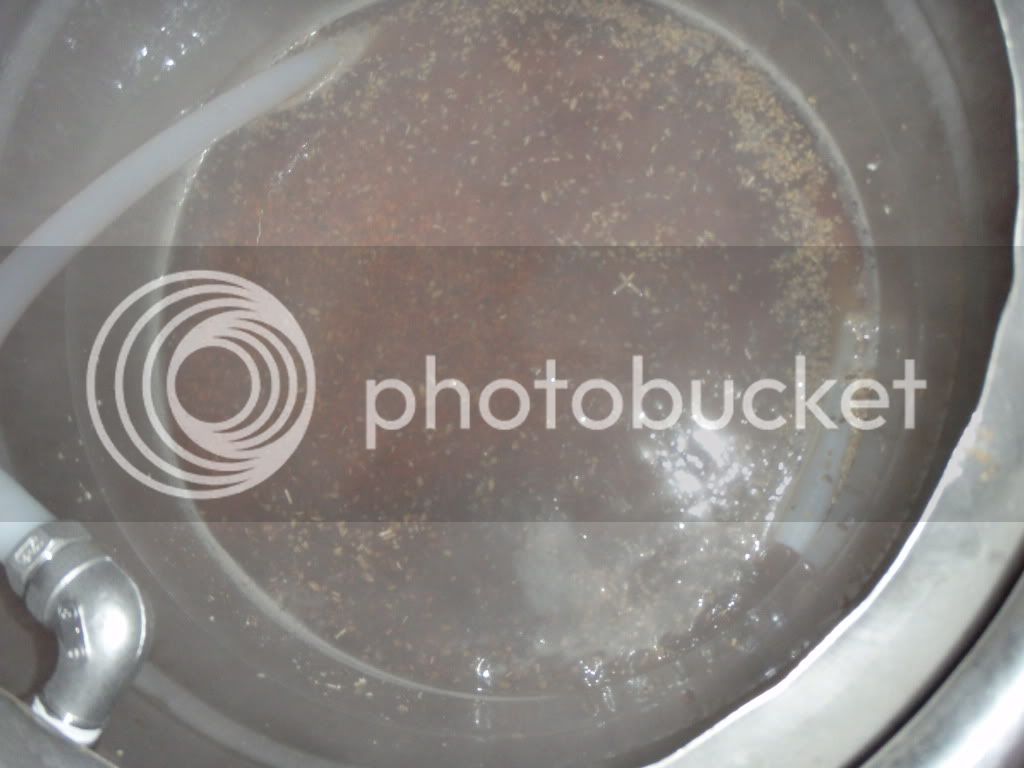
Back on topic, I rebuilt the RIMS and it's leak free. I also fixed the one pinhole leak in the MT/LT. Just doused it in flux and heated it back up until the solder flowed again. I ran a batch of oxyclean through it. The MT/LT started at 52, and it got up to 175 in about 35 mins with the pump going full guns. I moved that over to the BK and had a nice rolling boil at 100% in about 15 mins. I'm now running a batch of water through it, and will do the same again tomorrow. I'm continuing to iron out the kinks before I actually put grain into it.

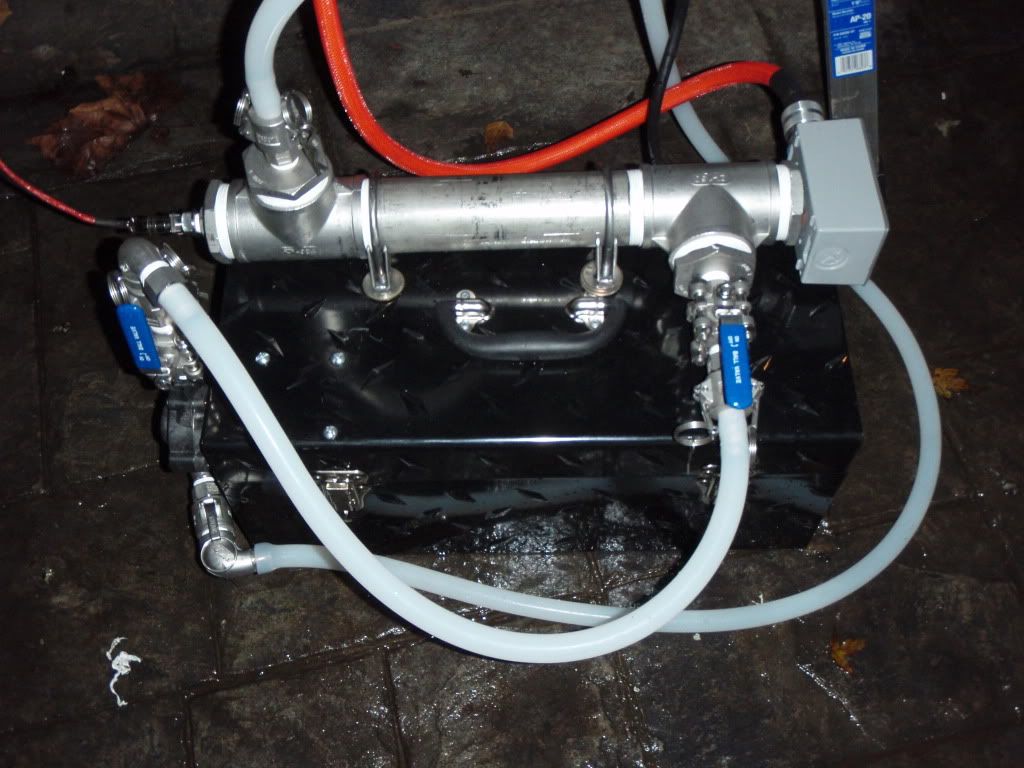
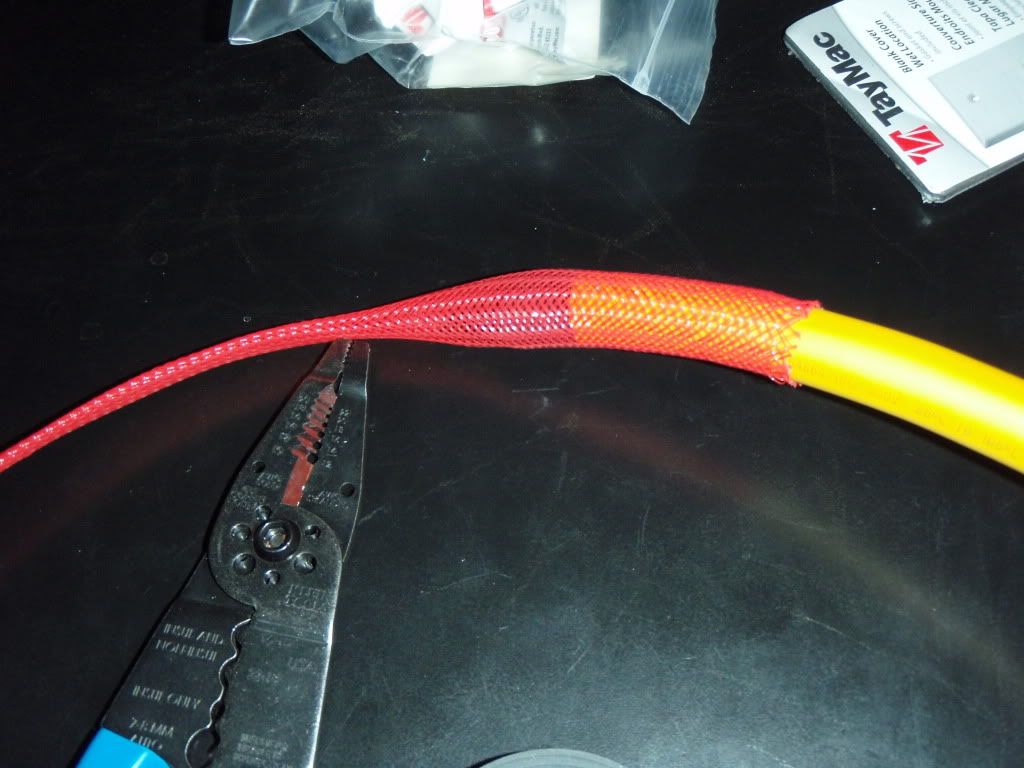
When I rebuilt the RIMS I flipped ends, and oriented the input horizontally to facilitate draining and keep air out of the tube. It's much easier to use in this configuration, and with the ball valve on the input I'm able to keep it flooded to prevent dry firing the element. I had some issues this time getting the element far enough into the 2"x1" reducer bushing to get a good seal with the gasket. I'm considering tapping the thread to NPS on that bushing so I can tighten it down all the way and really sandwich the box. Has anyone done this? How hard is it to get a 1" tap into a stainless bushing that's currently cut for NPT? Where would I go to have it done? I'd hate to spend $$$ on a 1" tap that I'm only going to use once only to find out that I can't turn it in by hand.

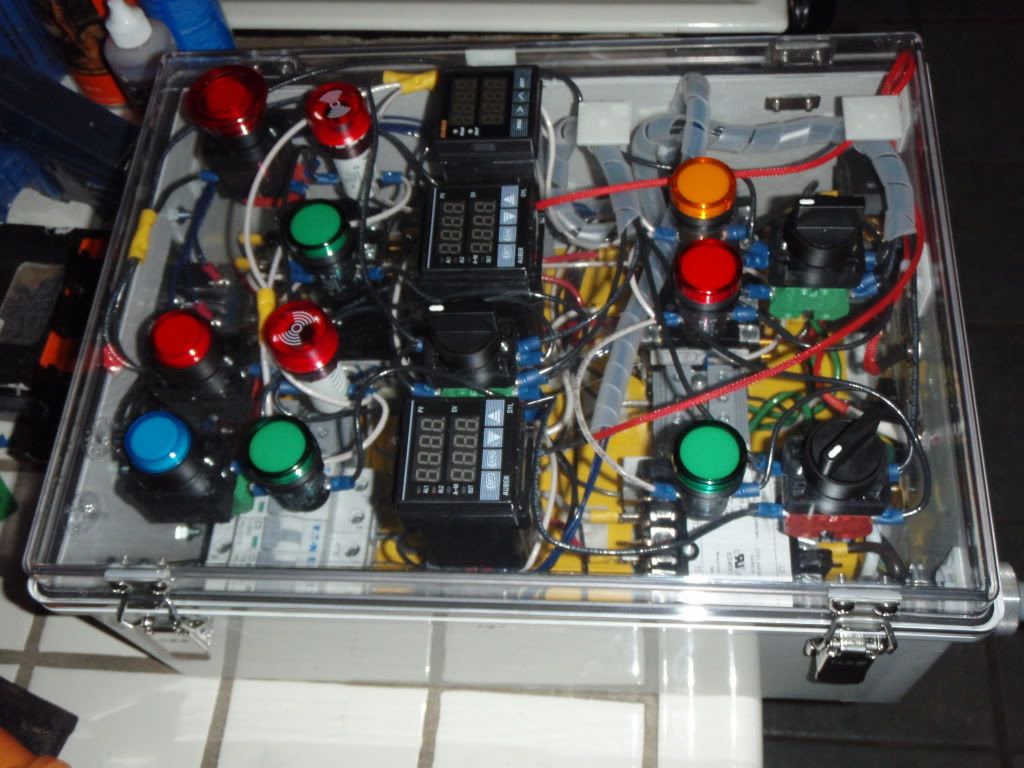
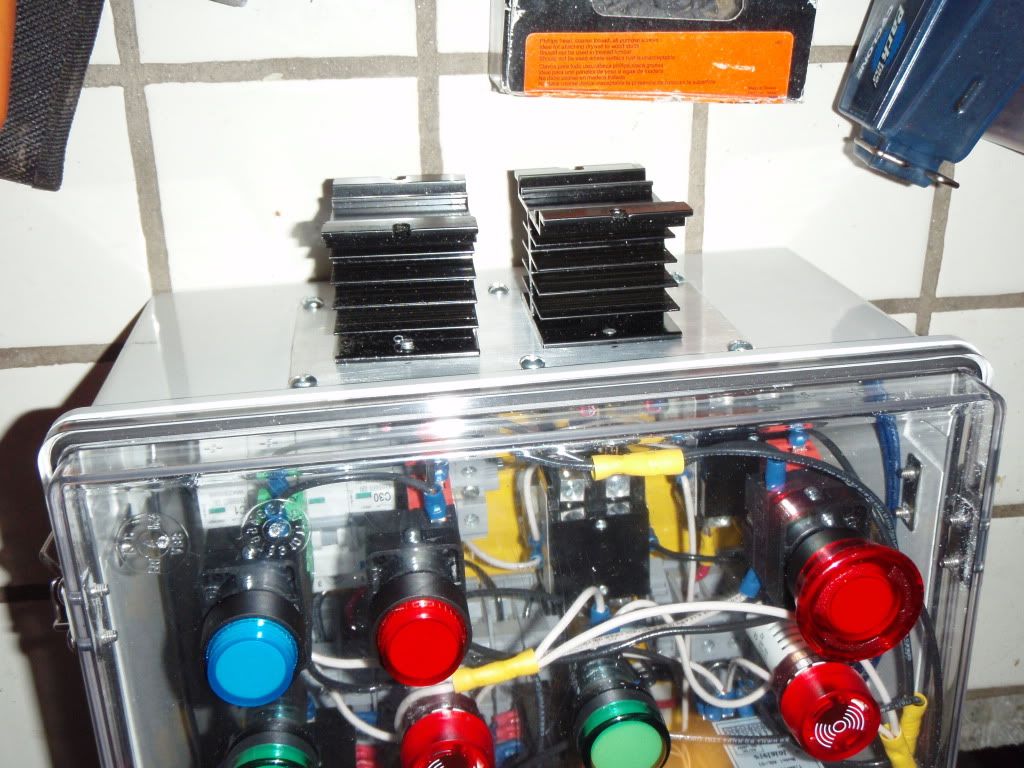
Here's the new RIMS setup:
PC150201.jpg


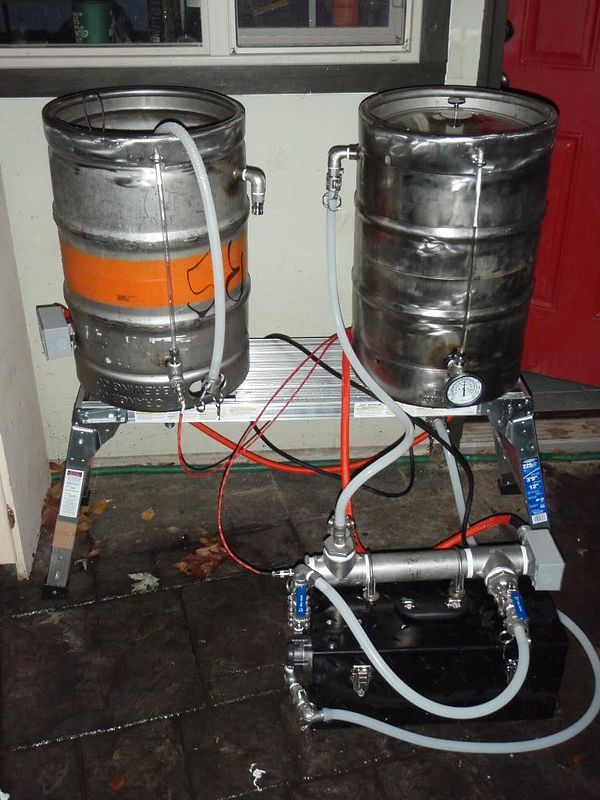
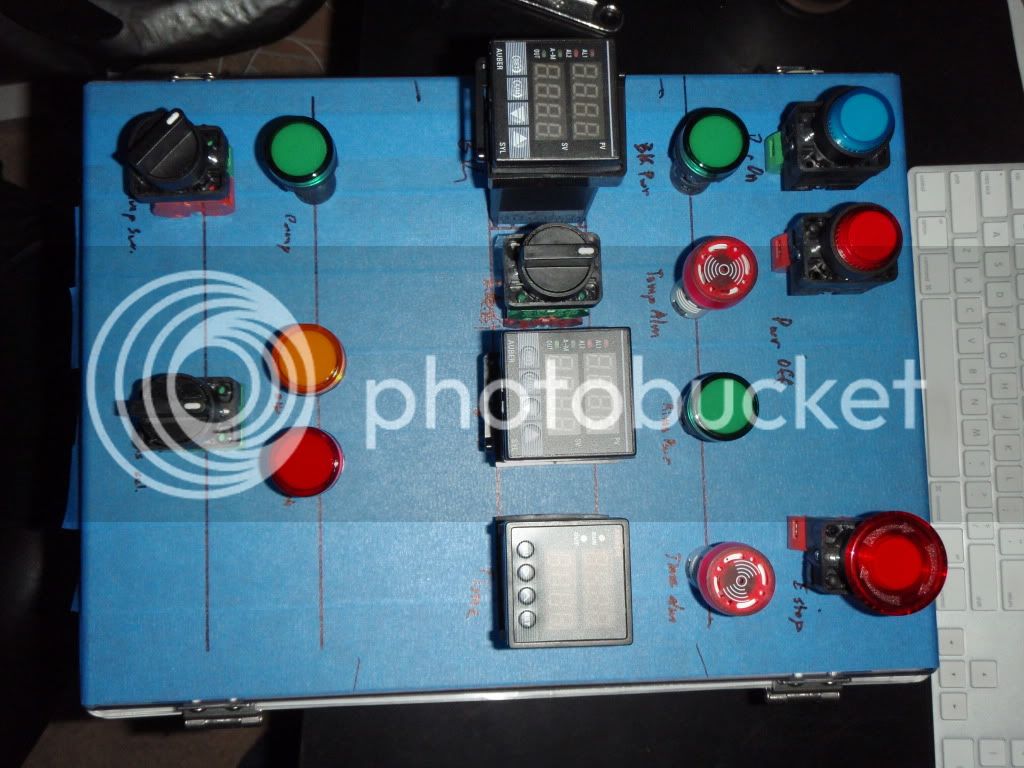
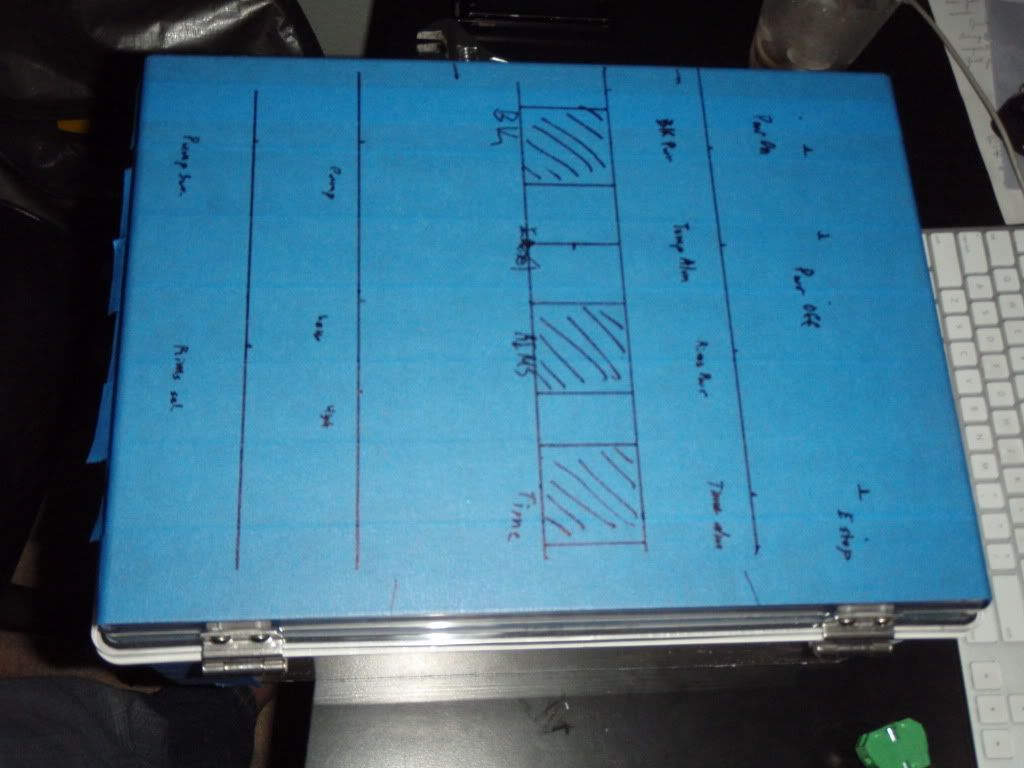
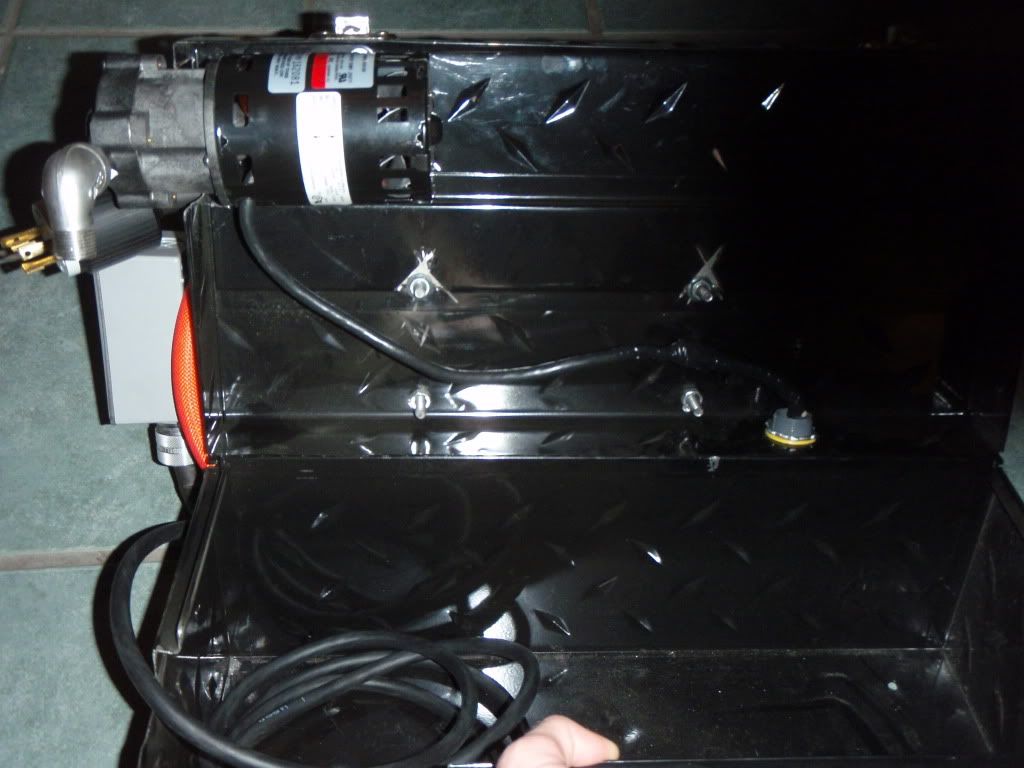
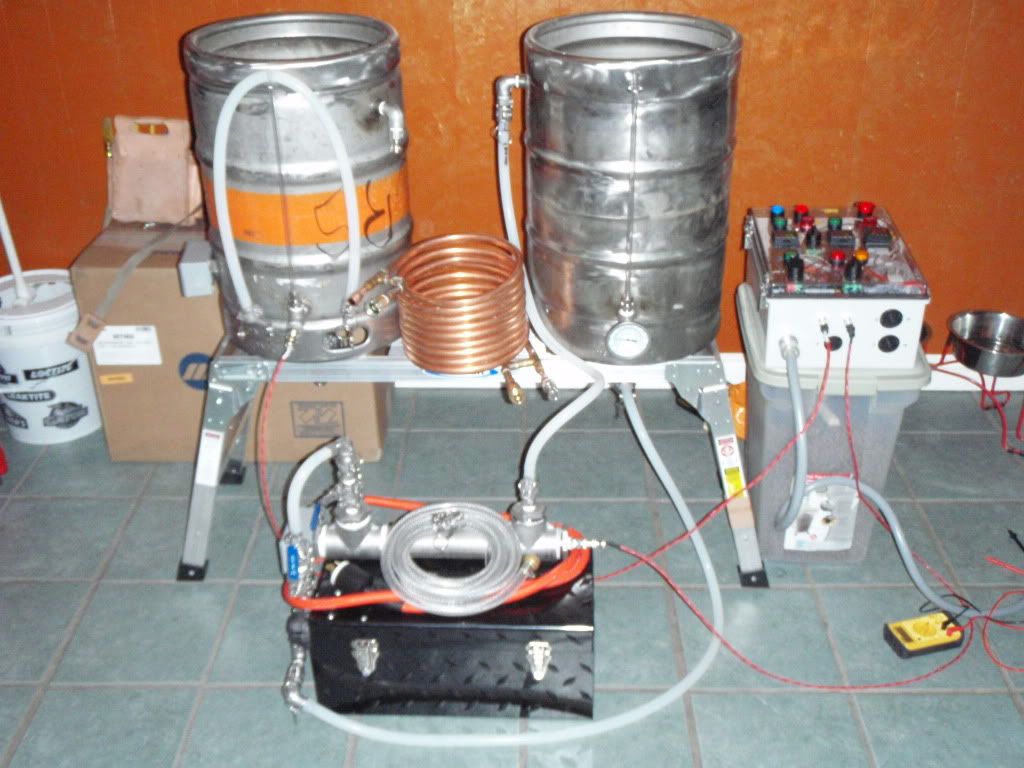
And here's the rig doing a water run, the CP's inside, the rest is on the patio:
PC150203.jpg


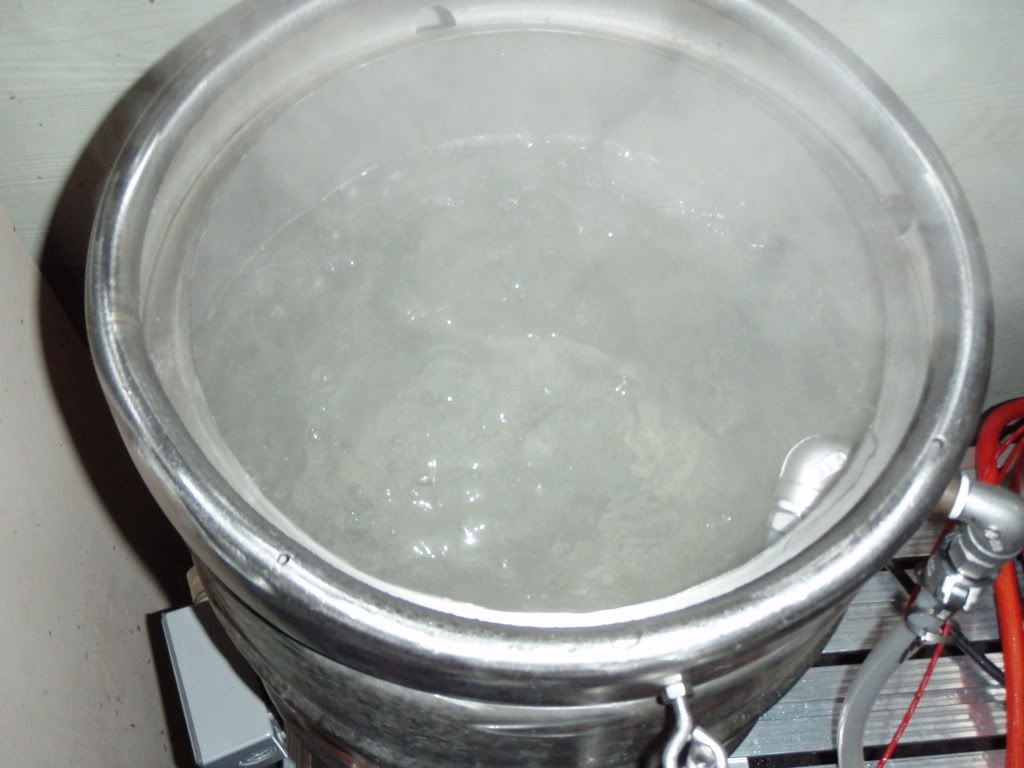
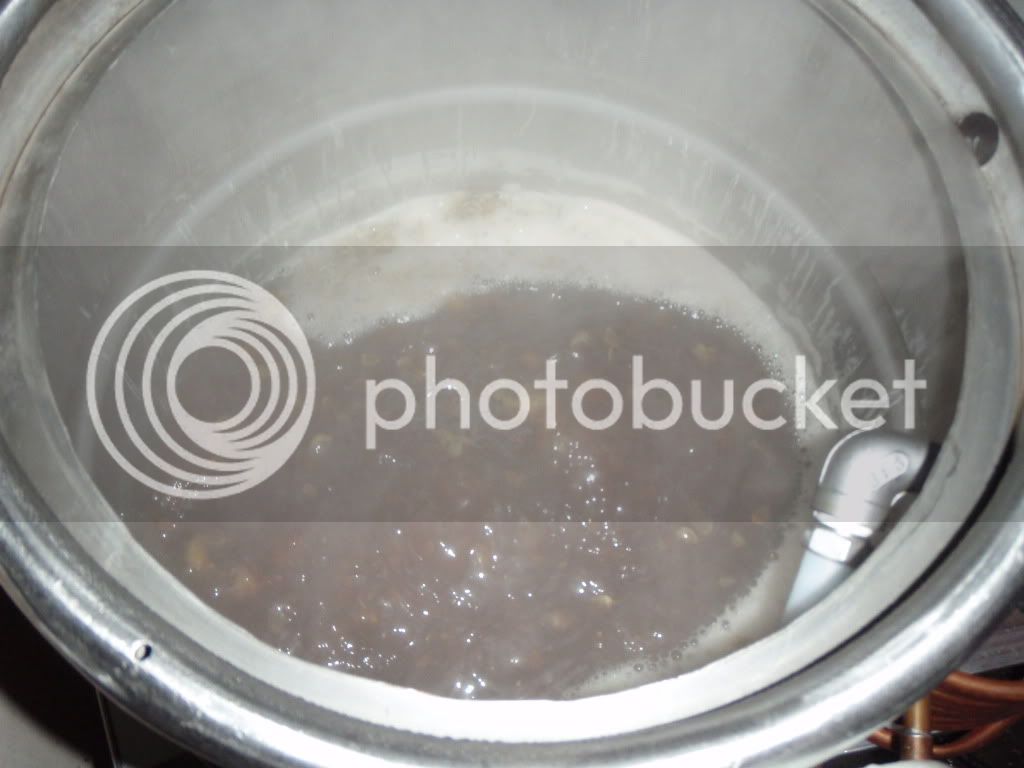
Here's 14ish gallons of water at full boil on 65% pwr:
PC150204.jpg


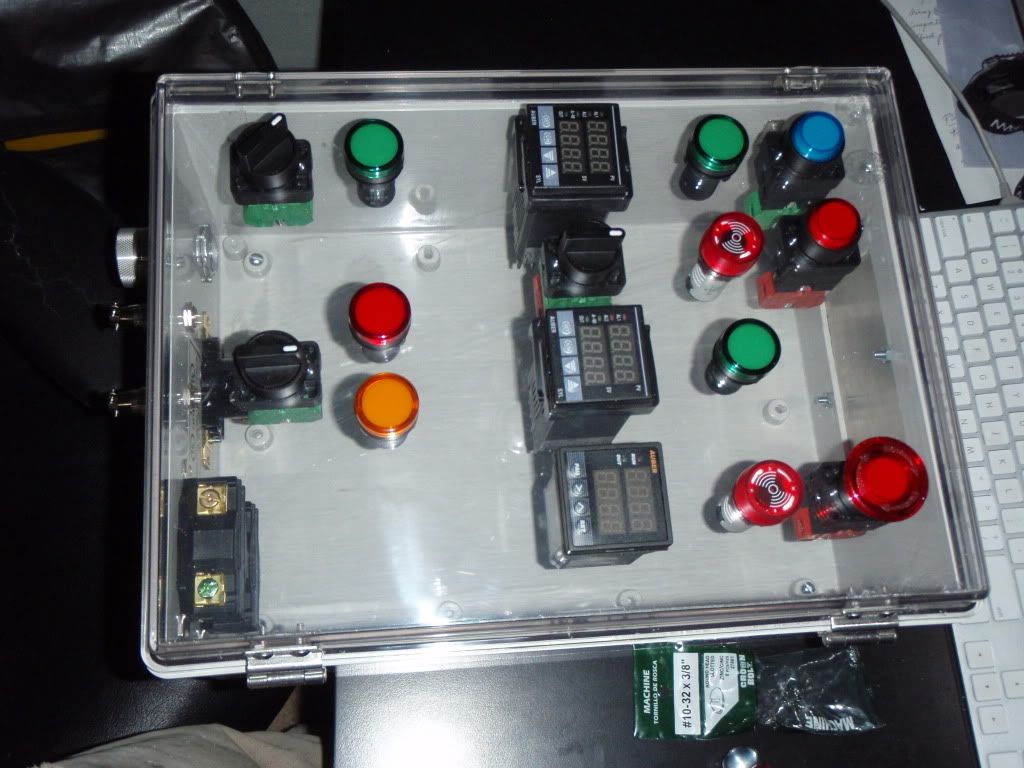
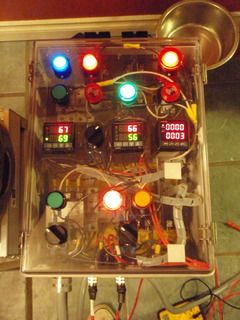
One last question for tonight, what settings does everyone use for their BK that's controlled by an Auber PID? I have it on manual at 100% to get to a boil, then 60% to maintain, but it cycles between a crazy boil when the 5500w is on and nothing when it's off. Right now the cycle time is 2s, which seems to be the minimum. Is this what everyone else runs? Since it's uninsulated and ambient was around 50 today I'm probably using a lot more power than I need to, but I want to get a couple beers in the fermenter before I actually polish and insulate the kegs, just in case I decide to make changes after a bit of getting used to one another.
 
In my system (Omega PID), I had to decrease cycle time to 1 second before I could no longer see an on/off in the boil. Are you sure the minimum cycle time is 2 sec? The minimum on my PID is 0.3 sec.
 
In my system (Omega PID), I had to decrease cycle time to 1 second before I could no longer see an on/off in the boil. Are you sure the minimum cycle time is 2 sec? The minimum on my PID is 0.3 sec.

Hmm, from what I read in the owner's manual the SSR cycle time should be set at 2s, which is the minimum. I'm assuming that's an absolute sort of thing, but I dunno, this is my first PID controlled system.

On another note, I just took 14 gal from 165 to boiling in 13 min in the BK, so that's exciting. I'm sure this will improve with insulation, but right now it looks like the 5.5 kW elements might be a bit overkill. The high/low selector in the RIMS works really well. I autotuned it on high, but it holds temp great on low, even with no insulation. I was planning on re-running the autotune after I shorten my hoses and add the insulation, since I'm guessing it'll overshoot pretty bad once I decrease the heat loss.

One other thing, the Auber timer counter is nice looking, but not the most user friendly thing in the world. Setting the time etc is kind of a hassel with just the two buttons. As far as I can tell the pause button is not maintained. Unless I'm doing something wrong with it, it only seems to pause when it's held down. If this is the case then I'm going to add in a 2 pos NO selector to pause the timer. I've got an extra lying around from the build. I kind of wish I'd gone with the one Kal used in his build now.
 
I got the bug yesterday and put the new rig to use. Did 5 gallons of the RPA. I'm still waiting on the FB for my BK to come in, but as I was searching the house for a hop sack I saw my vegetable steamer and said oh what the hell. It fit past the element just fine, and did a great job of keeping hops and break out of the fermenter.

A couple questions, though. I was having real problems with recirculation. I tried running it at about half throttle on the pump, but that carved a serious channel in the grainbed. I'm using the coiled silicone hose for a return. When I throttled the pump back to a low enough flow that it wasn't cutting into the grain the flow was so low that the RIMS had some serious overshoot problems. (boiled the tube once). So how fast does everyone recirculate during the mash? How have other people solved the return line problem, short of making a diffuser of some sort? Is there anything wrong with going fast recirculating, assuming I can fix the channeling problem? I had the pump open all the way during steps from 122 to 152 and 152 to mashout and it didn't get stuck.

On a side note, I didn't time how long the steps took, but with the element on high and the pump running full bore they were FAST, surprisingly fast actually. I was monitoring temps in the middle, the edge, with the MT/LT thermometer and taking the average of them as the mash temp. The middle was about 2 F higher than the edge or the built in termometer. The RIMS was running about 2 F higher than the mash temp, which was expected.

Here's the mash:
PC160208.jpg


And here's the boil:
PC160209.jpg


All in all it was an awesome brew day. I scooped out the grain and hops when done then pulled the FB's, took off the clovers, and hosed the kegs out. Easiest cleanup ever... Put the clovers back on and recirculated PBW for 20 mins, then water for 20 and done.
 
Turning the kegs upside down and using tri-clovers is an awesome idea. Really makes clean up a snap.

Well, it wasn't my idea at all, SS put it in my head when I first started this thread. It is awesome, though, having a 2" dump to just flush the last bits of grain and hops from.

On a side note, I picked up my FB for the kettle today, so no more vegetable steamer. Right now I've got ingredients for a batch of Moose Drool clone and a robust porter. Problem is that I've got approximately 0 empty fermenters, 0 empty kegs, and half a case of empty bottles. If only I could drink more, I could brew more. Stupid beer's getting in the way of my brewing.
 
Back
Top