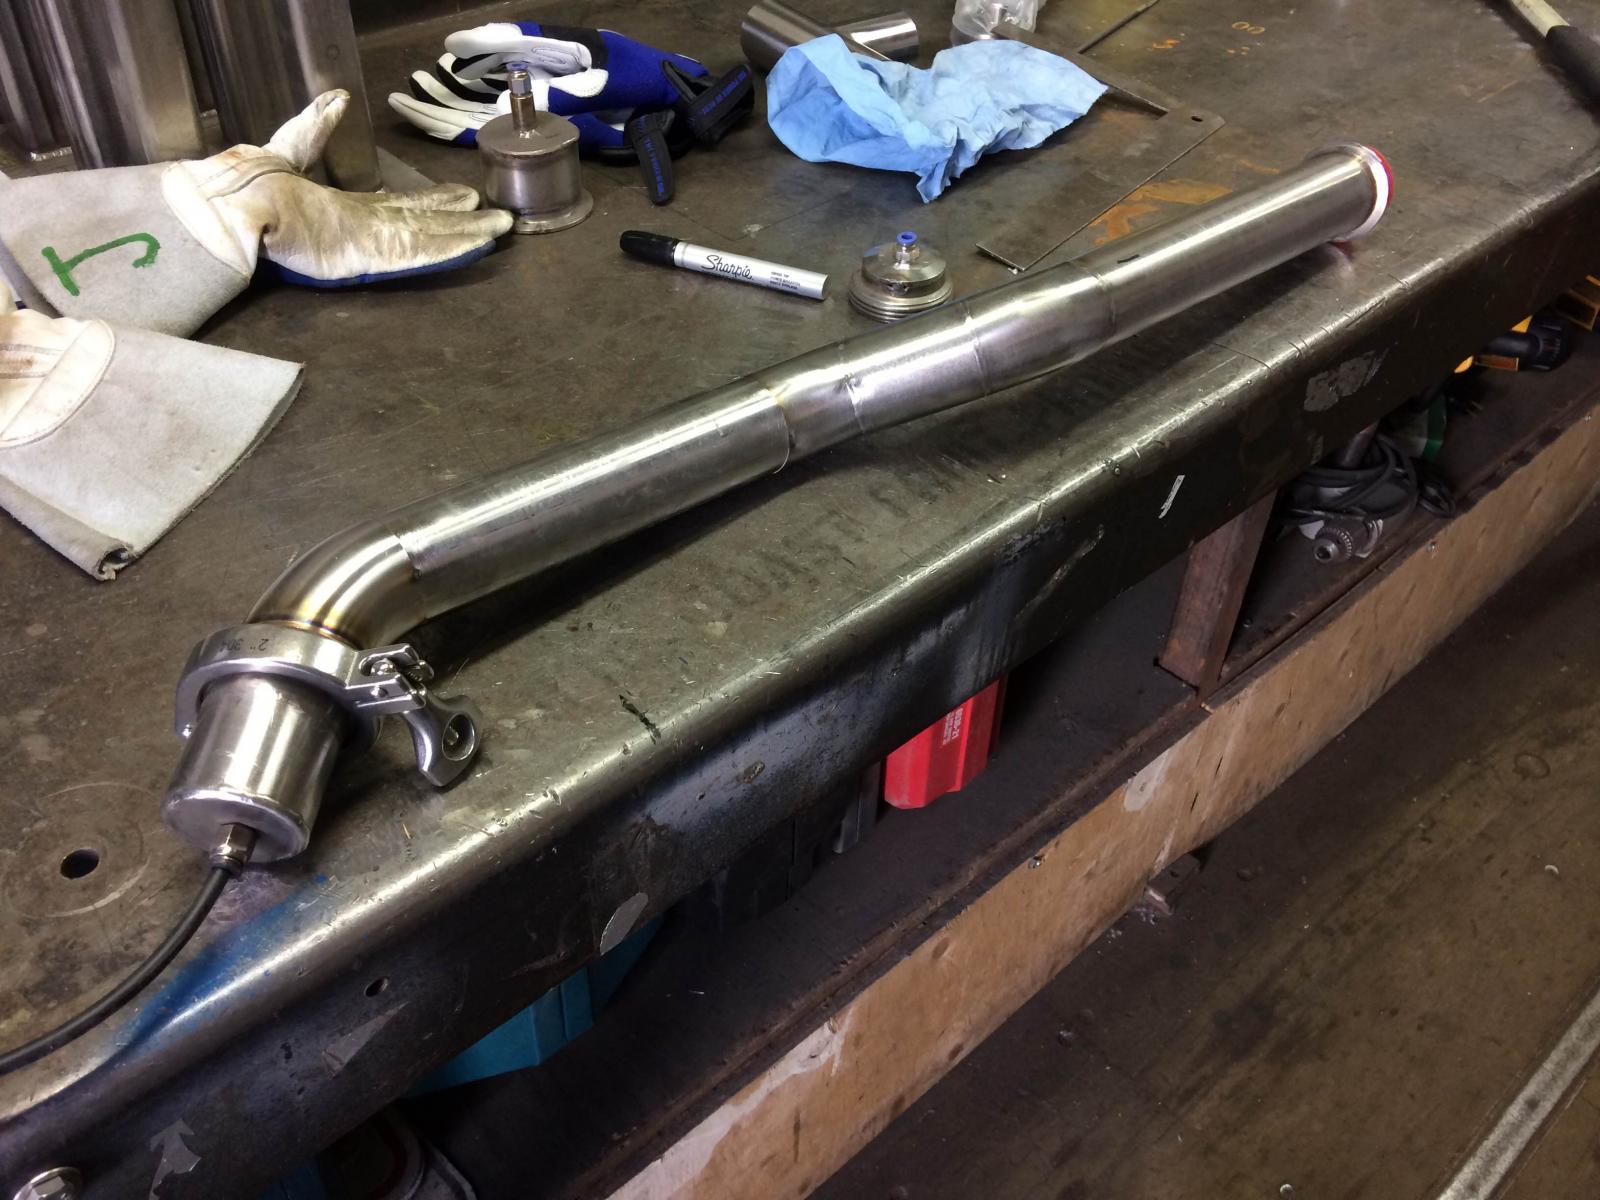
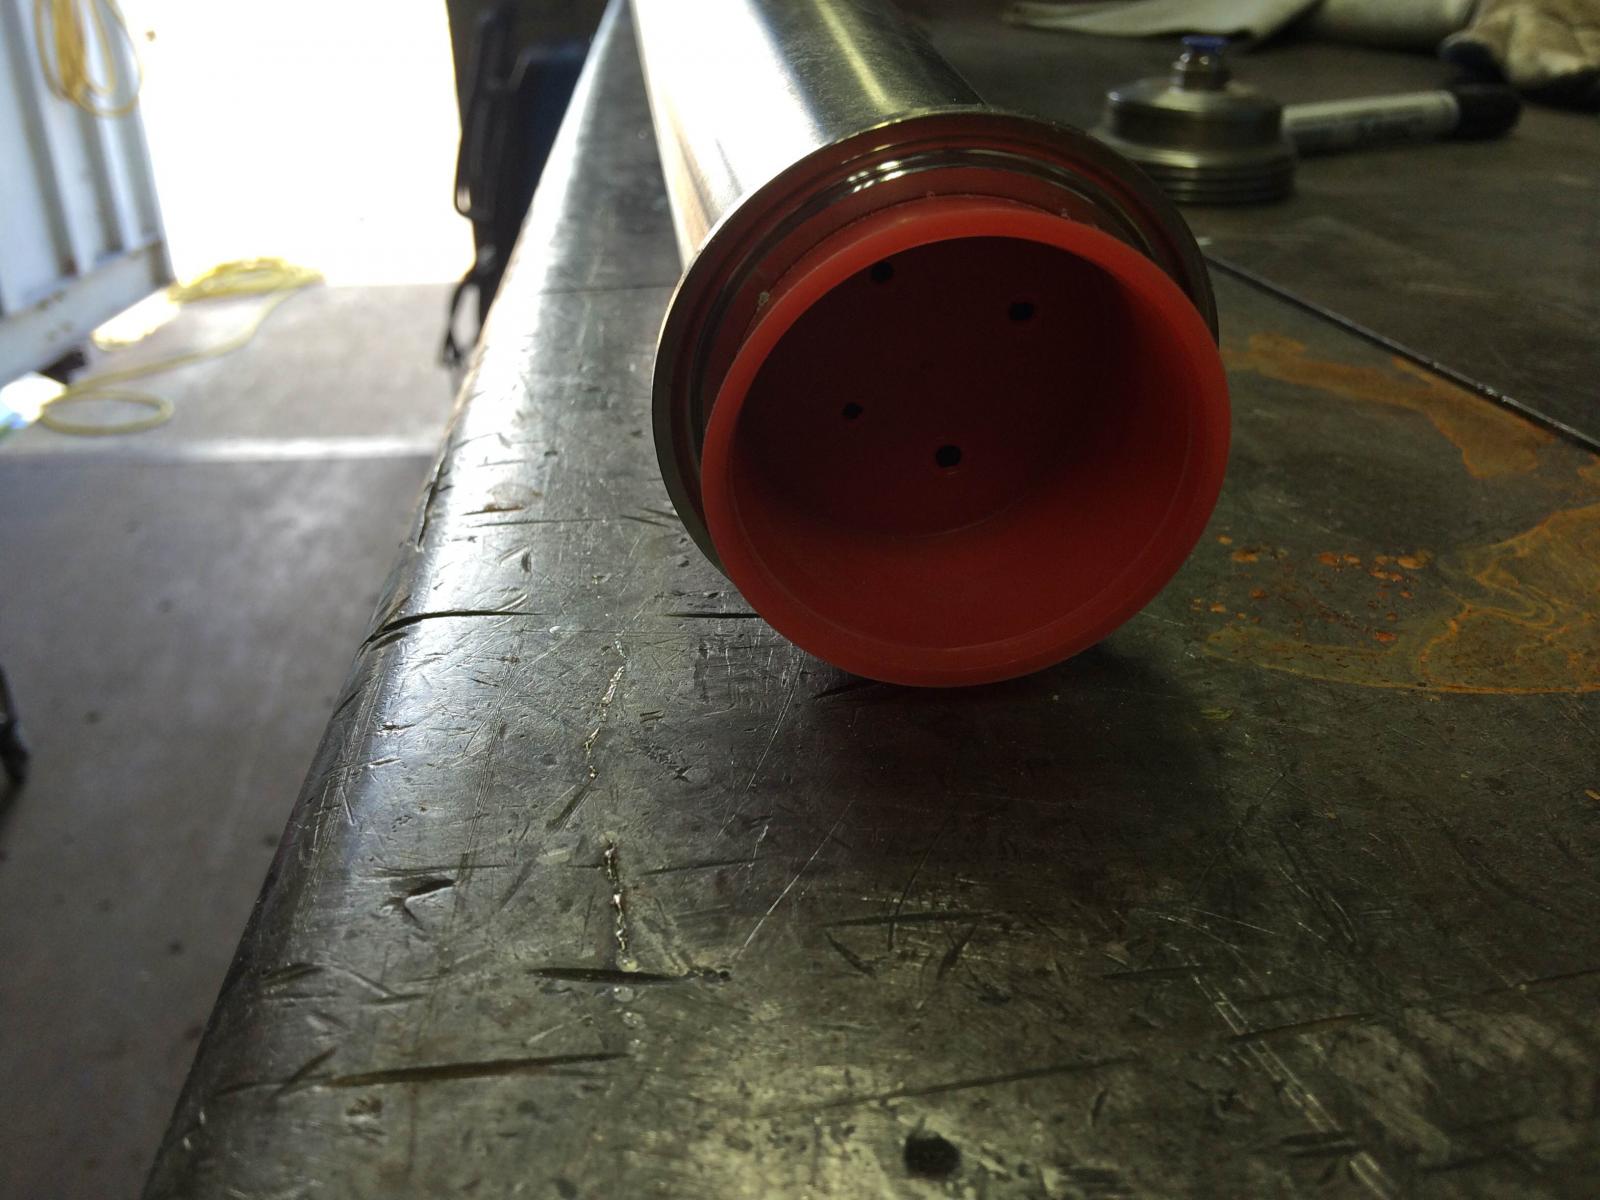
Tig welding!!

Homebrew Talk - Beer, Wine, Mead, & Cider Brewing Discussion Forum

Help Support Homebrew Talk - Beer, Wine, Mead, & Cider Brewing Discussion Forum:

This site may earn a commission from merchant affiliate links, including eBay, Amazon, and others.
Sweet I should be starting my single tier brew stand here soon I'll keep it updated thru this page too. Can't wait to see your set up
 
In my class this week, we did some stick. I have a new appreciation for that stuff. Get me back to the MIG please...
 
Lol stick is ok but to dial it in is some work, tig is a hole other animal and it's taking a lot of practice just to get where I am now I have a lot of respect for the tig welder that make it look like nothing and lay stacked dimes all day, my hand likes to go dead half way in a pas and sorta makes my welds go crapy
 
Working on that brew stand. It is 2x2x.065 304SS. Machine is a maxstar 150 sth set at 15cfh, 62 amps, hf start with a pedal. Tugsten 1/16 is tri-mix ground to a point. Filler is 308L in 1/16 for the wide gaps present at T-joint welds and .040" for the fillet and butt welds.

All the cuts were made with a 80 tooth carbide 14" dry cut saw and any residual joint prep was done with a 80 grit flap disc.

I am pretty happy with the fit-up of the butt welds:


Everything tacked into place and clamped to the table to keep it square:


T-joint weld I reference earlier with the wider gap due to the rounded nature of the square tubing corners. I used the thicker filler here and ran wide open (all of 62 amps) and travelled as fast as I could.


And 3 welds coming together. I ran the vertical weld uphill.
 
I'm hoping for some good welds. These are good enough but I'd like them to look better. I've done it before but that was when I had much more energy. I've been pushing it pretty hard lately and my work is suffering. Oh well. I promised some pictures so I had to deliver!
 
Looks great man stand is pretty much how mine will be but with the center missing for bottom drain mash tun, I got a big stainless job in line either end of week or next week can't wait to be dabbin on some stainless to get me ready to pull the plug on building my stand out of ss lol
 
Nice! The biggest pain with stainless is the giant heat soak issues. It wets out faster and easier than mild steel. I also run an inverter but I run a touch under 1 amp per thou as a general rule.

I'll be getting a batch of pump plates back from the laser cutter soon. 14 ga 2b 304ss laser cut to the spec of march/chugger pump mounts. PM me if you want a set. I don't remember how many I'm cutting this batch but quite a few.
 
Will do thanks for the offer hopefully I can get the stand built rather cheap find some decommissioned kegs, or sell my street bike and get some stout tanks not sure yet, and be brewing easy sooner then later, with ease of repetition of batches, thinking a loves controller controlling my hlt burner and the temp from the herms with continuous recirculating mash

Sorry started day dreaming again tig pics should be coming soon all the tubing is cut now waiting for the collars to be machined
 
Working on that brew stand. It is 2x2x.065 304SS. Machine is a maxstar 150 sth set at 15cfh, 62 amps, hf start with a pedal. Tugsten 1/16 is tri-mix ground to a point. Filler is 308L in 1/16 for the wide gaps present at T-joint welds and .040" for the fillet and butt welds.

All the cuts were made with a 80 tooth carbide 14" dry cut saw and any residual joint prep was done with a 80 grit flap

T-joint weld I reference earlier with the wider gap due to the rounded nature of the square tubing corners. I used the thicker filler here and ran wide open (all of 62 amps) and travelled as fast as I could.

Very nice work, everything I learned about TIG was from YouTube. TIG Time and Welding Tips and Tricks are great channels.

I had a ***** of a time with movement of the stainless tube. It would want to open up on the opposite side even with the tack welds. I had to clamp the pieces to my table saw or it would come out crooked. It would warp out of shap in one direction, and then warp back again on the other side so it ended up straight. Forget vertical welds if your a beginner, I made a hell of a mess. I welded every joint horizontal.
 
Thanks!

Trial and error here. Lots and lots of hood time. I'll go drop $100 on steel and just weld it together. Last run was a bunch of 16ga and 14ga 304ss sheared into 2" strips. Then I spent the next 4 hours just running fillet welds. I didn't care if it warped. Just practicing.

I have a 1/2" thick welding table that I use. I clamp stuff to it all the time to get it straight. I am looking forward to when I can afford to move up to a 1" thick table that is blanchard ground to be dead flat.

Welding is just like brewing. You don't need to be a pro to start but you have to be willing to put in tons of time.

RE: tack welds. Maybe just better tacks? Fitup is huge with TIG. I like to use fusion tacks, or non-filler tacks, to hold things in place. Turn up the heat another 10% than what you plan to weld with and just zap that tack into place. Quick and smooth is key.

When it comes to out of position I like overhead and vertical up. I hate horizontal. Flat is also preferred, of course, as gravity is in your favor!
 
I tried fusion tacks, but when you start running your beads, the force from the contraction was enough to pop some of them open. The heat zone from my first tacks were as big as my thumb nail, (too many amps for too long) but with practise they were smaller then my pinky nail.

Close fitting joints is key !!!
 
If you check out my pictures you'll see the fit up I have on the mitered joint. I think that is imperative for a good weld. Tack every inch or two along the weld area if you need. No problems with that.

Do you have a foot pedal or hand control? That helps a ton. I have a 14 pin miller pedal I need to sell if you have a 14 Pin miller welder.
 
Been welding sanitary, and structural SS for 8 years now. if you guys need tips im sure i can be of some assistance. heres some of my work

PA272094.jpg


PA272096.jpg


PA252092.jpg


plate.JPG


PA152080.jpg
 
Been welding sanitary, and structural SS for 8 years now. if you guys need tips im sure i can be of some assistance. heres some of my work


Yeah, please provide some of your tig settings and technique for the sanitary butt welds, and welding thin pipe to a thick coupling.
 
Shortyz question on purging, any easy purge set ups we don't have anything to do purging which I hate, and any tips when welding with a purge set up? I have seen a tube from an extra bottle running into capped ends with alum foil does that work?
 
Guys im gone to a music festival in washington this weekend, i will have a good write up on purging and settings when i return. I get back monday, so probably tuesday/wednesday. keep posting questions so i can adress anything you guys want to know :)
 
Guys im gone to a music festival in washington this weekend, i will have a good write up on purging and settings when i return. I get back monday, so probably tuesday/wednesday. keep posting questions so i can adress anything you guys want to know :)

Perfect!

I am wondering the best way to weld a back to back triclamp fitting inside the keggle. Basically 1 1.5" tri clamp on the outside connected to another 1.5" on the inside to run recirculation through a herms coil.

Also, any tips for purging a 50' coil to a tri-clamp fitting as well as the flow rates needed for purging.
 
Interesting will give it a try on Tuesday, and that material was horrible for tig welding in the first place and nothing I did would clean up the grease soaked material I hit it with a grinder for ten mins good crazy cleaner and still had this grease film deal on it I wish it didn't have those blemishes threw it would make the smurf blood look so much better
 
So what do you get when you take some triclover caps and drill/tap them to NPT?


And then you thread them onto a stainless steel pump head:


Dip in some filler and grab a light grit flap disc? A triclamp chugger pump!
 
Did you back gas or purg anything If not this is something I can actually do no problem at work I'm still figuring out how to get some sanitary/purg set up made to have my keggles perfect when I get them
 
Sweet something I can do with just free time then until I figure out some purge set up to purge everything and anything I weld lol
 
Shortyz question on purging, any easy purge set ups we don't have anything to do purging which I hate, and any tips when welding with a purge set up? I have seen a tube from an extra bottle running into capped ends with alum foil does that work?
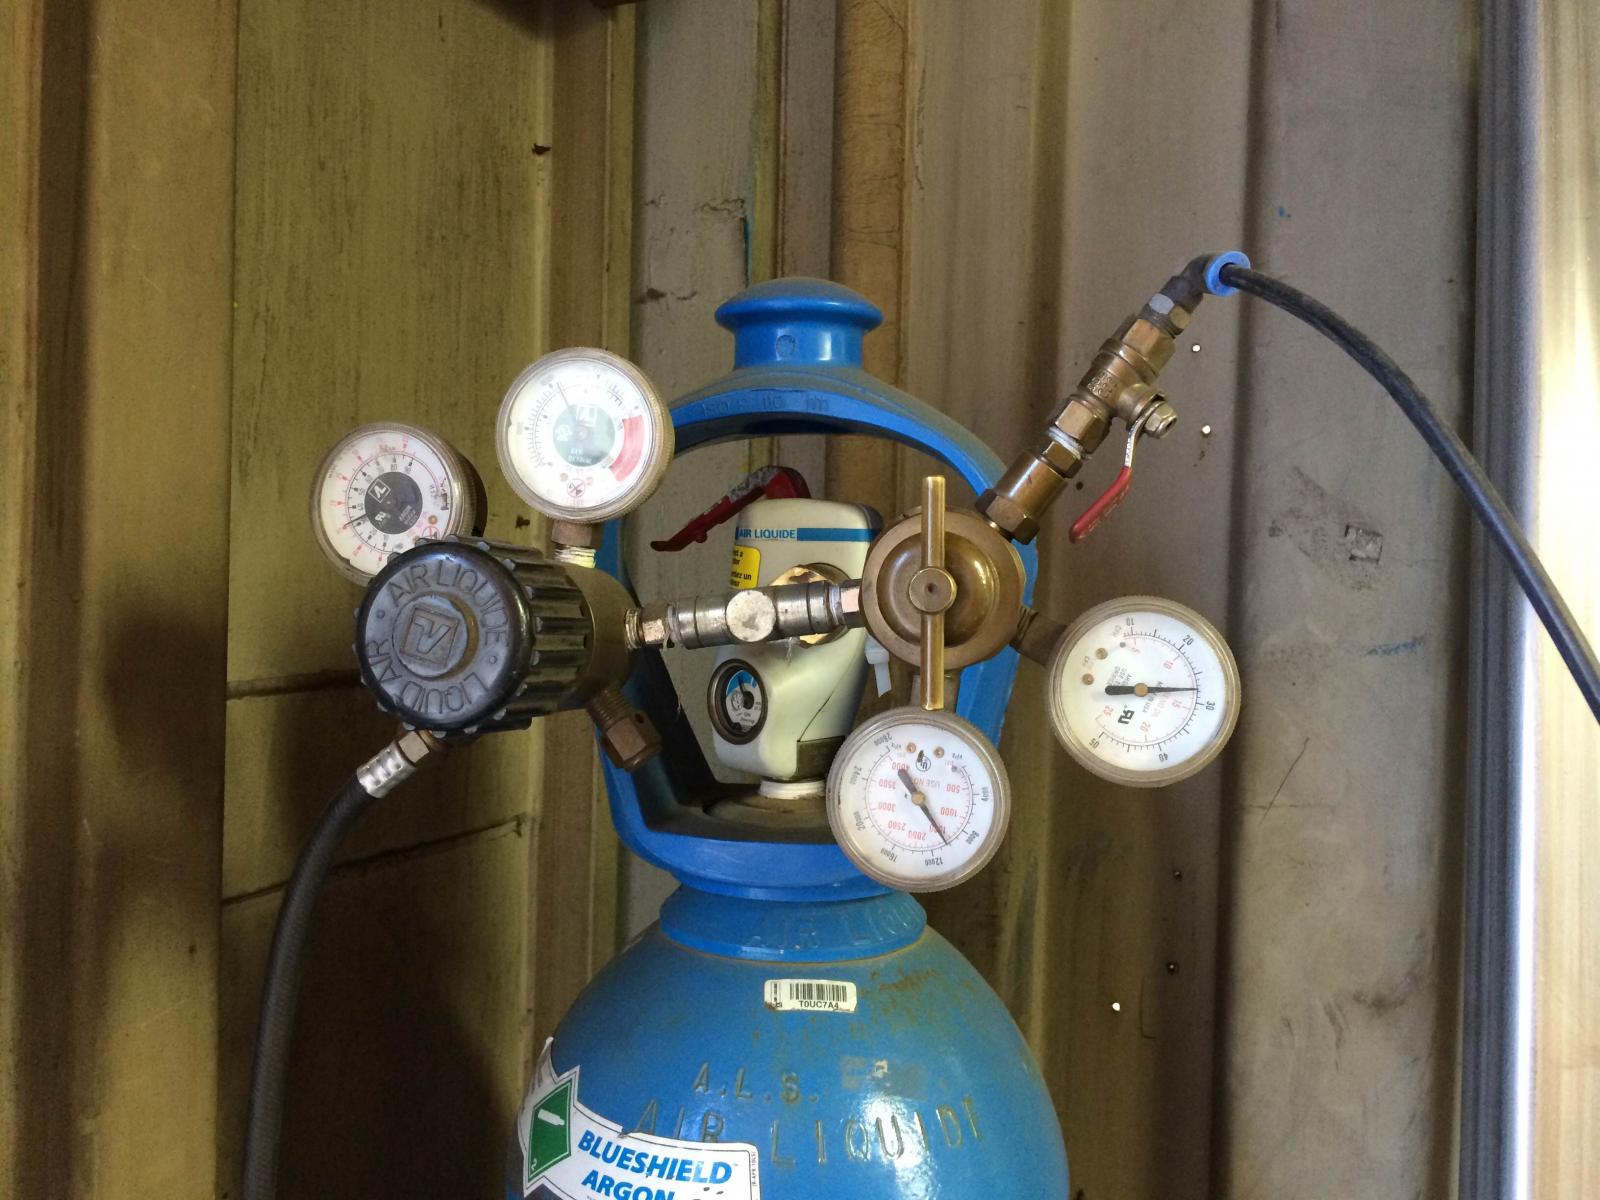
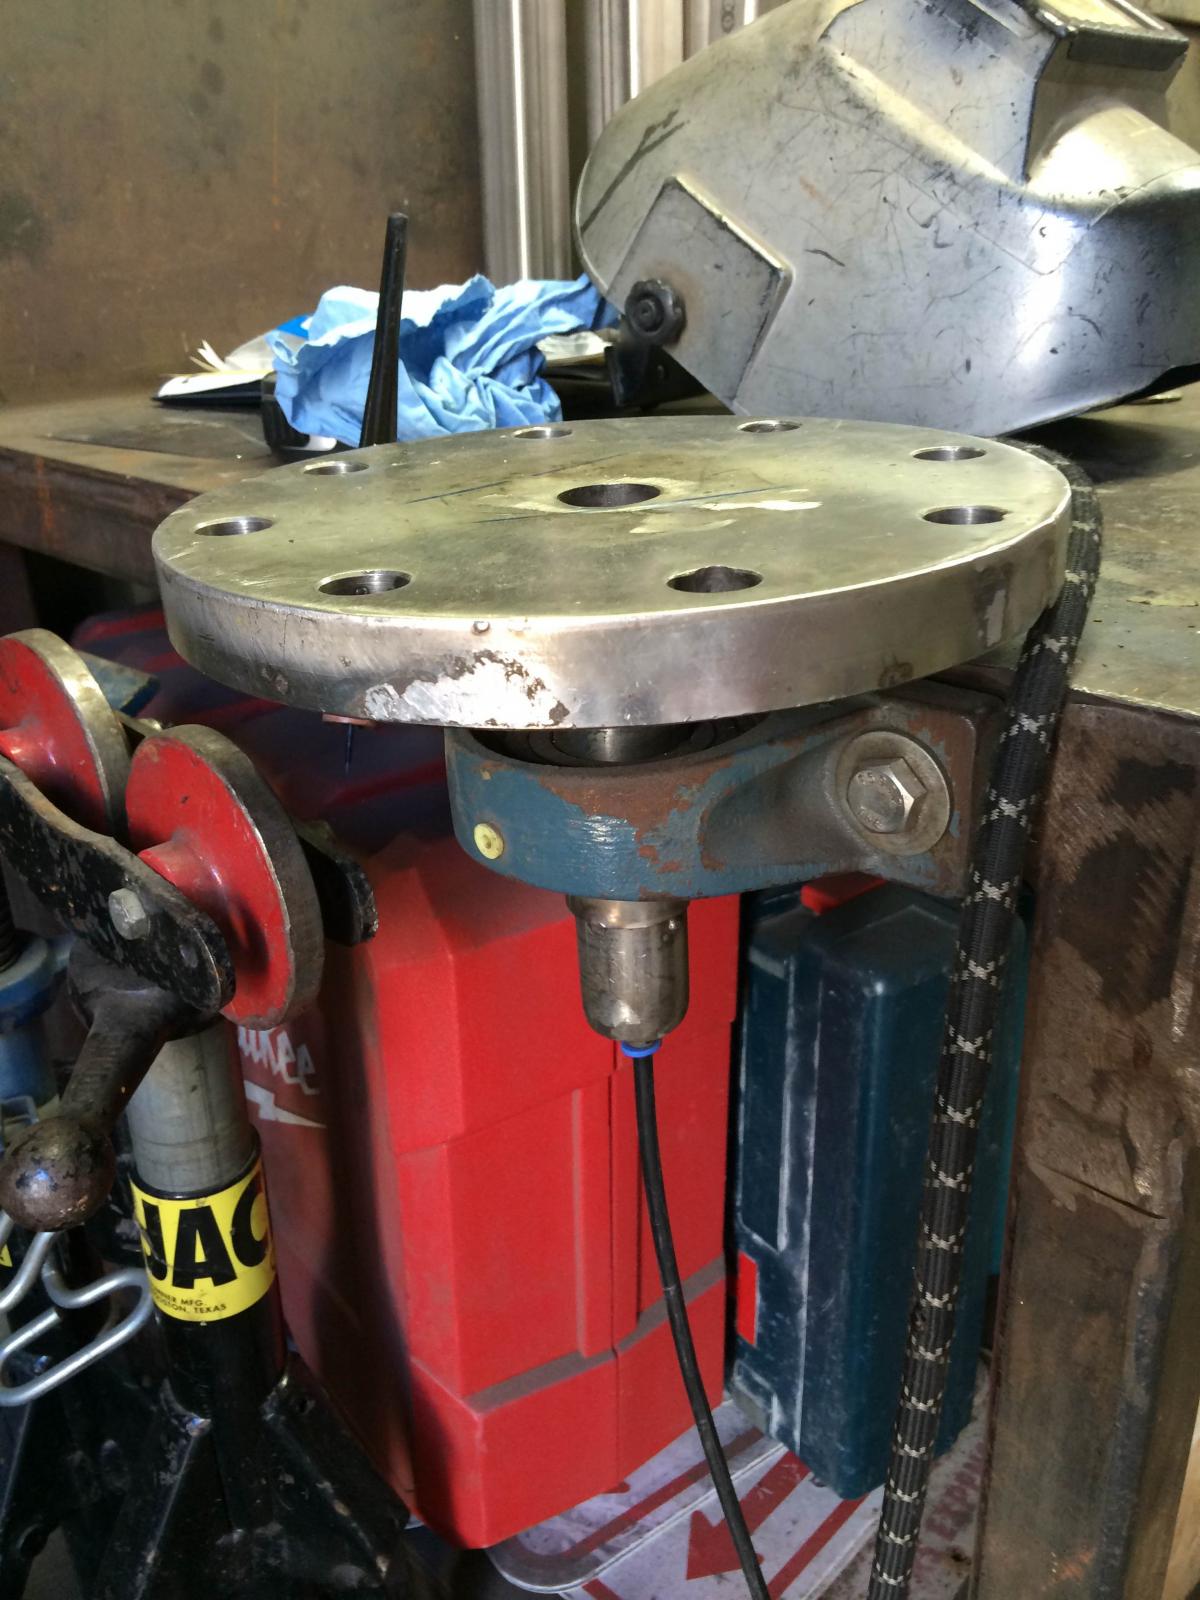
Ok I am back. i will hit a few questions with mutiple topics but here we go.

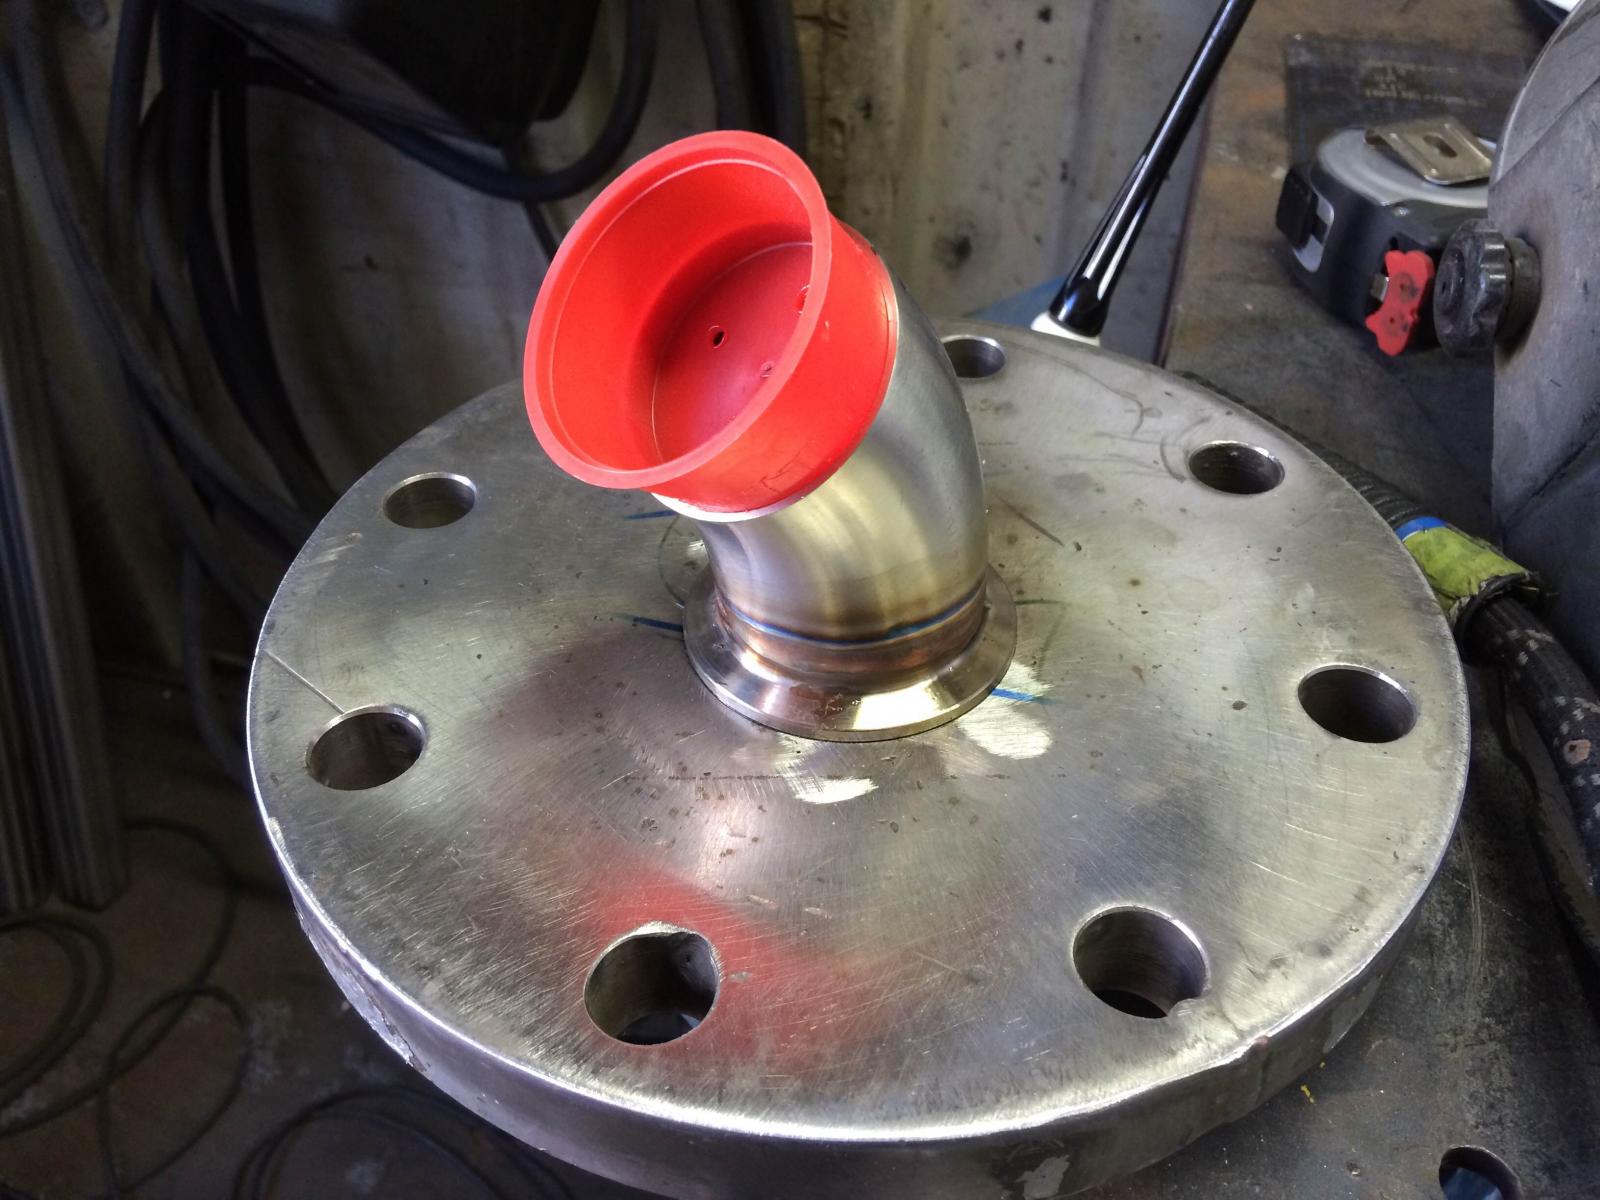
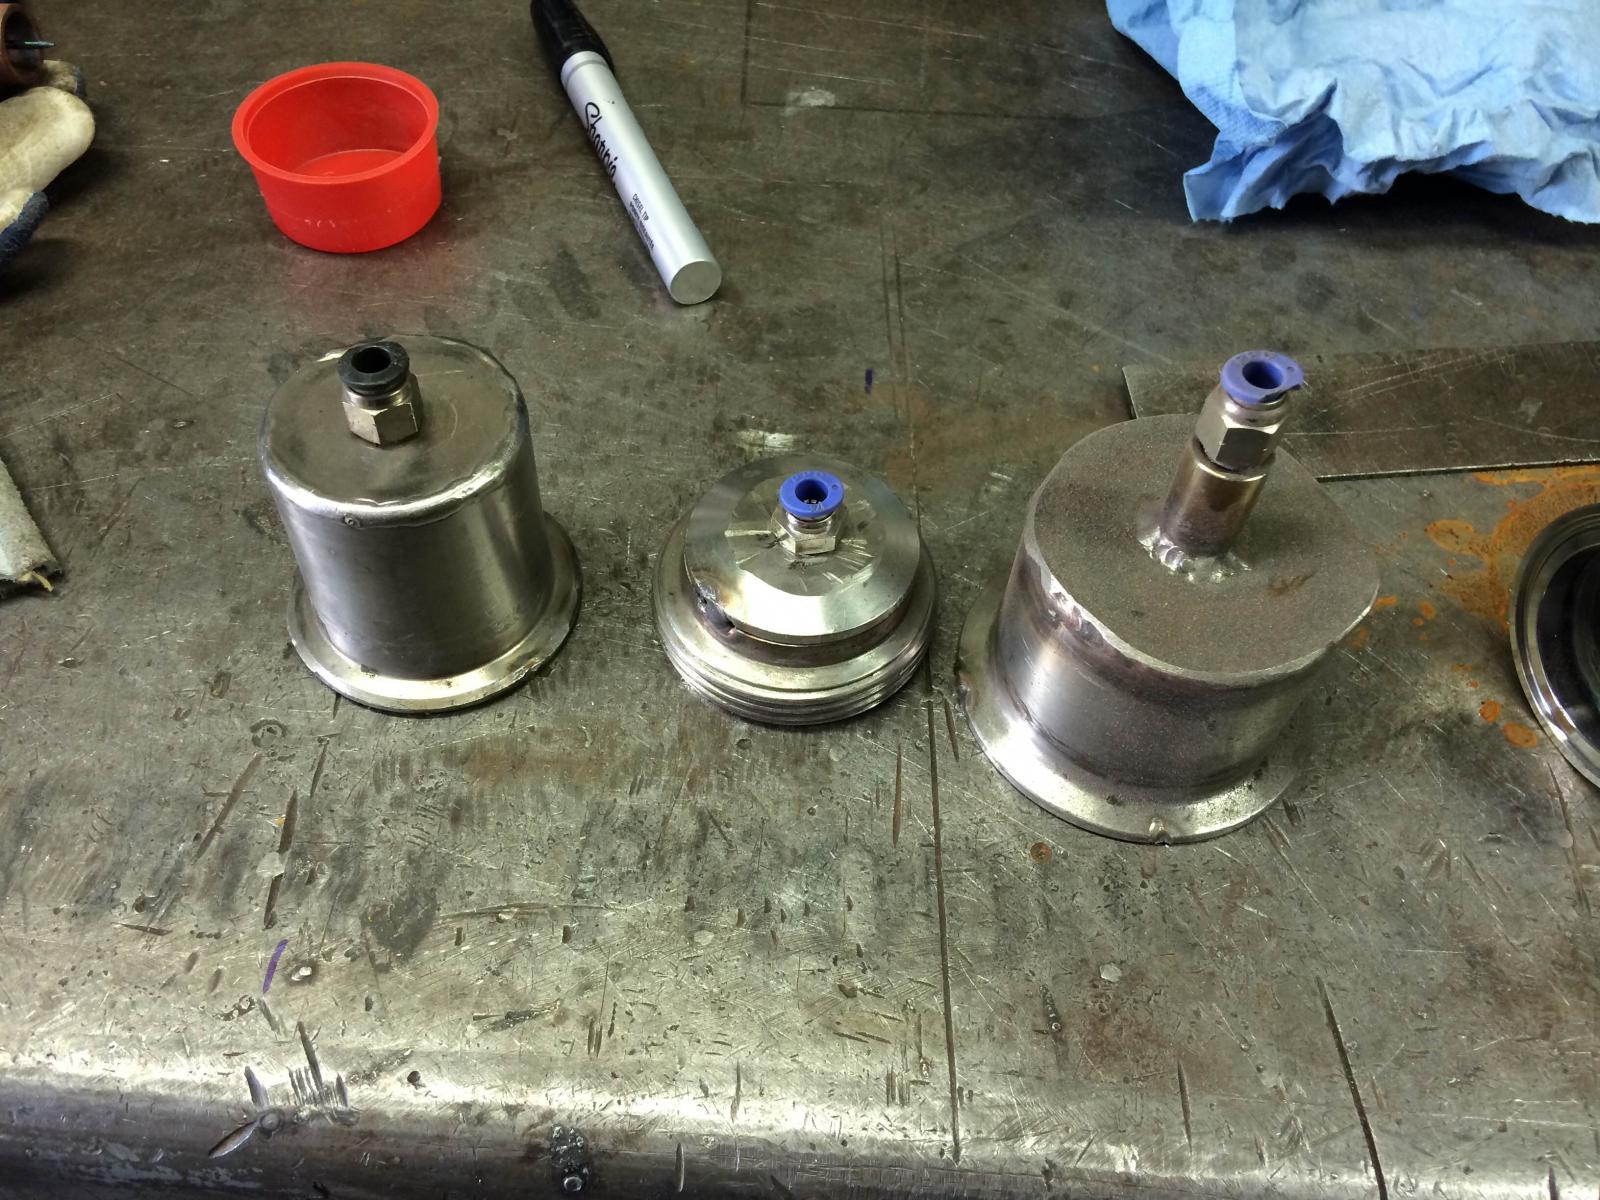
To purge properly, you need dual regs on your bottle. this allows you to set the CFM to the proper setting depending on what you are welding, big pipe requires big cfm. Remember when purging you should always have your gas feed at the lowest point because argon is heavier then air and you want it to displace the air not mix with it (the result is popcorn, or in technical terms chromium carbide precipitates, they are really tough to grind out). I work with .065 pipe alot so im using like 20cfm @ 57-59 amps. the pictures below are of the dual regs and turntable i use, along with some purge fittings. Foil tape works fine for plugging an open purge end, just poke 4 holes in it and your good to go. I use pipe plug inserts because it speeds things up a bit.

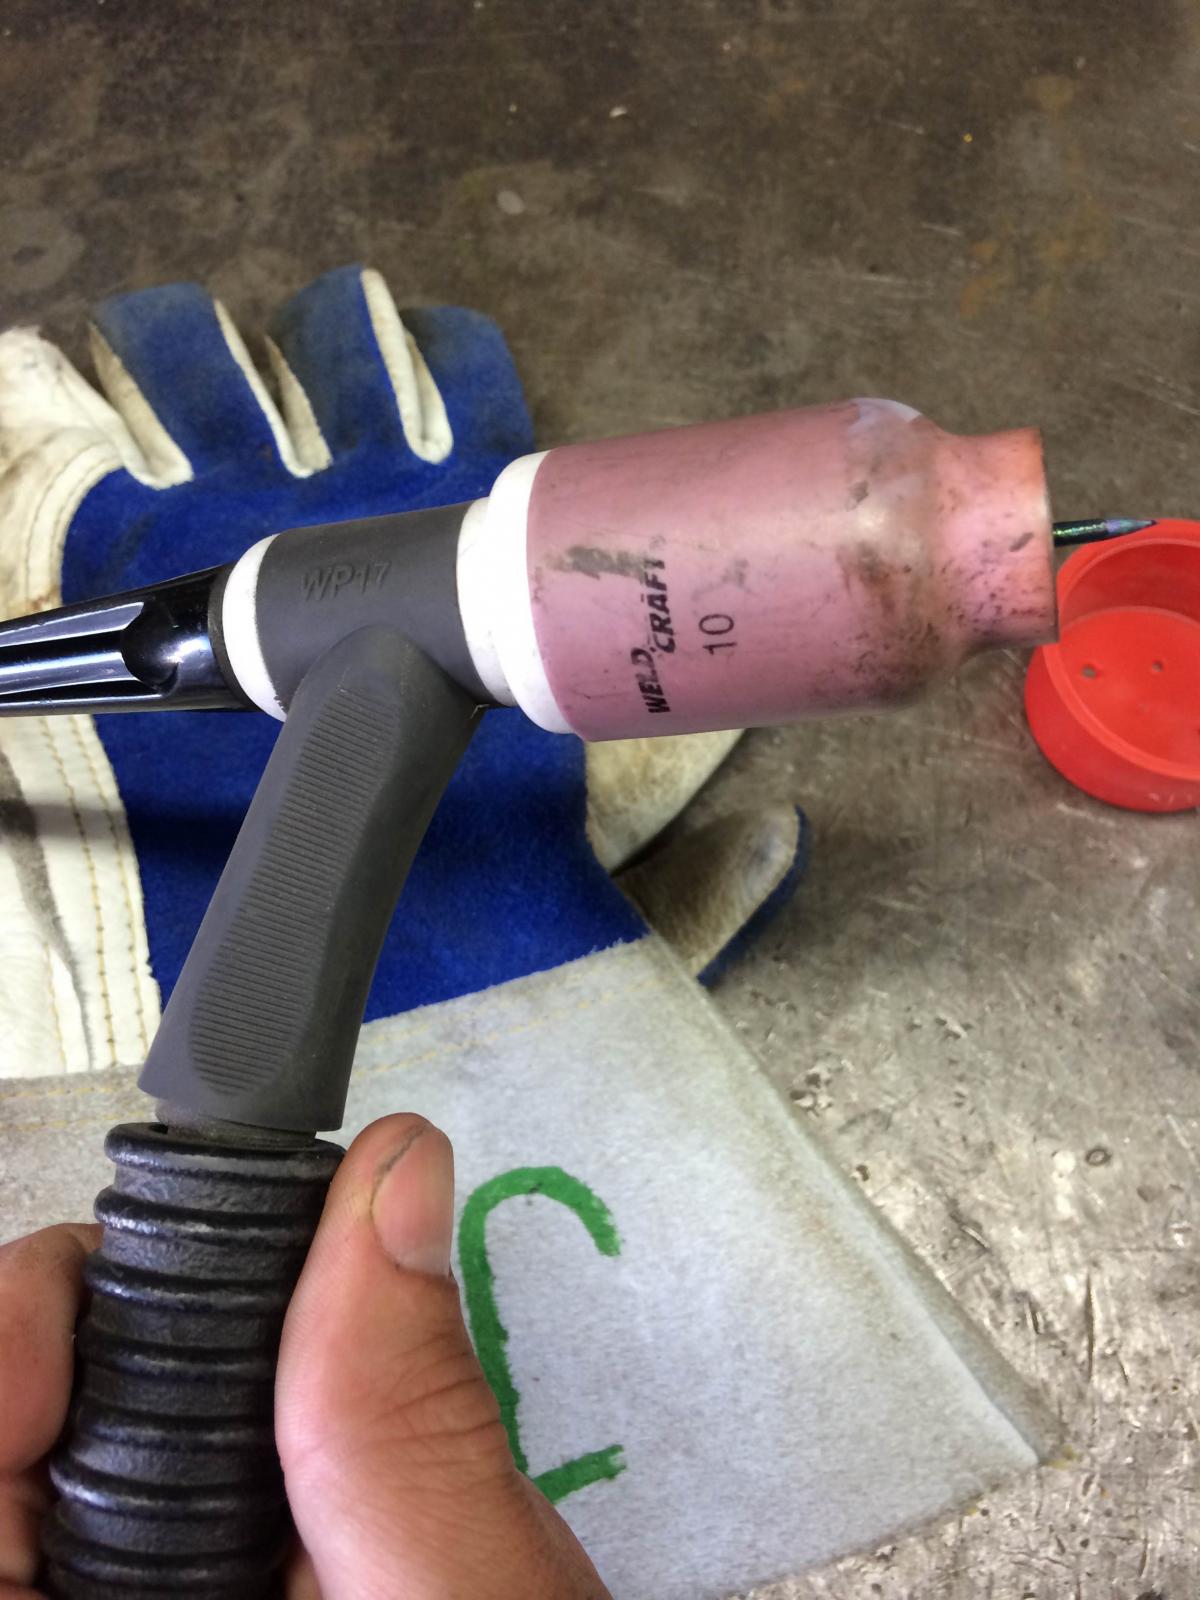
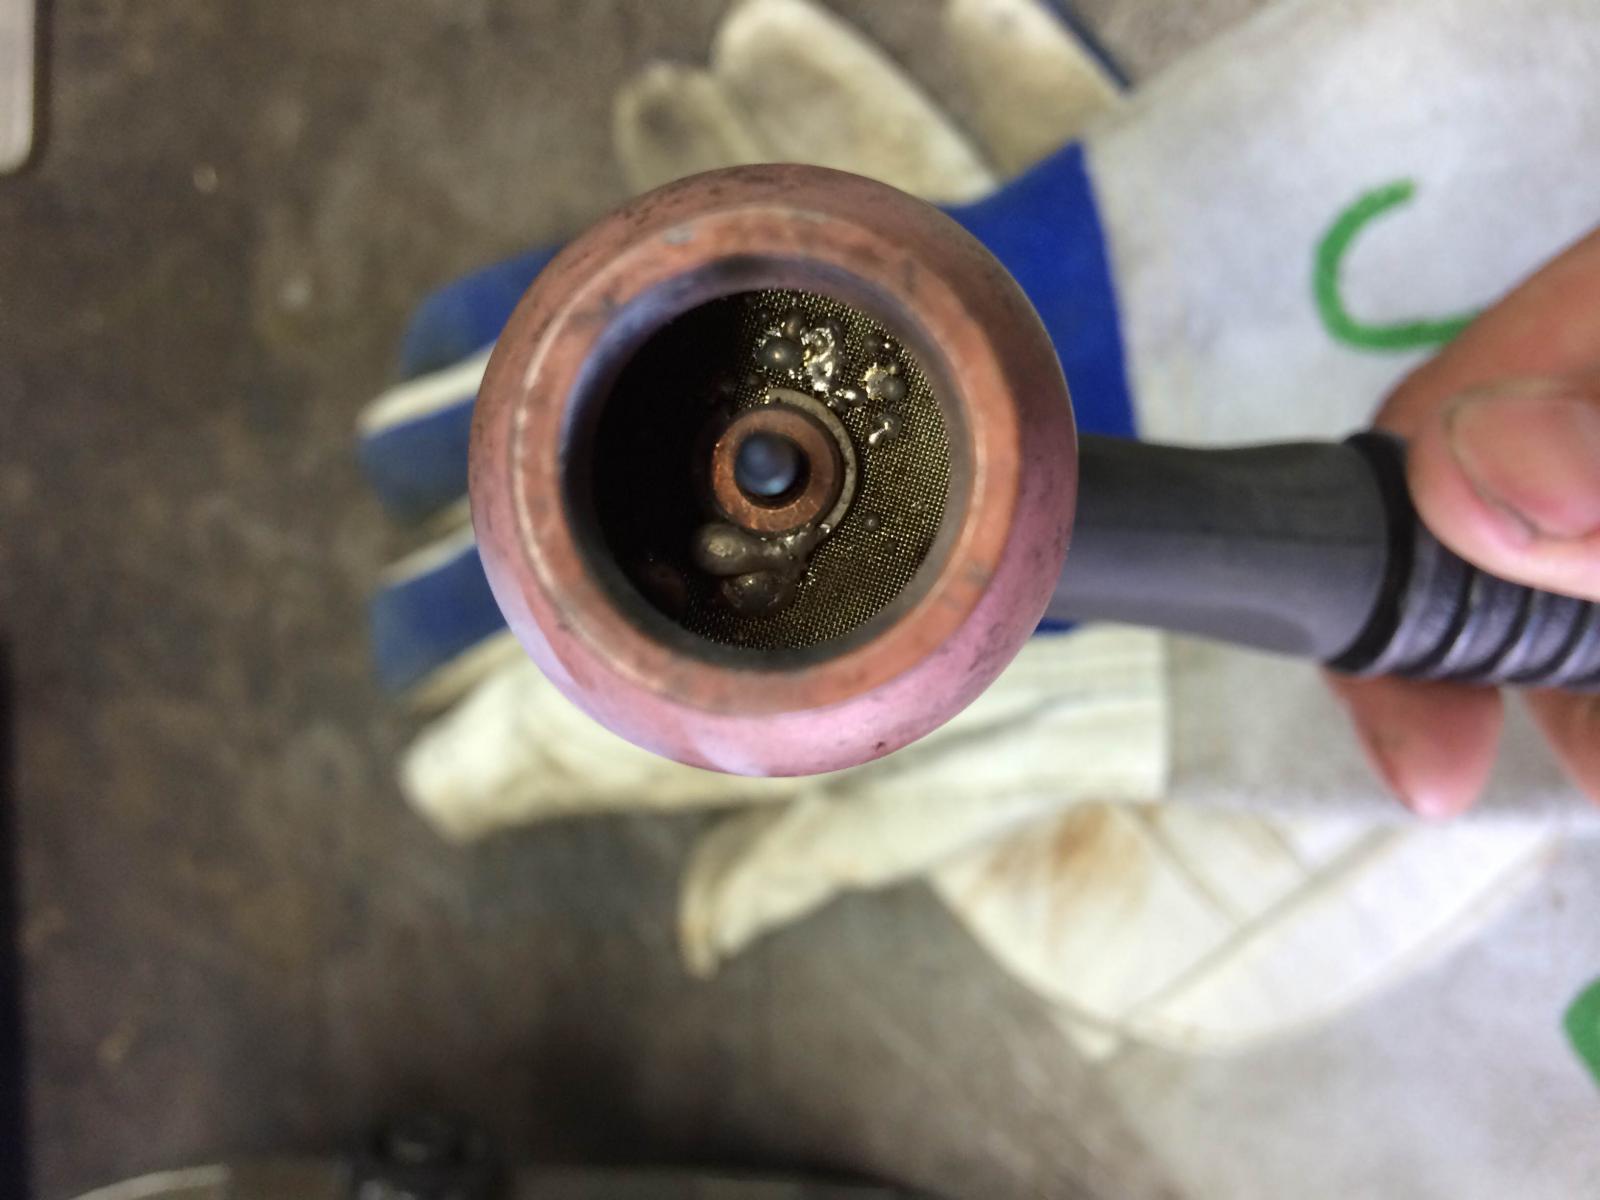
Torch setup is vital to a good weld aswell, i use the LARGE gas lense with a 10 cup, this baby gives you huge gas coverage. A gas lense is a must!

photo16.jpg


photo4(1).jpg


photo15.jpg


photo8.jpg


photo11.jpg


photo10.jpg
 
Perfect!

I am wondering the best way to weld a back to back triclamp fitting inside the keggle. Basically 1 1.5" tri clamp on the outside connected to another 1.5" on the inside to run recirculation through a herms coil.

Also, any tips for purging a 50' coil to a tri-clamp fitting as well as the flow rates needed for purging.
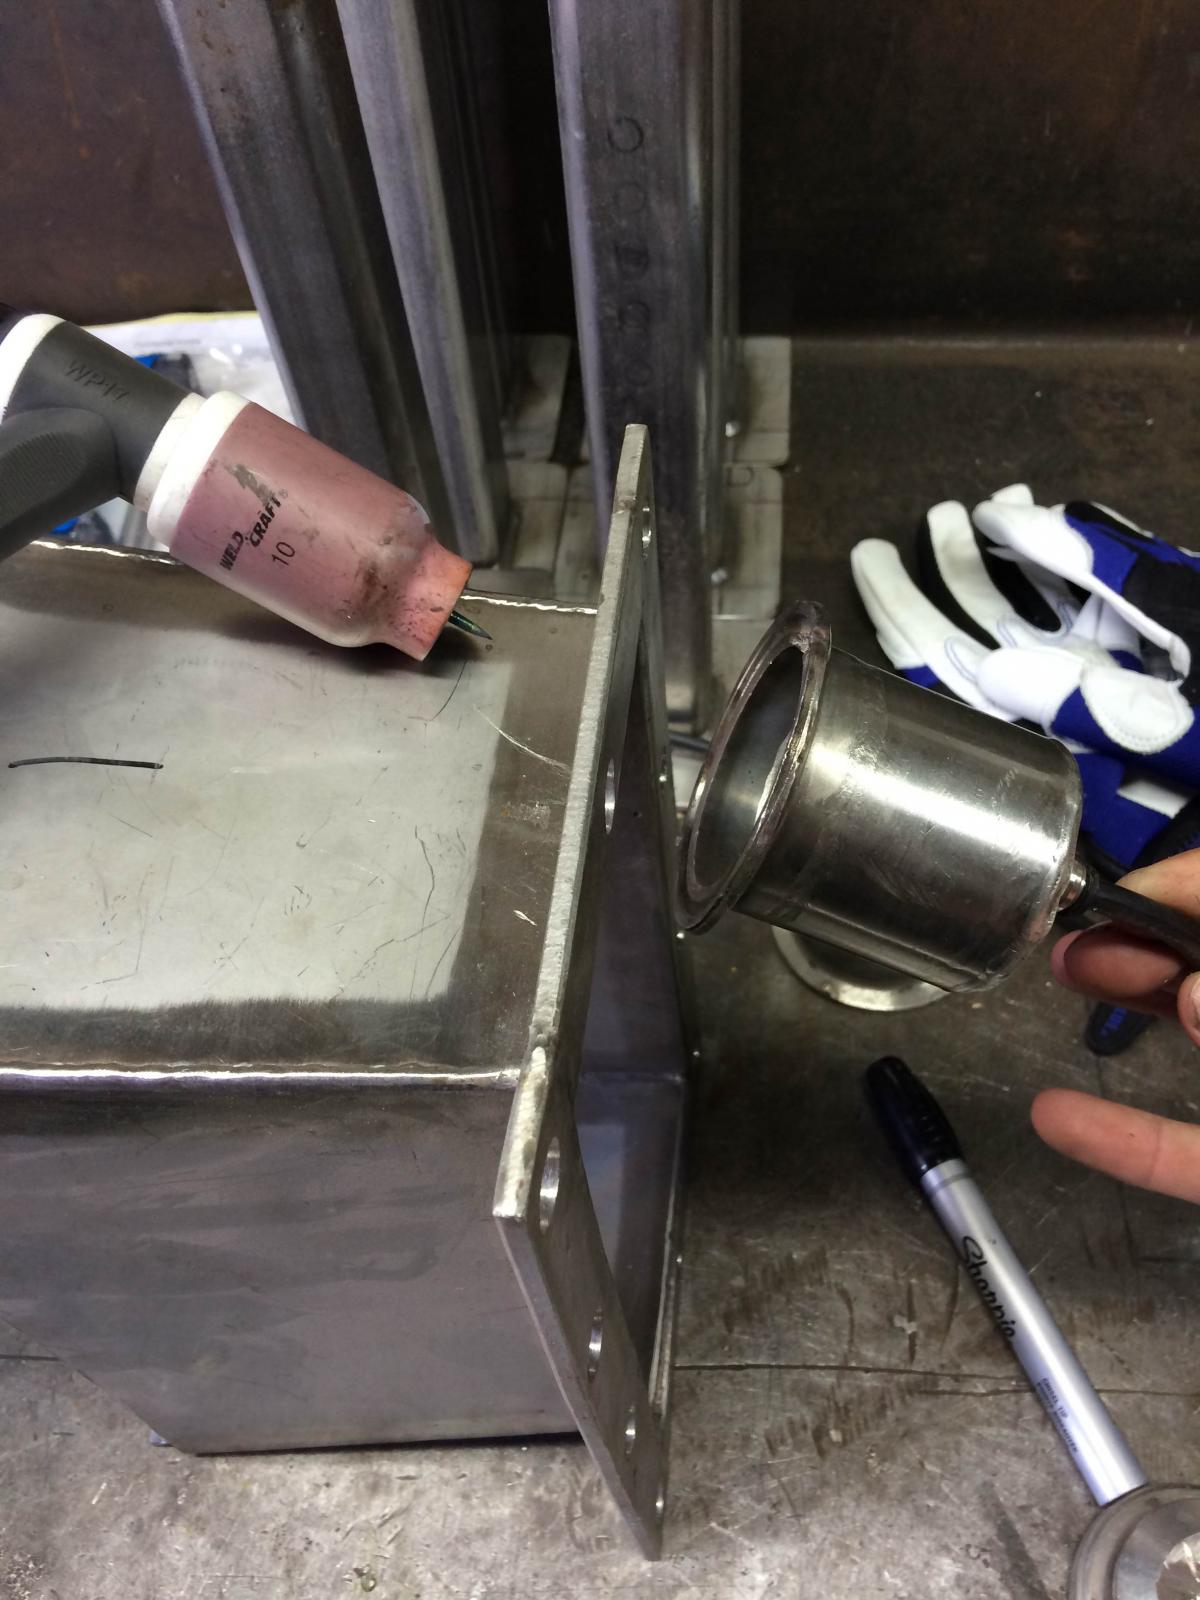
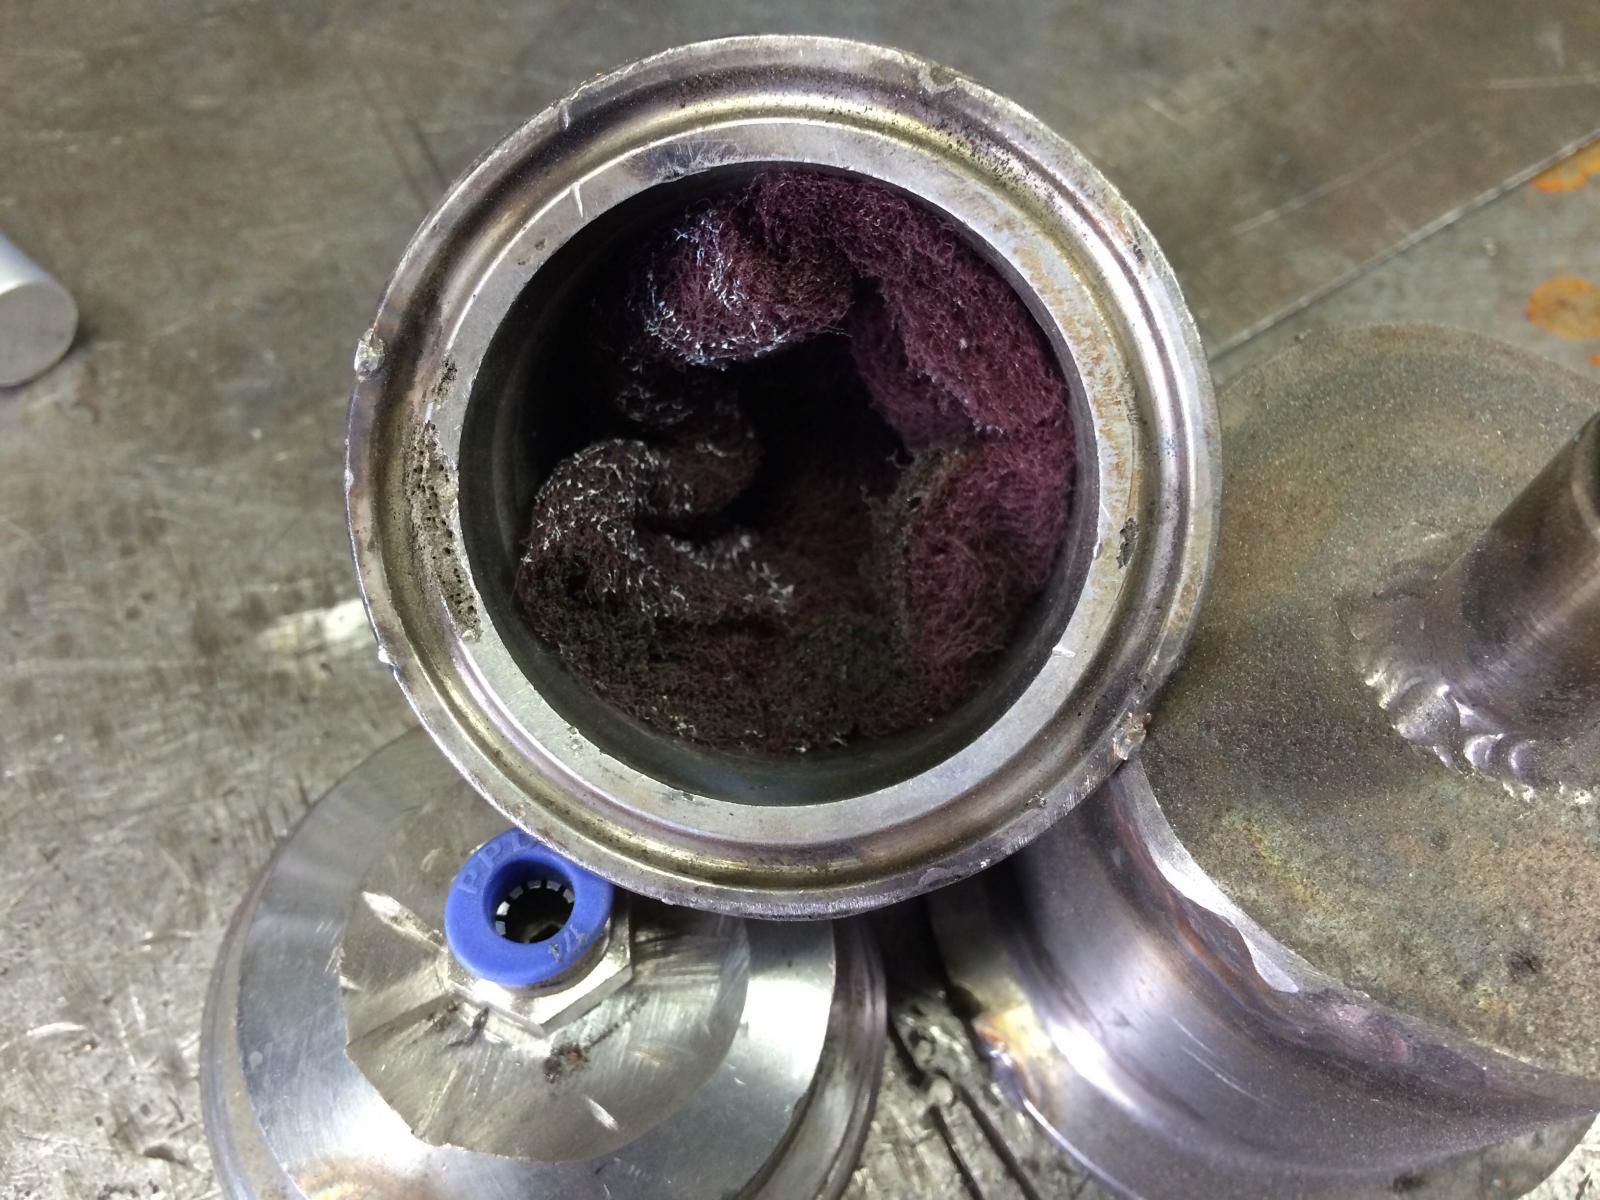
For the back to back ferrule fitting i would buy 2 "long 1" ferrule" (clamp size is the same on 1" and 1.5" and i doubt your coil is 1.5"). Heres what i would do, grab a 1" hole saw, drill your 1/4" pilot hole first before setting the hole saw on the arbor, because you will break the bit when you break through :). Then i would slide 1 long ferrule in and tack the other one on, now hook up your purge fitting to one side of it. If you dont have an adapter to hook your purge gas up to, you can tee off your regulator and tape a little hose inside the fitting. Once thats done tape off the other end and poke 1 HOLE in it. Remember with purging a slight pressure inside the pipe should be maintained to hold your weld pool from sluffing in. Weld 1" at like 50 amps, watch your weld pool, this is very important, when you see your pool WIGGLE you need to go a little quicker. Maintain a little wiggle to your weld pool, what this means is that you have proper penetration. Its a balancing act when it comes to welding thin wall pipe and you only get 1 crack at it, screw it up and you start again. Now that you have the 2 ferrules welded together you can tack the fitting to the container where you want it. yet again you want your purge gas on the 1" pipe as before to prevent contamination on the inside of the pipe. This is where it gets a little trickier, This is a filet weld so you want to use some filler rod, 1/8" is good for small stuff like this. Just buzz around the pipe adding a bit of filler as you go. (if you wanted a sanitary inside weld you would need another guy who is purging the inside with a hose or fitting, more amps, talking to partner, watching pool. But if this is for a boil kettle or something i would not be to concerned about a crack on the inside of the kettle if you cant get in there to weld it.

first picture is how we backpurge to weld fitting into tanks without contaminated the weld (2 guys needed, communication is key to proper penetration)

second picture is the backpurge fitting, now look closely. You can see the same gas lense idea with the purge fittings. ALWAYS stuff some steel wool or scrubby pad in the purge fittings. This creates laminar flow, if you dont know what that is go youtube it.

keep the questions coming in, if you dont understand my drivel ask me to clarify with pictures or something. cheers!

photo3.jpg


photo1(22).jpg
 
Also guys, just remember a weld may look really nice (like some guy walking the cup at 40 amps) but the weld is garbage and the penetration is piss poor. I see this time and time again, it aint on the surface that what counts. stack all the dimes you want but if that weld isnt done at the proper amperage for the material thickness it will fail.

ex: if i am welding 1/4" structural SS i will do a root pass at 180 amps and cap it at 140.
 
Purge setup on a 2" pipe. Masking tape works to plug off the end aswell..

I always use 3/32 tungsten, never change for any jobs. Was using 2% thoriated but thats cancerous so i switch to lanthanated and never looked back.

only filler i carry is 1/8" and 5/32.

photo1(23).jpg


photo2(3).jpg
 
Back
Top