Single Vessel, All Electric, NS, NC Brewery

Homebrew Talk - Beer, Wine, Mead, & Cider Brewing Discussion Forum

Help Support Homebrew Talk - Beer, Wine, Mead, & Cider Brewing Discussion Forum:

This site may earn a commission from merchant affiliate links, including eBay, Amazon, and others.
Originally, I planned on using the BCS-460 for control. Now that I'm pretty sure I'll only use 1 5500w 220v element, what PID would you recommend?

(even though a rims for on-demand hot water and sparging WOULD be awesome)

It is the future...
 
It is the future...

As in, "It's the future of brewing"...?

I got a fair amount from selling 3 keggles (shipping killed me), so I have some nice funds for this build. I'm hoping to have enough $$$ left over to build a smaller ~3gallon 115v unit. So I guess I keep changing my mind because I don't want to add something that isn't going to be useful. Adding the RIMS would be relatively inexpensive; it'll just make the plumbing a lot more complex, and the extra fittings can get $$$.

If I do a RIMS, I'm going to try to include a sightglass right in the middle....I think it'll be awesome.:ban:
 
It is the future...

I disagree. For homebrewers I think steam is the future. It is much more efficient than anything out there. The neet thing about steam is that a little of it contains so much energy. It's perfect for a RIMS and steam will heat anything faster than anything out there. Thats why the big boys use it.
 
Guy, I think you're right about that....but it DOES push the envelope in terms of safety. Sure, we play with fire and electricity, but high pressure steam can be pretty dangerous.

Though I would never attempt to make one, I really like the calandria that GreenMonti and Kladue were working on......what a cool concept. :mug:
 
How do you sparge with steam?

It does not take alot of steam to heat water to sparge temperatures and if you are already using steam for the RIM's why not use it. Read Greenmonti's thread where he successfully made a steam jacketed vessel out of a keggle without loosing any of the keggle's volume capacity. Also if one looks to do some step mashing with undermodified malts there is nothing faster in stepping than steam.
 
Guy, I think you're right about that....but it DOES push the envelope in terms of safety. Sure, we play with fire and electricity, but high pressure steam can be pretty dangerous.

Though I would never attempt to make one, I really like the calandria that GreenMonti and Kladue were working on......what a cool concept. :mug:
Steve,

The cool thing is that the steam does not have to be high pressure. Precautions do have to be taken but after reading Kladue's and GreenMonti's threads, I am convinced it can be done safely. I have read somewhere that the amount of pressure of steam used to heat the entire Empire State Building is surprisingly low.
 
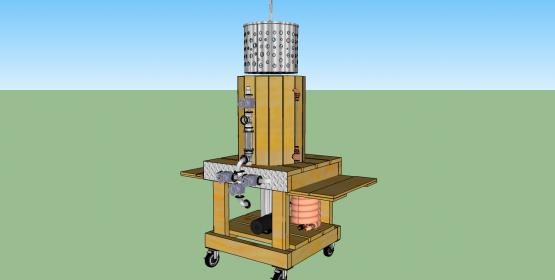
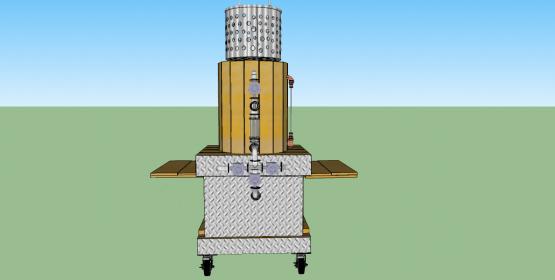
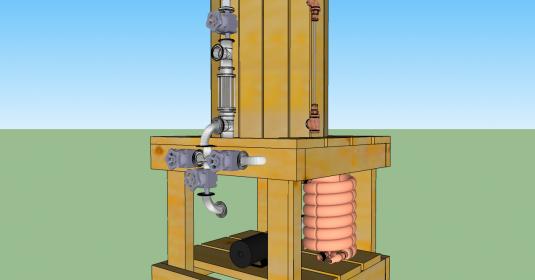
Here's a screenshot of what I've been working on. I still have to source some triclover stuff, but I have most of the big stuff now.

UNIBREW 5500 WOOD STAND.jpg


UNIBREW 5500 WOOD STAND1.jpg


UNIBREW 5500 WOOD STAND2.jpg
 
Guy, I think you're right about that....but it DOES push the envelope in terms of safety. Sure, we play with fire and electricity, but high pressure steam can be pretty dangerous.

Though I would never attempt to make one, I really like the calandria that GreenMonti and Kladue were working on......what a cool concept. :mug:


I have successfully boiled with steam via direct injection and a big ZERO on the pressure scale. Not to mention that it was silent. That experiment never hit the boards though. Reason being, the boil actually increased in volume by a small amount, and one would need one heck of an efficient MLT to make that happen.

Short of that all my steam runs have been with low pressure. I haven't had a need to go over 6 PSI on my steam to boil 14 gallons of water.

The MK-I does work, I just think it could be better. I would lock myself into 10 gallon runs if it worked better then it does. Having said that, it still seems to be the best piece I have made yet. I haven't matched it with any other build. That's without any mods to it like there is in the thread. I would be happy to continue with the concept and build the other one we discussed in that thread, but the laser guy keeps jerking me around. I just can't pass up his price compared to other shops.

OT, I am digging your build. I really like your renderings. That thing is going to look sweet. I for one am looking forward to the day it lives. Keep up the good work.
 
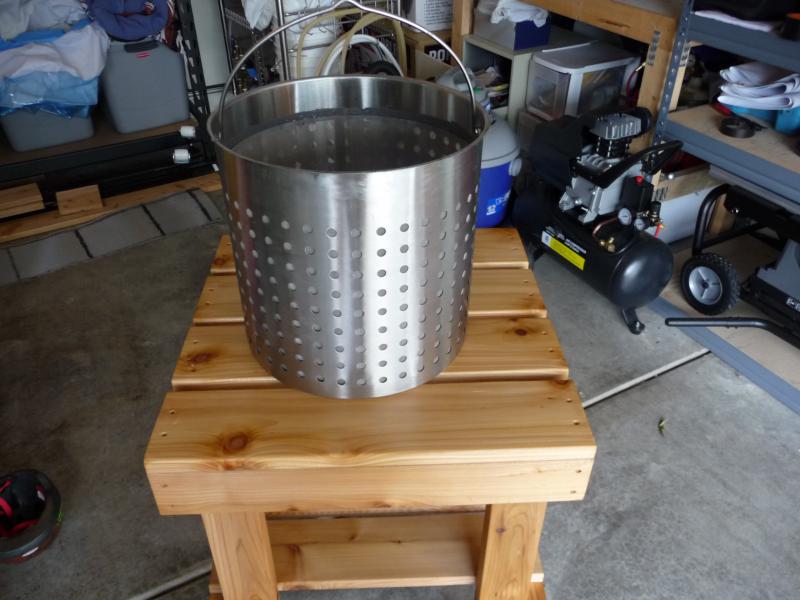
Here's some more views with the side tables, plus some diamond plate. I pretty much have everything I need to do this, just gotta get some time away from SWMBO and the kids. I'm gonna try to do the basket tomorrow, I'll cut and size the screen with tin snips. I think I'm going to try "tack soldering" the screen in place with a soldering iron, then go at it with a propane torch to complete the seams.

UNIBREW 5500 WOOD STAND WINGS DOWN.jpg


UNIBREW 5500 WOOD STAND WINGS UP.jpg


UNIBREW 5500 WOOD STAND BLING.jpg
 
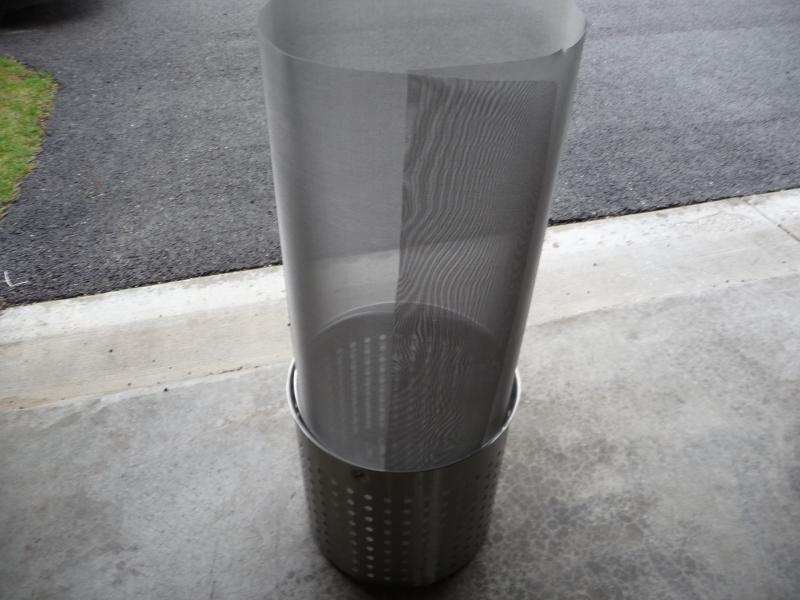
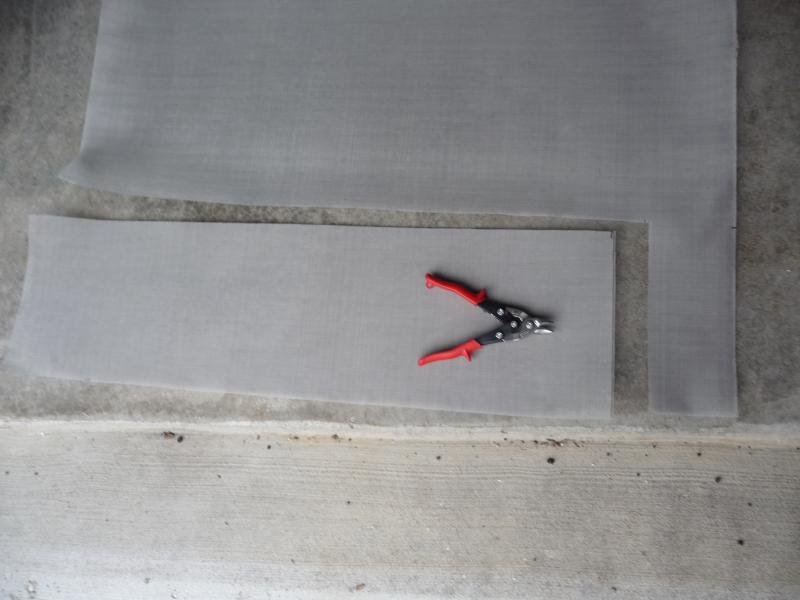
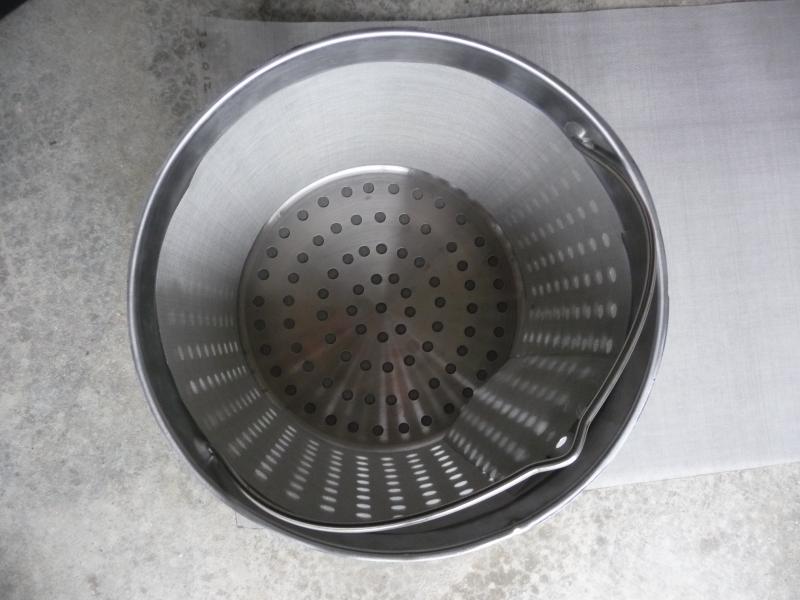
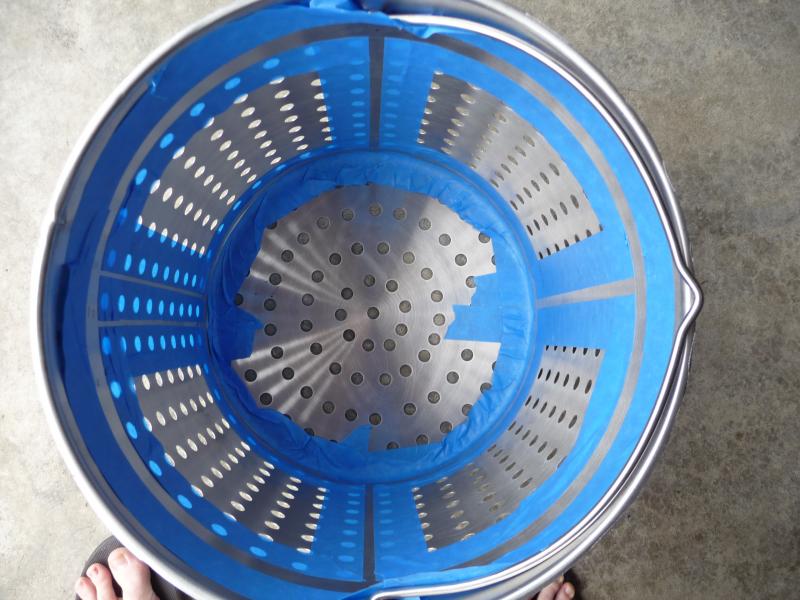
So I started putting the basket together...I sized it, cut it, and cleaned the inside of the basket. I screwed up and came up short on the circumference. It's okay, because I added another piece that will create a stronger seam.

P1020495.jpg


P1020496.jpg


P1020498.jpg
 
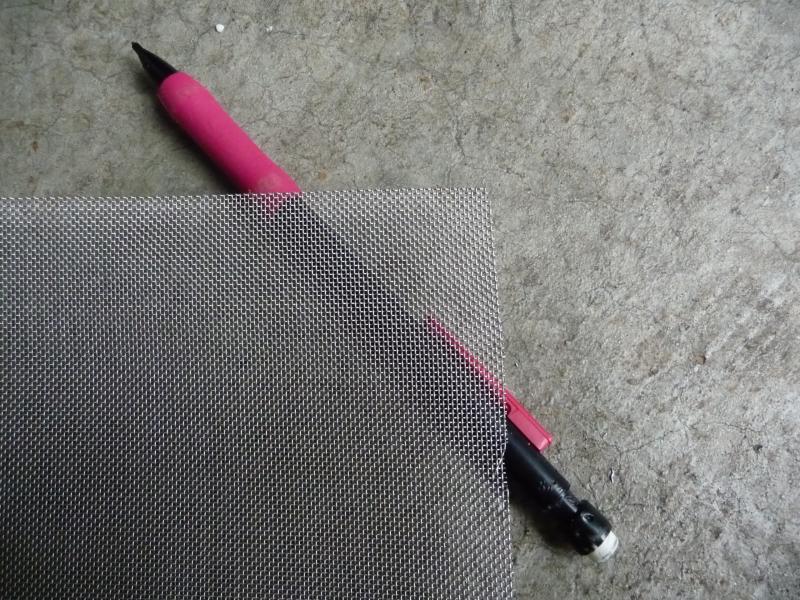
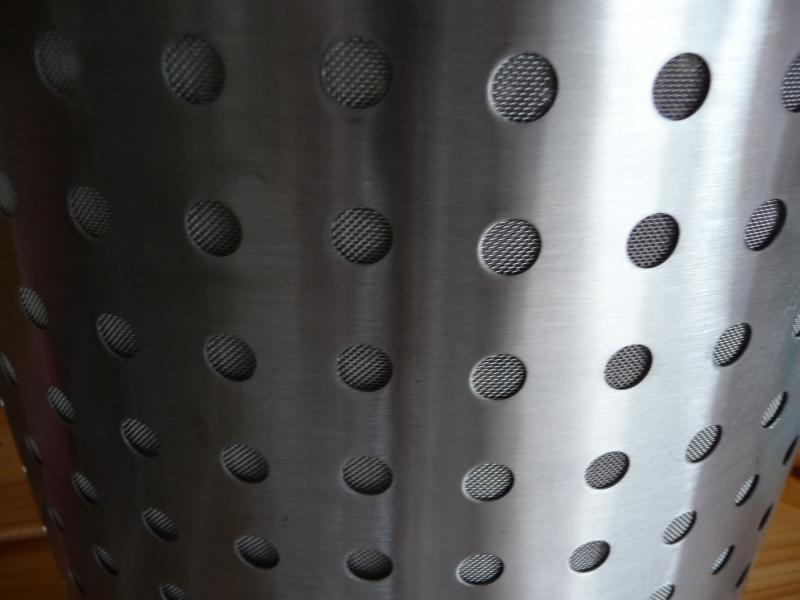
And a few more...you can see how I came up short on screen and then covered it. I also used a pencil for reference so you could see how fine the screen is...

P1020499.jpg


P1020501.jpg


P1020502.jpg
 
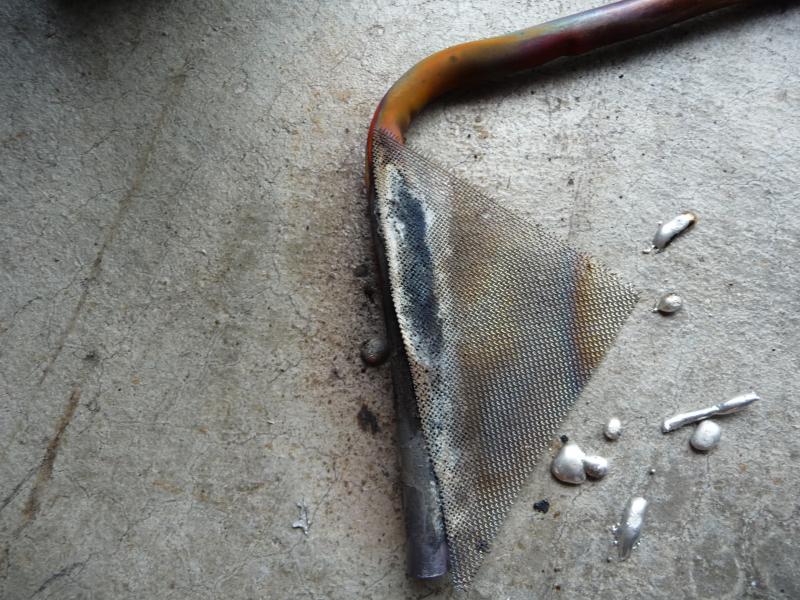
Okay...I did a test run of soldering SS screen to a piece of copper just to see how easy it would be. FAIL! I first tried to go the precision route with a soldering iron....it didn't have enough power to heat a joint, nor could I "tack solder" because the heat would get pulled away into the fitting.

Then I went with a propane torch. I tinned both surfaces, kept the heat off, etc....but because the wire in the screen had a much smaller mass than the copper....it would go to red hot (probably ruining the stainless properties), while the copper wasn't hot enough.The solder would just bead up and roll off the screen...I couldn't get it to penetrate. I'm glad I realized all ths before I tried it on the basket. I'm just going to JB weld it...maybe I'll throw some easy to manipulate thin aluminum flat bar over the seams for looks.

P1020505.jpg


P1020506.jpg
 
Maybe just rivet the screen to the basket, punch/drill holes for the rivets then pop an @$$load of them in there. Either way I'm liking the progress, now I'm off to brew!!!
 
I think drilling and riveting could be a real PITA...especially if the rivets weren't stainless.

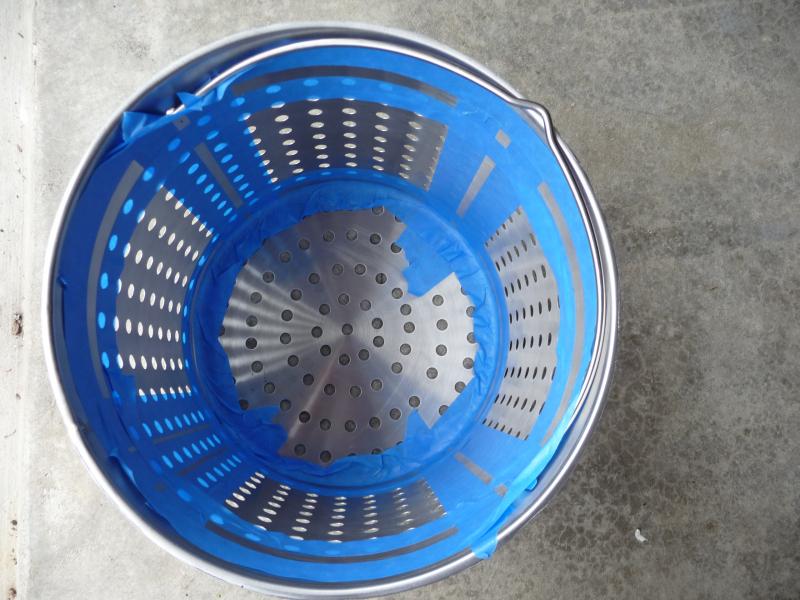
I just picked up 3 packs of JB weld at ACE; they had several other types of epoxy, but most of it was only rated to 200F. Good ol' JB weld is good to 600F and is food grade once cured. I figure I'll tape up the inside of the basket only where I want the epoxy....then I'll mix the JB weld up real good in a plastic cup and spread with a plastic knife or spoon. That way, I'll have the cleanest seams possible and the screen should just stick right in there.....

That's the PLAN, anyway :D
 
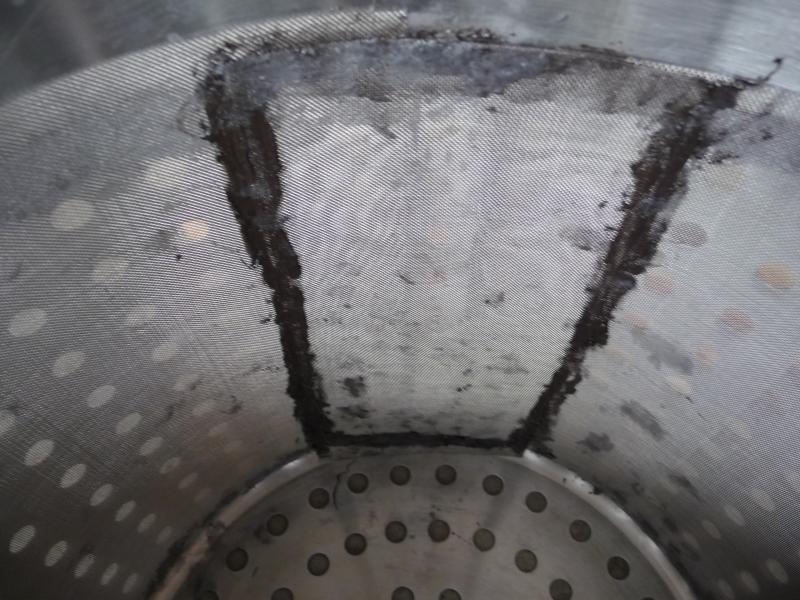
Okay, so JB weld was ALSO a PITA! Here's my first attempt, I taped everything off real nice, mixed up a bunch of regular JB weld, and spread it on with a plastic spoon:

P1020522.jpg


P1020526.jpg


P1020529.jpg
 
I thought I was going to be real slick, so I dropped in the screen, and immediately had a problem; the JB weld takes a while to tack up, and there was also that area where the screen didn't cover. I had JB Quick, which is the same thing but it cures in 5 mins. Ya gotta work pretty fast with this stuff! After getting everything in there, I had made a royal mess, and it still didn't seat well:

P1020531.jpg


P1020532.jpg


P1020534.jpg
 
First of all, let me say this isn't easy. I wore rubber gloves, and if you inadvertently brush the screen, the epoxy will get on it and you're screwed. It ruins an otherwise pristine screen and you'll never get that epoxy off. JB Weld (gray) doesn't show as bad as JB Quick (black) does.

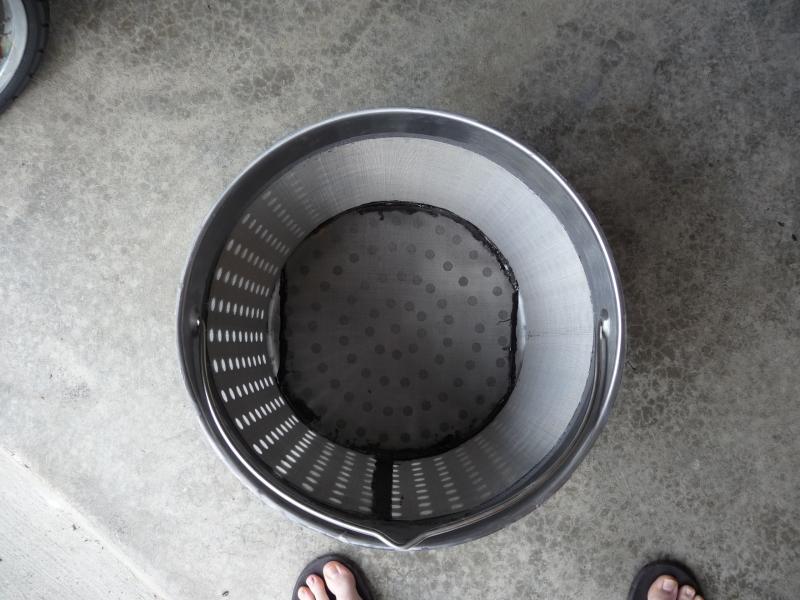
I sat and thought about how embarrassed I would be to post this kind of craftsmanship on HBT, and decided to start over before the epoxy really cured. I took the remainder of the screen I had, this time I made sure there was an overlap. Only one bead of JB Quick down the side this time, and around the bottom. The JB weld that was in there from the previous screen was just getting tacky and will probably still bond in some spots.

P1020535.jpg


P1020538.jpg


P1020537.jpg
 
SO, If anyone is following this thread and decides to go this route, here's a few tips:
1. Only make enough epoxy for a small area.
2. JB Quick cures a lot quicker, so you can stick the screen in and it'll stay. SEE #1!
3. Regular JB Weld blends really well with SS, the color is barely noticeable. If you have a way to clamp the screen evenly, this would be the preferred epoxy.
4. Wear gloves when applying epoxy, and especially when cutting SS screen!
5. If I could do it again, I'd put tape on the screen and spread the epoxy on the screen. I learned that you only really need the epoxy at the edge of the screen where it meets the basket.....if you could run a bead along there, you'd be golden.
6. Big One: Make sure the screen fits perfectly, and doing the epoxy will be easy because nothing will move or pull away from the basket.

All in all, I don't think it looks terrible, and you can't see anything from the outside of the basket at all. I plan to clean things up on the inside with a dremel tool.

Progress is a beautiful thing!
 
I can't wait to see a whole mess of hops swirling around inside this basket! :ban:
 
I think I'll try soldering stainless screen. I think the trick is to heat the larger of the two masses and carefully flow the solder in when the heat transfers to the screen.

I'm watching for updates how your screen works out!
 
I thought that too....heating the copper first, then the screen. just keep in mind that the screen goes red hot with zero effort.

Prolly won't use the screen until i get all the plumbing set up. It's going to be $$$$! I think I need to call KLG stainless....their website has some issues but I still want to go with them because they have the best prices.
 
As an update, just bought MEGA triclover fittings last night. KLG Stainless is fantastic. Their prices are way below everyone else's, and 10 minutes after I emailed him with what I needed, he zipped me a paypal invoice.

$4.50 for a 1.5" triclover clamp? $10 shipping for 15 fittings? Fuhgheddaboutit.......:p :mug:
 
Stainless solders as good if not easier than copper when you use cut muriatic acid as your flux. Overheat your screwed as screen must be heated with a iron or a large soldering gun vs a torch you already found was a bad idea. The torch works great on plate or even thin stainless but not screen soldering.
 
I have a HUGE @$$ soldering iron that I got from an old garage cleanup I did around a year ago. I wonder how many watts it is, and if it would work?

BRB... ...it's huge but from what I can find (from the model number) it's only about 25W. Not sure that would work.
 
I thought that too....heating the copper first, then the screen. just keep in mind that the screen goes red hot with zero effort.

Prolly won't use the screen until i get all the plumbing set up. It's going to be $$$$! I think I need to call KLG stainless....their website has some issues but I still want to go with them because they have the best prices.

What about setting the screen up and have a sheetmetal shop spot weld it together?
 
How many watts (in an iron) do you thing would do the trick? Those little butane ones are rated to the equivalent of 50W.
 
I would bet a 150 to 200 watt electric soldering iron would work asthis is a screen not solid stainless. Even a big Weller gun with 325 watts on high would work. Hell we had 325 watt irons in high school electric shop. Old sheetmetal workers and shops would have used those plain non electric copper irons for soldering gutters and flashing.
 
There's a pretty cheap 150w one on ebay....should get the job done. I wish i woulda thought about using a soldering iron ON the screen.....I was trying to heat the fitting. I think if you could spot solder the screen into the basket, you'd be good. Or, at the very least, solder up the screen and then insert it into the basket.
 
Install butcher paper in the basket before adding the screen, expand the screen tight to the basket then clamp the joint. Solder away for a perfect fit that can be removed. A rather basic DIY project.
 
Install butcher paper in the basket before adding the screen, expand the screen tight to the basket then clamp the joint. Solder away for a perfect fit that can be removed. A rather basic DIY project.

This is a pretty good idea...hindsight is always 20/20! One thing I found is that if you fit the screen tightly, you don't need to create a "seal"...i.e, you don't have to run epoxy for the entire seam, nor would you have to solder the entire thing. You just need to keep it in place, and the basket will do the rest.
 
This is a pretty good idea...hindsight is always 20/20! One thing I found is that if you fit the screen tightly, you don't need to create a "seal"...i.e, you don't have to run epoxy for the entire seam, nor would you have to solder the entire thing. You just need to keep it in place, and the basket will do the rest.

In that case add a 1" overlap then use a couple rare earth magnets provided the basket's magnetic stainless.
 
In that case add a 1" overlap then use a couple rare earth magnets provided the basket's magnetic stainless.

I don't know how I'd feel about magnets, I'd probably punch a larger hole in that SS Screen and feed some stainless nuts/bolts/washers in to the baskets holes and tighten them down.

Hey, wahddya know maybe you don't have to weld/solder this after all!!! :ban:
 
I got all the fittings in from KLG Stainless....2 days after ordering! Awesome! It's pretty good quality stuff, all pristine. Nothing like brand new industrial stainless parts! :ban::rockin::ban: Since it IS Father's Day this weekend, I should be able to steal some time in the garage. I plan to fit everything together and see where I need to cut and drill the stand. I'm also hoping I get the stuff I need to silver solder the fittings.
 
Back
Top