
Kinggolf83
Member
- Joined
- May 20, 2019
- Messages
- 15
- Reaction score
- 3
I started brewing about eight years ago when my wife surprised me with a Mr. Beer kit. I made some passable beers and some that were plain awful. I enjoyed the hobby but really did not enjoy my beer as much as what I could buy at the market. So I put Mr. Beer in the back closet and continued to enjoy the ever changing climate of Craft Brew.
A couple of years later, a new friend and colleague brought to my attention he was brewing beer and we started talking about his setup and the beers he was creating. I got really excited by this venture and one day we went to the LHBS and picked up my first 5 gallon kit and supplies. I was hooked. I was brewing at least once a month and creating some decent beers and started writing my own partial extract recipes.
Like almost all homebrewers, there comes a point where they graduate from Extract to All Grain. So I created a makeshift three tier system with two rectangular Igloo coolers and an 8 gallon pot. I started brewing in the garage and used my work bench and some boxes to brew for several years. Made some pretty great beers too.
However, you are all here for the new Single Tier HERMS System and not my homebrew odyssey. So here we go....
I have been planning this system for several years and I sketched many different iterations of basically the same design until I was ready to pull the trigger. Let's start with the frame.
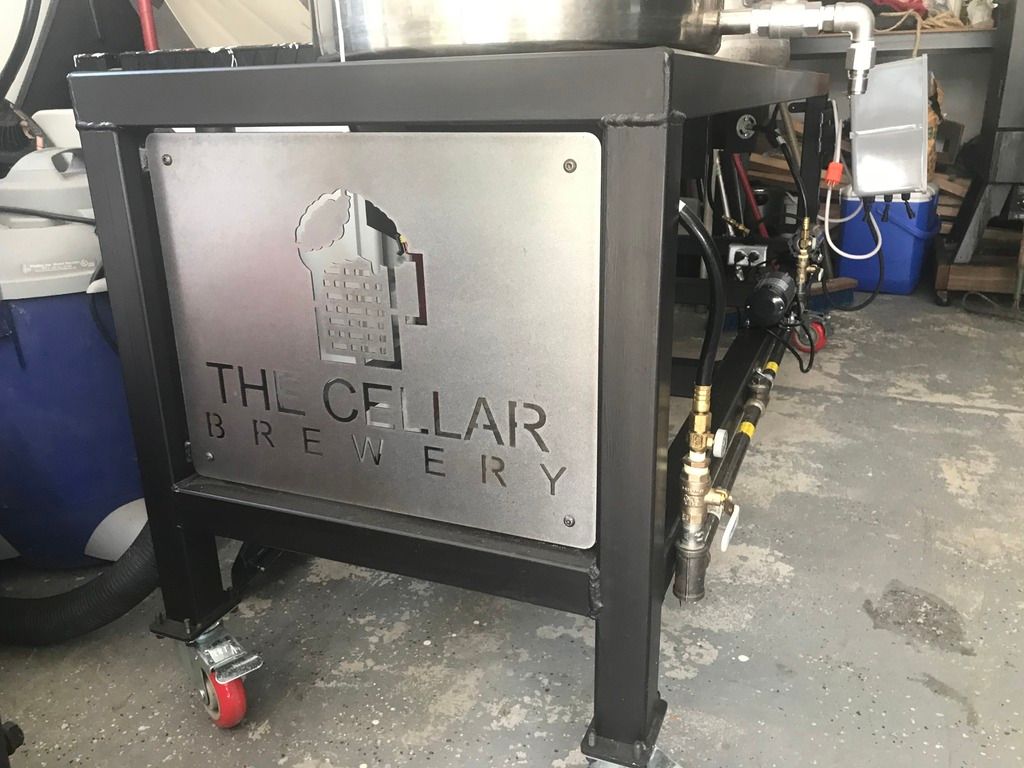
A buddy of mine works for the local Career Center and was able to have his students create a frame out of 2" Steel tubing, 6' long, and about 3' tall with 3" locking castors. He also took liberty to create a custom side plate for the stand with my homebrewery logo. The stand was then painted with Rustoleum High Temp Grill Paint. ~$300
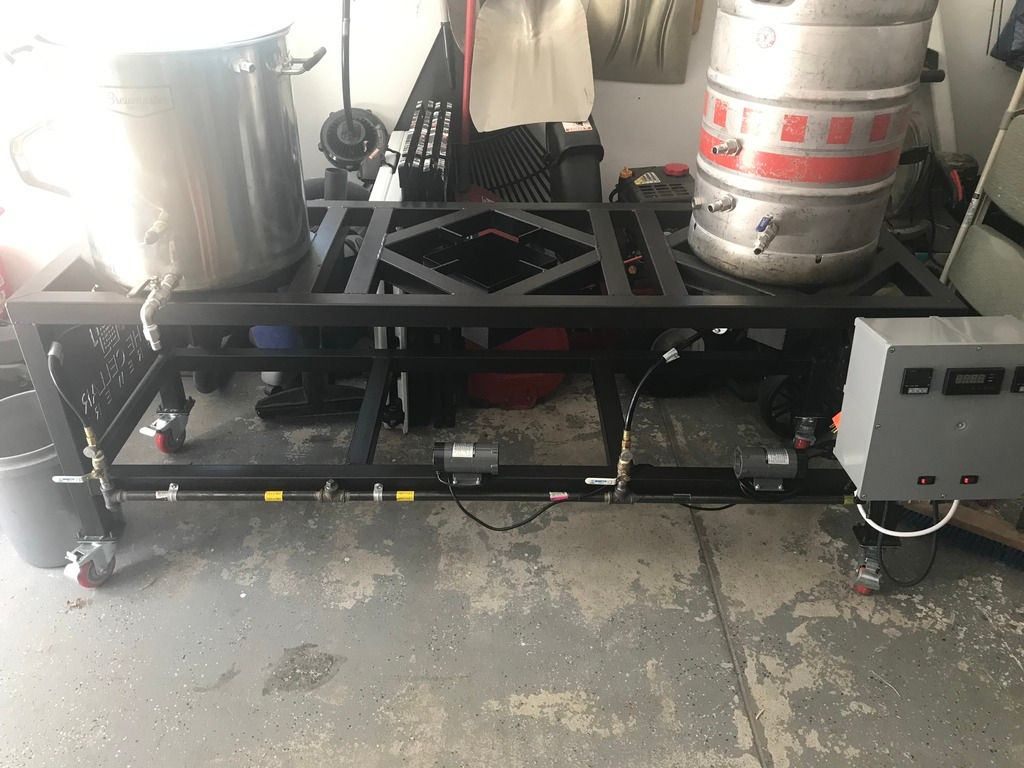
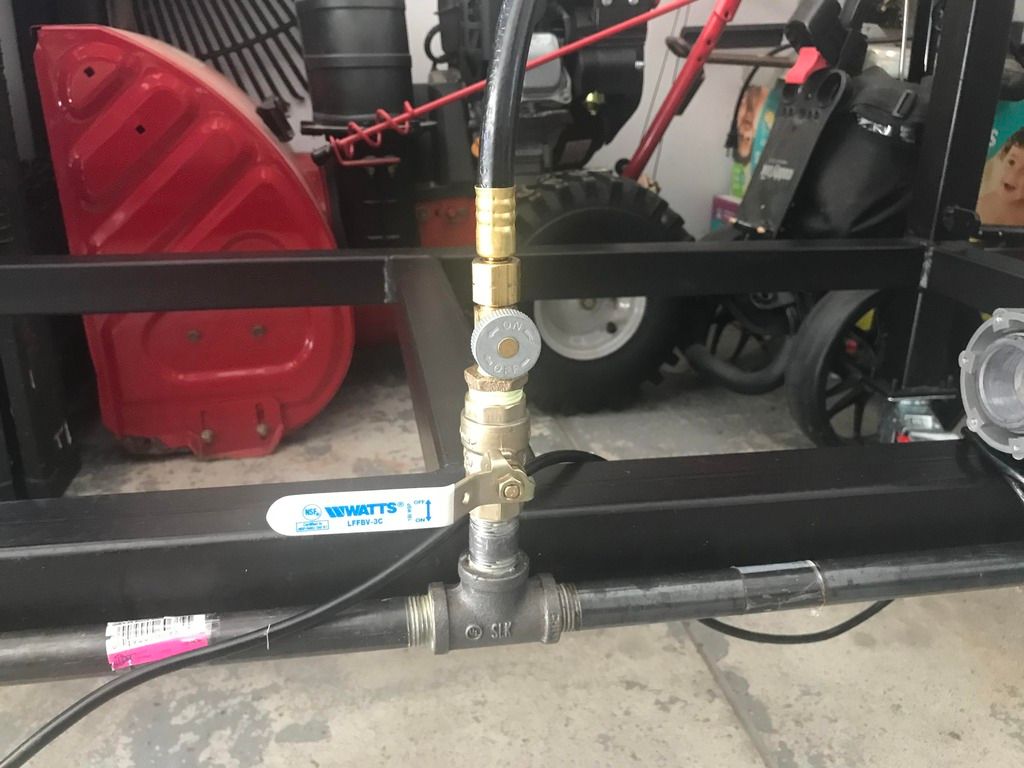
Next, I needed to figure out how to supply propane to the two Dark Star burners we cannibalized from the stands I already had. I chose to use black iron pipe to supply propane to the burners. I then had the local propane shop (they supply propane and propane accessories) build the supply hoses. Each supply hose has a brass ball valve and needle valve. This allows me to adjust the propane all the way up or down to just a bubble above the burner.
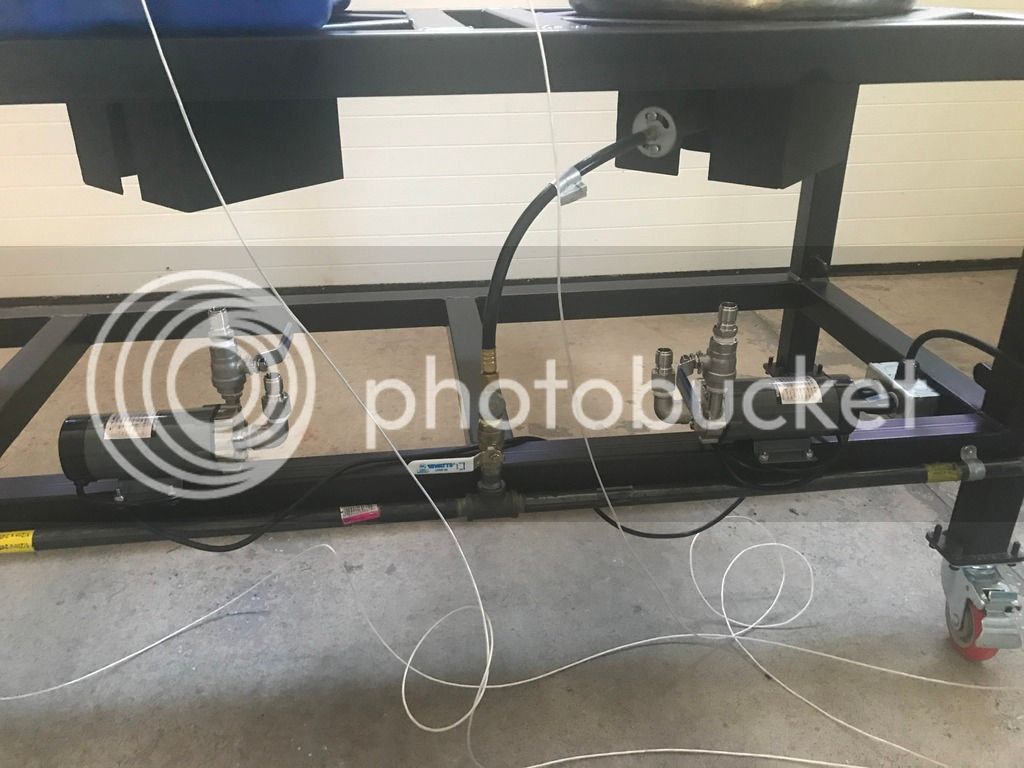
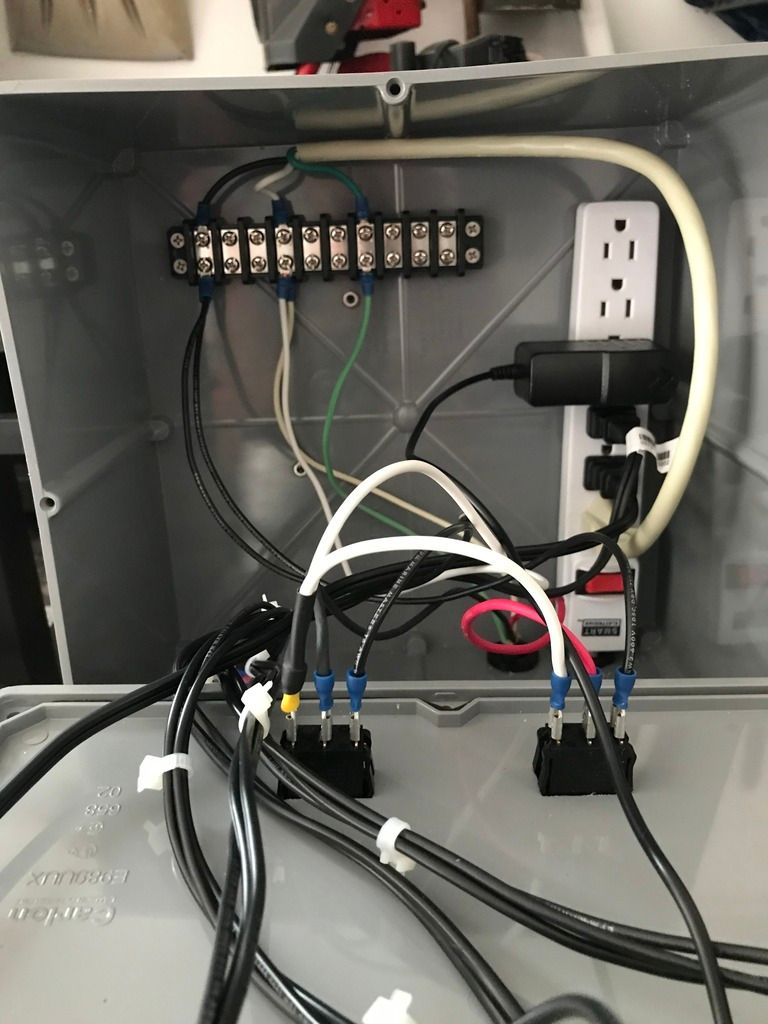
I then attached two Mark II pumps with angled steel. Each pump has quick disconnects and SS ball valves. These are then wired to a small electrical outlet and wired to the control panel. The pumps are controlled by two lighted toggle switches.
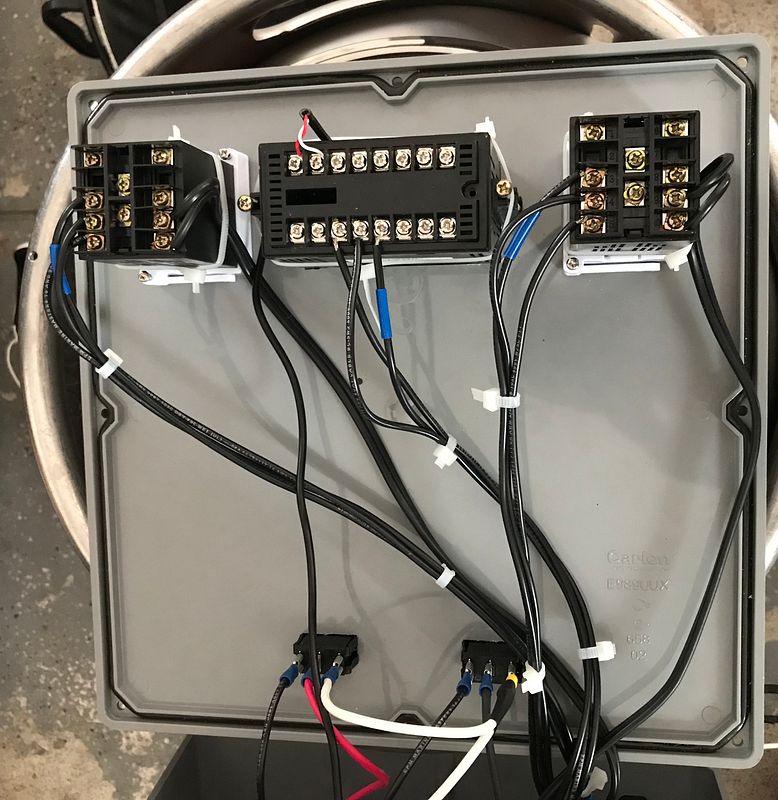
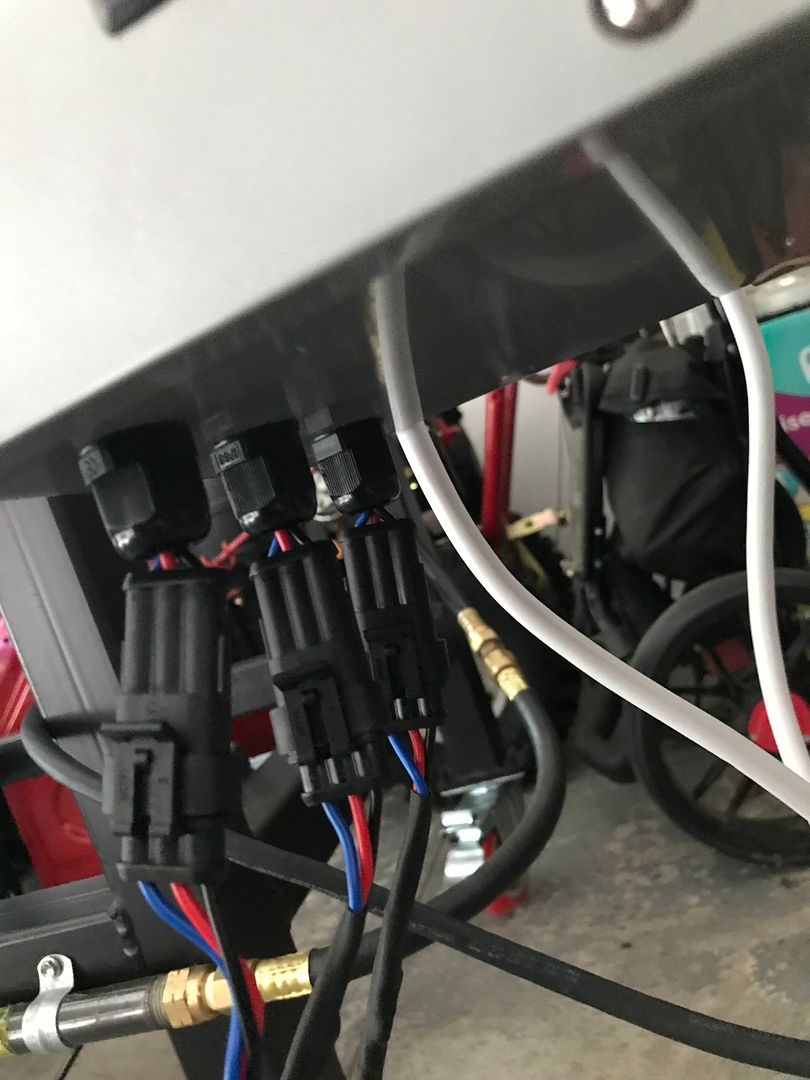
I already had a DC Temp Display from Ebay but I also wanted the possibility to add automation later so I bought two InkBird ITC-106v PIDs. This caused a conundrum with wiring, so we chose to include a surge protector in the control box to supply power to each device. Also, each temp display is connected with PT-100 RTD temp probes and inserted in each vessel at a 9" thermowell. The temp probes are easily disconnected at the control box with waterproof three pin auto connectors. In addition, the control box is powered by an extension cord wired to a GFCI.

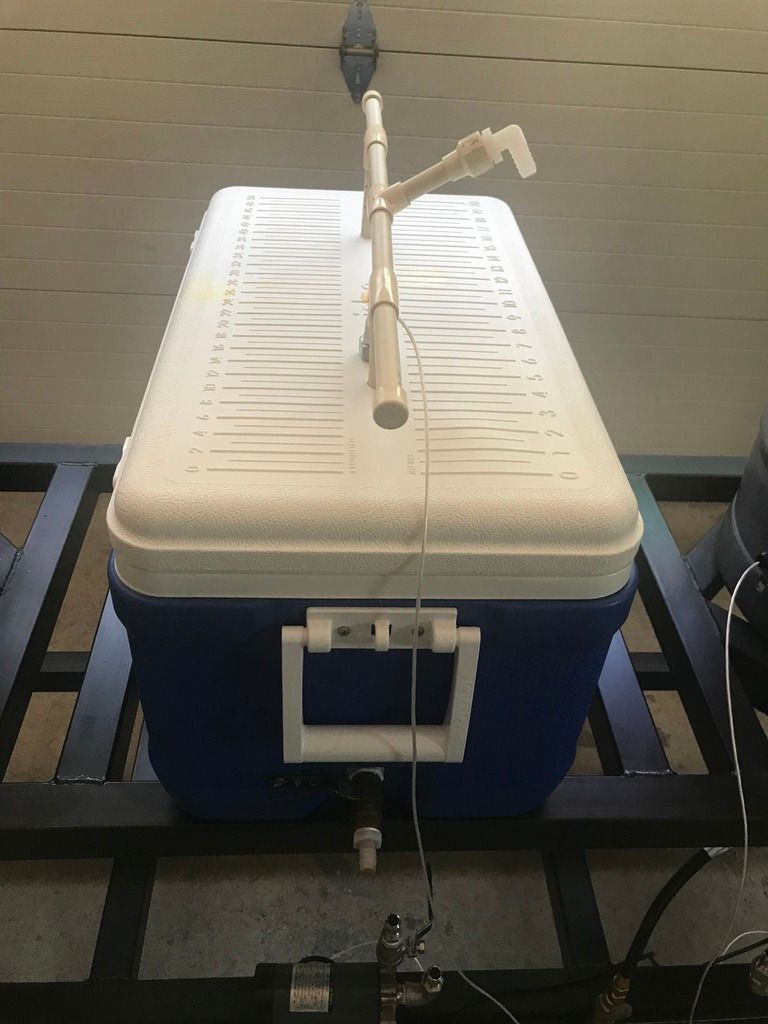
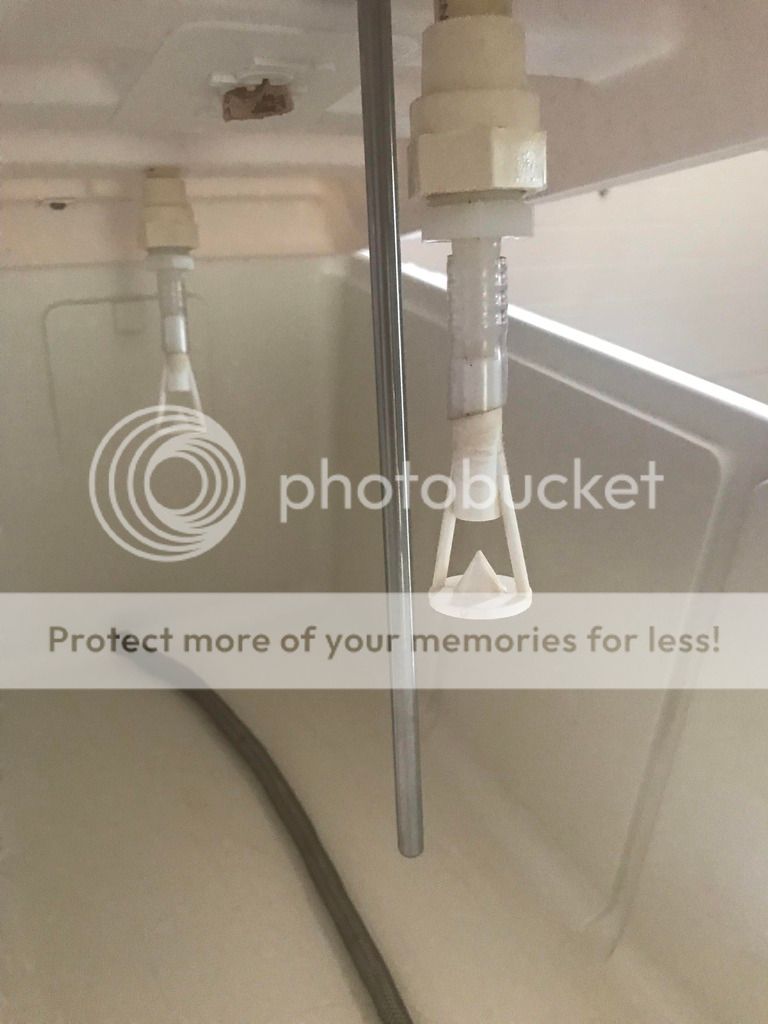
Finally, I decided to continue to use one of my rectangular 12 gallon Igloo coolers for the MLT. Inserted through the lid are a thermowell and re-circulation/sparge arm with sprayers. Currently, I use a SS braided water supply for a screen and is connected to a ball valve.
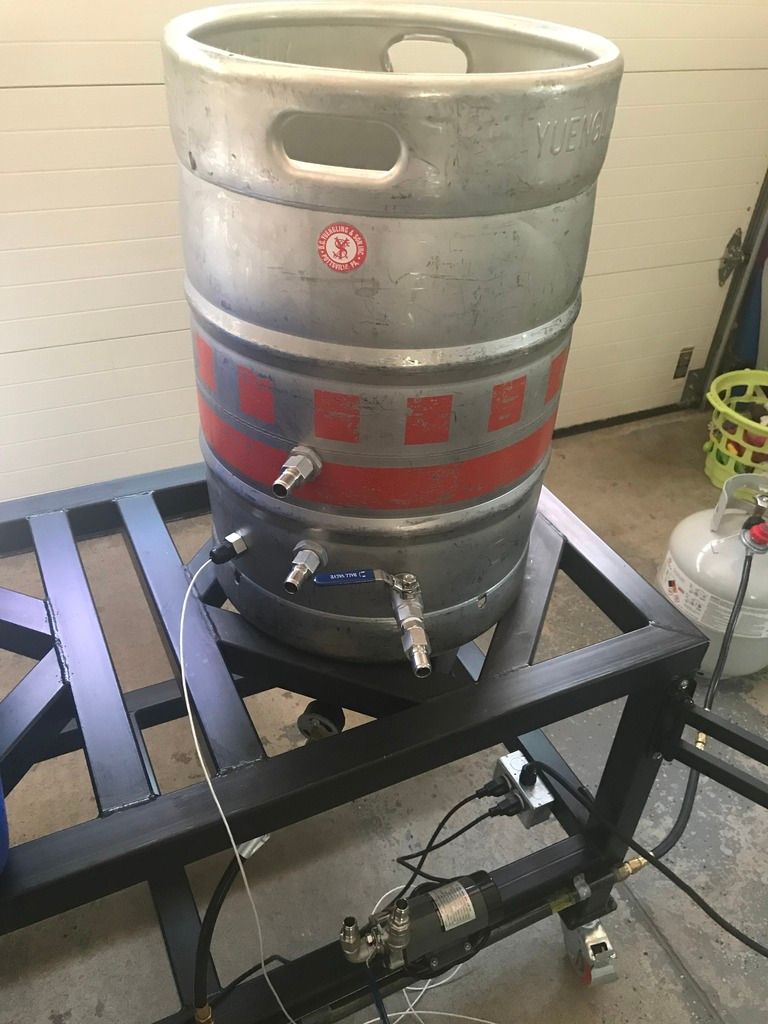
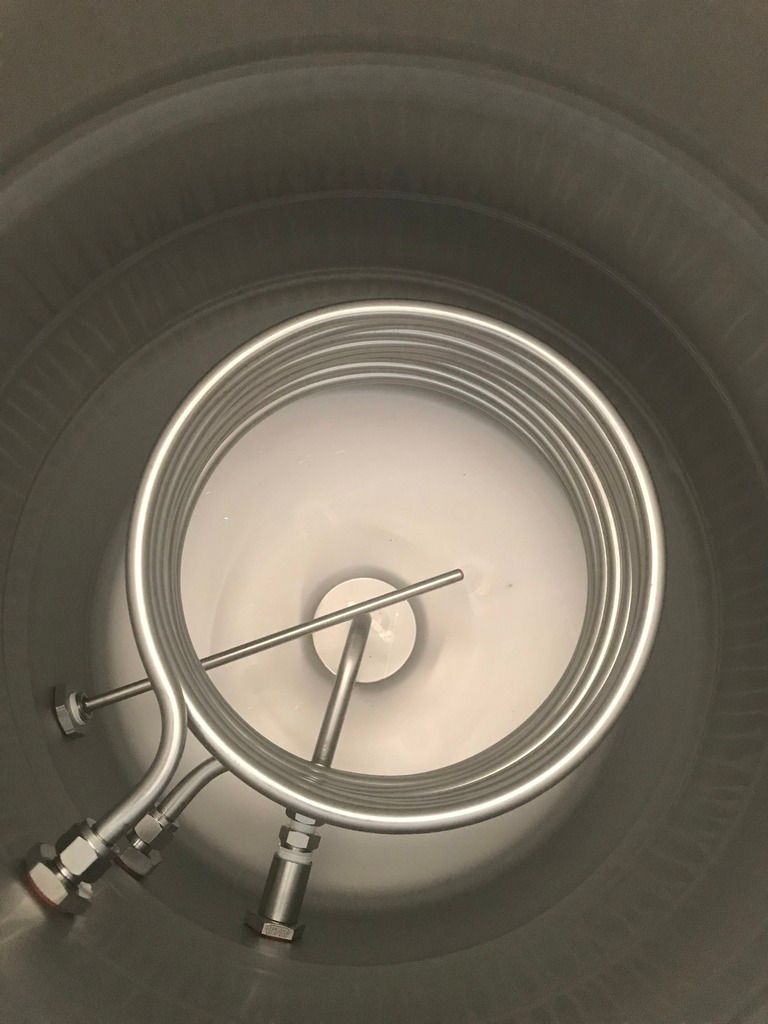
The HLT is a converted keg. It was then fitted with weldless bulkhead and ball valve, 25' HERMS Coil, and 9" thermowell. I currently use the HERMs Coil to recirculate the wort during the mash to maintain mash temp as well as coiling the wort after the boil.
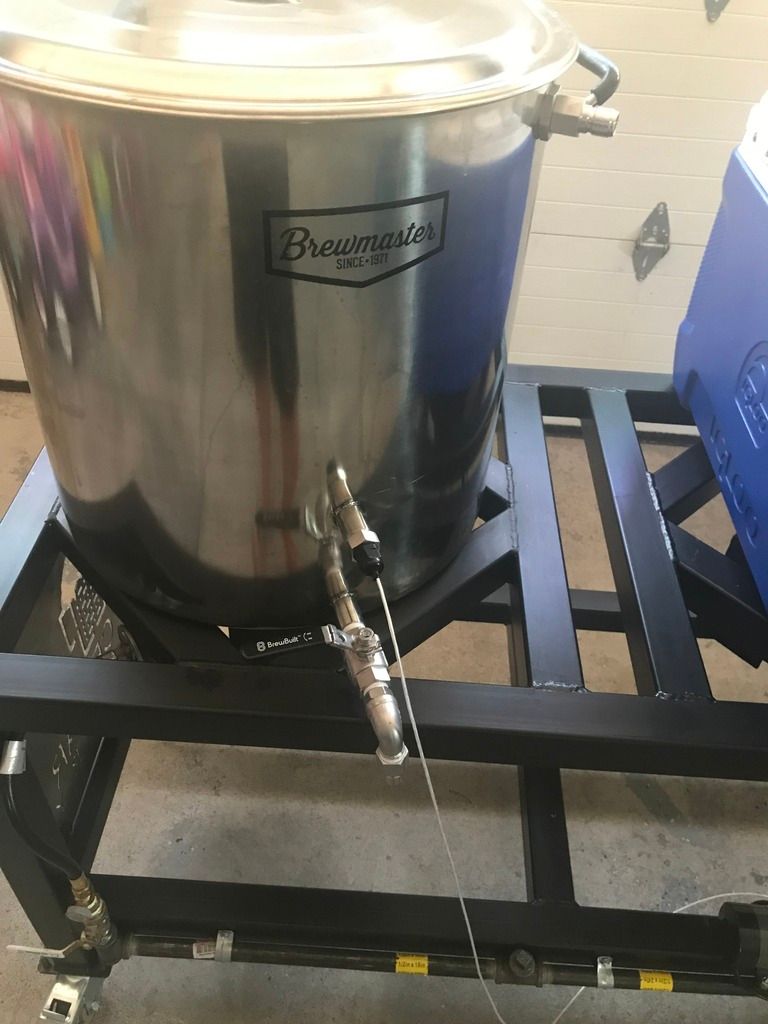
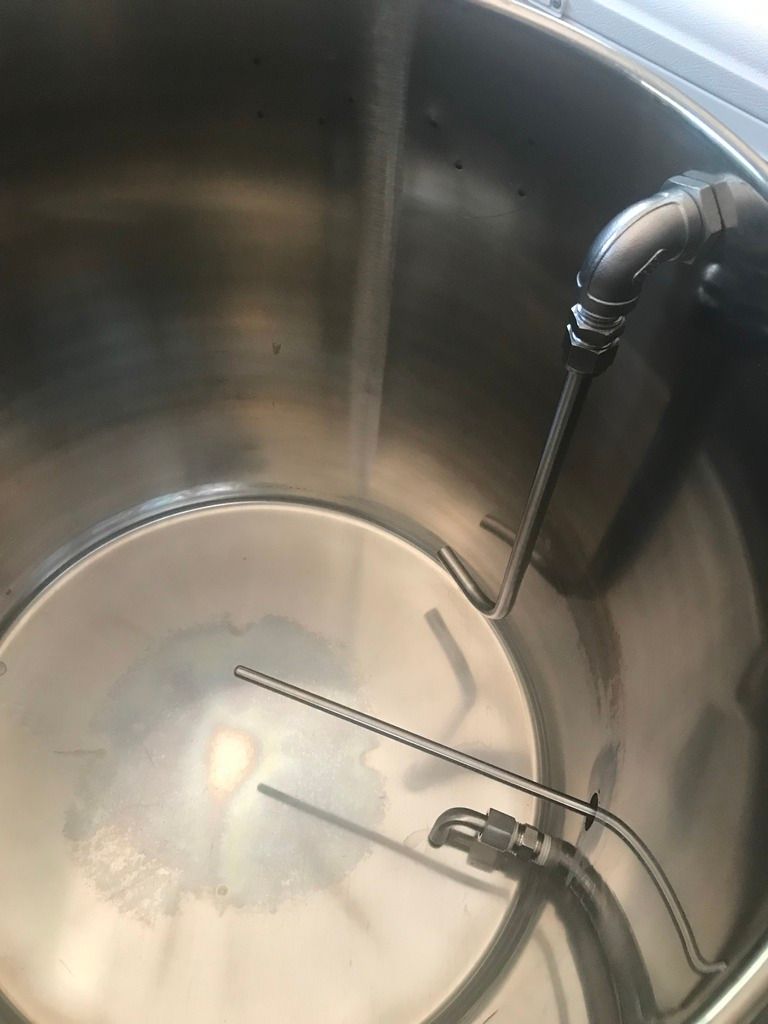
The BK is an 18 gallon Brewmasters kettle. It was a sweet deal on Homebrew Finds, if you don't subscribe to them, I suggest you check them out. The BK includes a SS ball valve with short diptube, 9" thermowell, and a whirlpool arm. Many of the stainless steel fitting were sourced from Bargain Fittings.
I have only brewed on the system a couple times and it is currently a work in progress. But I thought I would share. If you have any questions/comments/concerns I appreciate the input.
Keep Calm and Brew On!
A couple of years later, a new friend and colleague brought to my attention he was brewing beer and we started talking about his setup and the beers he was creating. I got really excited by this venture and one day we went to the LHBS and picked up my first 5 gallon kit and supplies. I was hooked. I was brewing at least once a month and creating some decent beers and started writing my own partial extract recipes.
Like almost all homebrewers, there comes a point where they graduate from Extract to All Grain. So I created a makeshift three tier system with two rectangular Igloo coolers and an 8 gallon pot. I started brewing in the garage and used my work bench and some boxes to brew for several years. Made some pretty great beers too.
However, you are all here for the new Single Tier HERMS System and not my homebrew odyssey. So here we go....
I have been planning this system for several years and I sketched many different iterations of basically the same design until I was ready to pull the trigger. Let's start with the frame.
A buddy of mine works for the local Career Center and was able to have his students create a frame out of 2" Steel tubing, 6' long, and about 3' tall with 3" locking castors. He also took liberty to create a custom side plate for the stand with my homebrewery logo. The stand was then painted with Rustoleum High Temp Grill Paint. ~$300
Next, I needed to figure out how to supply propane to the two Dark Star burners we cannibalized from the stands I already had. I chose to use black iron pipe to supply propane to the burners. I then had the local propane shop (they supply propane and propane accessories) build the supply hoses. Each supply hose has a brass ball valve and needle valve. This allows me to adjust the propane all the way up or down to just a bubble above the burner.
I then attached two Mark II pumps with angled steel. Each pump has quick disconnects and SS ball valves. These are then wired to a small electrical outlet and wired to the control panel. The pumps are controlled by two lighted toggle switches.
I already had a DC Temp Display from Ebay but I also wanted the possibility to add automation later so I bought two InkBird ITC-106v PIDs. This caused a conundrum with wiring, so we chose to include a surge protector in the control box to supply power to each device. Also, each temp display is connected with PT-100 RTD temp probes and inserted in each vessel at a 9" thermowell. The temp probes are easily disconnected at the control box with waterproof three pin auto connectors. In addition, the control box is powered by an extension cord wired to a GFCI.
Finally, I decided to continue to use one of my rectangular 12 gallon Igloo coolers for the MLT. Inserted through the lid are a thermowell and re-circulation/sparge arm with sprayers. Currently, I use a SS braided water supply for a screen and is connected to a ball valve.
The HLT is a converted keg. It was then fitted with weldless bulkhead and ball valve, 25' HERMS Coil, and 9" thermowell. I currently use the HERMs Coil to recirculate the wort during the mash to maintain mash temp as well as coiling the wort after the boil.
The BK is an 18 gallon Brewmasters kettle. It was a sweet deal on Homebrew Finds, if you don't subscribe to them, I suggest you check them out. The BK includes a SS ball valve with short diptube, 9" thermowell, and a whirlpool arm. Many of the stainless steel fitting were sourced from Bargain Fittings.
I have only brewed on the system a couple times and it is currently a work in progress. But I thought I would share. If you have any questions/comments/concerns I appreciate the input.
Keep Calm and Brew On!
