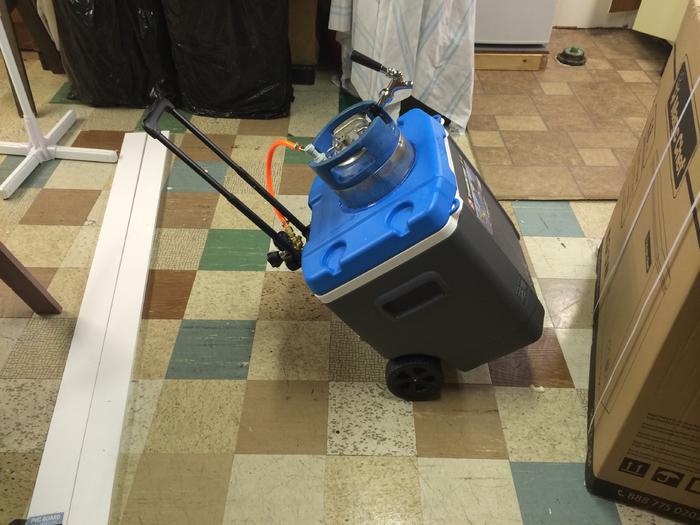
Portable Igloo Keg Cooler

Homebrew Talk - Beer, Wine, Mead, & Cider Brewing Discussion Forum

Help Support Homebrew Talk - Beer, Wine, Mead, & Cider Brewing Discussion Forum:

This site may earn a commission from merchant affiliate links, including eBay, Amazon, and others.

jrm21086

Member
Joined
Sep 14, 2012
Messages
20
Reaction score
5
Location
Coventry
Hi everyone,

This is my first time posting a DIY project. I've gotten so much information from HBT and the posts here; I don't know if I would be able to homebrew successfully with it.

Anyway, I'd like to share my portable keg cooler. I originally built the garbage can model but decided it was too heavy to be practical for me. If you entertain a lot, go to a bunch of parties, and/or have a vehicle large enough to haul it then that's great. I don't, so I built this. Others have done the same project or similar projects, but I wanted to share. Enjoy!

Parts
--------------------
Igloo Cooler from Sam's Club 60qt
Great Stuff spray foam
Faucet with QD attached
20oz Paintball Tank
Harbor Freight CO2 regulator
Vinyl Air hose tubing from Harbor Freight (cheap!...a little big but I cranked on the worm clamps and it worked great)
3M "Sea Blue" Duct tape (found it at Lowes)

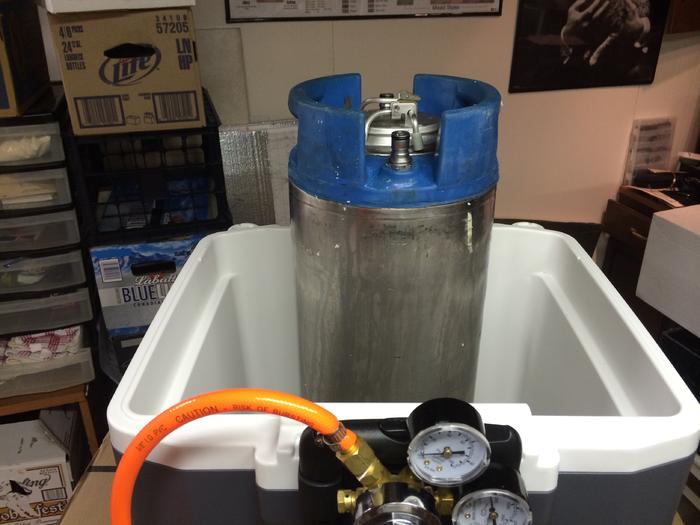
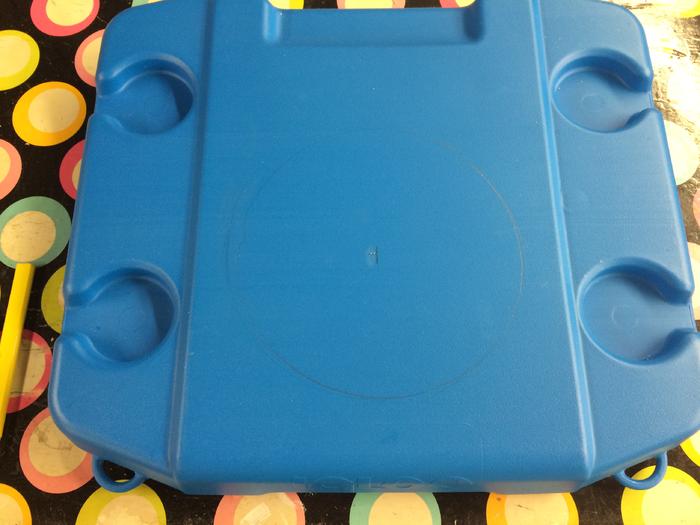
The first pics show the lid removed from the cooler. I used a flathead scredriver to pop it off. Pretty easy

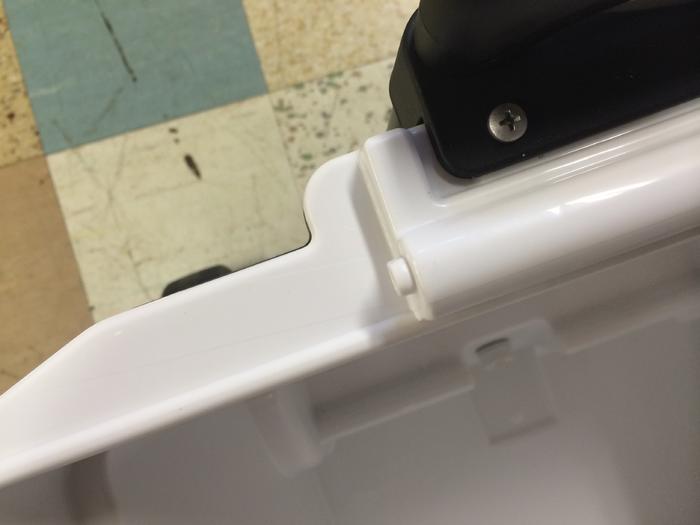
Then I took my Dremel tool and sanded off the white plastic "hinge pin" on the body of the cooler itself. Due to the angles you have to assembly the set up straight down (no angle)

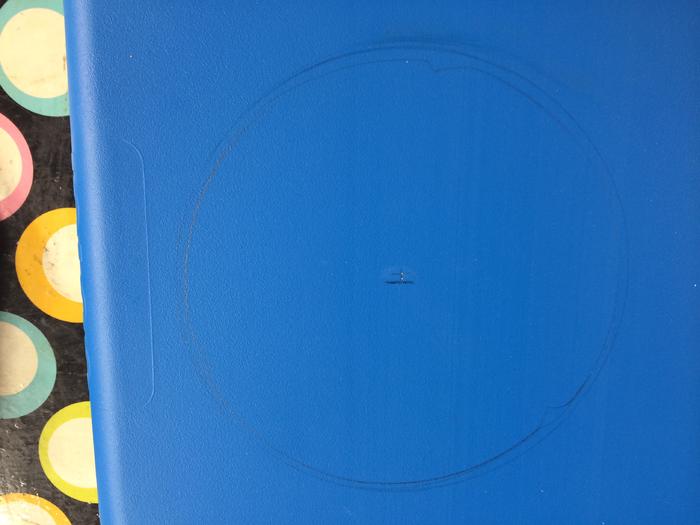
I measured my keg (Firestone Challenger ball lock) and added some space, then drew a circle with a compass. I would be more generous here, as it is now a pretty tight fit.

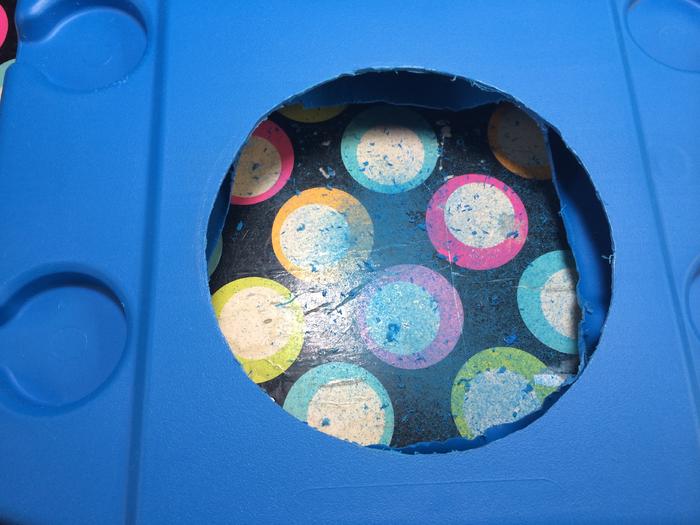
Next I cut the hole using a Rotozip bit for my Dremel. I got close to the line then finished up with the sanding wheel. Did a nice job actually, I was impressed.

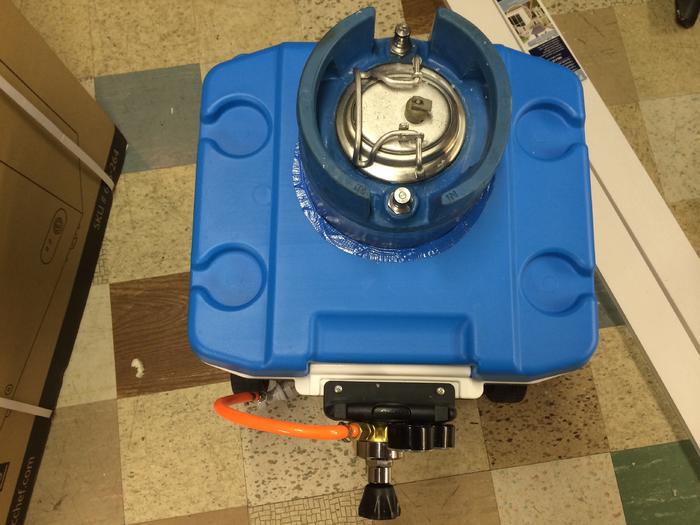
One thing you can't see is that most cooler lids are hollow. I filled it with Great Stuff to extend past diameter of the whole, then trimmed it once it hardened. I used 3M Blue Duct Tape to seal around the edges. I overlapped and made it sloppy then used my compass again to trace a neat circle and trimmed with a sharp razor blade. Came out pretty well, although I think I'll be adding more of a "flange" of tape as the pressure of removing and re-installing the keg moves the tap around more than I'd like.
IMG_0853.jpg


IMG_0854.jpg


IMG_0855.jpg


IMG_0856.jpg
 
Sorry, I'm not good at taking pictures as I work!

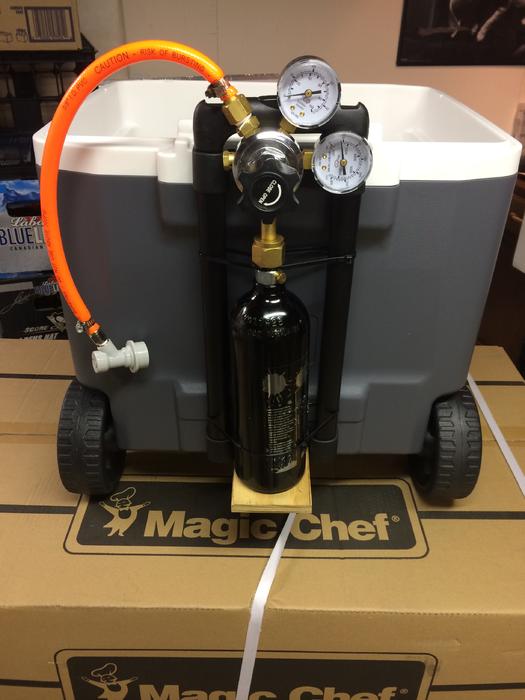
I cut a small square 1/2" plywood, and used some small screws and L brackets to mount a shelf to the bottom of the cooler, to hold the paintball CO2 tank. There are two screws holding the bottom part of the handle assembly to the cooler. I removed those and put my L brackets through the screws, and then reattached. This proved to be quite strong. I may paint the wood shelf for durability.

The HF regulator is acceptable as a serving regulator but I still have my Taprite that I'm using for my keezer (notice the pic?? :) ) I just don't think it is particularly accurate.

NOTE ON PAINTBALL TANK / REGULATOR: I was getting frustrated here. First a bought a cheap "The Adapter" style adapter from an eBay store. Fit on the PB tank fine but wouldn't fit either regulator as I think it is threaded the wrong way. So I went a different direction and bought a universal fill adapter and some bushings/nipples from Amazon to connect the tank directly into the regulator. I'm not sure what the heck happened to the bushing but brass was coming off in ribbons. I'm pretty sure the thread sizes were different even though the interwebs said it would work. Bought another bushing and got the wrong gender on the end (doh!). Really getting frustrated now.

What I never bothered to check was that the the regular regulator fits fine on to the PB tank. The only difference is there is no pin on the regulator. What I did was take a small piece of brass tubing (used a shank from Dremel parts) and crimped the one end closed. I carefully set it on the regulator, along with the reg. washer, and screwed the nut down. Success! The action of screwing the nut down against the tube allows the gas to flow. Nothing more needed than a piece of old junk laying around.

IMG_0868.jpg


IMG_0869.jpg


IMG_0870.jpg
 
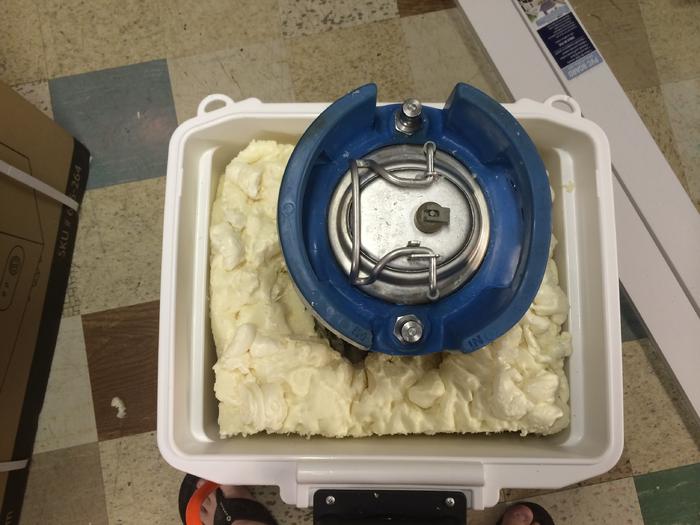
I wasn't very happy with this next part, and I also didn't take any pictures during the process due to the nature of Great stuff spray foam. I took a garbage bag and lined my cooler, then wrapped my keg in a garbage bag. I created a false bottom of sorts out of 1/2" insulation foam board and cut a keg-sized hole in it. This sits on top of the wheels.

My idea was to provide a very thick layer of insulation so that I could put in a small bag of ice to only cool the bottom part of the keg (where the beer actually comes from). It seems dumb to "waste" two whole large bags of ice to keep everything ice cold, when a) the keg will already be cold and b) the beer is drawn from the bottom anyway.

As you can imagine, this was incredibly messy. I also ran into trouble of the foam not curing all the way, even after a few days. I think the bag prevented air from curing the foam. I only applied one can at a time (4 total - two regular and two extra expanding).

My original idea was to spray this with a rubber coating material to protect the foam but I gave up due to the many voids and rough texture. It would take forever to coat it and still not be one solid coat. I left it as-is.

I might replace it with something like this.

IMG_0871.jpg


IMG_0872.jpg


IMG_0873.jpg
 
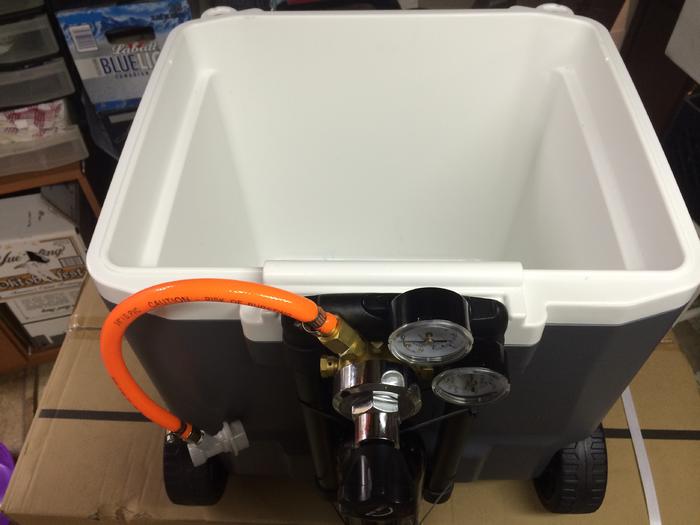
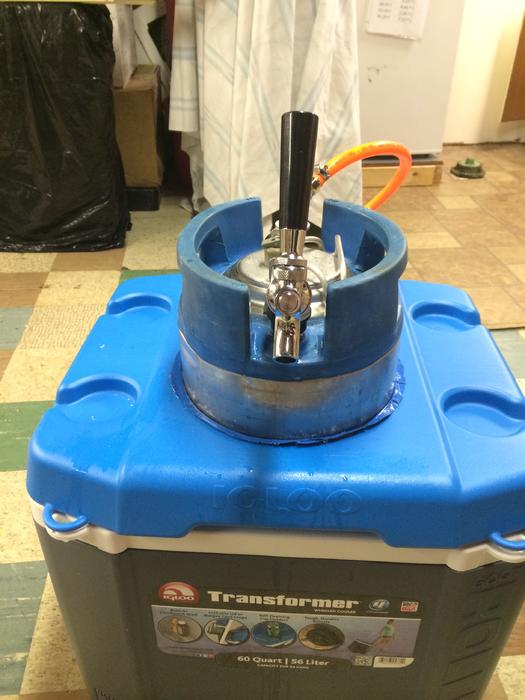
Here's the final product. I'll need to take some better final pics.

My concerns are the serving temperature of the beer and foaming. I've never used one of this QD/faucet setups before so I'm hoping there won't be an issue. As for the temp, I could always add more ice.

This will debut on July 4th so I hope to take some pics of it in action. Inaugural brew is an American Cream Ale (extract) that is pretty darn tasty.

IMG_0877.jpg


IMG_0878.jpg


IMG_0879.jpg
 
Foaming inside the cooler is brilliant. Nicely done and just keep adding ice if need be.
 
Its a little sobering to actually add it all up. I didn't include tax or shipping, and I already had the keg and the regulator. I put the regulator in because I thought that to be sort of specialized, whereas I would assume you would already have a keg if you wanted to make a keg cooler, lol. Total cost was probably around $145. Here's the link to the full price out. https://drive.google.com/file/d/0BzUliGGM7dLYcTM3eW9zQnM0M3M/edit?usp=sharing
 
Awesome. Not a bad price considering what a retailer would charge for the same thing. Congrats on a successful design.
 
Had the first full day of usage yesterday for our July 4th picnic. I brought the unit out at 2:30 PM and it sat on our cement patio. The sun was on the patio all morning but it moves off around 1:00, so there was no direct sun on the keg kooler, but the cement was still warm.

I placed the keg in the cooler, surrounded it with approx. 1/2 a 10# bag of ice, put the foam over it, and secured the lid. I bled the pressure and turned on the gas.

One upgrade I may see in the future is a tighter spread of PSI for gauge. Because there's almost no resistance coming through the QD faucet, you need very little pressure and it is very easy to get all foam. I actually had the gas shut off and did 3 or 4 pours before it slowed up enough to turn the gas back on. I would like to be able to "set and forget" it.

I (consistently...lol) drank from the keg all night and every pour was ice cold. We started wrapping up around 9:00-9:30 PM. I cracked into the cooler and it had a substantial amount of ice, with about 2-3 cups of water in the bottom - the rest was ice. I would call this a success.

The temperature in the main part of the day was between 72-74 degree, and it did cool off as the sun was going down past the trees. I will need to try this again in a 85-90 degree day to try the results. Given the amount of ice left, I don't think this setup would have any issues with that.

One of the best things is clean up. I just take apart the QD faucet and put it in some Oxy clean solution. Even in a substantially inebriated state, I can manage this. Let it sit overnight, rinse and spray with Star San and you're good to go.

During the past week, I brought it out one night after work as I had some visitors. What is great is that the set up takes less than 5 minutes - and this is with no ice. I think you would be OK for even a few hours with no ice at all.

All in all I am very happy with this. Best part is I used my abandoned BierMuncher garbage-can-style-Kegerator and used it as my new garbage can for the party :)
 
Back
Top