My keg fermenter

Homebrew Talk - Beer, Wine, Mead, & Cider Brewing Discussion Forum

Help Support Homebrew Talk - Beer, Wine, Mead, & Cider Brewing Discussion Forum:

This site may earn a commission from merchant affiliate links, including eBay, Amazon, and others.

sam_cotter

Active Member
Joined
Aug 21, 2016
Messages
40
Reaction score
14
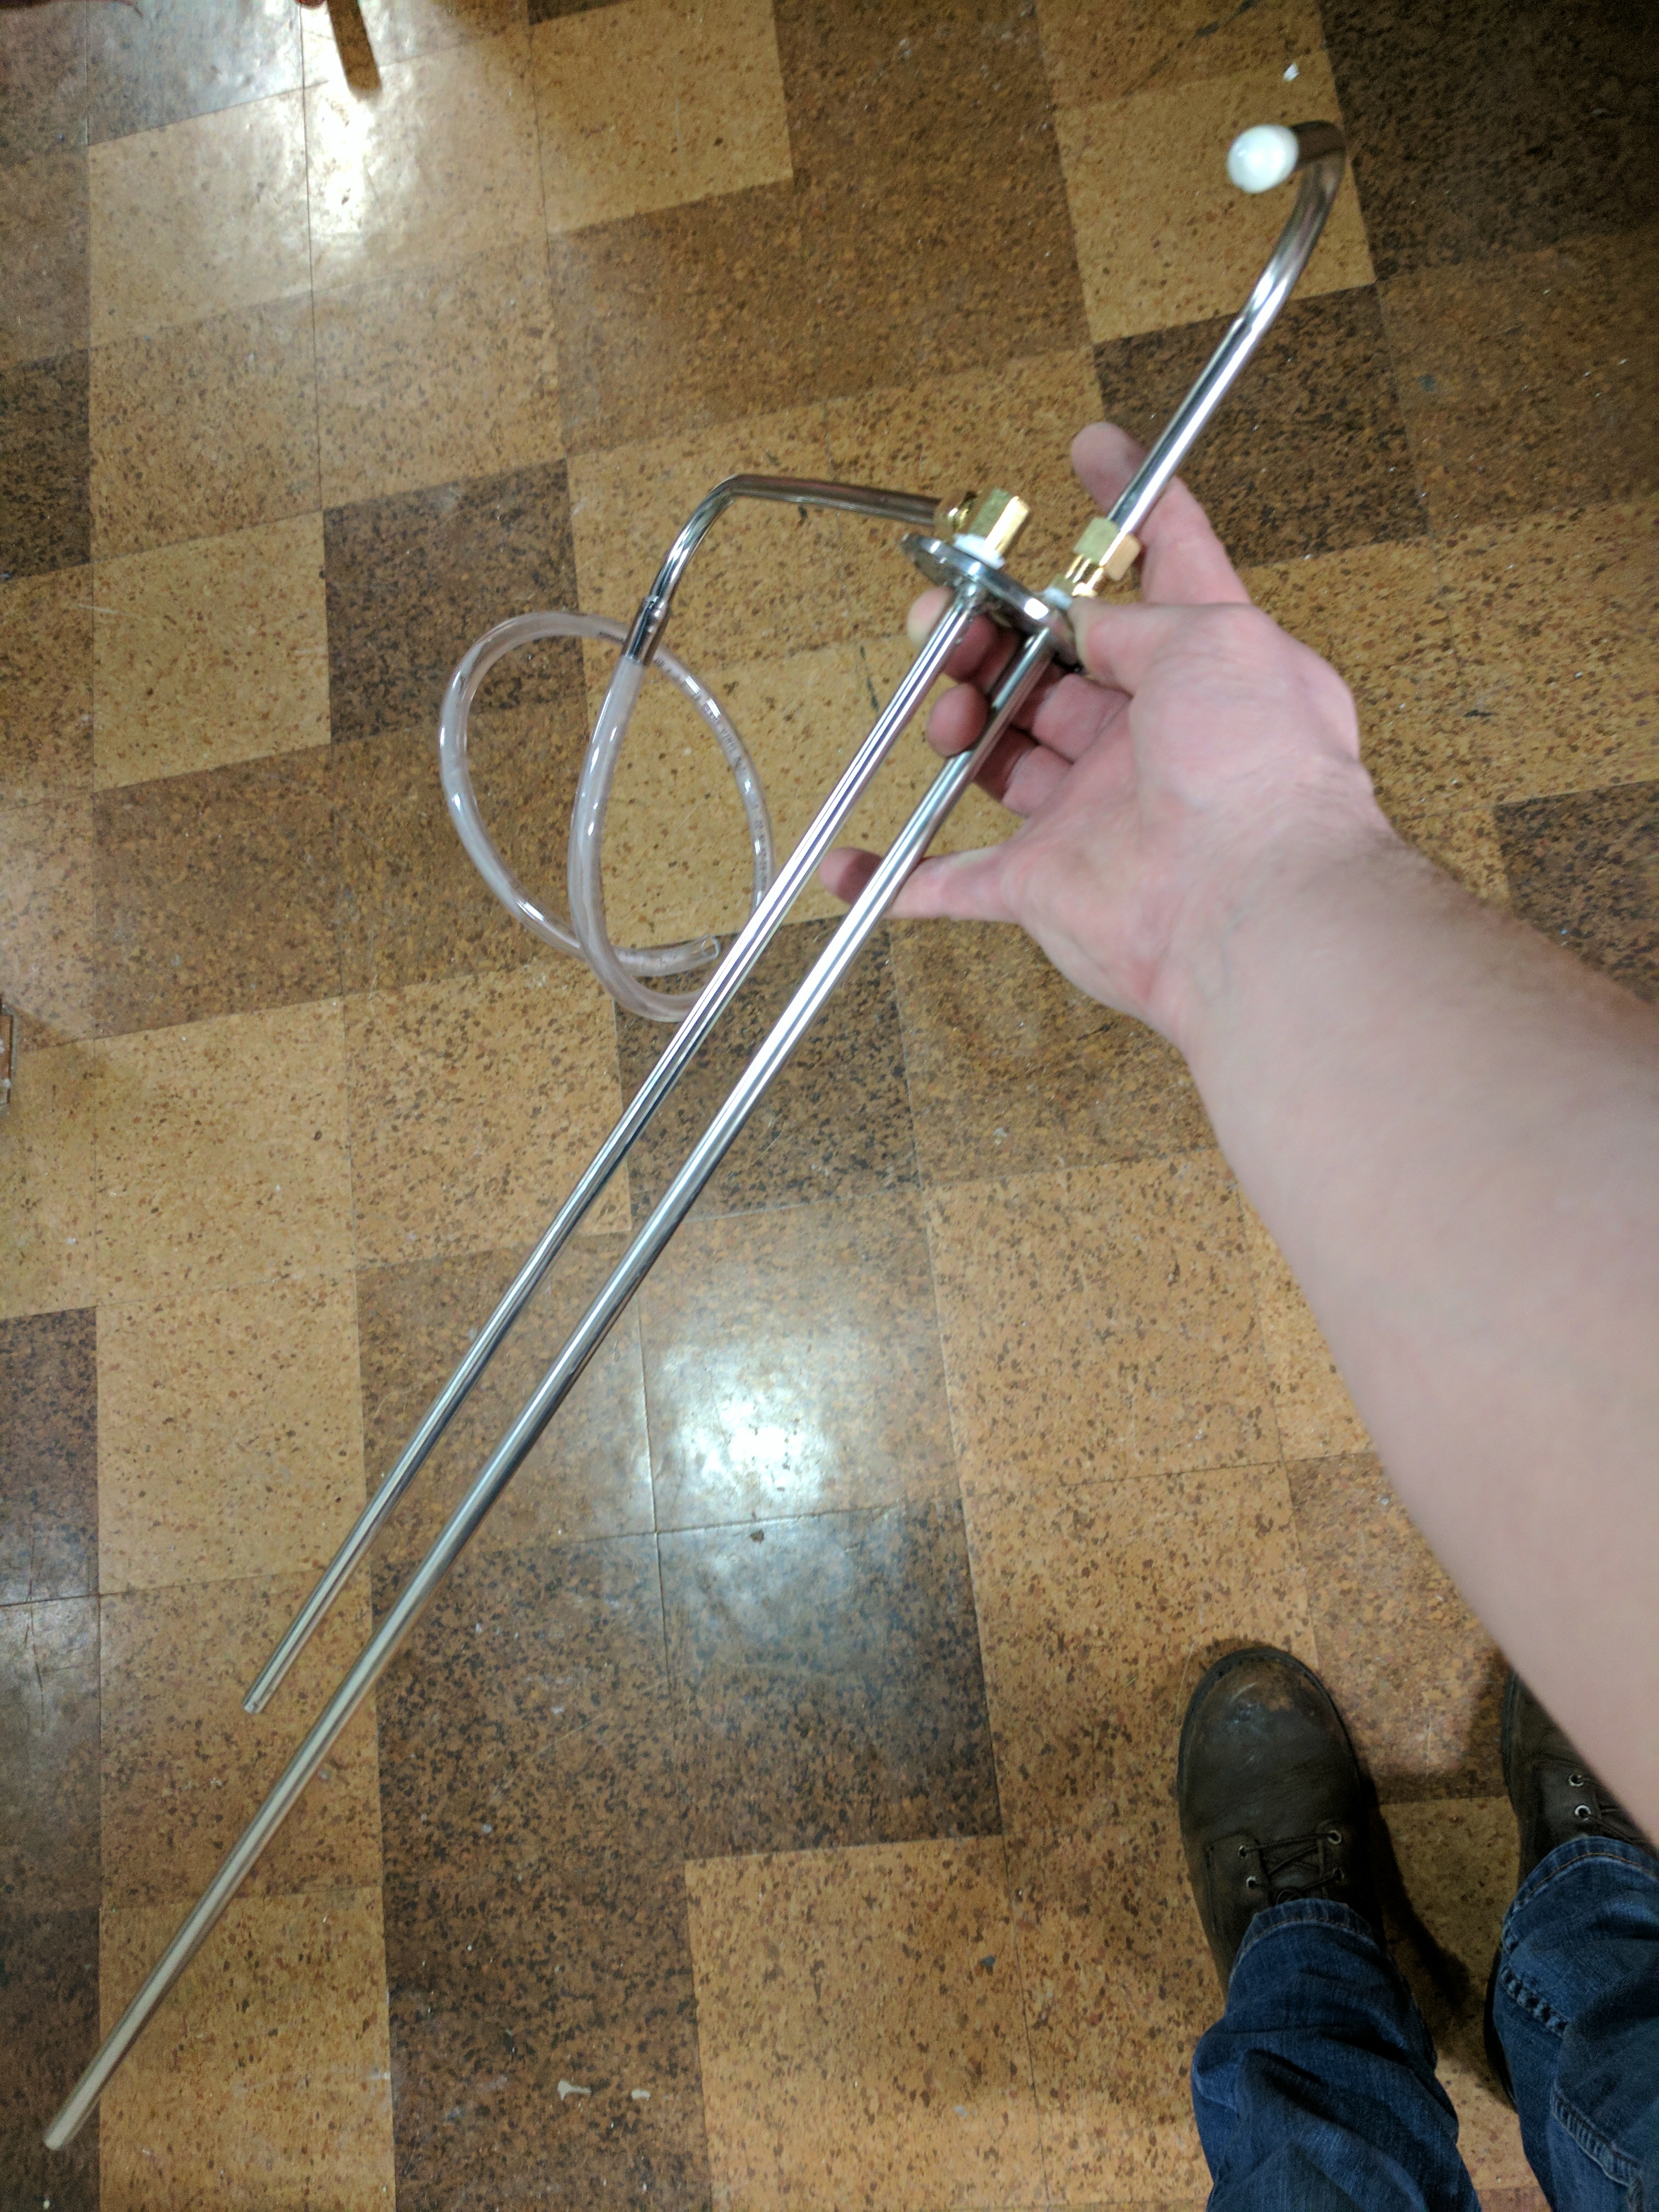
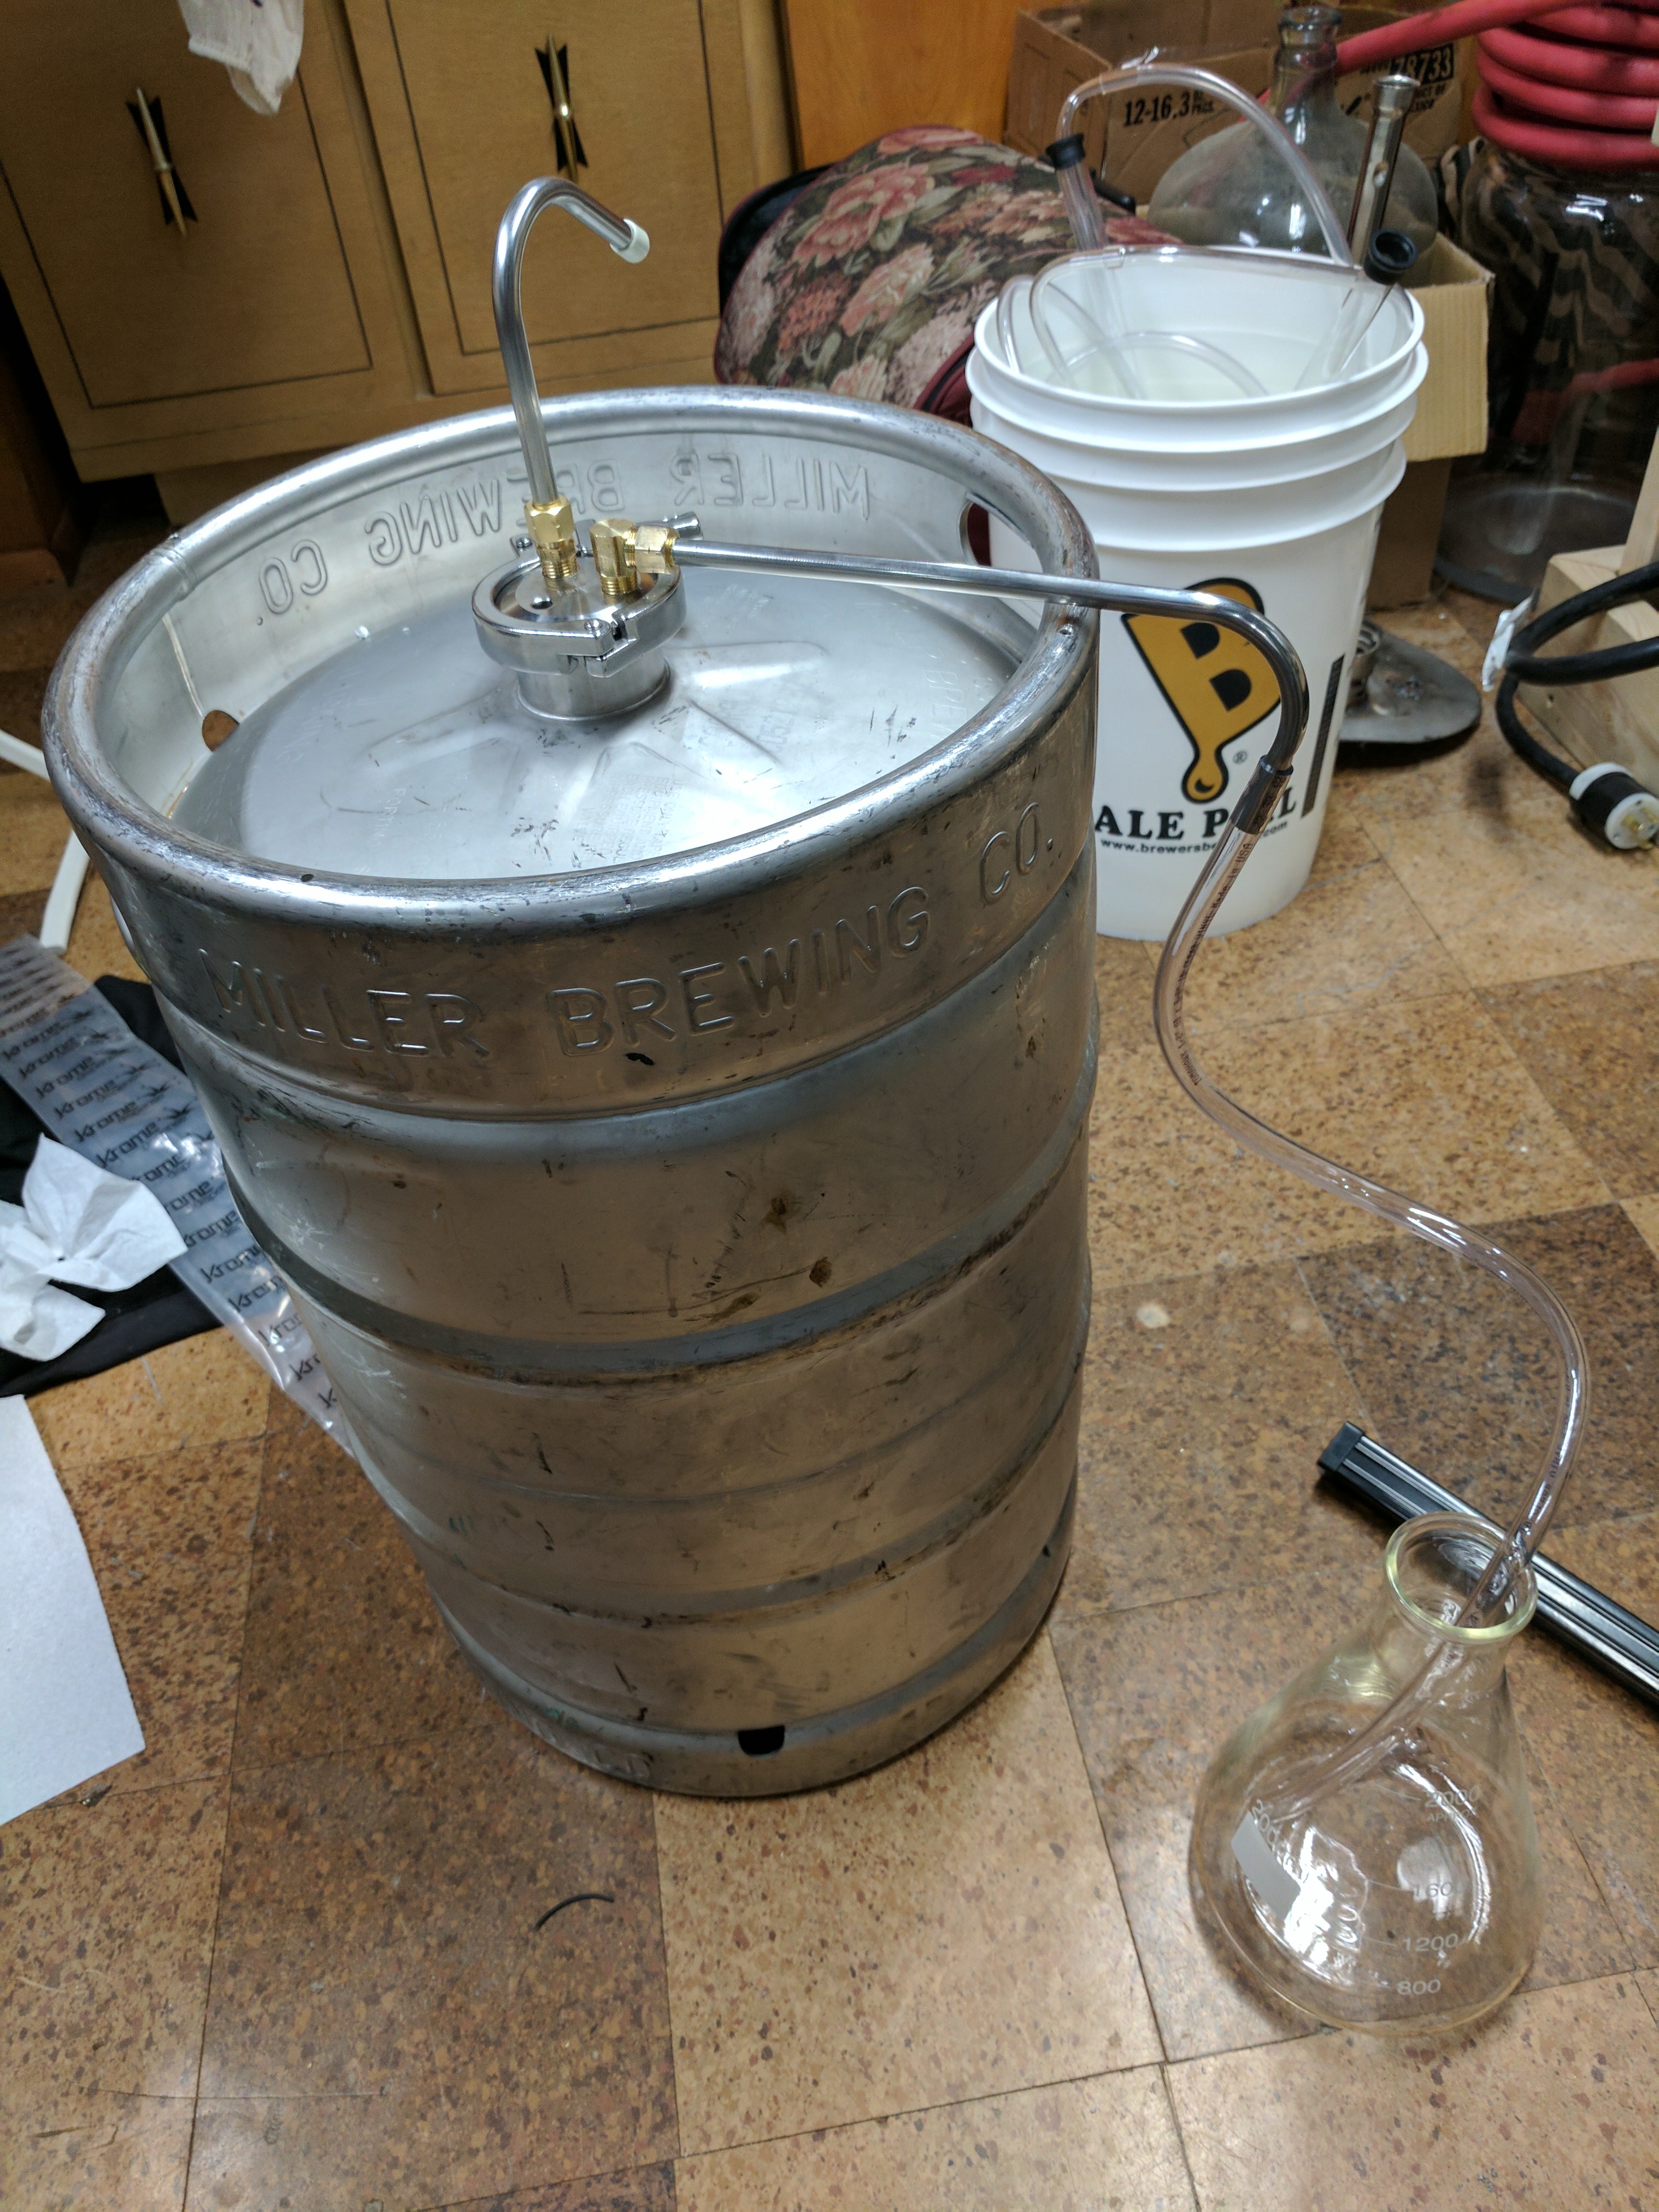
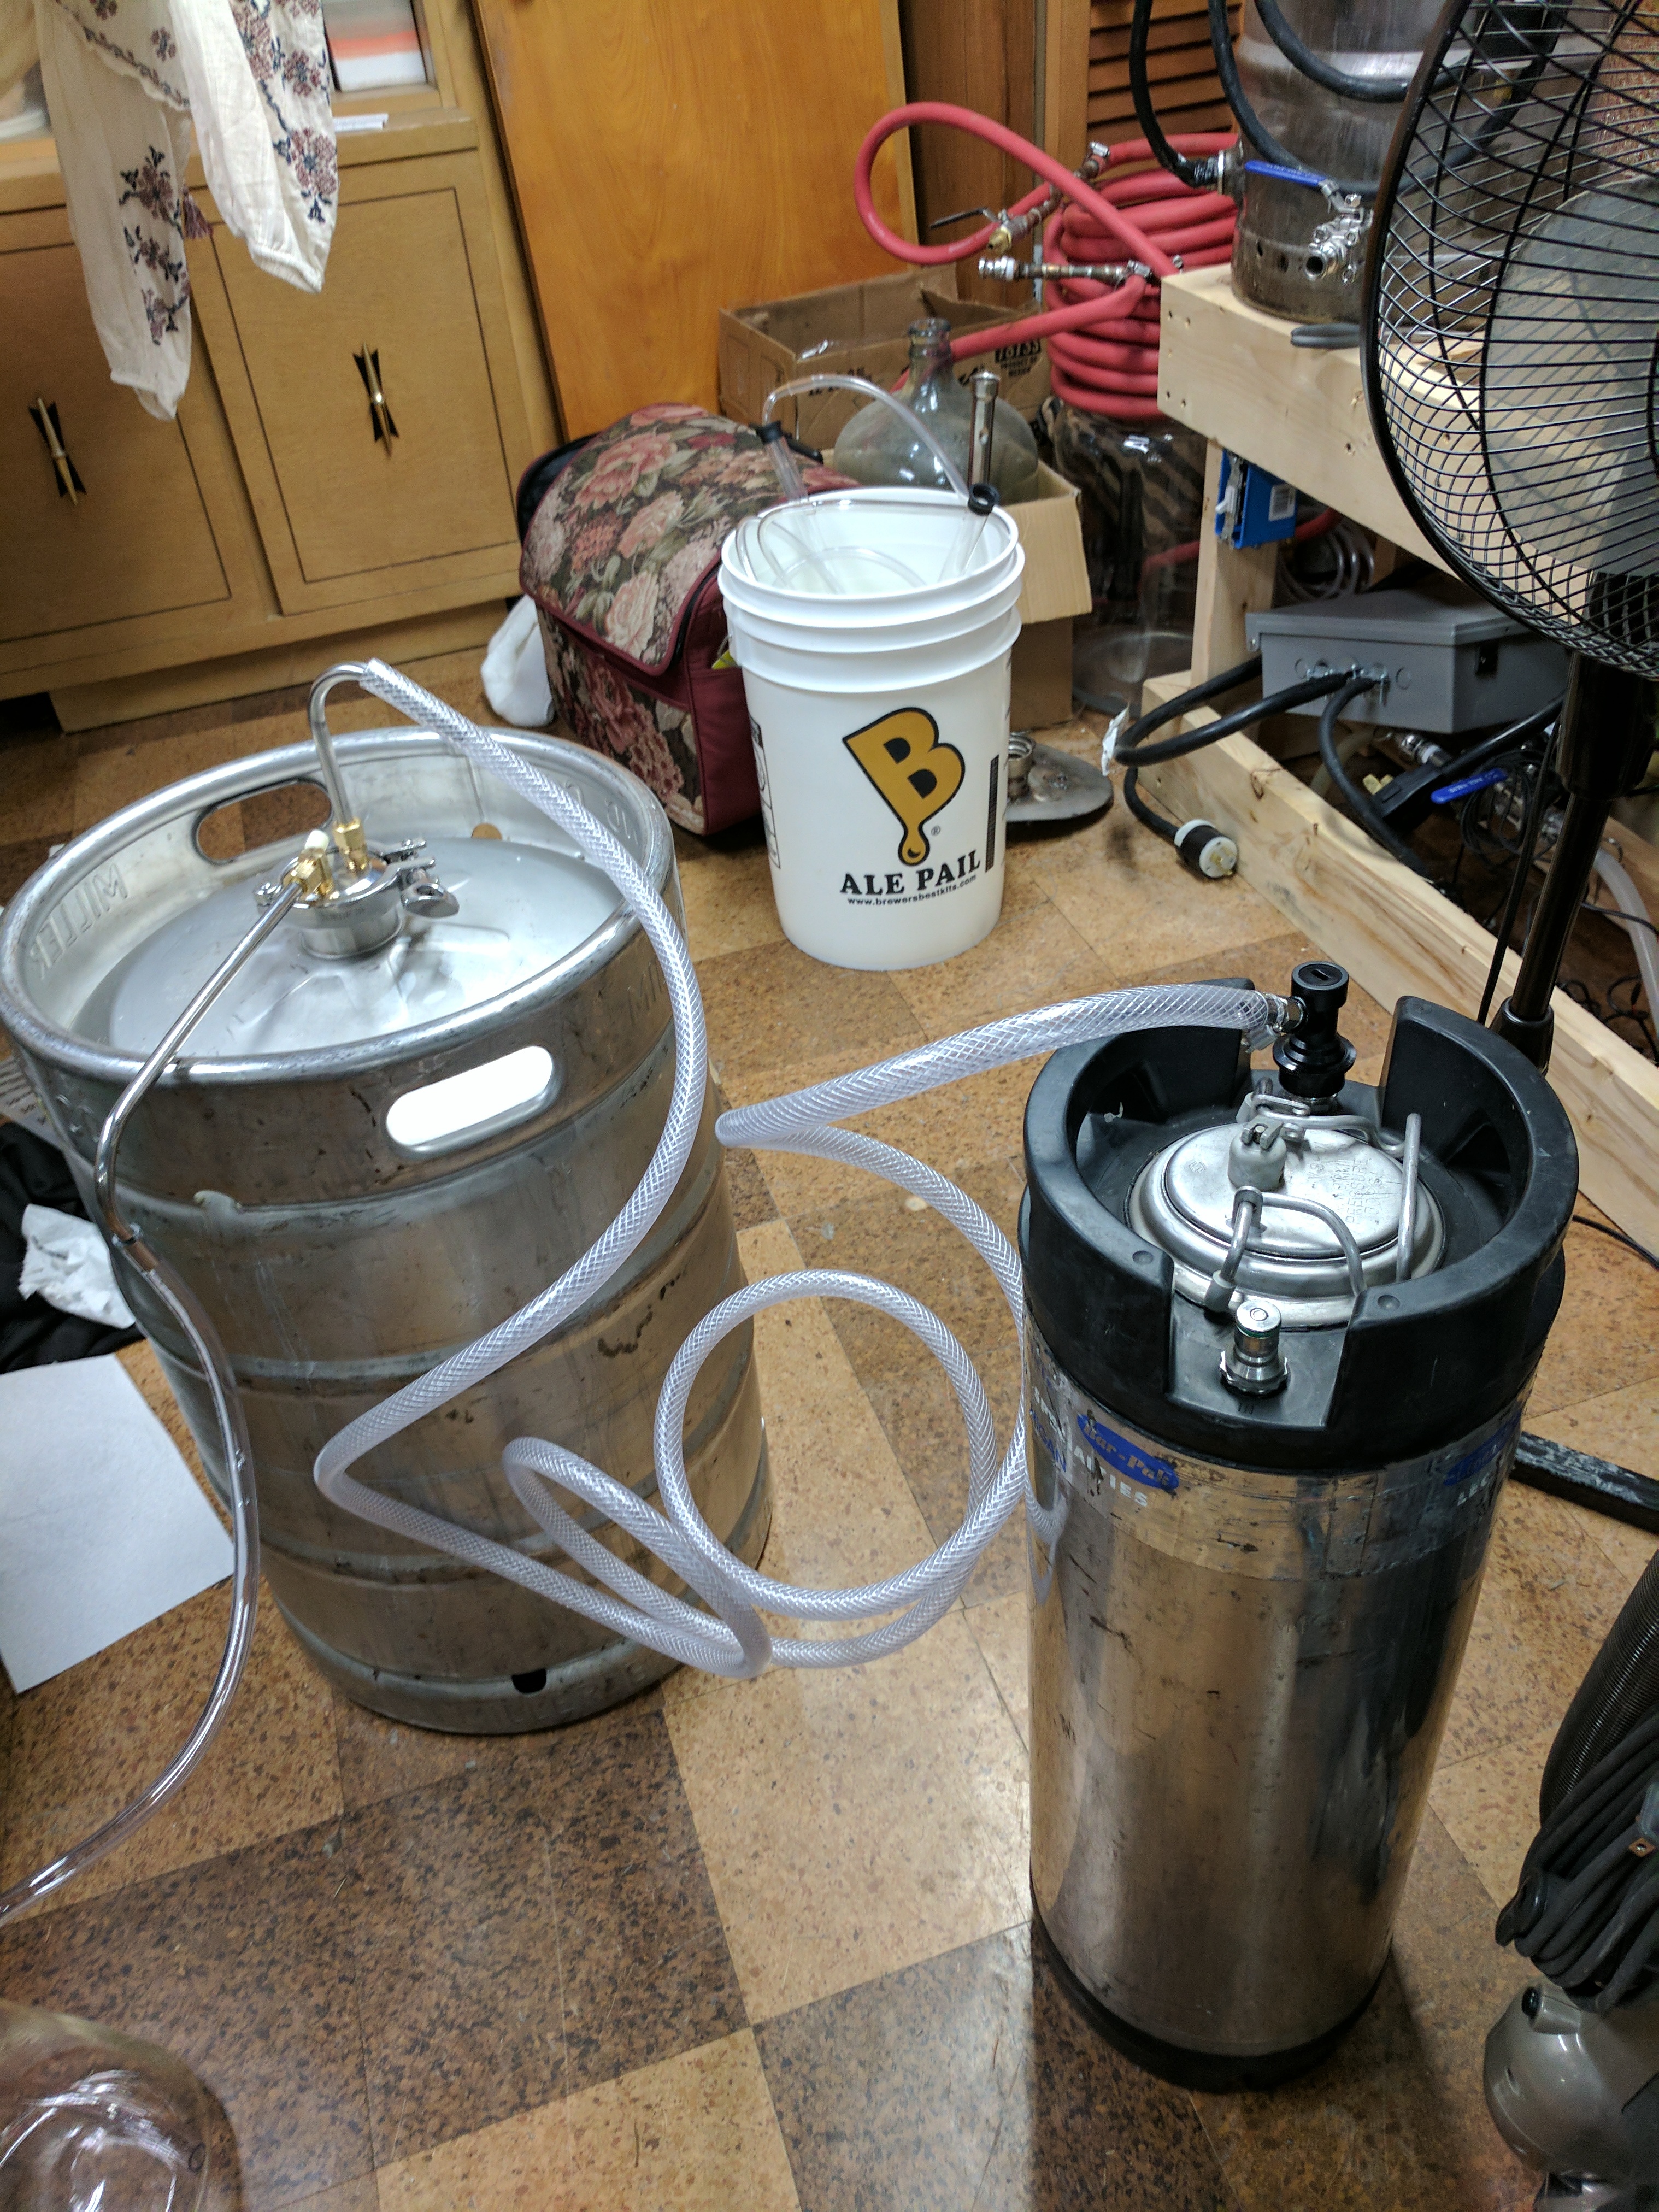
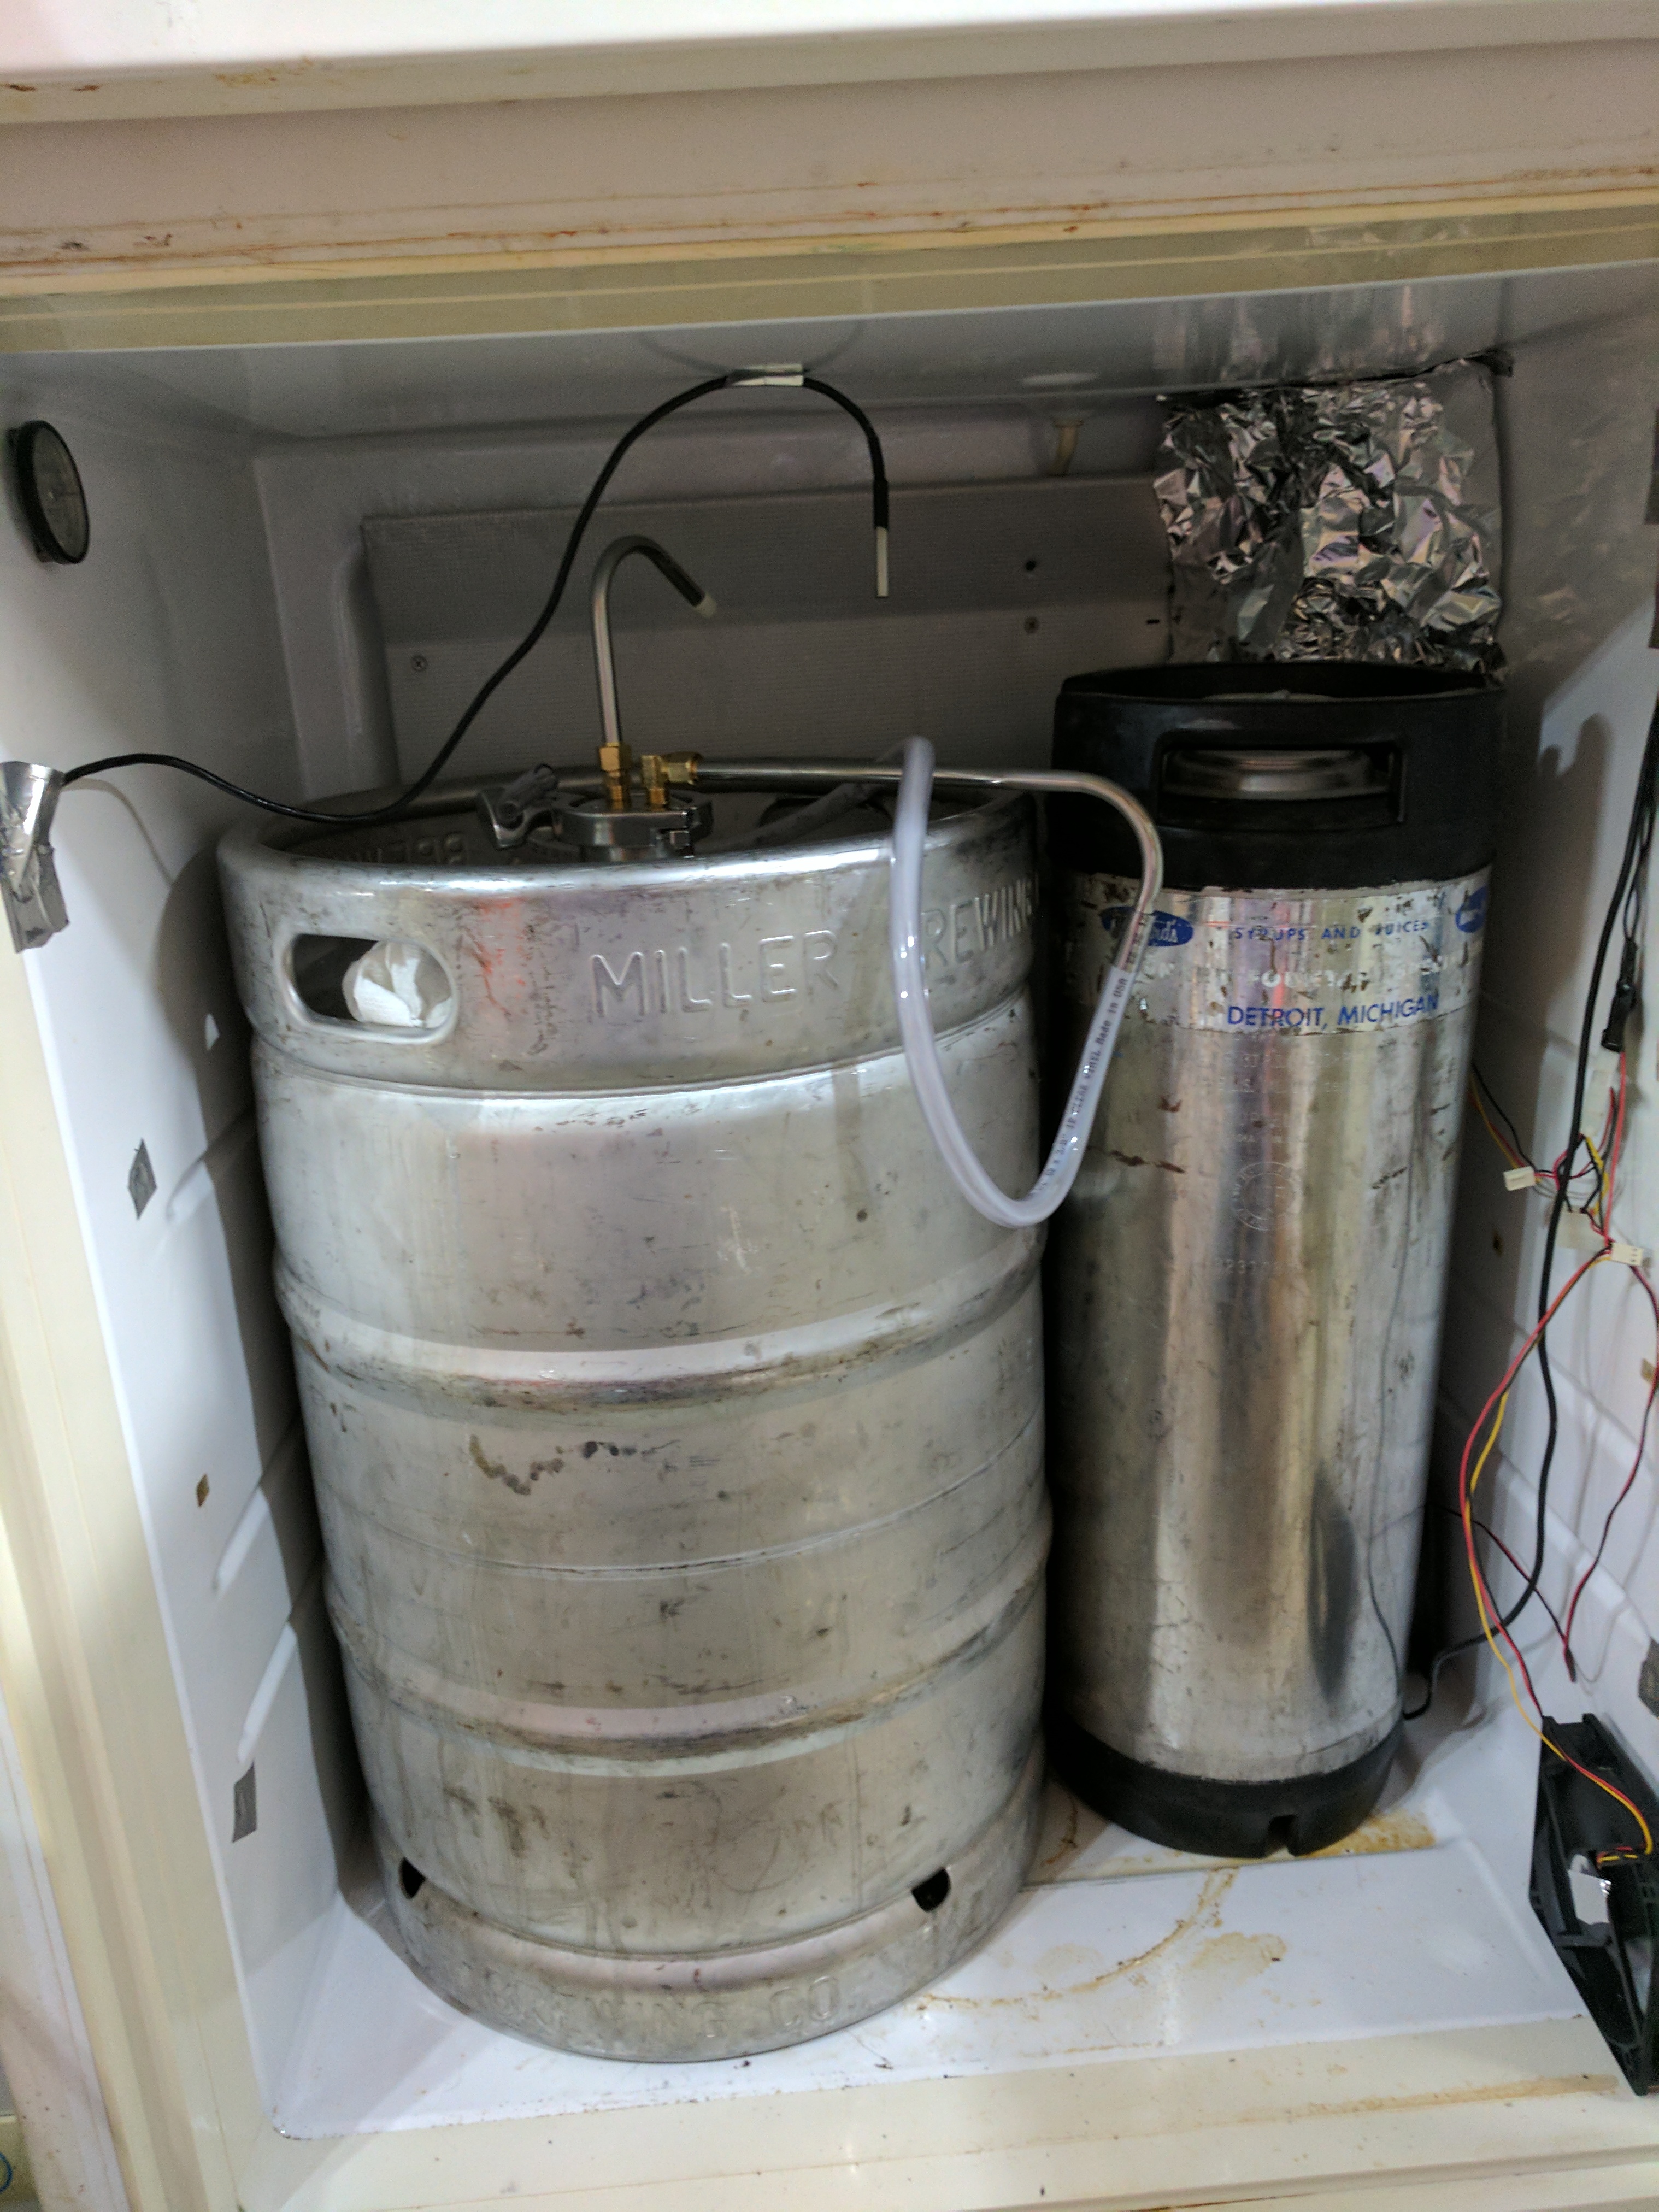
Hi all, I am working on a keg based fermenter. I made a jig to use a angle grinder to remove the stem from a new keg. I then measured the diference in diameter to depth of the remaining top surface. I came up with 11 degrees. I cut a piece of 6 3/4" diameter 316 stainless and turned up a cover that has a sealing surface to match the top surface of the keg. I will use a silicone gasket made from 1/16" thick silicon sheet stock to seal the cap to the keg. I need to machine holes into it to accommodate blow off and transfer. Pictures of where I am are below.

Sam

fermenterwithcap.jpg


fermentercap.jpg
 
I did some more work on my keg based fermenter. The cap has been drilled and tapped with three NPT ports, a 3/8" in the center and two 1/2". I also made clamp rails that contact the inside rim of the keg and screws clamp the cap to the top of the keg. I used a ball endmill to create receiving divots for the screws. I now need to make a gasket from sheet silicone. I may later on open up the NPT threads to smooth bores and weld on tri-clamp fittings. Pictures of the progress are below

fermenteropentop.jpg


fermenterwtopwclamp.jpg


fermenterwtop.jpg
 
I have been thinking how I will use my keg based fermenter when it is completed. The concept a hot wort transfer to the fermenter and and overnight chill then pitch yeast is very appealing to me The keg based fermenter would lend itself nicely to this method. The last time I brewed was twenty plus years ago and I am just getting back into the whole hobby / art. The ten gallon keg based brewery is slowly but surely coming together.

Sam
 
Nice work. Regarding filling with hot wort, how will you be dealing with the cooling of the wort and possible suck back of potentially unsanitized water or starsan water into your fermenter? Potentially infecting or diluting your finished product?
 
Nice work. Regarding filling with hot wort, how will you be dealing with the cooling of the wort and possible suck back of potentially unsanitized water or starsan water into your fermenter? Potentially infecting or diluting your finished product?

I would like to think that I could transfer the hot wort, seal it up and let it cool, but I am confident the keg would not be able to handle the negative pressure and implode. I plan on doing a ten gallon batch so I would have around 5 gallons of open space. I have thought of connecting a co2 line and regulate to a couple pounds to keep the pressure slightly positive as the wort cools.

Sam
 
Sam, why not use oxygen? That way when you break the seal to add yeast you won't have to worry about reverse pressure. JMTC Also, that is a really cool build.
 
Sam, why not use oxygen? That way when you break the seal to add yeast you won't have to worry about reverse pressure. JMTC Also, that is a really cool build.

I did think about oxygen, but I do not have an oxygen setup, and I am not looking to add that expense right now. That would definitely be a option down the road.

Sam
 
I made a gasket out of 1/16" silicone sheet. An airtight pressure seal should be achieved. I will get a pressure gauge and seal it up and see if it holds pressure. Picture below. I may go no chill and pressurized fermentation.

fermenterwgasket.jpg
 
My plan is to do a leak test this weekend. Hopefully the keg with cap will be airtight. In the mean time I bought the new keg from:

https://www.instantkegs.com/

I was pleased with their pricing and delivery.

Sam
 
I assembled all the stuff to do a pressure test. there is one small leak right where a arrow was stamped into the top of the keg. I had given the sealing area a sanding with 220 grit paper and suspected the arrow may be a problem. I am confident I can smooth it out for a leak tight seal. Picture attached.

Sam

fermenterleaking.jpg
 
I sanded smooth the leaking area and have pressurized it again and now looks good no leaks.

now I need to get a stainless racking cane and brew some beer.

sam
 
I just recently "built" a sanke keg fermenter, but I didn't modify the keg to do it. I got the idea from Brewers Hardware but built it myself.

Built in racking cane, thermowell and blowoff - after this picture was taken, I marked the racking cane in gallon increments so I can choose what level of beer is remaining. Thermowell is welded in, other fittings are 1/4 NPT.
ASubthK.jpg

Fermenter Mode:
mCsazCk.jpg

Transfer Mode - I just put a little CO2 pressure on the blowoff port and it auto transfers with zero oxygen contact
4oJPBvK.jpg

Racking cane fits in fermentation chamber so I don't have to move 10-14 gal of wort. I can also use it to take samples for gravity readings as well.
vOwjoll.jpg


Currently on its first use fermenting ~14 gal of Cream Ale. Haven't had to clean it yet but PBW/Oxyclean and maybe a little heat should (hopefully) be all it needs.
 
I just recently "built" a sanke keg fermenter, but I didn't modify the keg to do it. I got the idea from Brewers Hardware but built it myself. It uses a 2" Tri Clamp to connect to the original keg top without the spear.

Homemade fermentation/transfer adapter. Has welded in thermowell and 2x 1/4" NPT holes tapped for racking cane and blowoff.
ASubthK.jpg


Fermenter mode. Racking cane is capped.
mCsazCk.jpg


Transfer mode. Hose with Ball lock fitting on racking cane connects to CO2 purged keg and CO2 feeds into the blowoff port for oxygen free transfer.
4oJPBvK.jpg


Fits in fermentation chamber with racking cane so I can transfer without having to move 10-14 gal of beer.
vOwjoll.jpg


Currently using it for the first time to ferment 14 gal of Cream Ale. Clean up will consist of PBW and heat and maybe a mirror to double check. If necessary, I may need to build a kind of CIP ball setup but I doubt it.
 
The cool part about keg fermenters is that you could boil and ferment in the same vessel, making sanitization a breeze. Plus of course you have the ability to easily boil and ferment a 10 gallon batch.
 
Do you have a picture from the top? Looks like a cool setup.

Sam
I do. I am working on a video of the whole project as well. If you look under the stand you would see a shop light with a ceramic heat bulb. I silver soldered a 50' SS coil inside that is connected to a bucket of water inside the kegerator. The Inkbird controls the lamp and the pond pump for both hot and cold.

IMG_0101.jpg


IMG_0067.jpg


IMG_0104.jpg
 
Don't know if I missed it (sorry if I did) but how big is the hole you cut in the keg itself. looks like you have a 3/4" (approx.) lip on your "lid" so is the hole a bit bigger than 5"?
Asking as I currently am looking at converting a couple of 50L kegs and wasn't to check if a 4" TC would be big enough.

I cut a six inch hole in the top of the keg. The cap I made has about a 7/16" wide sealing surface. I was planning on a 5 inch hole in the top of the keg but when I was using the jig I made for the angle grinder a bolt holding the grinder vibrated loose and the cut off wheel skated out a bit and I had to go up to 6" to make round hole.

SAm
 
I do. I am working on a video of the whole project as well. If you look under the stand you would see a shop light with a ceramic heat bulb. I silver soldered a 50' SS coil inside that is connected to a bucket of water inside the kegerator. The Inkbird controls the lamp and the pond pump for both hot and cold.

How is the lid held down? Very cool with the temp control.

Sam
 
I cut a six inch hole in the top of the keg. The cap I made has about a 7/16" wide sealing surface. I was planning on a 5 inch hole in the top of the keg but when I was using the jig I made for the angle grinder a bolt holding the grinder vibrated loose and the cut off wheel skated out a bit and I had to go up to 6" to make round hole.

SAm

Cheers :)
 
Hello all, I have my second all grain 10 gallon batch fermenting away in my sanke fermenter. So far I am thrilled with it.

Cleaning it is a breeze. Open it up, garden hose in the driveway to get the big stuff out, hot tap water with oxyclean free scrub, hot tap water rinse. On brew day a few gallons of boiling water poured in, lay it on its side and roll so all interior get boil water exposed to it, tip upside down to drain, ready to ferment. The top is run thru the dishwasher with heated dry. the thermocouple tube and "siphon tube" are cleaned with oxylcean when the initial cleaning is done then when water is being heated for the next brew session they are immersed in the hot water. Picture of the current batch fermenting below. I have been pressure fermenting and so far so good.
Sam
fermenterpic.jpg
 
Oxiclean free is the fragrance and dye free version of Oxiclean Versatile. The tub has a green lid instead of a yellow one.
 
Have my 5th batch fermenting. 35 degrees in the garage so it is in the back hall. Currently @66.9 F and 17.5 psi. fermentation is pretty much done so it will be going into the garage for cold crash tomorrow. I really like this fermenter.
hallwaykeg.jpg
 
Back
Top