
vettehead99
Member
I figured I would put up yet another quick fermentation chamber DIY I did over the past couple of weeks. It's a few quick photos and I'm bypassing a lot of the nitty gritty details, but if you want to see a lot more writing, check out the link on my sig.
I basically followed the same style of design as found in the following blogs:
https://www.brewpi.com/fridge-hacking-guide/
https://dotps1.github.io/homebrewing/2018/01/22/brewing-your-own-brewpi.html
http://diybrewpi.wikia.com/wiki/DIYBrewPi_Wikia
I'm sure these links are familiar to many who've done this build.
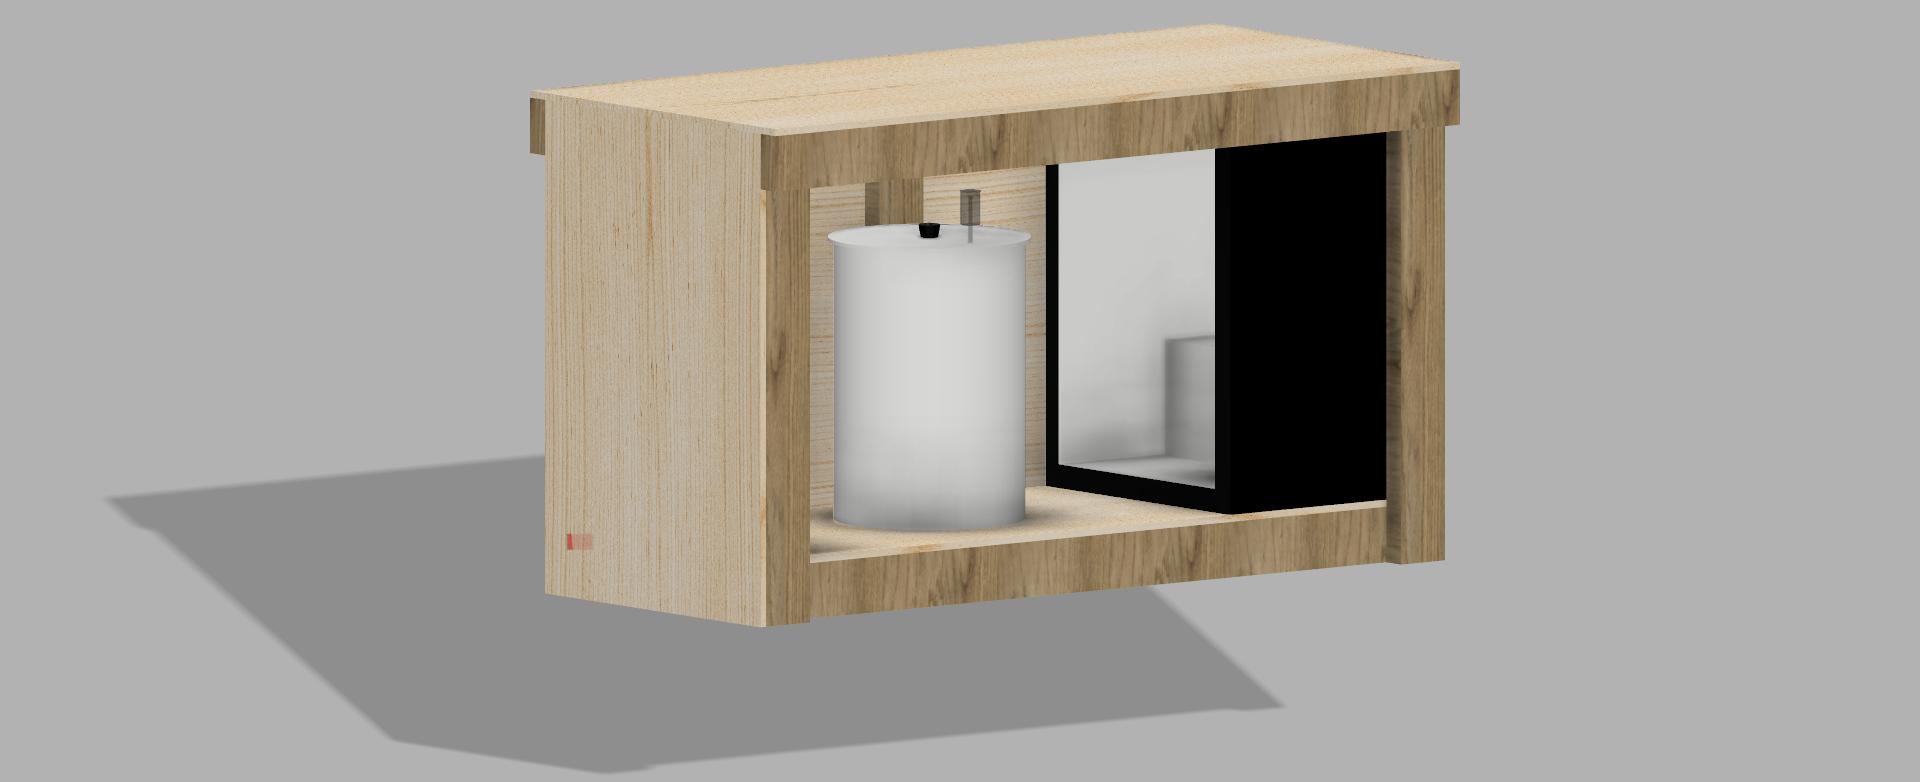
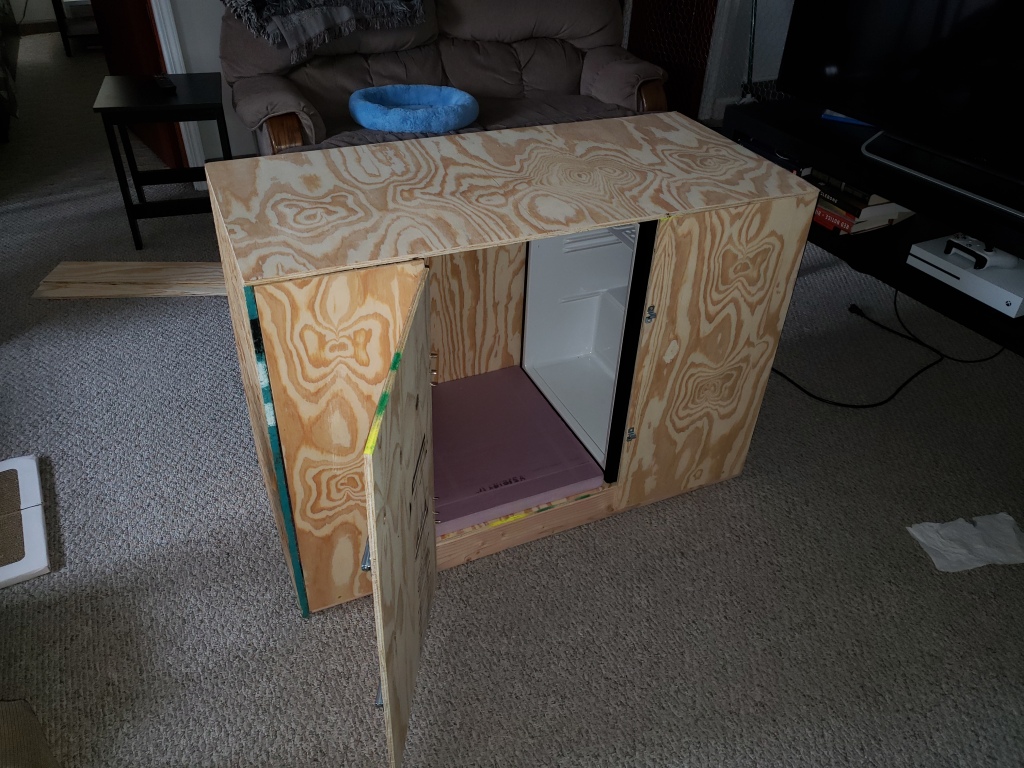
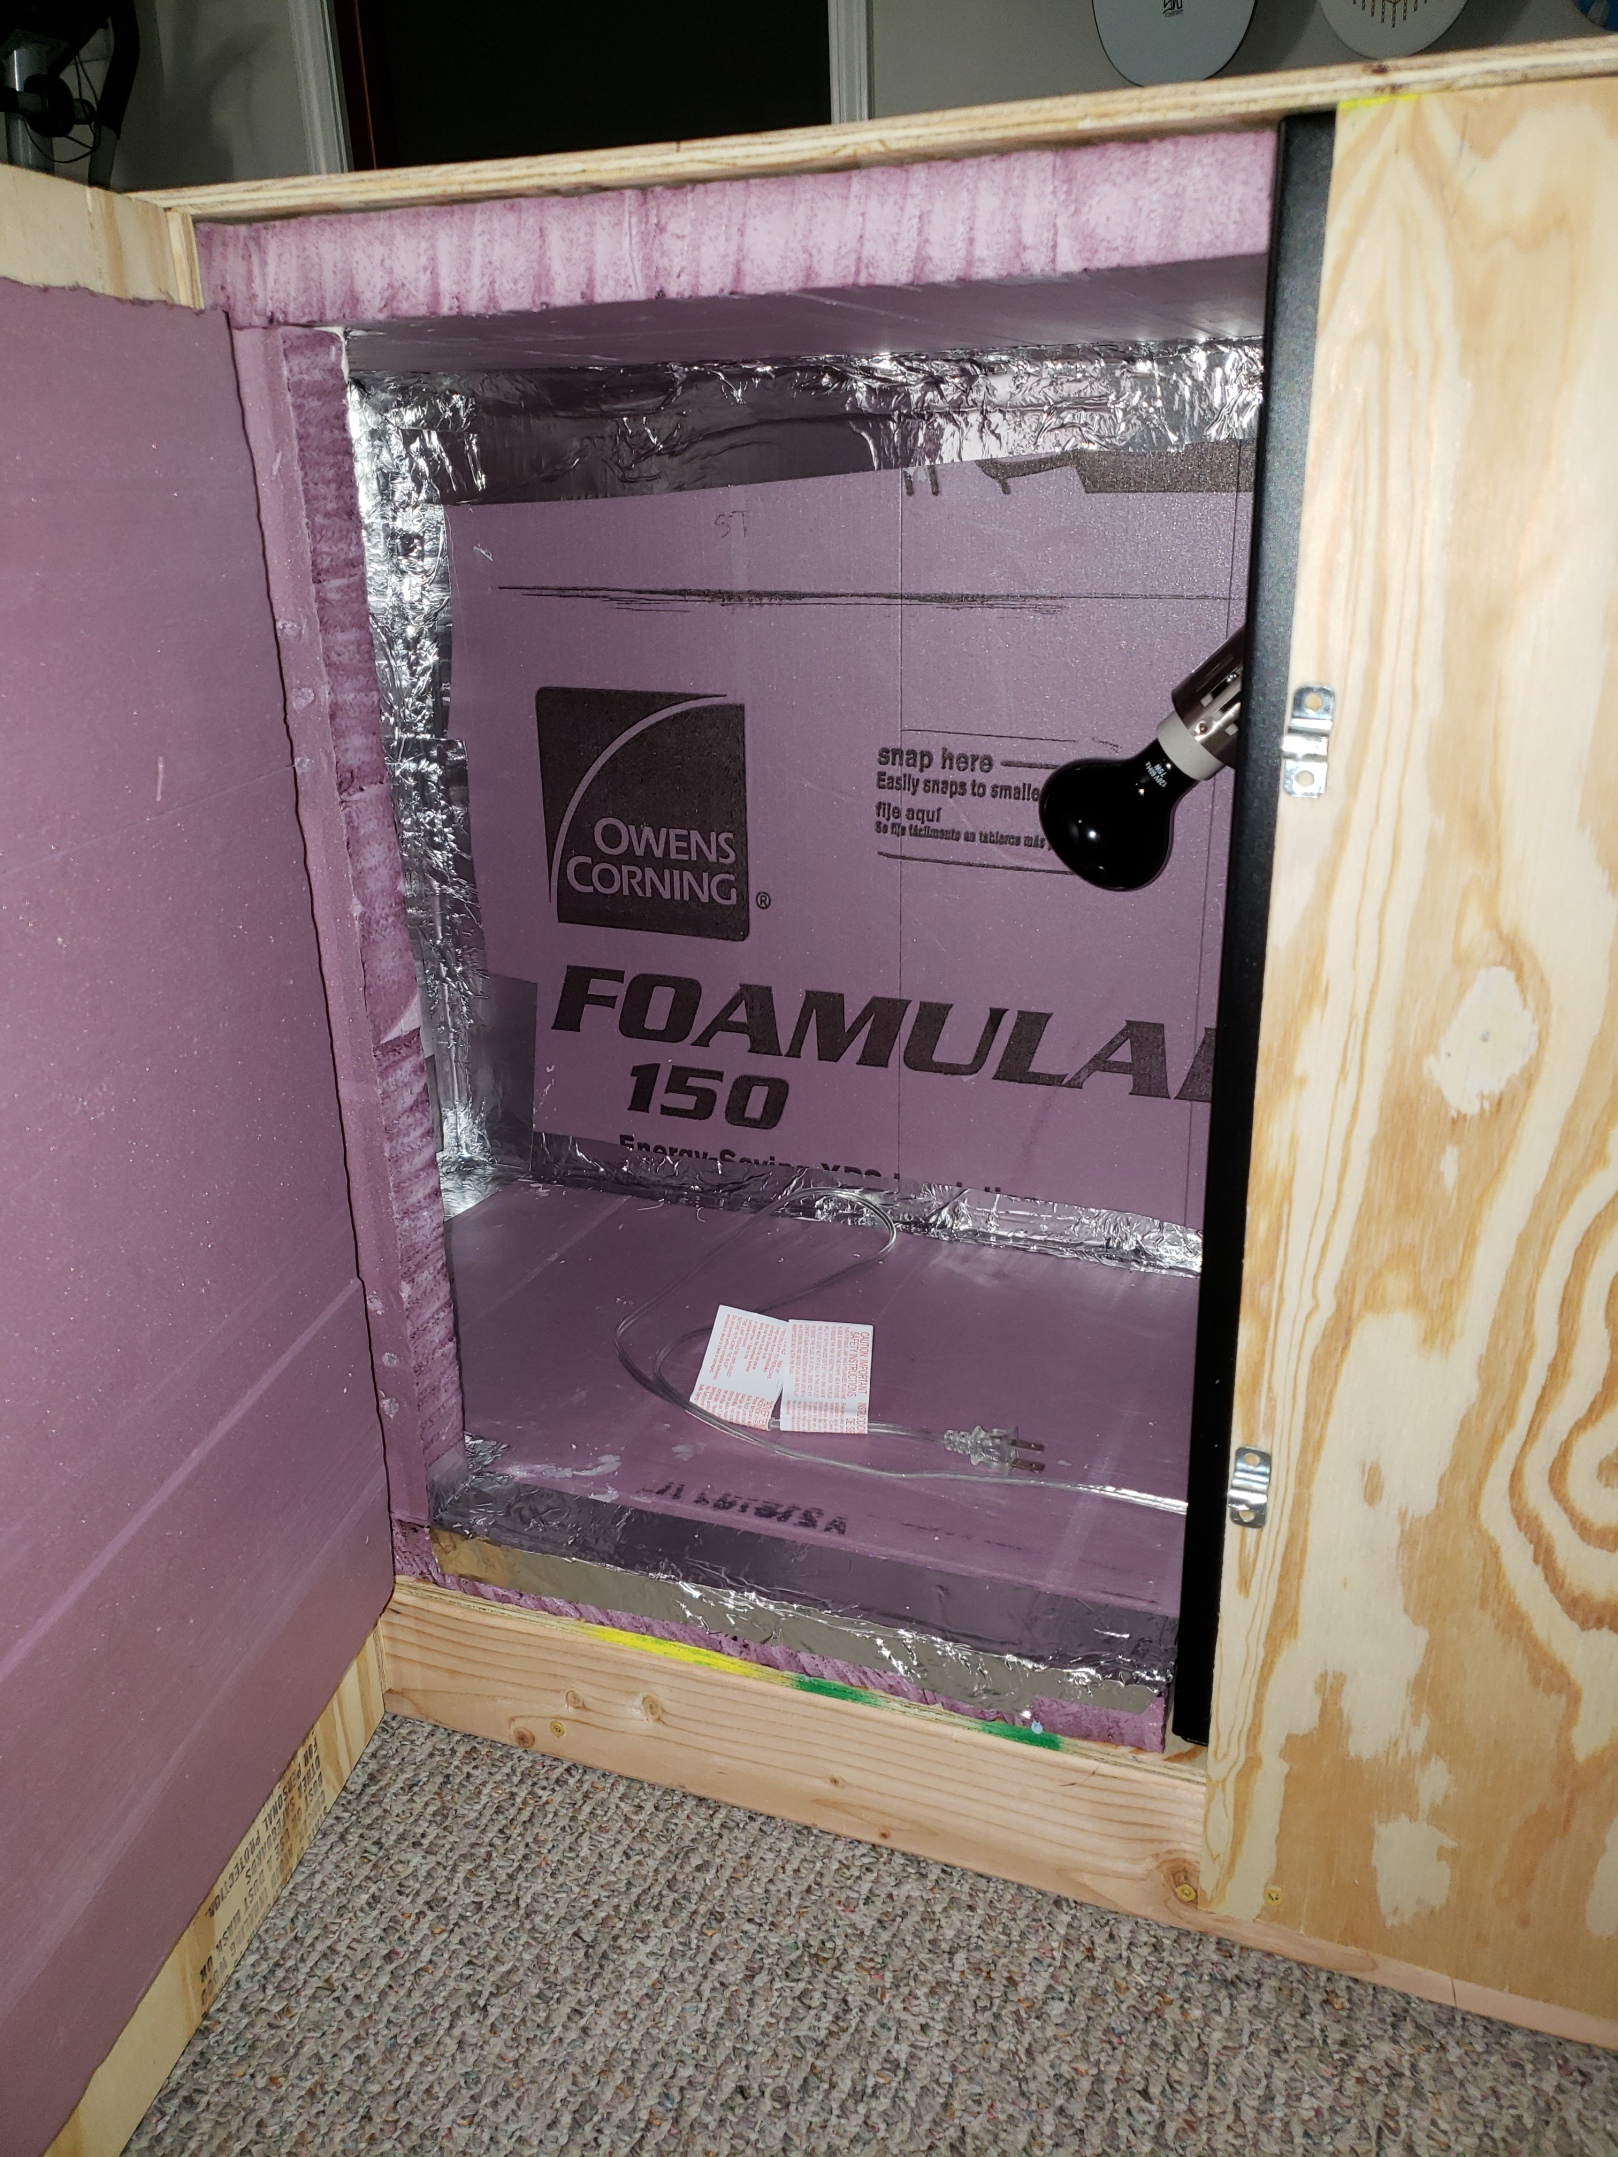
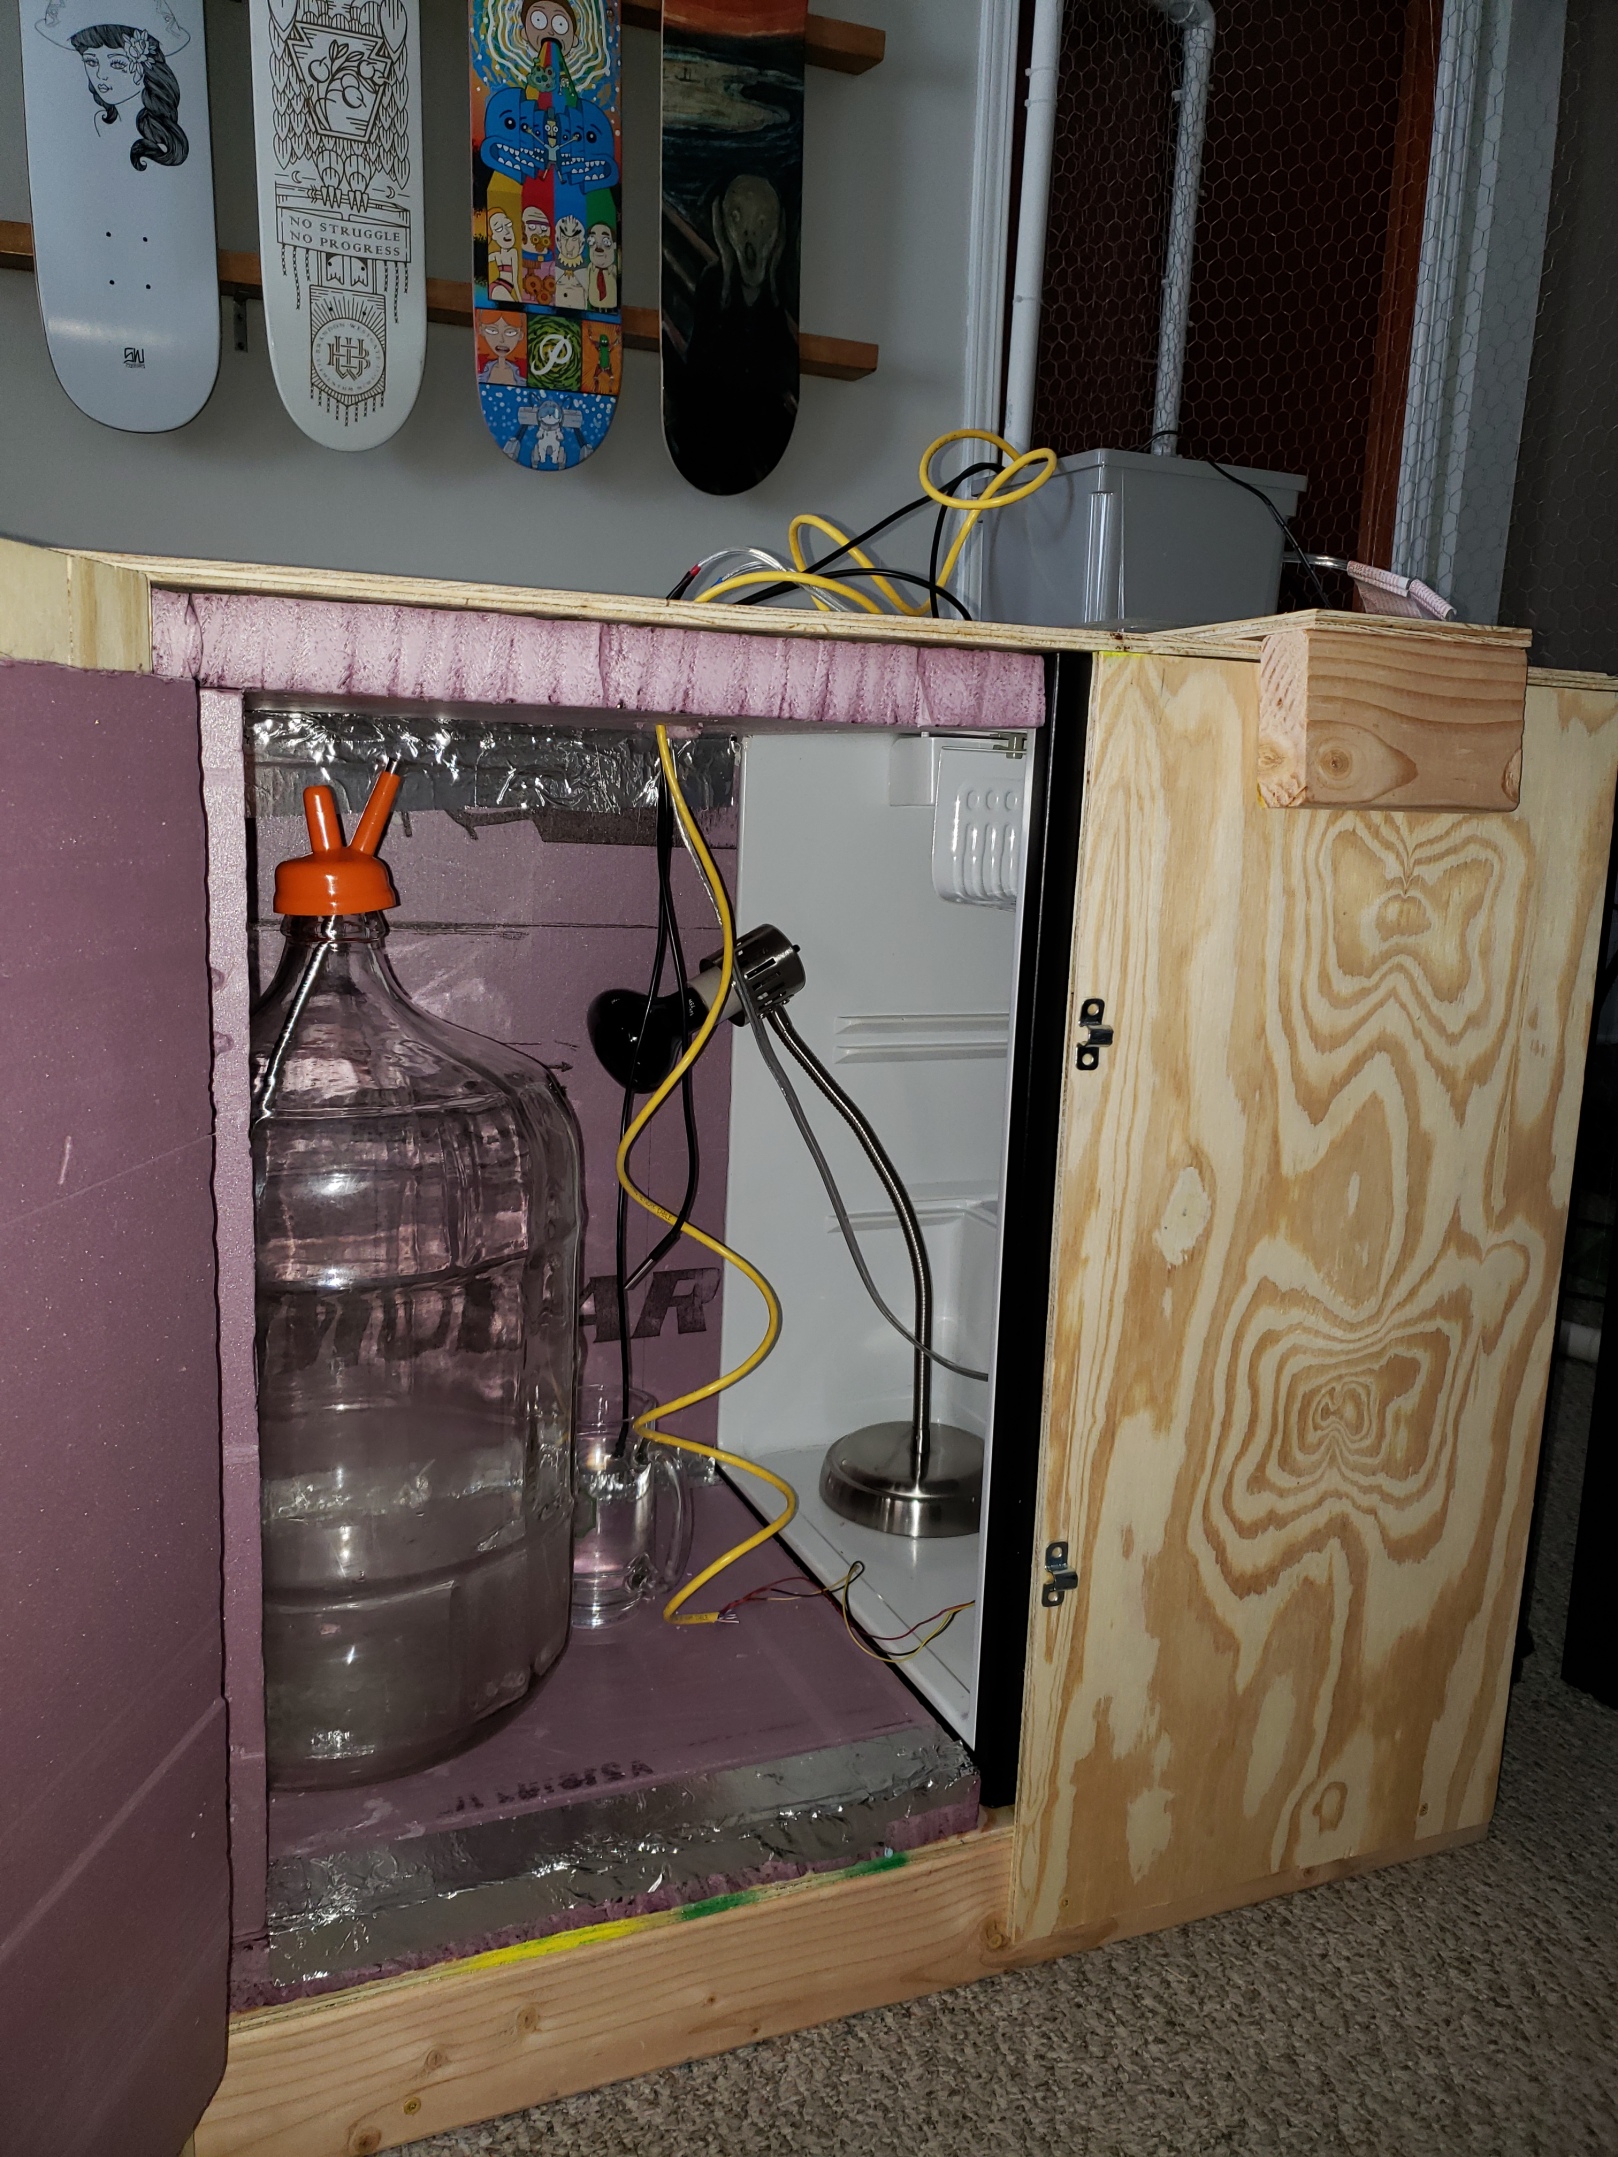
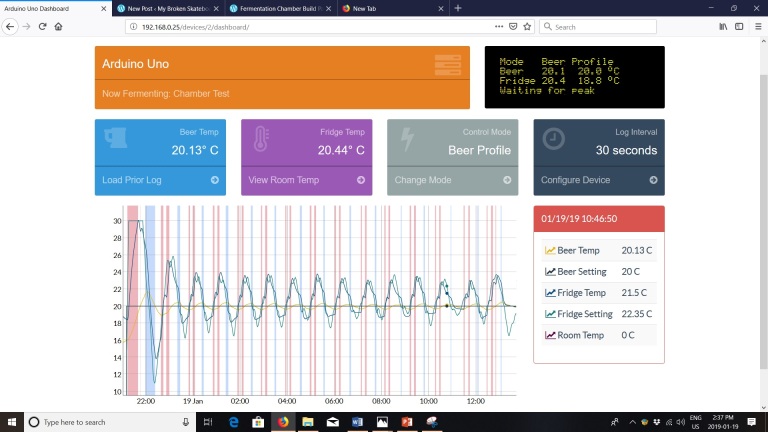
It's far from the prettiest fermenter out there, but so far it does the trick. I did a quick test on a cup of water to see how well the environment works, below is the Fermentrack output. I'm testing it right now on 5 gallons of water to see how well it holds a 20C temperature over 5 days, followed by a cold crash. It didn't come out looking quite like the conceptual idea I had going, but that's because I made a lot of little woodworking mistakes along the way.
A couple other details for those interested:
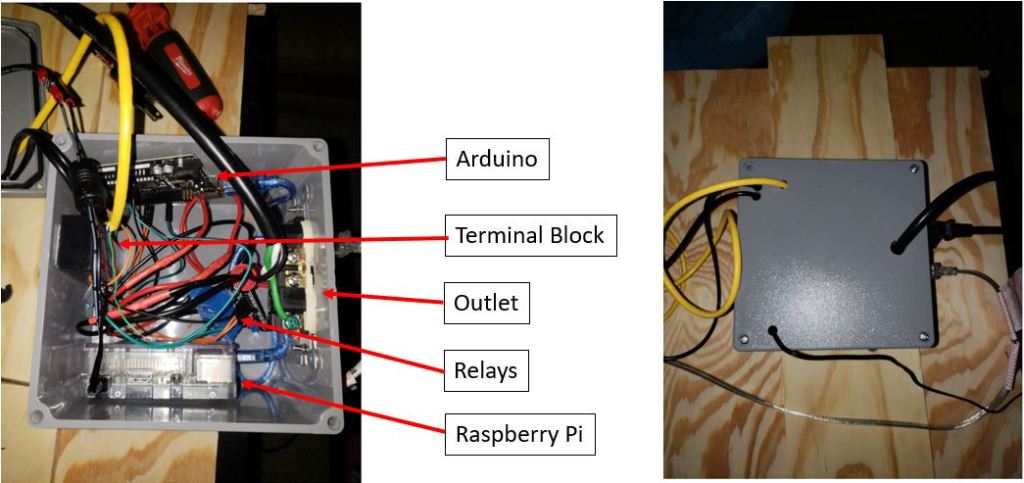
I used an arduino and raspberry pi as I'd planned on doing a brewpi setup. I quickly discovered this was going to be a nuisance as it required going to legacy versions of Raspian Jessie and configuring different hex files for the arduino. I went the Fermentrack route, and I was amazed at how easy it was to initially set up. I've had a few intermittent issues with the controller needing a reflash between logging sessions, but so far it's working. Hats off to both @FuzzeWuzze and @Thorrak for contributions to brewpi and Fermentrack. If I ever meet you in person, I definitely owe you beers (or maybe 6 )
)
Also, the yellow cable is a hacked up ethernet cable for the fan. Ethernet cable is a surprisingly useful cable for hobby wiring. Only downside is the small 22 gauge wiring is so damn prone to being cut when stripping. Maybe I need some better strippers.
There's still some testing and tuning to do before it's ready for the next brew. I'll have some better pictures once I finish the final touches.

I basically followed the same style of design as found in the following blogs:
https://www.brewpi.com/fridge-hacking-guide/
https://dotps1.github.io/homebrewing/2018/01/22/brewing-your-own-brewpi.html
http://diybrewpi.wikia.com/wiki/DIYBrewPi_Wikia
I'm sure these links are familiar to many who've done this build.
It's far from the prettiest fermenter out there, but so far it does the trick. I did a quick test on a cup of water to see how well the environment works, below is the Fermentrack output. I'm testing it right now on 5 gallons of water to see how well it holds a 20C temperature over 5 days, followed by a cold crash. It didn't come out looking quite like the conceptual idea I had going, but that's because I made a lot of little woodworking mistakes along the way.
A couple other details for those interested:
I used an arduino and raspberry pi as I'd planned on doing a brewpi setup. I quickly discovered this was going to be a nuisance as it required going to legacy versions of Raspian Jessie and configuring different hex files for the arduino. I went the Fermentrack route, and I was amazed at how easy it was to initially set up. I've had a few intermittent issues with the controller needing a reflash between logging sessions, but so far it's working. Hats off to both @FuzzeWuzze and @Thorrak for contributions to brewpi and Fermentrack. If I ever meet you in person, I definitely owe you beers (or maybe 6
)Also, the yellow cable is a hacked up ethernet cable for the fan. Ethernet cable is a surprisingly useful cable for hobby wiring. Only downside is the small 22 gauge wiring is so damn prone to being cut when stripping. Maybe I need some better strippers.
There's still some testing and tuning to do before it's ready for the next brew. I'll have some better pictures once I finish the final touches.
")
