Monitoring/controlling with Linux on the cheap

Homebrew Talk - Beer, Wine, Mead, & Cider Brewing Discussion Forum

Help Support Homebrew Talk - Beer, Wine, Mead, & Cider Brewing Discussion Forum:

This site may earn a commission from merchant affiliate links, including eBay, Amazon, and others.
I'm learning a lot about this stuff just by the suggestions you've made. For todya I got in some PHP-GTK2 programming and it's not too bad so far. When I get home I may set up for some more php scripting.

I have a few laptops and more than a couple older desktops. Just haven't decided how I want one of them to be set up as the controller. Probably just connect some wires to start, then see if I will want to design the control panel to integrate it, or just have it sitting on the table somewhere.
 
Since you're going to want to run the scheduled task more than once, "cron" is a better tool
Funny, I thought about mentioning cron. Depending on how you set up the rig, it could be very useful (like regularly dumping data to a log file). However, when I mentioned the at utility, I was thinking about tasks like turning valves or heating sparge water at a specific time during the brew day.
 
However, when I mentioned the at utility, I was thinking about tasks like turning valves or heating sparge water at a specific time during the brew day.

ahhh.... ok. Get the water hot before you wake up sort of routine... sure.
 
Actually, timed hop additions are exactly what I'm going to do. :) For some reason, I suck at hopping schedules. My wife has to run the timer or I screw it up fantastically. Since making beer is a procedural sport, the script to run it will be very simple. Do something, make some noise, wait for enter. Rinse, repeat. :)
 
I'm learning a lot about this stuff just by the suggestions you've made. For todya I got in some PHP-GTK2 programming and it's not too bad so far. When I get home I may set up for some more php scripting.

GTK... that makes my head hurt just thinking about it. :)


I have a few laptops and more than a couple older desktops. Just haven't decided how I want one of them to be set up as the controller. Probably just connect some wires to start, then see if I will want to design the control panel to integrate it, or just have it sitting on the table somewhere.

Old desktops will do the trick, but, an old laptop is oh so sweet for something like this. The form factor reasons are obvious, but also consider that depending how good the battery is, you have a built-in UPS with a laptop...
 
So far GTK seems not too bad. I'm basically following along with some tutorials, but it's sinking in. It integrates well with PHP, so I can run the two together easily (or will when I have enough understanding of each to do something useful)

For today, I may look into making a simple timer application in PHP and see how it goes.
 
I just have to try this. My order from Hobby Boards should be here next week. I'm building owfs on a Debian distro as I type this post. If all goes well, my next brew day will be controlled solely by 1-wire devices connected via USB to my NSLU2.
 
I just have to try this. My order from Hobby Boards should be here next week. I'm building owfs on a Debian distro as I type this post. If all goes well, my next brew day will be controlled solely by 1-wire devices connected via USB to my NSLU2.

Sounds great. I have been away from this a bit. Spring has turned on me this year. I haven't even put the laptop in the garage to monitor the lager fermentation that I just started.

I'm going to forget using this as a brewtroller for now. I will want it as a cheap and integrated way to monitor temps and cycle fridge for fermentation though. I may even end up foregoing GTK and just use PHP scripting to fill a web page with information that I can pull up from anywhere.
 
I put together a very simple, cheap enclosure this weekend. Everything is in place and ready for the Hobby Boards parts to arrive. I'll likely add a fan so that the hard drive doesn't overheat. The last picture is washed out - you were supposed to see ten RJ-11 jacks for 1-wire components.

scaledp1030679.jpg


scaledp1030681.jpg


scaledp1030680.jpg
 
Homer, I'll have to post some of the code for the rig's webpage. It will be easy to modify when I get the 1-wire stuff installed. All of the sensor data lives in a really small XML file that gets updated via scripts that used to read microprocessor data from a serial port.

Here's an old screenshot:

brewhutscreenshot.jpg
 
Simply OUTSTANDING!!!

I was about to post some framework code, but lets see where this goes first. :)

Yuri, you look like you're "handy". You should make a telescope and take advantage of those Southwest skies!
 
Aw, don't remind me that I have a mirror blank sitting in my computer room waiting to be figured. That was a bunch of work to do. I really should finish my Ronchi Screen and get it finished. But then I'd have to clean everything out of my side porch and re-clean it so I can polish the mirror blank. It's currently full of scrap wood that I will "probably" never use. But i *could* move all of that to the upstairs of my new garage...

Do you know how much it would cost to have the mirror silvered?
 
Our astro club has our own mirror making/testing facilities: http://telescopelab.com/ so I don't have to locate a special place for my mirror making at home - it stays at the lab until done. :)

Coatings... We do our own, but only for club members. Spectrum (http://www.spectrum-coatings.com/) is who I'd recommend (Bob Royce uses them and I've had a 12.5 redone by them). Last I checked it was about $100 to coat a 10" with the enhanced coatings.

On a side note... Beer and scopes work very well together. In fact, the scope I use for our public sidewalk astronomy events is painted up in a Dale Sr motif. And I have beer related stickers everywhere. Both serve to "break the ice" and helps draw folks "in" who would normally be put-off by a scope. There is nothing like seeing a 10 yr old face light up the first time they see Saturn... I think I enjoy it more than they do. :)
 
Ah, yes, Spectrum was the place we looked at years ago when we started out ATM projects. My friend got ahead of me, and so to avoid contaminating his mirror with my larger grit, I stopped work on mine. We were "supposed" to grind at the same grit level to avoid any problems. As far as I know, he quit working on his during the figuring stage and ended up blowing some windfall cash on a 4.5" Dob mount Meade.

I think his brother has it now. It was neat to see some things, but I never got enough hands-on to really get to know the thing. I borrowed my dad's for a bit once, but they had left it out in the garage with the cap off and I had to clean the mirror and make some major adjustments and I don't think I got it right. Things were still a bit fuzzy.

What I find interesting is that with a lot of patience, and a small bit of science, your average person can build a better scope than they could buy at a store. And for not much money.
 
Here is some code to get you started. Some of it is brutally inelegant...but it works. First up, the html file:

Code:
<!DOCTYPE html>
<html>
  <head>
   <meta http-equiv="Content-Type" content="text/html;charset=utf-8">
   <link href="/images/favicon.ico" rel="icon" type="image/x-icon">
   <link rel=StyleSheet href="css/styles.css" type="text/css">
   <title>K&auml;mpferstrahl Brew Monitor</title>
   <script type="application/javascript" src="./js/gauge.js"></script>
   <script type="application/javascript" src="./js/light.js"></script>
   <script type="application/javascript">

  // global variables to hold data from Ajax requests
  var steamPress = 0;
  var steamTemp = 0;
  var mashTemp = 0;
  var spargeTemp = 0;
  var boilTemp = 0;
  var mashVol = 0;
  var boilVol = 0;
  var lightTest = false;
  var steamElement = 0;

  // Ajax request for xml data generated by Arduino
  function ajaxUpdateValues() {

    var httpRequest;
    var xmlDoc;

    // get the xml document via Ajax/http
    httpRequest = new XMLHttpRequest();
    httpRequest.onreadystatechange=function() {
      if(httpRequest.readyState == 4) {
        steamPress = Number(httpRequest.responseText);
      }
    }
    httpRequest.open("GET","./xml/brewhut.xml",false);
    httpRequest.send(null);
    xmlDoc=httpRequest.responseXML;

    // update the global variables by parsing the xml document
    steamPress=Number(xmlDoc.getElementsByTagName("steamPress")[0].childNodes[0].nodeValue);
    steamTemp=Number(xmlDoc.getElementsByTagName("steamTemp")[0].childNodes[0].nodeValue);
    spargeTemp=Number(xmlDoc.getElementsByTagName("spargeTemp")[0].childNodes[0].nodeValue);
    mashTemp=Number(xmlDoc.getElementsByTagName("mashTemp")[0].childNodes[0].nodeValue);
    boilTemp=Number(xmlDoc.getElementsByTagName("boilTemp")[0].childNodes[0].nodeValue);
    mashVol=Number(xmlDoc.getElementsByTagName("mashVol")[0].childNodes[0].nodeValue);
    boilVol=Number(xmlDoc.getElementsByTagName("boilVol")[0].childNodes[0].nodeValue);
    steamElement=Number(xmlDoc.getElementsByTagName("steamElement")[0].childNodes[0].nodeValue);

  }

  // force the webcam image to reload by appending time data
  function updateImage() {
    var img = document.getElementById("webcam");
    var now = new Date();
    img.src="images/cam.jpg"+ "?" + now.getTime();
  }

  // this function calls the Ajax update and draws the canvas elements
  // it is to be executed repeatedly through the use of the setInterval method
  function update() {

    // update Arduino data
    ajaxUpdateValues();

    // draw gauges
    var canvas = document.getElementById("steamPress");
    var ctx = canvas.getContext("2d");
    drawGauge(ctx, 0, 20, 0.25, 1, "Steam Pressure", "psi", steamPress);

    canvas = document.getElementById("steamTemp");
    ctx = canvas.getContext("2d");
    if (steamTemp < 0) {
      drawGauge(ctx, 60, 260, 5, 10, "Steam Temp", "Error", 0);
    } else {
      drawGauge(ctx, 60, 260, 5, 10, "Steam Temp", "Deg F", steamTemp);
    }

    canvas = document.getElementById("mashTemp");
    ctx = canvas.getContext("2d");
    if (mashTemp < 0) {
      drawGauge(ctx, 20, 220, 5, 10, "Mash Temp", "Error", 0);
    } else {
      drawGauge(ctx, 20, 220, 5, 10, "Mash Temp", "Deg F", mashTemp);
    }

    canvas = document.getElementById("spargeTemp");
    ctx = canvas.getContext("2d");
    if (spargeTemp < 0) {
      drawGauge(ctx, 20, 220, 5, 10, "Sparge Temp", "Error", 0);
    } else {
      drawGauge(ctx, 20, 220, 5, 10, "Sparge Temp", "Deg F", spargeTemp);
    }

    canvas = document.getElementById("boilTemp");
    ctx = canvas.getContext("2d");
    if (boilTemp < 0) {
      drawGauge(ctx, 20, 220, 5, 10, "Boil Temp", "Error", 0);
    } else {
    drawGauge(ctx, 20, 220, 5, 10, "Boil Temp", "Deg F", boilTemp);
    }

    canvas = document.getElementById("mashVol");
    ctx = canvas.getContext("2d");
    if (mashVol < 0) {
      drawGauge(ctx, 0, 24, 0.5, 1, "Mash Volume", "Error", 0);
    } else {
      drawGauge(ctx, 0, 24, 0.5, 1, "Mash Volume", "Gal", mashVol);
    }

    canvas = document.getElementById("boilVol");
    ctx = canvas.getContext("2d");
    if (boilVol < 0) {
      drawGauge(ctx, 0, 24, 0.5, 1, "Boil Volume", "Error", 0);
    } else {
      drawGauge(ctx, 0, 24, 0.5, 1, "Boil Volume", "Gal", boilVol);
    }

    canvas = document.getElementById("steamElement");
    ctx = canvas.getContext("2d");
    drawGauge(ctx, 0, 100, 2, 10, "Heating Element", "%", steamElement);

  }

  // make the script execute at a set interval (in milliseconds)
  function init() {
    setInterval("update();", 500);
    setInterval("updateImage();", 3000);
  }
    </script>
  </head>

  <body onload="init();">

   <div>
    <table style="margin-left:auto;margin-right:auto;">
     <tr>
      <td>
       <table style="margin-left:auto;margin-right:auto;">
        <tr>
         <td>
          <canvas id="steamPress" width="180" height="200">
           This page is incompatible with your browser.
          </canvas>
         </td>
         <td>
          <canvas id="mashVol" width="180" height="200">
           This page is incompatible with your browser.
          </canvas>
         </td>
         <td>
          <canvas id="boilVol" width="180" height="200">
           This page is incompatible with your browser.
          </canvas>
         </td>
        </tr>
        <tr>
         <td>
          <canvas id="steamTemp" width="180" height="200">
           This page is incompatible with your browser.
          </canvas>
         </td>
         <td>
          <canvas id="mashTemp" width="180" height="200">
           This page is incompatible with your browser.
          </canvas>
         </td>
         <td>
          <canvas id="boilTemp" width="180" height="200">
           This page is incompatible with your browser.
          </canvas>
         </td>
        </tr>
        <tr>
         <td></td>
         <td>
          <canvas id="spargeTemp" width="180" height="200">
           This page is incompatible with your browser.
          </canvas>
         </td>
         <td>
          <canvas id="steamElement" width="180" height="200">
           This page is incompatible with your browser.
          </canvas>
         </td>
        </tr>
       </table>
      </td>
      <td style="vertical-align:text-top;">
       <img id="webcam" height="400" src="images/cam.jpg">
      </td>
     </tr>
    </table>
   </div>

   <div style="text-align:center;">
    <span style="font-family: PHANTOM STENCIL; color: #222222; font-size: 69pt;">Kampferstrahl</span>
    <h4>Version 0.2.3, 7 Feb 10 --- <a href="http://twitter.com/kampferstrahl">Twitter</a></h4>
   </div>

   <div>
    <br><br><br><br>
    <p><a href="http://brew-hut">Back to server homepage</a>
    <p style="font-size:125%">
     Arduino's output must be dumped to /var/www/xml/brewhut.xml in real time for this page to be useful.<br>
     A script called brewhut runs `head -n 12 /dev/ttyUSB0 > /var/www/xml/brewhut.xml` about every 250 ms.<br>
     Whenever a sketch is uploaded to Arduino, running `screen /dev/ttyUSB0 115200` will recapture the serial port for terminal use.<br>
   </div>
  </body>
 </html>
 
And here's some javascript for the gauges:

Code:
/*
  Canvas based gauge adapted from the demo at http://ecc.webhop.org:8081/
    (to log in - user: admin    password: bcsdemo)

  Adapted by Yuri, Dec 09
  
*/

// some global style values

var titleFill = "#222222";
var labelFill = "#666666";
var valueFill = "#222222";
var outerBezelDarkFill = "#222222";
var outerBezelLightFill = "#666666";
var innerBezelDarkFill = "#C0C0C0";
var innerBezelLightFill = "#FAFCFF";
var tickStroke = "#222222";
var centerPinStroke = "#222222";
var centerPinFill = "#666666";
var pointerFill = "#C00000";

function drawLabel(ctx, title, label, value) {
  ctx.save(); 
  ctx.font = "bold 1.0em Verdana"; 
  ctx.fillStyle = titleFill; 
  ctx.lineWidth = 1; 
  ctx.translate(90, 2); 
  ctx.textAlign = "center"; 
  ctx.fillText(title, 0, 10); 
  ctx.font = "0.675em Verdana"; 
  ctx.fillStyle = labelFill; 
  ctx.fillText(label, 0, 145); 
  ctx.fillStyle = valueFill; 
  ctx.font = "bold 0.875em Verdana";
  ctx.fillText(value, 0, 130);
  ctx.restore();
}

function drawBezels(ctx) {
  ctx.save();
  var innerStyle = ctx.createRadialGradient(87, 90, 57, 90, 95, 75); 
  innerStyle.addColorStop(0, innerBezelLightFill); 
  innerStyle.addColorStop(0.9, innerBezelDarkFill); 
  ctx.fillStyle = innerStyle; 
  ctx.arc(90, 95, 72, 0, Math.PI * 2, true); 
  ctx.fill(); 
  ctx.beginPath();
  ctx.lineWidth = 9;
  var outerStyle = ctx.createRadialGradient(90, 95, 68, 90, 95, 76);
  outerStyle.addColorStop(0, outerBezelDarkFill);
  outerStyle.addColorStop(0.7, outerBezelLightFill);
  outerStyle.addColorStop(1, outerBezelDarkFill); 
  ctx.strokeStyle = outerStyle;
  ctx.arc(90, 95, 73, 0, Math.PI * 2, true);
  ctx.stroke();
  ctx.restore();
}

function drawTickMarks(ctx, minVal, maxVal, minor, major) {
  ctx.save(); 
  ctx.translate(90, 95); 
  ctx.rotate(Math.PI + Math.PI / 4 - Math.PI / 2); 
  var increment = (2 * Math.PI - Math.PI / 2);
  increment = increment / ((maxVal - minVal) / major);
  ctx.rotate(-increment);
  for (var i = 0; i < (maxVal - minVal) / major + 1; i++) {
    ctx.beginPath(); 
    ctx.rotate(increment); 
    ctx.moveTo(68, 0); 
    ctx.lineTo(60, 0); 
    ctx.stroke();
  }
  ctx.restore();
  ctx.save();
  ctx.translate(90,95);
  ctx.rotate(Math.PI + Math.PI / 4 - Math.PI / 2); 
  increment = (2 * Math.PI - Math.PI / 2);
  increment = increment / ((maxVal - minVal) / minor);
  for (i = 0; i < (maxVal - minVal) / minor; i++) {
    ctx.beginPath(); 
    ctx.rotate(increment); 
    ctx.moveTo(68, 0); 
    ctx.lineTo(64, 0); 
    ctx.stroke();
  }  
  ctx.restore();
  ctx.save();
  ctx.font = "italic .5em Verdana";
  ctx.translate(90, 98); 
  ctx.textAlign = "center";
  increment = (2 * Math.PI - Math.PI / 2);
  increment = 2 * increment / ((maxVal - minVal) / major);   
  for (i = 0; i <= (maxVal - minVal) / major / 2; i++) {
    ctx.beginPath(); 
    ctx.fillText(minVal + i * major * 2,
     52 * Math.cos(Math.PI + increment * i - Math.PI / 4),
     52 * Math.sin(Math.PI + increment * i - Math.PI / 4));
  }
  ctx.restore();
}

function drawCenterPin(ctx) {
  ctx.save(); 
  ctx.beginPath(); 
  ctx.lineWidth = 2; 
  ctx.strokeStyle = centerPinStroke; 
  ctx.fillStyle = centerPinFill; 
  ctx.arc(90, 95, 5, 0, Math.PI * 2, true); 
  ctx.stroke(); 
  ctx.fill(); 
  ctx.restore();
}

function drawPointer(ctx, minVal, maxVal, value) {
  ctx.save(); 
  ctx.translate(90, 95); 
  ctx.rotate(-Math.PI / 2 - Math.PI / 4);
  ctx.rotate((2 * Math.PI - Math.PI / 2) * (value - minVal) / (maxVal - minVal)); 
  ctx.moveTo(-3, 15);
  ctx.beginPath();
  ctx.moveTo(-3, 15);
  ctx.fillStyle = pointerFill;
  ctx.lineTo(0, -60); 
  ctx.lineTo(3, 15);
  ctx.lineTo(-3, 15);
  ctx.fill();
  ctx.restore();
}

function drawGauge(ctx,                   // canvas context
                   minVal, maxVal,        // min and max gauge values
                   minorTick, majorTick,  // tick mark intervals
                   title, label,          // main title and face label
                   value) {               // current value
  ctx.save(); 
  ctx.font = "76% Verdana,Tahoma,Arial,sans-serif"; 
  ctx.clearRect(0, 0, ctx.canvas.width, ctx.canvas.height);   
  drawBezels(ctx);
  drawTickMarks(ctx, minVal, maxVal, minorTick, majorTick); 
  drawLabel(ctx, title, label, value); 
  drawCenterPin(ctx);
  drawPointer(ctx, minVal, maxVal, value);
  ctx.restore();
}
 
There's an update on this page:

http://harmoniccode.blogspot.com/search/label/canvas

...and canvas tags now appear to be properly supported on the iPhone Safari browser. Sweet!

Ok, it's bedtime.

Actually... that's not as much of an update as it is a search result. Topics under "Category" (in right column) will get you there and a few other interesting places.

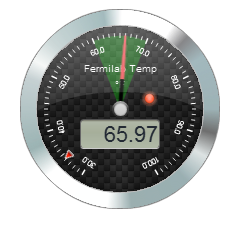
fermitemp.jpg


Simply outstanding. That gui widget Yuri found works very well. Big thumbs up. :)

I'll be posting the framework code for this and a few other fun things shortly (like sending an sms when temps are out of range). It's a combo of PHP, JS, AJAX and YUI. Lots of room to expand on...

The code will be posted via my github account, so, for those who don't know "git", now is a good time to start. :)
 
I had been planning on doing an Arduino-based setup to run a lot of this stuff, but... this is so ridiculously easy and elegant, it's almost stupid not to do it this way. If you start with some basic bash scripts, you could easily - like in a few minutes - completely modify a brewing process.

I wonder if I could run a Cat5e drop from my garage to my server room to run the bus over, and use my main server to run all of this rather than adding an additional always-on machine to my network. I could just use my laptop to monitor, either via terminal, X11 forwarding, or web, depending on the front-end I build. That would be preferable to running an old laptop in my garage 24/7 to monitor fermentation chamber(s).

On the flip side, running an Arduino based PID on mains power in the fermenter would probably be a lot less "flaky" than sending temp data over the bus to a remote machine, that would send back commands to turn on/off the compressor or heat source.

Those Canvas web GUI elements are slick. This thread makes me happy.
 
If you start with some basic bash scripts, you could easily - like in a few minutes - completely modify a brewing process.

I run everything with bash scripts, mostly from cron. It's not sexy and it's not pretty, but, it's damned effective and almost bullet-proof.

I wonder if I could run a Cat5e drop from my garage to...

There are a zillion ways to set this up - this is one. I use ssh for remote access to my linux box, but you could use VNC (and its many cousins) or any of the methods you mention above.


On the flip side, running an Arduino based PID on mains power in the fermenter would probably be a lot less "flaky" than sending temp data over the bus to a remote machine, that would send back commands to turn on/off the compressor or heat source.

I've been using 1wire in private and industrial use for many years. I've never had a problem with it that wasn't later attributed to things like fork-lifts pulling wires loose and other stupid human tricks. YMMV. :)

Those Canvas web GUI elements are slick. This thread makes me happy.

Yea, I'm becoming a convert... :) Prior to this, I'd never looked into the "canvas" stuff in HTML5... We live in interesting times.
 
Man that's nice, I guess it's time to learn to script. I do everything manually on demand now. When I get to play with linux that is.
 
I can't order any samples, they want a business or education address. I have neither.
 
I run everything with bash scripts, mostly from cron. It's not sexy and it's not pretty, but, it's damned effective and almost bullet-proof.
I work at a supercomputer center, and that's what we do too. Unix commandline capabilities are very powerful.
 
GatorDad, I'm less ambitious than you, but I did get some 1-wire temp probes to watch the basement fermentation chamber. Just so I understand what you're going for, why did you chose owfs vs. digitemp software for this? I've started playing with digitemp's software and it looks like it'd be very easy to dump into either an rrd database or a sql database. What's better about owfs?

Thanks!
 
They changed their policy. I used to order from them on occasion. Recently, I tried to use the same account, and I got a message stating that they would not ship to a residential address.

They shipped to my home address about a month ago... odd.
 
They shipped to my home address about a month ago... odd.

and I just placed another order. What are you folks clicking on?

EDIT: wait a sec... Yuri. What's the name of your brewery? Kampferstrahl? Where is it located? There's your "business" address. :)
 
GatorDad, I'm less ambitious than you, but I did get some 1-wire temp probes to watch the basement fermentation chamber. Just so I understand what you're going for, why did you chose owfs vs. digitemp software for this? I've started playing with digitemp's software and it looks like it'd be very easy to dump into either an rrd database or a sql database. What's better about owfs?

Thanks!

In short, because I can do what I want, the way I want it. :)

OWFS is a *file system* and as such fits into the *nix concept much better (little tools that work together). You can interact with it in ways you can't with "regular" software. From simple command line tools to full blown apps. As a file system, you can use any programming/scripting language you want as long as that lang can interact with a file system (and most can). What I didn't want was to be calling external programs with goofy parms (e.g. DigiTemp) from code and dealing with those headaches.

There are numerous ways/reasons to log data. I posted a link to a RRD tool earlier in this thread, and storing to a sql table is trivial in most scripting languages (e.g. PHP), and you're not limited to mysql - for example, postgresql might be your preference. I don't want someone else deciding how I log my data... :)
 
fermitemp3.jpg


Code posted for the above at github.

From your linux command line:
Code:
#git clone git://github.com/ccurran/beer-monitor.git

Will pull the current source set to your machine.


This is a first stab at a PHP/JS framework for beer processing.

This first version displays a temperature gauge and a chart for a fermentation chamber (fridge) I have. It does not control the temperature; it monitors only. I use a cron script to control the temps.

Most of the fun is in "php/body.php".

  • The 1wire device name used is "/mnt/fermiTemp".
  • To enable SMS:
    • set BEER.SMS_ON = true;
    • read comments above BEER.checkRange()
    • search/replace the "to" number "1112223333@gateway" to yours
    • in "php/_server.php", search for "CHANGE BEFORE USE" and do it.

Let me know what you find wrong or broken...
 
GatorDad, I'm less ambitious than you, but I did get some 1-wire temp probes to watch the basement fermentation chamber. Just so I understand what you're going for, why did you chose owfs vs. digitemp software for this? I've started playing with digitemp's software and it looks like it'd be very easy to dump into either an rrd database or a sql database. What's better about owfs?

Thanks!

OWFS is neat, and powerful if you know what you are doing. But for basic logging, I think most people are going to want to try something canned and ready to go. I liked the LogTemp software I started with for logging. it's point and click and easy to use.

Now you can't do as much with it, but it's basic and easy enough for someone who has not done much programming. If you are familiar with basic programming skills and understand a scripting language, then OWFS is a better choice.

Yup. This stuff isn't really for beginners or the faint of heart. :) If you want plug/play, don't look here - this isn't for you.
 
Back
Top