They like you! They really, really like you! 

Curious though. Why'd you decide to give it up after holding out?
As most know that when working with stainless steel you must be very carefull about what comes in contact with the stainless. Wire brushes are probly the biggest example of this.
It goes for every thing. If a carbon source gets on the surface and the stainless gets to its magic temp of 800-1600 degrees, then it will become what is known as sensitized.
The only real fix is to do a solution heat treat on the material to get it back to where it once was.
So, we must think about all things that come in contact with the stainless. Drilling we are pretty much screwed on.
Every thing else we can controll. When hammering on stainless it is best to use a chunk of stainless. Iron will embed in the surface and that iron will rust.
Yes I know I typed "weldor". It is a clairification in text. Here is the first bit from wikipedia.
A welder (also weldor, which term distinguishes the tradesman from the equipment used to make welds) is a tradesman who specialises in welding materials together.
Which solution is comprised of annealing the metal.
I've always done this by heating it up again and cooling it very slowly.
I don't know what the temp', soak, and ramp down are.
Lots of guys I've known just use some abrasive in the discoloration to get rid of it.
Well not entirely screwed, just mostly screwed (forgive me Miracle Max). You can always take a small grinder or a couple sheets of abrasive to the holes and clean them up.
Dude
Welding is welding
Sanitary doesnt matter in a boil kettle as its below the surface of the wort and it already sterilized by 214 degree wort.
FWIW welding like this has been around a LONG LONG time
.Dude
Welding is welding
Sanitary doesnt matter in a boil kettle as its below the surface of the wort and it already sterilized by 214 degree wort.
FWIW welding like this has been around a LONG LONG time
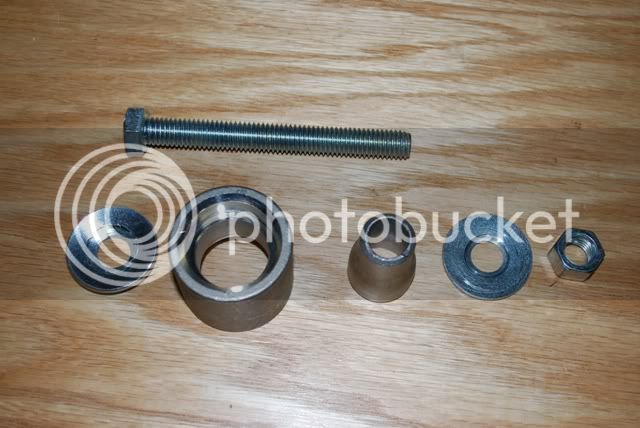
During my last order from McMaster Carr a few weeks ago I did a little research and came up with my version of the keg tool. It certainly isn't as elegant or sophisticated as greenmonty's but it did get the job done. The two main ingredients are a
3/4" to 1/2" stainless steel butt-weld pipe fitting:
http://www.mcmaster.com/#45605k711/=61bdmv
1" stainless socket weld low pressure coupling:
http://www.mcmaster.com/#4335t64/=61be9j
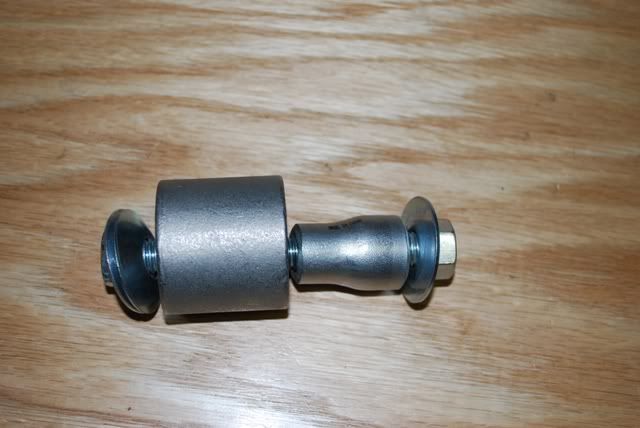
The 3/4" to 1/2" reducer fits perfectly inside of the 1"coupling and the OD of the reducer is the same as a 1/2" couple. I used a 4" 5/8" bolt to connect it all together.
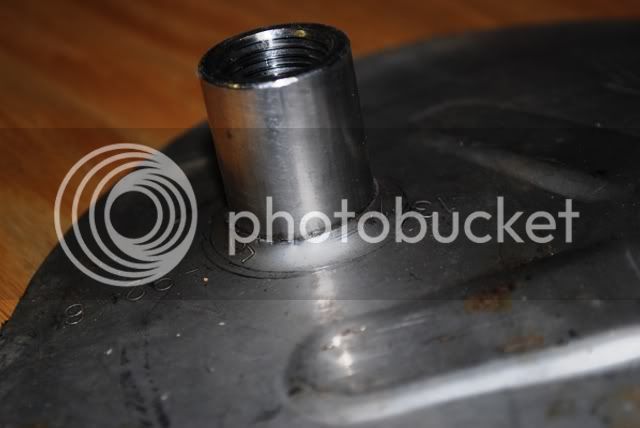
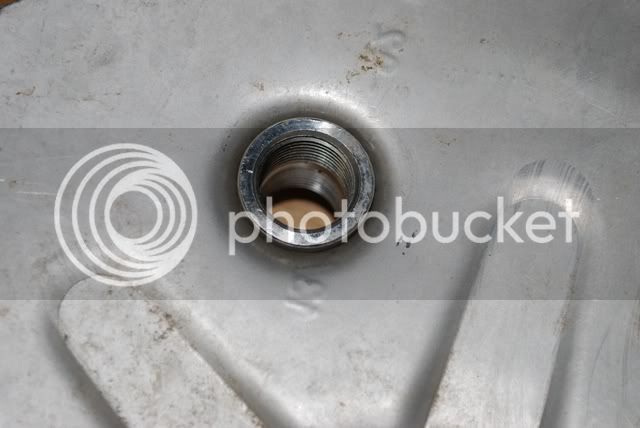
I used a Greenlee 7/8" inch hole punch and unlike greenmonty's, once I pulled the reducer through, I had to reload and pull the coupling through. I tested on a keg top I cut out. Here are the results. When I get brave enough I'm going to modify my HLT with a HERMS coil using this tool. I'm not sure I'm ready to TIG it myself though.
How much is everyone undersizing the hole as compared to the fitting being welded into the keg?
Question...
If you wanted to use this method for pulling a hole for a 1" coupling (coupling is for a water heater element), what size hole and pull through should you use?
Which solution is comprised of annealing the metal.
I've always done this by heating it up again and cooling it very slowly.
I don't know what the temp', soak, and ramp down are.
Lots of guys I've known just use some abrasive in the discoloration to get rid of it.
As mentioned by the others a 7/8" hole is what you want for the 1/2" couplings. I haven't made one for the 1" coupling yet but, I would build mine and drill a hole the size of the pipe just like on the 1/2" stuff. Not sure what that is off hand.
Blane,
That is a great looking tool. Very well done. Don't be afraid to weld it. Just a simple fusion weld is all that is needed I just like to add filler for the look. Take your time, you will see that doing it this way is extremely easy to weld up.
Since I only had one day of TIG before I had to leave the class, would you wash from the thicker coupling to the thinner keg material or weave over the seam?

When I just fuse them I just run the torch right at the joint. Maybe a little bit biased to the coupling. No weaving IMO. Maybe a little back and forth movement if you would like to give the bead a little style. You don't need a lot of power either. 50-70 amps should be all that is needed. I have to weld one up tomorrow for a testing tank I need. I don't plan on using any filler or to purge it out. Just a down and dirty weld to get me through. I will try and video the weld for you. Shouldn't be too hard too do. I will post tomorrow if I succeed or fail.
Cheers.
I'm a visual kind of guy. That would be great to watch if you could make it happen. Thanks.


Ok Blane,
I am not a camera guy by any means. I did the best I could (alone) at getting a video. I would not call it a success. You will however get an idea of what I meant by a back and forth motion to give the bead some style. Not just a fusion weld or as I call them, slug tracks.
Here is the video. Its very short but you should get the idea of the movement and how tight the motion is.
That's a great shot. Thanks for taking the time to put it together. I see what you mean about staying just above the seam. How far around the coupling would you go before you stopped and let it cool down a bit so as not to blow a hole in the keg?
First, those welds are wow!
Couple of questions:
In the last post, you didn't purge. I am assuming that purging is a better practice, or is it not needed because of the tight fit? Could flux be used to prevent sugaring ?
The material - Ampco xx. I am assuming this needs to be harder than the SS?
Thanks, and if you decide to make these, I'd be on that list.
Once I am done with the testing the keg/tank is going to the scrap yard
I am completely impressed with this GreenMonti. Please forgive me if I am showing my lack of experience in this area, but do you think this would still work with the silver soldering method? I dont have the tools, experience or money to get this done with a weldor.
It seems to have been mentioned in this thread, but I didnt see a go ahead with the soldering.
thanks again for sharing!
Let me be the first to offer to pay the shipping cost for you to send me that "test keg".


Enter your email address to join:
