[ETA: In order to "Future-Proof" this article, I have created a page for it on the BrewPi Remix website. You can
read the most up to date version there.]
I am NOT sure when this changed.
@day_trippr is running Wheezy and Jessie and uses the "old" way of setting up a BT device. I'm using Stretch with bluetoothd 5.43 and the method by which you set up /dev/rfcomm* devices with the rfcomm.conf file in /etc/bluetooth is no longer supported. I'm sure someone somewhere could tell me WHY this is better. I'm sure we'd hear some crap about "cloud-enabled" like they tell me with all my favorite Ubuntu items that no longer work.
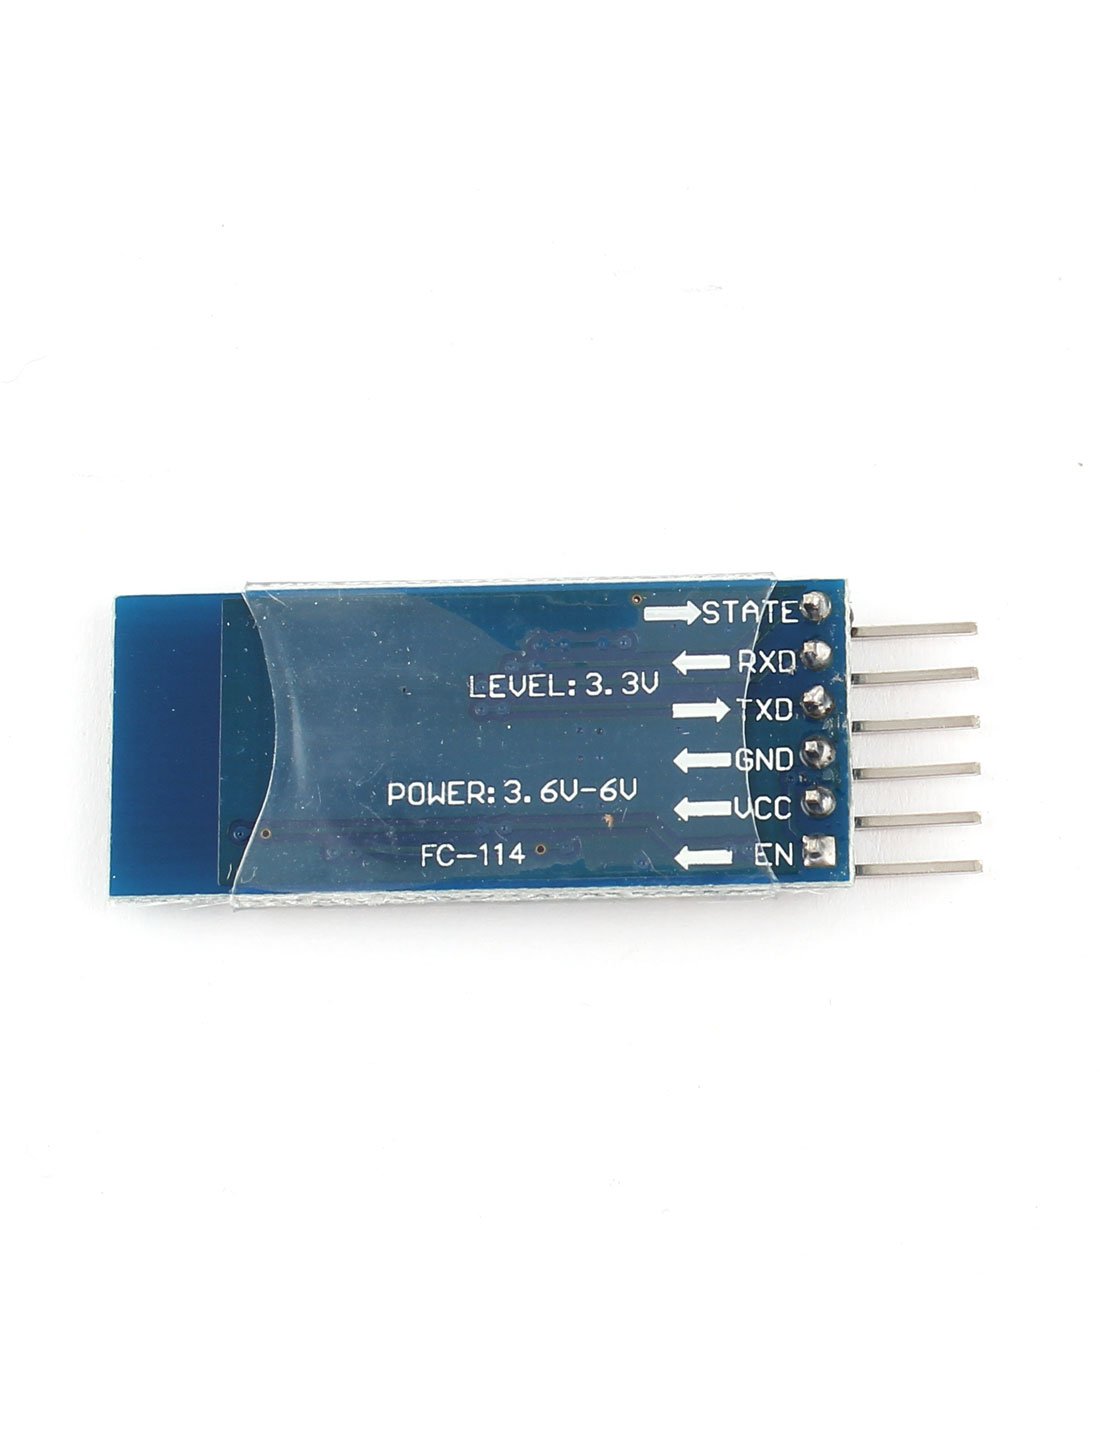
Anyway, here's how you can get the devices enabled with Stretch. To start with, make sure your HC-05/6 is powered up in its
production configuration. At this point it's probably flashing 2-3 times per second. Then, prove to yourself that there's no rfcomm* devices:
Code:
pi@brewpi:~ $ ls -al /dev/rfc*
ls: cannot access '/dev/rfc*': No such file or directory
Next, execute the new CLI for bluez, "bluetoothctl":
Code:
pi@brewpi:~ $ sudo bluetoothctl
[NEW] Controller XX:XX:XX:XX:XX:XX brewpi [default]
The controller listed is your local Pi's controller. After this we need to turn on and configure the "agent" which is the process that allows you to enter the pairing codes when required:
Code:
[bluetooth]# agent on
Agent registered
[bluetooth]# default-agent
Default agent request successful
The next thing to do is allow the system to scan for local devices. If you have a "busy" area bluetooth-wise, you may get a lot of spam. Just let it run about 10 seconds and if you are living a clean life you will see your target BT device and it's MAC address. After that you can turn off the scan.
Code:
[bluetooth]# scan on
Discovery started
[CHG] Controller XX:XX:XX:XX:XX:XX Discovering: yes
[NEW] Device XX:XX:XX:XX:XX:XX XX-XX-XX-XX-XX-XX
[NEW] Device XX:XX:XX:XX:XX:XX [TV] Living room
[NEW] Device XX:XX:XX:XX:XX:XX Chamber 1
[...]
[bluetooth]# scan off
[...]
Discovery stopped
[CHG] Controller XX:XX:XX:XX:XX:XX Discovering: no
You may have to scroll up to find it, but if you gave it a friendly name ("Chamber 1" in my case), you should see the MAC followed by that name. Next, you will pair with your device with the pair command. It will prompt you to enter the code which is generally 1234 or 0000 unless you change it:
Code:
[bluetooth]# pair XX:XX:XX:XX:XX:XX
Attempting to pair with XX:XX:XX:XX:XX:XX
[CHG] Device XX:XX:XX:XX:XX:XX Connected: yes
Request PIN code
[agent] Enter PIN code: 1234
[CHG] Device XX:XX:XX:XX:XX:XX UUIDs: 00001101-0000-1000-8000-00805f9b34fb
[CHG] Device XX:XX:XX:XX:XX:XX ServicesResolved: yes
[CHG] Device XX:XX:XX:XX:XX:XX Paired: yes
Pairing successful
[CHG] Device XX:XX:XX:XX:XX:XX ServicesResolved: no
[CHG] Device XX:XX:XX:XX:XX:XX Connected: no
[bluetooth]# trust XX:XX:XX:XX:XX:XX
[CHG] Device XX:XX:XX:XX:XX:XX Trusted: yes
Changing XX:XX:XX:XX:XX:XX trust succeeded
At this point your BT dongle is probably flashing once every two seconds. It's paired and trusted as you can see by issuing the 'info' command:
Code:
[bluetooth]# info XX:XX:XX:XX:XX:XX
Device XX:XX:XX:XX:XX:XX
        Name: Chamber 1
        Alias: Chamber 1
        Class: 0x001f00
        Paired: yes
        Trusted: yes
        Blocked: no
        Connected: no
        LegacyPairing: yes
        UUID: Serial Port               (00001101-0000-1000-8000-00805f9b34fb)
I noticed that if you power-cycle the BT dongle at this point, it will go back to flashing 2-3 times/second but that doesn't seem to affect things. You can exit or quit back to the shell prompt:
Code:
[bluetooth]# exit
Agent unregistered
[DEL] Controller XX:XX:XX:XX:XX:XX brewpi [default]
pi@brewpi:~ $
So, it's paired and trusted but still not visible in the device list:
Code:
pi@brewpi:~ $ ls -al /dev/rfc*
ls: cannot access '/dev/rfc*': No such file or directory
Next, we need to bind it to the device:
Code:
pi@brewpi:~ $ sudo rfcomm bind 0 XX:XX:XX:XX:XX:XX 1 > /dev/null 2>&1 &
[1] 3345
It seems like the command runs till something touches the device (which is why we background it with the trailing '&'.) In that command the '0' is the rfcomm device we want to assign, the MAC address should be obvious, and the 1 is the channel. Unless you know why you want to change this, use '1'. Now prove there is a device in the list (and see the background process exit):
Code:
pi@brewpi:~ $ ls -al /dev/rfc*
crw-rw---- 1 root dialout 216,  0 Mar 16 13:31 /dev/rfcomm0
[1]+  Done                    sudo rfcomm bind 0 XX:XX:XX:XX:XX:XX 1 > /dev/null 2>&1
pi@brewpi:~ $
Power-cycling the BT device at this point proves the device will reconnect after a power failure after about 10 seconds. What does not happen however is re-establish the device after a Pi reboot or power failure. We need a way to issue the rfcomm command after reboot (and after the bluetoothd starts.) Create a file named 'rfcomm0.service' in the '/etc/systemd/system/' directory and add the following information:
Code:
[Unit]
After=bluetooth.service

[Service]
ExecStart=/usr/bin/rfcomm bind 0 XX:XX:XX:XX:XX:XX 1 > /dev/null 2>&1 &

[Install]
WantedBy=default.target
This will allow systemd to execute the rfcomm command binding that MAC to rfcomm0 after the bluetooth.service starts. To enable this unit file, issue the commands:
Code:
pi@brewpi:~ $ sudo chown root:root /etc/systemd/system/rfcomm0.service
pi@brewpi:~ $ sudo chmod 664 /etc/systemd/system/rfcomm0.service
pi@brewpi:~ $ sudo systemctl daemon-reload
pi@brewpi:~ $ sudo systemctl enable rfcomm0
Created symlink /etc/systemd/system/default.target.wants/rfcomm0.service → /etc/systemd/system/rfcomm0.service.
pi@brewpi:~ $
You can start it with the 'sudo systemctl start rfcomm0' command, but there's no reason to since it's already bound. If you check the status of this daemon after system reboot it will not be running, because it ran once and exited - which is all we needed it to do:
Code:
pi@brewpi:~ $ sudo systemctl status rfcomm0
● rfcomm0.service
   Loaded: loaded (/etc/systemd/system/rfcomm0.service; enabled; vendor preset:
   Active: inactive (dead) since Sat 2019-03-16 13:43:59 CDT; 40s ago
  Process: 290 ExecStart=/usr/bin/rfcomm bind 0 XX:XX:XX:XX:XX:XX 1 > /dev/null 2>&1 & (code=exited, status=0/SUCCESS)
 Main PID: 290 (code=exited, status=0/SUCCESS)

Mar 16 13:43:59 brewpi systemd[1]: Started rfcomm0.service.
That's how you set up your BT devices now in Stretch! You'll notice that using the graphical interface is also not needed. Using this method, no additional packages are required as a matter of fact, all the packages are part of the stock distribution.
If you have multiple devices, you'd change the above steps using 1, 2, 3, etc., instead of 0. You would also need a systemd unit file for each device.