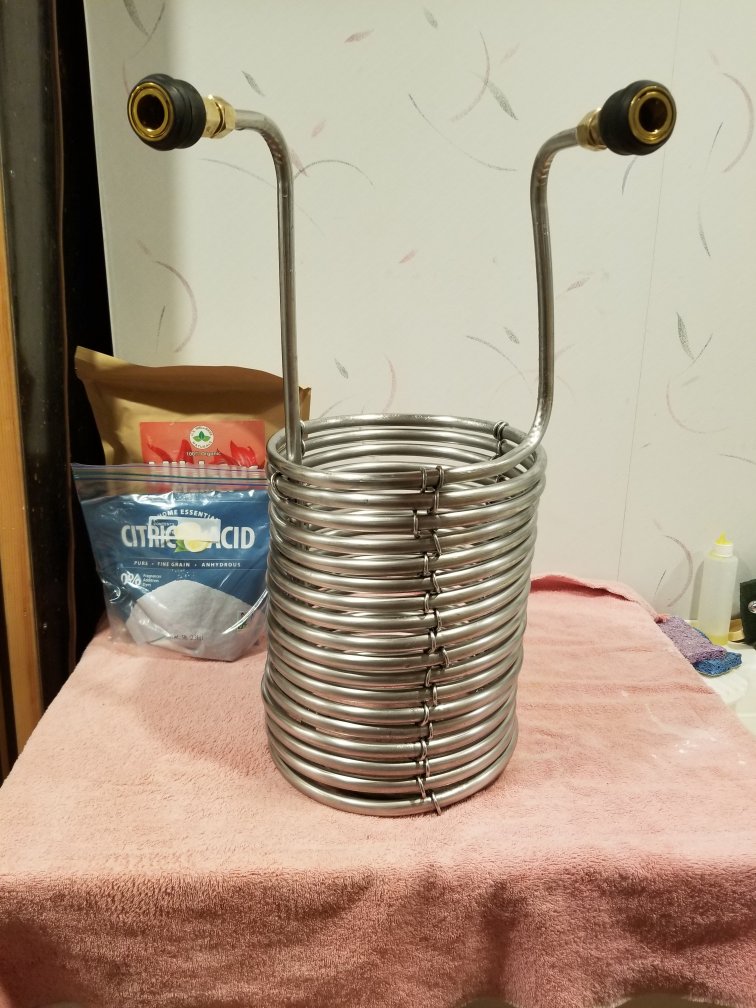
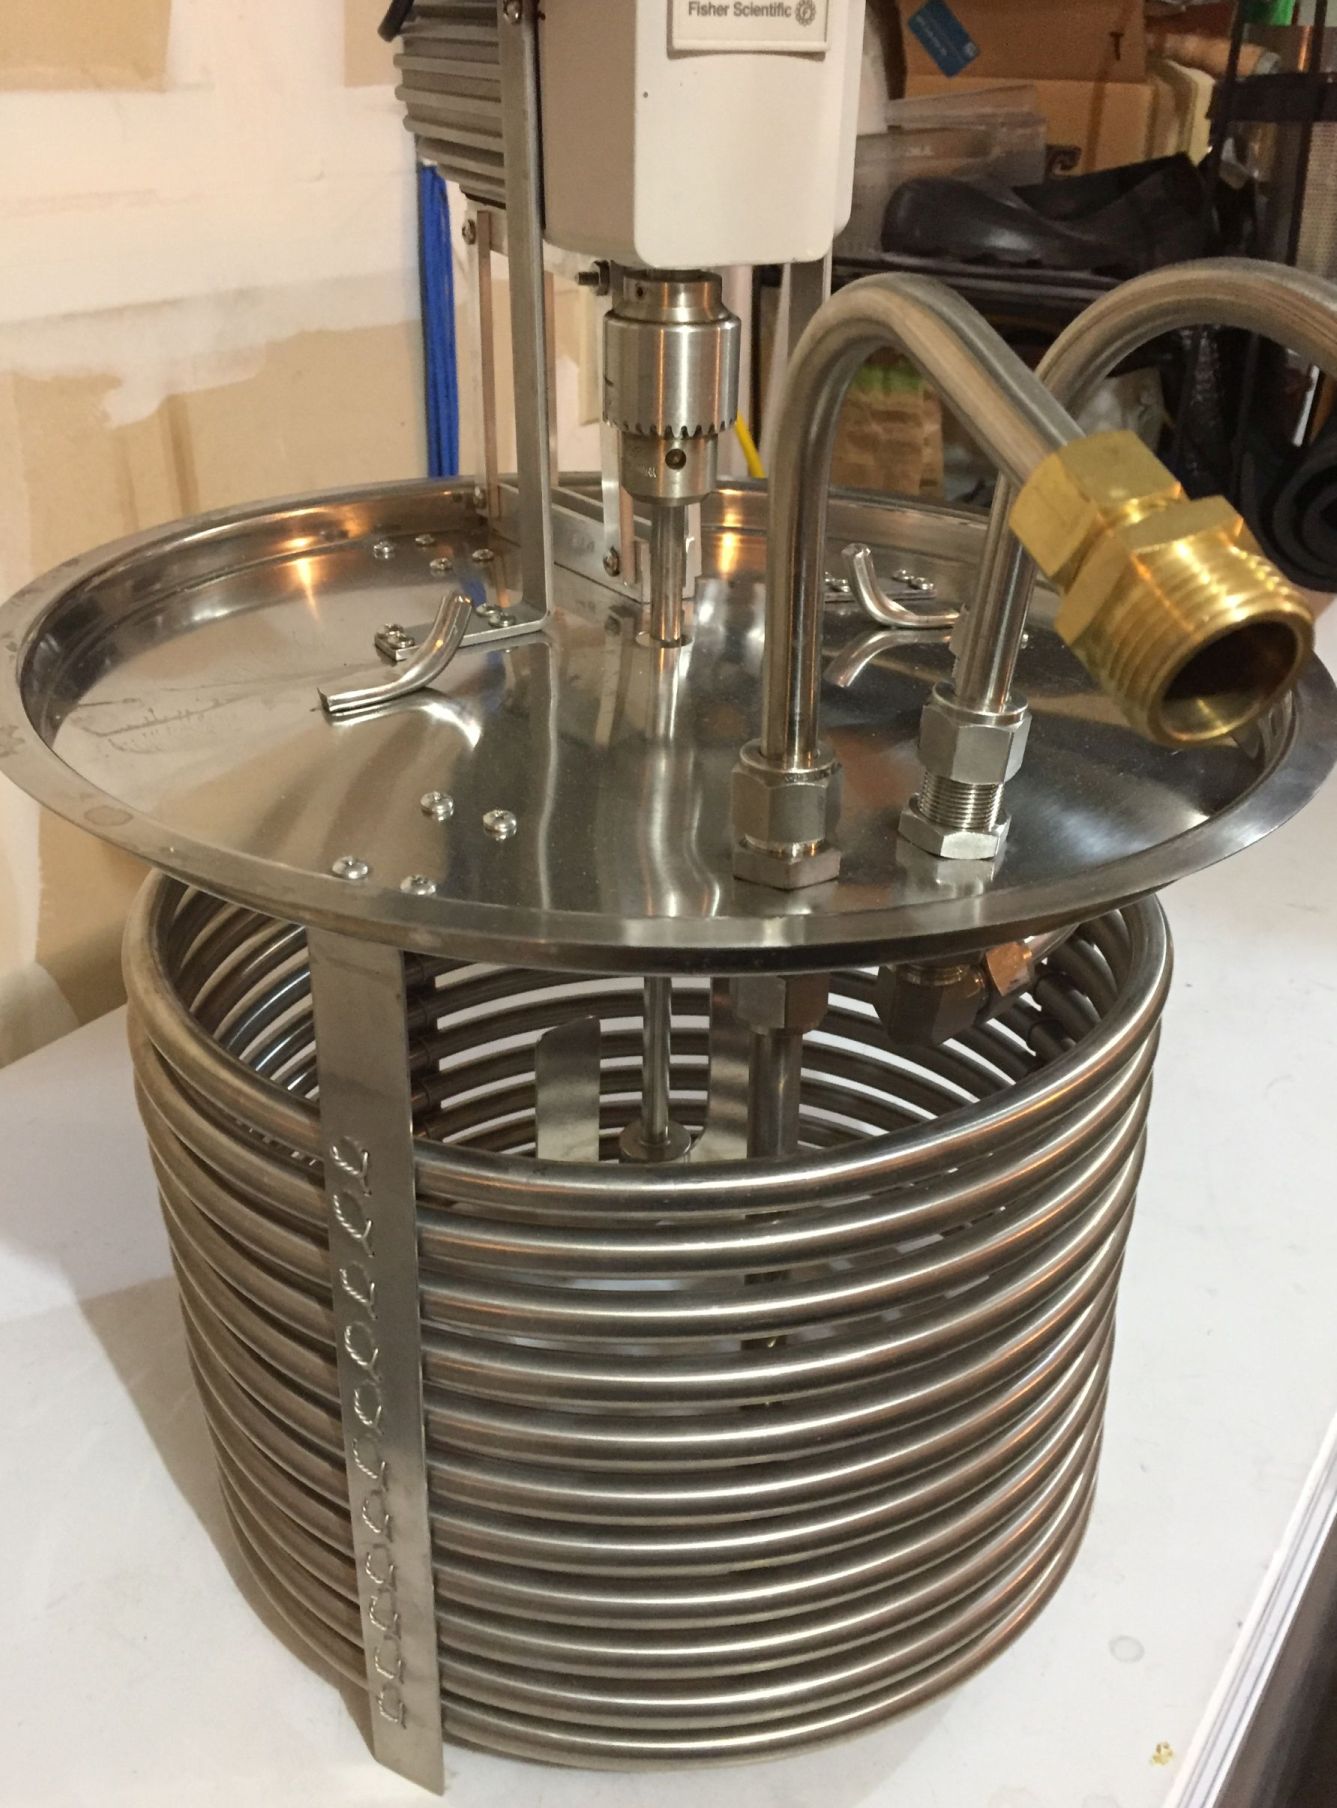
A few years ago I decided to eliminate copper in my end to end brewing process and picked up a 50 foot 1/2" SS IC.
It worked pretty well - faster than my home-wound 50' CU IC - but that used 3/8" tubing which is a pretty big difference.
Anyway, one thing that always bugged me was the inside of the IC was a dead zone wrt wort movement.
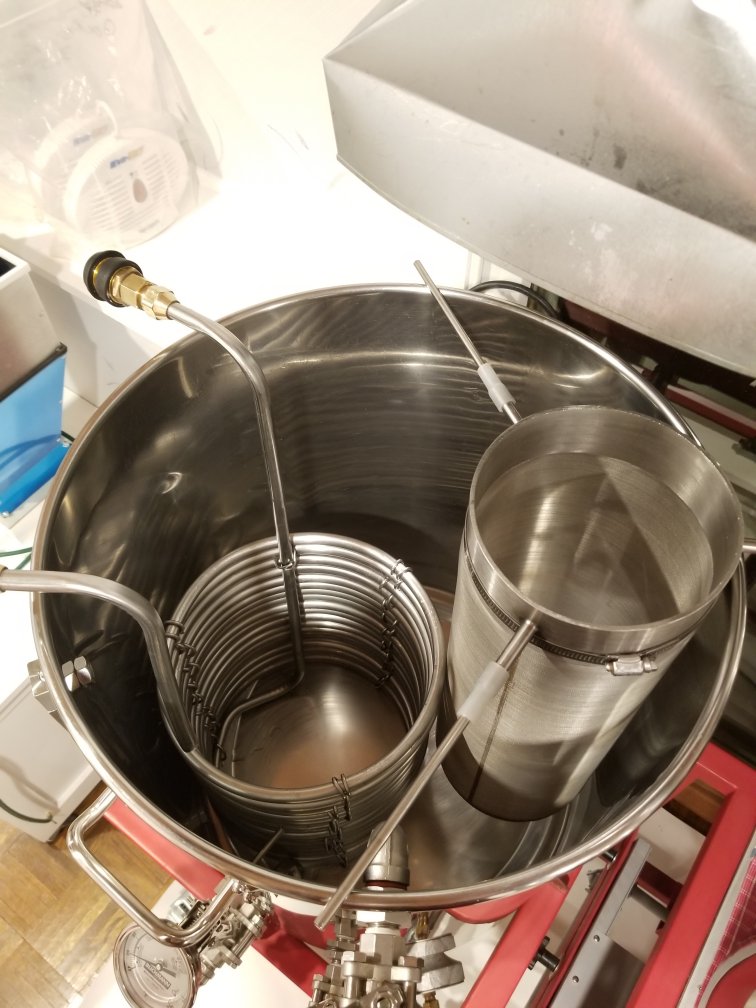
My flat-out whirlpooling (6-7 GPM) had to make a huge excursion around the IC instead of having at least some of the flow run through the coil stack.
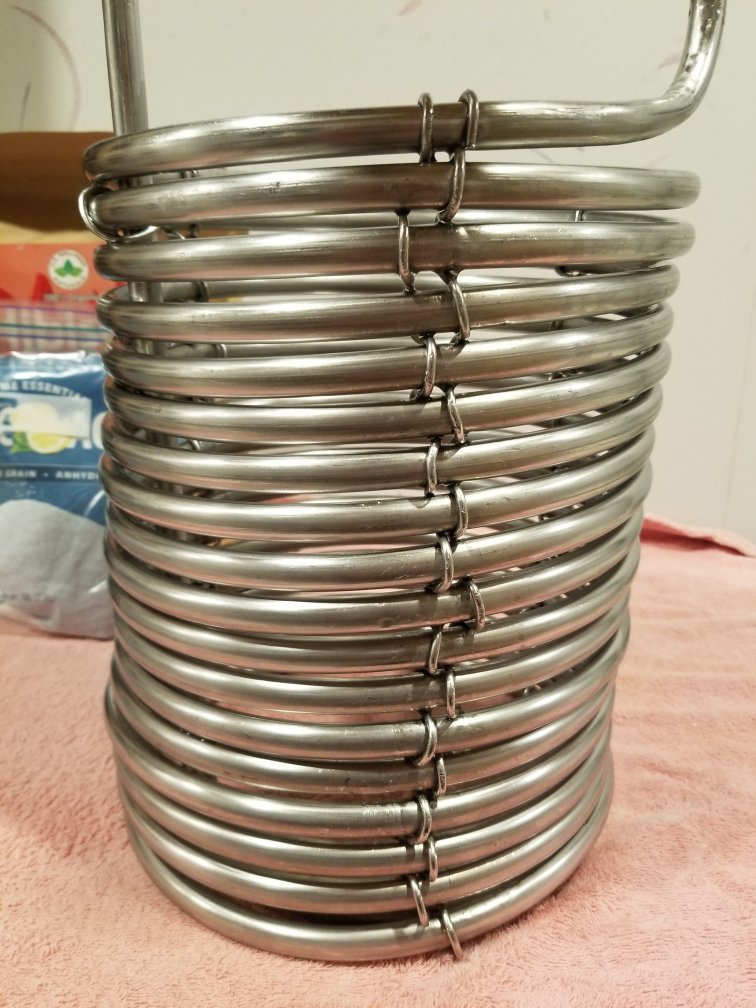
And it wasn't hard to figure: almost the entire length of each loop was slammed tight to its neighbors,
from almost the bottom to almost the top, in a 19 loop stack. I wish I had a picture of the IC in its pristene state.
I tried simply loosening the clamps that held everything in place but instead of uniformly expanding the stack it threw a bulge to one side.
No bueno. I tried manhandling the thing but other than repeated finger pinches all I managed to do was further distort the loops.
So I clamped it tight again and lived with it.
But I've hankered to do something about it for years, just didn't have any great ideas on how. Still don't
I had considered SS wire, but really didn't think it could be done.
But I finally bit the bullet a week ago, picked up a 23 foot coil of "fully annealed" 1/8" thick solid 304 stainless steel wire from McMaster-Carr,
and figured/hoped I'd find some way to thread it through the stack in three pairs of interwoven runs positioned evenly around the circumference for stability.
I'll say right here, "fully annealed 1/8" SS solid wire" is nowhere near as flexible as one might hope.
The stuff is a ***** to bend, but it does stay bent, so that's something.
So right off I had to decide how long to make each wire. Running short would totally suck, but excessive length would make things that much harder.
I wanted to weave a pair of wires against each other to keep all the tubing square/plumb, so I decided to use the full circumference
of the 1/2" tubing multiplied by the number of loops in the stack (plus one), double that, and add a few inches for insurance.
That math worked out to 72" for each of three wires.
Next I found the middle of each wire and made a 1/2" radius bend at that spot, then positioned each wire one third of the way around the coil.
Then I clamped the bottom loop to a piece of 3/4" plywood using hard copper pipe brackets in between the wire positions.
The plywood would allow me to hold the IC in place while working.
So, off I went, full of trepidation (did I mention the wire is a ***** to bend?)
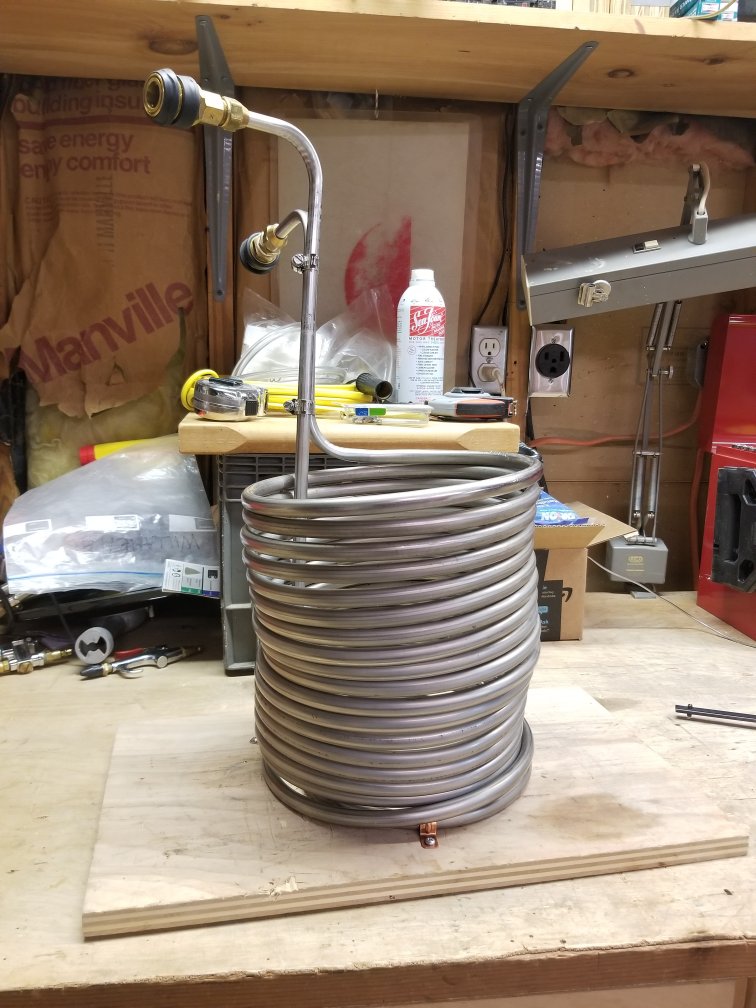
First pic is the IC in its manhandled condition. You can see I managed to open up some gaps,
but I wanted much more than that. Plus, symmetry would be nice as a straight stack
wouldn't prevent my 6" SS spider from occupying the kettle as well.
Next, the folded wires are in place.

Then "SPROING!" Clamps released, stack gone haywire, and I'm off!

At this point I had managed to find a repeatable process to get a few loops bound together, and had gotten to where I was beginning to think I had a
realistic chance of pulling this off. I found a 12" channelock along with a 10" channelock allowed holding a wire loop snug to a tube so
it wouldn't back out while using the other pair to roll the wire tight over the next tube section. Also, a third clamp kept pairs of tubing
parallel to the stack didn't develop a lean, while a pair of MDF wedges gave me the space above the tube to pass the ends of the SS wire
through the stack a lot easier.
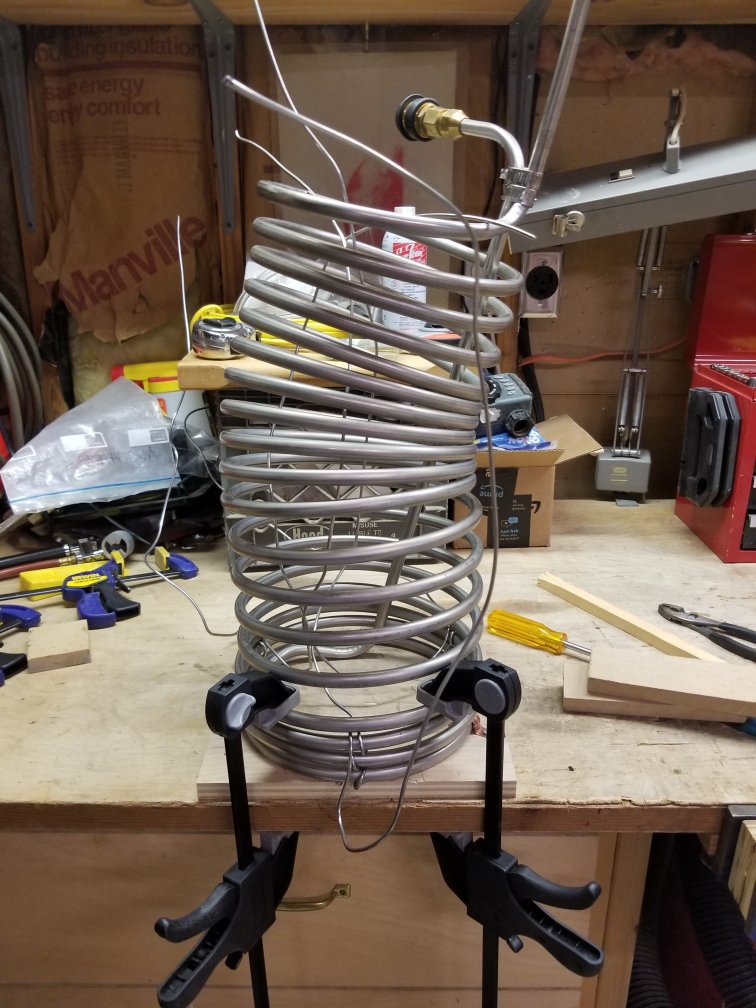
This was the end of the first session, a little over three hours of effort. Six loops bound in three places, and my hands were sore as hell
and nicked in a couple places. Time for many beers - and a couple of Band-Aids! By this time I had cut the plywood base down to the minimum
to allow better leverage with the clamps. I was a little concerned that because I couldn't keep the wire as tight through its weave as
"circumference" implies I was going to run out of wire before the full IC was bound up.
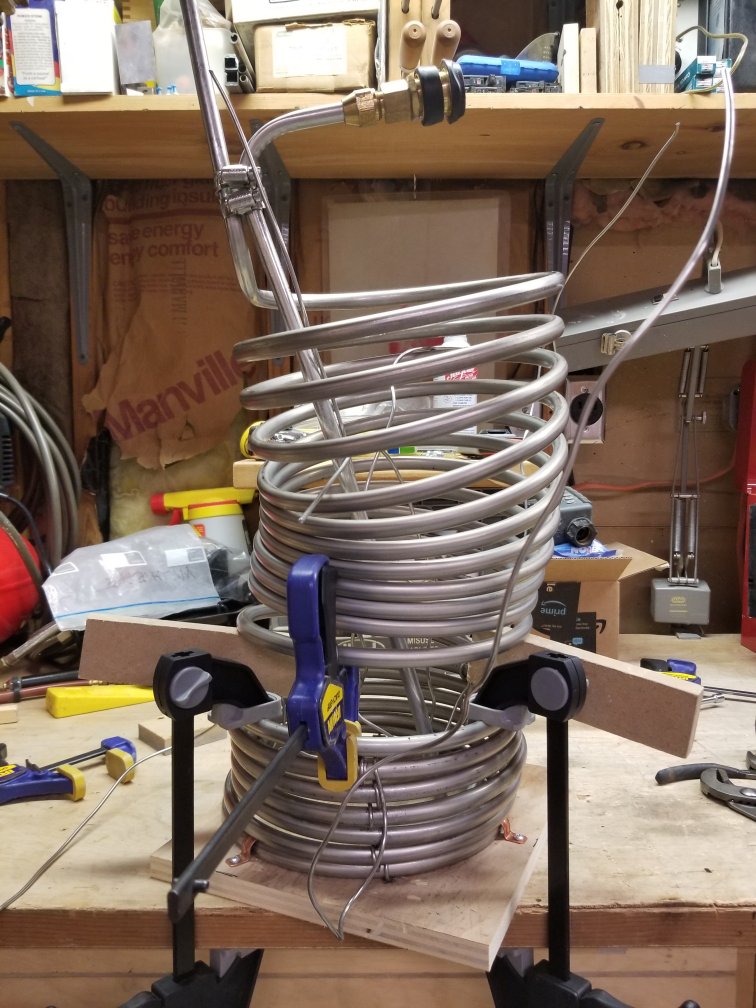
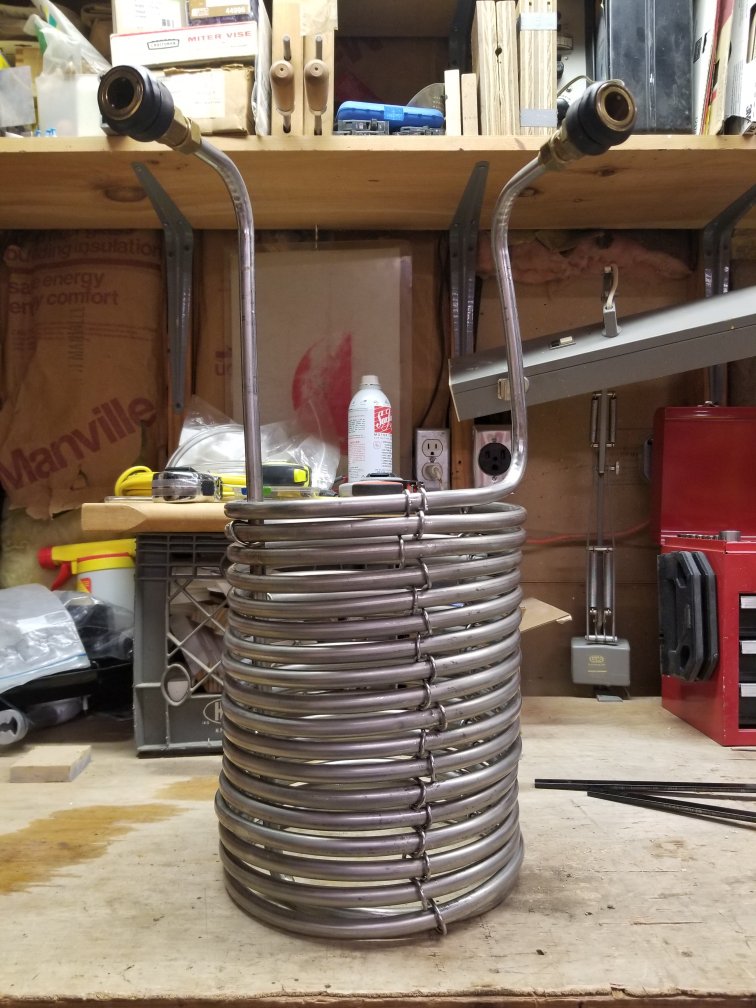
I worked on the coil for a few hours Sunday and Monday and managed to get the full coil bound together.
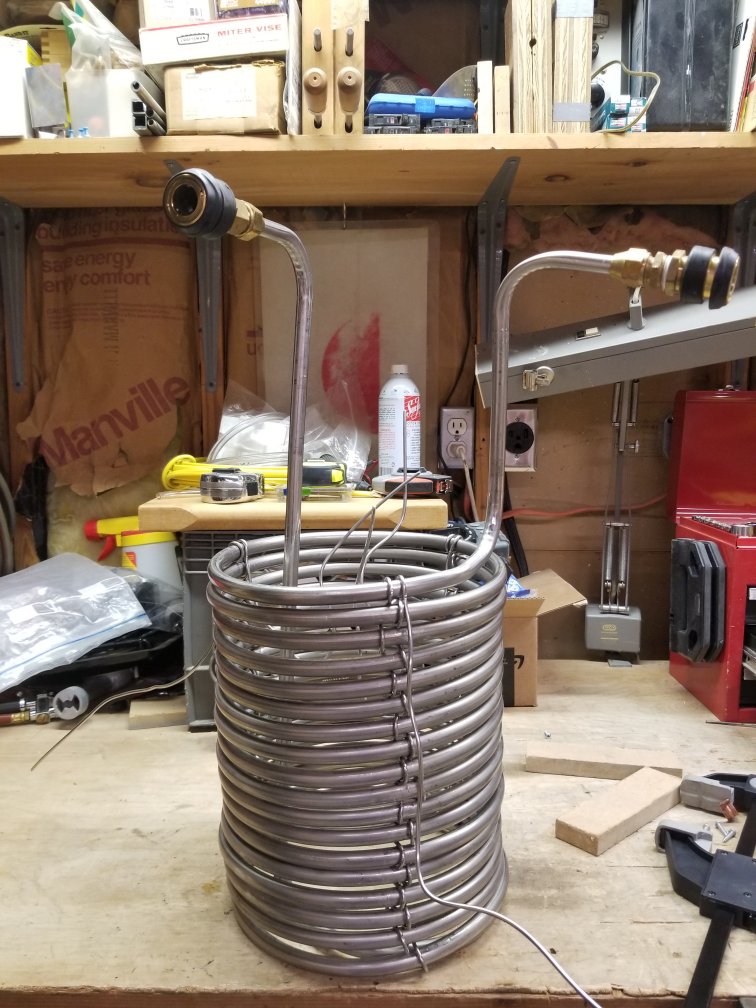
Cannot cut this stuff without the compound hardened dykes that I don't possess, so I used a Dremel with a virgin fiber cutoff wheel - and a full face shield.
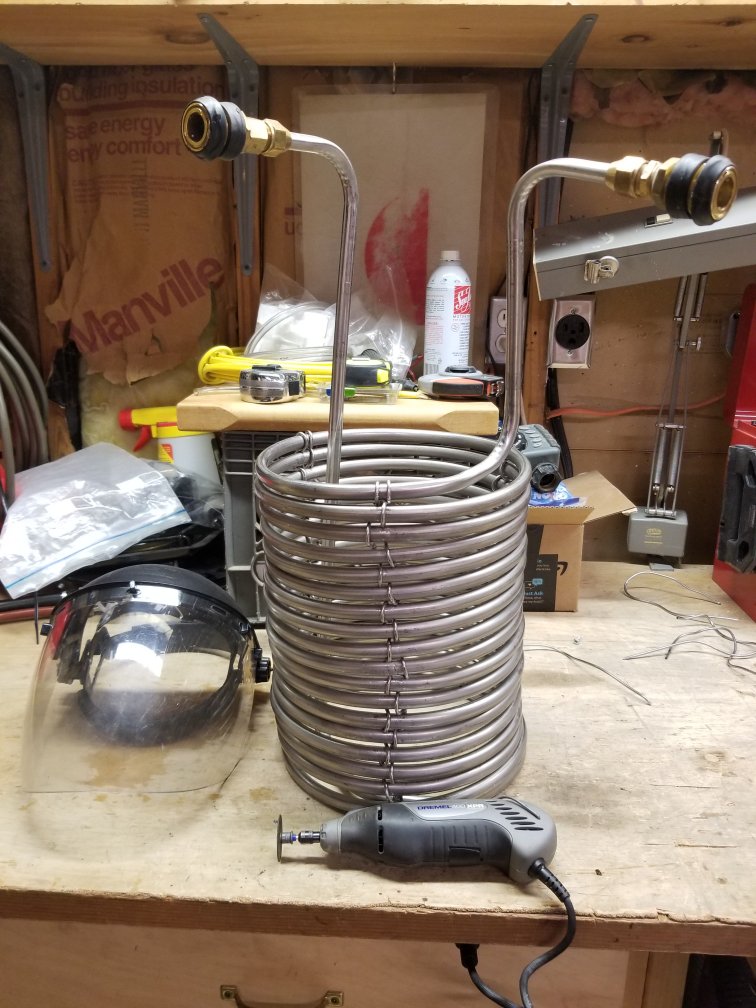
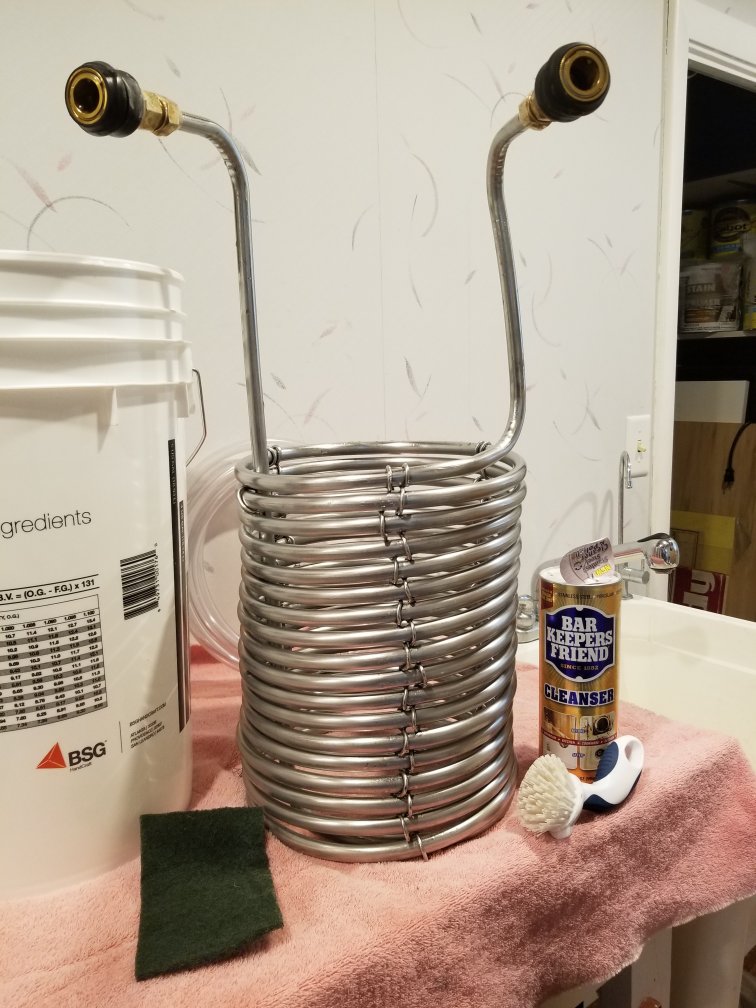
After pinching the tag ends into the gaps to keep them from snagging things it was ready for cleaning and passivation.
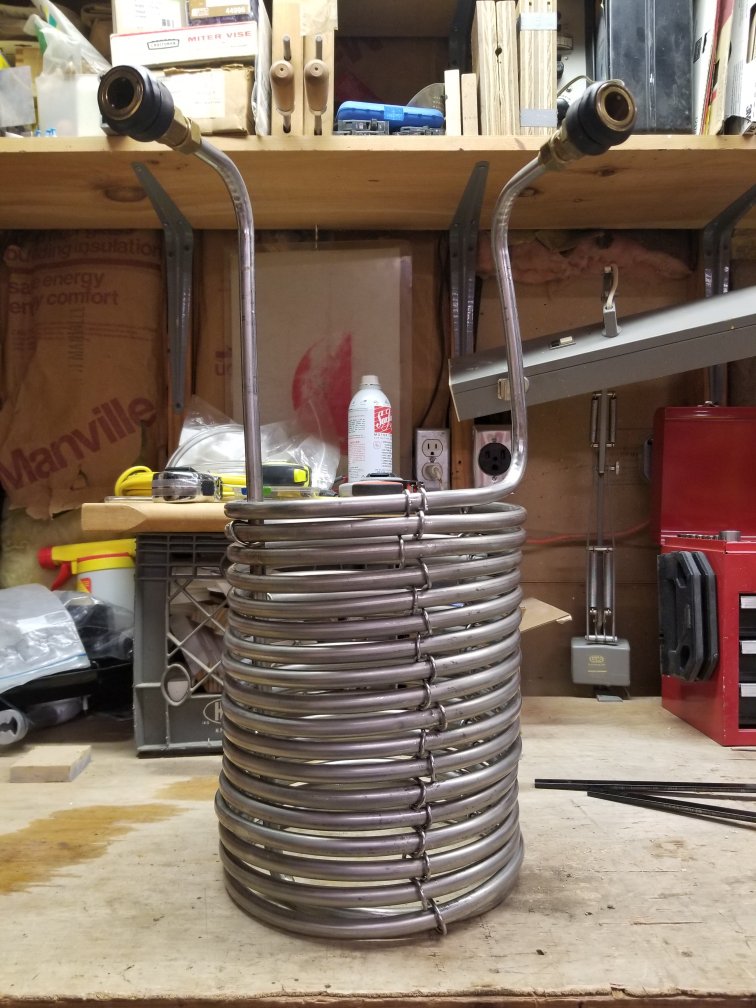
[to be continued]
Cheers!
It worked pretty well - faster than my home-wound 50' CU IC - but that used 3/8" tubing which is a pretty big difference.
Anyway, one thing that always bugged me was the inside of the IC was a dead zone wrt wort movement.
My flat-out whirlpooling (6-7 GPM) had to make a huge excursion around the IC instead of having at least some of the flow run through the coil stack.
And it wasn't hard to figure: almost the entire length of each loop was slammed tight to its neighbors,
from almost the bottom to almost the top, in a 19 loop stack. I wish I had a picture of the IC in its pristene state.
I tried simply loosening the clamps that held everything in place but instead of uniformly expanding the stack it threw a bulge to one side.
No bueno. I tried manhandling the thing but other than repeated finger pinches all I managed to do was further distort the loops.
So I clamped it tight again and lived with it.
But I've hankered to do something about it for years, just didn't have any great ideas on how. Still don't
I had considered SS wire, but really didn't think it could be done.
But I finally bit the bullet a week ago, picked up a 23 foot coil of "fully annealed" 1/8" thick solid 304 stainless steel wire from McMaster-Carr,
and figured/hoped I'd find some way to thread it through the stack in three pairs of interwoven runs positioned evenly around the circumference for stability.
I'll say right here, "fully annealed 1/8" SS solid wire" is nowhere near as flexible as one might hope.
The stuff is a ***** to bend, but it does stay bent, so that's something.
So right off I had to decide how long to make each wire. Running short would totally suck, but excessive length would make things that much harder.
I wanted to weave a pair of wires against each other to keep all the tubing square/plumb, so I decided to use the full circumference
of the 1/2" tubing multiplied by the number of loops in the stack (plus one), double that, and add a few inches for insurance.
That math worked out to 72" for each of three wires.
Next I found the middle of each wire and made a 1/2" radius bend at that spot, then positioned each wire one third of the way around the coil.
Then I clamped the bottom loop to a piece of 3/4" plywood using hard copper pipe brackets in between the wire positions.
The plywood would allow me to hold the IC in place while working.
So, off I went, full of trepidation (did I mention the wire is a ***** to bend?)
First pic is the IC in its manhandled condition. You can see I managed to open up some gaps,
but I wanted much more than that. Plus, symmetry would be nice as a straight stack
wouldn't prevent my 6" SS spider from occupying the kettle as well.

Next, the folded wires are in place.

Then "SPROING!" Clamps released, stack gone haywire, and I'm off!

At this point I had managed to find a repeatable process to get a few loops bound together, and had gotten to where I was beginning to think I had a
realistic chance of pulling this off. I found a 12" channelock along with a 10" channelock allowed holding a wire loop snug to a tube so
it wouldn't back out while using the other pair to roll the wire tight over the next tube section. Also, a third clamp kept pairs of tubing
parallel to the stack didn't develop a lean, while a pair of MDF wedges gave me the space above the tube to pass the ends of the SS wire
through the stack a lot easier.

This was the end of the first session, a little over three hours of effort. Six loops bound in three places, and my hands were sore as hell
and nicked in a couple places. Time for many beers - and a couple of Band-Aids! By this time I had cut the plywood base down to the minimum
to allow better leverage with the clamps. I was a little concerned that because I couldn't keep the wire as tight through its weave as
"circumference" implies I was going to run out of wire before the full IC was bound up.

I worked on the coil for a few hours Sunday and Monday and managed to get the full coil bound together.

Cannot cut this stuff without the compound hardened dykes that I don't possess, so I used a Dremel with a virgin fiber cutoff wheel - and a full face shield.

After pinching the tag ends into the gaps to keep them from snagging things it was ready for cleaning and passivation.

[to be continued]
Cheers!


