- Joined
- Feb 17, 2018
- Messages
- 345
- Reaction score
- 41
All,
My apologies, but I have searched for hours for a post.
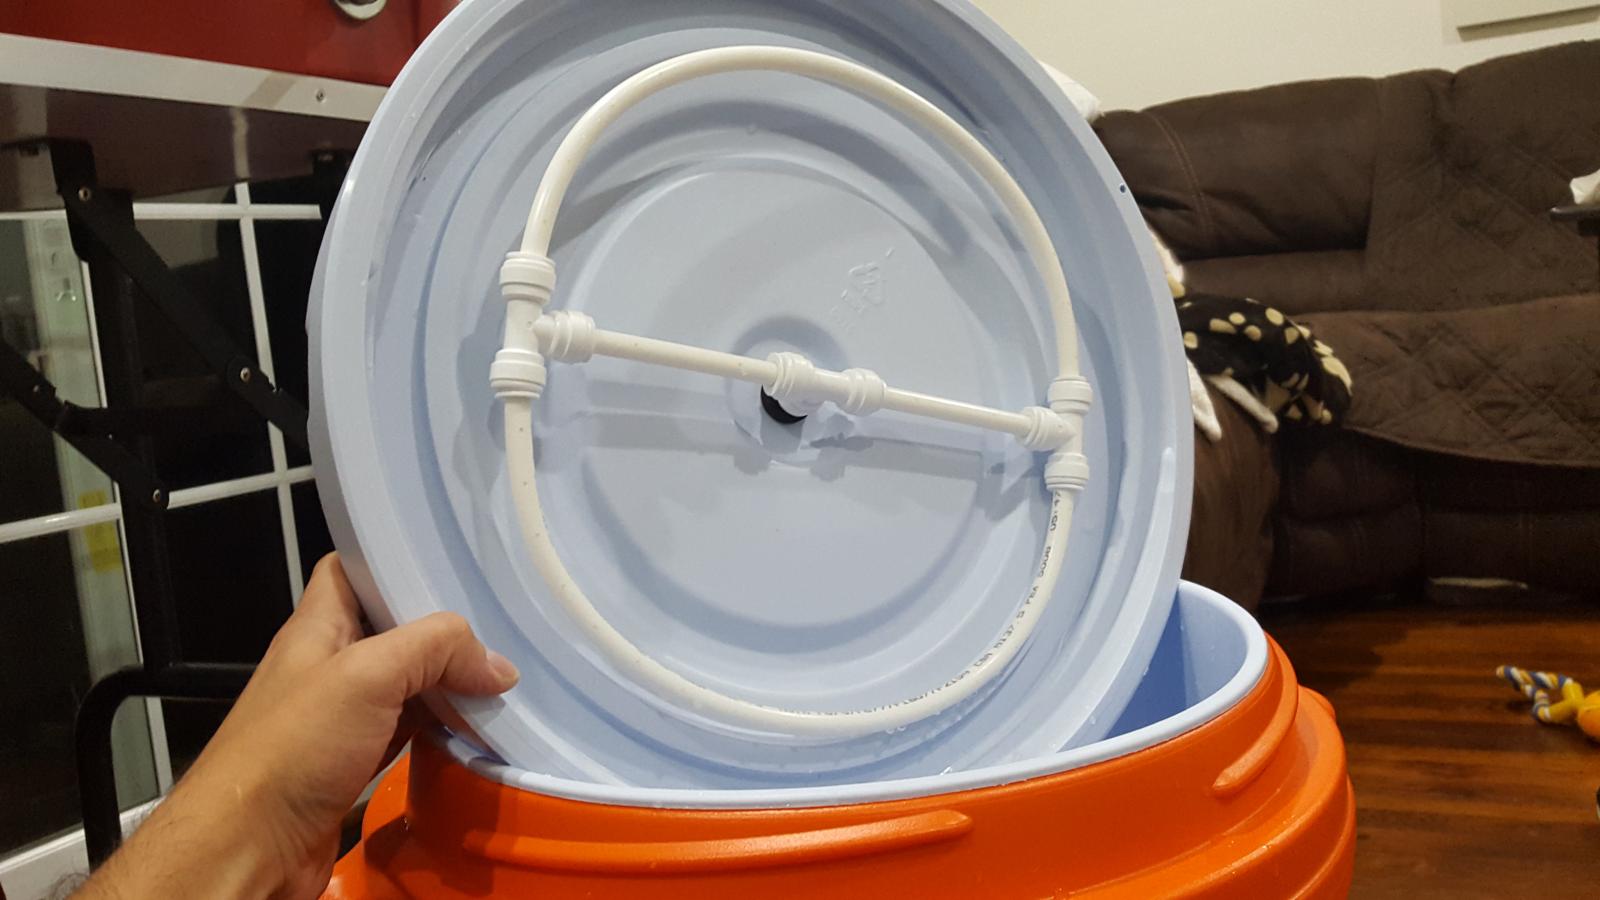
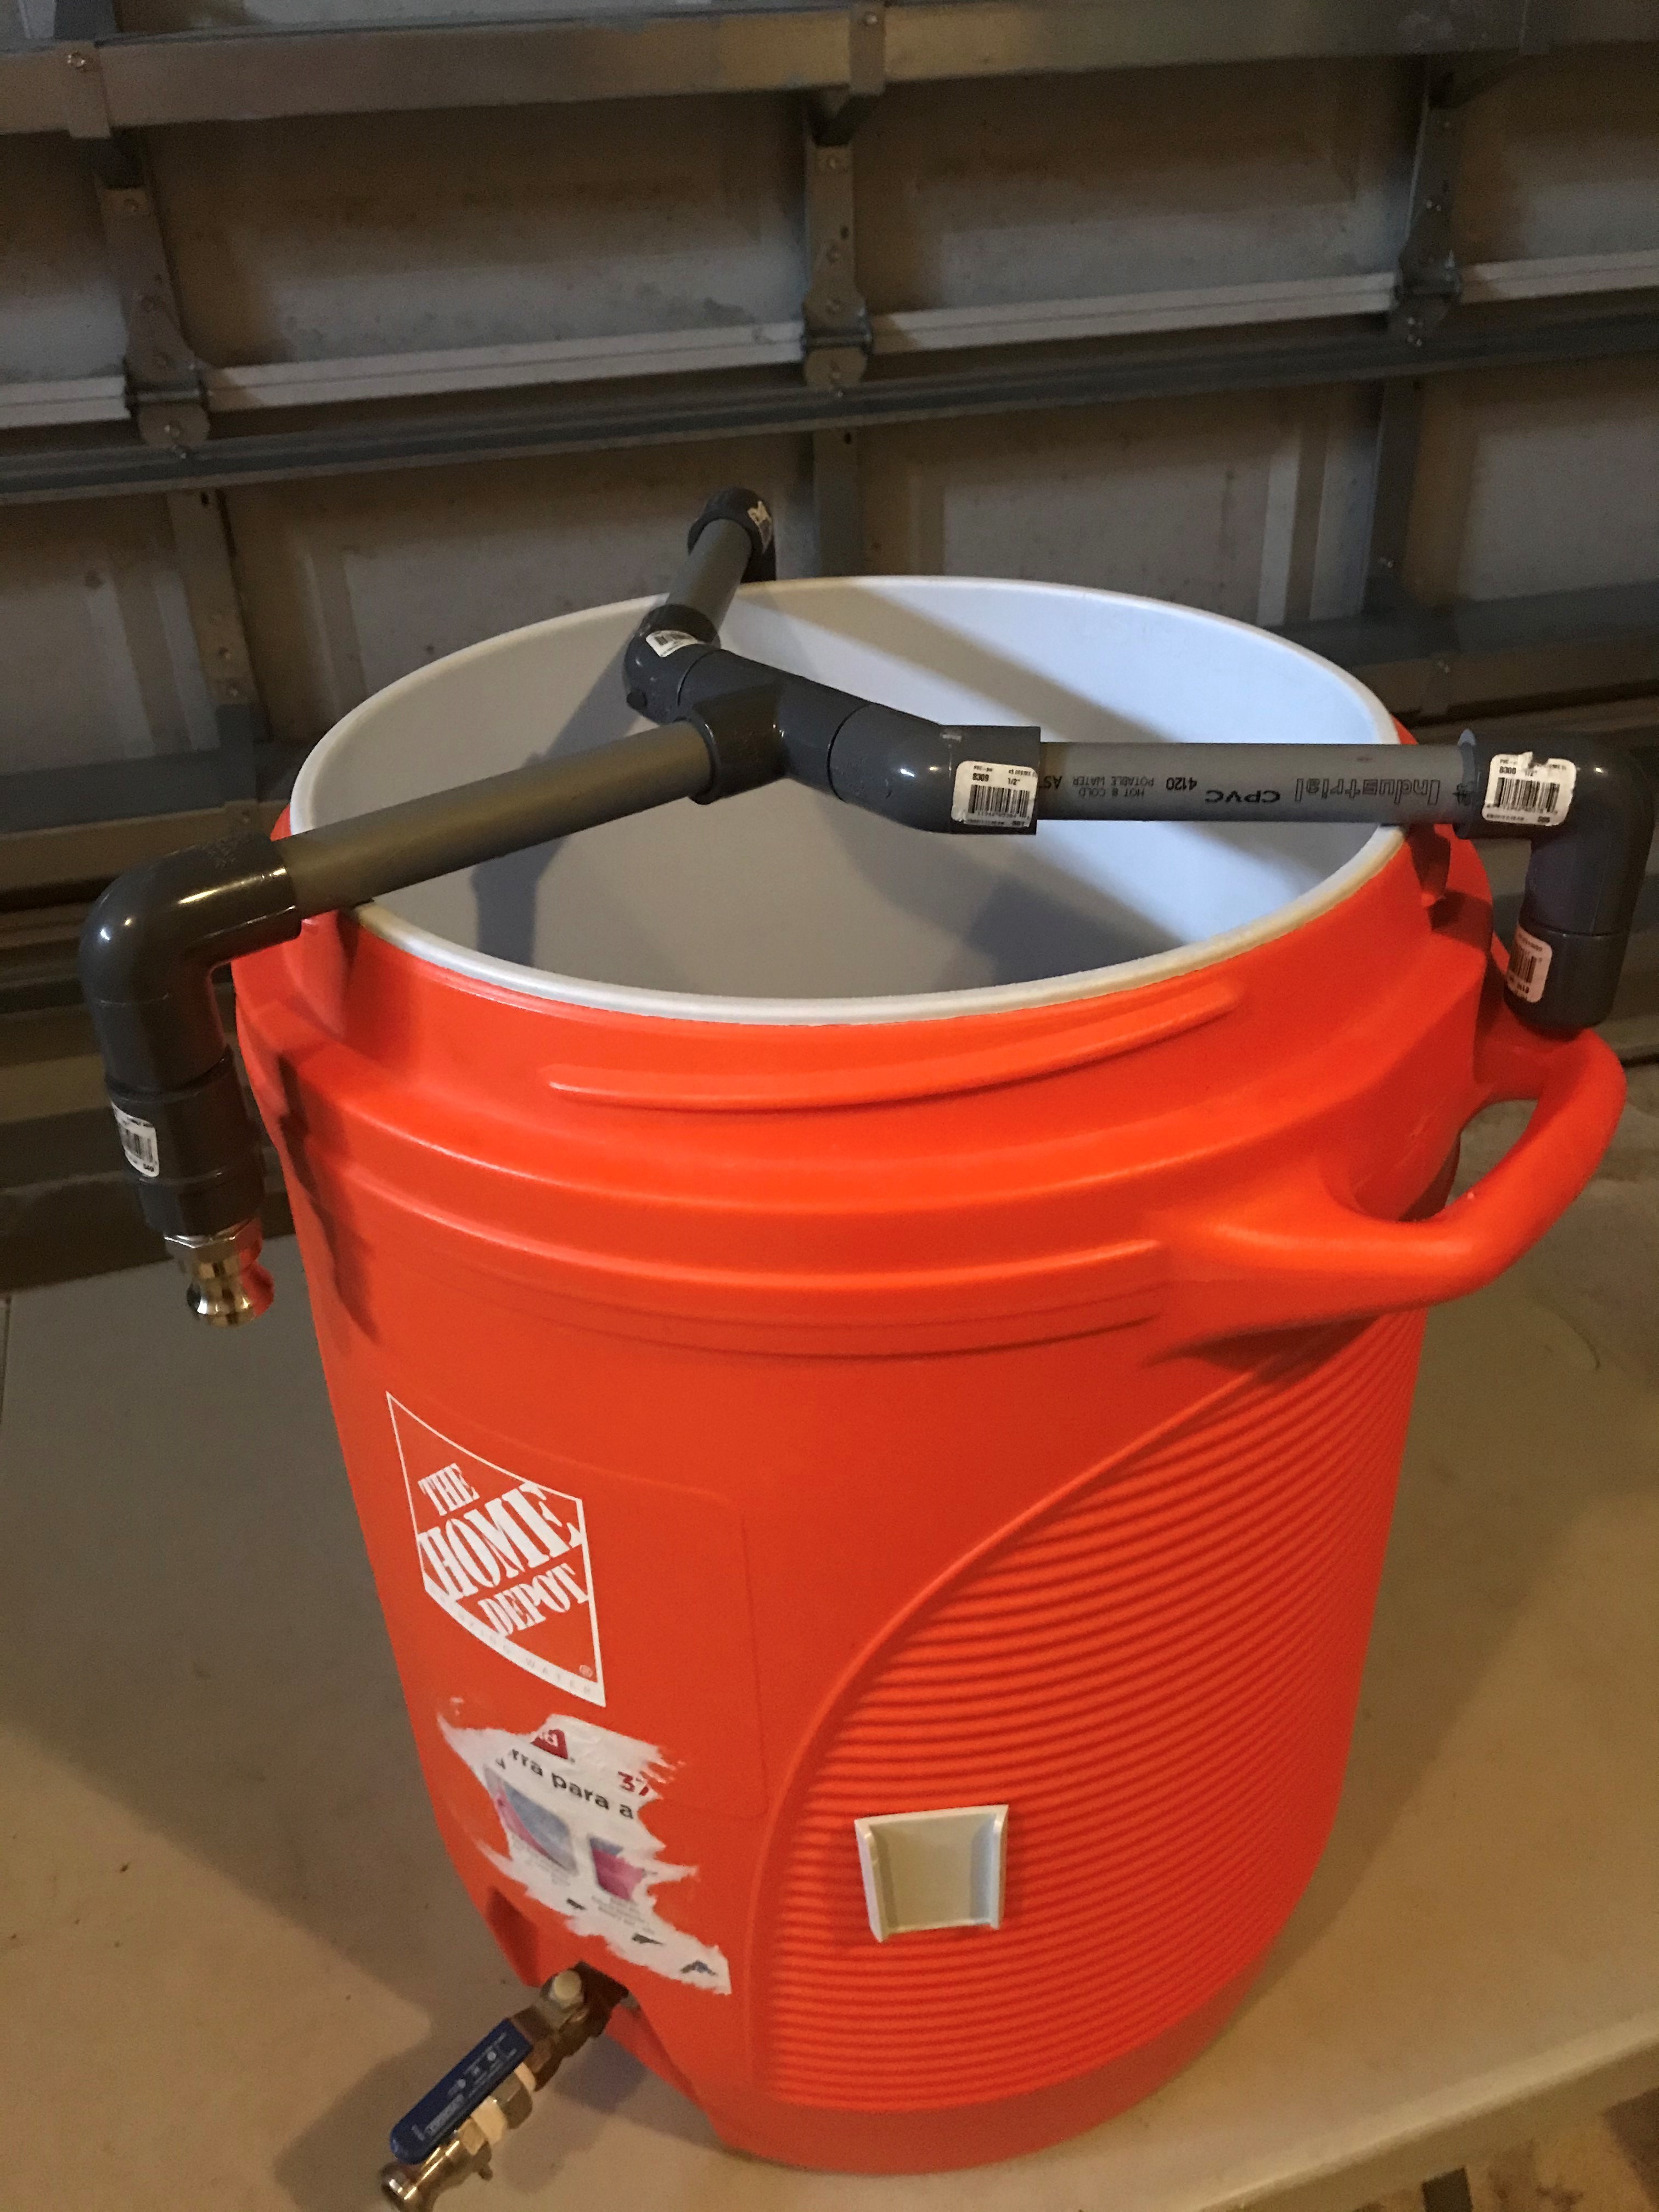
It shows how to use the lid of the cooler with PEX tubing (small white tubing from Home depot), 2 "T" junctions, and parts to mount it to the lid. On the top side, it connects to water and holes are drilled in the tubing. I've attached a photo of it (I found it almost a year ago when I just started brewing).
Any help locating this would be great. I have seen several copper tubing options in my searches, but I am looking for this one specifically.
Thanks!
My apologies, but I have searched for hours for a post.
It shows how to use the lid of the cooler with PEX tubing (small white tubing from Home depot), 2 "T" junctions, and parts to mount it to the lid. On the top side, it connects to water and holes are drilled in the tubing. I've attached a photo of it (I found it almost a year ago when I just started brewing).
Any help locating this would be great. I have seen several copper tubing options in my searches, but I am looking for this one specifically.
Thanks!