First kegerator build with new to me old GE fridge

Homebrew Talk - Beer, Wine, Mead, & Cider Brewing Discussion Forum

Help Support Homebrew Talk - Beer, Wine, Mead, & Cider Brewing Discussion Forum:

This site may earn a commission from merchant affiliate links, including eBay, Amazon, and others.

Funke1

Member
Joined
Mar 3, 2017
Messages
9
Reaction score
0
First post. I've been lurking this forum for years and lusted over all the cool builds you guys have done.

My girlfriend's cousin is remodeling her basement and asked me if I would like to have her grandmother's old fridge for the price of hauling it up the stairs. I only planned my whole day around it lol.

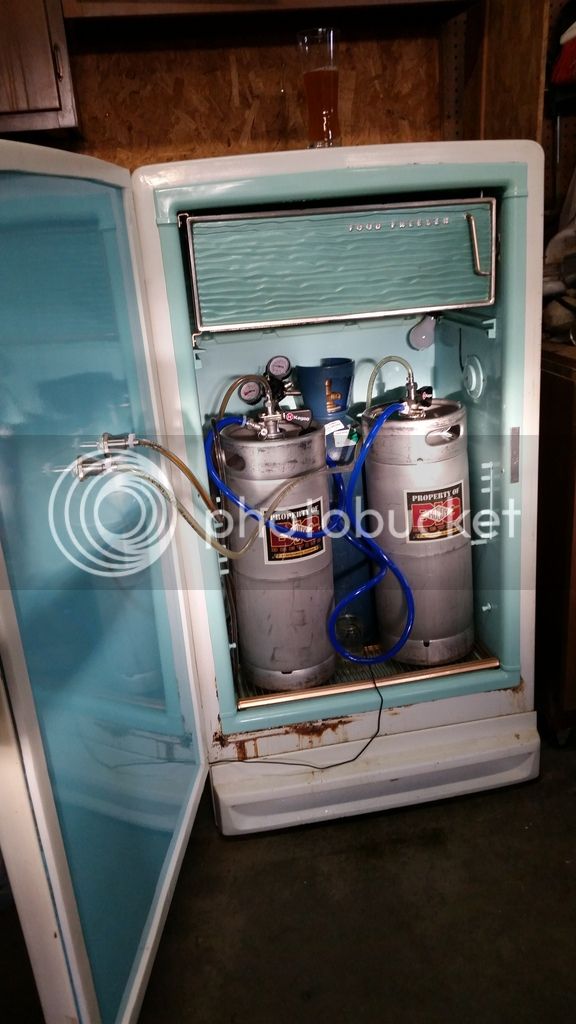
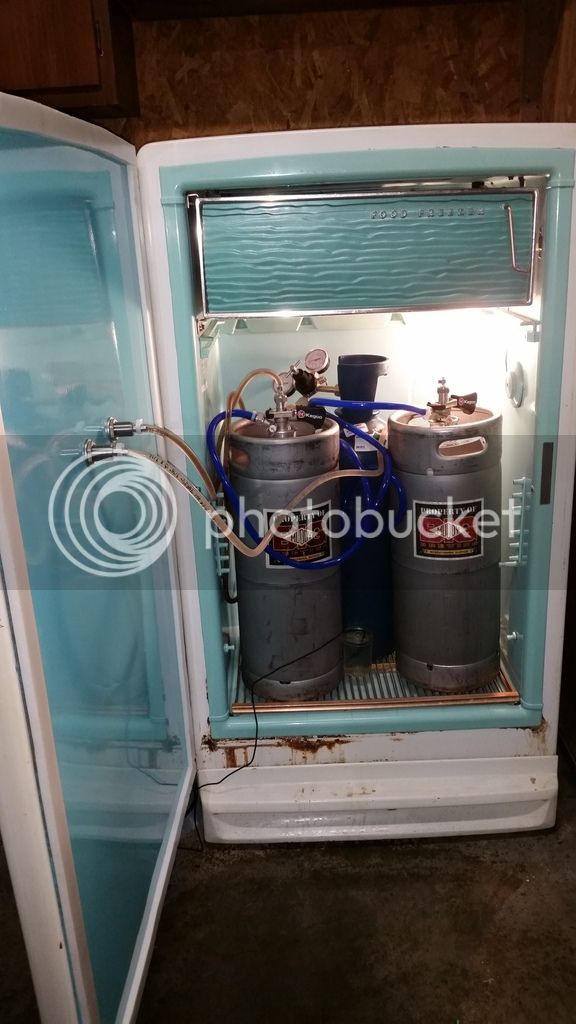
The fridge runs great and they have plugged and unplugged it several times over the years for parties. I've kept my beer cold in it many times.

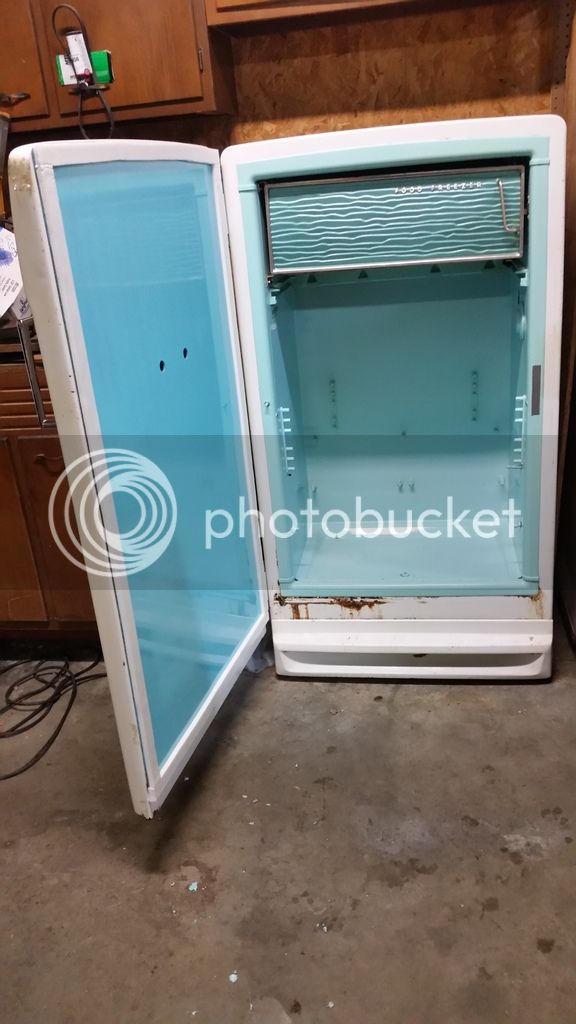
It is a General Electric model LB30NB1 with the "1" stamped in. Going by GE's dating site, the first letter of the serial number represents the month, the second letter, the year. The serial of this fridge starts with "YM". Y doesn't match up to any month, but M matches 1955. Most of this style fridge that I have seen had a lazy Susan style rotating shelf system. Some had a foot pedal that rotated the shelves. This one had had basic wire shelving and lower crisper drawers. I'm assuming it was an early "base" model, or a later 1960s model as it has a magnet door instead of a latching system.

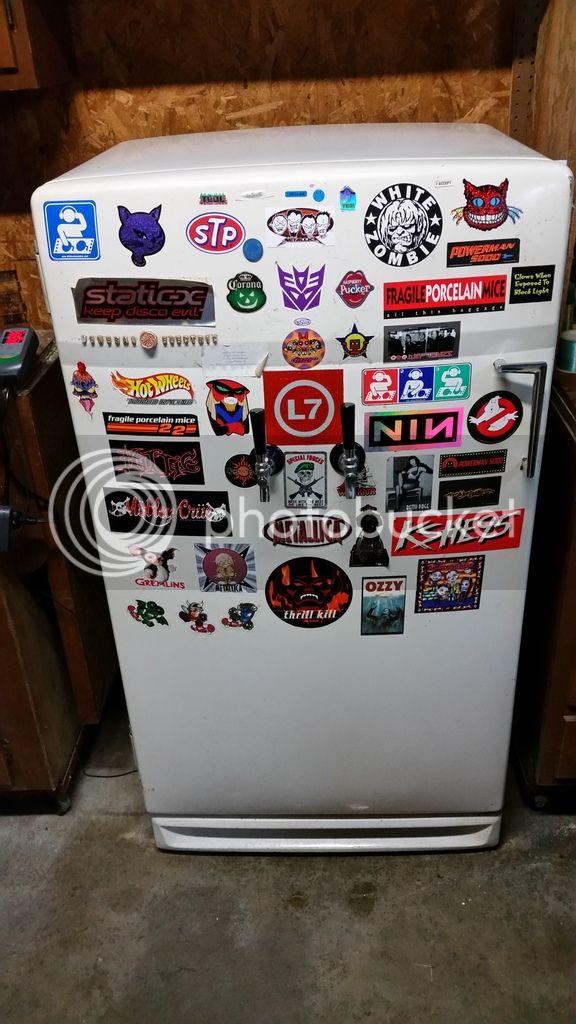
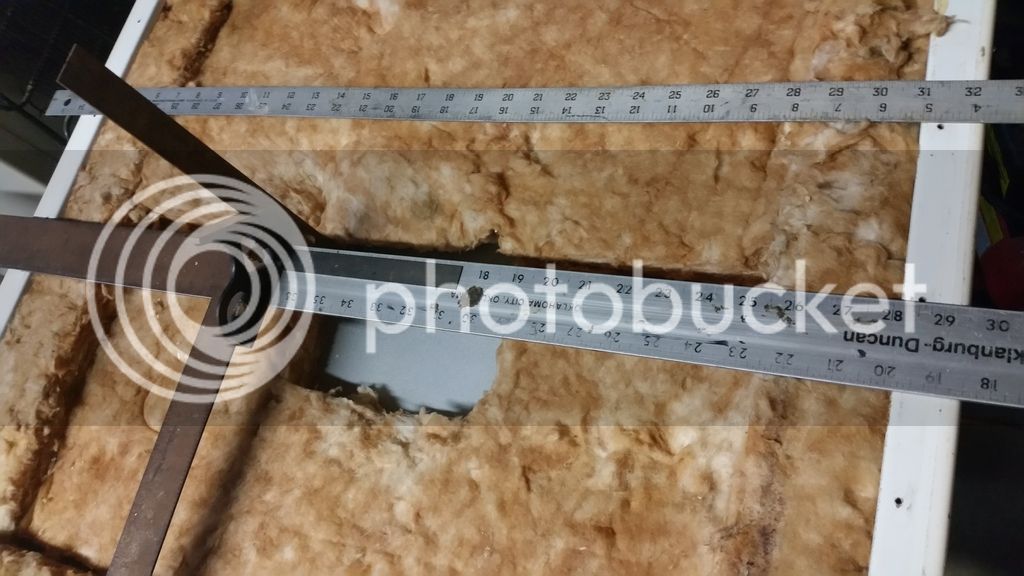
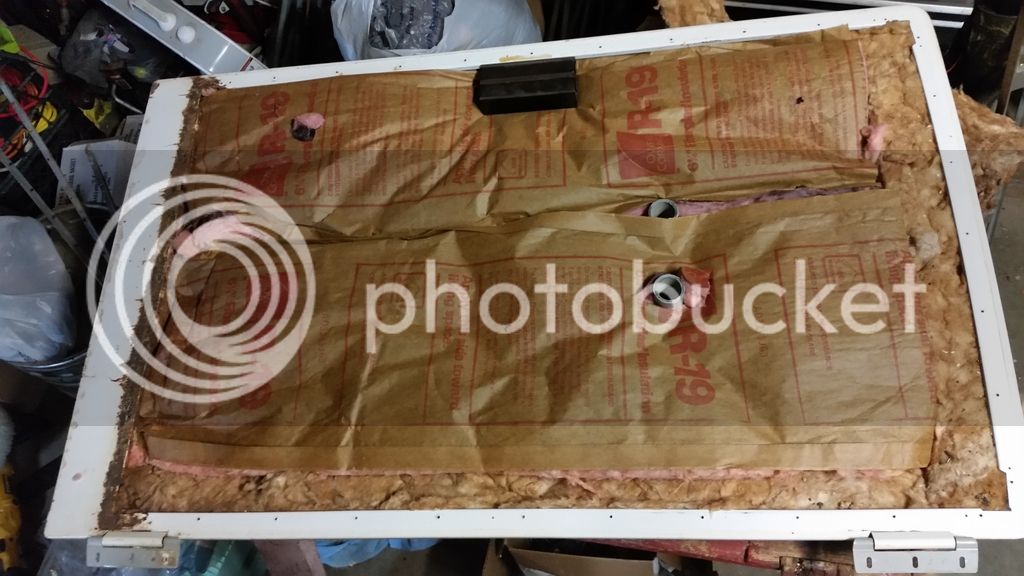
The door seal had a huge chunk missing, and the lower metal strip was completely rusted through into dust. The door panel is plastic and has the magnets built in. It has been cracked and repaired many times, and will crack and break if you look at it wrong.

My plan is to replace the door panel with something different and use weather stripping to replace the seal.
I'm posting from my cell phone, so I'll include pictures in my next post.
 
I got some work done to the fridge. :ban:

I carefully cut the recessed part of the door panel out with a dremel and used it as a pattern for an 1/8" sheet of water resistant paneling. I believe it is coated phenolic.

Just by eyeballing it, I was able to find a close shade of spray paint to match the aqua marine/teal-ish color of the inside.

I also cleaned up the rest of the fridge and did some buffing to the paint.


20170226_170214_zpsg39lsmgs.jpg
[/URL][/IMG]

20170303_201400_zpsxueevobq.jpg
[/URL][/IMG]

20170227_205351_zps0u0z3sl4.jpg
[/URL][/IMG]

20170228_223155_zpscwe0omeb.jpg
[/URL][/IMG]

20170302_220818_zpsn6tjfahw.jpg
[/URL][/IMG]

20170302_212219_zpsnzsyfig5.jpg
[/URL][/IMG]

20170303_183110_zpsqv72fjea.jpg
[/URL][/IMG]

20170304_153041_zpsmoyywiqy.jpg
[/URL][/IMG]

20170304_173437_zpshhksxtia.jpg
[/URL][/IMG]

20170304_182352_zpsv9fzczby.jpg
[/URL][/IMG]
 
I love those old fridges! I have a frigidarie that was built in 1949 that works awesome! I'll have to try buffing it like you, made a big difference. Looks good so far. And those stickers are a keeper!
 
Thank you. I detail cars for a living and have a lot of experience working with clear coated and lacquer based painted surfaces.

I say "buffed" as a general term. I use my buffer only with heavy cut compound to remove a lot of material quickly. It spreads a lot of dust, creates swirls, and excess compound is difficult to remove if not immediately removed. For this, I used my random orbiter DA and some correction compound just to see what it would do.

When you buff a clear coated surface, you are only working the clear coat. When you buff a painted surface like this, you are removing the top layer of paint. What happens is, the paint soaks up all your compound, and your pad soaks up all the paint and crap that came off with it. This reduces your efficiency and only smears stuff around.

So what you want to do is clean your pad every time you add compound and only work small areas at a time. I found that the best way to do this is to use an air compressor with a spray nozzle set to 100+ psi and blast all the crap out of the pad between passes.

Since the paint soaked up as much correction compound as it did, that tells me that it could use a heavy cut with the buffer, followed by a light correction compound pass with the DA to remove swirls and provide a polished finish, followed by a coating of wax.

Once I do that, the paint will be protected from any further rust and grime that it comes in contact with and provide an easy clean up.

There have been times when I was cleaning windows after a buff and wax job and set a bottle of glass cleaner on the hood, only to have it slide right off.

Yes, I do love the stickers too, and will work around them.
 
That's some good info, i don't have a DA but I have a buffer so maybe I'll give that a try.

Keep us posted on your progress, looks good so far.
 
I got my all stainless double tap keg kit in from Kegco. Unfortunately, I mistook that a 4 1/8" shank is actually the entire length of the shank and not the thickness of the door it will fit. These will only fit a 3" thick door.

I considered mounting directly to the outer shell of the door and running the lines through the door panel, but I read that the beer inside the shank will be warm and foamy and only waste beer. So now I guess I'm going to send these shanks back and get longer ones.
 
I totally forgot I had the same problem, I just mounted thin to to front part of the door. No foaming or anything.

I'm going to cut a bigger piece out of the inside and use a 2x4 against the front so they are more stable and "inside" the fridge.
 
Does it make a difference if I run it without the insulated drain pan under the freezer? I don't think it has much of any effect on frost build up, especially if I'm not opening the door very often.

My thinking is that the freezer wouldn't have to get as cold to keep the fridge at my desired temperature and would be more efficient without it.

It would also allow me to mount my shanks a few inches higher on the door. But now I'm wondering, how close can I place the shanks to the freezer coils before my beer lines freeze up? Would an inch away be sufficient?
 
I don't think it makes a difference if the pan is there or not and I don't think it's going to run any less. Mine has to be defrosted every few months no matter what and it will freeze outward onto the shelf, there's probably an inch of ice on mine now so it's time to defrost. Depending on how far the coil comes down and how high you mount your shanks it is a possibility that they will freeze.

I have my shanks mounted below the "freezer" and I've not had a freezing problem but I have the plate there also.

If you are going to be an inch away I would think it would be ok but I'm not sure, maybe get one of those freeze pops and hang it in where you want to put a shank and see if it freezes.
 
The more I read about people having issues with beer lines freezing, the more I feel like I should err on the side of caution. So I think I'm going to mount them below the drain pan. Hopefully, tonight if I have time.
 
Sorry it's been a while. I've been working a ton of overtime and have been trying to get this project near completion.

I spent a lot of time measuring before cutting any holes. I set these 5" apart in case I for some reason decide to mount a third tap between them.

20170323_221721_zpsxigqvixy.jpg


20170324_195001_zpsjxrxe8fa.jpg


I think I followed the curvature of the door pretty nicely.

20170324_200907_zpsjrndj8et.jpg


New insulation, pvc pipes for structural strength, and heavy duty magnet installed.

20170324_193057_zpsuzyjzlye.jpg


1 1/2" x 7/16" rubber foam insulation for the door seal and door mounted.

20170403_212142_zpsgb1wovm7.jpg


It fits! The girlfriend and I went to Big Muddy Brewery in Murphysboro, Illinois. We sampled some beers and returned home with a keg of their Galaxy IPA and a keg of Vanilla Coffee Stout.

20170403_215440_zpswizzsz9g.jpg


Equipment sanitized and kegs tapped. :mug: 
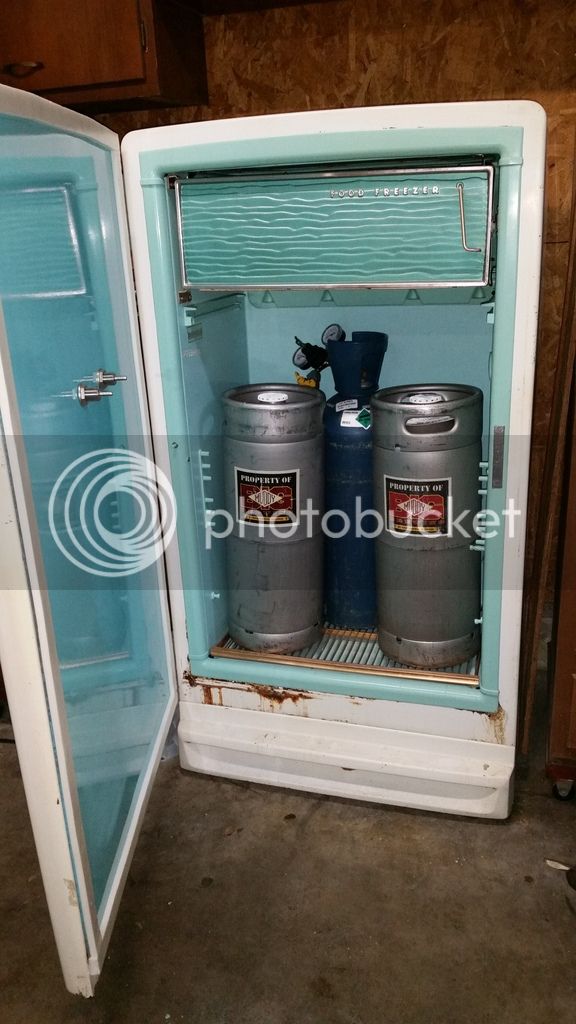
I used all stainless everything. 5' gas lines and 10' beer lines.

20170406_182641_zpsjuqttplr.jpg


20170404_192900_zpsn7qgabkx.jpg


I've got my temperature regulated with an Inkbird temperature controller set at 39*. Fridge temp knob set at 4 of 9 for low overshoot. This thing hardly ever runs.

20170405_205807_zps5m9twoiy.jpg


I initially set my regulator to 7psi and burped the kegs a few times to remove any air introduced to the kegs. The first few pulls were pretty flat and beer barely dribbled out. I upped it to 12psi and it poured a little better, but was still pretty flat. So then I upped my co2 to 20psi and left it there for a few days. I was then getting some nice head and bubbles, and the pour had a nice flow. I've since dropped it back down to 12psi to see how it would do, but I think the sweet spot is going to be around 16psi.

20170408_162249_zpsclcohpbu.jpg


The next thing I am going to do is build a base with some angle iron and castor wheels so I can easily move it around.
 
That looks great! The insulation is a good call. I have mine set around 10 but I have 20ft lines. And casters will be nice cause that fridge is heavy.
 
Great work! I love these kegerators, I have a similar build of my own going on: https://www.homebrewtalk.com/showthread.php?t=598984

Now that the weather has been better I've made a lot of progress sanding and painting so I'll post an update soon.

How did you prep the interior surface for that teal color? Mine must be a hard enamel coating because a sander or even a wire wheel wont even scratch it at all to rough it up for a new coating.
 
Thank you.
I used a water resistant phenolic paneling from Lowes and used my old panel as a pattern. It was super easy to roughen up with a wood block and sandpaper.
I'm assuming you are wanting to reuse your original door panel? I'm not really sure what to recomend. Is it a flat panel with no shelves?
I would maybe give it a good cleaning and then taping off and painting a very small area. Like maybe one square inch, and then see if it peels right off easy with a sharp razor blade. If it sticks, then paint it. If not, replace it or maybe make a small pass at a bottom corner with a sand blaster and see if that will roughen it up.
 
Back
Top