Fermentation Chamber Build

Homebrew Talk - Beer, Wine, Mead, & Cider Brewing Discussion Forum

Help Support Homebrew Talk - Beer, Wine, Mead, & Cider Brewing Discussion Forum:

This site may earn a commission from merchant affiliate links, including eBay, Amazon, and others.

digitalpeer

Member
Joined
Mar 4, 2012
Messages
12
Reaction score
8
Location
Las Vegas
This setup won't work for everyone, but here's how I piggybacked off of my kegerator to cool a separate fermentation chamber. I've been using this setup for about a year and it's been absolutely fantastic. I have not seen a setup like this before, so maybe this will spark some ideas for those with a similar setup.

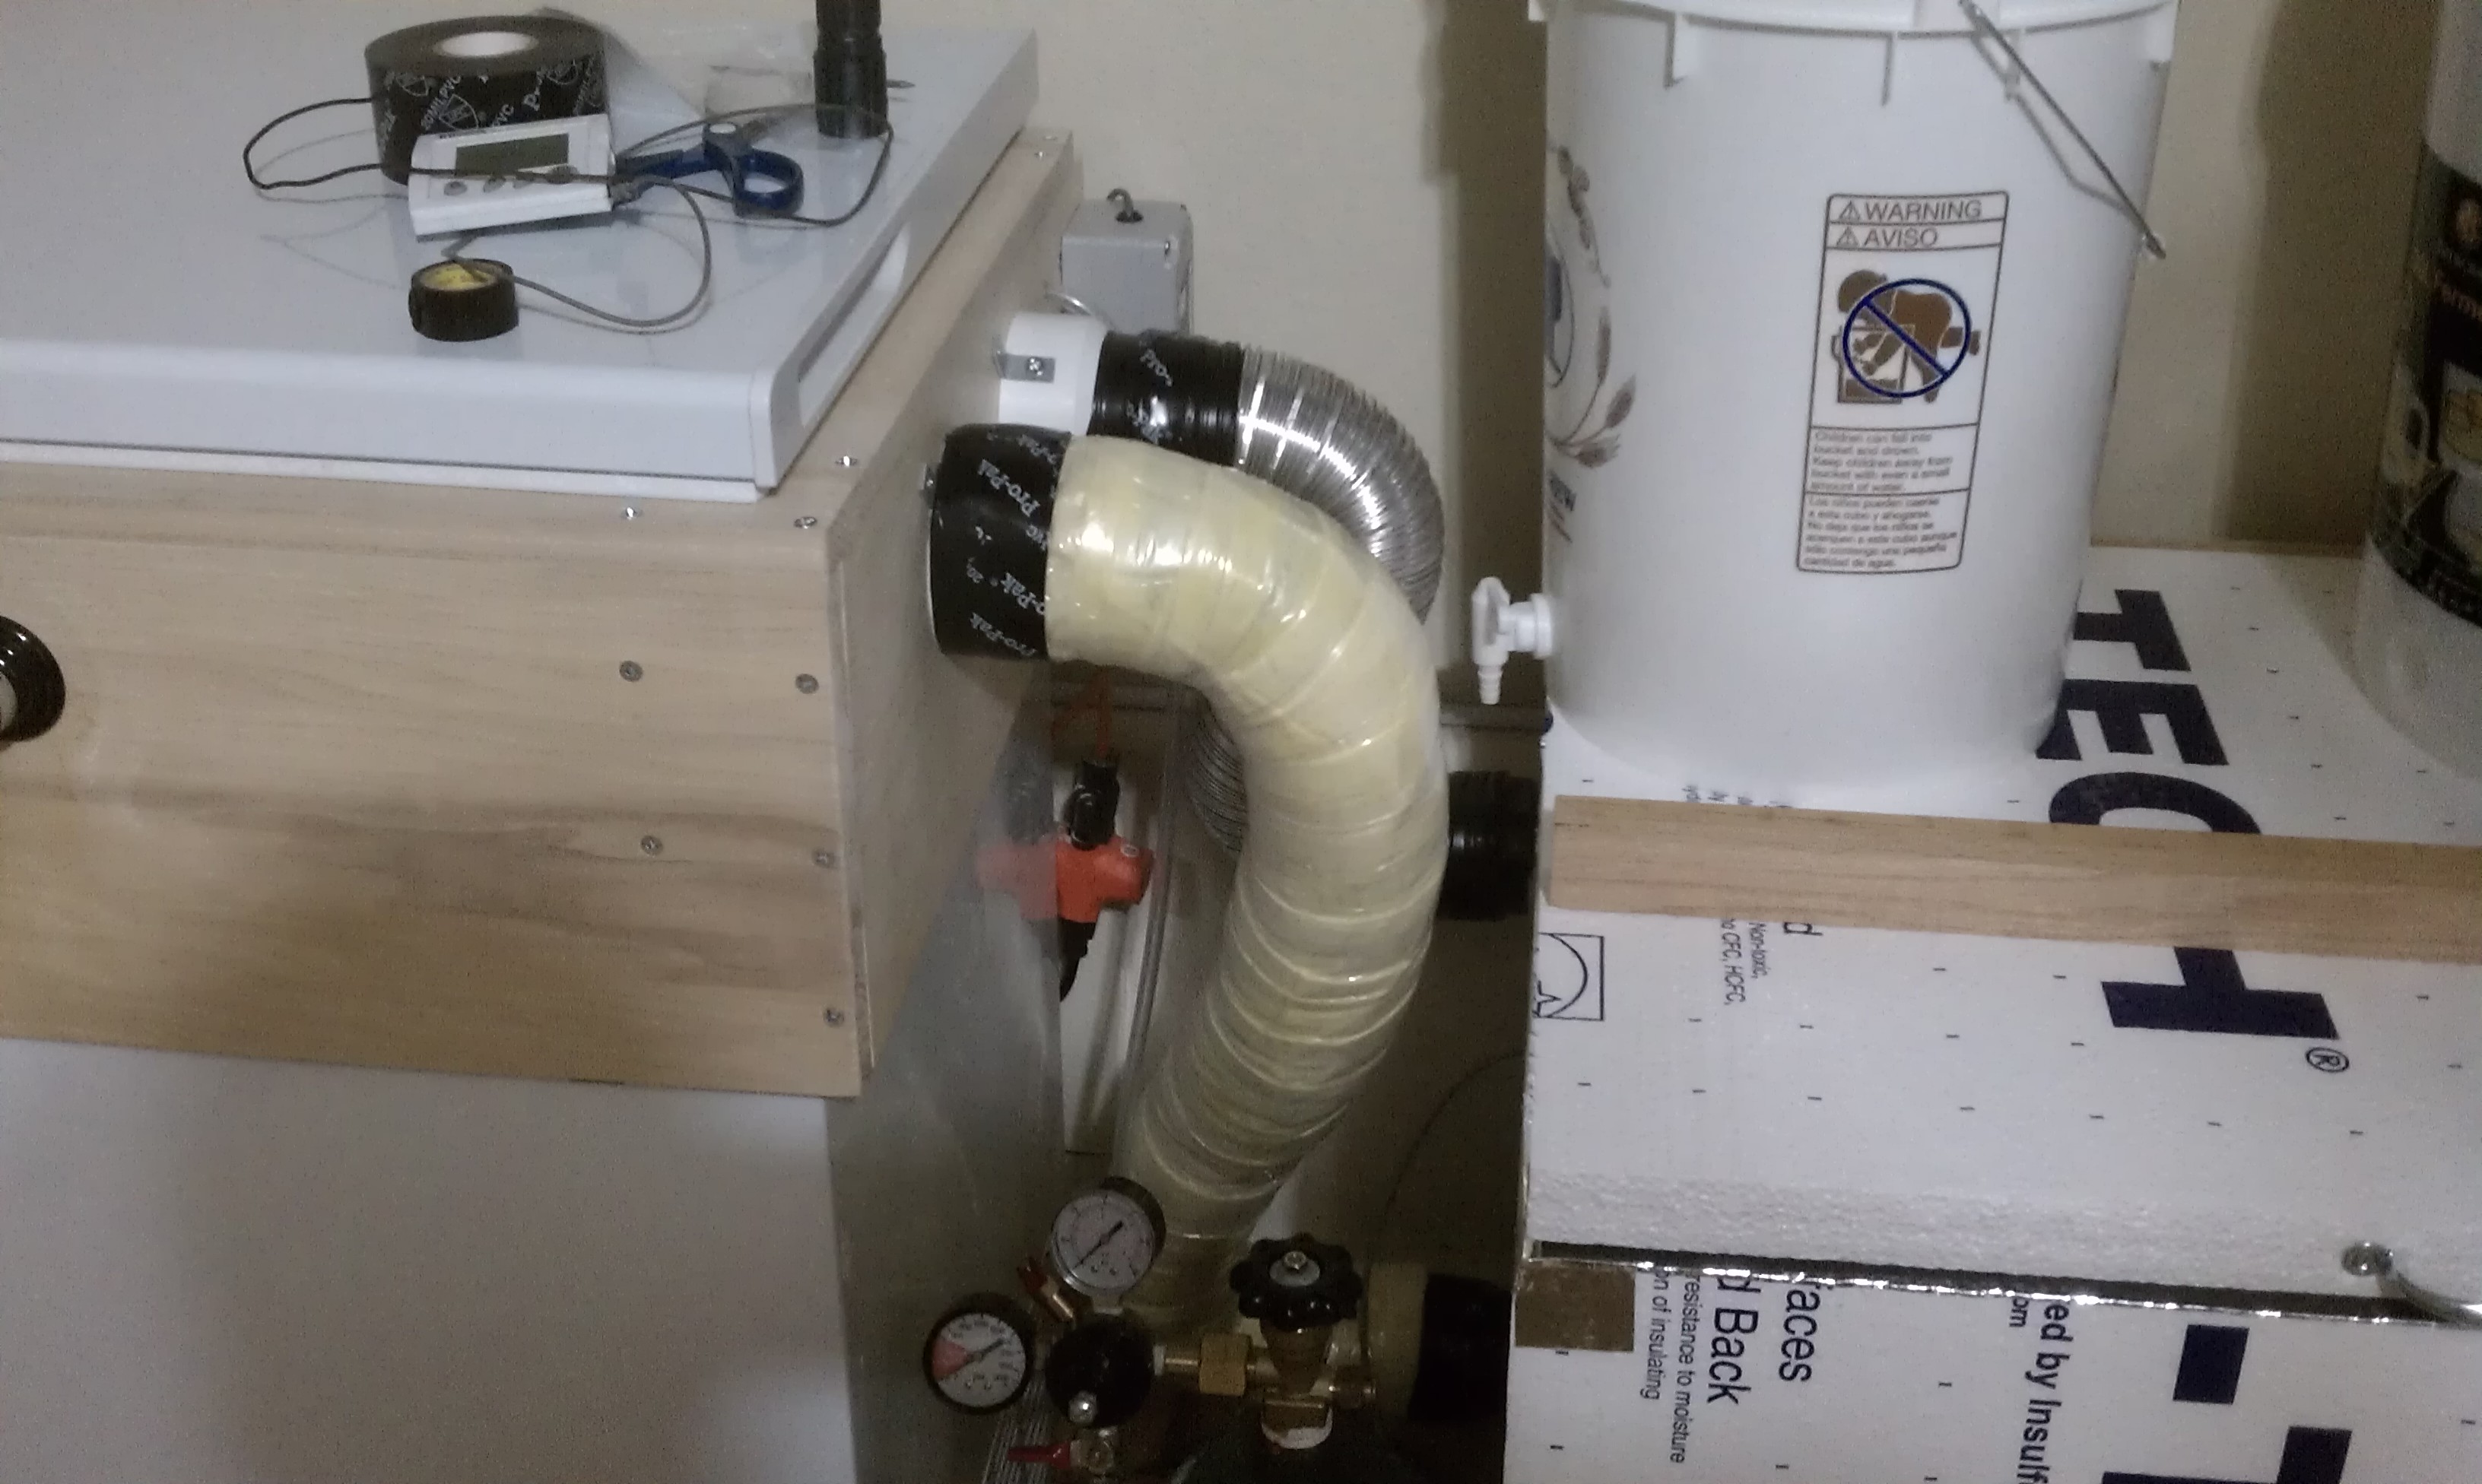
More details and pictures can be found here.

The general idea is the kegerator and fermentation chamber are attached by dryer hose and fans are used to circulate the air as needed to maintain the higher temperature in the fermentation chamber.

IMAG0683.jpg
 
Nice! I have actually been planning something very similar, using a fan connected to the temperature controller to pull cold air from my keg fridge to an adjacent fermentation chamber. How thick is the insulation you used for the chamber? Is yours setup with two hoses so one pulls air in, and another takes it back out to relieve pressure? Is there a second fan for the second tube, or does the positive pressure ffrom the first fan take care of it? Is that some sort of insulation on the one line closest to the front?

So many questions! I have been laying this out in my head for a few months now, and am getting pretty close to starting construction. I am still working out how big to make it, as I am trying to relocate all my brew gear to the garage (where my beer fridge is), so I want as much room as possible, but am in tight space. I am looking at doing a double height ferm chamber. Bottom to hold 3 buckets with airlocks, and the top rack to hold up to 6 kegs for secondary/aging/storage purposes. Currently I am worrying about insulation thickness...I had planned on 2.5" all around, with some areas where the wood structure requires reducing to 1"...but since the garage stays between 50-80 year round and the ferm chamber set at 62-64 I wasn't sure if I really needed it, and every inch counts. (THATS WHAT SHE SAID)

Anyway, thanks for sharing, cool build.
 
The styrofoam, which comes with an aluminum foil like cover on one side, is 1.5 inches thick. You can get it in a variety of thicknesses. I believe it's called Insulfoam and it's usually used for high end insulation needs. I just cut it with a mini hand saw. It's all sealed up air tight and it gets up to 115 in my garage. Absolutely no problem keeping the temps in there around 60 and it barely runs.

There are two hoses, one for intake and one for exhaust. I use a fan on the end of each hose to circulate the air (in opposite directions). See the link for more pictures. I originally used just one fan, but I had a second fan on hand and it definitely seems to "work" faster with 2 fans. They are just your typical PC case fans. I put insulation around both hoses. That picture was just in the middle of doing it. When the fans are running, the aluminum hoses definitely get cold to the touch so I thought it was best to insulate.

The nice thing about the sryrofoam is you can make any shape or any size box you want and it's really easy and fairly cheap. A word of advice, plan out exactly how many and exactly what fermenting containers you want to fit in there at a time. Also, don't forget to include the height of airlocks.

I tried looking into some auto closing vents to put on the opposite end of the hoses to close off the circulation when the fans weren't running, like the ones you see on the outside of house dryer ducts, but just couldn't find any that fit very well. Turns out, it really isn't necessary unless you need to heat as well. I suspect the heat will just run right up into the kegerator.

Cool, thanks for the info. When I looked through your link I realized a lot of my questions were answered there, but thanks for taking the time to answer them here too. Very nice to hear that is enough insulation, I was worrying about my plan a lot, and was erring on the side of too much.

Yeah, the airlock height is giving me problems, and I am actually contemplating designing in a system of tubes to run to a water pitcher, basically doing nothing but blowoff tubes instead of airlocks. I think I could reduce my height by 2" that way, but I am not sure yet if it would be worth the effort...

Hmmm, maybe I will consider 2 fans, its not like they are expensive. When I would need to heat the chamber I was thinking of making some 'plugs' out of insulation and just putting them in the hole next to the fan (with the fans unplugged), but that is one part of the design I haven't spent a lot of time thinking about. I measured and laid out a stacking patter for the buckets and kegs, and made sure to give myself some wiggle room since things always shift/bend a little. I am looking at an interior rectangle that is 23" x 27" to hold 3 buckets or 6 ball lock kegs. I really wanted 4 buckets...but it would have stuck out too far from the wall and blocked my path to the fridge if the car was pulled in...and that is where I keep my beer, so it was a deal-breaker, heheh.
 
Yeah, the airlock height is giving me problems, and I am actually contemplating designing in a system of tubes to run to a water pitcher, basically doing nothing but blowoff tubes instead of airlocks. I think I could reduce my height by 2" that way, but I am not sure yet if it would be worth the effort...


Can you not make a blow off tube dealio, and skip the airlock?
 
This is awesome. I was debating cutting a hole in the side of my current kegerator to give it a test, but I couldn't find this idea/plans for it.

My plan atm is to get 2 free mini fridges after my college lets out (due to the fact that I am moving south in July). However, if I can figure out how to cut a hole in my current fridge, that'll be a lot cheaper and easier. Thanks!
 
GREAT idea here! I'm currently fermenting in my home office closet and the temperature is out of range ideal for best yeast performance. I may make mine detachable so when I want to roll my keezer to the back porch, I can cover the circulation holes and go!
Does anyone see down sides to this design?

I don't think so. I'm nearing the point of no return with drilling the holes in my collar-I've thought about the same thing (plugging the holes) and I'm assuming it can be done by capping the PVC. I'll play around with the sizes and reply back with what works but my gut says a PVC cap will be it (OP uses PVC through the collar-spoke with him offline).
 
Back
Top