I bought the FastFerment on a whim. And I am very satisfied so far. Here are some thoughts, ideas and comments for others who may be interested or may already have purchased one or two or more.
I brew with a ten gallon electric brewery consisting of a half-barrel keg as my HLT, a 70 quart cooler as my mash tun and a half-barrel keg as my brew kettle. It is an electric set up so I can brew indoors. It is set up for gravity operation (avoiding pumps that way) with the HLT above the mash tun, which is above the boil kettle, which drain into a carboy. I then pickup the carboy and pour it into my fermenter, using the pouring as a way to oxygenate the wort after brewing. By pouring it aggressively (using a funnel), it really shakes things up and gets a lot of O2 into the wort. Works pretty well.
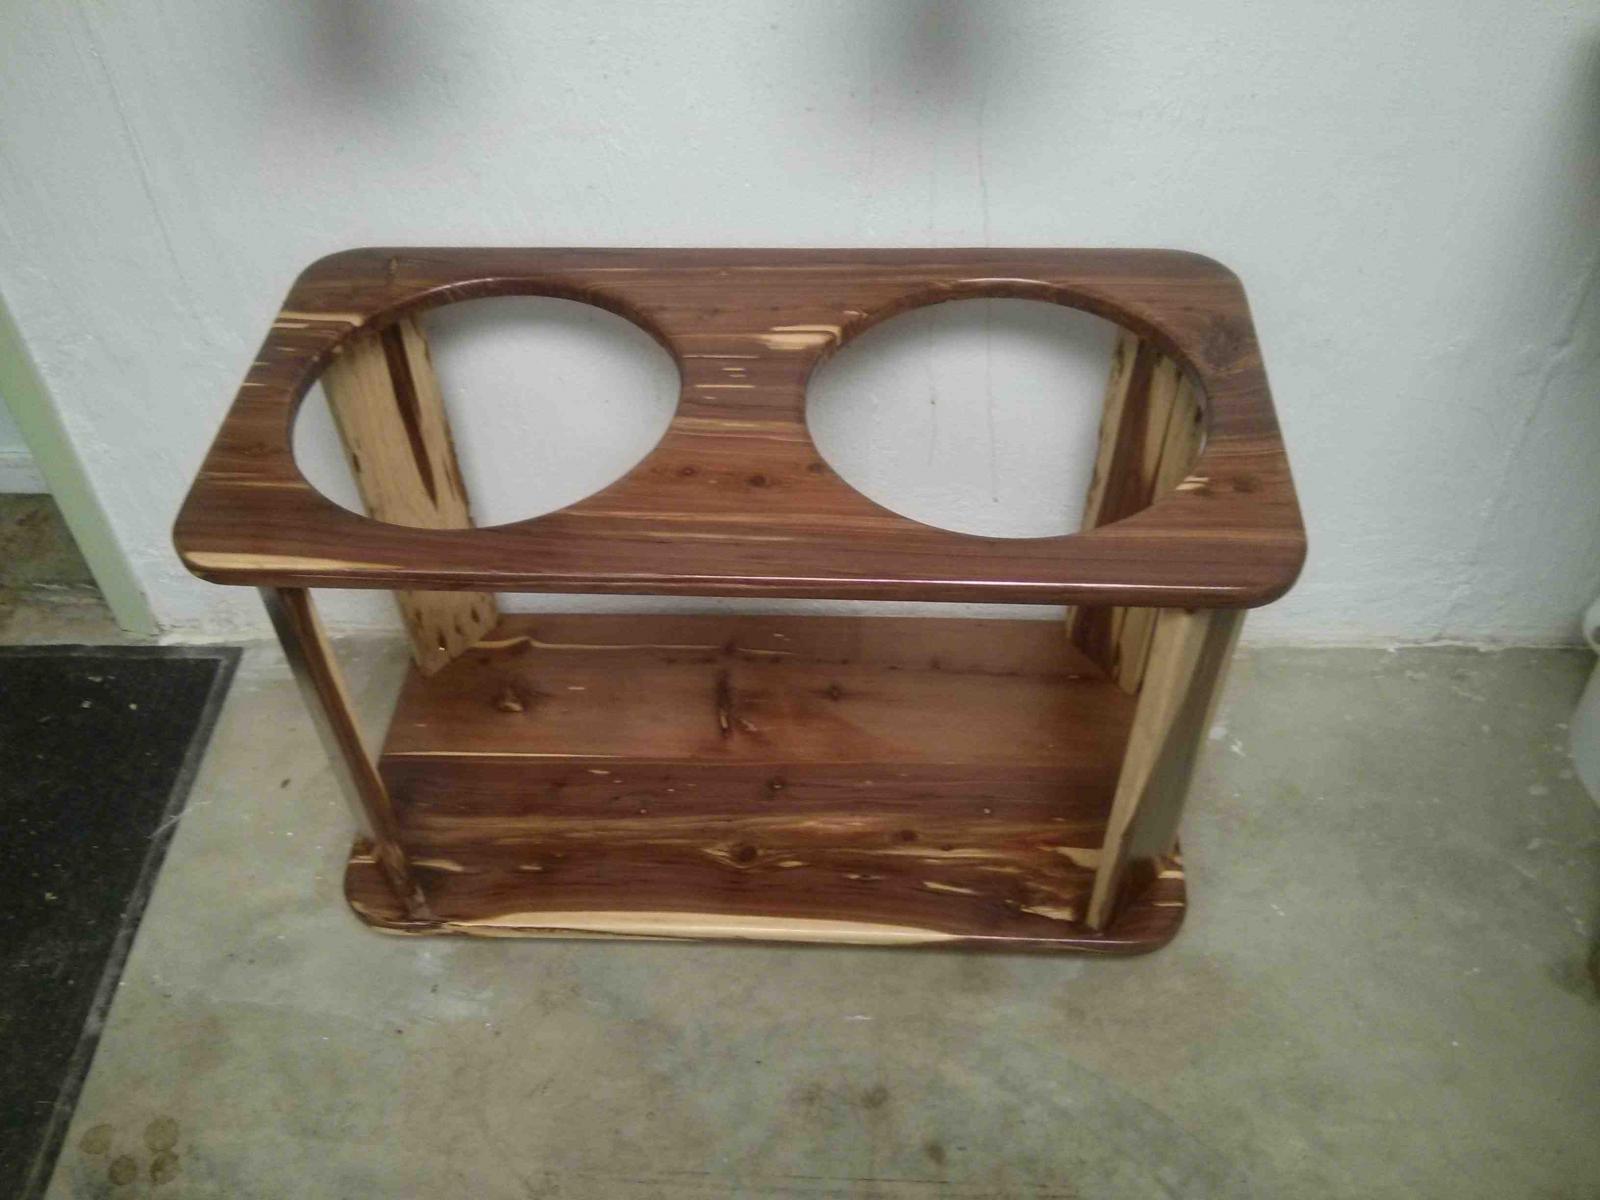
The Fastferment is a most awkward piece of equipment by the very nature of being a conical unit. There is no easy way for it to stand up on its own. The collection bulb does allow it to stand up in a pinch, but not securely enough to rely on it. So one of my first steps was to build a stand to hold the fermenters. I brew in a different room than where I ferment. So I added wheels to get it from the boil kettle to the ferment room.
You will need a stand of some sort (unless you mount and then pour into the fermenter while it is on the wall). But $35 for the metal stand they sell seems too expensive. You can easily make one out of wood.
Mine is made out of red cedar (cause I had some and it is pretty cool wood to both work with and to smell!). I used pocket holes (made with a Kreg Jig) to hold it all together. Pocket holes are a really quick way to build things and they hold tight. The fermenter holes are 11 1/4 (285mm) in diameter. The overall top dimension is 15 x 30 (380mm x 660mm). The top is just about 18 (450mm) above the bottom shelf. The top is held by four uprights that are 17 (430mm). Each upright has 3 pocket holes no glue. And it is holding up well. The wheels were scavenged from an old dehumidifier.
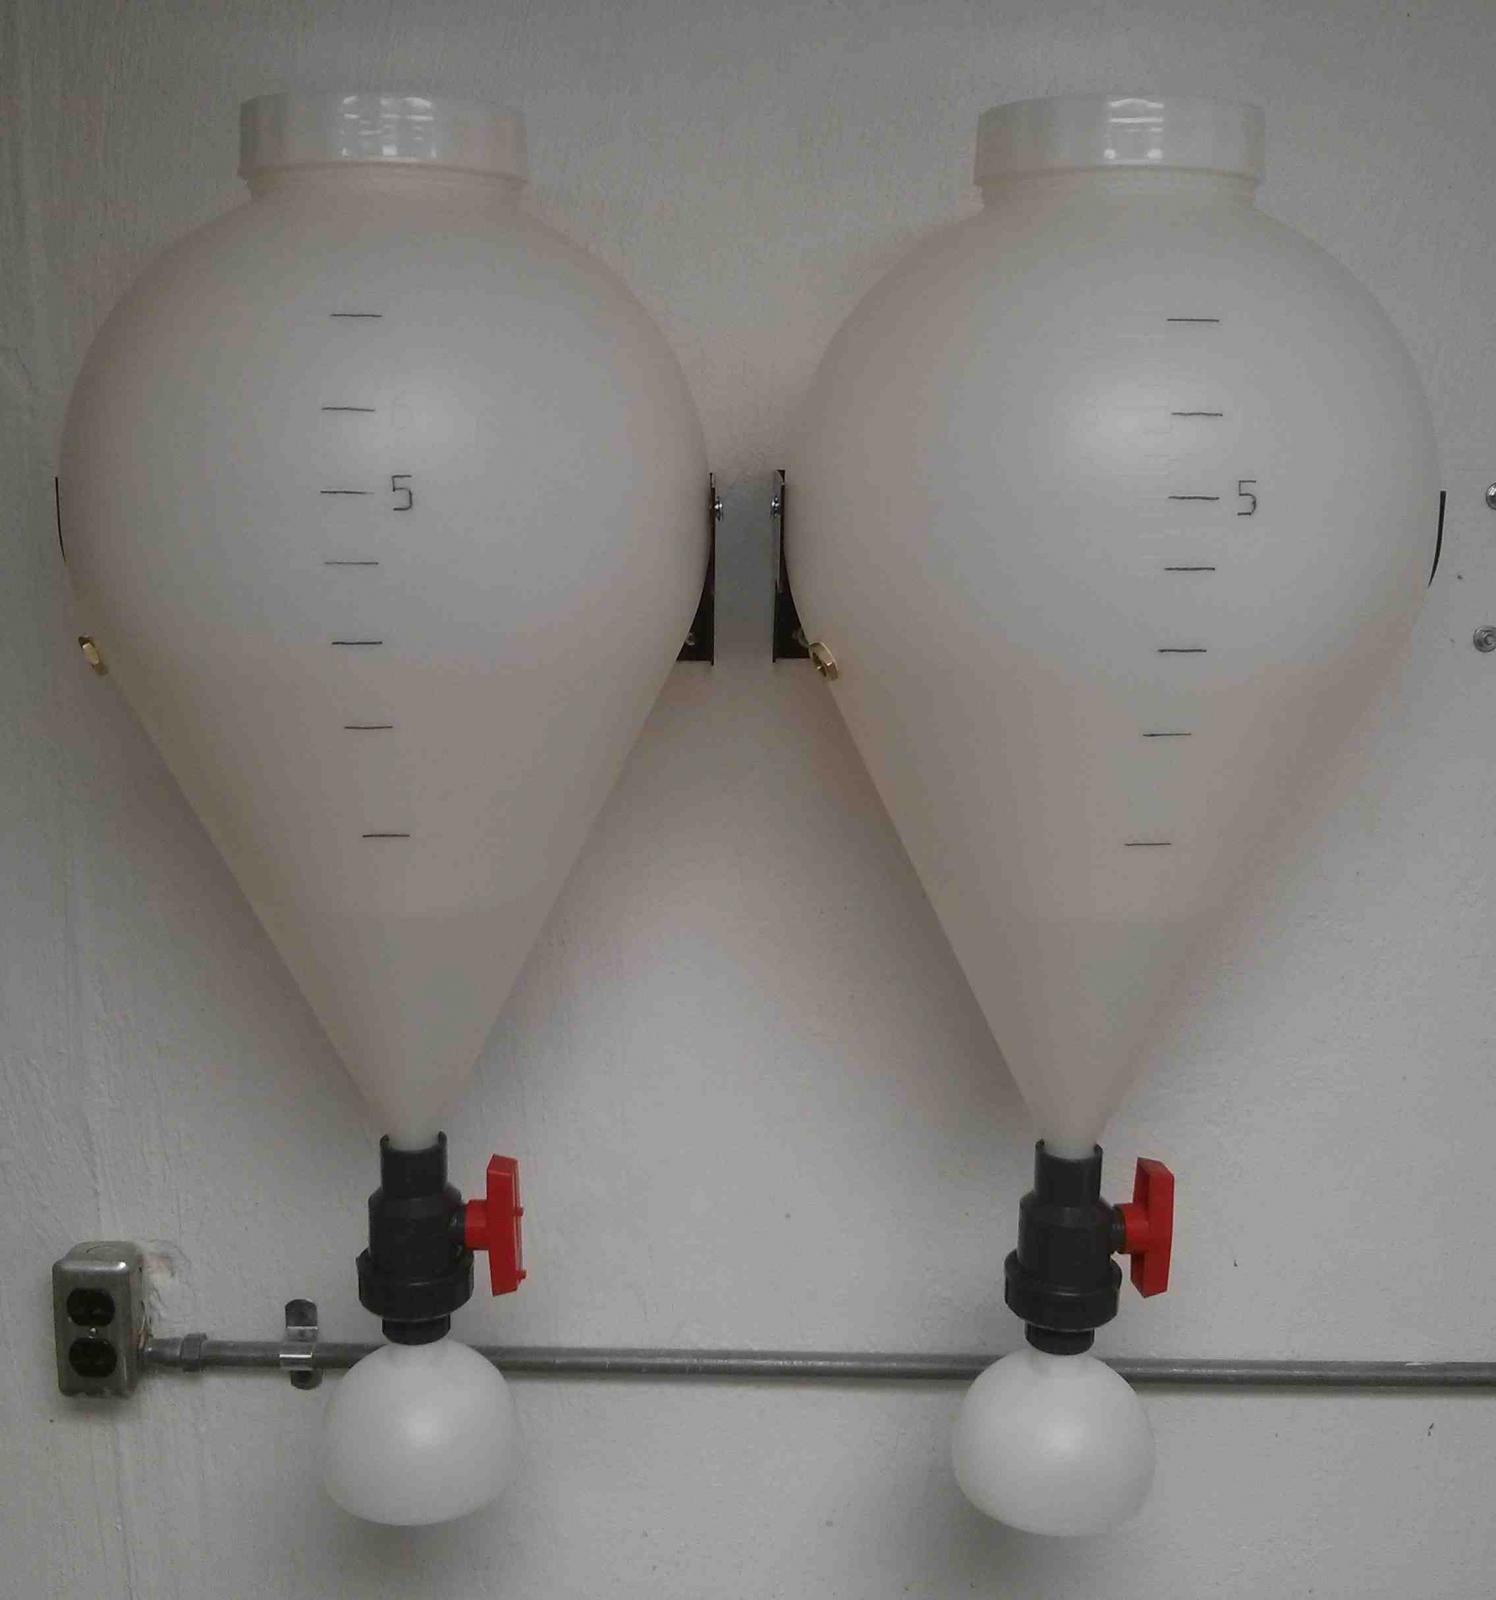
Mounting the FastFerment involved concrete anchors into my basement wall.
But !!! Note that my brackets are faced inward. The directions are written to mount the brackets outward so they will match up with wall studs that are on 16 centers. I found having the brackets facing outward makes the arrangement look bulky. It is much neater to turn them toward the inside. If you decide to face them inward, drill your mounting holes on 12 1/2 to 12 3/4 (315mm to 325mm) centers.
The top mounting bolt is 57 1/2 (1460mm) above the floor. This allows the bottom of the fermenter with the collection bulb attached to be around 33 above the floor, so you can place a 30 table underneath. A table under the fermenter let's you easily remove the bulb and put a plate underneath to collect any spillage.
Prepping the Fastferment is something to pay attention to. The threads have lots of left over plastic from the molding process. Doesn't hurt to try and clean this off. But most important you will need to sand the top. The top, where the lid screws on, was not level at all. I don't see how I could have ever gotten a good seal with the thin gasket included with the lid. So I used 80 grit sandpaper glued to a tabletop (I used a spray adhesive on a scrap slab of granite). Sanding was a job. I held it upside down, hugging it and rocking back and forth for about 10 minutes each. It took a lot of sanding to get it flat.
I also cut an additional gasket to be sure there was a tight fit. Using the gasket provided as a template, I found some foam packing material and just cut it with an exacto knife.
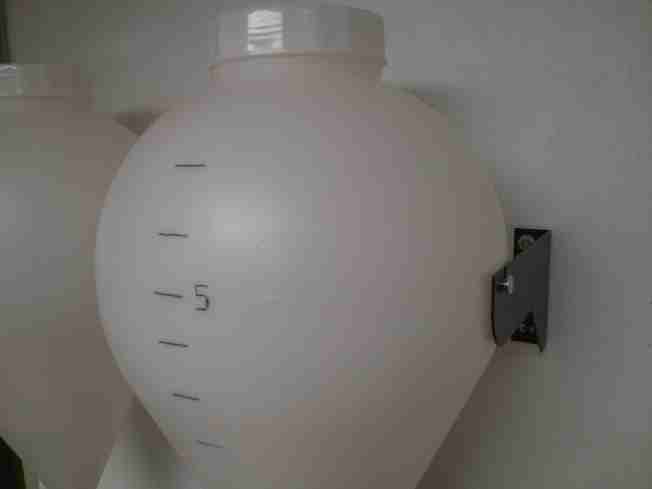
You might have noticed the graduations on the fermenter are in black. I used a black marker and highlighted each mark. They are not easy to read, so this helps, but it's not necessary.
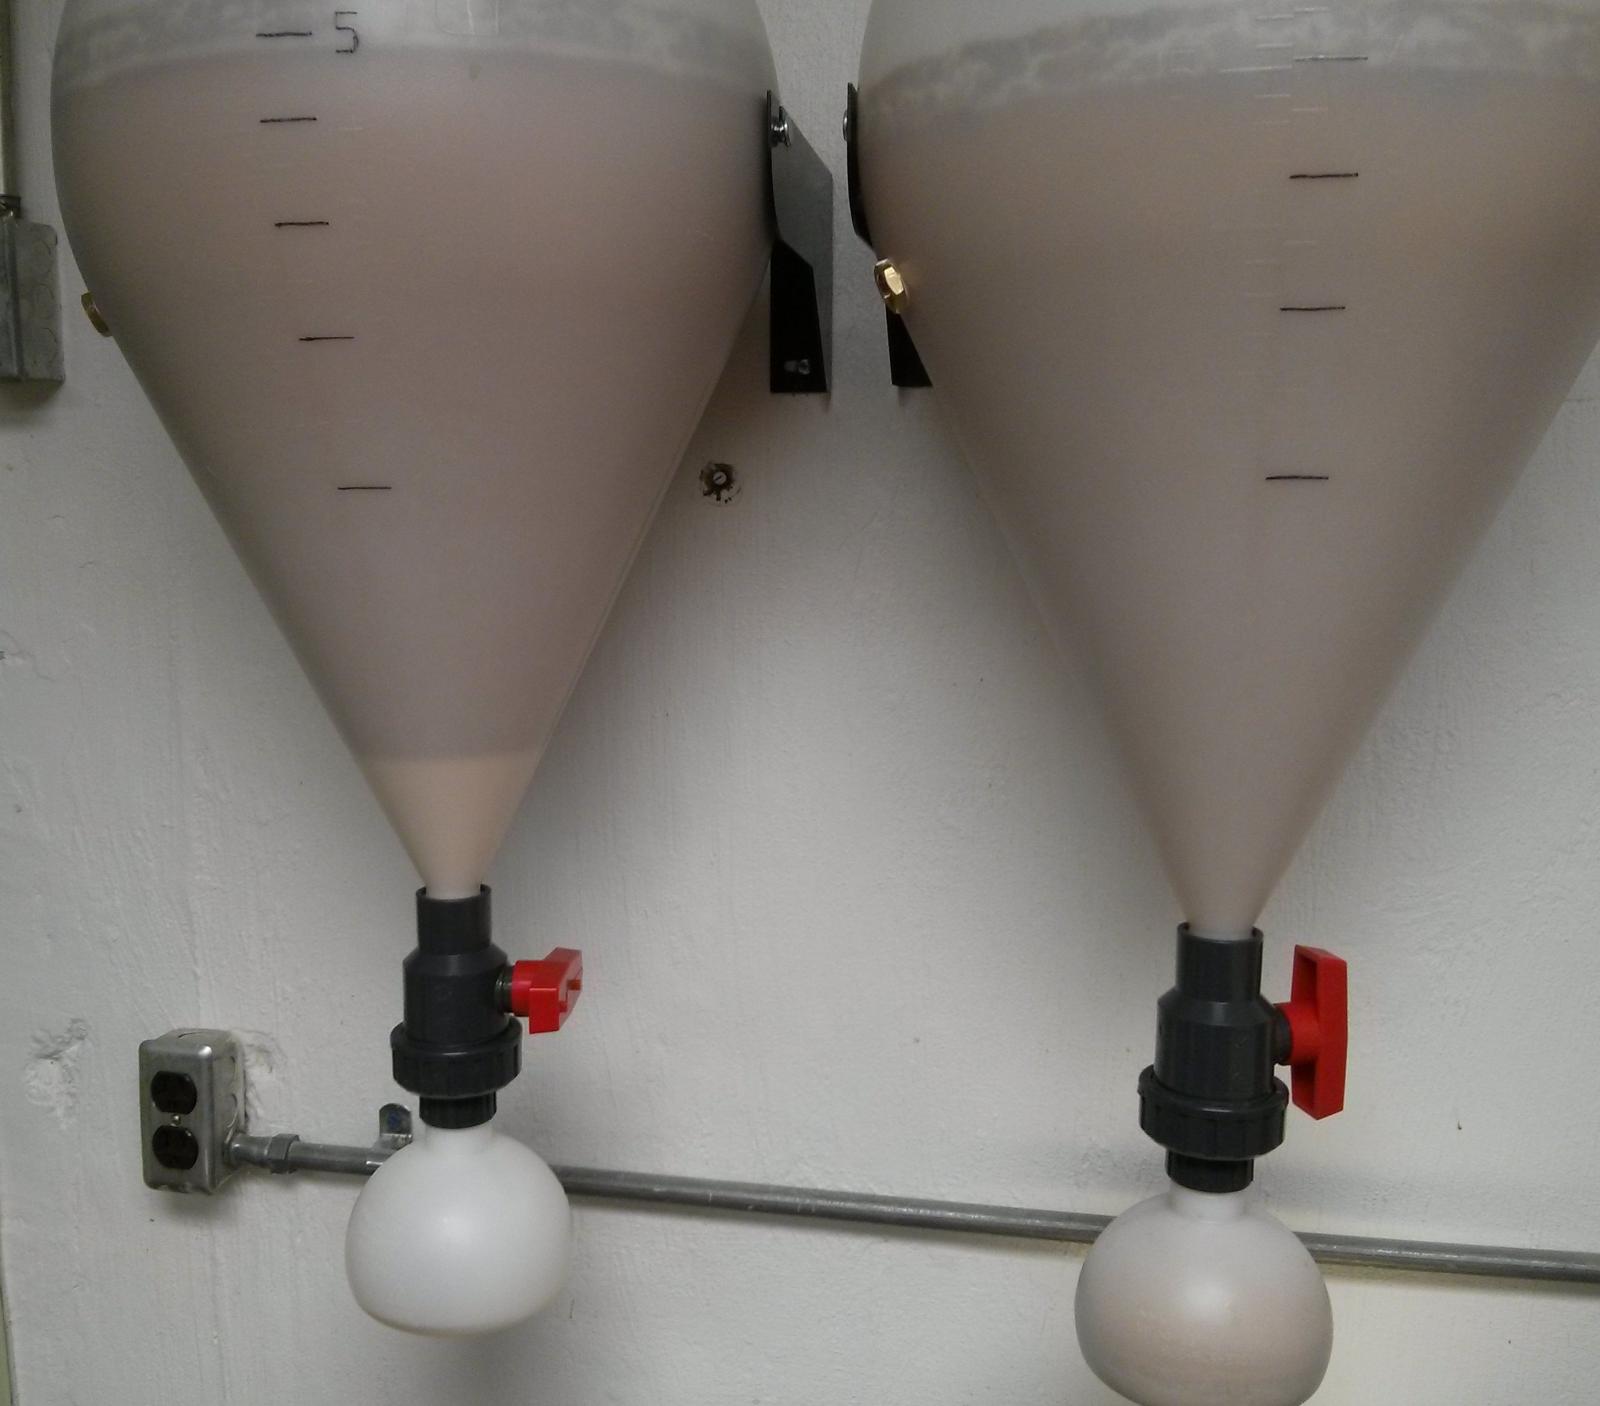
Fermenting can be done with the valve open to the collection bulb, or closed. Attached is a picture of a SMASH brew using whole hops. Not much trub. I let it settle overnight and then added the yeast. You can see the yeast on the left fermenter in the picture. Makes it easy to harvest.
I think this covers it. Any questions, just let me know. Would I recommend it? You bet. Glass carboys are too fragile. Keg fermenting is hard to remove the trub. Never did like using buckets, but they work ok. I now see why the big guys use conical fermenters.
Cheers!


