
silver97232
Member
This is my system for cold side brewing
Background:
I struggled with a persistent infection for about 30 batches, it frustrated me to no end, but it also taught me a lot. I now have the capability to test and identify samples by microscope or growing on selective media, I have done plate checks to count bacterial levels in the air, built a Dexter-style room, and spent more money than I care to mention, but I now have a sytem that I think really shines as a setup for ease of use, sanitation, and cleaning, and is relatively inexpensive. Even if you don't use the whole system I believe each part helps.
My goals after deciding brewing was my favorite hobby, was to brew inside in comfort, and to constantly try and improve my brewing. I got into all grain by using the brew-in-a-bag, then moved to electric, gravity feed, bought a pump etc. I moved into my basement to have a dedicated spot for brewing, this detail is what led to the majority of my problems. My house is almost 90 years old, and the amount of dust floating in the air is incredible, if you open a sterile agar plate for even 5 seconds there's a significant number of colonies, my dryer is down there which kicks up dust, starsan left open is bad within a couple hours. It's about the worst place to try and do sterile techniques, but it rains a lot here, and after switching to electric you can never go back to propane, so I had to make it work.
Doing wort stability tests (WST) isolated the infection prior to transfer to fermenter, I was using an immersion chiller at the time, I covered the top of the kettle during cooling, sprayed copious amounts of starsan in the air, built a room of visqueen to keep out drafts, none of it worked. I gave up and bought a plate chiller, it was expensive but I do not believe this system works without it. When wort cools in a vessel it creates a vacuum, this negative pressure draws in ambient air, the faster you cool and pitch, the less time bacteria has a chance to grow and get a foothold, but you're still drawing in ambient air.
I should state that my situation is an extreme, most people are not brewing in an environment saturated with dust, and would not see such drastic impacts. Changing to a plate chiller helped, I could now recirculate wort through the chiller. But the infection still remained, even sterilizing the plate chiller, or recirculating for 60 minutes didn't eliminate the infection.
I started making larger changes after really thinking about this article http://www.brewingtechniques.com/library/backissues/issue2.4/dawson.html
I had used a racking cane with co2 to transfer from carboy to keg before, but while looking at the diagrams is became apparent that using a carboy would still open the system to ambient air. Fermenting in corny kegs was the answer, they already have built in racking and co2 ports, easy to clean, handles, and could handle high heat. Another major benefit was that you could store them sanitized and pressurized for use whenever needed. Transferring is now incredibly easy, I just hook one keg to another, and push with co2. When you pitch yeast, pump co2 through at 30psi with the lid open, this keeps anything from falling onto the wort, you could probably leave it open for days like this, but that's just speculation.
The final piece of the puzzle was recirculating through the ball lock connectors, by using a set of tank posts with a mfl adapter, you can push liquid through them during the boil, this means that the entire system gets hot. I should note that I don't believe 15 minutes to be adequate for recirculation, I would recommend a minimum of 30 minutes. The reason is that it takes 15-20 minutes to kill the bacteria, but that timer only starts once the whole system is that hot, giving yourself 10 minutes for everything to get hot ensures santization.
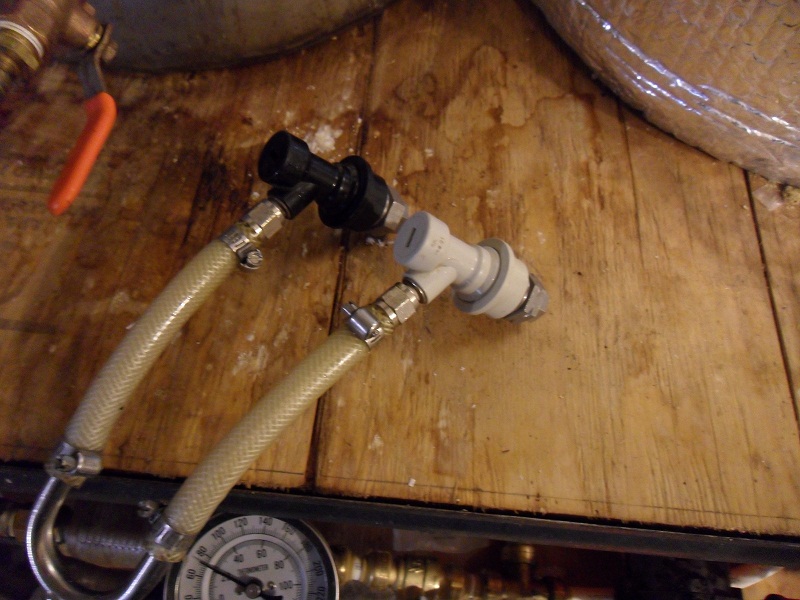
This is the assembly that I recirculate through
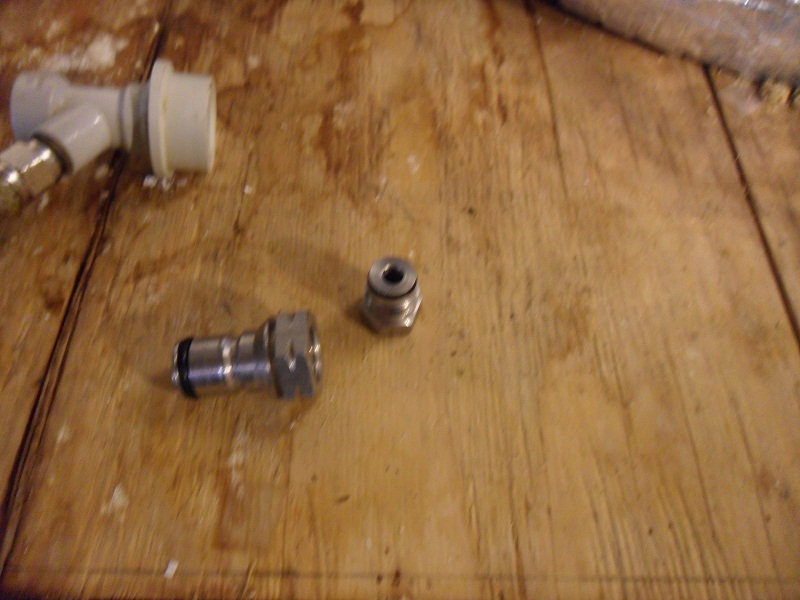
And here's what allows you to push through the ball locks
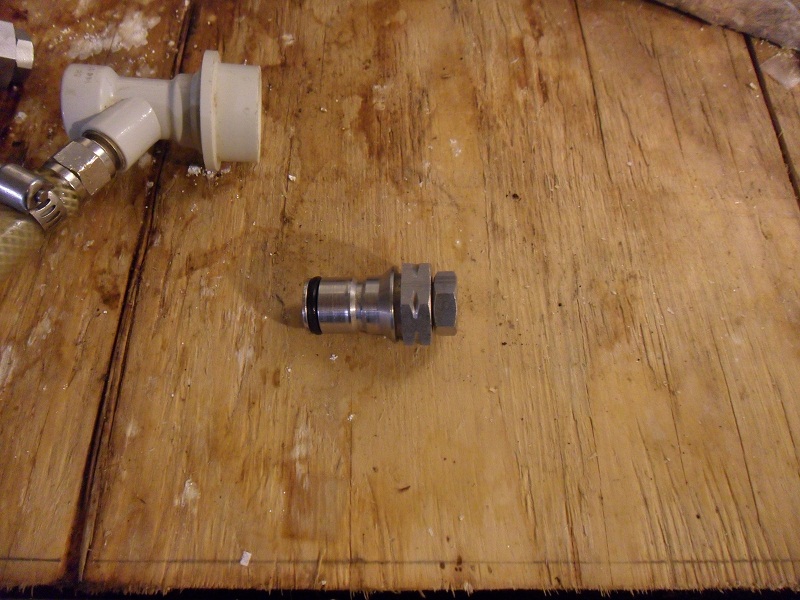
There's a post to mfl adapter, I purchased this all as a set to convert a sanke to ball lock.
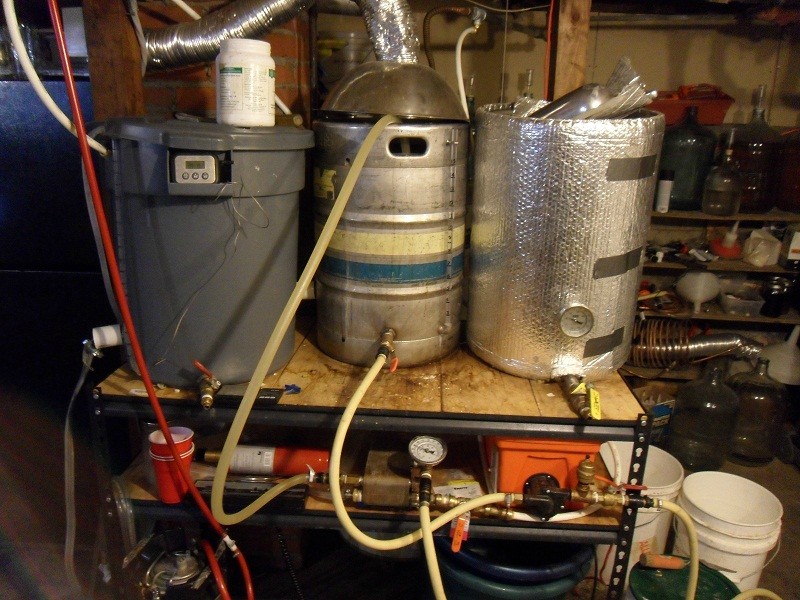
Here's the system in the configuration during boil, pump into chiller, then back into kettle through ball lock assembly
Now, I hear people say all the time that they've never had an infection, and maybe they're lucky, but I think it's more that they don't test. Small infections can go unnoticed for months, or years if you keep the temperature low, but testing tells all.
These were brewed 2 days apart the only change was recirculating through the ball locks, I had been waiting for my tank post adapter to come in the mail. The WST for the first was bad in 2 days, the second is still fine almost 2 weeks later.
These are two plates taken from the slurry at the bottom of the fermenter after transferring. The green matter on the left slide is just dead yeast, LMDA kills brewing yeast.
On the right, there are over 100 CFU (colony forming units), the next brew, none. I should note that I merely swabbed and plated, commercial breweries take a 100ml sample and force it through a filter which catches any bacteria, then plate the filter, effectively sampling 100 times more than I did.
My favorite new toy:
It's a dishwasher for cleaning corny kegs, even used as fermenters, give it a brief spray, then just put it in. It runs through a rinse, hot clean, hot clean with PBW and then rinse to remove PBW. Total cost was about $60 and it's amazing. The tiles are just there to raise the water level to contact the element, not necessary, but it helps.

Here's how it works on brewday:
Add anti-foam drops
40 minutes to end of boil Start recirculating
1 minute before end of boil, vent corny keg (This is important, otherwise co2 will blow back through the lines) , spray down connections and air with starsan
Hook up chiller to fermenter, place on scale
Start transfer and cooling water flow
Stop transfer when tared weight equals 39-40#
Hook co2 to gas in, pump @30psi, open vent
Spray down with starsan, remove lid and pitch yeast, replace lid
Close top valve, hook oxygen to liquid out, bubble through for 30 seconds
Rock fermenter to dissolve as much oxygen as possible
Ferment as normal, attach blowoff to gas in (don't make the mistake of hooking to the liquid side, it will pump itself out)
To transfer out of fermenter:
Disconnect blow off, attach co2
Use a picnic tap to pour off until it runs clear, normally about 12oz
Attach sanitized jumper line to fermenter liquid out
Vent serving keg, then attach jumper to liquid out
Beer will then flow
Disconnect when you either see it turn cloudy or it's the end of the keg
It all sounds more complicated than it is, I think it's easier now than dealing with carboys. I am still developing it, but it ties together the benefits of small scale brewing while using commercial techniques as well. I don't think it's a solution for many, but it's made brewing much more enjoyable for me.
Most importantly, this has allowed me to refocus on the fun parts of brewing. I don't have to worry any more and I know that my beer is clean.
Imminent improvements:
Corny post covers to keep dust off after sanitizing
Might switch to stainless steel ball locks
I am always looking for suggestions, and will answer any quesitons.
Background:
I struggled with a persistent infection for about 30 batches, it frustrated me to no end, but it also taught me a lot. I now have the capability to test and identify samples by microscope or growing on selective media, I have done plate checks to count bacterial levels in the air, built a Dexter-style room, and spent more money than I care to mention, but I now have a sytem that I think really shines as a setup for ease of use, sanitation, and cleaning, and is relatively inexpensive. Even if you don't use the whole system I believe each part helps.
My goals after deciding brewing was my favorite hobby, was to brew inside in comfort, and to constantly try and improve my brewing. I got into all grain by using the brew-in-a-bag, then moved to electric, gravity feed, bought a pump etc. I moved into my basement to have a dedicated spot for brewing, this detail is what led to the majority of my problems. My house is almost 90 years old, and the amount of dust floating in the air is incredible, if you open a sterile agar plate for even 5 seconds there's a significant number of colonies, my dryer is down there which kicks up dust, starsan left open is bad within a couple hours. It's about the worst place to try and do sterile techniques, but it rains a lot here, and after switching to electric you can never go back to propane, so I had to make it work.
Doing wort stability tests (WST) isolated the infection prior to transfer to fermenter, I was using an immersion chiller at the time, I covered the top of the kettle during cooling, sprayed copious amounts of starsan in the air, built a room of visqueen to keep out drafts, none of it worked. I gave up and bought a plate chiller, it was expensive but I do not believe this system works without it. When wort cools in a vessel it creates a vacuum, this negative pressure draws in ambient air, the faster you cool and pitch, the less time bacteria has a chance to grow and get a foothold, but you're still drawing in ambient air.
I should state that my situation is an extreme, most people are not brewing in an environment saturated with dust, and would not see such drastic impacts. Changing to a plate chiller helped, I could now recirculate wort through the chiller. But the infection still remained, even sterilizing the plate chiller, or recirculating for 60 minutes didn't eliminate the infection.
I started making larger changes after really thinking about this article http://www.brewingtechniques.com/library/backissues/issue2.4/dawson.html
I had used a racking cane with co2 to transfer from carboy to keg before, but while looking at the diagrams is became apparent that using a carboy would still open the system to ambient air. Fermenting in corny kegs was the answer, they already have built in racking and co2 ports, easy to clean, handles, and could handle high heat. Another major benefit was that you could store them sanitized and pressurized for use whenever needed. Transferring is now incredibly easy, I just hook one keg to another, and push with co2. When you pitch yeast, pump co2 through at 30psi with the lid open, this keeps anything from falling onto the wort, you could probably leave it open for days like this, but that's just speculation.
The final piece of the puzzle was recirculating through the ball lock connectors, by using a set of tank posts with a mfl adapter, you can push liquid through them during the boil, this means that the entire system gets hot. I should note that I don't believe 15 minutes to be adequate for recirculation, I would recommend a minimum of 30 minutes. The reason is that it takes 15-20 minutes to kill the bacteria, but that timer only starts once the whole system is that hot, giving yourself 10 minutes for everything to get hot ensures santization.
This is the assembly that I recirculate through
And here's what allows you to push through the ball locks
There's a post to mfl adapter, I purchased this all as a set to convert a sanke to ball lock.
Here's the system in the configuration during boil, pump into chiller, then back into kettle through ball lock assembly
Now, I hear people say all the time that they've never had an infection, and maybe they're lucky, but I think it's more that they don't test. Small infections can go unnoticed for months, or years if you keep the temperature low, but testing tells all.
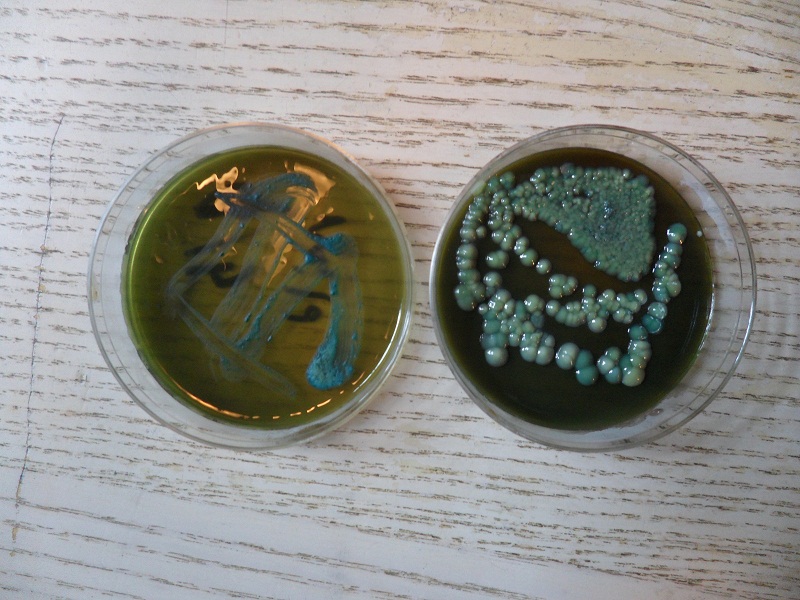
These were brewed 2 days apart the only change was recirculating through the ball locks, I had been waiting for my tank post adapter to come in the mail. The WST for the first was bad in 2 days, the second is still fine almost 2 weeks later.
These are two plates taken from the slurry at the bottom of the fermenter after transferring. The green matter on the left slide is just dead yeast, LMDA kills brewing yeast.
On the right, there are over 100 CFU (colony forming units), the next brew, none. I should note that I merely swabbed and plated, commercial breweries take a 100ml sample and force it through a filter which catches any bacteria, then plate the filter, effectively sampling 100 times more than I did.
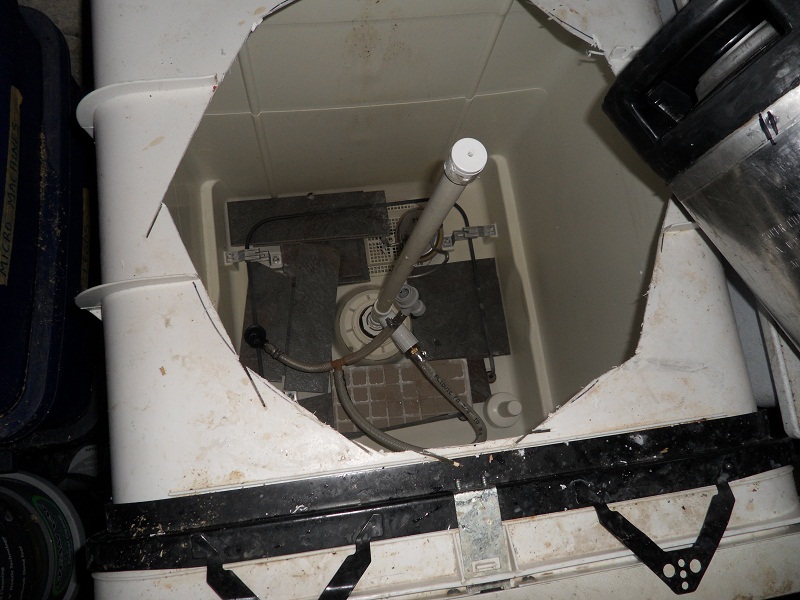
My favorite new toy:
It's a dishwasher for cleaning corny kegs, even used as fermenters, give it a brief spray, then just put it in. It runs through a rinse, hot clean, hot clean with PBW and then rinse to remove PBW. Total cost was about $60 and it's amazing. The tiles are just there to raise the water level to contact the element, not necessary, but it helps.
Here's how it works on brewday:
Add anti-foam drops
40 minutes to end of boil Start recirculating
1 minute before end of boil, vent corny keg (This is important, otherwise co2 will blow back through the lines) , spray down connections and air with starsan
Hook up chiller to fermenter, place on scale
Start transfer and cooling water flow
Stop transfer when tared weight equals 39-40#
Hook co2 to gas in, pump @30psi, open vent
Spray down with starsan, remove lid and pitch yeast, replace lid
Close top valve, hook oxygen to liquid out, bubble through for 30 seconds
Rock fermenter to dissolve as much oxygen as possible
Ferment as normal, attach blowoff to gas in (don't make the mistake of hooking to the liquid side, it will pump itself out)
To transfer out of fermenter:
Disconnect blow off, attach co2
Use a picnic tap to pour off until it runs clear, normally about 12oz
Attach sanitized jumper line to fermenter liquid out
Vent serving keg, then attach jumper to liquid out
Beer will then flow
Disconnect when you either see it turn cloudy or it's the end of the keg
It all sounds more complicated than it is, I think it's easier now than dealing with carboys. I am still developing it, but it ties together the benefits of small scale brewing while using commercial techniques as well. I don't think it's a solution for many, but it's made brewing much more enjoyable for me.
Most importantly, this has allowed me to refocus on the fun parts of brewing. I don't have to worry any more and I know that my beer is clean.
Imminent improvements:
Corny post covers to keep dust off after sanitizing
Might switch to stainless steel ball locks
I am always looking for suggestions, and will answer any quesitons.
