

As we all know, we got into homebrewing to save money... (waits for laughter to die)
Okay, homebrewing rarely saves us money in the long run, but that does not mean that we do not try to stretch our pennies wherever we can. One of the best ways of cutting costs and having the best and freshest ingredients is buying ingredients in bulk. However, buying in bulk creates its own set of problems: you are now on the hook to safely store and maintain the freshness of the ingredients.
The Problem
Malt and malt extract are easy to store, they have long shelf-lives and can be easily stored in airtight containers. Hops and yeast, on the other hand, are not so easy: oxygen and temperature can rapidly degrade their quality so special care must be taken to properly maintain them. Care and handling of yeast is a story for another day, so for now let us take a look a few facts about hops to see why proper care is needed:
- Fact: New hop crops are only released once a year (September/October for the Northern Hemisphere and March/April for the Southern Hemisphere).
- Fact: The best hops sell out rapidly so it is necessary to order as many hops as you can as soon as you can.
- Fact: Opened hops maintain their quality and freshness for two weeks at 50F and five weeks at 26F.
- Fact: Vacuum-sealed hops can retain their character for up to five years when frozen.
"The 2015 American hop crop - yes, the one that won't be harvested until next August and September - is basically sold out... And it means that brewers, particularly homebrewers, who know they are going to want particular varieties during the course of the year should buy them when a chance arises."
So what can we conclude from this? We can save big bucks and secure our favorite varieties by buying hops in bulk and freezing them in a vacuum-sealed container. Unfortunately, this poses a challenge for homebrewers who have not yet invested in the proper vacuum-sealing equipment, which can cost upwards of $100 or more. Besides, we would rather spend our money on new brew equipment and ingredients.
The Solution
Being a tightwad I have spent a lot of time thinking on how to come up with a cheap option for hop storage. The solution came to me on a random idle evening as I went down the path of following just about any link I could get my hands on to perpetuate my idleness. As we all know, sometimes that means you stumble into a community dedicated to preserving salad in jars; sometimes that means you become enraptured by one-upmanship of the salad-in-a-jar enthusiasts as they try to preserve their salads in the cheapest way possible. And sometimes that means you crib come up with an idea for storing hops in such a cheap and easy way that you feel like you should start a life in the informercial biz...
Here's everything you need to get started:
- Ziploc Vacuum Starter Kit ($4.23)
- FoodSaver Regular-Mouth Jar Sealer ($9.99 - don't worry, won't need a FoodSaver)
- A set of Pint Ball Jars ($10.99 - if you're like me, you already have a bunch laying around)
The Process
Step 0: If you are using brand-new Ball jars the lids still contain a food-safe sealing compound embedded into the lid. You will have trouble getting the lid to seal if you do not remove the compound, a short boil in water will accomplish this.

Step 1: Dump your hops into the Ball jar. I find a pint jar holds roughly 8 oz of hop pellets and 1 oz of whole leaf hops. Needless to say, this method works best for pellet hops.

Step 2: Place the lid (minus the screw band) on top of the Ball jar and slide the Jar Sealer on top of it.


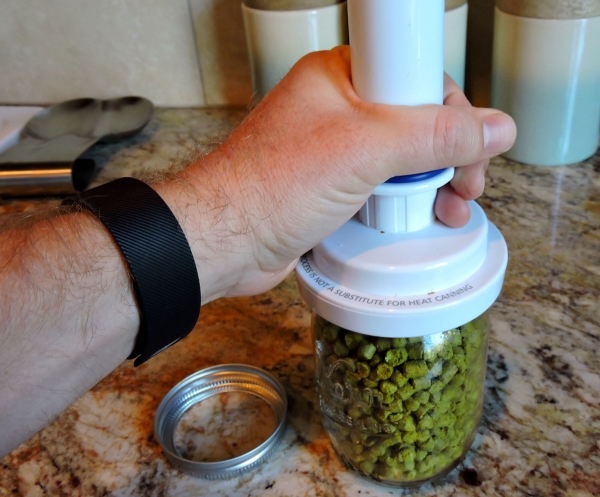
Step 3: Place the business end of the Ziploc Vacuum centered over the Jar Sealer hole. The Ziploc Vacuum should approximately fill the entire Jar Sealer top.

Step 4: Hold the Ziploc Vacuum in place with your non-dominant hand while you pump the plunger like a bicycle pump. You should hear the "click" of the lid and smell the aroma of hops as you suck the air out of the jar. Keep pumping until the lid stops clicking or you get tired (a minute or so).
Step 5: Remove the Jar Sealer, you should see that the pop-up thingy is sucked in. If the lid comes off it means you did not make a tight seal. Reposition the lid on the jar and repeat steps 2-4.
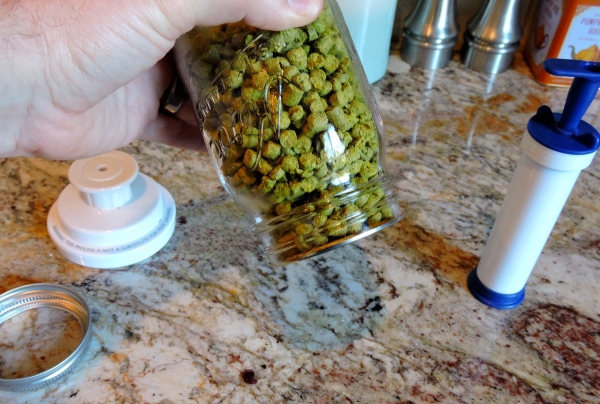
Step 5b: If you are feeling gutsy you can now turn the jar over and be amazed at how the lid stays sealed! I recommend doing this over a bowl in case the seal is not tight.
Step 6: Label the lid with the hop variety and alpha acid %, I just use blue painter's tape. You can now screw down the screw band until it's tight.

Step 7: Stash the jar in the freezer. Pull it out when you need more hops and repeat the process as needed.

Congratulations, you now have vacuum-sealed hops that should keep fresh and vibrant until the next year's crop comes out (and beyond). This process also works for any dry good you would like to keep fresh, try it with your spices!
Happy brewing!
***
Derek Springer is a homebrewer and blogger from San Diego, CA who can be found at Five Blades Brewing. Besides homebrewing Derek contributes to open-source projects like the BeerXML Shortcode plugin for WordPress and frequently speaks at blogging conferences including the European and American Beer Bloggers Conference. Catch him this June at NHC 2015 as he gives a seminar titled Berliner and Beyond: Sour Mashing and its Applications.
In the mean time, check out his latest series on Neomexicanus hops!

")