Brau Supply

Homebrew Talk - Beer, Wine, Mead, & Cider Brewing Discussion Forum

Help Support Homebrew Talk - Beer, Wine, Mead, & Cider Brewing Discussion Forum:

This site may earn a commission from merchant affiliate links, including eBay, Amazon, and others.
Well, unfortunately there was a shipping snafu and I won't be getting the new rig in time for a weekend brew this weekend. However, the folks there have been a dream to work with. We spoke on the phone this afternoon and they were very apologetic and accommodating.

If the rig is a good to work with as the people have been, then I'll be a customer for life.
 
Looks fancy, hope you enjoy it. Out of curiosity, what'd the total come out to? Single vessel with recirc, temp control?
 
I had a nice long post written with the app on my phone. I should have learned my lesson the first time the app wouldn't let me post something... grrr.. Let's see if I can remember everything I had written.

Got my new rig in the mail last Friday. Haven't had the opportunity to brew with it yet, but thought I'd relay my first impressions.

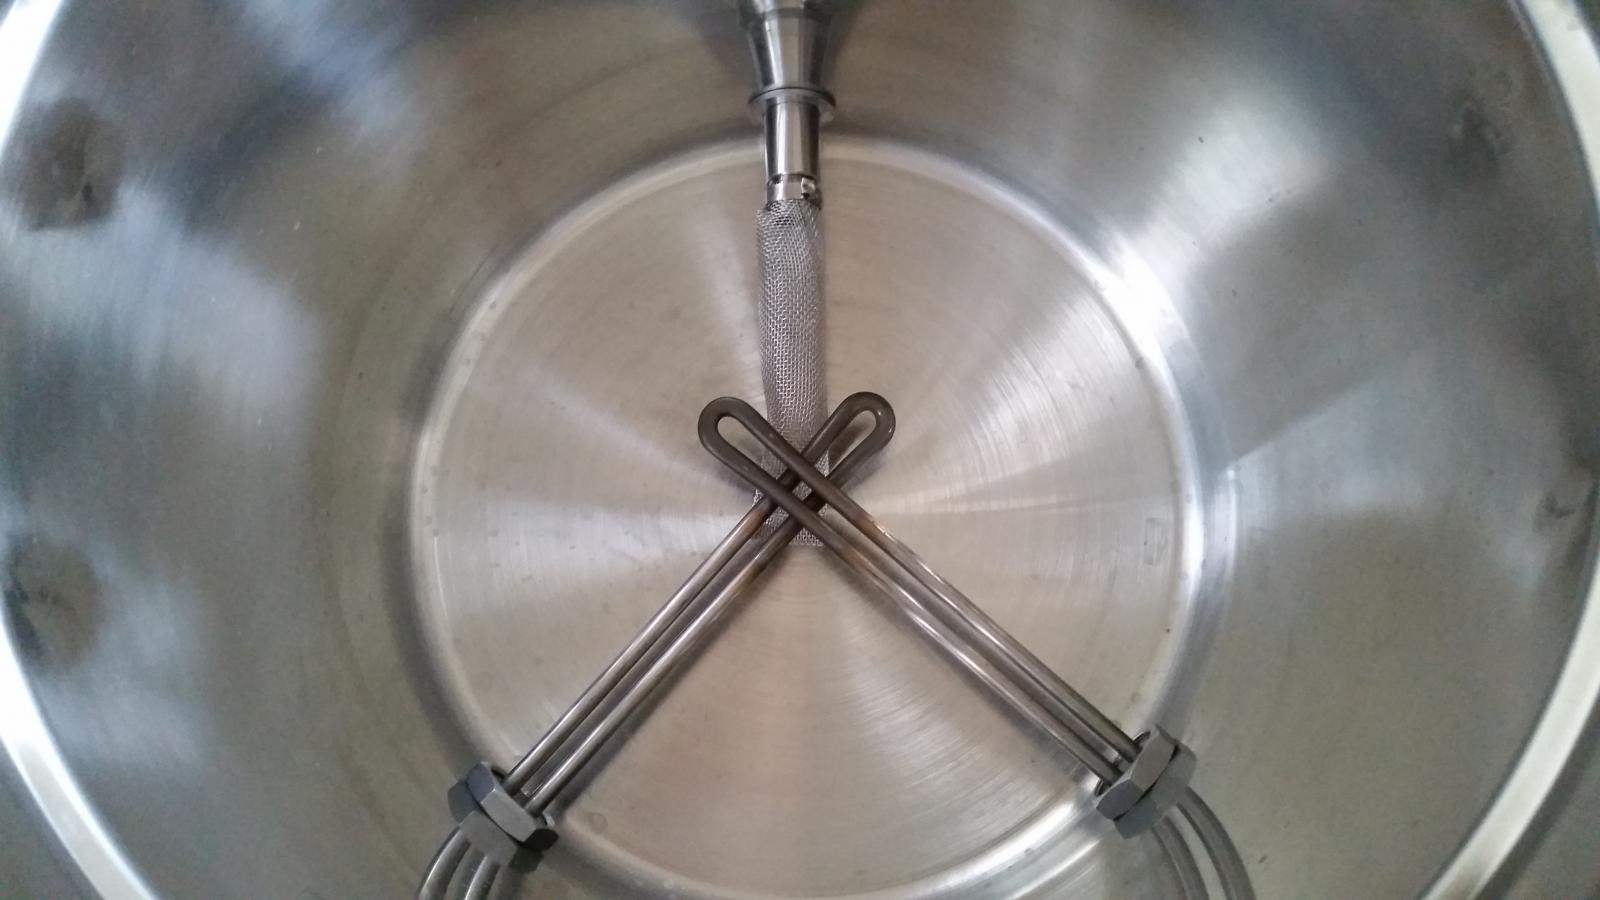
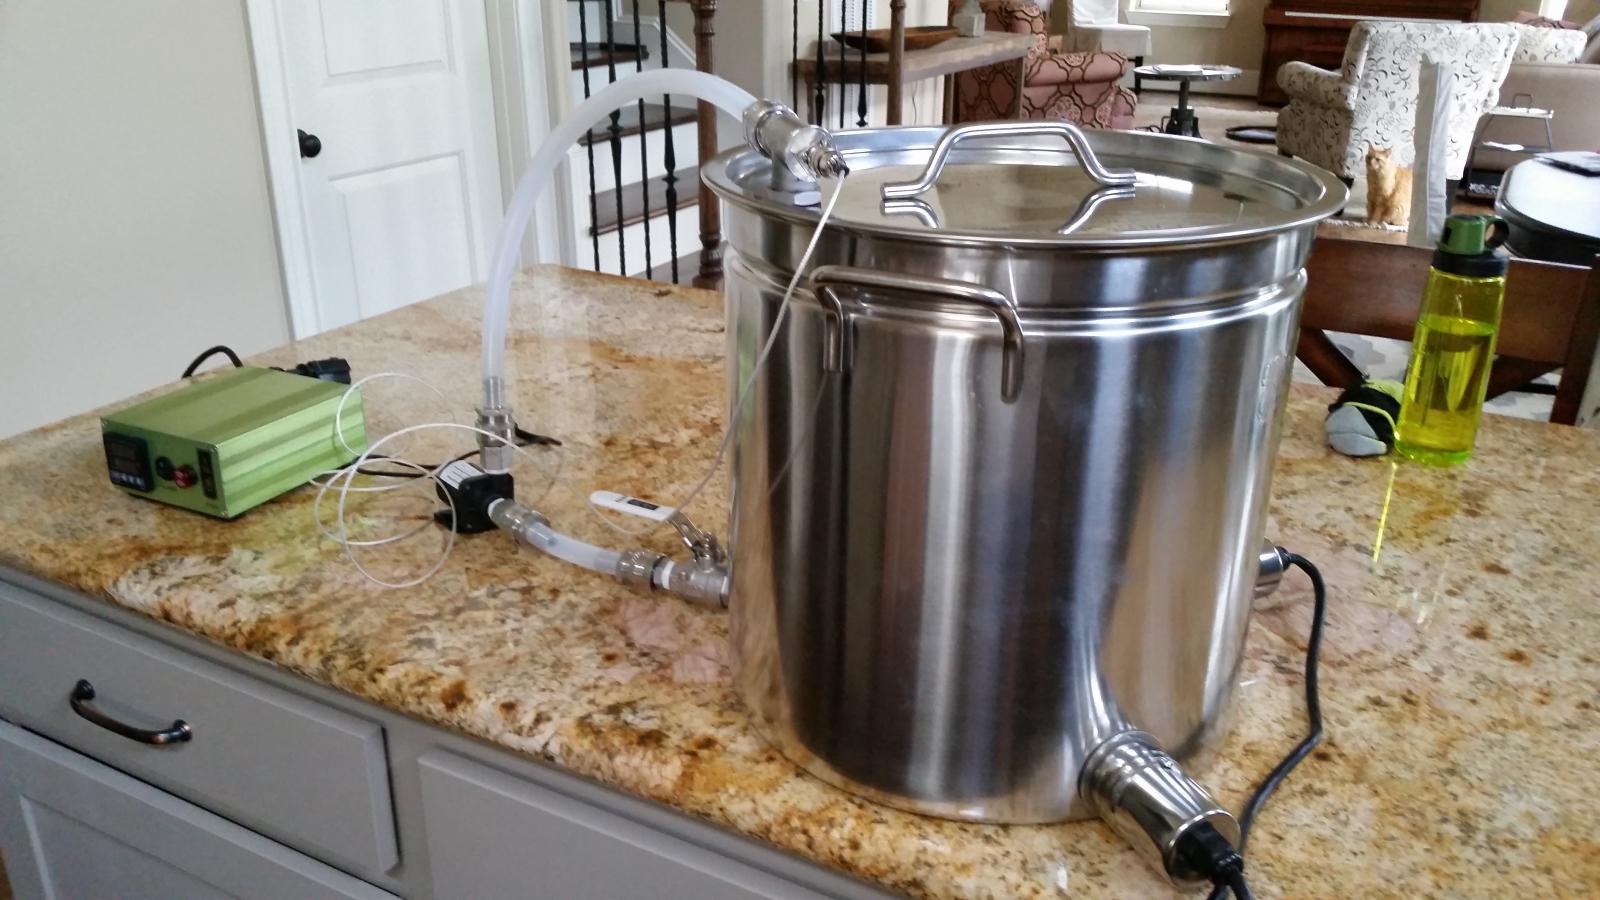
The rig comes partially assembled with the elements installed. I had to install the valve, the return tee and temp probe, and wire up the cords to the elements. This was all pretty easy given the provided assembly instructions.

Kettle: The kettle is a 36 quart Bayou Classic with a steamer basket. I already own one of these and have been very happy with it. Given the placement of the outlet valve, there is exactly 0.5 gallons of dead space in the bottom of the kettle. I'm usually a dump-everything-in-the-fermenter kind of guy. We'll see if I resist the temptation to just tip it over and pour that last little bit in the fermenter.

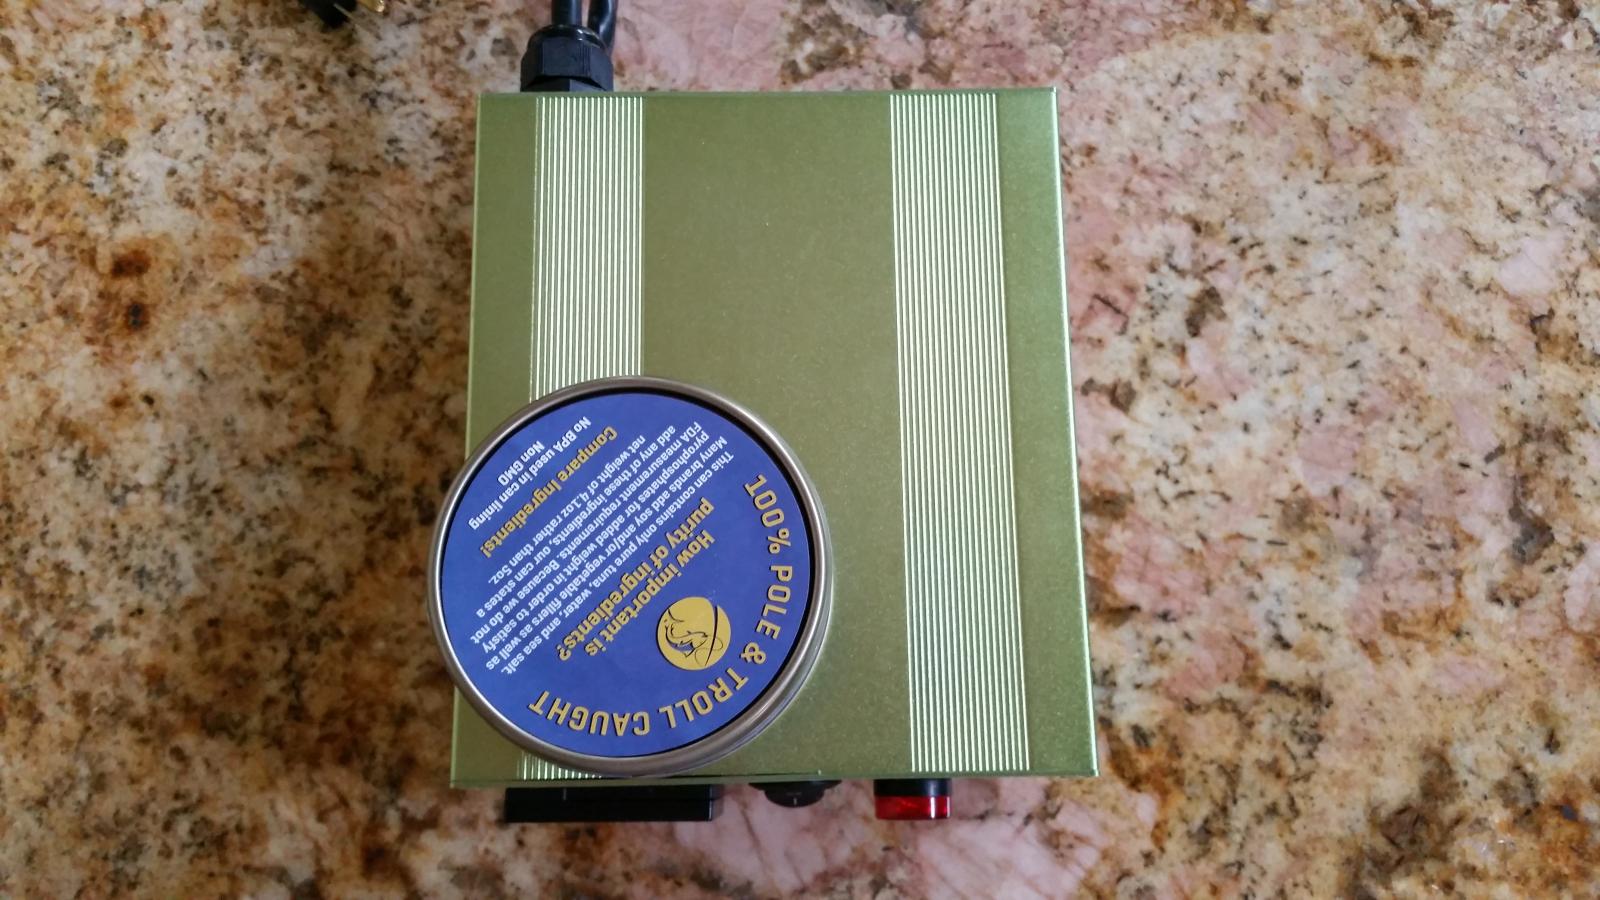
Controller: The controller is housed in a sturdy and compact metal enclosure and is a really nice shade of green. If I'm not mistaken, the wiring to the elements is 16 gauge, which should be sufficient for 1500 watts. Steven even includes detailed instructions on how to set up the controller and perform an auto-tune for your system.

Bag: I've gotta be honest, I was a little skeptical of the BIAB bag included with the rig because of my excellent experience with wilserbrewer's wares. But, as it turns out, it actually looks OK. Steven also included a small hop bag which I put to use this week for dry hopping.

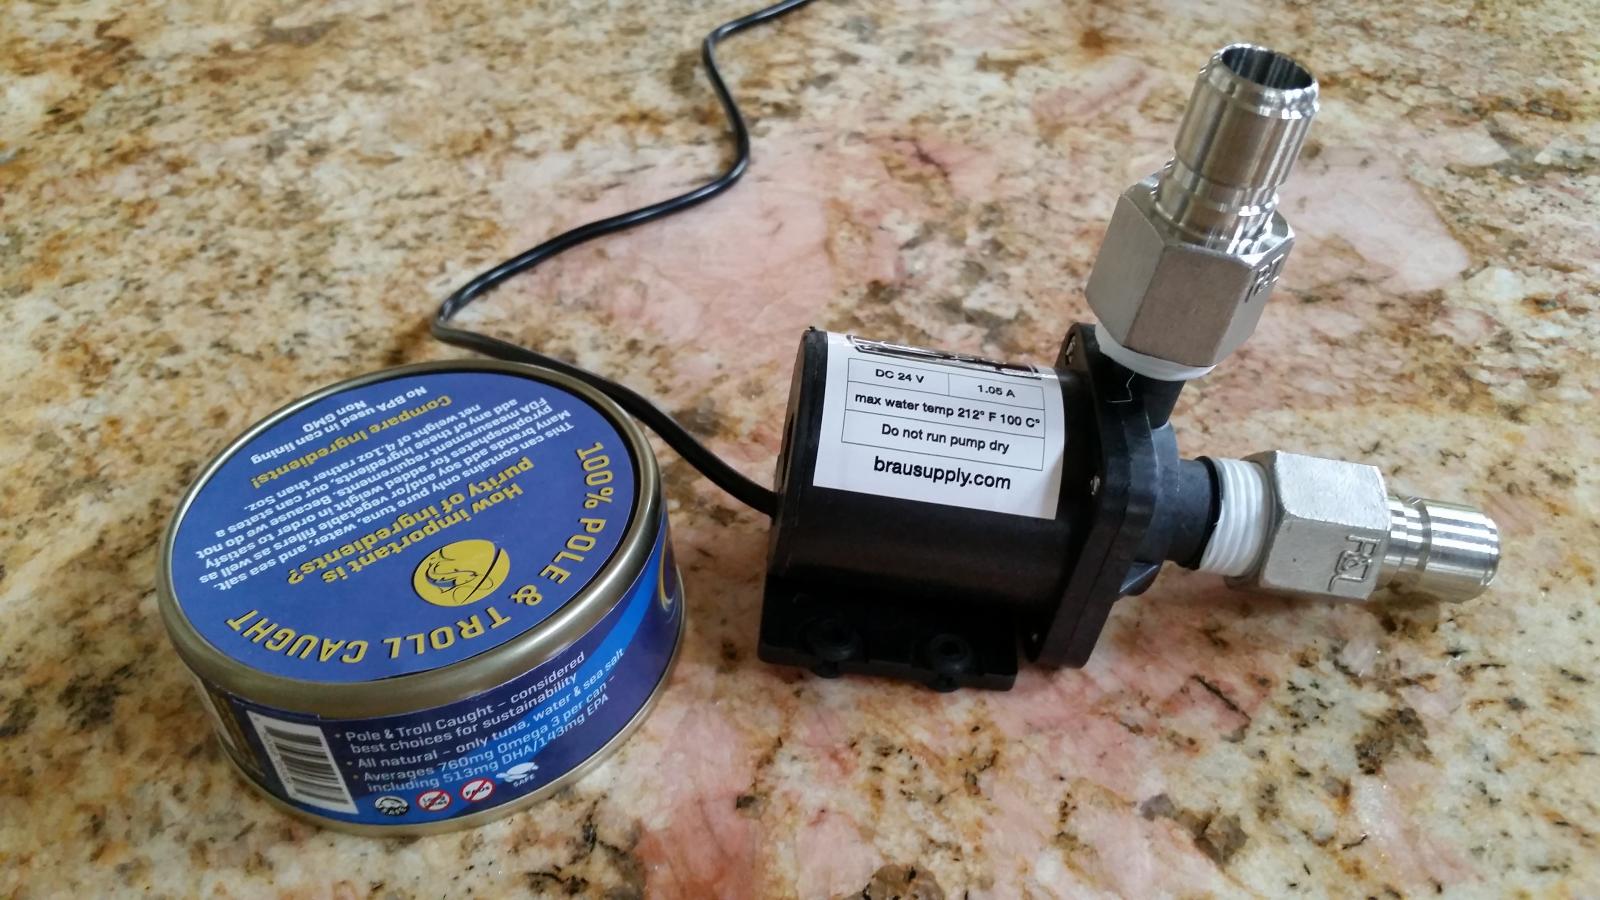
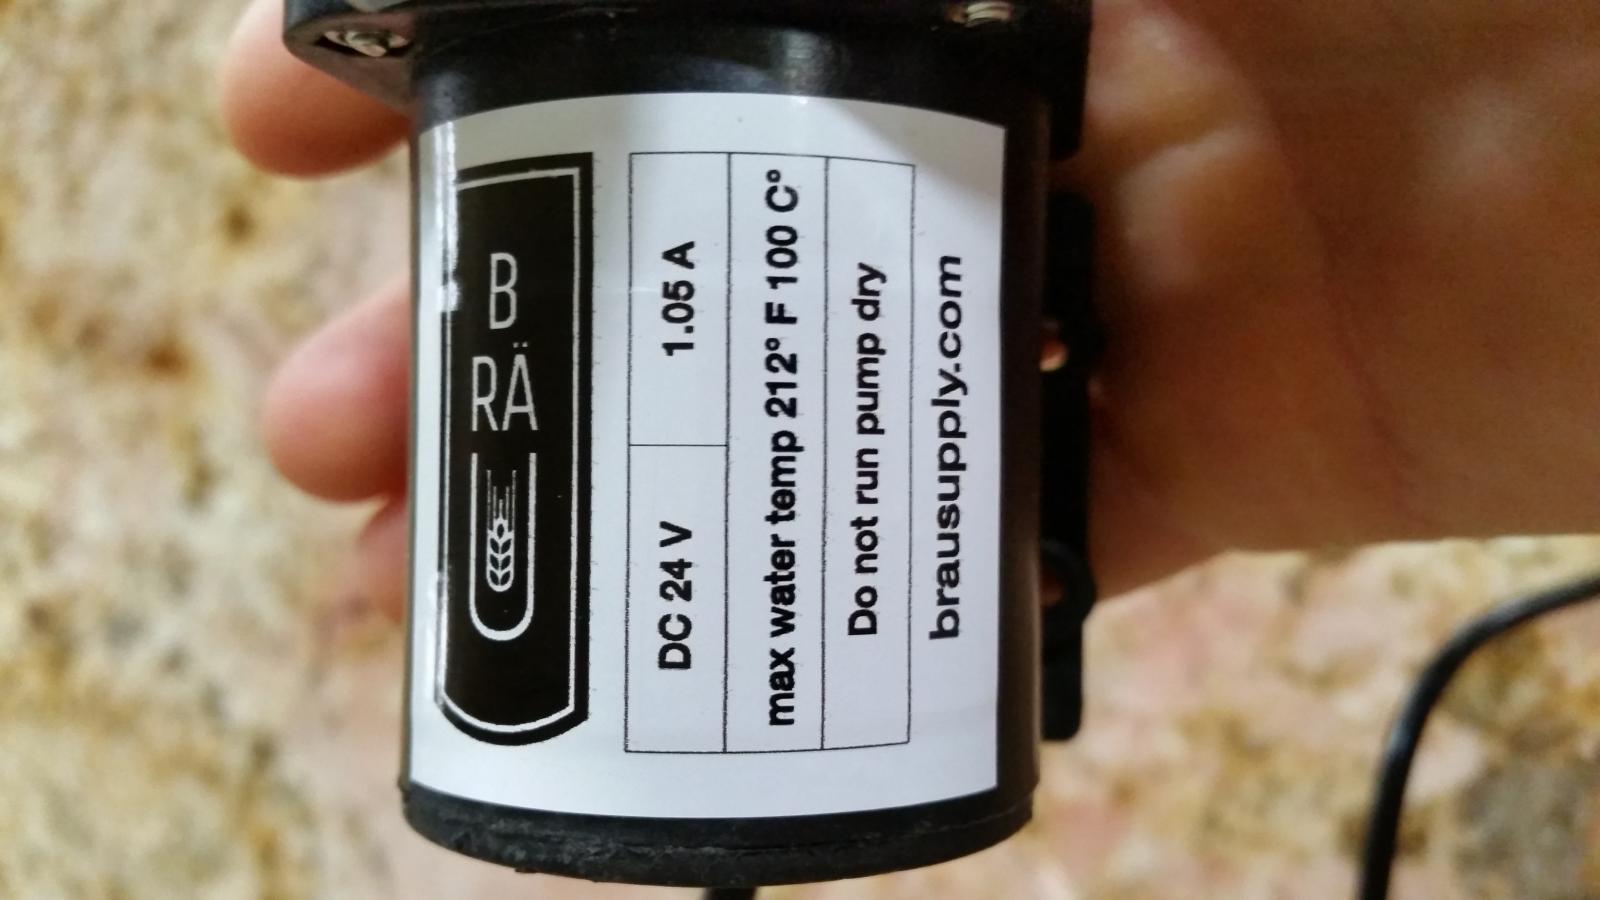
Pump: The pump is a tiny little thing, but it looks like it has a pretty significant flow rate when I pumped some water around in a circle. Maybe I'll measure the flow one day if I'm bored. The small footprint of the pump is going to be appreciated on brew day. One thing that I think would be really nice is an on/off switch in the pumps cord. With the current set up, as soon as you plug the pump in it starts running, so you better be ready and have everything lined up before doing so.

Quick Disconnects: This has been the only snag. The QDs are of sound build, but when I put everything together and was prepped for a wet run, I noticed the quick disconnects were leaking like crazy! I contacted Steven and he was quick to reply. Turns out they got some faulty o-rings from one of their suppliers and he said he'd be happy to ship me some replacements. In the meantime I've ordered some from Amazon. The unfortunate thing is I had to buy a lifetime supply of 100. I hope they fit!

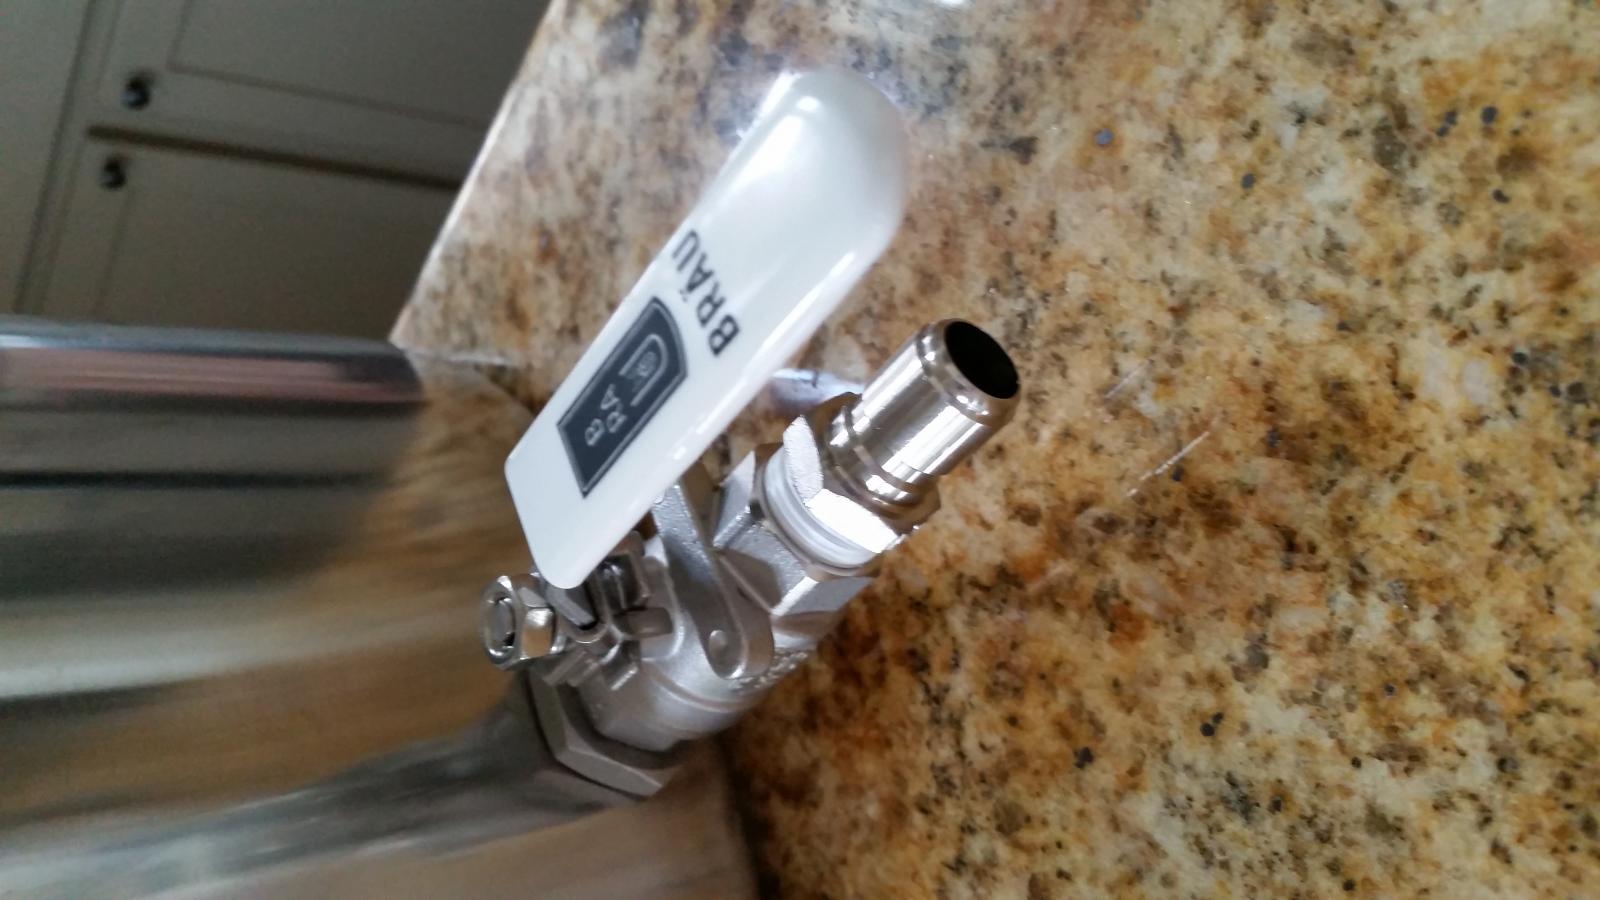
Valve: Appears to be a standard 1/4 turn ball valve. Nothing fancy but suits my needs just fine.

Other thoughts: I kind of wished the kettle was a 40 or 44 quart to allow for bigger batches using the no-sparge technique. With the set up I'll be limited to a grain bill of about 9 pounds doing a no-sparge. But then again, I'm thinking about switching to smaller batches any way to allow me to brew more often. Also, I'm curious how I'm going to control the pump's flow rate without a valve on the discharge. In my line of work we almost always use control valves to keep centrifugal pumps from running out on their curves. In this set up, I can see a discharge valve being handy if, for instance, the wort does not flow through the bag fast enough to keep a steady flow to the pump's suction. Being able to slow down the flow would correct that problem. Then again, I'm just hypothesizing and don't know that it will be a problem to begin with.

That's it for now. Below are a few pictures. Can o'tuna for scale in some pictures.

20150509_083058.jpg


20150509_083132.jpg


20150509_083334.jpg


20150509_083436.jpg


20150509_083454.jpg


20150509_083532.jpg


20150509_083644.jpg


20150509_083711.jpg


20150509_084533.jpg


20150509_084555.jpg
 
Pump: The pump is a tiny little thing, but it looks like it has a pretty significant flow rate when I pumped some water around in a circle. Maybe I'll measure the flow one day if I'm bored. The small footprint of the pump is going to be appreciated on brew day. One thing that I think would be really nice is an on/off switch in the pumps cord. With the current set up, as soon as you plug the pump in it starts running, so you better be ready and have everything lined up before doing so.


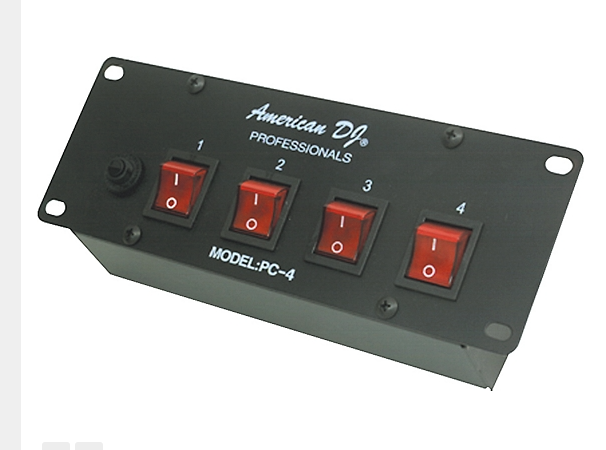
http://www.musiciansfriend.com/pro-...0@ADL4MF-adType^PLA-device^c-adid^51870555867

Maybe get something like this to plug everything into. It looks like it is about the same size as the controller box. I think this is rated for 15amps/1800 watts so not sure if that is enough to have everything plugged into it. They also sell switches at Home Depot that plug into the outlet.

I watched one of their how to videos and they recommend running the pump while chilling. I would think that this would stir up everything so you would have to either whirlpool when it is chilled and let everything settle or just dump everything in as you suggested.

Screen Shot 2015-05-16 at 2.42.34 PM.png


leviton-45098.jpg
 
Thanks for the info NTex. Those are good ideas.

Quick question for those out there that use a pump to circulate. Yesterday I was running the auto tune function on the PID and noticed that all my barbed quick disconnect connections for the silicon hose to and from the kettle and pump were leaking, very slowly. Maybe I'm naive, but I didn't think I would need hose clamps on those. As a temporary fix I took zip ties and tightened them around the connections. It worked, but I think that I might like to remove the quick disconnects every so often to run a brush down the entire hose length.

Thoughts?

Silicon is not like PEX that has a memory. You will need a low pressure clamp like the little fishes clamps http://www.amazon.com/dp/B007QEDV4U/?tag=skimlinks_replacement-20.

Their pressure ratings are very optimistic and you need to account for the OD of your hose after it is on the barb for your sizing.
 
Last edited by a moderator:
I have one of the mini systems as well. I haven't had problems with any leaky qd, but those o-rings are probably a good thing to keep on hand. What size o-rings did you end up ordering?

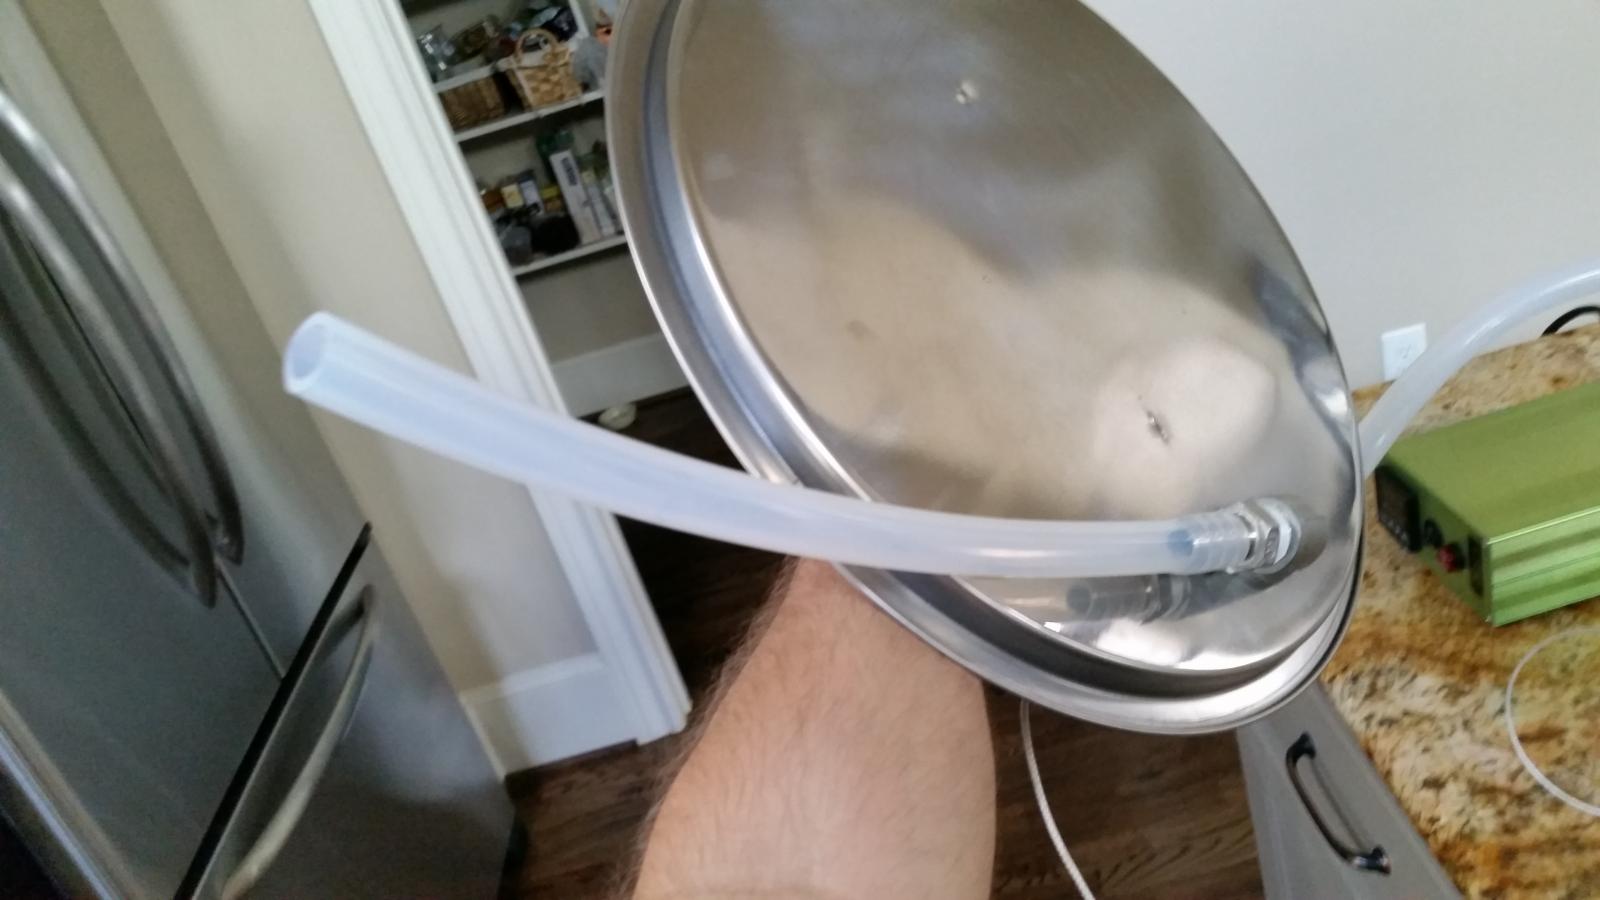
I ended up changing the silicon hose inside the pot to a locline flexible coolant hose and get a perfect whirlpool during the mash.

These are the ones I ordered, but oddly the price has jumped from about $13 when I bought just a week ago to $40 now!!! Not sure what Amazon is up to.

207 Silicone O-Ring, 70A Durometer, Red, 9/16" ID, 13/16" OD, 1/8" Width (Pack of 100) https://www.amazon.com/dp/B000FN0Y62/?tag=skimlinks_replacement-20

I'll have to look into that hose you got. Do you have a picture?

Also, I bought a $6 pizza screen to use as a false bottom. I've found the basket works well if you use a pour over sparge, but I've started using the dunk method and it just gets in the way.
 
Last edited by a moderator:
These are the ones I ordered, but oddly the price has jumped from about $13 when I bought just a week ago to $40 now!!! Not sure what Amazon is up to.

207 Silicone O-Ring, 70A Durometer, Red, 9/16" ID, 13/16" OD, 1/8" Width (Pack of 100) https://www.amazon.com/dp/B000FN0Y62/?tag=skimlinks_replacement-20

I'll have to look into that hose you got. Do you have a picture?

Also, I bought a $6 pizza screen to use as a false bottom. I've found the basket works well if you use a pour over sparge, but I've started using the dunk method and it just gets in the way.

You can get a pack of ten O-rings for $4 w/ free shipping:
http://www.amazon.com/dp/B000FMWORK/?tag=skimlinks_replacement-20

No per unit savings, but ten should be plenty.
 
Last edited by a moderator:
I have one of the mini systems as well. I haven't had problems with any leaky qd, but those o-rings are probably a good thing to keep on hand. What size o-rings did you end up ordering?

I ended up changing the silicon hose inside the pot to a locline flexible coolant hose and get a perfect whirlpool during the mash.

I want to be sure I understand this. Are you curving the hose around the O.D. of the pot and creating a whirlpool that way? What is the advantage of a whirlpool while mashing?

Also, it looks like it is rated to only 170F. Is that a concern?
 
I want to be sure I understand this. Are you curving the hose around the O.D. of the pot and creating a whirlpool that way? What is the advantage of a whirlpool while mashing?

Also, it looks like it is rated to only 170F. Is that a concern?

Maybe whirlpool was the wrong word. I found that the loc-line tubing allows for a more controlled stream and water movement keeping the grain bed from settling too much and requiring frequent stirring.

The only times I recirc is during the mash and for 5 minutes at the end of the boil to sanitize my tubing and plate chiller. In my research of the loc-line tubing, I came across a member here who contacted the manufacturer and they stated it is actually fda certified to 240°, but mechanically only to 170°.
 
Hmm, Steven at Brau Supply says he does not stir his mash at all, and that he gets 80% efficiencies. I just pushed the silicone hose into the grain bed, and let the circulating water do the rest. But I am still working the learning curve on this, as I brought very little experience to the table when I bought my Mini.

I do not understand "mechanically certified." What does that mean?
 
The silicon hose in effect accomplishes the same thing, but I liked being able to aim it around and really improve the water movement.

My understanding is that at higher temps (240°+) as the plastic softens, it is possible that fluid may leak from between the connections. So in a mechanical usage (supply line for coolant or lubricant) the hose can fail.
 
Hmm, Steven at Brau Supply says he does not stir his mash at all, and that he gets 80% efficiencies. I just pushed the silicone hose into the grain bed, and let the circulating water do the rest. But I am still working the learning curve on this, as I brought very little experience to the table when I bought my Mini.

That's encouraging. I guess I should buy one of those 12 volt solar water pumps for my new eBIAB.

For my thread I started "Electric BIAB, no pump, no element guard" ; https://www.homebrewtalk.com/showthread.php?t=526370

I guess I will have both...

MS
 
The silicon hose in effect accomplishes the same thing, but I liked being able to aim it around and really improve the water movement.

My understanding is that at higher temps (240°+) as the plastic softens, it is possible that fluid may leak from between the connections. So in a mechanical usage (supply line for coolant or lubricant) the hose can fail.

That makes sense to me.

I suppose in the event the hose did leak, you'd just be leaking wort into wort. No harm in that.
 
Hmm, Steven at Brau Supply says he does not stir his mash at all, and that he gets 80% efficiencies. I just pushed the silicone hose into the grain bed, and let the circulating water do the rest. But I am still working the learning curve on this, as I brought very little experience to the table when I bought my Mini.

I do not understand "mechanically certified." What does that mean?

I think it means that beyond the 170deg even though it is still food safe the tubing could fail or deform. I once tried to chill some wort with latex based tubing and even though it was food safe to 212 it blew up like a balloon! Not good...
 
I have to jump in. WhoVous that looks tasty!

Thanks, Steven.

It tasted a whole lot better than anything I've brewed before. My stepson said that if this was served to him in some $7 a glass craft beer bar he'd be very happy with it. Granted, not the toughest audience, but it was good.

The recipe was mine. I tried to follow BJCP guidelines for APAs. The bitter is very clean and not especially long lasting. Aroma is just OK, at least to my aging nose. Taste is reasonably complex and quite "juicy." Color is OK. Mouthfeel is pretty smooth and round, and where I wanted it to be.

Head is not very long lasting and the bubbles are too large. Lacing is light.

This is after two weeks in the fermenter followed by a three day dry hop in the fermenter. No cold crash. Thirteen days in bottles followed by one day in the refrigerator.

"Chill haze" is next on my learning list. Each of my gallon kit beers before this was simply all clouds all the time. This one was crystal clear in the bottle before refrigeration. I did not know before this that a bottle could be clear when warm and cloudy when cool. It is too late for almost everything I could have done to avoid a chill haze this time around, although I am going to cold condition some bottles for about five days before opening the next one. Dunno how much that will help.

Still, while there are lots of faults to be found, I am over the moon happy with how this came out. I made a bunch of mistakes while familiarizing myself with a new system, and it is still a darn tasty brew.

Phil Anderson
 
Last edited:
Also, I'm curious how I'm going to control the pump's flow rate without a valve on the discharge. In my line of work we almost always use control valves to keep centrifugal pumps from running out on their curves. In this set up, I can see a discharge valve being handy if, for instance, the wort does not flow through the bag fast enough to keep a steady flow to the pump's suction. Being able to slow down the flow would correct that problem. Then again, I'm just hypothesizing and don't know that it will be a problem to begin with.

A buddy at work gave me a fantastic idea to use should I find there's a problem controlling the flow. I can put a flow control hose clamp like this on the discharge...

E.C. Kraus Flow Control Hose Clamp https://www.amazon.com/dp/B00838W4NC/?tag=skimlinks_replacement-20

Itching to brew with this thing. All I need now is some free time.
 
Last edited by a moderator:
Silicon is not like PEX that has a memory. You will need a low pressure clamp like the little fishes clamps http://www.amazon.com/dp/B007QEDV4U/?tag=skimlinks_replacement-20.

Their pressure ratings are very optimistic and you need to account for the OD of your hose after it is on the barb for your sizing.

Got the hose clamps in the mail yesterday. Went with the 1/2" size. They fit, and I think they'll hold the pressure just fine.

Thanks for the recommendation!
 
Last edited by a moderator:
Got the hose clamps in the mail yesterday. Went with the 1/2" size. They fit, and I think they'll hold the pressure just fine.

Thanks for the recommendation!

Cool. I find I have to go about 1/8" large than they claim their diameter range is when dealing with barbed fittings. If you are under 45 PSI they should be fine. 50-100 PSI, marginally but OK if you use two. Over that is not advisable unless the fluids are never going to warm enough for the hoses to soften (if they are, tighten them another click when the hose is at its softest from prolonged heating).
 
I've ordered some clamps myself, but I wonder just how much pressure you think will be involved here. I'd guess not much, as there is always the other end of the tube to release the pressure. I want the clamps because I pulled a hose off by mistake, not because I think the barb cannot handle the pressure.

I am also a little confused about constricting the flow of the hose. Once the hoses are filled with wort, where is the additional air going to come from. Isn't it a sealed system at this point?

I am very new to all of this, and confess I may be missing something here.

Only reason I got the clamps is because my barb connections were leaking during the wet run. I don't expect hardly any pressure.

And the reason one might want to restrict the flow on the discharge is if the pump is pulling at a higher rate from the kettle than is flowing through the bag into the pump suction, into what I would call the "sump" below the basket bottom. You could potentially empty the sump and cavitate the pump.
 
http://www.modernpumpingtoday.com/detecting-pump-cavitation/

Waddaya know? Another subject of which I know nothing.

I have heard a few noises that I suppose could be cavitation, but which I thought simply meant a seal was less than complete and air was being sucked in that way. I got some bad QDs from the same batch that you got. Steven replaced them, and now I have to push the connections around to create that same kind of sucking sound. But I think I see your point, and I suspect cavitation just might be possible if the mash was thick enough.
 
"Chill haze" is next on my learning list. Each of my gallon kit beers before this was simply all clouds all the time. This one was crystal clear in the bottle before refrigeration. I did not know before this that a bottle could be clear when warm and cloudy when cool. It is too late for almost everything I could have done to avoid a chill haze this time around, although I am going to cold condition some bottles for about five days before opening the next one. Dunno how much that will help.
Phil Anderson

go with a longer cold condition, couple of weeks if you have the patience for it, after carbonation is complete, that can drop a lot of the chill haze out.
 
And the reason one might want to restrict the flow on the discharge is if the pump is pulling at a higher rate from the kettle than is flowing through the bag into the pump suction, into what I would call the "sump" below the basket bottom. You could potentially empty the sump and cavitate the pump.

If the pump is DC could you not wire a rheostat to the pump. Is a DC pump like a DC computer fan? It would be like the homemade stirplate and a DC fan? At the same time wire a switch and you can turn the pump on and off with the switch and regulate the flow with the rheostat. Or you get a universal AC/DC wall wart that allows you to chose different voltage.

I'm a Civil Engineer by trade so I'm just throwing something out that maybe someone with more knowledge can confirm or deny!!
 
Back
Top