
Most of my brewery stuff is stainless steel, and due to my brother using my equipment in a really infected batch, I decided to replace everything plastic. I hated spending money on it. I also have a bunch of sours that I'll need to bottle soon, and I don't want to contaminate some sours with cultures that were used in other sours, just because they used the same equipment.
So I'm looking at getting rid of ALL plastic in my brewery. My first target was the bottling bucket/spigot. Not only is it the most expensive of the plastic pieces I have (autosiphon, bottling wand, and bottling bucket), but it's also by far the bulkiest, and I didn't want to waste space with multiple bottling buckets. But a dedicated stainless steel bottling vessel seemed like an absurd waste of money. So I came up with this.
I almost didn't post this, as in retrospect it seems so obvious, and is EXTREMELY simple. But I've never heard of anyone doing this before, so I decided I'd share.
The Bottling Kettle
First off, this isn't for everyone. It requires a kettle with a ball valve and quick disconnect. If you already have this, it's a very cheap little project.
This solves more than one problem I had with plastic bottling buckets. The most obvious one is that it's far more sanitary, since you can obviously even boil water directly in it. And my kettle in particular - a Blichmann Boilermaker - has the diptube sitting about 1/8" from the bottom, meaning far less waste. You can also use whatever hop filter you normally use, to deal with trub if you want.
What you'll need:
Step 1:
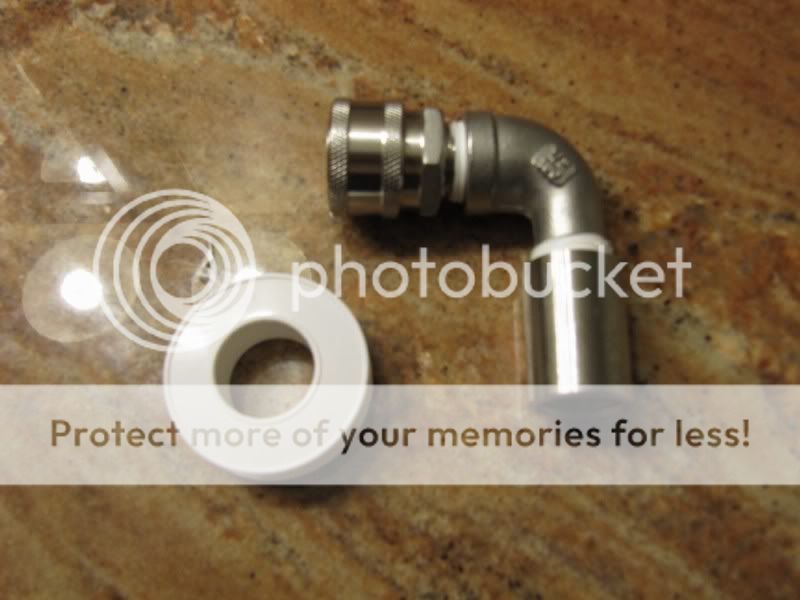
Using teflon tape, connect quick disconnect to elbow fitting.
Step 2:
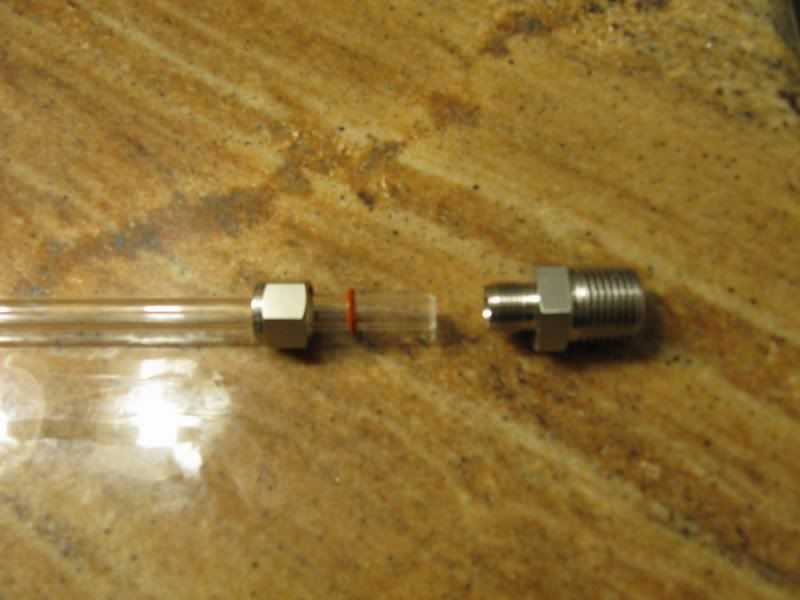
Align compression nut, o-rings, and fitting along the "top" part of the bottle filler like so, and tighten it all together.
Step 3:
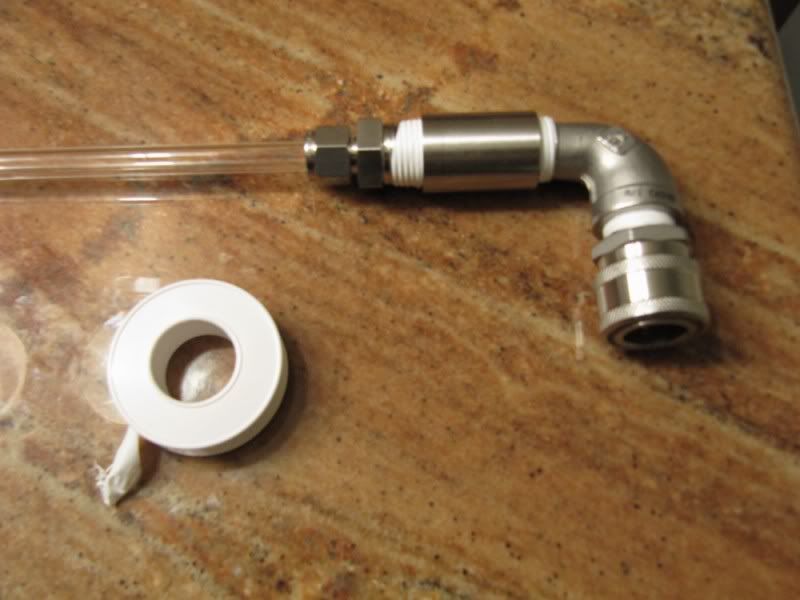
Connect the bottle filler assembly to the elbow fitting using teflon tape.
And done!
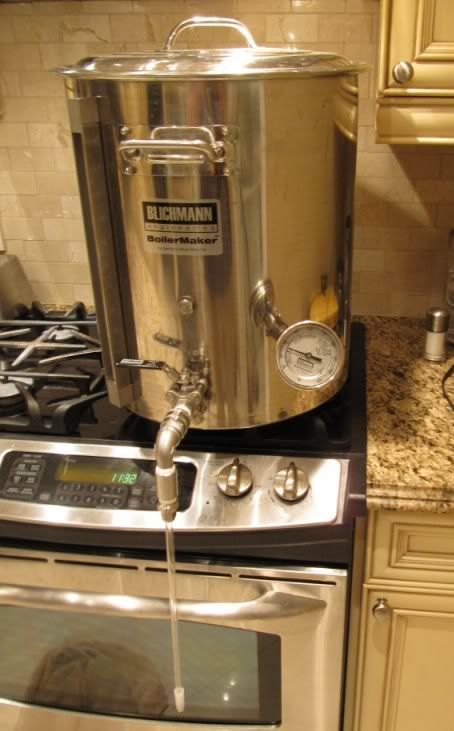
Just connect it to your kettle when ready to bottle!
So I'm looking at getting rid of ALL plastic in my brewery. My first target was the bottling bucket/spigot. Not only is it the most expensive of the plastic pieces I have (autosiphon, bottling wand, and bottling bucket), but it's also by far the bulkiest, and I didn't want to waste space with multiple bottling buckets. But a dedicated stainless steel bottling vessel seemed like an absurd waste of money. So I came up with this.
I almost didn't post this, as in retrospect it seems so obvious, and is EXTREMELY simple. But I've never heard of anyone doing this before, so I decided I'd share.
The Bottling Kettle
First off, this isn't for everyone. It requires a kettle with a ball valve and quick disconnect. If you already have this, it's a very cheap little project.
This solves more than one problem I had with plastic bottling buckets. The most obvious one is that it's far more sanitary, since you can obviously even boil water directly in it. And my kettle in particular - a Blichmann Boilermaker - has the diptube sitting about 1/8" from the bottom, meaning far less waste. You can also use whatever hop filter you normally use, to deal with trub if you want.
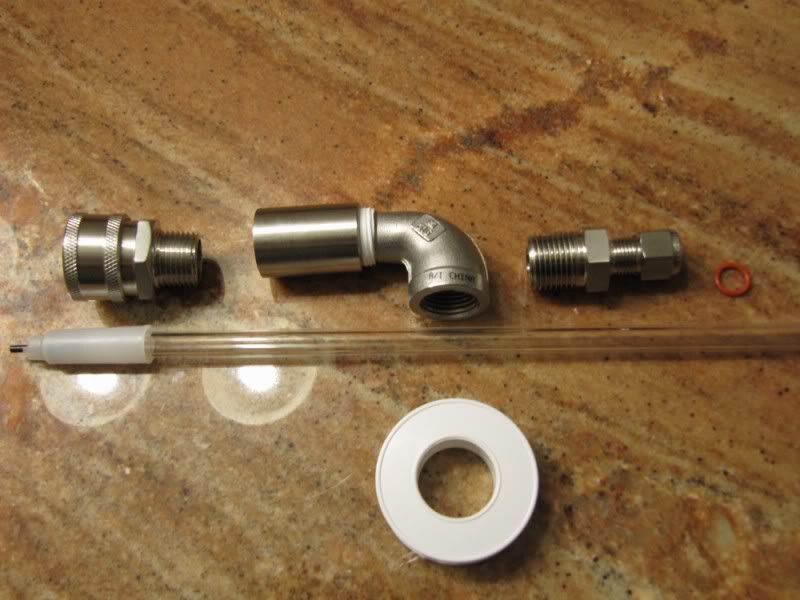
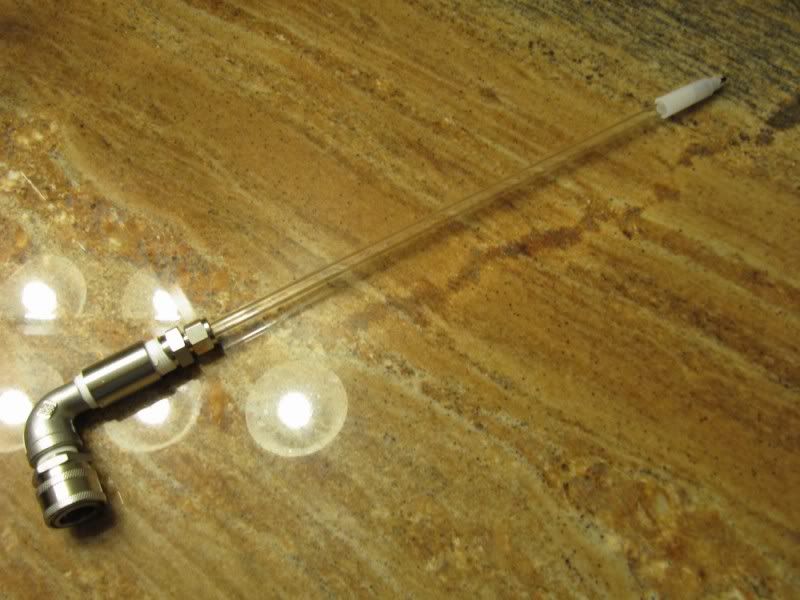
What you'll need:
- Quick Disconnect (must mate with kettle's QD)
- 90-degree elbow fitting (I'm using a street elbow + coupler right now since I had them on hand)
- MPT x 3/8" Compression fitting
- TWO 3/8" ID x 1/2" OD silicone o-rings (Only one in picture as I seemed to have lost the 2nd one!)
- 3/8" Bottle filler
- Teflon tape
Step 1:
Using teflon tape, connect quick disconnect to elbow fitting.
Step 2:
Align compression nut, o-rings, and fitting along the "top" part of the bottle filler like so, and tighten it all together.
Step 3:
Connect the bottle filler assembly to the elbow fitting using teflon tape.
And done!
Just connect it to your kettle when ready to bottle!

")
