Blichmann BrewEasy

Homebrew Talk - Beer, Wine, Mead, & Cider Brewing Discussion Forum

Help Support Homebrew Talk - Beer, Wine, Mead, & Cider Brewing Discussion Forum:

This site may earn a commission from merchant affiliate links, including eBay, Amazon, and others.
My system Ramps up quick b/c I have the rims rocket, once the grain temp is close to 168 (167 or so) I start the 10 min clock...my ramp time is somewhere around 10 mins to get the GRAIN temp to 168...my wort temp hits 168 in a minute or so. If I'm gonna have a mash start to get stuck, it's usually in the mash out...so keep a close watch. One other thing, mash out is to denature the enzymes, even if you don't hit 168 in the grain bed, you'll quickly hit 168 when you start heating the bk. Better to be on the cold side of 168 than too hot on mash out, you don't want off flavors (that evidently comes with being too hot). Just my humble opinion...
 
Has anyone made a Czech Pils on the BrewEasy? I'm trying to determine how to build the (very soft) water and if I should add any specialty malts to make sure there is some body. Any thoughts?
 
So is the consensus here that 5 gallon batches in a 10 gallon electric is a no go? New to all grain and electric 10 gallon looks really good to me..would mainly do 5 gallon batches, but would want that flexibility.
 
So is the consensus here that 5 gallon batches in a 10 gallon electric is a no go? New to all grain and electric 10 gallon looks really good to me..would mainly do 5 gallon batches, but would want that flexibility.

I am really curious about this as well. I typically make 6 gallon batches and was wondering if there would be problems keeping the coil submerged during the mash re-circulation, or keeping enough liquid in mashtun.

While I like having the ability to do 10 gallon batches that is not the norm for me.
 
This question was discussed much earlier in the thread.

IIRC, the consensus was: yes, you CAN do 5 gallon batches in the 10 gallon system, you just need to keep a closer eye on the level in the bottom kettle.

I plan on buying one of these next year, and like many people here, will probably do mainly 5 gallon batches - I was planning to scale my recipes up for 7 gall or so & just discard the excess...
 
This question was discussed much earlier in the thread.


IIRC, the consensus was: yes, you CAN do 5 gallon batches in the 10 gallon system, you just need to keep a closer eye on the level in the bottom kettle.


I plan on buying one of these next year, and like many people here, will probably do mainly 5 gallon batches - I was planning to scale my recipes up for 7 gall or so & just discard the excess...


Is there something that could be made out of stainless to displace the water. How about a smaller stainless pot that fits nicely inside and not touch the boil coil, in the MT which could be removed before the boil.
 
Is there something that could be made out of stainless to displace the water. How about a smaller stainless pot that fits nicely inside and not touch the boil coil, in the MT which could be removed before the boil.

Ummmm.... that is a damn good idea! Can't believe I didn't think of it myself.

I can't see any reason why it wouldn't work. A big inverted cylinder inside of the boil coil... you could remove it before the boil if you wanted to whirlpool...

Nice idea! If you do it, make sure & post here how it worked out so the rest of us can copy your great idea!
 
Last edited:
Ummmm.... that is a damn good idea! Can't believe I didn't think of it myself.

I can't see any reason why it wouldn't work. A big inverted cylinder inside of the boil coil... you could remove it before the boil if you wanted to whirlpool...

Nice idea! If you do it, make sure & post here how it worked out so the rest of us can copy your great idea!

This is pretty much exactly what I do (mentioned it in https://www.homebrewtalk.com/showpost.php?p=6696127&postcount=331)

What I use is a cheap 3 gallon SS pot from Walmart and weigh it down with barbell weights.

It works well, but I can tell you some of the downsides:

  • the height of liquid in the BK will be more sensitive to float position, which is a problem because:
  • unless you have a sealed displacement vessel you'll have to worry about wort spilling into the displacer
  • also if the displacer isn't sealed, you'll have to remove it before final runoff. This means you'll have to remove the MT drain line, lift the MT off, remove the displacer, then put the MT back on. Remember, the MT is filled with heavy grain.

I've thought of other alternative displacers, but none as cheap as a pot and weights.
 
How about a sealed displacement vessel? Pay a friend (in beer, natch) to weld closed a 1 or 2 gallon pot?

When I pondered that one, the concern I had was if the vessel were too thin it might burst due to temperature/pressure rise - could be a non-issue, haven't done the math. I even thought about adding a GoreTex vent to such a thing, but that's ridiculously complicated :) Solid stainless stock is just too expensive. Maybe something heavy coated in something inert? It would be easiest if you could just leave it in the BK until after transferred the finished wort.
 
When I pondered that one, the concern I had was if the vessel were too thin it might burst due to temperature/pressure rise - could be a non-issue, haven't done the math.


Good point. Why not vent it w/ a piece of SS tubing? High enough, heavy/strong enough and shaped correctly it could also act as a handle to lift once the mash tun was removed...

Removable top or a second line and you could use water as weight as well - would take longer to heat, but then again you would have the system to do it and it would help maintain stable temperatures.

M

That makes sense to me. And It wouldn't be too difficult to add a threaded SS pipe to the lid. If one could find an ideally shaped and inexpensive pressure cooker, you could also avoid having to permanently fix the lid to the pot.
 
Doing a 5 gal batch on a 10 gal system isn't the eazyest thing to do. Here is what I do hope it helps.

I do a 90 min boil on all my 5gal batches witch gives me more water to cover the boil coil. I also drew a line on the site glass where the coil is so I can keep a good eye on it. My goal is to keep at lease a extra gallon of water over the coil.

As far as the Auto sparge. I will dough in and set my sparge arm making sure that I have at least 1 gal of water over the coil. Then I will start the re circulation using the 1.25 gpm and throttle back my chugger pump to about half to a third. I will then look at the Auto Sparge hose to make sure I have a nice steady stream coming out. I will usually adjust the pump flow a little to get it just where i want. You don't want it blasting out to fast. After that the water level over the boil coil doesn't move.

This points out something important I didn't mention. I don't always have to use the displacer on "5 gallon" batches. As mentioned, longer boils help. So do smaller grain bills. Trying to do a 5 gallon barleywine might not be realistic without a displacer. Punk Rock, what's the largest grain bill you've pulled off for a 5 gallon batch?

This might be obvious, but for those trying to decide whether a 10 gal system is versatile enough for smaller batches, consider that even if it might not be realistic to always do batches that are exactly 5 gallons into the fermenter, it might be realistic to do 6. The point is that its not an all-or-nothing proposition.
 
Punk Rock, what's the largest grain bill you've pulled off for a 5 gallon batch?

I believe the largest grain bill I have done for a five gallon batch so far is about 18.5 lb. Also when I say 5 gal batch I'm actually trying to hit a 5.5 gal after boil.

The 10 gal system will do a 5 gal batch just fine, you just have to keep a closer eye on it. In fact most of my brews are 5 gal batches. I brew to much to do 10 gal batches all of the time. I like the flexibility to be able to do 5, 10 and 15 gallon batches.

Also just one other point about my system I am not using the tower of power I am using a custom controller using the BCS-460.

Here is a pic of my setup.
https://goo.gl/photos/QhPgr25fh7UA6BaA8
 
So if I build a displacer, help me here, am I forgetting anything?

The height of the displacer only needs to be a litter higher than the height of the top of the boil coil. I only need the same clearance between the coil and displacer as the coil and pot. I need a vent stack to avoid a pressure vessel also acting as a handle. A way to fill it with water ,so it will sink, via vent tub I guess. It should be made of stainless.

If I tig weld the lid on a cheep pot, remove the pot handle(nob type) enlarge the bolt hole to take a fitting for the vent tube and add a stack, this should work. As far as the drain tube, if you didn't want it draining on top of the pot, just add a piece of silicone tubing to lengthen it out.

I like to experiment with recipes and 10 gals is a bit much, 3 to 5 gals would be better.
 
I'm not sure how to word this;

A kettlebell would work but only displace the save volume of water as it's own volume, I though if the displacer was as close to the coil as possible and needs to be no higher, instead of it needing to displace a large volume of water it would rather change the volume that the pot will hold at the bottom. If I could snugly fit the displacer in the bottom of the pot, the volume of water that is required to cover the coil will be greatly reduced, eccenually creating a channel around the coil requiring very little water.

Is this correct?
 
Anything that displaces will provide some assistance. Even something sealed that is not as high as the BoilCoil (like a kettlebell) would be helpful - but it's a matter of how much. I generally agree that making the displacer as tall as the BoilCoil (plus coverage margin) makes sense. The only reason it would need to be taller is if you decided to not seal it and rely on its height to keep wort out. The restriction on height is that it will eventually run into the wort return tube.

On the topic of how close to the coils to make the displacer, wider diameters will make the autosparge / BK height sensitivity problem worse. However, that doesn't really matter with a sealed vessel. The length of the AS arm also plays a role here. I've extended mine to handle a large range of grain bills. You may have to as well, but it's also a good idea to keep multiple lengths handy.

I've got a spreadsheet that could help you decide what size of a displacer you'd need. I'll publish it soon.
 
So if I build a displacer, help me here, am I forgetting anything?

The height of the displacer only needs to be a litter higher than the height of the top of the boil coil. I only need the same clearance between the coil and displacer as the coil and pot. I need a vent stack to avoid a pressure vessel also acting as a handle. A way to fill it with water ,so it will sink, via vent tub I guess. It should be made of stainless.

If I tig weld the lid on a cheep pot, remove the pot handle(nob type) enlarge the bolt hole to take a fitting for the vent tube and add a stack, this should work. As far as the drain tube, if you didn't want it draining on top of the pot, just add a piece of silicone tubing to lengthen it out.

I like to experiment with recipes and 10 gals is a bit much, 3 to 5 gals would be better.

The only potential issue I see is the possibility that the vent pipe/handle could interfere with the wort return tube (since it's centered). As long as it's not tool long or you have enough room to place the displacer off-center in the BK it should work just fine.
 
Even something sealed that is not as high as the BoilCoil (like a kettlebell) would be helpful - but it's a matter of how much.

I generally agree that making the displacer as tall as the BoilCoil makes sense. The only reason it would need to be taller is if you decided to not seal it and rely on its height to keep wort out.


On the topic of how close to the coils to make the displacer, wider diameters will make the autosparge / BK height sensitivity problem worse. However, that doesn't really matter with a sealed vessel. The length of the AS arm also plays a role here. I've extended mine to handle a large range of grain bills.


I've got a spreadsheet that could help you decide what size of a displacer you'd need. I'll publish it soon.


A matter of how much? To me, all I want to do is keep the coil under water. So if I create something that channels water around the coil, the less water the better, the height of the coil is all it needs to be to create the channel and closer to the coil (larger diameter) will further reduce the volume of water to fill said channel.

I agree the height is only depended whether or not you seal the displacer. I originally planned doing this the "quick cheap" way but I now realize I want to do smaller batches now more than ever because 10 gals of beer I don't like the taste of is hard to swallow. I have means of cutting, welding, grinding, I see no reason for me not to make it sealed with a vent tube off centred.

Back in the thread it was posted that a length of M8, threaded stock, could be cut up to make several different lengths of arms for the auto sparge, I already have this taken care of.

If I create the smallest channel possible around the coil keeping it submerged that will give me the greatest possible variances in batch sizes, maybe even a 3 gallon batch.

I would like to see your spread sheet please before I build this. Off to the scrap yard, they sell used metal at $0.30/lbs.
 
The only potential issue I see is the possibility that the vent pipe/handle could interfere with the wort return tube (since it's centered). As long as it's not tool long or you have enough room to place the displacer off-center in the BK it should work just fine.


Silicone tubing on the drain tube could redirect the flow off to the side if you use a generic pot with a lid weighted with water.
 
I would like to see your spread sheet please before I build this.

Try the link below and let me know if you run into problems. Some notes:


  • B1-B12 are meant to be edited to match your system. B11 is probably best left alone and B12 only affects the gravity estimate (column J).
  • I put in diameter numbers for a 20 gallon BoilerMaker and a cheap 4 gallon Walmart SS pot.
  • Column H shows the wort height without displacer and column I shows the wort height with displacer. Cells where the wort does not cover the coil are marked red, otherwise green.
  • B10 encodes how much you want to cover the coils. I know the manuals say to cover by 1 inch, but I really think you can get away with 1/4 inch since we're not boiling during the mash. YMMV
  • The calculations are not yet sophisticated enough to include the actual volume of the coils themselves. But this is OK, because the calculations are then worst case.

https://docs.google.com/spreadsheets/d/1-7h4bk_3OjkW4mlMBt6C9QrLhVj0OtKpv6pKkm1VzyE/copy
 
That makes sense to me. And It wouldn't be too difficult to add a threaded SS pipe to the lid. If one could find an ideally shaped and inexpensive pressure cooker, you could also avoid having to permanently fix the lid to the pot.


Like the pressure cooker idea. Things that make you go hmmm...

http://www.cancooker.com/cancooker-original/

Enlarging that vent hole would be easy enough. 1/4" weld less fitting with a bit of SS tubing? Could even retain the cooker for its original purpose if done right.

I am thinking this needs to be tried!

M
 
Just brewed my 2nd batch on my gas fired 5G BE-the BYO Oct 2013 Everett clone. Much easier with the 2nd batch. Filled the 7.5 MT all the way up for what ended up being just shy of 4gal in the fermenter.

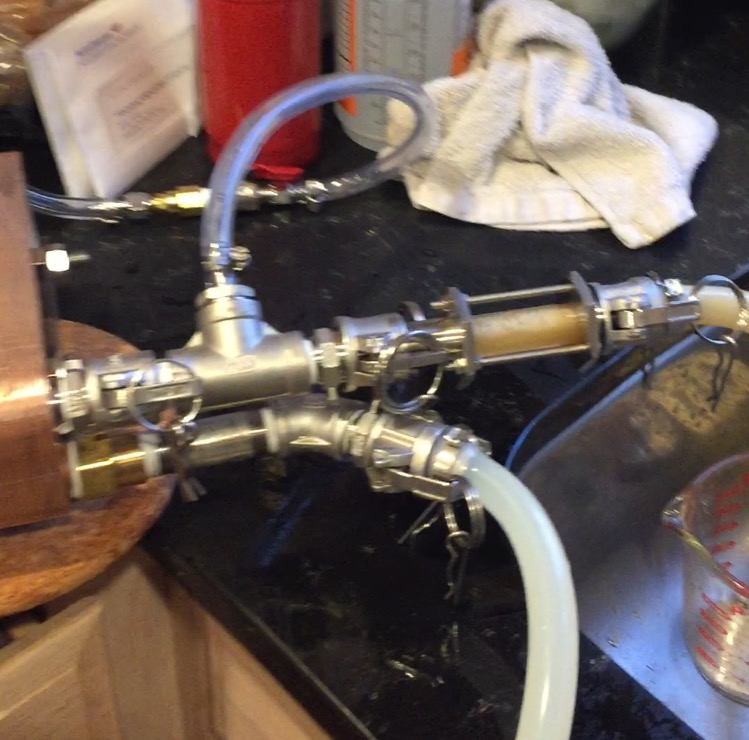
The part that I added for this brew was an inline oxygenator post chiller(parts from Brewhardware.)View attachment ImageUploadedByHome Brew1452406134.626907.jpg
I could clearly see it through the sightglass
View attachment ImageUploadedByHome Brew1452406158.184322.jpg
Very happy so far.

I was wondering what other gas users do for hose cleaning. I've run boiling water through tonight and done a warm PBW run through everything on the last batch. PBW each time could get expensive.
 
I was wondering what other gas users do for hose cleaning. I've run boiling water through tonight and done a warm PBW run through everything on the last batch. PBW each time could get expensive.


Buy in bulk. Usually wait for a coupon or deal to roll around and pick-up one of the 8# jars.

Nice job on the O2 system as well.

M
 
@WWJPD Which parts did you use to build the inline oxygenator besides the 1/2" NPT oxygenation stone? That looks awesome and could easily be modified to perform kettle souring by switching to a CO2 charger to bubble C02 to purge oxygen.
 
@WWJPD Which parts did you use to build the inline oxygenator besides the 1/2" NPT oxygenation stone? That looks awesome and could easily be modified to perform kettle souring by switching to a CO2 charger to bubble C02 to purge oxygen.


If you don't want to DIY'it, I have been happy with Stout's SPOX:

http://conical-fermenter.com/SPOX-Oxygenation-Aeration-Assembly.html

I put a second tee on the other end with a Blichmann Brewmometer and used some 1-1/2" SS clamp mounts to attach it all to the wall behind my BrewEasy. Looks slick and works well.

M
 
@WWJPD Which parts did you use to build the inline oxygenator besides the 1/2" NPT oxygenation stone? That looks awesome and could easily be modified to perform kettle souring by switching to a CO2 charger to bubble C02 to purge oxygen.

I got all the parts from Bobby at Brewhardware
I have camlocks QD coming off of the plate chiller.

1/2" NPT T, part number TEE12
1/2" NPT screw in O2 stone, part number OXYGENSTONENPT
1/2" camlock on in-side, part number CAMB
1/2" camlock on out-side, part number CAMF


I also put in a valve with backcheck(part num BV14CHECK) inline with the O2 hose because I was worried about wort coming back up in the tubing. In speaking to a brewer from Kent Falls the other night, he said they do something similar on their bigger system without a check valve and nothing ever comes back up all the way to the O2 regulator. I still feel better safe than sorry.

I also put a sightglass(part num FLOWSIGHTCAM) on after the O2 injector. I only got it for the fun of it, but it became very useful trying to adjust the O2 regulator as you could visually see the difference adjusting the flow did. It convinced me that without the sightglass, I would have definitely had the O2 on too high. I also ordered a cheap $6 flowmeter from China to put inline with the gas, but not sure I'll use it now.

IMG_0771.jpg
 
Today I learned that the only thing that sucks worse than a stuck sparge is a stuck recirculating mash....carry on.

Actually - EDIT: My mash had a bit of foam on top, kinda looked like a beautiful beer. This MIGHT be a good indicator that there are flow issues- Now, carry on.
 
What causes stuck sparge on this system? I'm new to all grain, and hope to buy this system sometime in the next 2 months of so.

There are a few things, though this one was almost certainly caused by too fine a crush coupled with the discovery that I didn't have the bag of rice hulls that I thought I had ;)

Another way this can be achieved is to dough-in with the pump running.

Stirring the mash too hard and forcing a lot of husks/hulls through the false bottom can lead to a clogged orifice(fortunately, this one is easily rectified)

Generally speaking, particularly with my 5G version, I barely stir at all on dough-in, always keep the pump off and then let it sit for a good 10 minutes before applying heat and starting the re-circ.

These usually work really well - i Just got a little greedy with my crush this time around and was short rice-hulls to compensate.

Cement.
 
Rice hulls are your friend... :)

Last couple of batches, I have done a reverse dough-in, layering rice hulls and crushed grain in a dry mash tun and pumping water from underneath the false bottom.

Not sure it does much, but it is a lot easier to stir the mash initially and I don't seem to get the dough balls that formed when I was adding grain to the water.

M

Sounds like a good idea - are you doing this on a BrewEasy? Certainly seems doable if starting with a dry tun. I've never considered it. I'd have a slight issue with the tun->kettle drain since everything but that uses quick disconnects, but could always work around that. Food for thought - thanks.
 
Back
Top