You are using an out of date browser. It may not display this or other websites correctly.
You should upgrade or use an alternative browser.
You should upgrade or use an alternative browser.
Antique Radio Kegerator Build
- Thread starter Howiedw
- Start date

Help Support Homebrew Talk - Beer, Wine, Mead, & Cider Brewing Discussion Forum:
This site may earn a commission from merchant affiliate
links, including eBay, Amazon, and others.


OP
OP
Howiedw
Well-Known Member
Had another slight issue today. I froze the beer lines. Thankfully I caught it before I had kegcicles. They're full of sanitizer. Pulled both kegs out and disconnected them, and relocated the thermocouple probe closer to the cold plate. We'll see if that keeps the beer cold but not frozen. Fridge guts were set to the lowest setting. If this dosen't work, I guess I will have to order a digital temp controller which I may do eventually anyway. Any recomendations? The STC-1000 seems pretty popular around these threads, and fairly inexpensive.
OP
OP
Howiedw
Well-Known Member
That STC-1000 should do the trick. Put the probe in a low alcohol spirit and see if that works. Thats how i have mine set up in my Keezer. Love this build btw. very original! Cheers!
I'll propably just do a yeast vial packed with fine sand. Less of a chance of spilling. And it won't waste good vodka. Or perhaps just some Isopropal Alcohol in a test tube. I can get that from work.
OP
OP
Howiedw
Well-Known Member
Holy Schiznit! I ordered the temp controller on the 25th, And it's here already! Brooklyn to Seattle in two days! Now to figure how to wire it. Hopefully I'll have it ready by the time the beer is!
OP
OP
Howiedw
Well-Known Member
After a bit of tinkering, I got it installed and working. Once again, taking cues from others on this forum, I used a modified receptical cover as a mounting bracket. I cut two of them and used them to sandwich the old speaker grill to hold it in place with the retaining clips. Here are a couple pf pics of what it looks like installed. It's running now for a controller test prior to transfering beer to the kegs for the first drafts.


Good job! It's looking pretty sweet.
I used a yeast vial drilled just big enough to push the probe through filled with water. As an alternative to the sand method (which is probably an even better idea since it won't leak or spoil.)
I need to find a unique item to kegerate this summer. Keeping my eyes open for a very small yard sale fridge to sacrifice.
fireslayer
Well-Known Member
Cool idea!
DrinkingLounge
Well-Known Member
can you find a brass cover plate? I'd strip it and let it tarnish a bit. It would look more like it came with the radio than the just plain white plastic cover plate.
It's a cool idea for sure.
It's a cool idea for sure.
OP
OP
Howiedw
Well-Known Member
can you find a brass cover plate? I'd strip it and let it tarnish a bit. It would look more like it came with the radio than the just plain white plastic cover plate.
It's a cool idea for sure.
I used what I had on hand. That is definately a planned upgrade. And yesterday I racked the two beers I had fermenting into kegs and placed them into the kegaradio for cooling and force carbonating Hopefully by this weekend they will be ready to drink! 7-8 PSI @ 2.2 C for a week. That sound about right? Or should I bump it to 10PSI?
OP
OP
Howiedw
Well-Known Member
can you find a brass cover plate? I'd strip it and let it tarnish a bit. It would look more like it came with the radio than the just plain white plastic cover plate.
It's a cool idea for sure.
Something Like this?


DrinkingLounge
Well-Known Member
perfect! Makes it look like it came with it.
can you squeeze a working speaker in that thing and hoop up an ipod and play some old time tunes
can you squeeze a working speaker in that thing and hoop up an ipod and play some old time tunes
OP
OP
Howiedw
Well-Known Member
perfect! Makes it look like it came with it.
can you squeeze a working speaker in that thing and hoop up an ipod and play some old time tunes
The finishing touch will be to find a modern radio with a vintage look to place in the hole that is left. I'm looking for one of the Crosley style radios that I can cannibalize to fit. Searching craigslist and goodwill because I cant justify full retail for something that I am going to tear apart.
mike_in_ak
Well-Known Member
I really want to see this thing finished! It's like a hideaway speakeasy type thing. No officer, nothing going on here...
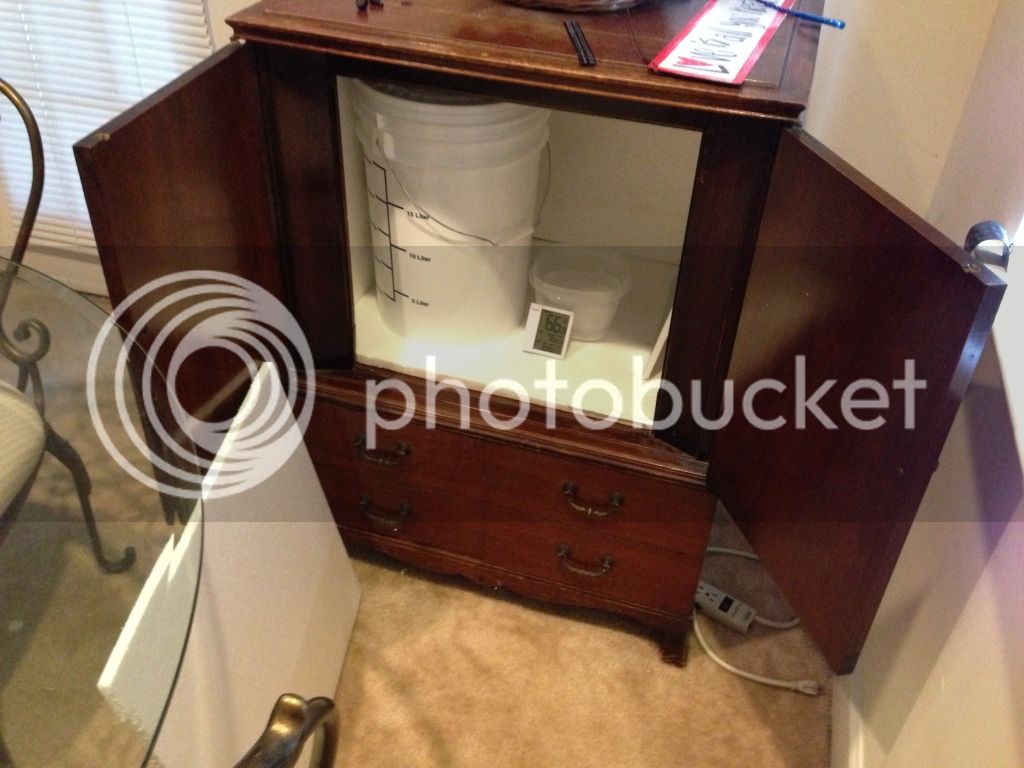
I kind of did the same thing the other day, only for a ferm chamber. We had an antique liquor cabinet that sat in the corner of our dining room and was never used for anything. Lined the inside with foam and now all I have to do is rig up a fan to circ air better. Just 2 bottles of ice and temp dropped 15 degrees in 10 minutes and holds well.
OP
OP
Howiedw
Well-Known Member
So, It's working fine, just a few modifications. I finally found a black marker board to put in place of the radio control panel. I ended placing some aluminum straps across the hot coils to help maintain contact with the heat sink plate. I still need to get some various thicknesses of foam tape to seal the door better. The humidity in the air tends to frost up the food plate and freeze my beer lines if it gets too thick. Other than that.........
More picts later this week.
More picts later this week.


OP
OP
Howiedw
Well-Known Member
The Swmbo got me a bluetooth speaker for christmas. This is it's new home.
I also swaped around the "speaker grill" so I can more easily see the controller display. Now the kegeradio has sound!!!!


I also swaped around the "speaker grill" so I can more easily see the controller display. Now the kegeradio has sound!!!!
Cool, can you hear the speaker decently through the box?
In_Vino_Veritas
Well-Known Member
- Joined
- Apr 7, 2013
- Messages
- 54
- Reaction score
- 3
So here's the last week.
Massive amountd of hand-wet sanding between many coats of finish.
I thought that I was going to save time with a poly and stain in one. Boy, was I wrong. It streaked and ran....needless to say, I will not be using it again. I finially got enough coats on where I could wet sand with a 120 grit sponge and sand down the peaks and streaks to get an almost even finish.
Once I got the finish as even as I could get it, I began the actual clear poly satin finish, Lightly sanding with 00 steel wool between each coat. Here it sits as of tonite. 3 coats of clear on the top and 2 on the sides. The doors have the original finish with 1 coat of the tinted polystain. Once completely dry, I will sand and clear.
Now for a beer. Still working on empting the keg in the fridge that i need to tear apart to use in this project.
And a shot of the bike as well. Cheers!
Nice XB9S, I was a design engineering for Buell before they closed shop, working on the water engines: 1125CR, 1125R and BII.
Similar threads
- Replies
- 6
- Views
- 3K